
Integrating Red Hat Process Automation Manager with other products and components
Abstract
Preface
As a developer or system administrator, you can integrate Red Hat Process Automation Manager with other products and components, such as Spring Boot, Red Hat Fuse, Red Hat Single Sign-On, and other supported products.
Making open source more inclusive
Red Hat is committed to replacing problematic language in our code, documentation, and web properties. We are beginning with these four terms: master, slave, blacklist, and whitelist. Because of the enormity of this endeavor, these changes will be implemented gradually over several upcoming releases. For more details, see our CTO Chris Wright’s message.
Part I. Creating Red Hat Process Automation Manager business applications with Spring Boot
As a developer, you can use Spring Boot starters through the business applications website to quickly create Red Hat Process Automation Manager business applications, configure those applications, and deploy them to an existing service or in the cloud.
Chapter 1. Red Hat Process Automation Manager Spring Boot business applications
Spring Framework is a Java platform that provides comprehensive infrastructure support for developing Java applications. Spring Boot is a lightweight framework based on Spring Boot starters. Spring Boot starters are pom.xml files that contain a set of dependency descriptors that you can include in your Spring Boot project.
Red Hat Process Automation Manager Spring Boot business applications are flexible, UI-agnostic logical groupings of individual services that provide certain business capabilities. Business applications are based on Spring Boot starters. They are usually deployed separately and can be versioned individually. A complete business application enables a domain to achieve specific business goals, for example order management or accommodation management.
On the business application website you can create a Process Automation Manager, Decision Manager, or Business Optimizer business application. After you create and configure your business application, you can deploy it to an existing service or to the cloud, through OpenShift.
Business applications can contain one or more of the following projects and more than one project of the same type:
- Business assets (KJAR): Contains business processes, rules, and forms and are easily imported into Business Central.
- Data model: Data model projects provide common data structures that are shared between the service projects and business assets projects. This enables proper encapsulation, promotes reuse, and reduces shortcuts. Each service project can expose its own public data model.
- Service: A deployable project that provides the actual service with various capabilities. It includes the business logic that operates your business. In most cases, a service project includes business assets and data model projects. A business application can split services into smaller component service projects for better manageability.
Chapter 2. Creating a business application
You can use the business application website to quickly and easily create business applications using the Spring Boot framework. Doing this by-passes the need to install and configure Red Hat Process Automation Manager.
Procedure
Enter the following URL in a web browser:
https://start.jbpm.org
- Click Configure your business application.
- Click Business Automation and click Next.
- Enter a package and application name.
Select Enterprise 7.9 from the Version menu and click Next.
NoteYou must select Enterprise 7.9 to create a Red Hat Process Automation Manager business application.
Select the project types that you want to include in your project. You can include more than one project type.
- Business Assets: Contains business processes, rules, and forms and are easily imported into Business Central. Select Dynamic Assets instead if you want to add adaptive and dynamic assets such as cases.
- Data Model: Provides common data structures that are shared between the service projects and business assets projects. This enables proper encapsulation, promotes reuse, and reduces shortcuts. Each service project can expose its own public data model.
- Service: Includes business logic that operates your business.
Click Generate business application.
The
<BUSINESS-APPLICATION>.zipfile downloads, where<BUSINESS-APPLICATION>is the name that you entered in the Application Name box.-
Extract the
<BUSINESS-APPLICATION>.zipfile.
Chapter 3. Apache Maven and Red Hat Process Automation Manager Spring Boot applications
Apache Maven is a distributed build automation tool used in Java application development to create, manage, and build software projects. Maven uses standard configuration files called Project Object Model (POM) files to define projects and manage the build process. POM files describe the module and component dependencies, build order, and targets for the resulting project packaging and output using an XML file. This ensures that the project is built in a correct and uniform manner.
A Maven repository stores Java libraries, plug-ins, and other build artifacts. The default public repository is the Maven 2 Central Repository, but repositories can be private and internal within a company to share common artifacts among development teams. Repositories are also available from third-parties.
You can use the online Maven repository with your Spring Boot projects or you can download the Red Hat Process Automation Manager Maven repository. The recommended approach is to use the online Maven repository with your Spring Boot projects. Maven settings used with a repository manager or repository on a shared server provide better control and manageability of projects.
3.1. Configuring a Red Hat Process Automation Manager Spring Boot project for the online Maven repository
After you create your Red Hat Process Automation Manager Spring Boot project, configure it with the online Maven Repository to store your application data.
Prerequisites
- You have created a Red Hat Process Automation Manager Spring Boot project.
Procedure
-
In the directory that contains your Red Hat Process Automation Manager Spring Boot application, open the
<BUSINESS-APPLICATION>-service/pom.xmlfile in a text editor or IDE, where<BUSINESS-APPLICATION>is the name of your Spring Boot project. Add the following repository to the
repositorieselement:<repository> <id>jboss-enterprise-repository-group</id> <name>Red Hat JBoss Enterprise Maven Repository</name> <url>https://maven.repository.redhat.com/ga/</url> <layout>default</layout> <releases> <updatePolicy>never</updatePolicy> </releases> <snapshots> <updatePolicy>daily</updatePolicy> </snapshots> </repository>Add the following plug-in repository to the
pluginRepositorieselement:NoteIf your
pom.xmlfile does not have thepluginRepositorieselement, add it as well.<pluginRepository> <id>jboss-enterprise-repository-group</id> <name>Red Hat JBoss Enterprise Maven Repository</name> <url>https://maven.repository.redhat.com/ga/</url> <layout>default</layout> <releases> <updatePolicy>never</updatePolicy> </releases> <snapshots> <updatePolicy>daily</updatePolicy> </snapshots> </pluginRepository>Doing this adds the productized Maven repository to your business application.
3.2. Downloading and configuring the Red Hat Process Automation Manager Maven repository
If you do not want to use the online Maven repository, you can download and configure the Red Hat Process Automation Manager Maven repository. The Red Hat Process Automation Manager Maven repository contains many of the requirements that Java developers typically use to build their applications. This procedure describes how to edit the Maven settings.xml file to configure the Red Hat Process Automation Manager Maven repository.
When you configure the repository by modifying the Maven settings.xml file, the changes apply to all of your Maven projects.
Prerequisites
- You have created a Red Hat Process Automation Manager Spring Boot project.
Procedure
Navigate to the Software Downloads page in the Red Hat Customer Portal (login required), and select the following product and version from the drop-down options:
- Product: Red Hat Process Automation Manager
- Version: 7.9
-
Download Red Hat Process Automation Manager 7.9 Maven Repository (
rhpam-7.9.1-maven-repository.zip). - Extract the downloaded archive.
-
Change to the
~/.m2/directory and open the Mavensettings.xmlfile in a text editor or integrated development environment (IDE). Add the following lines to the
<profiles>element of the Mavensettings.xmlfile, where<MAVEN_REPOSITORY>is the path of the Maven repository that you downloaded. The format of<MAVEN_REPOSITORY>must befile://$PATH, for examplefile:///home/userX/rhpam-7.9.1.GA-maven-repository/maven-repository.<profile> <id>red-hat-enterprise-maven-repository</id> <repositories> <repository> <id>red-hat-enterprise-maven-repository</id> <url>MAVEN_REPOSITORY</url> <releases> <enabled>true</enabled> </releases> <snapshots> <enabled>false</enabled> </snapshots> </repository> </repositories> <pluginRepositories> <pluginRepository> <id>red-hat-enterprise-maven-repository</id> <url><MAVEN_REPOSITORY></url> <releases> <enabled>true</enabled> </releases> <snapshots> <enabled>false</enabled> </snapshots> </pluginRepository> </pluginRepositories> </profile>Add the following lines to the
<activeProfiles>element of the Mavensettings.xmlfile and save the file.<activeProfile>red-hat-enterprise-maven-repository</activeProfile>
If your Maven repository contains outdated artifacts, you might encounter one of the following Maven error messages when you build or deploy your project, where <ARTIFACT_NAME> is the name of a missing artifact and <PROJECT_NAME> is the name of the project you are trying to build:
-
Missing artifact <PROJECT_NAME> -
[ERROR] Failed to execute goal on project <ARTIFACT_NAME>; Could not resolve dependencies for <PROJECT_NAME>
To resolve the issue, delete the cached version of your local repository located in the ~/.m2/repository directory to force a download of the latest Maven artifacts.
Chapter 4. Spring Security with Red Hat Process Automation Manager
Spring Security is provided by a collection of servlet filters that make up the Spring Security library. These filters provide authentication through user names and passwords and authorization through roles. The default Spring Security implementation generated in a Red Hat Process Automation Manager Spring Boot application provides authorization without authentication. This means that anyone with a user name and password valid for the application can access the application without a role.
The servlet filters protect your Spring Boot application against common exploits such as cross-site request forgery (CSRF) and cross-origin resource sharing (CORS). Spring Web relies on the DispatcherServlet to redirect incoming HTTP requests to your underlying java REST resources annotated with the @Controller annotation. The DispatchServlet is agnostic of elements such as security. It is good practice and more efficient to handle implementation details such a security outside of the business application logic. Therefore, Spring uses filters to intercept HTTP requests before routing them to the DispatchServlet.
A typical Spring Security implementation consists of the following steps that use multiple servlet filters:
- Extract and decode or decrypt user credentials from the HTTP request.
- Complete authentication by validating the credentials against the corporate identity provider, for example a database, a web service, or Red Hat Single Sign-On.
- Complete authorization by determining whether the authorized user has access rights to perform the request.
-
If the user is authenticated and authorized, propagate the request to the
DispatchServlet.
Spring breaks these steps down into individual filters and chains them together in a FilterChain. This chaining method provides the flexibility required to work with almost any identity provider and security framework. With Spring Security, you can define a FilterChain for your application programmatically. The following section is from the business-application-service/src/main/java/com/company/service/DefaultWebSecurityConfig.java file generated as part of a business application created on the https://start.jbpm.org web site.
@Configuration("kieServerSecurity")
@EnableWebSecurity
public class DefaultWebSecurityConfig extends WebSecurityConfigurerAdapter {

    @Override (1)
    protected void configure(HttpSecurity http) throws Exception {
        http
                .cors().and()
                .csrf().disable()       (2)
                .authorizeRequests()    (3)
                .antMatchers("/rest/*").authenticated().and()
                .httpBasic().and()      (4)
                .headers().frameOptions().disable();    (5)
}-
(1) Overrides the default
configure(HttpSecurity http)method and defines a custom FilterChain using the Spring HttpClient fluent API/DSL - (2) Disables common exploit filters for CORS and CSRF tokens for local testing
- (3) Requires authentication for any requests made to the pattern 'rest/*' but no roles are defined
- (4) Allows basic authentication through the authorization header, for example header 'Authorization: Basic dGVzdF91c2VyOnBhc3N3b3Jk'
- (5) Removes the 'X-Frame-Options' header from request/response
This configuration allows any authenticated user to execute the KIE API.
Because the default implementation is not integrated into any external identity provider, users are defined in memory, in the same DefaultWebSecurityConfg class. The following section shows the users that are provided when you create a Red Hat Process Automation Manager Spring Boot business application:
    @Autowired
    public void configureGlobal(AuthenticationManagerBuilder auth) throws Exception {
        auth.inMemoryAuthentication().withUser("user").password("user").roles("kie-server");
        auth.inMemoryAuthentication().withUser("wbadmin").password("wbadmin").roles("admin");
        auth.inMemoryAuthentication().withUser("kieserver").password("kieserver1!").roles("kie-server");
    }
4.1. Using Spring Security to authenticate with authorization
By default, anyone with a user name and password valid for the Red Hat Process Automation Manager Spring Boot application can access the application without requiring a role. Spring Security authentication and authorization are derived from the HTTPSecurity filter chain configuration. To protect the REST API from users that do not have a specific role mapping, use the Spring Security .authorizeRequests() method to match the URLs that you want to authorize.
Prerequisites
- You have a Red Hat Process Automation Manager Spring Boot application.
Procedure
-
In the directory that contains your Red Hat Process Automation Manager Spring Boot application, open the
business-application-service/src/main/java/com/company/service/DefaultWebSecurityConfig.javafile in a text editor or IDE. To authorize requests for access by an authenticated user only if they have a specific role, edit the
.antMatchers("/rest/*").authenticated().and()line in one of the following ways:To authorize for a single role, edit the
antMatchersmethod as shown in the following example, where<role>is the role that that the user must have for access:@Configuration("kieServerSecurity") @EnableWebSecurity public class DefaultWebSecurityConfig extends WebSecurityConfigurerAdapter { @Override protected void configure(HttpSecurity http) throws Exception { http .cors().and().csrf().disable() .authorizeRequests() .antMatchers("/**").hasRole("<role>") .anyRequest().authenticated() .and().httpBasic() .and().headers().frameOptions().disable(); } ...To authorize a user that has one of a range of roles, edit the
antMatchersmethod as shown in the following example, where<role>and<role1>are each roles the user can have for access:@Configuration("kieServerSecurity") @EnableWebSecurity public class DefaultWebSecurityConfig extends WebSecurityConfigurerAdapter { @Override protected void configure(HttpSecurity http) throws Exception { http .cors().and().csrf().disable() .authorizeRequests() .antMatchers("/**").hasAnyRole("<role>", "<role1") .anyRequest().authenticated() .and().httpBasic() .and().headers().frameOptions().disable(); } ...
The authorizeRequests method requires authorization of requests for a specific expression. All requests must be successfully authenticated. Authentication is performed using HTTP basic authentication. If an authenticated user tries to access a resource that is protected for a role that they do not have, the user receives an HTTP 403 (Forbidden) error.
4.2. Disabling Spring Security in a Red Hat Process Automation Manager business application
You can configure Spring Security in a Red Hat Process Automation Manager business application to provide the security context without authentication.
Prerequisites
- You have a Red Hat Process Automation Manager Spring Boot application.
Procedure
-
In the directory that contains your Red Hat Process Automation Manager Spring Boot application, open the
business-application-service/src/main/java/com/company/service/DefaultWebSecurityConfig.javafile in a text editor or integrated development environment (IDE). Edit the
.antMatchersmethod as shown in the following example:@Override protected void configure(HttpSecurity http) throws Exception { http .cors().and().csrf().disable() .authorizeRequests() .antMatchers("/*") .permitAll() .and().headers().frameOptions().disable(); }The
PermitAllmethod allows any and all requests for the specified URL pattern.
Because no security context is passed in the HttpServletRequest, Spring creates an AnonymousAuthenticationToken and populates the SecurityContext with the anonymousUser user with no designated roles other than the ROLE_ANONYMOUS role. The user will not have access to many of the features of the application, for example they will be unable to assign actions to group assigned tasks.
4.3. Using Spring Security with preauthenication
If you disable Spring Security authentication by using the PermitAll method, any user can log in to the application, but users will have limited access and functionality. However, you can preauthenticate a user, for example a designated service account, so a group of users can use the same login but have all of the permissions that they require. That way, you do not need to create credentials for each user.
The easiest way to implement preauthentication is to create a custom filter servlet and add it before the security FilterChain in the DefaultWebSecurityConfig class. This way, you can inject a customized, profile-based security context, control its contents, and keep it simple.
Prerequisites
- You have a Red Hat Process Automation Manager Spring Boot application and you have disabled Spring Security as Section 4.2, “Disabling Spring Security in a Red Hat Process Automation Manager business application”.
Procedure
Create the following class that extends the
AnonymousAuthenticationFilterclass:import org.springframework.security.authentication.AnonymousAuthenticationToken; import org.springframework.security.core.Authentication; import org.springframework.security.core.AuthenticationException; import org.springframework.security.core.GrantedAuthority; import org.springframework.security.core.authority.SimpleGrantedAuthority; import org.springframework.security.core.context.SecurityContextHolder; import org.springframework.security.web.authentication.AnonymousAuthenticationFilter; import javax.servlet.FilterChain; import javax.servlet.ServletException; import javax.servlet.ServletRequest; import javax.servlet.ServletResponse; import javax.servlet.http.HttpServletRequest; import java.io.IOException; import java.util.Arrays; import java.util.Collections; import java.util.List; public class <CLASS_NAME> extends AnonymousAuthenticationFilter { private static final Logger log = LoggerFactory.getLogger(<CLASS_NAME>.class); public AnonymousAuthFilter() { super("PROXY_AUTH_FILTER"); } @Override public void doFilter(ServletRequest req, ServletResponse res, FilterChain chain) throws IOException, ServletException { SecurityContextHolder.getContext().setAuthentication(createAuthentication((HttpServletRequest) req)); log.info("SecurityContextHolder pre-auth user: {}", SecurityContextHolder.getContext()); if (log.isDebugEnabled()) { log.debug("Populated SecurityContextHolder with authenticated user: {}", SecurityContextHolder.getContext().getAuthentication()); } chain.doFilter(req, res); } @Override protected Authentication createAuthentication(final HttpServletRequest request) throws AuthenticationException { log.info("<ANONYMOUS_USER>"); List<? extends GrantedAuthority> authorities = Collections .unmodifiableList(Arrays.asList(new SimpleGrantedAuthority("<ROLE>") )); return new AnonymousAuthenticationToken("ANONYMOUS", "<ANONYMOUS_USER>", authorities); } }Replace the following variables:
-
Replace
<CLASS_NAME>with a name for this class, for exampleAnonymousAuthFilter. -
Replace
<ANONYMOUS_USER>with a user ID, for exampleService_Group. -
Replace
<ROLE>with the role that has the privileges that you want to give to<ANONYMOUS_USER>.
-
Replace
If you want to give
<ANONYMOUS_USER>more than one role, add additional roles as shown in the following example:.unmodifiableList(Arrays.asList(new SimpleGrantedAuthority("<ROLE>") , new SimpleGrantedAuthority("<ROLE2>")Add
.anonymous().authenticationFilter(new <CLASS_NAME>()).and()to thebusiness-application-service/src/main/java/com/company/service/DefaultWebSecurityConfig.javafile, where<CLASS_NAME>is the name of the class that you created:@Override protected void configure(HttpSecurity http) throws Exception { http .anonymous().authenticationFilter(new <CLASS_NAME>()).and() // Override anonymousUser .cors().and().csrf().disable() .authorizeRequests() .antMatchers("/*").permitAll() .and().headers().frameOptions().disable(); }
4.4. Configuring the business application with Red Hat Single Sign-On
Most organizations provide user and group details through single sign-on (SSO) tokens. You can use Red Hat Single Sign-On (RHSSO) to enable single sign-on between your services and to have a central place to configure and manage your users and roles.
Prerequisites
- You have a Spring Boot application ZIP file that you created using the business applications website.
Procedure
- Download and install RHSSO. For instructions, see the Red Hat Single Sign-On Getting Started Guide.
Configure RHSSO:
Either use the default master realm or create a new realm.
A realm manages a set of users, credentials, roles, and groups. A user belongs to and logs into a realm. Realms are isolated from one another and can only manage and authenticate the users that they control.
-
Create the
springboot-appclient and set theAccessTypeto public. Set a valid redirect URI and web origin according to your local setup, as shown in the following example:
-
Valid redirect URIs:
http://localhost:8090/* -
Web origin:
http://localhost:8090
-
Valid redirect URIs:
- Create realm roles that are used in the application.
- Create users that are used in the application and assign roles to them.
Add the following element and property to the Spring Boot project
pom.xmlfile, where<KEYCLOAK_VERSION>is the version of Keycloak that you are using:<properties> <version.org.keycloak><KEYCLOAK_VERSION></version.org.keycloak> </properties>
Add the following dependencies to the Spring Boot project
pom.xmlfile:<dependencyManagement> <dependencies> <dependency> <groupId>org.keycloak.bom</groupId> <artifactId>keycloak-adapter-bom</artifactId> <version>${version.org.keycloak}</version> <type>pom</type> <scope>import</scope> </dependency> </dependencies> </dependencyManagement> .... <dependency> <groupId>org.keycloak</groupId> <artifactId>keycloak-spring-boot-starter</artifactId> </dependency>In your Spring Boot project directory, open the
business-application-service/src/main/recources/application.propertiesfile and add the following lines:# keycloak security setup keycloak.auth-server-url=http://localhost:8100/auth keycloak.realm=master keycloak.resource=springboot-app keycloak.public-client=true keycloak.principal-attribute=preferred_username keycloak.enable-basic-auth=true
Modify the
business-application-service/src/main/java/com/company/service/DefaultWebSecurityConfig.javafile to ensure that Spring Security works correctly with RHSSO:import org.keycloak.adapters.KeycloakConfigResolver; import org.keycloak.adapters.springboot.KeycloakSpringBootConfigResolver; import org.keycloak.adapters.springsecurity.authentication.KeycloakAuthenticationProvider; import org.keycloak.adapters.springsecurity.config.KeycloakWebSecurityConfigurerAdapter; import org.springframework.beans.factory.annotation.Autowired; import org.springframework.context.annotation.Bean; import org.springframework.context.annotation.Configuration; import org.springframework.security.config.annotation.authentication.builders.AuthenticationManagerBuilder; import org.springframework.security.config.annotation.web.builders.HttpSecurity; import org.springframework.security.config.annotation.web.configuration.EnableWebSecurity; import org.springframework.security.core.authority.mapping.SimpleAuthorityMapper; import org.springframework.security.core.session.SessionRegistryImpl; import org.springframework.security.web.authentication.session.RegisterSessionAuthenticationStrategy; import org.springframework.security.web.authentication.session.SessionAuthenticationStrategy; @Configuration("kieServerSecurity") @EnableWebSecurity public class DefaultWebSecurityConfig extends KeycloakWebSecurityConfigurerAdapter { @Override protected void configure(HttpSecurity http) throws Exception { super.configure(http); http .csrf().disable() .authorizeRequests() .anyRequest().authenticated() .and() .httpBasic(); } @Autowired public void configureGlobal(AuthenticationManagerBuilder auth) throws Exception { KeycloakAuthenticationProvider keycloakAuthenticationProvider = keycloakAuthenticationProvider(); SimpleAuthorityMapper mapper = new SimpleAuthorityMapper(); mapper.setPrefix(""); keycloakAuthenticationProvider.setGrantedAuthoritiesMapper(mapper); auth.authenticationProvider(keycloakAuthenticationProvider); } @Bean public KeycloakConfigResolver KeycloakConfigResolver() { return new KeycloakSpringBootConfigResolver(); } @Override protected SessionAuthenticationStrategy sessionAuthenticationStrategy() { return new RegisterSessionAuthenticationStrategy(new SessionRegistryImpl()); } }
Chapter 5. Red Hat Process Automation Manager Spring Boot configuration
After you create your Spring Boot project, you can configure several components to customize your application.
5.1. Configuring REST endpoints for Spring Boot applications
After you create your Spring Boot project, you can configure the host, port, and path for the REST endpoint for your Spring Boot application.
Prerequisites
- You have a ZIP file that you created using the business application website.
Procedure
-
Extract the Spring Boot project ZIP file and navigate to the
<BUSINESS-APPLICATION>/<BUSINESS-APPLICATION>-service/src/main/resourcesfolder, where<BUSINESS-APPLICATION>is the name of your Spring Boot project. -
Open the
application.propertiesfile in a text editor. Configure the host, port, and path for the REST endpoints, where
<ADDRESS>is the server address and<PORT>is the server port:server.address=<ADDRESS> server.port=<PORT> cxf.path=/rest
The following example adds the REST endpoint to the address
localhoston port8090.server.address=localhost server.port=8090 cxf.path=/rest
5.2. Configuring the KIE Server identity
After you create your Spring Boot project, you can configure KIE Server so that it can be easily identified.
Prerequisites
- You have a Spring Boot business application ZIP file that you created using the business application website.
Procedure
-
Extract the Spring Boot project ZIP file and navigate to the
<BUSINESS-APPLICATION>/<BUSINESS-APPLICATION>-service/src/main/resourcesfolder, where<BUSINESS-APPLICATION>is the name of your Spring Boot project. -
Open the
application.propertiesfile in a text editor. Configure the KIE Server parameters as shown in the following example:
kieserver.serverId=<BUSINESS-APPLICATION>-service
kieserver.serverName=<BUSINESS-APPLICATION>-service
kieserver.location=http://localhost:8090/rest/server
kieserver.controllers=http://localhost:8080/business-central/rest/controller
The following table describes the KIE Server parameters that you can configure in your business project:
Table 5.1. kieserver parameters
Parameter Values Description kieserver.serverIdstring
The ID used to identify the business application when connecting to the Process Automation Manager controller.
kieserver.serverNamestring
The name used to identify the business application when it connects to the Process Automation Manager controller. Can be the same string used for the
kieserver.serverIdparameter.kieserver.locationURL
Used by other components that use the REST API to identify the location of this server. Do not use the location as defined by
server.addressandserver.port.kieserver.controllersURLs
A comma-separated list of controller URLs.
5.3. Configuring KIE Server components to start at runtime
If you selected Business Automation when you created your Spring Boot business application, you can specify which KIE Server components must start at runtime.
Prerequisites
- You have a Spring Boot business application ZIP file that you created using the business application website.
Procedure
-
Extract the Spring Boot project ZIP file and navigate to the
<BUSINESS-APPLICATION>/<BUSINESS-APPLICATION>-service/src/main/resourcesfolder, where<BUSINESS-APPLICATION>is the name of your Spring Boot project. -
Open the
application.propertiesfile in a text editor. To set a component to start at runtime, set the value of the component to
true.The following table lists the components that you can set to start at runtime:
Table 5.2.
kieservercapabilities parametersParameter Values Description kieserver.drools.enabledtrue, falseEnables or disables the Decision Manager component.
kieserver.dmn.enabledtrue, falseEnables or disables the Decision Model and Notation (DMN) component.
kieserver.jbpm.enabledtrue, falseEnables or disables the Red Hat Process Automation Manager component.
kieserver.jbpmui.enabledtrue, falseEnables or disables the Red Hat Process Automation Manager UI component.
kieserver.casemgmt.enabledtrue, falseEnables or disables the case management component.
5.4. Configuring your Spring Boot application for asynchronous execution
After you create your Spring Boot project, you can use the jbpm.executor parameters to enable asynchronous execution.
Prerequisites
- You have a Spring Boot business application ZIP file that you created using the business application website.
Procedure
-
Extract the Spring Boot project ZIP file and navigate to the
<BUSINESS-APPLICATION>/<BUSINESS-APPLICATION>-service/src/main/resourcesfolder, where<BUSINESS-APPLICATION>is the name of your Spring Boot project. -
Open the
application.propertiesfile in a text editor. To enable asynchronous execution, set the value of the
jbpm.executor.enabledparameter totrue, uncomment the otherjbpm.executorparameters, and change the values as required, as shown in the following example:jbpm.executor.enabled=true jbpm.executor.retries=5 jbpm.executor.interval=0 jbpm.executor.threadPoolSize=1 jbpm.executor.timeUnit=SECONDS
The following table describes the executor parameters that you can configure in your business project:
Table 5.3. Executor parameters
Parameter Values Description jbpm.executor.enabledtrue, falseDisables or enables the executor component.
jbpm.executor.retriesinteger
Specifies the number of retries if errors occur while a job is running.
jbpm.executor.intervalinteger
Specifies the length of time that the executor uses to synchronize with the database. The unit of time is specified by the
jbpm.executor.timeUnitparameter. Disabled by default (value0).jbpm.executor.threadPoolSizeinteger
Specifies the thread pool size.
jbpm.executor.timeUnitstring
Specifies the time unit used to calculate the interval that the executor uses to synchronize with the database. The value must be a valid constant of
java.util.concurrent.TimeUnit. The default value isSECONDS.
5.5. Configuring the business application for a cluster using Quartz
If you plan to run your application in a cluster, you must configure the Quartz timer service.
Prerequisites
- You have a ZIP file that you created using the business application website, that you want to use in a cluster.
Procedure
Create the
quartz.propertiesfile and add the following content:#============================================================================ # Configure Main Scheduler Properties #============================================================================ org.quartz.scheduler.instanceName = SpringBootScheduler org.quartz.scheduler.instanceId = AUTO org.quartz.scheduler.skipUpdateCheck=true org.quartz.scheduler.idleWaitTime=1000 #============================================================================ # Configure ThreadPool #============================================================================ org.quartz.threadPool.class = org.quartz.simpl.SimpleThreadPool org.quartz.threadPool.threadCount = 5 org.quartz.threadPool.threadPriority = 5 #============================================================================ # Configure JobStore #============================================================================ org.quartz.jobStore.misfireThreshold = 60000 org.quartz.jobStore.class=org.quartz.impl.jdbcjobstore.JobStoreCMT org.quartz.jobStore.driverDelegateClass=org.jbpm.process.core.timer.impl.quartz.DeploymentsAwareStdJDBCDelegate org.quartz.jobStore.useProperties=false org.quartz.jobStore.dataSource=myDS org.quartz.jobStore.nonManagedTXDataSource=notManagedDS org.quartz.jobStore.tablePrefix=QRTZ_ org.quartz.jobStore.isClustered=true org.quartz.jobStore.clusterCheckinInterval = 5000 #============================================================================ # Configure Datasources #============================================================================ org.quartz.dataSource.myDS.connectionProvider.class=org.jbpm.springboot.quartz.SpringConnectionProvider org.quartz.dataSource.myDS.dataSourceName=quartzDataSource org.quartz.dataSource.notManagedDS.connectionProvider.class=org.jbpm.springboot.quartz.SpringConnectionProvider org.quartz.dataSource.notManagedDS.dataSourceName=quartzNotManagedDataSource
NoteData source names in the Quartz configuration file refer to Spring beans. The connection provider must be set to
org.jbpm.springboot.quartz.SpringConnectionProviderto enable integration with Spring-based data sources.To enable the Quartz clustered timers and set the path of the
quartz.propertiesfile that you created in the previous step, include the following properties in the<BUSINESS-APPLICATION>/<BUSINESS-APPLICATION>-service/src/main/resourcesapplication.propertiesfile, where<BUSINESS-APPLICATION>is the name of your Spring Boot project.jbpm.quartz.enabled=true jbpm.quartz.configuration=quartz.properties
Create a managed and an unmanaged data source by adding the following content to the
<BUSINESS-APPLICATION>/<BUSINESS-APPLICATION>-service/src/main/resources/application.propertiesfile:# enable to use database as storage jbpm.quartz.db=true quartz.datasource.name=quartz quartz.datasource.username=sa quartz.datasource.password=sa quartz.datasource.url=jdbc:h2:./target/spring-boot-jbpm;MVCC=true quartz.datasource.driver-class-name=org.h2.Driver # used to configure connection pool quartz.datasource.dbcp2.maxTotal=15 # used to initialize quartz schema quartz.datasource.initialization=true spring.datasource.schema=classpath*:<QUARTZ_TABLES_H2>.sql spring.datasource.initialization-mode=always
In the preceding example, replace
<QUARTZ_TABLES_H2>with the name of a Quartz H2 database schema script. The last three lines of the preceding configuration initialize the database schema.
By default, Quartz requires two data sources:
- Managed data source to participate in the transaction of the decision engine or process engine
- Unmanaged data source to look up timers to trigger without any transaction handling
Red Hat Process Automation Manager business applications assume that the Quartz database (schema) will be co-located with Red Hat Process Automation Manager tables and therefore produce data sources used for transactional operations for Quartz.
The other (non transactional) data source must be configured but it should point to the same database as the main data source.
5.6. Configuring business application user group providers
With Red Hat Process Automation Manager, you can manage human-centric activities. To provide integration with user and group repositories, you can use two KIE API entry points:
-
UserGroupCallback: Responsible for verifying whether a user or group exists and for collecting groups for a specific user -
UserInfo: Responsible for collecting additional information about users and groups, for example email addresses and preferred language
You can configure both of these components by providing alternative code, either code provided out of the box or custom developed code.
For the UserGroupCallback component, retain the default implementation because it is based on the security context of the application. For this reason, it does not matter which backend store is used for authentication and authorisation (for example, RH-SSO). It will be automatically used as a source of information for collecting user and group information.
The UserInfo component is a separate component because it collects more advanced information.
Prerequisites
- You have a ZIP file that you created using the business application website and that contains a business automation project.
Procedure
To provide an alternative implementation of
UserGroupCallback, add the following code to the Application class or a separate class annotated with@Configuration:@Bean(name = "userGroupCallback") public UserGroupCallback userGroupCallback(IdentityProvider identityProvider) throws IOException { return new MyCustomUserGroupCallback(identityProvider); }To provide an alternative implementation of
UserInfo, add the following code to the Application class or a separate class annotated with@Configuration:@Bean(name = "userInfo") public UserInfo userInfo() throws IOException { return new MyCustomUserInfo(); }
5.7. Configuring a Spring Boot project with a MySQL or PostgreSQL database
Red Hat Process Automation Manager business applications are generated with the default H2 database. You can change the database type to MySQL or PostgreSQL.
Prerequisites
- You have a Spring Boot application file that you created using the business applications website.
Procedure
-
Extract the Spring Boot project ZIP file and navigate to the
<BUSINESS-APPLICATION>/<BUSINESS-APPLICATION>-service/src/main/resourcesfolder, where<BUSINESS-APPLICATION>is the name of your Spring Boot project. -
Open the
application.propertiesfile in a text editor. Configure your Spring Boot project to use a MySQL or PostgreSQL, complete one of the following set of steps:
To configure your business application to use a MySQL database, locate the following parameters in the
application.propertiesfile and change the values as shown:spring.datasource.username=jbpm spring.datasource.password=jbpm spring.datasource.url=jdbc:mysql://localhost:3306/jbpm spring.datasource.driver-class-name=com.mysql.jdbc.jdbc2.optional.MysqlXADataSource spring.jpa.properties.hibernate.dialect=org.hibernate.dialect.MySQL5InnoDBDialect
To configure your business application to use a PostgreSQL database, locate the following parameters in the
application.propertiesfile and change the values as shown:spring.datasource.username=jbpm spring.datasource.password=jbpm spring.datasource.url=jdbc:postgresql://localhost:5432/jbpm spring.datasource.driver-class-name=org.postgresql.xa.PGXADataSource spring.jpa.properties.hibernate.dialect=org.hibernate.dialect.PostgreSQLDialect
NoteTo create a PostgreSQL schema that uses the
byteacolumn type instead of theoidcolumn type, set the value of theorg.kie.persistence.postgresql.useByteaproperty totrue:org.kie.persistence.postgresql.useBytea=true
-
Save the
application.propertiesfile.
5.8. Configuring business applications for JPA
The Java Persistence API (JPA) is a standard technology that enables you to map objects to relational databases. You must configure JPA for your Red Hat Process Automation Manager business application.
Prerequisites
- You have a ZIP file that you created using the business applications website.
Procedure
-
Extract the
<BUSINESS-APPLICATION>.zipfile and navigate to the<BUSINESS-APPLICATION>/<BUSINESS-APPLICATION>-service/src/main/resourcesfolder, where<BUSINESS-APPLICATION>is the name of your Spring Boot project. -
Open the
application.propertiesfile in a text editor. Locate the following parameters in the
application.propertiesfile and verify that they have the values shown:spring.jpa.properties.hibernate.dialect=org.hibernate.dialect.H2Dialect spring.jpa.properties.hibernate.show_sql=false spring.jpa.properties.hibernate.hbm2ddl.auto=update spring.jpa.hibernate.naming.physical-strategy=org.hibernate.boot.model.naming.PhysicalNamingStrategyStandardImpl
If your business application has business automation capabilities, you can add entities to the entity manager factory by adding a comma-separated list of packages:
spring.jpa.properties.entity-scan-packages=org.jbpm.springboot.samples.entities
Business applications with business automation capabilities create an entity manager factory based on the
persistence.xmlfile that comes with Red Hat Process Automation Manager. All entities found in theorg.jbpm.springboot.samples.entitiespackage are automatically added to the entity manager factory and used the same as any other JPA entity in the application.
Additional resources
For more information about configuring JPA, see the Spring Boot Reference Guide.
5.9. Enabling Swagger documentation
You can enable Swagger-based documentation for all endpoints available in the service project of your Red Hat Process Automation Manager business application.
Prerequisites
- You have a Spring Boot application ZIP file that you created using the business applications website.
Procedure
-
Extract the
<BUSINESS-APPLICATION>.zipfile and navigate to the<BUSINESS-APPLICATION>/<BUSINESS-APPLICATION>-servicefolder, where<BUSINESS-APPLICATION>is the name of your Spring Boot project. -
Open the service project
pom.xmlfile in a text editor. Add the following dependencies to the service project
pom.xmlfile and save the file.<dependency> <groupId>org.apache.cxf</groupId> <artifactId>cxf-rt-rs-service-description-swagger</artifactId> <version>3.2.6</version> </dependency> <dependency> <groupId>io.swagger</groupId> <artifactId>swagger-jaxrs</artifactId> <version>1.5.15</version> <exclusions> <exclusion> <groupId>javax.ws.rs</groupId> <artifactId>jsr311-api</artifactId> </exclusion> </exclusions> </dependency>To enable the Swagger UI (optional), add the following dependency to the
pom.xmlfile and save the file.<dependency> <groupId>org.webjars</groupId> <artifactId>swagger-ui</artifactId> <version>2.2.10</version> </dependency>
-
Open the
<BUSINESS-APPLICATION>/<BUSINESS-APPLICATION>-service/src/main/resources/application.propertiesfile in a text editor. Add the following line to the
application.propertiesfile to enable Swagger support:kieserver.swagger.enabled=true
After you start the business application, you can view the Swagger document at http://localhost:8090/rest/swagger.json. The complete set of endpoints is available at http://localhost:8090/rest/api-docs?url=http://localhost:8090/rest/swagger.json.
Chapter 6. Creating a self-contained Red Hat Process Automation Manager Spring Boot JAR file
You can create a single self-contained Red Hat Process Automation Manager Spring Boot JAR file that contains a complete service, including KIE Server and one or more KJAR files. The Red Hat Process Automation Manager Spring Boot JAR file does not depend on any KJAR files loading at runtime.
If necessary, the Red Hat Process Automation Manager Spring Boot JAR file can contain multiple versions of the same KJAR file, including modules. These KJAR files can have the same artifactID and groupID attribute values, but have different version values.
The included KJAR files are separated from any JAR files in the BOOT-INF/lib directory to avoid class loader collisions. Each KJAR classpath container file is isolated from other KJAR classpath container files and does not rely on the Spring Boot class loader.
Prerequisites
- You have an existing Red Hat Process Automation Manager Spring Boot project.
- You have completed development of one or more KJAR files for the project.
Procedure
Build all KJAR files for the project. In the default business application, the KJAR source is contained in the
<BUSINESS-APPLICATION>/<BUSINESS-APPLICATION>-kjardirectory, whereBUSINESS-APPLICATIONis the name of the business application. Your project might include other KJAR source directories.To build the KJAR files, for every KJAR source directory, complete the following steps:
- Change to the KJAR source directory.
Enter the following command:
mvn install
This command builds the KJAR file and places it into the local Maven repository. By default, this repository is located in the
~/.m2/repodirectory.
In the
<BUSINESS-APPLICATION>/<BUSINESS-APPLICATION>-service/src/main/resourcesdirectory, add the following property to your Spring Boot applicationapplication.propertiesfile:kieserver.classPathContainer=true
When this property is set to
true, KIE Server uses the class loader used by the container to load KJAR files and their dependencies.Complete one of the following actions to ensure that KIE Server loads the necessary KJAR modules:
To configure KIE Server to scans and deploy all KJAR modules available in the Spring Boot application, add the following property to the
application.propertiesfile:kieserver.autoScanDeployments=true
When this property is set to
true, KIE Server deploys all KJAR modules available in the application, whether they are declared programmatically or through the Maven plug-in.This option is the simplest method to include all KJAR modules. However, it has two drawbacks:
- The application sets all container IDs and aliases automatically, based on the group, artifact, and version (GAV) of every KJAR module. You cannot set a custom container ID or alias for a KJAR module.
- At startup time, the application scans the JAR file and the class path for KJAR modules. Therefore, the duration of startup might be increased.
To avoid these drawbacks, you can configure every KJAR module individually using the
application.propertiesfile or using Java source code, as described in one of the following options.To configure every KJAR module individually using the
application.propertiesfile, for each of the KJAR modules that you want to include in the service, add the following properties to theapplication.propertiesfile:kieserver.deployments[<n>].containerId=<container> kieserver.deployments[<n>].alias=<alias> kieserver.deployments[<n>].artifactId=<artifact> kieserver.deployments[<n>].groupId=<group> kieserver.deployments[<n>].version=<version>
Replace the following values:
-
<n>: A sequential number:0for the first KJAR module,1for the second module, and so on -
<container>: The container ID for the KJAR module -
<alias>: The alias for the KJAR module -
<artifact>: The artifact ID for the KJAR module -
<group>: The group ID for the KJAR module -
<version>: The version ID for the KJAR module
The following example configures two versions of the
EvaluationKJAR module:kieserver.deployments[0].alias=evaluation_v1 kieserver.deployments[0].containerId=evaluation_v1 kieserver.deployments[0].artifactId=Evaluation kieserver.deployments[0].groupId=com.myspace kieserver.deployments[0].version=1.0.0-SNAPSHOT kieserver.deployments[1].alias=evaluation_v2 kieserver.deployments[1].containerId=evaluation_v2 kieserver.deployments[1].artifactId=Evaluation kieserver.deployments[1].groupId=com.myspace kieserver.deployments[1].version=2.0.0-SNAPSHOT
-
To configure every KJAR module individually using Java source code, create a class in your business application service, similar to the following example:
@Configuration
public class KieContainerDeployer {

    @Bean
    public KieContainerResource evaluation_v1() {
        KieContainerResource container = new KieContainerResource("evaluation_v1", new ReleaseId("com.myspace", "Evaluation", "1.0.0-SNAPSHOT"), STARTED);
        container.setConfigItems(Arrays.asList(new KieServerConfigItem(KieServerConstants.PCFG_RUNTIME_STRATEGY, "PER_PROCESS_INSTANCE", "String")));
        return container;
    }

    @Bean
    public KieContainerResource evaluation_v2() {
        KieContainerResource container = new KieContainerResource("evaluation_v2", new ReleaseId("com.myspace", "Evaluation", "2.0.0-SNAPSHOT"), STARTED);
        container.setConfigItems(Arrays.asList(new KieServerConfigItem(KieServerConstants.PCFG_RUNTIME_STRATEGY, "PER_PROCESS_INSTANCE", "String")));
        return container;
    }
}
For every KJAR module that you want to include, create a
KieContainerResourcebean in this class. The name of the bean is the container name, the first parameter ofKieContainerResource()is the alias name, and the parameters ofReleaseId()are the group ID, artifact ID, and version ID of the KJAR module.
In the
<BUSINESS-APPLICATION>/<BUSINESS-APPLICATION>-servicedirectory, add the following Maven plug-in in the Spring Bootservice/pom.xmlfile where<GROUP_ID>,<ARTIFACT_ID>, and<VERSION>are the group, artifact, and version (GAV) of a KJAR artifact that your project uses. You can find these values in thepom.xmlfile that is located in the KJAR source directory.NoteYou can add more than one version of an artifact.
  <build>
    <plugins>
      <plugin>
        <groupId>org.kie</groupId>
        <artifactId>kie-maven-plugin</artifactId>
        <version>${version.org.kie}</version>
        <executions>
          <execution>
            <id>copy</id>
            <phase>prepare-package</phase>
            <goals>
              <goal>package-dependencies-kjar</goal>
            </goals>
          </execution>
        </executions>
        <configuration>
          <artifactItems>
            <artifactItem>
              <groupId><GROUP_ID></groupId>
              <artifactId><ARTIFACT_ID></artifactId>
              <version><VERSION></version>
            </artifactItem>
          </artifactItems>
        </configuration>
      </plugin>
    <plugins>
  <build>
The artifacts required to run the KJAR will be resolved at build time.
The following example adds two version of the
Evaluationartifact:<build> <plugins> <plugin> <groupId>org.kie</groupId> <artifactId>kie-maven-plugin</artifactId> <version>${version.org.kie}</version> <executions> <execution> <id>copy</id> <phase>prepare-package</phase> <goals> <goal>package-dependencies-kjar</goal> </goals> </execution> </executions> <configuration> <artifactItems> <artifactItem> <groupId>com.myspace</groupId> <artifactId>Evaluation</artifactId> <version>1.0.0-SNAPSHOT</version> </artifactItem> <artifactItem> <groupId>com.myspace</groupId> <artifactId>Evaluation</artifactId> <version>2.0.0-SNAPSHOT</version> </artifactItem> </artifactItems> </configuration> </plugin> <plugins> <build>To build the self-contained Spring Boot image, enter the following command in the
<BUSINESS-APPLICATION>/<BUSINESS-APPLICATION>-servicedirectory:mvn install
Optional: to run the self-contained Spring Boot image, locate the JAR file in the
targetsubdirectory and enter the following command:java -jar <FILENAME>.jar
In this command, replace
<FILENAME>with the name of the JAR file.
Chapter 7. Business application execution
By default, business applications contain a single executable project, the service project. You can execute the service project on Windows or Linux, in standalone (unmanaged) or development (managed) mode. Standalone mode enables you to start your application without additional requirements. Applications started in development mode require Business Central to be available as the Process Automation Manager controller.
7.1. Running business applications in standalone mode
Standalone (unmanaged) mode enables you to start your business application without additional requirements.
Prerequisites
-
You have a
<BUSINESS-APPLICATION>.zipfile that you created using the business applications website, where<BUSINESS-APPLICATION>is the name of your Spring Boot project. - The business application is configured.
Procedure
-
Navigate to the
<BUSINESS-APPLICATION>/<BUSINESS-APPLICATION>-servicefolder. Enter one of the following commands:
Table 7.1. Standalone launch options
Command
Description
./launch.sh clean installLaunches in standalone mode on Linux or UNIX.
./launch.bat clean installLaunches in standalone mode on Windows.
./launch.sh clean install -PmysqlLaunches in standalone mode on Linux or UNIX if you have configured the application with a MySQL database.
./launch.bat clean install -PmysqlLaunches in standalone mode on Windows if you have configured the application with a MySQL database.
./launch.sh clean install -PpostgresLaunches in standalone mode on Linux or UNIX if you have configured the application with a postgreSQL database.
./launch.bat clean install -PpostgresLaunches in standalone mode on Windows if you have configured the application with a PostgreSQL database.
The
clean installargument directs Maven to build a fresh installation. The projects are then built in the following order:- Data model
- Business assets
Service
The first time that you run the script, it might take a while to build the project because all dependencies of the project are downloaded. At the end of the build, the application starts.
Enter the following command to access your business application:
http://localhost:8090/
-
Enter the credentials
user/userorkieserver/kieserver1!.
7.2. Running business applications in development mode
Development (managed) mode enables developers to work on a Red Hat Process Automation Manager business application business assets project and dynamically deploy changes to the business application without the need to restart it. In addition, development mode provides a complete monitoring environment for business automation capabilities, for example process instances, tasks, and jobs.
Prerequisites
- You have a Spring Boot application ZIP file that you created using the business applications website.
- You configured the business application.
- Business Central is installed and running.
Procedure
-
Navigate to the
<BUSINESS-APPLICATION>/<BUSINESS-APPLICATION>-servicefolder, where<BUSINESS-APPLICATION>is the name of your Spring Boot project. Enter one of the following commands:
Table 7.2. Managed launch options
Command
Description
./launch-dev.sh clean installLaunches in development mode on Linux or UNIX.
./launch-dev.bat clean installLaunches in development mode on Windows.
./launch-dev.sh clean install -PmysqlLaunches in development mode on Linux or UNIX if you have configured the application with a MySQL database.
./launch-dev.bat clean install -PmysqlLaunches in development mode on Windows if you have configured the application with a MySQL database.
./launch-dev.sh clean install -PpostgresLaunches in development mode on Linux or UNIX if you have configured the application with a postgreSQL database.
./launch-dev.bat clean install -PpostgresLaunches in development mode on Windows if you have configured the application with a PostgreSQL database.
The
clean installargument directs Maven to build a fresh installation. The projects are then built in the following order:- Data model
- Business assets
Service
The first time that you run the script, it might take a while to build the project because all dependencies of the project are downloaded. At the end of the build, the application starts.
Enter the following command to access your business application:
http://localhost:8090/
-
Enter the credentials
user/userorkieserver/kieserver1!. After the business application starts, it connects to the Process Automation Manager controller and is visible in Menu → Deploy → Execution Servers in Business Central.
Chapter 8. Importing and deploying business assets projects in Business Central
You can import a business assets project that is part of a Red Hat Process Automation Manager business application into Business Central and then deploy that project to a business application.
Prerequisites
- You have a business application project running in development mode.
- Red Hat Process Automation Manager Business Central is installed.
Procedure
-
Navigate to the
<BUSINESS-APPLICATION>/<BUSINESS-APPLICATION>-kjarfolder, where<BUSINESS-APPLICATION>is the name of your Spring Boot project. Execute the following following commands to initialize the Git repository for your project:
$ git init
$ git add -A
$ git commit -m "Initial project structure"
- Log in to Business Central and go to Menu → Design → Projects.
Select Import Project and enter the following URL:
file:///<business-application-path>/<business-application-name>-kjar
- Click Import and confirm the project to be imported.
- After the business assets project is imported into Business Central, open the project and click Add Assets to add assets such as business processes to your business assets project.
Click Deploy on your project page to deploy your project to a running business application.
NoteYou can also select the Build & Install option to build the project and publish the KJAR file to the configured Maven repository without deploying to a KIE Server. In a development environment, you can click Deploy to deploy the built KJAR file to a KIE Server without stopping any running instances (if applicable), or click Redeploy to deploy the built KJAR file and replace all instances. The next time you deploy or redeploy the built KJAR, the previous deployment unit (KIE container) is automatically updated in the same target KIE Server. In a production environment, the Redeploy option is disabled and you can click Deploy only to deploy the built KJAR file to a new deployment unit (KIE container) on a KIE Server.
To configure the KIE Server environment mode, set the
org.kie.server.modesystem property toorg.kie.server.mode=developmentororg.kie.server.mode=production. To configure the deployment behavior for a corresponding project in Business Central, go to project Settings → General Settings → Version and toggle the Development Mode option. By default, KIE Server and all new projects in Business Central are in development mode. You cannot deploy a project with Development Mode turned on or with a manually addedSNAPSHOTversion suffix to a KIE Server that is in production mode.- To review project deployment details, click View deployment details in the deployment banner at the top of the screen or in the Deploy drop-down menu. This option directs you to the Menu → Deploy → Execution Servers page.
- To interact with your newly deployed business assets, go to Menu → Manage → Process Definitions and Process Instances.
Chapter 9. Replicating audit data in a JMS message broker
You can replicate KIE Server audit data to a Java Message Service (JMS) message broker, for example ActiveMQ or Artemis, and then dump the data in an external database schema so that you can improve the performance of your Spring Boot application by deleting the audit data from your application schema.
If you configure your application to replicate data in a message broker, when an event occurs in KIE Server the record of that event is stored in the KIE Server database schema and it is sent to the message broker. You can then configure an external service to consume the message broker data into an exact replica of the application’s database schema. The data is appended in the message broker and the external database every time an event is produce by KIE Server.
Only audit data is stored in the message broker. No other data is replicated.
Prerequisites
- You have a Red Hat Process Automation Manager Spring Boot project.
Procedure
-
Open the Spring Boot application’s
pom.xmlfile in a text editor. Add the KIE Server Spring Boot audit dependency to the
pom.xmlfile:<dependency> <groupId>org.kie</groupId> <artifactId>kie-server-spring-boot-autoconfiguration-audit-replication</artifactId> <version>${version.org.kie}</version> </dependency>Add the dependency for your JMS client. The following example adds the Advanced Message Queuing Protocol (AMQP) dependency:
<dependency>
  <groupId>org.amqphub.spring</groupId>
  <artifactId>amqp-10-jms-spring-boot-starter</artifactId>
  <version>2.2.6</version>
</dependency>
Add the JMS pool dependency:
<dependency>
  <groupId>org.messaginghub</groupId>
  <artifactId>pooled-jms</artifactId>
</dependency>
To configure KIE Server audit replication to use queues, complete the following tasks:
Add the following lines to your Spring Boot application’s
application.propertiesfile:kieserver.audit-replication.producer=true kieserver.audit-replication.queue=audit-queue
Add the properties required for your message broker client. The following example shows how to configure KIE Server for AMPQ, where
<JMS_HOST_PORT>is the port that the broker listens on and<USERNAME>and<PASSWORDare the login credentials for the broker:amqphub.amqp10jms.remote-url=amqp://<JMS_HOST_PORT> amqphub.amqp10jms.username=<USERNAME> amqphub.amqp10jms.password=<PASSWORD> amqphub.amqp10jms.pool.enabled=true
Add the following lines to the
application.propertiesfile of the service that will consume the message broker data:kieserver.audit-replication.consumer=true kieserver.audit-replication.queue=audit-queue
Add the properties required for your message broker client to the
application.propertiesfile of the service that will consume the message broker data. The following example shows how to configure KIE Server for AMPQ, where<JMS_HOST_PORT>is the port that your message broker listens on and<USERNAME>and<PASSWORD>are the login credentials for the message broker:amqphub.amqp10jms.remote-url=amqp://<JMS_HOST_PORT> amqphub.amqp10jms.username=<USERNAME> amqphub.amqp10jms.password=<PASSWORD> amqphub.amqp10jms.pool.enabled=true
To configure KIE Server audit replication to use topics, complete the following tasks:
Add the following lines to your Spring Boot application’s
application.propertiesfile:kieserver.audit-replication.producer=true kieserver.audit-replication.topic=audit-topic
Add the properties required for your message broker client to the
application.propertiesfile of the service that will consume the message broker data. The following example shows how to configure KIE Server for AMPQ, where<JMS_HOST_PORT>is the port that your message broker listens on and<USERNAME>and<PASSWORDare the login credentials for the message broker:spring.jms.pub-sub-domain=true amqphub.amqp10jms.remote-url=amqp://<JMS_HOST_PORT> amqphub.amqp10jms.username=<USERNAME> amqphub.amqp10jms.password=<PASSWORD> amqphub.amqp10jms.pool.enabled=true
Add the following lines to the
application.propertiesfile of the service that will consume the message broker data:kieserver.audit-replication.consumer=true kieserver.audit-replication.topic=audit-topic::jbpm kieserver.audit-replication.topic.subscriber=jbpm spring.jms.pub-sub-domain=true
Add the properties required for your message broker client to the
application.propertiesfile of the service that will consume the message broker data. The following example shows how to configure KIE Server for AMPQ, where<JMS_HOST_PORT>is the port that your message broker listens on and<USERNAME>and<PASSWORD>are the login credentials for the message broker:amqphub.amqp10jms.remote-url=amqp://<JMS_HOST_PORT> amqphub.amqp10jms.username=<USERNAME> amqphub.amqp10jms.password=<PASSWORD> amqphub.amqp10jms.pool.enabled=true amqphub.amqp10jms.clientId=jbpm
Optional: To configure the KIE Server that contains the replicated data to be read only, set the
org.kie.server.rest.mode.readonlyproperty in theapplication.propertiesfile totrue:org.kie.server.rest.mode.readonly=true
Additional resources
9.1. Spring Boot JMS audit replication parameters
The following table describes the parameters used to configure JMS audit replication for Red Hat Process Automation Manager applications on Spring Boot.
Table 9.1. Spring Boot JMS audit replication parameters
| Parameter | Values | Description |
|---|---|---|
|
|
| Specifies whether the business application will act as a producer to replicate and send the JMS messages to either a queue or a topic. |
|
|
| Specifies whether the business application will act as a consumer to receive the JMS messages from either a queue or a topic. |
|
|
| The name of the JMS queue to either send or consume messages. |
|
|
| The name of the JMS topic to either send or consume messages. |
|
|
| The name of the topic subscriber. |
|
|
| Specifies read only mode for the business application. |
Part II. Integrating Red Hat Fuse with Red Hat Process Automation Manager
As a system administrator, you can integrate Red Hat Process Automation Manager with Red Hat Fuse on Apache Karaf and Red Hat JBoss Enterprise Application Platform to facilitate communication between integrated services.
Red Hat Process Automation Manager does not support integration with Red Hat Fuse on Spring Boot.
Chapter 10. Red Hat Fuse and Red Hat Process Automation Manager
Red Hat Fuse is a distributed, cloud-native integration platform that is part of an agile integration solution. Its distributed approach enables teams to deploy integrated services where required. Fuse has the flexibility to service diverse users, including integration experts, application developers, and business users, each with their own choice of deployment, architecture, and tooling. The API-centric, container-based architecture decouples services so they can be created, extended, and deployed independently. The result is an integration solution that supports collaboration across the enterprise.
Red Hat Process Automation Manager is the Red Hat platform for creating business automation applications and microservices. It enables enterprise business and IT users to document, simulate, manage, automate, and monitor business processes and policies. Red Hat Process Automation Manager is designed to empower business and IT users to collaborate more effectively, so business applications can be changed easily and quickly.
You can install Red Hat Fuse on the Apache Karaf container platform or Red Hat JBoss Enterprise Application Platform and then install and configure Red Hat Process Automation Manager in that container.
For the version of Red Hat Fuse that Red Hat Process Automation Manager 7.9 supports, see Red Hat Process Automation Manager 7 Supported Configurations.
10.1. Red Hat Process Automation Manager Karaf features
The following table lists Red Hat Process Automation Manager Karaf features.
| Feature | Description |
|---|---|
|
| Contains the core and compiler of Drools, used to create KIE bases and KIE sessions from plain DRL. It also contains the implementation of the executable model. Uses Drools for rules evaluation, without requiring persistence, processes, or decision tables. |
|
| Contains the Drools templates. |
|
|
Uses Drools for rules evaluation with persistence and transactions, but without requiring processes or decision tables. The |
|
| Uses Drools with decision tables. |
|
|
Uses jBPM. The |
|
| Uses jBPM with human tasks. |
|
|
Provides the |
|
Core engine JARs and |
Uses Red Hat Process Automation Manager with the KIE scanner ( |
|
|
Provides the |
|
|
Installs the |
Chapter 11. Red Hat Process Automation Manager decision and process engines with Fuse on Apache Karaf
Apache Karaf is a standalone open-source runtime environment. It is based on the OSGi standard from the OSGi Alliance. Karaf provides support for modularisation through OSGi bundles with sophisticated class-loading support. You can deploy multiple versions of a dependency side by side in a Karaf container. You can use hot code swapping to upgrade or replace a module without shutting down the container.
Red Hat Process Automation Manager integration with Fuse on Karaf is provided through Karaf features. You can install individual components of Red Hat Process Automation Manager for Fuse on Karaf using these features.
Features files are XML files that specify which OSGI bundles are installed for a particular feature. The following features XML files facilitate Red Hat Process Automation Manager and Fuse on Karaf integration:
rhba-features-<FUSE-VERSION>-features.xmlThis file is part of Fuse installed in Karaf where
<FUSE-VERSION>is the version of Fuse. This file is stored in the Karaf system repository, in thesystem/org/jboss/fuse/features/rhba-featuresdirectory. This file contains prerequisites for installing Red Hat Process Automation Manager features.kie-karaf-features-7.44.0.Final-redhat-00006-features-fuse.xmlThis file is part of Red Hat Process Automation Manager and provides Red Hat Process Automation Manager features, which define the OSGi features that can be deployed into Red Hat Fuse. OSGi users can install features from this file to install Red Hat Process Automation Manager into Fuse and use it in their applications. You can find this features file in the online and offline Maven repository that is distributed with Red Hat Process Automation Manager. The group ID, artifact ID, and version (GAV) identifier of this file is
org.kie:kie-karaf-features:7.44.0.Final-redhat-00006.
11.1. Uninstalling obsolete Red Hat Process Automation Manager features XML files on Karaf
If your installation contains older versions of the Red Hat Process Automation Manager features XML files (for example, kie-karaf-features-<VERSION>-features.xml), you must remove these files and all associated files before installing the most recent features XML files.
Prerequisites
- Obsolete features XML files exist in your Apache Karaf installation.
Procedure
Enter the following commands to determine whether your installation contains obsolete Red Hat Process Automation Manager features XML files:
$ JBossFuse:karaf@root> feature:repo-list
$ JBossFuse:karaf@root> feature:list
Enter the following command, where
<FUSE_HOME>is the Fuse installation directory, to start the Red Hat Fuse console:$ ./<FUSE_HOME>/bin/fuse
Enter the following command, where
<FEATURE_NAME>is the name of the feature that you want to uninstall, to uninstall features or applications that use obsolete features XML files:JBossFuse:karaf@root> features:uninstall <FEATURE_NAME>
The following example shows how to remove features:
JBossFuse:karaf@root> features:uninstall drools-module
JBossFuse:karaf@root> features:uninstall jbpm
JBossFuse:karaf@root> features:uninstall kie-ci
Search Karaf home for references to bundles that use
drools,kie, orjbpm. The following example shows how to usegrepto search for these components:karaf@root> list -t 0 -s | grep drools karaf@root> list -t 0 -s | grep kie karaf@root> list -t 0 -s | grep jbpm
The example shows output from these commands:
250 │ Active   │  80 │ 7.19.0.201902201522          │ org.drools.canonical-model
251 │ Active   │  80 │ 7.19.0.201902201522          │ org.drools.cdi
252 │ Active   │  80 │ 7.19.0.201902201522          │ org.drools.compiler
Enter the following command, where
BUNDLE_IDis a bundle ID returned in the search, to remove the bundles found in the previous step:karaf@root> osgi:uninstall BUNDLE_ID
Enter the following command to remove the obsolete
drools-karaf-featuresURL:karaf@root> features:removeurl mvn:org.kie/kie-karaf-features/VERSION.Final-redhat-VERSION/xml/features
- Restart Fuse.
11.2. Installing Red Hat Process Automation Manager features on Karaf using XML files
Install Red Hat Process Automation Manager features on Karaf to create a dynamic runtime environment for your Red Hat Process Automation Manager processes.
Prerequisites
- A Red Hat Fuse installation in an Apache Karaf container is available. For information about installing Fuse in Apache Karaf, see Installing Red Hat Fuse on the Apache Karaf container.
- You have removed any obsolete Red Hat Process Automation Manager features XML files as described in Section 11.1, “Uninstalling obsolete Red Hat Process Automation Manager features XML files on Karaf”.
Procedure
To install Red Hat Process Automation Manager features, enter the following command:
$ JBossFuse:karaf@root> feature:install <FEATURE_NAME>
Use org.drools.osgi.spring.OsgiKModuleBeanFactoryPostProcessor instead of org.kie.spring.KModuleBeanFactoryPostProcessor to postprocess KIE elements in an OSGi environment.
Do not install the drools-module feature before the kie-spring feature. If you do, the drools-compiler bundle will not detect packages exported by kie-spring.
If you install the features in the incorrect order, run osgi:refresh drools-compiler_bundle_ID to force the drools-compiler to rebuild its Import-Package metadata.
In this command, <FEATURE_NAME> is one of the features listed in Section 10.1, “Red Hat Process Automation Manager Karaf features”.
11.3. Installing Red Hat Process Automation Manager features on Karaf through maven
Install Red Hat Process Automation Manager with Fuse on Apache Karaf to deploy integrated services where required.
Prerequisites
- A Red Hat Fuse 7.7 on Apache Karaf installation exists. For installation instructions, see Installing Red Hat Fuse on the Apache Karaf container .
- Any obsolete features XML files have been removed, as described in Section 11.1, “Uninstalling obsolete Red Hat Process Automation Manager features XML files on Karaf”.
Procedure
-
To configure the Maven repository, open the
FUSE_HOME/etc/org.ops4j.pax.url.mvn.cfgfile in a text editor. Make sure that the
https://maven.repository.redhat.com/ga/repository is present in theorg.ops4j.pax.url.mvn.repositoriesvariable and add it if necessary.NoteEntries are separated by a comma, space, and backslash (, \). The backslash forces a new line.
To start Fuse, enter the following command, where
FUSE_HOMEis the Fuse installation directory:$ ./FUSE_HOME/bin/fuse
To add a reference to the features file that contains installation prerequisites, enter the following command, where
<FUSE_VERSIONis the version of Fuse that you are installing:$ feature:repo-add mvn:org.jboss.fuse.features/rhba-features/<FUSE-VERSION>/xml/features
Enter the following command to add a reference to the Red Hat Process Automation Manager features XML file:
$ JBossFuse:karaf@root> features:addurl mvn:org.kie/kie-karaf-features/VERSION/xml/features-fuse
To see the current
drools-karaf-featuresversion, see the Red Hat Process Automation Manager 7 Supported Configurations page.Enter the following command to install a feature provided by Red Hat Process Automation Manager features XML file. In this command,
<FEATURE_NAME>is one of the features listed in Section 10.1, “Red Hat Process Automation Manager Karaf features”.JBossFuse:karaf@root> features:install <FEATURE_NAME>
Enter the following command to verify the installation:
$ JBossFuse:karaf@root>feature:list
Successfully installed features have the status
started.
Chapter 12. Installing Fuse on Red Hat JBoss Enterprise Application Platform
Install Red Hat Fuse 7.7 on Red Hat JBoss EAP 7.2.7 to use with Red Hat Process Automation Manager to deploy integrated services where required.
Red Hat Fuse 7.7 is supported on Red Hat JBoss EAP 7.2, whereas Red Hat Process Automation Manager 7.8.x and newer is supported on Red Hat Red Hat JBoss EAP 7.3. To ensure a stable deployment environment, install Fuse and Red Hat Process Automation Manager on different instances of Red Hat JBoss EAP according to the supported Red Hat JBoss EAP versions.
Red Hat Process Automation Manager 7.8.x and newer components on Red Hat JBoss EAP 7.2 are not officially supported. However, Red Hat provides guidance on a commercially reasonable basis until Fuse is available on Red Hat JBoss EAP 7.3. MarshallingFormat.JSON is not supported on Fuse integration with Red Hat JBoss EAP 7.2 using kie-camel. The default is JAXB.
Prerequisites
- A Red Hat Process Automation Manager installation on Red Hat JBoss Enterprise Application Platform 7.3 is available. For installation instructions, see Installing and configuring Red Hat Process Automation Manager on Red Hat JBoss EAP 7.3.
- A separate instance of Red Hat JBoss Enterprise Application Platform 7.2.7 is available.
Procedure
- Install Red Hat Fuse 7.7 on Red Hat JBoss Enterprise Application Platform 7.2.7. For installation instructions, see the Installing on JBoss EAP.
-
Open the
pom.xmlfile in the Fuse home directory in a text editor. Create the integration project with a dependency on the
kie-camelcomponent by editing thepom.xmlfile as shown in the following example:<dependency> <groupId>org.apache.camel</groupId> <artifactId>camel-core</artifactId> <scope>provided</scope> </dependency> <dependency> <groupId>org.kie</groupId> <artifactId>kie-api</artifactId> </dependency> <dependency> <groupId>org.kie</groupId> <artifactId>kie-ci</artifactId> <exclusions> <exclusion> <groupId>aopalliance</groupId> <artifactId>aopalliance</artifactId> </exclusion> </exclusions> </dependency> <dependency> <groupId>org.kie.server</groupId> <artifactId>kie-server-api</artifactId> <exclusions> <exclusion> <groupId>org.jboss.spec.javax.xml.bind</groupId> <artifactId>jboss-jaxb-api_2.3_spec</artifactId> </exclusion> <exclusion> <groupId>javax.activation</groupId> <artifactId>activation</artifactId> </exclusion> </exclusions> </dependency> <dependency> <groupId>org.jbpm</groupId> <artifactId>jbpm-bpmn2</artifactId> </dependency> <dependency> <groupId>org.kie</groupId> <artifactId>kie-camel</artifactId> <exclusions> <exclusion> <groupId>org.apache.cxf</groupId> <artifactId>cxf-core</artifactId> </exclusion> <exclusion> <groupId>org.apache.camel</groupId> <artifactId>camel-cxf</artifactId> </exclusion> <exclusion> <groupId>org.apache.camel</groupId> <artifactId>camel-cxf-transport</artifactId> </exclusion> <exclusion> <groupId>com.thoughtworks.xstream</groupId> <artifactId>xstream</artifactId> </exclusion> </exclusions> </dependency> <dependency> <groupId>org.kie.server</groupId> <artifactId>kie-server-client</artifactId> <exclusions> <exclusion> <groupId>org.jboss.spec.javax.ws.rs</groupId> <artifactId>jboss-jaxrs-api_2.0_spec</artifactId> </exclusion> </exclusions> </dependency>
Chapter 13. The kie-camel component
The kie-camel component is an Apache Camel endpoint provided by Red Hat Fuse that integrates Fuse with Red Hat Process Automation Manager. It enables you to specify a Red Hat Process Automation Manager module by using a Maven group ID, artifact ID, and version (GAV) identifier which you can pull into the route and execute. It also enables you to specify portions of the message body as facts.You can use the kie-camel component with embedded engines or with KIE Server.
Embedded engines
In this scenario, KIE engines run in the same container as the Fuse integration project and you can communicate with engines using KIE commands. To create the Camel producer, use the following URI:
kie-local:kie-session-name?action=execute
For example, enter the following command to initialize a Camel route in Spring:
<from uri="direct:runCommand" />
  	<to uri="kie-local:kie-session1?action=execute"/>
KIE Server
In this scenario, the kie-camel component connects to KIE Server using the KIE Server REST API. This enables users to communicate with the KIE Server using the KIE Server API. To create a producer, use the following URI:
kie:http://username:password@kie-server-url`
For example, enter the following command to initialize a Camel route in Spring:
<from uri="direct:runCommand" />
  	<to uri="kie:http://user:psswd@localhost:8080/kie-server-services/services/rest/server"/>
The message has the following headers:
Table 13.1. Message headers and descriptions
| Header | Description |
|---|---|
|
| KIE Server client (mandatory) |
|
| KIE Server client (mandatory) |
|
| The value of the client method parameter (optional) |
|
| The method parameter where the message body is stored (optional) |
Part III. Integrating Red Hat Process Automation Manager with Red Hat Single Sign-On
As a system administrator, you can integrate Red Hat Single Sign-On with Red Hat Process Automation Manager to secure your Red Hat Process Automation Manager browser applications with a single authentication method.
Prerequisites
- Red Hat Process Automation Manager is installed on Red Hat JBoss EAP 7.3. For information, see Installing and configuring Red Hat Process Automation Manager on Red Hat JBoss EAP 7.3.
Chapter 14. Integration Options
Red Hat Single Sign-On (RH-SSO) is a single sign-on solution that you can use to secure your browser applications with your REST web services and Git access.
When you integrate Red Hat Process Automation Manager with RH-SSO, you create an SSO and identity management (IDM) environment for Red Hat Process Automation Manager. The session management feature of RH-SSO enables you to use a single authentication for different Red Hat Process Automation Manager environments on the internet.
The following chapters describe how you can integrate RH-SSO with Red Hat Process Automation Manager:
Chapter 17, Authenticating Business Central through RH-SSO
To authenticate Red Hat Process Automation Manager through an RH-SSO server, you must secure both the Red Hat Process Automation Manager web client (Business Central) and remote services through RH-SSO.This integration enables you to connect to Red Hat Process Automation Manager through RH-SSO using either Business Central or a remote service consumer.
Chapter 18, Authenticating KIE Server through RH-SSO
To authenticate KIE Server through an RH-SSO server, you must secure the remote services provided by KIE Server. Doing this enables any remote Red Hat Process Automation Manager service consumer (user or a service) to authenticate through RH-SSO. Note that KIE Server does not have a web interface.
Chapter 19, Authenticating third-party clients through RH-SSO
If Business Central or KIE Server are using RH-SSO, third-party clients must authenticate themselves using RH-SSO. After authentication, they can consume the remote service endpoints provided by Business Central and KIE Server, such as the REST API or remote file system services.
To facilitate LDAP integration with Red Hat Process Automation Manager, consider using RH-SSO with LDAP. For information, see the "LDAP and Active Directory" chapter of the Red Hat Single Sign-On Server Administration Guide.
Chapter 15. Installing and configuring RH-SSO
A realm is a security policy domain defined for a web or application server. Security realms are used to restrict access for different application resources. You should create a new realm whether your RH-SSO instance is private or shared with other products. You can keep the master realm as a place for super administrators to create and manage the realms in your system. If you are integrating with an RH-SSO instance that is shared with other product installations to achieve single sign-on with those applications, all of those applications must use the same realm. To create an RH-SSO realm, download, install, and configure RH-SSO 7.4.
If Business Central and KIE Server are installed on different servers, complete this procedure on both servers.
Procedure
Navigate to the Software Downloads page in the Red Hat Customer Portal (login required), and select the product and version from the drop-down options:
- Product: Red Hat Single Sign-On
- Version: 7.4
-
Download Red Hat Single Sign-on 7.4.0 Server (
rh-sso-7.4.0.zip) and apply the latest patches. To install and configure a basic RH-SSO standalone server, follow the instructions in the "Installing and Booting" chapter of the Red Hat Single Sign On Getting Started Guide. For advanced settings for production environments, see the Red Hat Single Sign On Server Administration Guide.
NoteIf you want to run both RH-SSO and Red Hat Process Automation Manager servers on the same system, ensure that you avoid port conflicts. by doing one of the following:
Update the
RHSSO_HOME/standalone/configuration/standalone-full.xmlfile and set a port offset to 100. For example:<socket-binding-group name="standard-sockets" default-interface="public" port-offset="${jboss.socket.binding.port-offset:100}">Use an environment variable to run the server:
bin/standalone.sh -Djboss.socket.binding.port-offset=100
Chapter 16. Red Hat Process Automation Manager roles and users
To access Business Central or KIE Server, you must create users and assign them appropriate roles before the servers are started.
The Business Central and KIE Server use Java Authentication and Authorization Service (JAAS) login module to authenticate the users. If both Business Central and KIE Server are running on a single instance, then they share the same JAAS subject and security domain. Therefore, a user, who is authenticated for Business Central can also access KIE Server.
However, if Business Central and KIE Server are running on different instances, then the JAAS login module is triggered for both individually. Therefore, a user, who is authenticated for Business Central, needs to be authenticated separately to access the KIE Server (for example, to view or manage process definitions in Business Central). In case, the user is not authenticated on the KIE Server, then 401 error is logged in the log file, displaying Invalid credentials to load data from remote server. Contact your system administrator. message in Business Central.
This section describes available Red Hat Process Automation Manager user roles.
The admin, analyst, developer, manager, process-admin, user, and rest-all roles are reserved for Business Central. The kie-server role is reserved for KIE Server. For this reason, the available roles can differ depending on whether Business Central, KIE Server, or both are installed.
-
admin: Users with theadminrole are the Business Central administrators. They can manage users and create, clone, and manage the repositories. They have full access to make required changes in the application. Users with theadminrole have access to all areas within Red Hat Process Automation Manager. -
analyst: Users with theanalystrole have access to all high-level features. They can model and execute their projects. However, these users cannot add contributors to spaces or delete spaces in the Design → Projects view. Access to the Deploy → Execution Servers view, which is intended for administrators, is not available to users with theanalystrole. However, the Deploy button is available to these users when they access the Library perspective. -
developer: Users with thedeveloperrole have access to almost all features and can manage rules, models, process flows, forms, and dashboards. They can manage the asset repository, they can create, build, and deploy projects, and they can use Red Hat CodeReady Studio to view processes. Only certain administrative functions such as creating and cloning a new repository are hidden from users with thedeveloperrole. -
manager: Users with themanagerrole can view reports. These users are usually interested in statistics about the business processes and their performance, business indicators, and other business-related reporting. A user with this role has access only to process and task reports. -
process-admin: Users with theprocess-adminrole are business process administrators. They have full access to business processes, business tasks, and execution errors. These users can also view business reports and have access to the Task Inbox list. -
user: Users with theuserrole can work on the Task Inbox list, which contains business tasks that are part of currently running processes. Users with this role can view process and task reports and manage processes. -
rest-all: Users with therest-allrole can access Business Central REST capabilities. -
kie-server: Users with thekie-serverrole can access KIE Server (KIE Server) REST capabilities. This role is mandatory for users to have access to Manage and Track views in Business Central.
16.1. Adding Red Hat Process Automation Manager users
Before you can use RH-SSO to authenticate Business Central or KIE Server, you must add users to the realm that you created. To add new users and assign them a role to access Red Hat Process Automation Manager, complete the following steps:
- Log in to the RH-SSO Admin Console and open the realm that you want to add a user to.
Click the Users menu item under the Manage section.
An empty user list appears on the Users page.
Click the Add User button on the empty user list to start creating your new user.
The Add User page opens.
- On the Add User page, enter the user information and click Save.
- Click the Credentials tab and create a password.
Assign the new user one of the roles that allows access to Red Hat Process Automation Manager. For example, assign the
adminrole to access Business Central or assign thekie-serverrole to access KIE Server.NoteFor projects that deploy from Business Central on OpenShift, create an RH-SSO user called
mavenuserwithout any role assigned, then add this user to theBUSINESS_CENTRAL_MAVEN_USERNAMEandBUSINESS_CENTRAL_MAVEN_PASSWORDin your OpenShift template.- Define the roles as realm roles in the Realm Roles tab under the Roles section.
- Click the Role Mappings tab on the Users page to assign roles.
Chapter 17. Authenticating Business Central through RH-SSO
This chapter describes how to authenticate Business Central through RH-SSO. It includes the following sections:
Prerequisites
- Business Central is installed in a Red Hat JBoss EAP 7.3 server, as described in Installing and configuring Red Hat Process Automation Manager on Red Hat JBoss EAP 7.3.
- RH-SSO is installed as described in Chapter 15, Installing and configuring RH-SSO.
- Business Central users have been added to RH-SSO as described in Section 16.1, “Adding Red Hat Process Automation Manager users”.
Except for Section 17.1, “Creating the Business Central client for RH-SSO”, this section is intended for standalone installations. If you are integrating RH-SSO and Red Hat Process Automation Manager on Red Hat OpenShift Container Platform, complete only the steps in Section 17.1, “Creating the Business Central client for RH-SSO” and then deploy the Red Hat Process Automation Manager environment on Red Hat OpenShift Container Platform. For information about deploying Red Hat Process Automation Manager on Red Hat OpenShift Container Platform, see the relevant document on the Red Hat Customer Portal.
17.1. Creating the Business Central client for RH-SSO
After the RH-SSO server starts, use the RH-SSO Admin Console to create the Business Central client for RH-SSO.
Procedure
Enter
http://localhost:8180/auth/adminin a web browser to open the RH-SSO Admin Console and log in using the admin credentials that you created while installing RH-SSO.NoteIf you are configuring RH-SSO with Red Hat OpenShift Container Platform, enter the URL that is exposed by the RH-SSO routes. Your OpenShift administrator can provide this URL if necessary.
When you login for the first time, you can set up the initial user on the new user registration form.
- In the RH-SSO Admin Console, click the Realm Settings menu item.
On the Realm Settings page, click Add Realm.
The Add realm page opens.
- On the Add realm page, provide a name for the realm and click Create.
Click the Clients menu item and click Create.
The Add Client page opens.
On the Add Client page, provide the required information to create a new client for your realm. For example:
- Client ID: kie
- Client protocol: openid-connect
Root URL:
http://localhost:8080/business-centralNoteIf you are configuring RH-SSO with Red Hat OpenShift Container Platform, enter the URL that is exposed by the KIE Server routes. Your OpenShift administrator can provide this URL if necessary.
Click Save to save your changes.
After you create a new client, its Access Type is set to
publicby default. Change it toconfidential.The RH-SSO server is now configured with a realm with a client for Business Central applications and running and listening for HTTP connections at
localhost:8180. This realm provides different users, roles, and sessions for Business Central applications.
17.2. Installing the RH-SSO client adapter for Business Central
After you install RH-SSO, you must install the RH-SSO client adapter for Red Hat JBoss EAP and configure it for Business Central.
Prerequisites
- Business Central is installed in a Red Hat JBoss EAP 7.3 instance, as described in as described in Installing and configuring Red Hat Process Automation Manager on Red Hat JBoss EAP 7.3.
- RH-SSO is installed as described in Chapter 15, Installing and configuring RH-SSO.
-
A user with the
adminrole has been added to RH-SSO as described in Section 16.1, “Adding Red Hat Process Automation Manager users”.
Procedure
Navigate to the Software Downloads page in the Red Hat Customer Portal (login required), and select the product and version from the drop-down options:
- Product: Red Hat Single Sign-On
- Version: 7.4
-
Download Red Hat Single Sign-on 7.4 Client Adapter for JBoss EAP 7 (
rh-sso-7.4.0-eap7-adapter.zipor the latest version). Extract and install the adapter zip file. For installation instructions, see the "JBoss EAP Adapter" section of the Red Hat Single Sign On Securing Applications and Services Guide.
NoteInstall the adapter with the
-Dserver.config=standalone-full.xmlproperty.-
Navigate to the
EAP_HOME/standalone/configurationdirectory in your Red Hat JBoss EAP installation and open thestandalone-full.xmlfile in a text editor. Add the system properties listed in the following example to
<system-properties>:<system-properties> <property name="org.jbpm.workbench.kie_server.keycloak" value="true"/> <property name="org.uberfire.ext.security.management.api.userManagementServices" value="KCAdapterUserManagementService"/> <property name="org.uberfire.ext.security.management.keycloak.authServer" value="http://localhost:8180/auth"/> </system-properties>
Add the RH-SSO subsystem configuration. For example:
<subsystem xmlns="urn:jboss:domain:keycloak:1.1">
 <secure-deployment name="business-central.war">
   <realm>demo</realm>
   <realm-public-key>MIGfMA0GCSqGSIb3DQEBAQUAA4GNADCBiQKBgQCrVrCuTtArbgaZzL1hvh0xtL5mc7o0NqPVnYXkLvgcwiC3BjLGw1tGEGoJaXDuSaRllobm53JBhjx33UNv+5z/UMG4kytBWxheNVKnL6GgqlNabMaFfPLPCF8kAgKnsi79NMo+n6KnSY8YeUmec/p2vjO2NjsSAVcWEQMVhJ31LwIDAQAB</realm-public-key>
   <auth-server-url>http://localhost:8180/auth</auth-server-url>
   <ssl-required>external</ssl-required>
   <enable-basic-auth>true</enable-basic-auth>
   <resource>kie</resource>
   <credential name="secret">759514d0-dbb1-46ba-b7e7-ff76e63c6891</credential>
   <principal-attribute>preferred_username</principal-attribute>
 </secure-deployment>
</subsystem>
In this example:
-
secure-deployment nameis the name of your application’s WAR file. -
realmis the name of the realm that you created for the applications to use. -
realm-public-keyis the public key of the realm you created. You can find the key in the Keys tab in the Realm settings page of the realm you created in the RH-SSO Admin Console. If you do not provide a value forrealm-public-key, the server retrieves it automatically. -
auth-server-urlis the URL for the RH-SSO authentication server. -
enable-basic-authis the setting to enable basic authentication mechanism, so that the clients can use both token-based and basic authentication approaches to perform the requests. -
resourceis the name for the client that you created. -
credential nameis the secret key for the client you created. You can find the key in the Credentials tab on the Clients page of the RH-SSO Admin Console. principal-attributeis the login name of the user. If you do not provide this value, your User Id is displayed in the application instead of your user name.NoteThe RH-SSO server converts the user names to lower case. Therefore, after integration with RH-SSO, your user name will appear in lower case in Red Hat Process Automation Manager. If you have user names in upper case hard coded in business processes, the application might not be able to identify the upper case user.
-
The Elytron subsystem provides a built-in policy provider based on JACC specification. To enable the JACC manually in the
standalone.xmlor in the file where Elytron is installed, do any of the following tasks:To create the policy provider, enter the following commands in the management command-line interface (CLI) of Red Hat JBoss EAP:
/subsystem=elytron/policy=jacc:add(jacc-policy={})
/subsystem=undertow/application-security-domain=other:remove
/subsystem=undertow/application-security-domain=other:add(http-authentication-factory=keycloak-http-authentication,enable-jacc=true)
For more information about management CLI of Red Hat JBoss EAP, see the Management CLI Guide.
Navigate to the
EAP_HOME/standalone/configurationdirectory in your Red Hat JBoss EAP installation. Locate the Elytron and undertow subsystem configurations in thestandalone.xmlandstandalone-full.xmlfiles and enable JACC. For example:<subsystem xmlns="urn:wildfly:elytron:4.0" ...> ...... <policy name="jacc"><jacc-policy/></policy> </subsystem>
<subsystem xmlns="urn:jboss:domain:undertow:7.0" ...>
......
 <application-security-domains>
    <application-security-domain name="other" http-authentication-factory="keycloak-http-authentication" enable-jacc="true"/>
 </application-security-domains>
</subsystem>
Navigate to
EAP_HOME/bin/and enter the following command to start the Red Hat JBoss EAP server:./standalone.sh -c standalone-full.xml
You can also configure the RH-SSO adapter for Business Central by updating your application’s WAR file to use the RH-SSO security subsystem. However, Red Hat recommends that you configure the adapter through the RH-SSO subsystem. Doing this updates the Red Hat JBoss EAP configuration instead of applying the configuration on each WAR file.
17.3. Securing Business Central file system services using RH-SSO
To consume other remote services such as file systems (for example, a remote GIT service), you must specify the correct RH-SSO login module.
Procedure
Generate a JSON configuration file:
- Navigate to the RH-SSO Admin Console located at http://localhost:8180/auth/admin.
- Click Clients.
Create a new client with the following settings:
-
Set Client ID as
kie-git. -
Set Access Type as
confidential. - Disable the Standard Flow Enabled option.
- Enable the Direct Access Grants Enabled option.
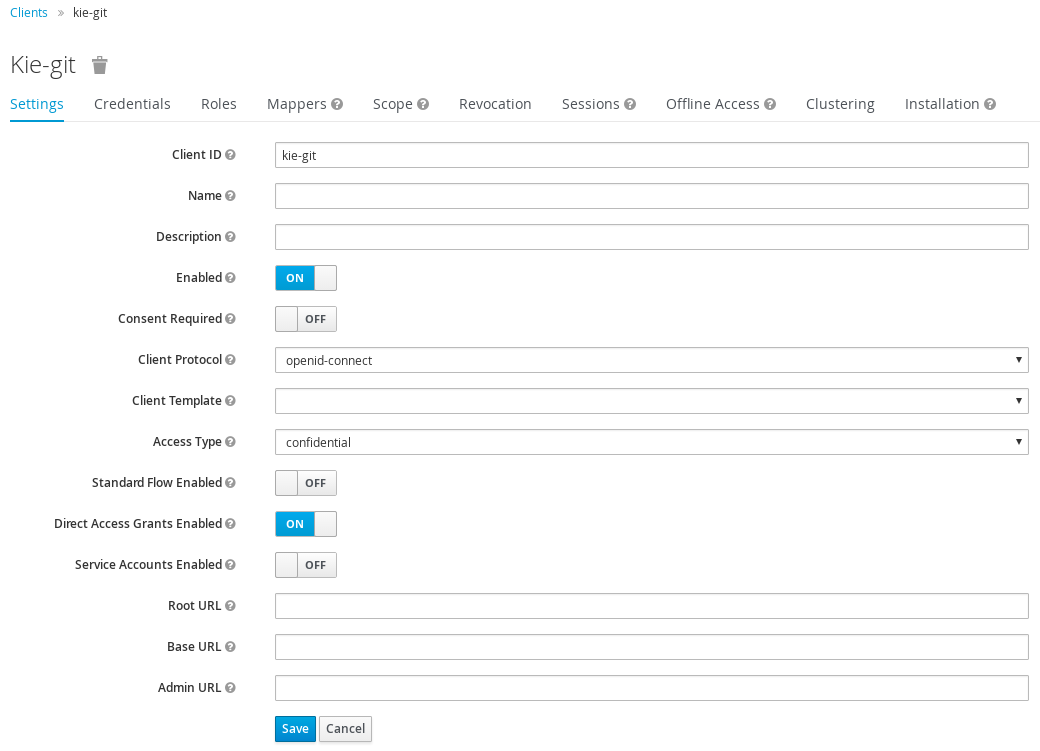
-
Set Client ID as
- Click Save.
- Click the Installation tab at the top of the client configuration screen and choose Keycloak OIDC JSON as a Format Option.
- Click Download.
- Move the downloaded JSON file to an accessible directory in the server’s file system or add it to the application class path.
Specify the correct RH-SSO login module in the
EAP_HOME/standalone/configuration/standalone-full.xmlfile. By default, the security domain in Red Hat Process Automation Manager is set toother. Replace the default values of thelogin-modulein this security domain with the values in the following example:<security-domain name="other" cache-type="default"> <authentication> <login-module code="org.keycloak.adapters.jaas.DirectAccessGrantsLoginModule" flag="required"> <module-option name="keycloak-config-file" value="$EAP_HOME/kie-git.json"/> </login-module> </authentication> </security-domain>The JSON file specified in the
module-optionelement contains a client used for securing the remote services. Replace the$EAP_HOME/kie-git.jsonvalue of themodule-optionelement with the absolute path or the class path (classpath:/EXAMPLE_PATH/kie-git.json) to this JSON configuration file.At this point, all users authenticated through the RH-SSO server can clone internal GIT repositories. In the following command, change
USER_NAMEto a RH-SSO user, for exampleadmin:git clone ssh://USER_NAME@localhost:8001/system
Chapter 18. Authenticating KIE Server through RH-SSO
KIE Server provides a REST API for third-party clients. If you integrate KIE Server with RH-SSO, you can delegate third-party client identity management to the RH-SSO server.
After you create a realm client for Red Hat Process Automation Manager and set up the RH-SSO client adapter for Red Hat JBoss EAP, you can set up RH-SSO authentication for KIE Server.
Prerequisites
- RH-SSO is installed as described in Chapter 15, Installing and configuring RH-SSO.
-
At least one user with the
kie-serverrole has been added to RH-SSO as described in Section 16.1, “Adding Red Hat Process Automation Manager users”. - KIE Server is installed in a Red Hat JBoss EAP 7.3 instance, as described in Installing and configuring Red Hat Process Automation Manager on Red Hat JBoss EAP 7.3.
This chapter contains the following sections:
Except for Section 18.1, “Creating the KIE Server client on RH-SSO”, this section is intended for standalone installations. If you are integrating RH-SSO and Red Hat Process Automation Manager on Red Hat OpenShift Container Platform, complete the steps in Section 18.1, “Creating the KIE Server client on RH-SSO” and then deploy the Red Hat Process Automation Manager environment on Red Hat OpenShift Container Platform. For information about deploying Red Hat Process Automation Manager on Red Hat OpenShift Container Platform, see the relevant document on the Red Hat Customer Portal.
18.1. Creating the KIE Server client on RH-SSO
Use the RH-SSO Admin Console to create a KIE Server client in an existing realm.
Prerequisites
- KIE Server is installed in a Red Hat JBoss EAP 7.3 server, as described in Installing and configuring Red Hat Process Automation Manager on Red Hat JBoss EAP 7.3.
- RH-SSO is installed as described in Chapter 15, Installing and configuring RH-SSO.
-
At least one user with the
kie-serverrole has been added to RH-SSO as described in Section 16.1, “Adding Red Hat Process Automation Manager users”.
Procedure
- In the RH-SSO Admin Console, open the security realm that you created in Chapter 15, Installing and configuring RH-SSO.
Click Clients and click Create.
The Add Client page opens.
On the Add Client page, provide the required information to create a KIE Server client for your realm, then click Save. For example:
-
Client ID:
kie-execution-server -
Root URL:
http://localhost:8080/kie-server Client protocol:
openid-connectNoteIf you are configuring RH-SSO with Red Hat OpenShift Container Platform, enter the URL that is exposed by the KIE Server routes. Your OpenShift administrator can provide this URL if necessary.
-
Client ID:
-
The new client Access Type is set to
publicby default. Change it toconfidentialand click Save again. -
Navigate to the Credentials tab and copy the secret key. The secret key is required to configure the
kie-execution-serverclient.
18.2. Installing and configuring KIE Server with the client adapter
After you install RH-SSO, you must install the RH-SSO client adapter for Red Hat JBoss EAP and configure it for KIE Server.
Prerequisites
- KIE Server is installed in a Red Hat JBoss EAP 7.3 server, as described in Installing and configuring Red Hat Process Automation Manager on Red Hat JBoss EAP 7.3.
- RH-SSO is installed as described in Chapter 15, Installing and configuring RH-SSO.
-
At least one user with the
kie-serverrole has been added to RH-SSO as described in Section 16.1, “Adding Red Hat Process Automation Manager users”.
If you deployed KIE Server to a different application server than Business Central, install and configure RH-SSO on your second server as well.
Procedure
Navigate to the Software Downloads page in the Red Hat Customer Portal (login required), and select the product and version from the drop-down options:
- Product: Red Hat Single Sign-On
- Version: 7.4
-
Download Red Hat Single Sign-on 7.4 Client Adapter for JBoss EAP 7 (
rh-sso-7.4.0-eap7-adapter.zipor the latest version). - Extract and install the adapter zip file. For installation instructions, see the "JBoss EAP Adapter" section of the Red Hat Single Sign On Securing Applications and Services Guide.
-
Go to
EAP_HOME/standalone/configurationand open thestandalone-full.xmlfile. -
Delete the
<single-sign-on/>element from both of the files. -
Navigate to
EAP_HOME/standalone/configurationdirectory in your Red Hat JBoss EAP installation and edit thestandalone-full.xmlfile to add the RH-SSO subsystem configuration. For example: Navigate to
EAP_HOME/standalone/configurationin your Red Hat JBoss EAP installation and edit thestandalone-full.xmlfile to add the RH-SSO subsystem configuration. For example:<subsystem xmlns="urn:jboss:domain:keycloak:1.1"> <secure-deployment name="kie-server.war"> <realm>demo</realm> <realm-public-key>MIGfMA0GCSqGSIb3DQEBAQUAA4GNADCBiQKBgQCrVrCuTtArbgaZzL1hvh0xtL5mc7o0NqPVnYXkLvgcwiC3BjLGw1tGEGoJaXDuSaRllobm53JBhjx33UNv+5z/UMG4kytBWxheNVKnL6GgqlNabMaFfPLPCF8kAgKnsi79NMo+n6KnSY8YeUmec/p2vjO2NjsSAVcWEQMVhJ31LwIDAQAB</realm-public-key> <auth-server-url>http://localhost:8180/auth</auth-server-url> <ssl-required>external</ssl-required> <resource>kie-execution-server</resource> <enable-basic-auth>true</enable-basic-auth> <credential name="secret">03c2b267-7f64-4647-8566-572be673f5fa</credential> <principal-attribute>preferred_username</principal-attribute> </secure-deployment> </subsystem> <system-properties> <property name="org.kie.server.sync.deploy" value="false"/> </system-properties>In this example:
-
secure-deployment nameis the name of your application WAR file. -
realmis the name of the realm that you created for the applications to use. -
realm-public-keyis the public key of the realm you created. You can find the key in the Keys tab in the Realm settings page of the realm you created in the RH-SSO Admin Console. If you do not provide a value for this public key, the server retrieves it automatically. -
auth-server-urlis the URL for the RH-SSO authentication server. -
resourceis the name for the server client that you created. -
enable-basic-authis the setting to enable basic authentication mechanism, so that the clients can use both token-based and basic authentication approaches to perform the requests. -
credential nameis the secret key of the server client you created. You can find the key in the Credentials tab on the Clients page of the RH-SSO Admin Console. -
principal-attributeis the login name of the user. If you do not provide this value, your User Id is displayed in the application instead of your user name.
-
- Save your configuration changes.
Use the following command to restart the Red Hat JBoss EAP server and run KIE Server.
EXEC_SERVER_HOME/bin/standalone.sh -c standalone-full.xml -Dorg.kie.server.id=<ID> -Dorg.kie.server.user=<USER> -Dorg.kie.server.pwd=<PWD> -Dorg.kie.server.location=<LOCATION_URL> -Dorg.kie.server.controller=<CONTROLLER_URL> -Dorg.kie.server.controller.user=<CONTROLLER_USER> -Dorg.kie.server.controller.pwd=<CONTOLLER_PASSWORD>
For example:
EXEC_SERVER_HOME/bin/standalone.sh -c standalone-full.xml -Dorg.kie.server.id=kieserver1 -Dorg.kie.server.user=kieserver -Dorg.kie.server.pwd=password -Dorg.kie.server.location=http://localhost:8080/kie-server/services/rest/server -Dorg.kie.server.controller=http://localhost:8080/business-central/rest/controller -Dorg.kie.server.controller.user=kiecontroller -Dorg.kie.server.controller.pwd=password
When KIE Server is running, enter the following command to check the server status, where
<KIE_SERVER_USER>is a user with thekie-serverrole and<PASSWORD>is the password for that user:curl http://<KIE_SERVER_USER>:<PASSWORD>@localhost:8080/kie-server/services/rest/server/
18.3. KIE Server token-based authentication
You can also use token-based authentication for communication between Red Hat Process Automation Manager and KIE Server. You can use the complete token as a system property of your application server, instead of the user name and password, for your applications. However, you must ensure that the token will not expire while the applications are interacting because the token is not automatically refreshed. To get the token, see Section 19.2, “Token-based authentication”.
Procedure
To configure Business Central to manage KIE Server using tokens:
-
Set the
org.kie.server.tokenproperty. Make sure that the
org.kie.server.userandorg.kie.server.pwdproperties are not set.Red Hat Process Automation Manager will then use the
Authorization: Bearer $TOKENauthentication method.
-
Set the
To use the REST API using the token-based authentication:
-
Set the
org.kie.server.controller.tokenproperty. -
Make sure that the
org.kie.server.controller.userandorg.kie.server.controller.pwdproperties are not set.
-
Set the
Because KIE Server is unable to refresh the token, use a high-lifespan token. A token’s lifespan must not exceed January 19 2038. Check with your security best practices to see whether this is a suitable solution for your environment.
Chapter 19. Authenticating third-party clients through RH-SSO
To use the different remote services provided by Business Central or by KIE Server, your client, such as curl, wget, web browser, or a custom REST client, must authenticate through the RH-SSO server and have a valid token to perform the requests. To use the remote services, the authenticated user must have the following roles:
-
rest-allfor using Business Central remote services. -
kie-serverfor using the KIE Server remote services.
Use the RH-SSO Admin Console to create these roles and assign them to the users that will consume the remote services.
Your client can authenticate through RH-SSO using one of these options:
- Basic authentication, if it is supported by the client
- Token-based authentication
19.1. Basic authentication
If you enabled basic authentication in the RH-SSO client adapter configuration for both Business Central and KIE Server, you can avoid the token grant and refresh calls and call the services as shown in the following examples:
For web based remote repositories endpoint:
curl http://admin:password@localhost:8080/business-central/rest/repositories
For KIE Server:
curl http://admin:password@localhost:8080/kie-server/services/rest/server/
19.2. Token-based authentication
If you want a more secure option of authentication, you can consume the remote services from both Business Central and KIE Server by using a granted token provided by RH-SSO.
Procedure
In the RH-SSO Admin Console, click the Clients menu item and click Create to create a new client.
The Add Client page opens.
On the Add Client page, provide the required information to create a new client for your realm. For example:
- Client ID: kie-remote
- Client protocol: openid-connect
- Click Save to save your changes.
Change the token settings in Realm Settings:
- In the RH-SSO Admin Console, click the Realm Settings menu item.
- Click the Tokens tab.
Change the value for Access Token Lifespan to
15minutes.This gives you enough time to get a token and invoke the service before it expires.
- Click Save to save your changes.
After a public client for your remote clients is created, you can now obtain the token by making an HTTP request to the RH-SSO server’s token endpoint using:
RESULT=`curl --data "grant_type=password&client_id=kie-remote&username=admin&password=password" http://localhost:8180/auth/realms/demo/protocol/openid-connect/token`
The user in this command is a Business Central RH-SSO user. For more information, see Section 16.1, “Adding Red Hat Process Automation Manager users”.
To view the token obtained from the RH-SSO server, use the following command:
TOKEN=`echo $RESULT | sed 's/.*access_token":"//g' | sed 's/".*//g'`
You can now use this token to authorize the remote calls. For example, if you want to check the internal Red Hat Process Automation Manager repositories, use the token as shown below:
curl -H "Authorization: bearer $TOKEN" http://localhost:8080/business-central/rest/repositories
Part IV. Integrating Red Hat CodeReady Studio with Red Hat Process Automation Manager
As a developer, you can integrate Red Hat CodeReady Studio with Red Hat Process Automation Manager to write complex applications and leverage code auto-completion.
Chapter 20. Installing Red Hat CodeReady Studio
Red Hat CodeReady Studio is an integrated development environment (IDE) based on Eclipse. It integrates tooling and runtime components by combining Eclipse, Eclipse Tooling, and Red Hat JBoss Enterprise Application Platform. Red Hat CodeReady Studio provides plug-ins with tools and interfaces for Red Hat Process Automation Manager.
Procedure
Download Red Hat CodeReady Studio:
- Log in to the Red Hat Customer Portal.
- Click DOWNLOADS at the top of the page.
- On the Product Downloads page, navigate to the RUNTIMES section, and click Red Hat Developer Studio.
-
On the Software Downloads page, download Red Hat CodeReady Studio 12.17.0 Stand-alone Installer (
codereadystudio-12.17.0.GA-installer-standalone.jar).
In a terminal window, navigate to the directory where you downloaded the installer JAR file and enter the following command:
java -jar codereadystudio-12.17.0.GA-installer-standalone.jar
Follow the instructions in the installer to complete the installation.
For more information, see the Red Hat CodeReady Studio Installation Guide.
Because of an issue in the way multi-byte rule names are handled, you must ensure that the instance of Red Hat CodeReady Studio is started with the file encoding set to UTF-8. You can do this by editing the $DS_HOME/studio/codereadystudio.ini file and adding the following property: "-Dfile.encoding=UTF-8".
Chapter 21. Installing Red Hat CodeReady Studio plug-ins
The Red Hat CodeReady Studio plug-ins for Red Hat Process Automation Manager are based on the community version of the plug-ins. For this reason, the Red Hat Process Automation Manager plug-in is called the Drools plug-in.
Procedure
Download the Red Hat Process Automation Manager plug-ins for Red Hat CodeReady Studio:
- Log in to the Red Hat Customer Portal.
- Click DOWNLOADS at the top of the page.
- On the Product Downloads page that opens, navigate to the RUNTIMES section, and click Red Hat Developer Studio.
-
On the Software Downloads page, from the Version list select 12.11.0, and then download Red Hat CodeReady Studio Integration Stack 12.11.0 Update Site Zip (
devstudio-integration-stack-12.11.0.GA-updatesite.zip).
- To start Red Hat CodeReady Studio, select Red Hat CodeReady Studio from the Start menu.
- Click Help → Install New Software.
- Click Add to display the Add Repository window.
-
Enter a name in the Name field, for example,
devstudio-12.11.0.GA. -
Click Archive, navigate to the
devstudio-integration-stack-12.11.0.GA-updatesite.zipfile, select the file, and then click OK. - Click Add.
- In the Install window, select JBoss Business Process and Rule Development from the Available Software list, click Next, and click Next again.
- Read the license agreements, click I accept the terms of the license agreements to accept the license agreements, and then click Finish.
- After the installation process has been completed, click Restart Now in the Software Updates window to restart Red Hat CodeReady Studio.
Chapter 22. Configuring the Red Hat Process Automation Manager server
You can configure Red Hat CodeReady Studio to run the Red Hat Process Automation Manager server.
Prerequisites
- Red Hat CodeReady Studio is installed with the Red Hat Process Automation Manager plug-ins.
- Red Hat Process Automation Manager is installed in a Red Hat JBoss EAP 7.3 server instance.
Procedure
- Start Red Hat CodeReady Studio.
- Click Window → Show View → Other, select Server → Servers, and then click Open to add the server view.
- Right-click on the Servers pane and select New → Server to open the server menu.
- Click Red Hat JBoss Middleware → JBoss Enterprise Application Platform 7.x and then click Next to define the server.
- In the Create a new Server Adapter window, select Create new runtime (next page) from the list, and then click Next.
- To set the home directory in the JBoss Runtime window, click the Browse button under Home Directory and navigate to the Red Hat JBoss EAP directory where Red Hat Process Automation Manager is installed.
- Enter a name for the server in the Name field, ensure that the configuration file is set, and then click Finish.
Chapter 23. Installing Red Hat Process Automation Manager runtime environments
In order to create Red Hat Process Automation Manager projects in Red Hat CodeReady Studio, it is necessary to install the Red Hat Process Automation Manager runtime environment.
A runtime environment is a collection of JAR files that represent a specific release of the software and includes the required libraries for compiling and running your business asset.
Prerequisites
- Red Hat CodeReady Studio is installed.
Procedure
Download the process engine:
- Log in to the Red Hat Customer Portal.
- Click DOWNLOADS at the top of the page.
- On the Product Downloads page that opens, navigate to the INTEGRATION AND AUTOMATION section, and click Red Hat Process Automation Manager.
-
On the Software Downloads page, download Red Hat Process Automation Manager 7.9.1 Add-Ons (
rhpam-7.9.1-add-ons.zip). -
Extract
rhpam-7.9.1-add-ons.zipand then extract the Drools runtime environment JAR files located in`rhpam-7.9.1-add-ons/rhpam-7.9.1-process-engine.zip`
- From the Red Hat CodeReady Studio menu, click Window → Preferences.
- Click Drools → Installed Drools Runtimes, and then click Add.
- In the name field, enter a name for the new runtime environment.
- Click Browse and navigate to the directory where you extracted the runtime environment files.
- Click OK to register the selected runtime environment in Red Hat CodeReady Studio.
- To set the runtime environment as the default Drools runtime, select the check box beside the runtime environment name.
- Click Apply and Close. If you have existing projects, you are prompted to restart Red Hat CodeReady Studio to update the runtime environment.
Chapter 24. Creating a Red Hat Process Automation Manager project
You can create and manage a Red Hat Process Automation Manager project in Red Hat CodeReady Studio.
Prerequisites
- Red Hat CodeReady Studio is installed with the Red Hat Process Automation Manager plug-ins.
- Red Hat Process Automation Manager runtime environment is installed.
Procedure
- In Red Hat CodeReady Studio, from the main menu, click File → New → Project.
-
In the search field, enter
Drools Project, select Drools Project, and then click Next. - Select the second option to create a project with a Red Hat Process Automation Manager example, and then click Next.
- In the Project name field, enter a name for the project.
- Click Finish.
Complete the following steps to test the project:
-
Navigate to the
src/main/javadirectory and expand thecom.samplepackage. Right click a Java class and select Run As → Java Application.
The output is displayed on the console tab.
-
Navigate to the
Chapter 25. Importing projects from a Git repository into Red Hat CodeReady Studio
You can configure Red Hat CodeReady Studio to connect to a central Git asset repository. The repository stores rules, models, functions, and processes. You can either clone a remote Git repository or import a local Git repository.
25.1. Cloning a remote Git repository
You can clone a Git repository to use with Red Hat CodeReady Studio.
Prerequisites
- Red Hat CodeReady Studio is installed with the Red Hat Process Automation Manager plug-ins.
- You have access permission for the remote Git repository that you want to clone.
Procedure
- In Red Hat CodeReady Studio, select the server from the Server tab and click the start icon to start the server.
Enter the following command in a terminal to start the secure shell server, if it is not running already.
/sbin/service sshd start
NoteThis command is specific to Linux and Apple Macintosh. On these platforms, if
sshdhas already been started, this command fails. If this happens, you may safely ignore this step.- In Red Hat CodeReady Studio , select File → Import… and navigate to the Git folder.
- Open the Git folder, select Projects from Git, and click Next.
- Select the repository source as Clone URI and click Next.
- Enter the details of the Git repository and click Next.
- Select the branch you want to import and click Next.
- To define the local storage for this project, enter or select a non-empty directory, make any configuration changes, and click Next.
- Import the project as a general project in the following window and click Next.
- Name the project and click Finish.
25.2. Importing a local Git repository
You can import a local Git repository to use with Red Hat CodeReady Studio.
Prerequisites
- Red Hat CodeReady Studio is installed.
Procedure
- In Red Hat CodeReady Studio, select the server from the Server tab and click the start icon to start the server.
- Select File → Import and navigate to the Git folder.
- Open the Git folder to select Projects from Git and click Next.
- Select Existing local repository as the repository source and click Next.
- Select the repository that is to be configured from the list of available repositories and click Next.
- In the window that opens, select Import as general project and click Next.
- Name the project and click Finish.
Chapter 26. Additional Resources
Appendix A. Versioning information
Documentation last updated on Tuesday, March 8, 2022.
Appendix B. Contact information
Red Hat Process Automation Manager documentation team: brms-docs@redhat.com