
Chapter 4. Process instance filtering in Business Central
Business Central now provides you with basic and advanced filters to help you filter and search through process instances. You can filter processes by attributes such as State, Errors, Filter By, Name, Start Date, and Last update. You can also create custom filters using the Advanced Filters option. The newly created custom filter is added to the Saved Filters pane, which is accessible by clicking on the star icon on the left of the Manage Process Instances page.
All users except those with manager or rest-all roles can access and filter process instances in Business Central.
4.1. Filtering process instances using basic filters
Business Central provides basic filters for filtering and searching through process instances based on their attributes such as State, Errors, Filter By, Name, Start Date, and Last update.
Procedure
- In Business Central, go to Menu → Manage → Process Instances.
On the Manage Process Instances page, click the filter icon on the left of the page to expand the Filters pane and select the filters you want to use:
- State: Filter process instances based on their state (Active, Aborted, Completed, Pending, and Suspended).
- Errors: Filter process instances that contain at least one or no errors.
- Filter By: Filter process instances based on Id, Initiator, Correlation Key, or Description attribute.
- Name: Filter process instances based on process definition name.
- Definition ID: The ID of the instance definition.
- Deployment ID: The ID of the instance deployment.
- SLA Compliance: SLA compliance status (Aborted, Met, N/A, Pending, and Violated).
- Parent Process ID: The ID of the parent process instance.
- Start Date: Filter process instances based on their creation date.
- Last update: Filter process instances based on their last modified date.
You can also use the Advanced Filters option to create custom filters in Business Central.
4.2. Filtering process instances using advanced filters
You can create custom process instance filters using the Advanced Filters option in Business Central.
Procedure
- In Business Central, click Menu → Manage → Process Instances.
- On the Manage Process Instances page, click the Advanced Filters icon.
- In the Advanced Filters pane, enter the name and description of the filter, and click Add New.
- Select an attribute from the Select column drop-down list, for example, processName. The content of the drop-down changes to processName != value1.
- Click the drop-down again and choose the required logical query. For the processName attribute, choose equals to.
Change the value of the text field to the name of the process you want to filter.
NoteThe
processNamemust match the value defined in the business process of the project.- Click Save and the processes are filtered according to the filter definition.
Click the star icon to open the Saved Filters pane.
In the Saved Filters pane, you can view all the saved advanced filters.
4.3. Managing process instances using default filter
You can set a process instance filter as a default filter using the Saved Filter option in Business Central. A default filter will be executed every time when the page is open by the user.
Procedure
- In Business Central, go to Menu → Manage → Process Instances.
On the Manage Process Instances page, click the star icon on the left of the page to expand the Saved Filters panel.
In the Saved Filters panel, you can view the saved advanced filters.
Default filter selection for Process Instances
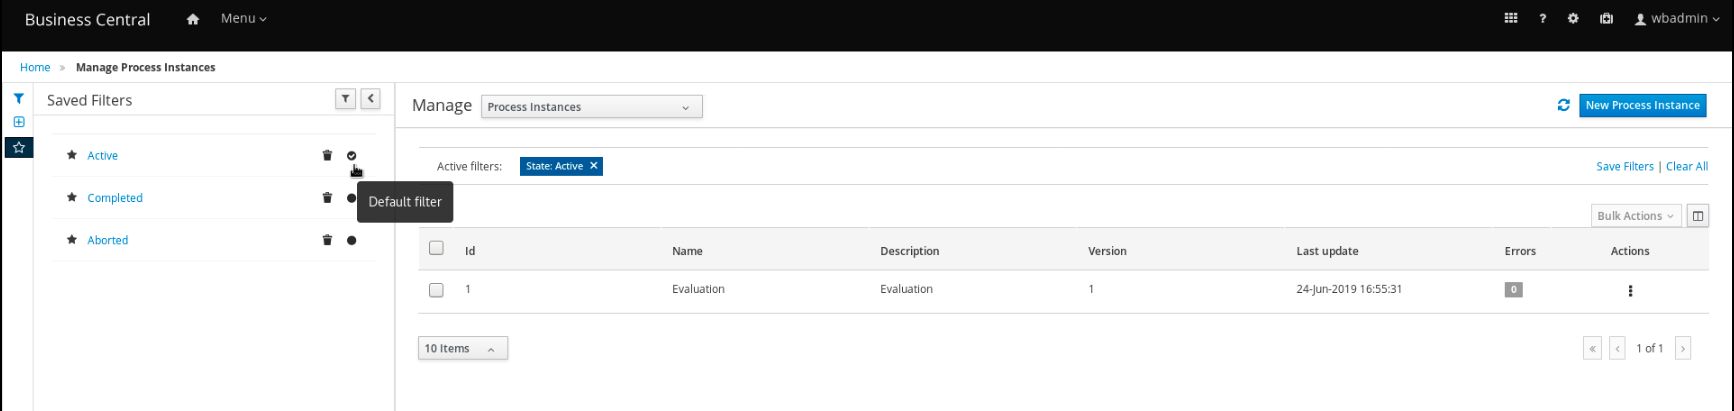
- In the Saved Filters panel, set a saved process instance filter as the default filter.
4.4. Viewing process instance variables using basic filters
Business Central provides basic filters to view process instance variables. You can view the process instance variables of the process as columns using Show/hide columns.
Procedure
- In Business Central, go to Menu → Manage → Process Instances.
- On the Manage Process Instances page, click the filter icon on the left of the page to expand the Filters panel.
In the Filters panel, select the Definition Id.
The filter is applied on the current process instance list.
- Click Show/hide columns on the upper right of the process instances list and the process instance variables of the specified process id will be displayed.
Click the star icon to open the Saved Filters panel.
In the Saved Filters panel, you can view all the saved advanced filters.
4.5. Viewing process instance variables using advanced filters
You can use the Advanced Filters option in Business Central to view process instance variables. When you create a filter over the column processId, you can view the process instance variables of the process as columns using Show/hide columns.
Procedure
- In Business Central, go to Menu → Manage → Process Instances.
- On the Manage Process Instances page, click the advanced filters icon to expand the Advanced Filters panel.
- In the Advanced Filters panel, enter the name and description of the filter, and click Add New.
-
From the Select column list, select the
processIdattribute. The value will change to processId != value1. - From the Select column list, select equals to for the logical query.
- In the text field, enter the name of the process id.
- Click Save and the filter is applied on the current process instance list.
- Click Show/hide columns on the upper right of the process instances list and the process instance variables of the specified process id will be displayed.
Click the star icon to open the Saved Filters panel.
In the Saved Filters panel, you can view all the saved advanced filters.