
Chapter 4. Task management
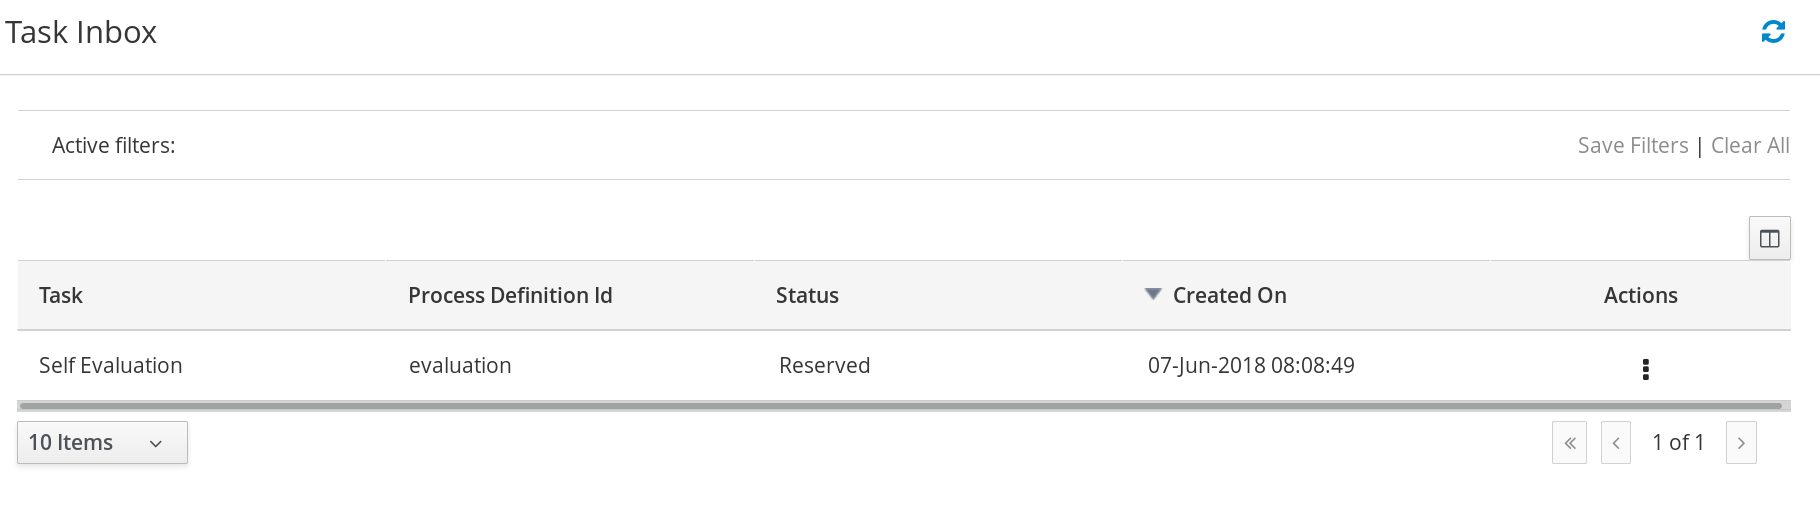
Tasks that are assigned to the current user appear in Menu → Track → Task Inbox in Business Central. You can click a task to open and begin working on it.
A user task can be assigned to a particular user, multiple users, or to a group. If assigned to multiple users or a group it appears in the task lists of all assigned users and any of the possible actors can claim the task. When a task is assigned to another user it no longer appears in your Task Inbox.
Business administrators can view and manage all user tasks from the Tasks page in Business Central, located under Menu → Manage → Tasks. Users with the admin or process-admin role can access the Tasks page but do not have access rights to view and manage tasks by default.
To manage all the tasks, a user must be specified as a process administrator by defining any of the following conditions:
-
User is specified as
task admin user. The default value isAdministrator. -
User belongs to the task administrators group. The default value is
Administrators.
You can configure the user and user group assignment with the org.jbpm.ht.admin.user and org.jbpm.ht.admin.group system properties.
You can open, view, and modify the details of a task, such as the due date, the priority, or the task description, by clicking a task in the list. The following tabs are available in the task page:
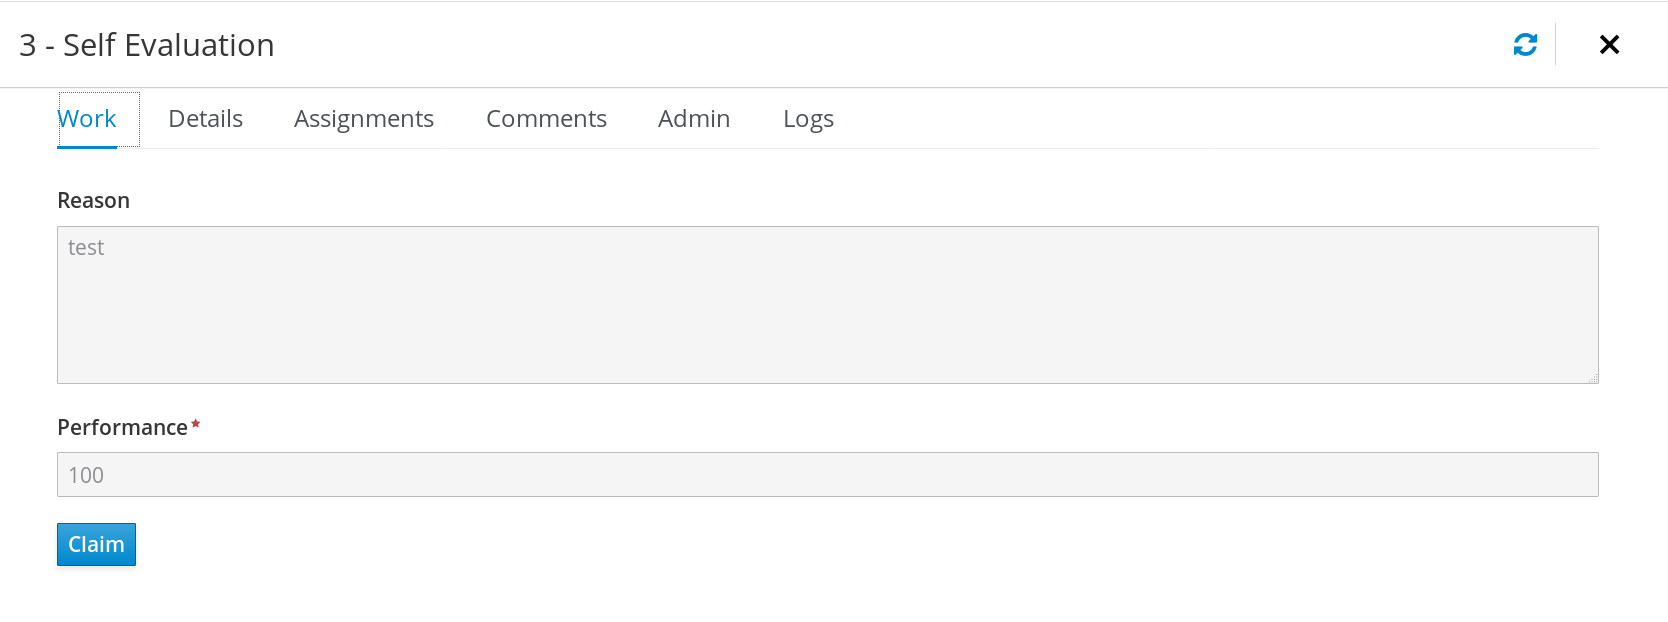
- Work: Displays basic details about the task and the task owner. You can click the Claim button to claim the task. To undo the claim process, click the Release button.
- Details: Displays information such as task description, status, and due date.
- Assignments: Displays the current owner of the task and enables you to delegate the task to another person or group.
- Comments: Displays comments added by task user(s). You can delete an existing comment and add a new comment.
- Admin: Displays the potential owner of the task and enables you to to forward the task to another person or group. It also displays the actual owner of the task and you can send a reminder to the actual owner of the task.
- Logs: Displays task logs containing task life cycle events (such as task started, claimed, completed), updates made to task fields (such as task due date and priority).
You can filter the tasks based on the filter parameters available by clicking the filters icon on the left side of the page. For more information about filtering, see Section 4.1, “Task filtering”.
In addition to these, you can create custom filters to filter tasks based on the query parameters you define. For more information about custom tasks filters, see Section 4.2, “Creating custom task filters”.
4.1. Task filtering
For tasks in Menu → Manage → Tasks and in Menu → Track → Task Inbox, you can use the Filters and Advanced Filters panels to sort tasks as needed.
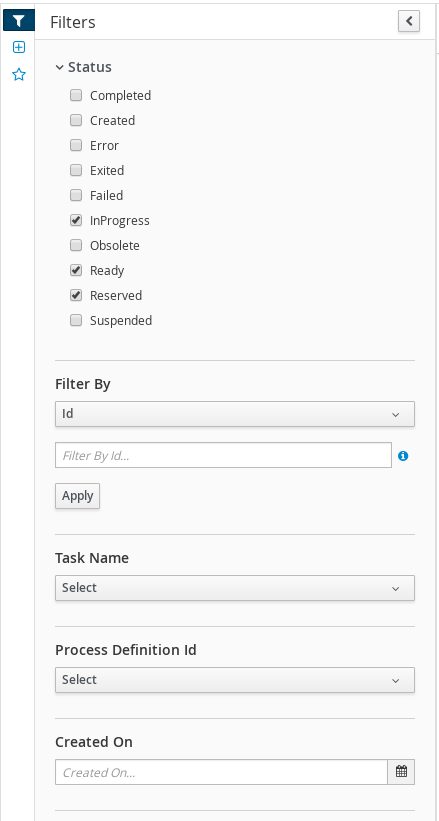
Figure 4.1. Filtering Tasks - Default View
The Manage Tasks page is only available to administrators and process administrators.
You can filter tasks by the following attributes in the Filters panel:
- Id
Filter by process instance ID.
Input:
Numeric- Task
Filter by task name.
Input:
String- Correlation key
Filter by correlation key.
Input:
String- Actual Owner
Filter by the task owner.
The actual owner refers to the user responsible for executing the task. The search is based on user ID, which is a unique value and depends on the ID management system.
Input:
String- Process Instance Description
Filter by process instance description.
Input:
String- Status
Filter by task status. You can select more than one status to display results that meet any of the selected states. Removing the status filter displays all processes, regardless of status.
The following filter states are available:
- Completed
- Created
- Error
- Exited
- Failed
- InProgress
- Obsolete
- Ready
- Reserved
- Suspended
- Process Name
- Filter by process name.
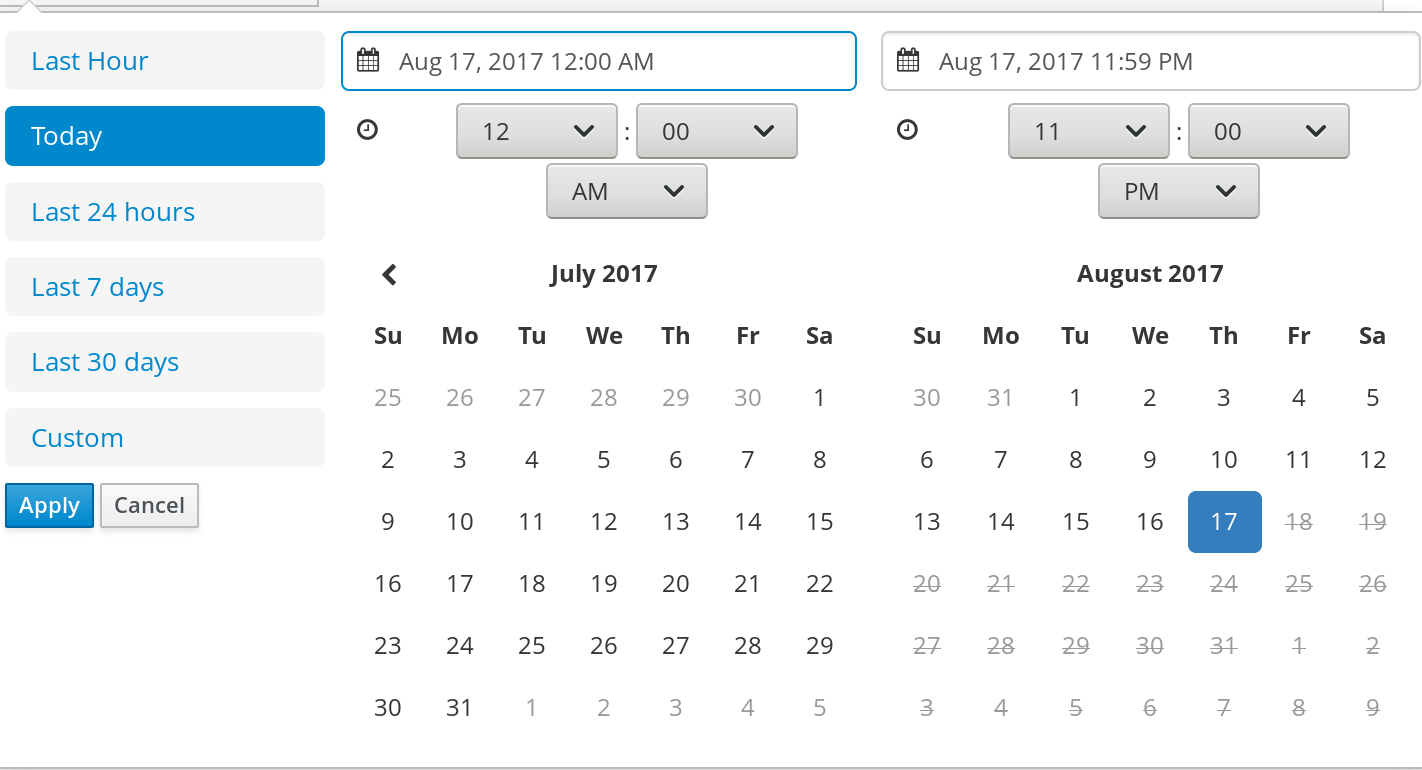
- Created On
Filtering by date or time.
This filter has the following quick filter options:
- Last Hour
- Today
- Last 24 Hours
- Last 7 Days
- Last 30 Days
Custom
Selecting Custom date and time filtering opens a calendar tool for selecting a date and time range.
Figure 4.2. Search by Date
4.2. Creating custom task filters
You can create a custom task filter based on a provided query in Menu → Manage → Tasks, or in Menu → Track → Task Inbox for tasks assigned to the current user.
Procedure
- In Business Central, go to Menu → Manage → Tasks
- In the Manage Tasks page, click the advanced filters icon on the left to open the list of Advanced Filters options.
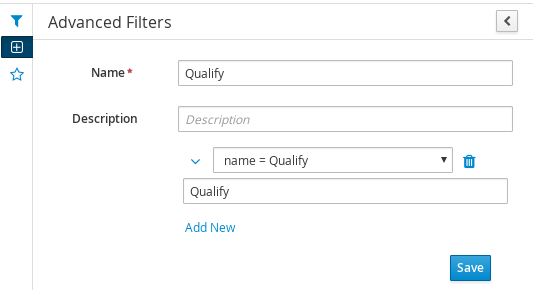
- In the Advanced Filters panel, enter the name and description of the filter, and click Add New.
In the Select column drop-down menu, choose name.
The content of the drop-down menu changes to
name != value1.- Click the drop-down menu again and choose equals to.
Rewrite the value of the text field to the name of the task you want to filter. Note that the name must match the value defined in the associated business process:
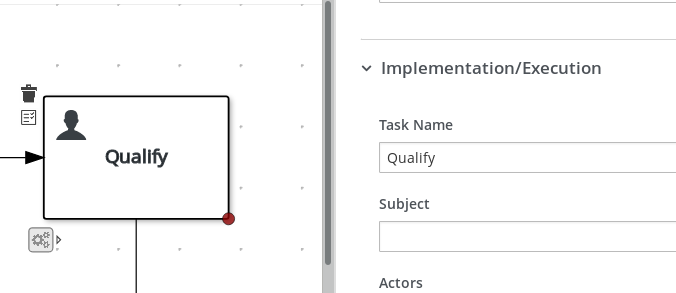
Click Ok to save the custom task filter.
After you apply the filter with a specified restriction, the set of configurable columns is based on the specific custom task filter and contains the following column options:

4.3. Managing tasks using a default filter
You can set a task filter as a default filter using the Saved Filter option in Business Central. A default filter will be executed every time when the page is open by the user.
Procedure
- In Business Central, go to Menu → Track → Task Inbox or go to Menu → Manage → Tasks
On the Task Inbox page or the Manage Tasks page, click the star icon on the left of the page to expand the Saved Filters panel.
In the Saved Filters panel, you can view the saved advanced filters.
Default filter selection for Tasks or Task Inbox
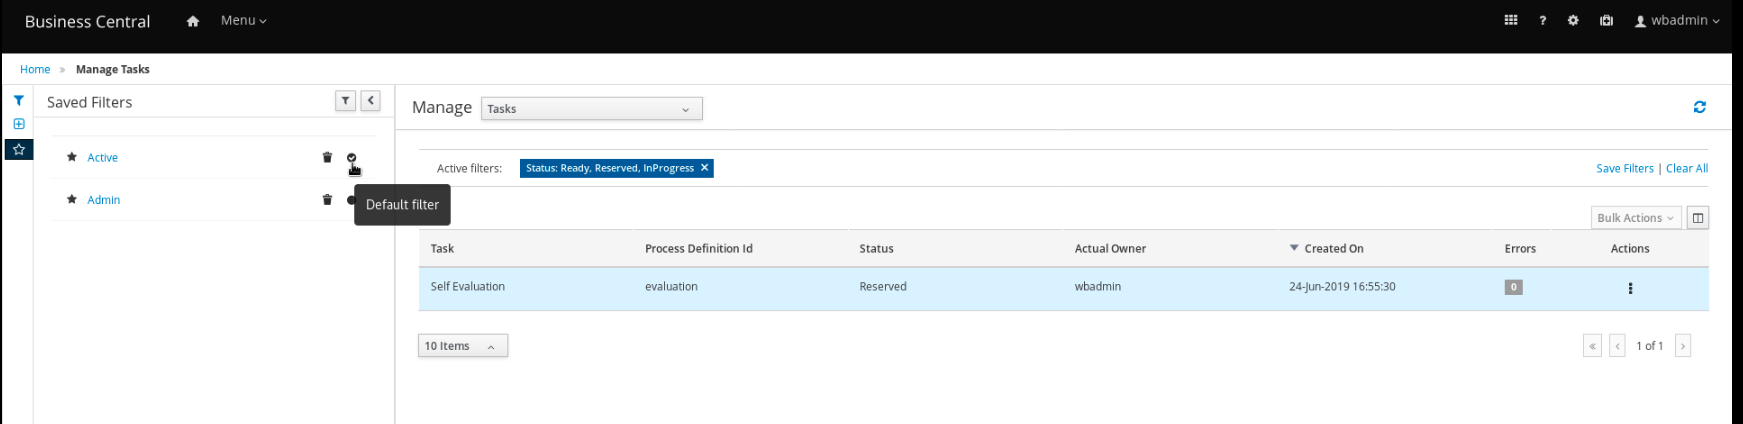
- In the Saved Filters panel, set a saved task filter as the default filter.
4.4. Viewing task variables using basic filters
Business Central provides basic filters to view task variables in Manage Tasks and Task Inbox. You can view the task variables of the task as columns using Show/hide columns.
Procedure
- In Business Central, go to Menu → Manage → Tasks or go to Menu → Track → Task Inbox.
- On the Task Inbox page, click the filter icon on the left of the page to expand the Filters panel
In the Filters panel, select the Task Name.
The filter is applied on the current task list.
- Click Show/hide columns on the upper right of the tasks list and the task variables of the specified task id will be displayed.
Click the star icon to open the Saved Filters panel.
In the Saved Filters panel, you can view all the saved advanced filters.
4.5. Viewing task variables using advanced filters
You can use the Advanced Filters option in Business Central to view task variables in Manage Tasks and Task Inbox. When you create a filter with the task defined, you can view the task variables of the task as columns using Show/hide columns.
Procedure
- In Business Central, go to Menu → Manage → Tasks or go to Menu → Track → Task Inbox.
- On the Manage Tasks page or the Task Inbox page, click the advanced filters icon to expand the Advanced Filters panel.
- In the Advanced Filters panel, enter the name and description of the filter, and click Add New.
-
From the Select column list, select the
nameattribute. The value will change to name != value1. - From the Select column list, select equals to for the logical query.
- In the text field, enter the name of the task.
- Click Save and the filter is applied on the current task list.
- Click Show/hide columns on the upper right of the tasks list and the task variables of the specified task id will be displayed.
Click the star icon to open the Saved Filters panel.
In the Saved Filters panel, you can view all the saved advanced filters.
4.6. Managing service tasks in Business Central
Service tasks (work items) are tasks that you can customize and reuse across multiple business processes or across all projects in Business Central. Red Hat Process Automation Manager provides a set of service tasks within the service task repository in Business Central. You can enable or disable the default service tasks and upload custom service tasks into Business Central to implement the tasks in the relevant processes.
Red Hat Process Automation Manager includes a limited set of supported custom tasks. Custom tasks that are not included in Red Hat Process Automation Manager are not supported.
Procedure
In Business Central, select the Admin icon in the top-right corner of the screen and select Service Tasks Administration.
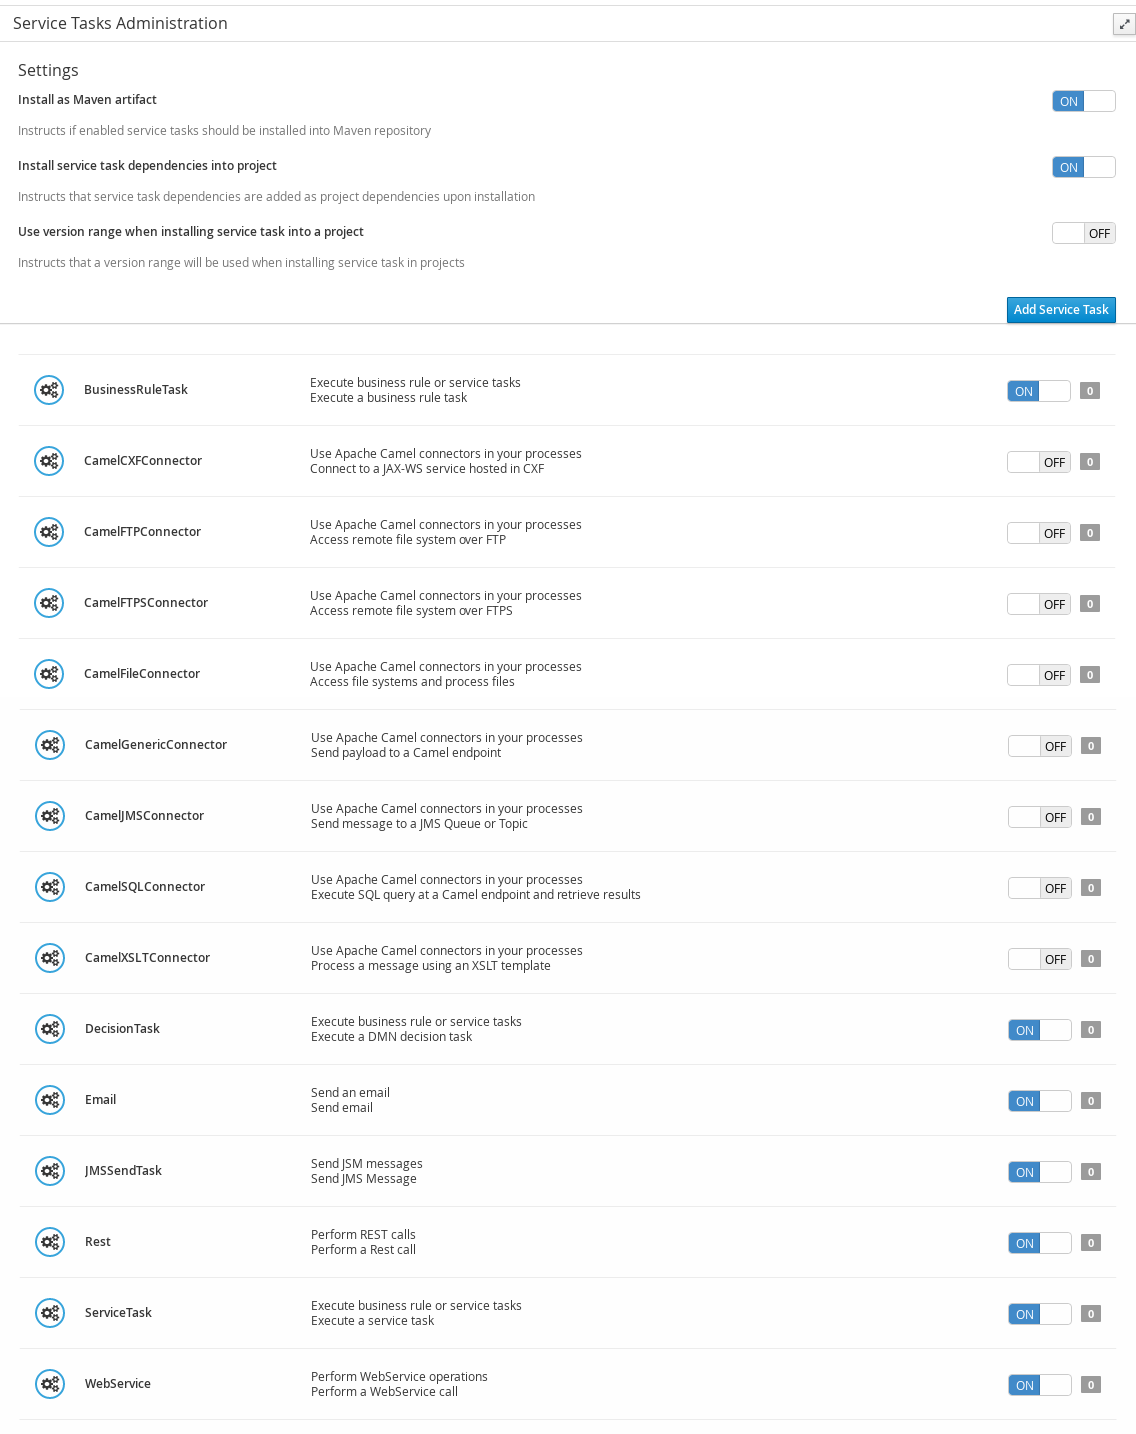
This page lists the service task installation settings and available service tasks for processes in projects throughout Business Central. The service tasks that you enable on this page become available in the project-level settings where you can then install each service task to be used in processes. The way in which the service tasks are installed in a project is determined by the global settings that you enable or disable under Settings on this Service Tasks Administration page.
Under Settings, enable or disable each setting to determine how the available service tasks will be implemented when a user installs them at the project level.
The following service task settings are available:
- Install as Maven artifact: Uploads the service task JAR file to the Maven repository that is configured with Business Central, if the file is not already present.
-
Install service task dependencies into project: Adds any service task dependencies to the
pom.xmlfile of the project where the task is installed. -
Use version range when installing service task into project: Uses a version range instead of a fixed version of a service task that is added as a project dependency. Example:
[7.16,)instead of7.16.0.Final
Enable or disable (set to ON or OFF) any available service tasks as needed. Service tasks that you enable will be displayed in project-level settings for all projects in Business Central.
Figure 4.3. Enable service tasks and service task settings
-
To add a custom service task, click Add Service Task, browse to the relevant JAR file, and click the Upload icon. The JAR file must contain work item handler implementations annotated with
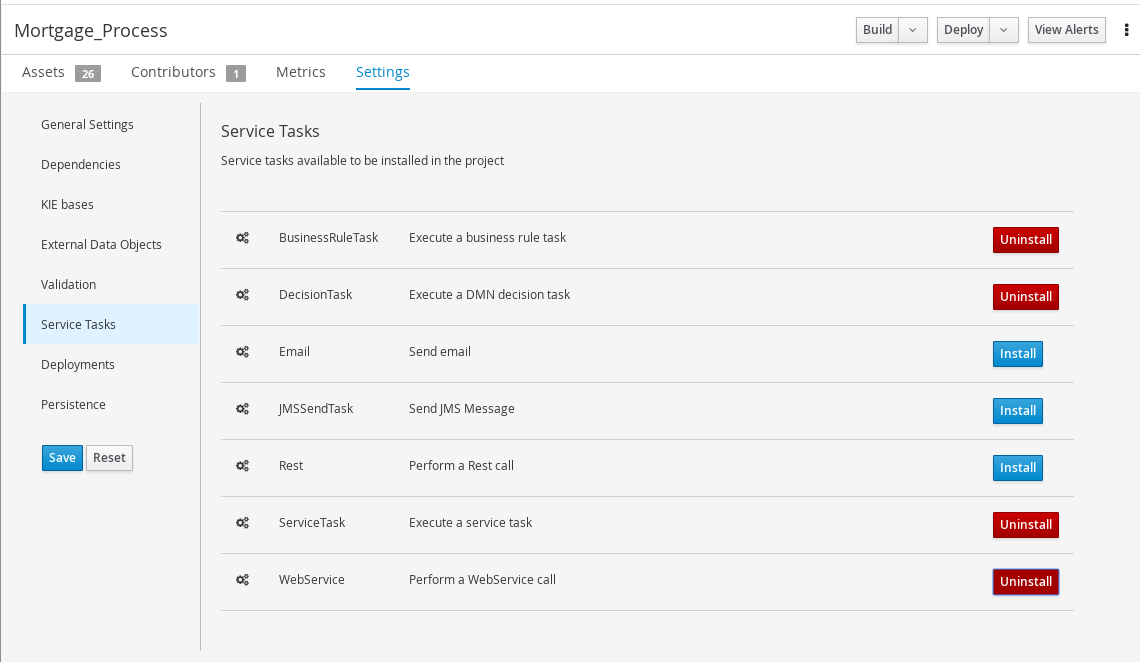
@Wid. - After you configure all required service tasks, navigate to a project in Business Central and go to the project Settings → Service Tasks page to view the available service tasks that you enabled.
- For each service task, click Install to make the task available to the processes in that project or click Uninstall to exclude the task from the processes in the project.
If you are prompted for additional information when you install a service task, enter the required information and click Install again.
The required parameters for the service task depend on the type of task. For example, rule and decision tasks require artifact GAV information (Group ID, Artifact ID, Version), email tasks require host and port access information, and REST tasks require API credentials. Other service tasks might not require any additional parameters.
Figure 4.4. Install service tasks for use in processes
- Click Save.
Return to the project page, select or add a business process in the project, and in the process designer palette, select the Service Tasks option to view the available service tasks that you enabled and installed:
Figure 4.5. Access installed service tasks in process designer

4.7. User task administration
User tasks enable you to include human actions as input to the business processes that you create. User task administration provides methods to manipulate user and group task assignments, data handling, time-based automatic notifications, and reassignments.
The following user task operations are available in Business Central:
- add/remove potential owners - by task id: Adds or removes users and groups using the task ID.
- add/remove excluded owners - by task id: Adds or removes excluded owners using the task ID.
- add/remove business administrators - by task id: Adds or removes business administrators using the task ID.
- add task inputs - by task id: Provides a way to modify task input content after a task is created using the task ID.
- remove task inputs - by task id: Removes task input variables using the task ID.
- remove task output - by task id: Removes task output variables using the task ID.
schedules new reassignment to given users/groups after given time elapses - by task id: Schedules automatic reassignment based on the time expression and the state of the task:
-
reassign if not started: Used if the task was not moved to the
InProgressstate. -
reassign if not completed: Used if the task was not moved to the
Completedstate.
-
reassign if not started: Used if the task was not moved to the
schedules new email notification to given users/groups after given time elapses - by task id: Schedules automatic email notification based on the time expression and the state of the task:
-
notify if not started: Used if the task was not moved to the
InProgressstate. -
notify if not completed: Used if the task was not moved to the
Completedstate.
-
notify if not started: Used if the task was not moved to the
- list scheduled task notifications - by task id: Returns all active task notifications using the task ID.
- list scheduled task reassignments - by task id: Returns all active tasks reassignments using the task ID.
- cancel task notification - by task id and notification id: Cancels and unschedules task notification using the task ID.
- cancel task reassignment - by task id and reassignment id: Cancels and unschedules task reassignment using the task ID.
4.8. Bulk actions on tasks
In the Tasks and Task Inbox pages in Business Central, you can perform bulk actions over multiple tasks in a single operation.
If a specified bulk action is not permitted based on the task status, a notification is displayed and the operation is not executed on that particular task.
4.8.1. Claiming tasks in bulk
After you create tasks in Business Central, you can claim the available tasks in bulk.
Procedure
In Business Central, complete one of the following steps:
- To view the Task Inbox page, select Menu → Track → Task Inbox.
- To view the Tasks page, select Menu → Manage → Tasks.
- To claim the tasks in bulk, on the Task Inbox page or the Manage Tasks page, select two or more tasks from the Task table.
- From the Bulk Actions drop-down list, select Bulk Claim.
- To confirm, click Claim on the Claim selected tasks window.
For each task selected, a notification is displayed showing the result.
4.8.2. Releasing tasks in bulk
You can release your owned tasks in bulk for others to claim.
Procedure
In Business Central, complete one of the following steps:
- To view the Task Inbox page, select Menu → Track → Task Inbox.
- To view the Tasks page, select Menu → Manage → Tasks.
- To release the tasks in bulk, on the Task Inbox page or the Manage Tasks page, select two or more tasks from the Task table.
- From the Bulk Actions drop-down list, select Bulk Release.
- To confirm, click Release on the Release selected tasks window .
For each task selected, a notification is displayed showing the result.
4.8.3. Resuming tasks in bulk
If there are suspended tasks in Business Central, you can resume them in bulk.
Procedure
In Business Central, complete one of the following steps:
- To view the Task Inbox page, select Menu → Track → Task Inbox.
- To view the Tasks page, select Menu → Manage → Tasks.
- To resume the tasks in bulk, on the Task Inbox page or the Manage Tasks page, select two or more tasks from the Task table.
- From the Bulk Actions drop-down list, select Bulk Resume.
- To confirm, click Resume on the Resume selected tasks window.
For each task selected, a notification is displayed showing the result.
4.8.4. Suspending tasks in bulk
After you create tasks in Business Central, you can suspend the tasks in bulk.
Procedure
In Business Central, complete one of the following steps:
- To view the Task Inbox page, select Menu → Track → Task Inbox.
- To view the Tasks page, select Menu → Manage → Tasks.
- To suspend the tasks in bulk, on the Task Inbox page or the Manage Tasks page, select two or more tasks from the Task table.
- From the Bulk Actions drop-down list, select Bulk Suspend.
- To confirm, click Suspend on the Suspend selected tasks window .
For each task selected, a notification is displayed showing the result.
4.8.5. Reassigning tasks in bulk
After you create tasks in Business Central, you can reassign your tasks in bulk and delegate them to others.
Procedure
In Business Central, complete one of the following steps:
- To view the Task Inbox page, select Menu → Track → Task Inbox.
- To view the Tasks page, select Menu → Manage → Tasks.
- To reassign the tasks in bulk, on the Task Inbox page or the Manage Tasks page, select two or more tasks from the Task table.
- From the Bulk Actions drop-down list, select Bulk Reassign.
- In the Tasks reassignment window, enter the user ID of the user to whom you want to reassign the tasks.
- Click Delegate.
For each task selected, a notification is displayed showing the result.