Chapter 5. Designing the case definition
You design cases using the process designer in Business Central. Case design is the basis of case management and sets the specific goals and tasks for each case. The case flow can be modified dynamically during run time by adding dynamic tasks or processes. In this procedure, you will create this same case definition to familiarize yourself with the case definition design process.
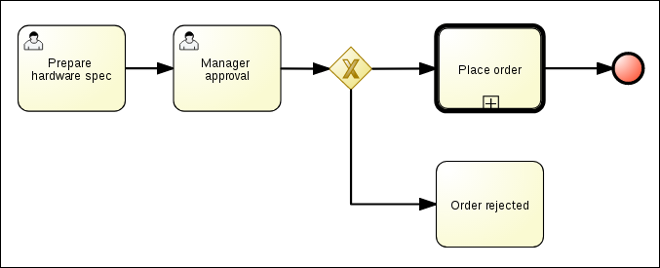
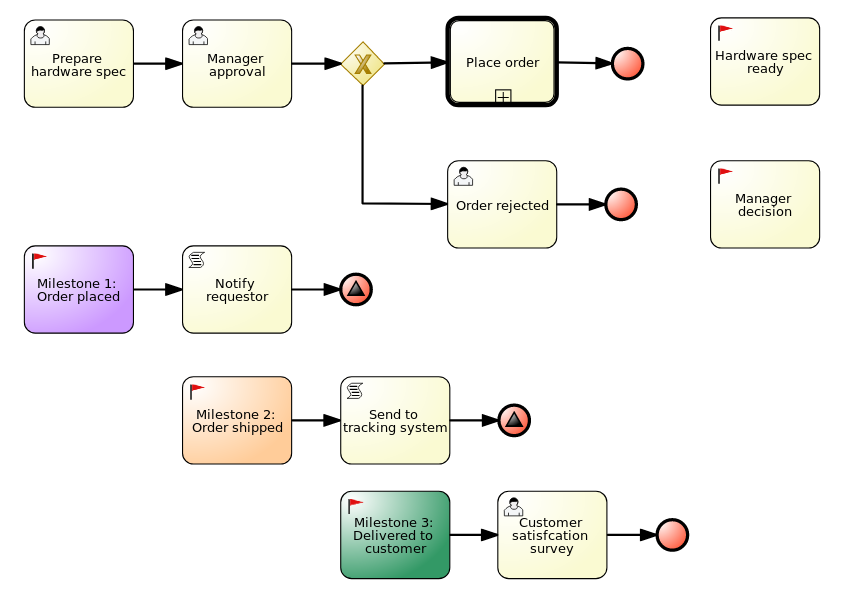
The IT_Orders sample project in Business Central includes the following orderhardware business process case definition.
Figure 5.1. orderhardware business process case definition
Prerequisites
- You have created a new case in Business Central. For more information, see Chapter 3, Creating a new IT_Orders case project.
- You have created the data objects. For more information, see Chapter 4, Data objects.
Procedure
- In Business Central, go to Menu → Design → Projects and click IT_Orders_New.
- Click Add Asset → Case Definition (legacy).
In the Create new Case definition window, add the following required information:
-
Case definition (legacy): Input
orderhardware. This is usually the subject of the case or project that is being case managed. - Package: Select com.myspace.it_orders_new to specify the location that the case file is created in.
-
Case definition (legacy): Input
- Click Ok to open the process designer.
Define process-level and case-level variables.
- Click BUSINESS PROCESSES (LEGACY) → orderhardware.
-
Click
 on the right side of the designer to open the Properties (BPMN-Diagram) panel.
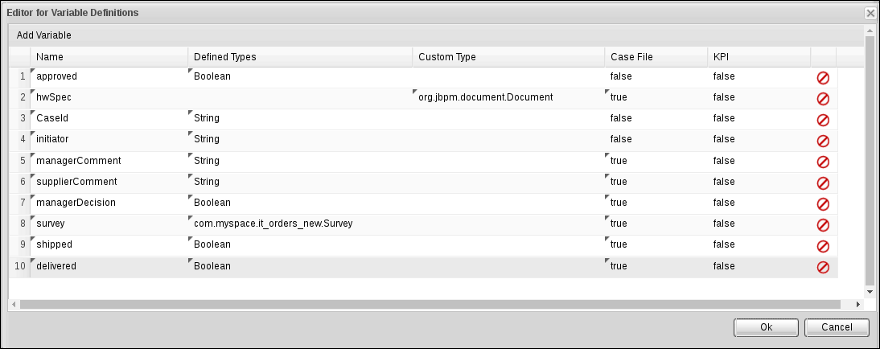
- Click the down arrow in the Variable Definitions field to open the Editor for Variable Definitions.
Click Add Variable, and input the following values and click Ok:
Figure 5.2. IT Orders variables
Define the roles involved in the case.
- Click the down arrow in the Case Roles field to open the Editor for Case Roles.
Click Add Case Role, and input the following values and click Ok:
Figure 5.3. ITOrders Case Roles

-
owner: The employee who is making the hardware order request. The role cardinality is set to1, which means that only one person or group can be assigned to this role. -
manager: The employee’s manager; the person who will approve or deny the requested hardware. The role cardinality is set to1, which means that only one person or group can be assigned to this role. -
supplier: The available suppliers of IT hardware in the system. The role cardinality is set to2, which means that more than one supplier can be assigned to this role.
-
- Click Save.
5.1. Creating the Place order subprocess
Create the Place order subprocess, which is a separate business process that is carried out by the supplier. This is a reusable process that occurs during the course of case execution as described in Chapter 5, Designing the case definition.
Prerequisites
- You have created a new case in Business Central. For more information, see Chapter 3, Creating a new IT_Orders case project.
- You have created the data objects. For more information, see Chapter 4, Data objects.
Procedure
- In Business Central, go to Menu → Design → Projects → IT_Orders_New.
- From the project menu, click Add Asset → Business Process.
In the Create new Business Process wizard, enter the following values:
-
Business Process:
place-order -
Package: Select
com.myspace.it_orders_new
-
Business Process:
- Click Ok. The diagram editor opens.
-
Click an empty space in the canvas, and in the upper-right corner, click the Diagram properties
 icon.
icon.
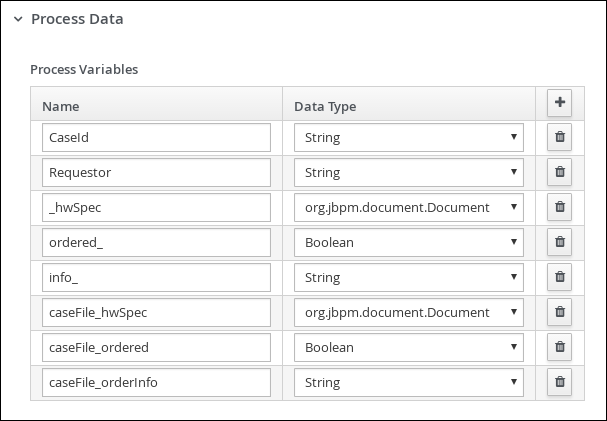
Scroll down and expand Process Data and click
 in the Process Variables section and enter the following values:
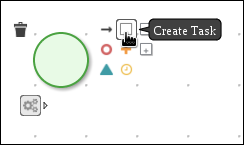
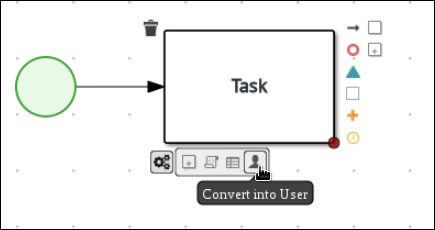
Click the start event and create an outgoing connection from the start event to a task and convert the new task to a user task.
-
Click the user task and in the Diagram properties panel, input
Place orderin the Name field. -
Expand Implementation/Execution, click Add below the Groups menu, click Select → New, and input
supplier. Click
in the Assignments field and add the following new conditions in the Place order Data I/O window. For the first input assignment, select Custom for the Data Type and input org.jbpm.document.Document.
- Click Save.
Select the Skippable check box and enter the following in the Description field:
Approved order #{CaseId} to be placed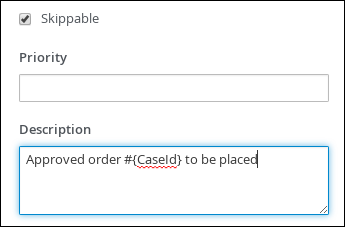
Create an outgoing connection from the Place order user task and connect it to an end event.


- In the diagram editor, click Save and click Save again to confirm your changes.
5.2. Creating the Manager approval business process
The manager approval process determines whether or not the order will be placed or rejected.
Figure 5.4. Business Process (legacy) editor

1: The canvas where you build your process diagram. Drag elements from the Object Library to the canvas to design your process.
2: The Object Library.
3: The Properties panel displays the properties of the selected element. If no element is selected, the panel contains process properties.
Procedure
- In Business Central, go to Menu → Design → Projects → IT_Orders_New → orderhardware Business Process (legacy).
- In the process designer, expand Tasks in the Object Library drag a new User task on to the canvas.
Click the new user, click
to open the Properties panel, and input the following values:
-
Groups -
supplier -
Name -
Prepare hardware spec -
Task Name -
PrepareHardwareSpec -
Description -
Prepare hardware specification for #{initiator} (order number #{CaseId})
-
Groups -
Click the down arrow in the Assignments field, add the following new conditions in the Prepare hardware spec Data I/O window. For the first output assignment, select Custom for the Data Type and input
org.jbpm.document.Document. Click Save.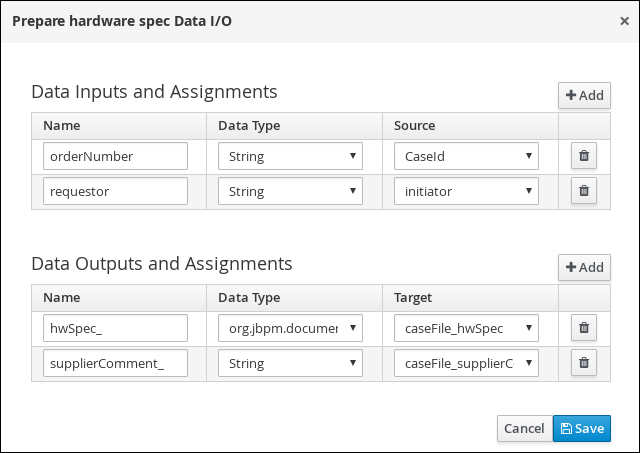
Click the Prepare hardware spec user task and create an new user task.

Click the new user task, click
to open the Properties panel, and input the following values:
-
Actors -
manager -
Name -
Manager approval -
Task Name -
ManagerApproval -
Description -
Approval request for new hardware for #{initiator} (order number #{CaseId})
-
Actors -
Click the down arrow in the Assignments field, add the following new conditions in the ManagerApproval Data I/O window. For the first output assignment, select Custom for the Data Type and input
org.jbpm.document.Document. Click Save.
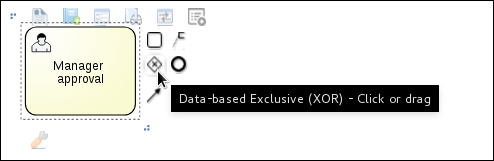
Click the Manager approval user task and create a Data-based Exclusive (XOR) gateway.
-
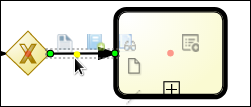
Click
 to open the Object Library, expand Subprocesses, click Reusable, and drag the new element to the canvas on the right side of the Data-based Exclusive (XOR) gateway.
Connect the Data-based Exclusive (XOR) gateway to the subprocess.
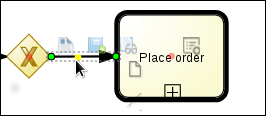
Click the subprocess, click
to open the Properties panel, and input or select the following values:
-
ActivityType -
Sub-Process -
Name -
Place order - Called Element - Select place-order.bpmn from the Asset Name column, and click Save.
- Independent - false
-
ActivityType -
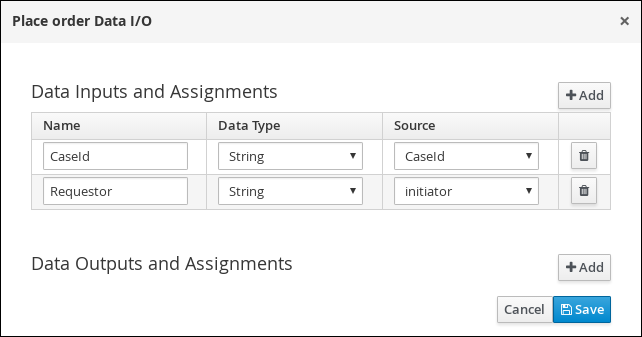
Click the down arrow in the Assignments field, add the following new conditions in the Place order Data I/O window, and click Save.
Click the connection from the Data-based Exclusive (XOR) gateway to the subprocess and click
to open the Properties panel.
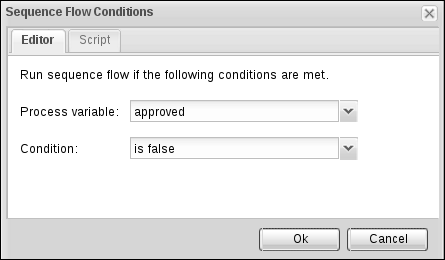
Click the down arrow in the Expression field and add the following Sequence Flow Conditions and click Ok.
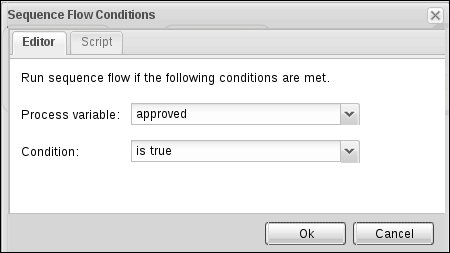
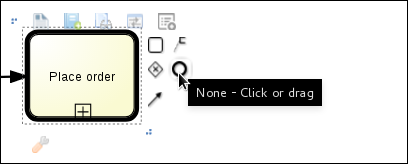
Click the Place order user task and create an end event.
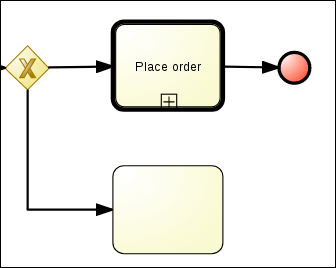
Click the Data-based Exclusive (XOR) gateway and create a new user task and drag the new task to align it below the Place order task.
Click the new user task, click
to open the Properties panel, and input the following values:
-
Actors -
owner -
Name -
Order rejected -
Task Name -
OrderRejected -
Description -
Order #{CaseId} has been rejected by manager
-
Actors -
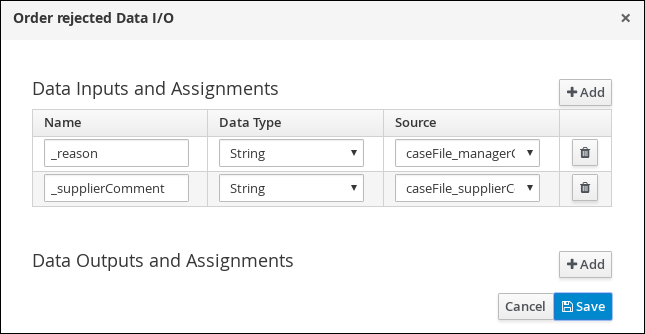
Click the down arrow in the Assignments field, add the following new conditions in the Order rejected Data I/O window, and click Save.
Click the connection from the Data-based Exclusive (XOR) gateway to the Order rejected task and click
, click the down arrow in the Expression field, and add the following Sequence Flow Conditions and click Ok.
Click the Place order user task, create an end event, click Save, and then Save to confirm your changes.