
Chapter 8. Ad hoc and dynamic tasks
You can use case management to carry out tasks in an ad hoc way, rather than following a strict end-to-end process. Tasks can also be added to a case dynamically during run time when required.
Ad hoc tasks are defined in the case modeling phase. Ad hoc tasks that are not configured as Adhoc autostart are optional and might not be used during a case. Therefore, they must be triggered by a signal event or by Java API to be available to be worked on during a case.
Dynamic tasks are defined during the case execution and are not present in the case definition model. Dynamic tasks address specific needs that arise during the case. They can be added to the case and worked on at any time using a case application, as demonstrated in the Red Hat Process Automation Manager Showcase application. Dynamic tasks can also be added by Java and Remote API calls.
Dynamic tasks can be user or service activities, while ad hoc tasks can be any type of task.
Dynamic processes are any reusable sub-process from a case project.
Ad hoc nodes with no incoming connections are configured in the node’s Adhoc autostart property and are triggered automatically when the case instance is started.
Ad hoc tasks are optional tasks that are configured in a case definition. Because they are ad hoc, they must be triggered in some way, usually by a signal event or Java API call.
8.1. Adding ad hoc tasks
Ad hoc tasks are optional tasks that are configured in a case definition. Because they are ad hoc, they must be triggered in some way, usually by a signal event or Java API call.
Prerequisites
- A case project has been created in Business Central.
- The IT_Orders_New case project has been created in Business Central.
- A case definition has been created.
Procedure
- In Business Central, go to Menu → Design → Projects and IT_Orders_New.
- Click the IT_Orders_New case project Business Process (legacy) asset.
-
In the process designer, click
 to open the Object Library on the left of the design palette.
From the list, select a task that you want to add to the case definition as an ad hoc task.
For example, you might want to add a user task to fill out a warranty claim if goods that are received are faulty. A warranty claim may or may not need to be completed during the course of the case, but it is available to be performed in an ad hoc way if required.
- Configure the ad hoc task properties in the Properties panel on the right.
-
Trigger the task during run time using a Java API call. For example, the
Order rejectedad hoc task is triggered by the following API call:CaseService.triggerAdHocFragment
8.2. Starting dynamic tasks and processes
You can add dynamic tasks and processes to a case during run time. Dynamic actions are a way to address changing situations, where an unanticipated change during the case requires a new task or process to be incorporated into the case.
Use a case application to add a dynamic task during run time. For demonstration purposes, the Business Central distribution includes a Showcase application where you can start a new dynamic task or process for the IT Orders application.
Prerequisites
- Process Server is deployed and connected to Business Central.
- The IT Orders project is deployed to Process Server.
-
The Showcase application
.warfile has been deployed alongside Business Central.
Procedure
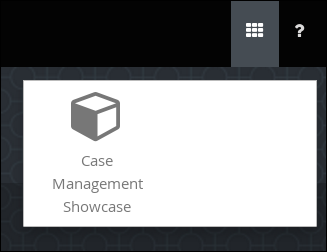
With the IT_Orders_New project deployed and running in the Process Server, in a web browser, navigate to the Showcase login page
http://localhost:8080/rhpam-case-mgmt-showcase/.Alternatively, if you have configured Business Central to display the Apps launcher button, use it to open a new browser window with the Showcase login page.
- Log in to the Showcase application using your Business Central login credentials.
- Select an active case instance from the list to open it.
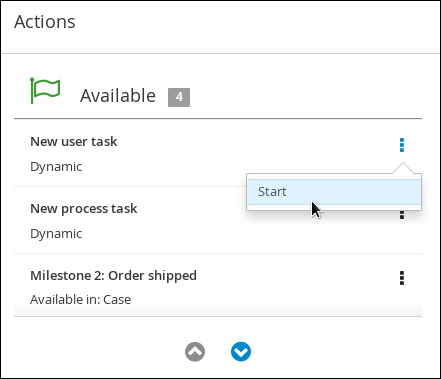
Under Overview → Actions → Available, click the
 button next to New user task or New process task to add a new task or process task.
Figure 8.1. Showcase dynamic actions
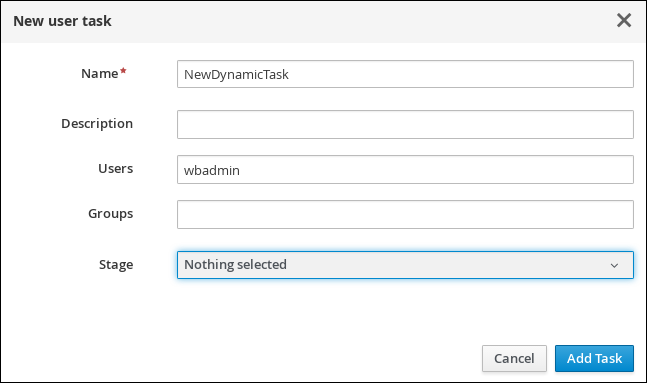
To create a dynamic user task, start a New user task and complete the required information:
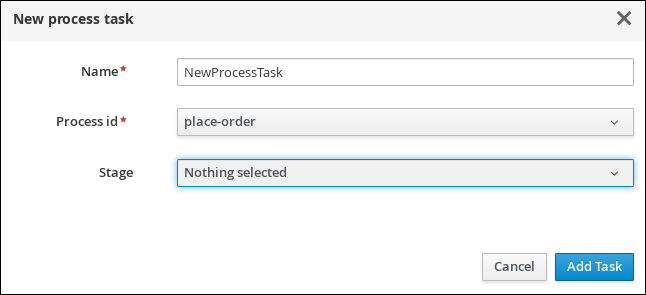
To create a dynamic process task, start a New process task and complete the required information:
To view a dynamic user task in Business Central, click Menu → Track → Task Inbox. The user task that was added dynamically using the Showcase application appears in the Task Inbox of users assigned to the task during task creation.
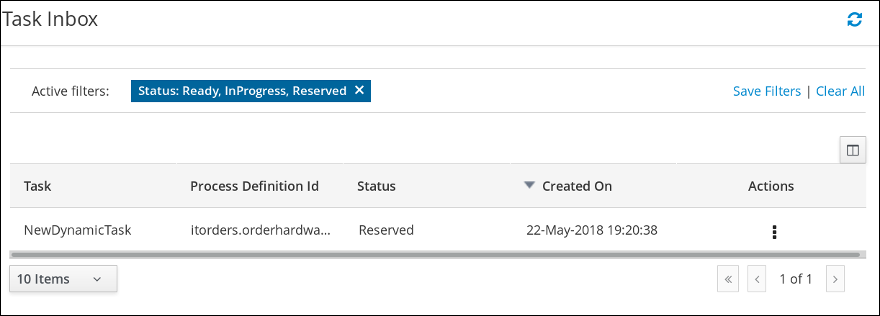
- Click the dynamic task in the Task Inbox to open the task. A number of action tabs are available from this page.
- Using the actions available under the task tabs, you can begin working on the task.
- In the Showcase application, click the refresh button in the upper-right corner. Case tasks and processes that are in progress appear under Overview → Actions → In progress.
- When you have completed working on the task, click the Complete button under the Work tab.
- In the Showcase application, click the refresh button in the upper-right corner. The completed task appears under Overview → Actions → Completed.
To view a dynamic process task in Business Central, click Menu → Manage → Process Instances.

- Click the dynamic process instance in the list of available process instances to view information about the process instance.
- In the Showcase application, click the refresh button in the upper-right corner. Case tasks and processes that are in progress appear under Overview → Actions → In progress.
8.3. Closing a case in the Showcase application
A case instance is complete when no more activities need to be performed and the business goal has been achieved. After a case is complete, you can close the case to indicate that the case is complete and that no further work is required. When you close a case, consider adding a specific comment about why you are closing the case. If needed, you can reopen the case later with the same case ID.
You can use the Showcase application to close a case instance at any time. From Showcase, you can easily view the details of the case or leave a comment before closing it.
Prerequisites
- You are logged in to the Showcase application and are the owner or administrator for a case instance that you want to close.
Procedure
- In the Showcase application, locate the case instance you want to close from the list of case instances.
- To close the case without viewing the details first, click Close.
To close the case from the case details page, click the case in the list to open it.
From the case overview page you can add comments to the case and verify that you are closing the correct case based on the case information.
- Click Close to close the case.
- Click Back to Case List in the upper-left corner of the page to return to the Showcase case list view.
- Click the drop-down list next to Status and select Canceled to view the list of closed and canceled cases.