Chapter 4. Creating a business process in Business Central
The process designer is the Red Hat Process Automation Manager process modeler. The output of the modeler is a BPMN 2.0 process definition file. The definition is used as input for the Red Hat Process Automation Manager process engine, which creates a process instance based on the definition.
The procedures in this section provide a general overview of how to create a simple business process. For a more detailed business process example, see Getting started with business processes.
Prerequisites
- You have created or imported a Red Hat Process Automation Manager project. For more information about creating projects, see Managing projects in Business Central.
- You have created the required users. User privileges and settings are controlled by the roles assigned to a user and the groups that a user belongs to. For more information about creating users, see Installing and configuring Red Hat Process Automation Manager on Red Hat JBoss EAP 7.2.
Procedure
- In Business Central, go to Menu → Design → Projects.
- Click the project name to open the project’s asset list.
- Click Add Asset → Business Process.
In the Create new Business Process wizard, enter the following values:
- Business Process: New business process name
-
Package: Package location for your new business process, for example
com.myspace.myProject
- Click Ok to open the process designer.
In the upper-right corner, click the Diagram properties
 icon and add your business process property information, such as process data and variables:
- Scroll down and expand Process Data.
-
Click
 next to Process Variables and define the process variables that you want to use in your business process.
- In the process designer canvas, use the left toolbar to drag and drop BPMN components to define your business process logic, connections, events, tasks, or other elements.
- After you add and define all components of the business process, click Save to save the completed business process.
4.1. Creating business process tasks
You can create the following types of tasks as part of your business process:
- Business rule tasks: Used to make decisions through a Decision Model and Notation (DMN) model or rule flow group
- Script tasks: Used to execute a piece of code written in Java, JavaScript, or MVEL
- User tasks: Used to include human actions as input to the business process
As an example, this procedure uses a user task.
Procedure
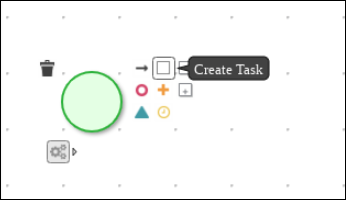
Click the start event to create an outgoing connection to a new task.
Figure 4.1. Outgoing connection from the start event to a user task
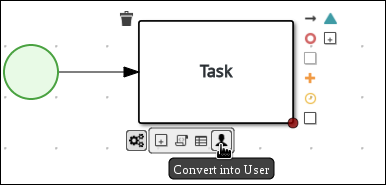
Convert the new task to one of the available task types, such as a user task.
Figure 4.2. Convert into a User task
-
For this example, click the user task and in the upper-right corner, click the Diagram properties
icon.
Add the user task property information, such as the following details:
- Expand Implementation/Execution and enter values for both the Task Name and Actor fields.
-
Click
 next to Assignments to open the Data I/O window
- Create the input and output assignments for the user task.
- After you add and define all task information, click Save to save the updated business process.
4.2. Making a copy of a business process
You can make a copy of a business process in Business Central and modify the copied process as needed.
Procedure
- In the business process designer, click Copy in the upper-right toolbar.
- In the Make a Copy window, enter a new name for the copied business process, select the target package, and optionally add a comment.
- Click Make a Copy.
- Modify the copied business process as needed and click Save to save the updated business process.
4.3. Resizing elements and using the zoom function to view business processes
You can resize individual elements in a business process and zoom in or out to modify the view of your business process.
Procedure
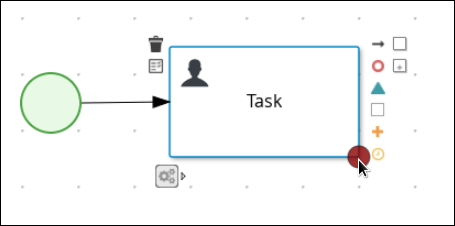
- In the business process designer, select the element and click the red dot in the lower-right corner of the element.
Drag the red dot to resize the element.
Figure 4.3. Resize an element
To zoom in or out to view the entire diagram, click the plus or minus sign on the lower-right side of the canvas.
Figure 4.4. Enlarge or shrink a business process

4.4. Generating process documentation in Business Central
In the process designer in Business Central, you can view and print a report of the process definition. The process documentation summarizes the components, data, and visual flow of the process in a format (PDF) that you can print and share more easily.
Procedure
- In Business Central, navigate to a project that contains a business process and select the process.
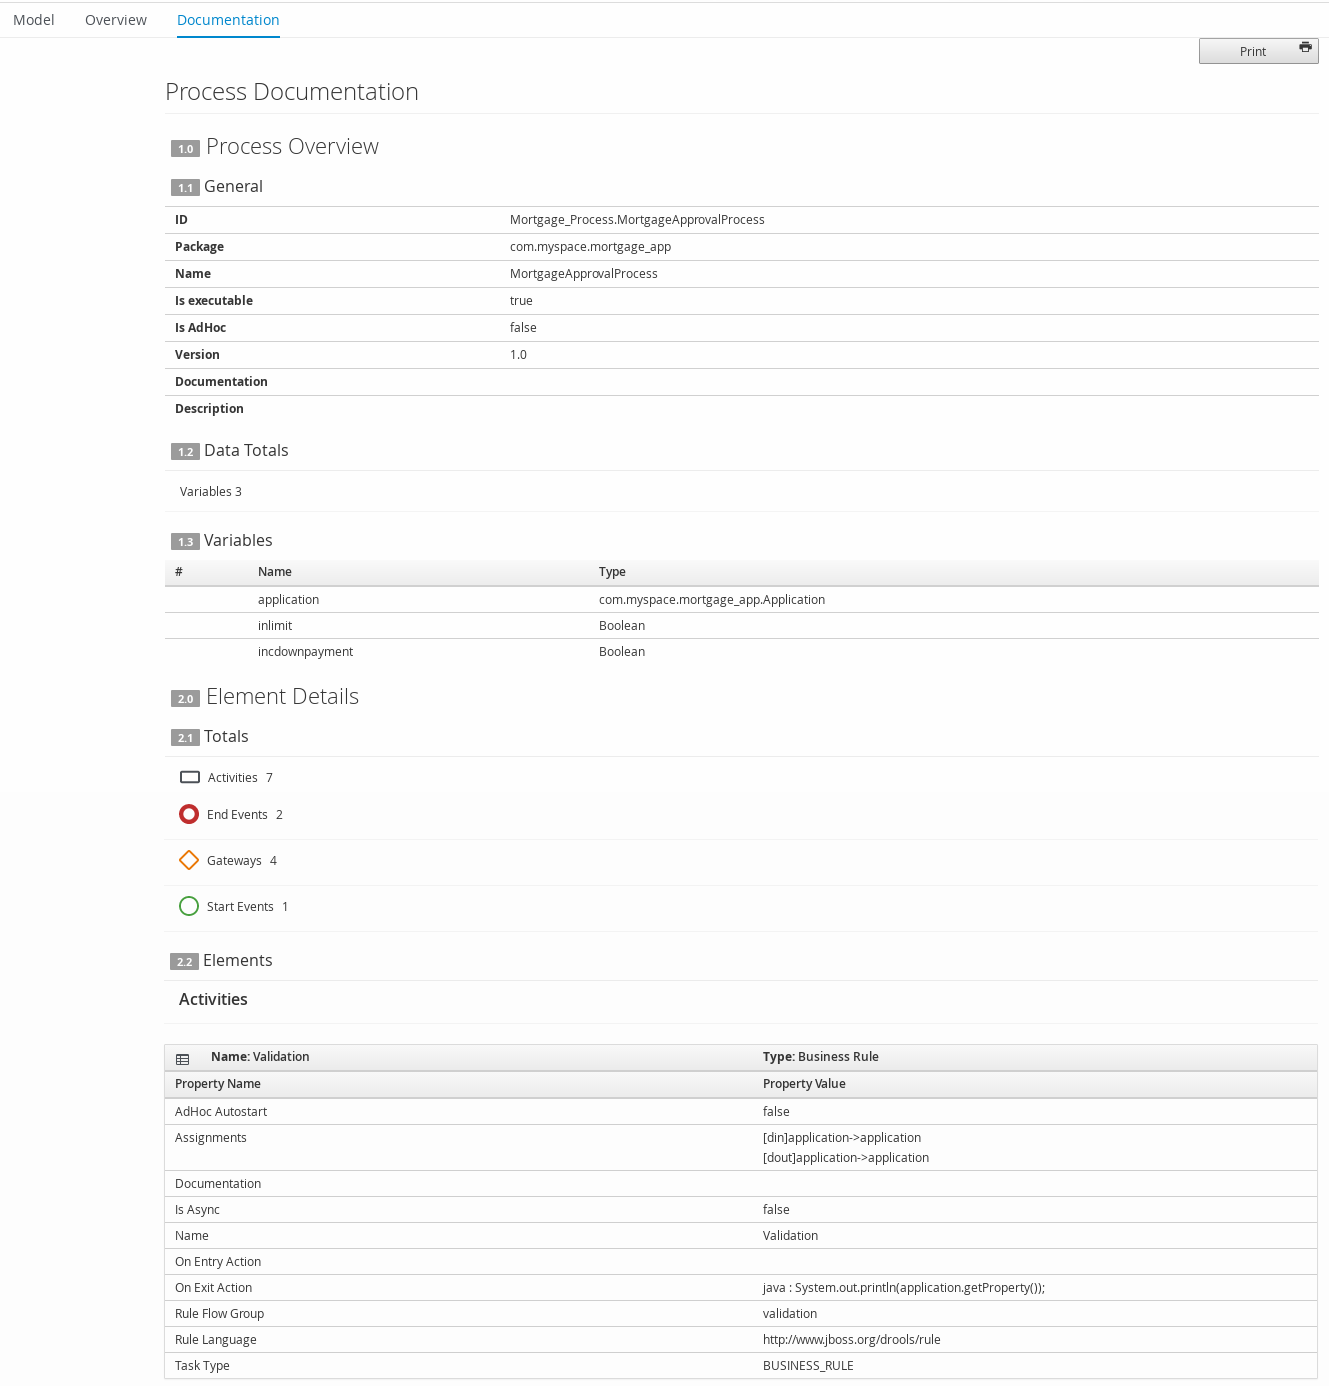
In the process designer, click the Documentation tab to view the summary of the process file, and click Print in the top-right corner of the window to print the PDF report.
Figure 4.5. Generate process documentation