
Red Hat Training
A Red Hat training course is available for Red Hat Process Automation Manager
Chapter 6. Designing the case definition
You design cases using the process designer in Business Central. Case design is the basis of case management and sets the specific goals and tasks for each case. The case flow can be modified dynamically during run time by adding dynamic tasks or processes.
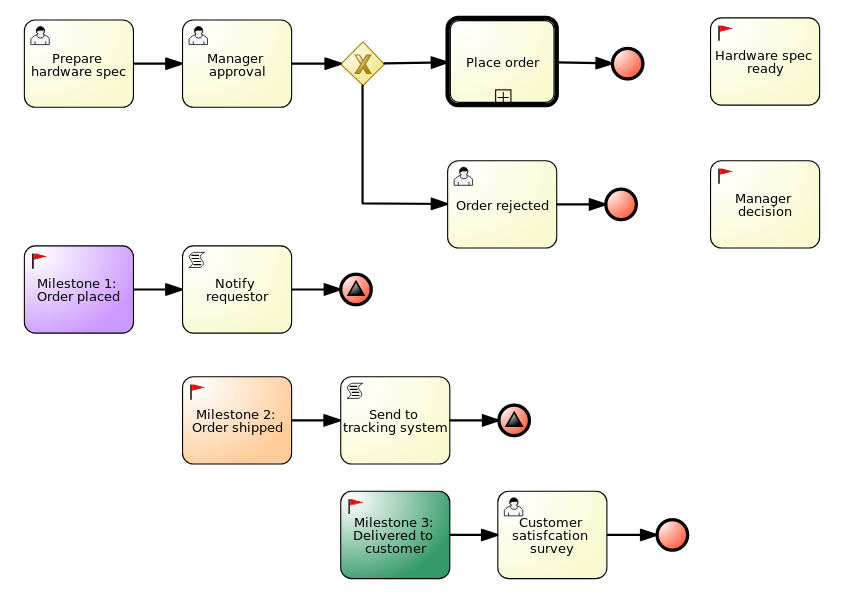
The IT_Orders sample project in Business Central includes the following orderhardware business process case definition. In this procedure, you will create this same case definition to familiarize yourself with the case definition design process.
Figure 6.1. orderhardware business process case definition
Prerequisites
- You have created a new case in Business Central. For more information, see Chapter 3, Creating a new IT Orders case project.
- You have created the data objects. For more information, see Chapter 4, Data objects.
- You have created the Place order subprocess. For more information, see Chapter 5, Creating the Place order subprocess.
Procedure
- In Business Central, go to Menu → Design → Projects and click IT_Orders_New.
- Click Add Asset → Case Definition (legacy).
In the Create new Case definition window, add the following required information:
-
Case Definition: Input
orderhardware. This is usually the subject of the case or project that is being case managed. - Package: Select com.myspace.it_orders_new to specify the location that the case file is created in.
-
Case Definition: Input
- Click Ok to open the process designer.
Define process-level and case-level variables.
-
Click
 to view the Project Explorer.
- Click BUSINESS PROCESSES (LEGACY) → orderhardware.
-
Click
 on the right side of the designer to open the Diagram properties panel.
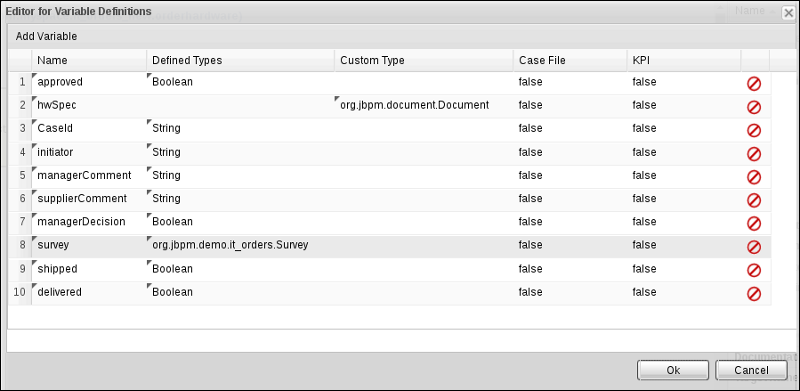
- Click the down arrow in the Variable Definitions field to open the Editor for Variable Definitions.
Click Add Variable, and input the following values and click Ok:
Figure 6.2. IT Orders variables
-
Click
Define the roles involved in the case.
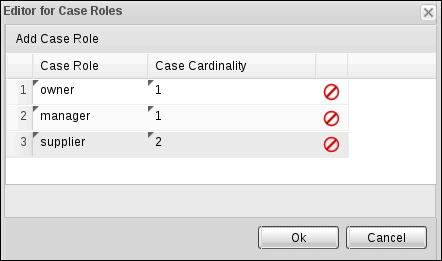
- Click the down arrow in the Case Roles field to open the Editor for Case Roles.
Click Add Case Role, and input the following values and click Ok:
Figure 6.3. ITOrders Case Roles
-
owner: The employee who is making the hardware order request. The role cardinality is set to1, which means that only one person or group can be assigned to this role. -
manager: The employee’s manager; the person who will approve or deny the requested hardware. The role cardinality is set to1, which means that only one person or group can be assigned to this role. -
supplier: The available suppliers of IT hardware in the system. The role cardinality is set to2, which means that more than one supplier can be assigned to this role.
-
Define the work item to be triggered when a new case starts.
NoteBy default, the process designer includes a Milestone object.
- Click Add Asset → Business Process (legacy).
Enter the following values:
-
Business Process:
orderhardware -
Package: Select
com.myspace.it_orders_new
-
Business Process:
Click Ok to open the Business Process (legacy) editor. The following image shows the different panels that comprise the editor.
Figure 6.4. Business Process (legacy) editor

1: The canvas where you build your process diagram. Drag elements from the Object Library to the canvas to design your process.
2: The Object Library.
3: The Properties panel displays the properties of the selected element. If no element is selected, the panel contains process properties.
6.1. Create the Manager approval business process
The manager approval process determines whether or not the order will be placed or rejected.
Procedure
- In the process designer, expand Tasks in the Object Library and drag a new User task on the canvas.
-
Click the new user task and in the upper-right corner, click
to open the Properties panel.
-
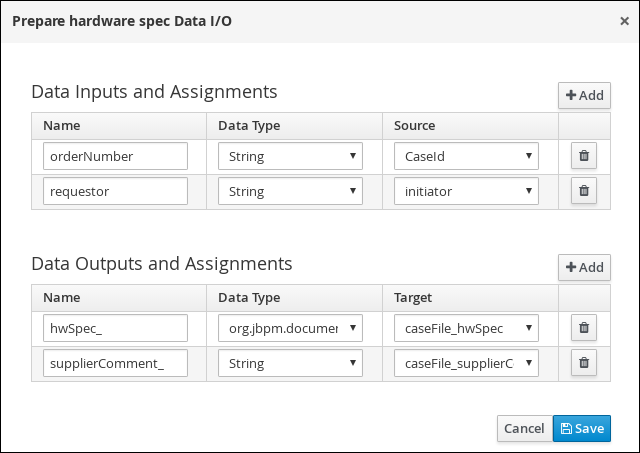
Input
supplierin the Groups field,Prepare hardware specin the Name field, andPrepareHardwareSpecin the Task Name field. Enter the following in the Description field:
Prepare hardware specification for #{initiator} (order number #{CaseId})Click the down arrow in the Assignments field, add the following new conditions in the Prepare hardware spec Data I/O window, and click Save.
Click the Prepare hardware spec user task and create an new user task.

-
Click the new user task and in the upper-right corner, click
to open the Properties panel.
-
Input
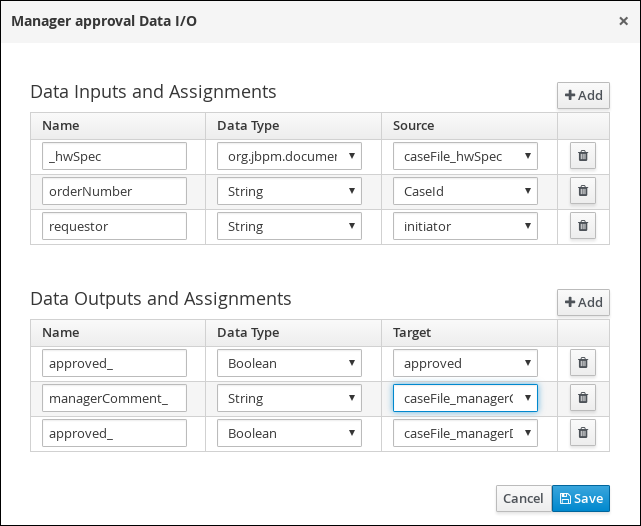
managerin the Actors field,Manager approvalin the Name field, andManagerApprovalin the Task Name field. -
Enter
Approval request for new hardware for #{initiator} (order number #{CaseId})in the Description field: Click the down arrow in the Assignments field, add the following new conditions in the ManagerApproval Data I/O window, and click Save.
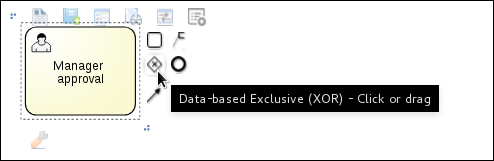
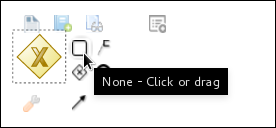
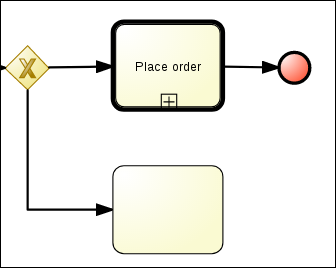
Click the Manager approval user task and create a Data-based Exclusive (XOR) gateway, and then click the exclusive gateway and create a new task.
-
Click the new task, and then click
to open the Properties panel.
-
Input
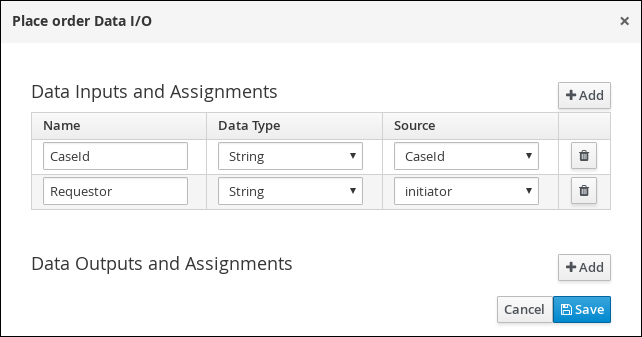
Sub-Processin the ActivityType field andPlace orderin the Name field. - Click the down arrow in the Called Element field, select place-order.bpmn from the Asset Name column, and click Save.
- Click the down arrow in the Independent field and select false.
Click the down arrow in the Assignments field and add the following new conditions in the Place order Data I/O window.
Click the connection from the exclusive gateway to the Place order task and add the following in the Expression field, and click Save.
return KieFunctions.isTrue(approved);Click the Place order user task and create an end event.
Click the exclusive gateway and create a new user task and drag the new task to align it below the Place order task.
-
Click the new user task and in the upper-right corner, click
to open the Properties panel.
-
Input
ownerin the Actors field,Order rejectedin the Name field, andOrderRejectedin the Task Name field. Enter
Order #{CaseId} has been rejected by managerin the Description field, click the down arrow in the Assignments field, and add the following new conditions in the Order rejected Data I/O window.
-
Click the connection from the exclusive gateway to the Order rejected task, add
return KieFunctions.isFalse(approved);in the Expression field, and click Save. - Click the Place order user task, create an end event, click Save, and then Save to confirm your changes.
6.2. Create the Hardware spec ready Milestone
Create a Hardware spec ready milestone that is reached when the required hardware specification document is completed.
Procedure
- In the process designer, expand Milestone in the Object Library and drag a new milestone on the canvas and place it on the right side of the Place order end event.
-
Click the new milestone and in the upper-right corner, click
to open the Properties panel.
-
Input
Hardware spec readyin the Name field. -
Select
truefrom the Adhoc autostart menu. Click the down arrow in the Assignments field and add the following new conditions in the Hardware spec ready Data I/O window.
Add
CaseData(data.get("hwSpec") != null)by selecting Constant from the Source menu.
- Click Save.
6.3. Create the Manager decision Milestone
This milestone is reached when the managerDecision variable has been given a response.
Procedure
- In the process designer, expand Milestone in the Object Library and drag a new milestone on the canvas below the the Notify requestor script task.
-
Click the new milestone and in the upper-right corner, click
to open the Properties panel.
-
Input
Manager decisionin the Name field. -
Select
truefrom the Adhoc autostart menu. Click the down arrow in the Assignments field and add the following new conditions in the Manager decision Data I/O window.
Add
CaseData(data.get("managerDecision") != null)by selecting Constant from the Source menu.
- Click Save.
6.4. Create the Order placed Milestone
This milestone is reached when the ordered variable has been given a response.
Procedure
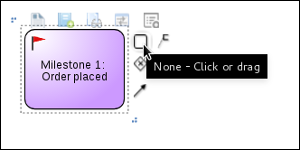
- In the process designer, click the default Milestone object.
-
In the upper-right corner, click
to open the Properties panel.
-
Input
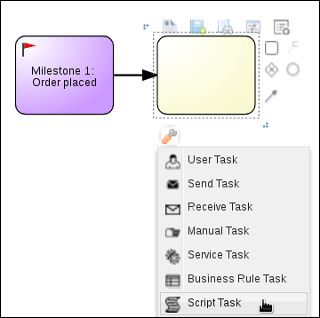
Milestone 1: Order placedin the Name field. -
Select
truefrom the Adhoc autostart menu. - Click the down arrow in the Assignments field to add a new condition in the Milestone 1: Order placed Data I/O window.
Click the Source column drop-down, select Constant, and input
org.kie.api.runtime.process.CaseData(data.get("ordered") == true). This means that a case variable namedorderedexists with the valuetrue.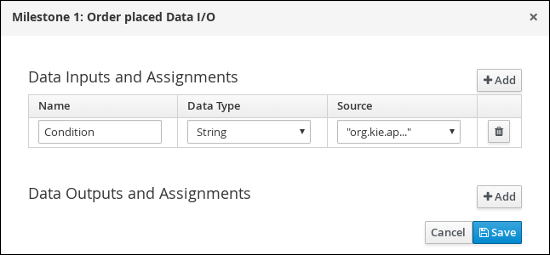
Click Save.
For more information about milestones, see Section 1.1, “Milestones”.
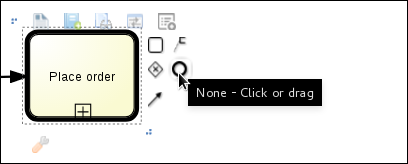
Click Milestone 1: Order placed and create a new script task.
-
Click the new script task and in the upper-right corner, click
to open the Properties panel.
-
Input
Notify requestorin the Name field. -
Click the down arrow in the Script field, input
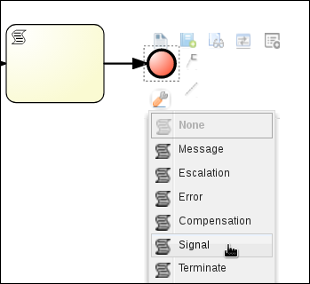
System.out.println("Notification::Order placed");, and click Ok. Click the Notify requestor scipt task and create a signal end event.

-
Click the signal event and click
to open the Properties panel.
- Click the down arrow in the Signal Scope field, select Process Instance.
-
Click the down arrow in the SignalRef field, input
Milestone 2: Order shipped, and click Ok.
6.5. Create the Order shipped Milestone
The condition for this milestone is that a case file variable named shipped is true. Adhoc autostart is not enabled for this milestone. Instead, it is triggered by a signal event when the order is ready to be sent.
Procedure
- In the process designer, expand Milestone in the Object Library and drag a new milestone on the canvas below the the Notify requestor script task.
-
Click the new milestone and in the upper-right corner, click
to open the Properties panel.
-
Input
Milestone 2: Order shippedin the Name field. -
Select
falsefrom the Adhoc autostart menu. - Click the down arrow in the Assignments field to add a new condition in the Data Inputs and Assignments window.
-
Click the Source column drop-down, select Constant, and input
org.kie.api.runtime.process.CaseData(data.get("shipped") == true). This means that a case variable namedshippedexists with the valuetrue. - Click Save.
- Click Milestone 2: Order shipped and create a new script task.
-
Click the new script task and in the upper-right corner, click
to open the Properties panel.
-
Input
Send to tracking systemin the Name field. -
Click the down arrow in the Script field, input
System.out.println("Order added to tracking system");, and click Ok. - Click the Send to tracking system scipt task and create a signal end event.
-
Click the signal event and click
to open the Properties panel.
- Click the down arrow in the Signal Scope field, select Process Instance.
-
Click the down arrow in the SignalRef field, input
Milestone 3: Delivered to customer, and click Ok.
6.6. Create the Delivered to customer milestone
The condition for this milestone is that a case file variable named delivered is true. Adhoc autostart is not enabled for this milestone. Instead, it is triggered by a signal event after the order has successfully shipped to the customer.
Procedure
- In the process designer, expand Milestone in the Object Library and drag a new milestone on the canvas below the the Send to tracking system script task.
-
Click the new milestone and in the upper-right corner, click
to open the Properties panel.
-
Input
Milestone 3: Delivered to customerin the Name field. -
Select
falsefrom the Adhoc autostart menu. - Click the down arrow in the Assignments field to add a new condition in the Milestone 2: Order shipped Data I/O window.
-
Click the Source column drop-down, select Constant, and input
org.kie.api.runtime.process.CaseData(data.get("delivered") == true). This means that a case variable nameddeliveredexists with the valuetrue. - Click Save.
- Click Milestone 3: Delivered to customer and create a new user task.
-
Click the new user task and in the upper-right corner, click
to open the Properties panel.
-
Input
ownerin the Actors field. Click the down arrow in the Assignments field to add data input and output assignments in the Milestone 3: Delivered to customer Data I/O window as shown below. For the output Data Type column, select Constant, and input
org.kie.api.runtime.process.CaseData(data.get("delivered") == true).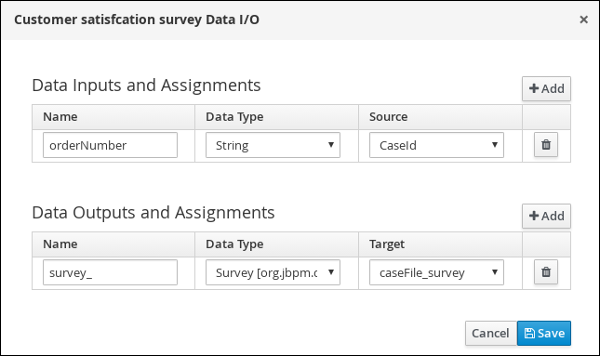
- Click Save.
-
Input
Customer satisfaction surveyin the Name field. -
Input
CustomerSurveyin the Task Name field. - Click the Customer satisfaction survey user task and create an end event.
- Click Save, and then Save to confirm your changes.
The IT Orders case can be closed after all milestone sequences are completed. However, due to the ad hoc nature of cases, the case could be reopened if, for example, the order was never received by the customer or the item is faulty. Tasks can be re-triggered or added to the case definition as required, even during run time.
For more information about ad hoc processes, see Chapter 8, Ad hoc and dynamic tasks.