
Red Hat Training
A Red Hat training course is available for Red Hat Process Automation Manager
Chapter 9. Adding rows and defining rules in guided decision tables
After you have created your columns in the guided decision table, you can add rows and define rules within the guided decision tables designer.
Prerequisite
Columns for the guided decision table have been added as described in Chapter 6, Adding columns to guided decision tables.
Procedure
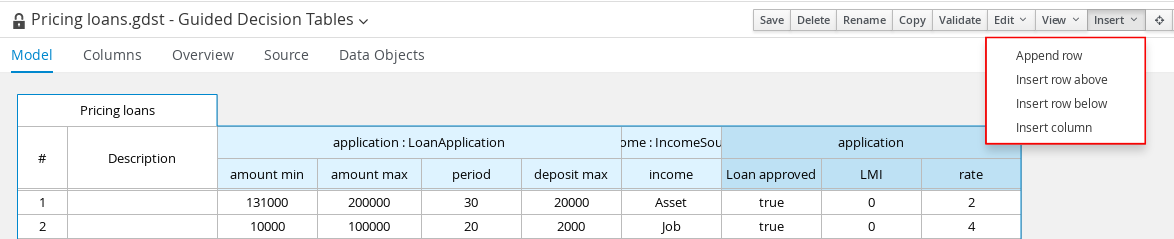
In the guided decision tables designer, click Insert → Append row or one of the Insert row options. (You can also click Insert column to open the column wizard and define a new column.)
Figure 9.1. Add Rows
Double-click each cell and enter data. For cells with specified values, select from the cell drop-down options.
Figure 9.2. Enter input data in each cell

After you define all rows of data in the guided decision table, click Validate in the upper-right toolbar of the guided decision tables designer to validate the table. If the table validation fails, address any problems described in the error message, review all components in the table, and try again to validate the table until the table passes.
NoteAlthough guided decision tables have real-time verification and validation, you should still manually validate the completed decision table to ensure optimal results.
- Click Save in the table designer to save your changes.