
Chapter 47. Configuring IBM WebSphere Application Server for KIE Server
Before you deploy KIE Server with IBM WebSphere Application Server, you must configure system properties, security settings, JMS requirements, and other properties on IBM WebSphere. These configurations promote an optimal integration with KIE Server.
Prerequisites
- IBM WebSphere Application Server is installed and running.
- You are logged in to the WebSphere Integrated Solutions Console.
47.1. Enabling administrative security
You must enable administrative security in the WebSphere Integrated Solutions Console so that you have the required permissions to create users and groups.
Procedure
- In the WebSphere Integrated Solutions Console, click Security → Global Security and ensure that the option Enable Application Security is selected. This may already be selected and overridden at the server level.
- Click Security Configuration Wizard and click Next.
- Select the repository that contains the user information. For example, select Federated repositories for local configurations.
- Click Next
- Enter the Primary administrative user name and Password.
- Click Next and then click Finish.
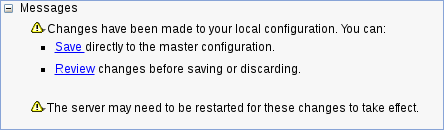
Click Save in the Messages window to save your changes to the primary configuration.
Figure 47.1. Save security changes
In your command terminal, navigate to the IBM WebSphere Application Server
/bindirectory location that you specified during installation, and run the following commands to stop and restart IBM WebSphere to apply the security changes:sudo ./stopServer.sh <SERVER_NAME>
sudo ./startServer.sh <SERVER_NAME>
Replace
<SERVER_NAME>with the IBM WebSphere Application Server name defined in Servers → Server Types → IBM WebSphere Application Servers of the WebSphere Integrated Solutions Console.
47.2. Configuring JDBC data sources in IBM WebSphere Application Server
A data source is an object that enables a Java Database Connectivity (JDBC) client, such as an application server, to establish a connection with a database. Applications look up the data source on the Java Naming and Directory Interface (JNDI) tree or in the local application context and request a database connection to retrieve data. You must configure data sources for IBM WebSphere Application Server to ensure proper data exchange between the servers and the designated database.
Typically, solutions using Red Hat Process Automation Manager manage several resources within a single transaction. JMS for asynchronous jobs, events, and timers, for example. Red Hat Process Automation Manager requires an XA driver in the datasource when possible to ensure data atomicity and consistent results. If transactional code for different schemas exists inside listeners or derives from hooks provided by the jBPM engine, an XA driver is also required.
Do not use non-XA datasources unless you are positive you do not have multiple resources participating in single transactions.
Prerequisites
- The JDBC providers that you want to use to create database connections are configured on all servers on which you want to deploy the data source. For more information about JDBC providers, see Configuring a JDBC provider in the IBM Knowledge Center.
Procedure
Navigate to the Software Downloads page in the Red Hat Customer Portal (login required), and select the product and version from the drop-down options:
- Product: Process Automation Manager
- Version: 7.12
- Download Red Hat Process Automation Manager 7.12.0 Add-Ons.
Complete the following steps to prepare your database:
-
Extract
rhpam-7.12.0-add-ons.zipin a temporary directory, for exampleTEMP_DIR. -
Extract
TEMP_DIR/rhpam-7.12.0-migration-tool.zip. -
Change your current directory to the
TEMP_DIR/rhpam-7.12.0-migration-tool/ddl-scriptsdirectory. This directory contains DDL scripts for several database types. Import the DDL script for your database type into the database that you want to use, for example:
psql jbpm < /ddl-scripts/postgresql/postgresql-jbpm-schema.sql
NoteIf you are using PostgreSQL or Oracle in conjunction with Spring Boot, you must import the respective Spring Boot DDL script, for example
/ddl-scripts/oracle/oracle-springboot-jbpm-schema.sqlor/ddl-scripts/postgresql/postgresql-springboot-jbpm-schema.sql.
-
Extract
- In the WebSphere Integrated Solutions Console, navigate to Resources → JDBC → Data sources.
- Select the scope at which applications can use the data source. You can choose a cell, node, cluster, or server.
- Click New to open the Create a data source wizard.
Enter a unique name in the Data source name field and a Java Naming and Directory Interface (JNDI) name in the JNDI name field. The application server uses the JNDI name to bind resource references for an application to this data source.
Do not assign duplicate JNDI names across different resource types, such as data sources versus J2C connection factories or JMS connection factories.
Do not assign duplicate JNDI names for multiple resources of the same type in the same scope.
- Click Next and choose Select an existing JDBC provider if the provider has been created, or choose Create new JDBC provider to define details for a new provider. (Creating the JDBC provider before this point is recommended, as a prerequisite to adding data sources.)
- On the Enter database specific properties for the data source panel, click Use this data source in container managed persistence (CMP) if container managed persistence (CMP) enterprise beans must access this data source. Then fill in any other database-specific properties.
Optional: Configure the security aliases for the data source. You can select None for any of the authentication methods, or choose one of the following types:
-
Component-managed authentication alias: Specifies an authentication alias to use when the component resource reference res-auth value is
Application. To define a new alias, navigate to Related Items → J2EE Connector Architecture (J2C) authentication data entries. A component-managed alias represents a combination of ID and password that is specified in an application for data source authentication. Therefore, the alias that you set on the data source must be identical to the alias in the application code. -
Mapping-configuration alias: Used only in the absence of a login configuration on the component resource reference. The specification of a login configuration and the associated properties on the component resource reference is the preferred way to define the authentication strategy when the res-auth value is set to
Container. If you specify theDefaultPrincipalMappinglogin configuration, the associated property is a JAAS - J2C authentication data entry alias. -
Container-managed authentication alias: Used only in the absence of a login configuration on the component resource reference. The specification of a login configuration and the associated properties on the component resource reference determines the container-managed authentication strategy when the res-auth value is set to
Container.
-
Component-managed authentication alias: Specifies an authentication alias to use when the component resource reference res-auth value is
Click Next, review the information for the data source, and click Finish to save the configuration and exit the wizard.
The Data sources panel displays your new configuration in a table along with any other data sources that are configured for the same scope.
For more information about IBM WebSphere Application Server data sources, see Configuring a JDBC provider and data source in the IBM Knowledge Center.
47.3. Configuring Java Message Service (JMS)
The Java Message Service (JMS) is a Java API that KIE Server uses to exchange messages with other application servers such as Oracle WebLogic Server and IBM WebSphere Application Server. You must configure your application server to send and receive JMS messages through KIE Server to ensure collaboration between the two servers.
47.3.1. Create a service bus and add IBM WebSphere Application Server
You must create a service bus and add the IBM WebSphere Application Server as a member in order to use JMS.
Procedure
- In the WebSphere Integrated Solutions Console, navigate to Service Integration → Buses → New.
- Enter a new bus name and clear the Bus Security option.
- Click Next and then Finish to create the service bus.
- Select the service bus that you created.
- Under Topology, select Bus Members → Add.
- In the Add a New Bus Member wizard, choose the IBM WebSphere Application Server and the type of message store for persistence. You can also specify the properties of the message store.
- Click Finish to add the new bus member.
47.3.2. Create JMS connection factories
To enable messaging with KIE Server, you must create certain JMS connection factories for sending and receiving messages.
Prerequisites
- You have created a service bus for IBM WebSphere Application Server.
Procedure
- In the WebSphere Integrated Solutions Console, navigate to Resources → JMS → Connection Factories.
- Select the correct scope and click New.
- Select the Default Messaging Provider option and click OK.
-
For each of the following required connection factories, enter the name of the connection factory (for example,
KIE.SERVER.REQUEST) and the JNDI name (for example,jms/cf/KIE.SERVER.REQUEST), and then select the service bus from the Bus Name drop-down list. Leave the default values for the remaining options. - Click Apply and then click Save to save the changes to the primary configuration, and repeat for each required factory.
47.3.2.1. JMS connection factories for KIE Server
The following table lists the required Java Message Service (JMS) connection factories that enable JMS messaging with KIE Server:
Table 47.1. Required JMS connection factories for KIE Server
| Name | Default value | Used for |
|---|---|---|
|
|
| Sending all requests to KIE Server |
|
|
| Receiving all responses produced by KIE Server |
|
|
| KIE Server executor services |
47.3.3. Create JMS queues
JMS queues are the destination end points for point-to-point messaging. You must create certain JMS queues to enable JMS messaging with KIE Server.
Prerequisites
- You have created a service bus for IBM WebSphere Application Server.
Procedure
- In the WebSphere Integrated Solutions Console, navigate to Resources → JMS → Queues.
- Select the correct scope and click New.
- Select the Default Messaging Provider option and click OK.
-
For each of the following required queues, enter the name of the queue (for example,
KIE.SERVER.REQUEST) and the JNDI name (for example,jms/KIE.SERVER.REQUEST), and then select the service bus from the Bus Name drop-down list. - From the Queue Name drop-down list, select the Create Service Integration Bus Destination, enter a unique identifier, and select the bus member that you created previously.
- Click Apply and then click Save to save the changes to the primary configuration, and repeat for each required queue.
47.3.3.1. JMS queues for KIE Server
The following table lists the required Java Message Service (JMS) queues that enable JMS messaging with KIE Server:
Table 47.2. Required JMS queues for KIE Server
| Name | Default value | Used for |
|---|---|---|
|
|
| Sending all requests to KIE Server |
|
|
| Receiving all responses produced by KIE Server |
|
|
| KIE Server executor services |
47.3.4. Create JMS activation specifications
A JMS activation specification is required in order to bridge the queue and the message-driven bean that enables JMS.
Prerequisites
- You have created a service bus for IBM WebSphere Application Server.
- You have created JMS queues.
Procedure
- In the WebSphere Integrated Solutions Console, navigate to Resources → JMS → Activation Specifications.
- Select the correct scope and click New.
- Select the Default Messaging Provider option and click OK.
-
For each of the following required activation specifications, enter the name of the activation specification (for example,
KIE.SERVER.REQUEST) and the JNDI name (for example,jms/activation/KIE.SERVER.REQUEST), and then select the service bus from the Bus Name drop-down list. -
From the Destination Type drop-down list, select Queue and enter the name of the corresponding queue as a Destination lookup (for example,
jms/KIE.SERVER.REQUEST). - Click Apply and then click Save to save the changes to the primary configuration, and repeat for each required activation specification.
47.3.4.1. JMS activation specifications for KIE Server
The following table lists the required Java Message Service (JMS) activation specifications that enable JMS messaging with KIE Server:
Table 47.3. Required JMS activation specifications for KIE Server
| Name | Default value | Used for |
|---|---|---|
|
|
| Sending all requests to KIE Server |
|
|
| Receiving all responses produced by KIE Server |
|
|
| KIE Server executor services |
47.4. Setting system properties in IBM WebSphere Application Server
Set the system properties listed in this section on your IBM WebSphere Application Server before you deploy KIE Server.
Procedure
- In the WebSphere Integrated Solutions Console, navigate to Servers → Server Types → IBM WebSphere Application Servers.
- In the list of application servers, choose the server on which you are going to deploy KIE Server.
Under the Server Infrastructure, click Java and Process Management → Process Definition.
Figure 47.2. WebSphere configuration page

Under Additional Properties, click Java Virtual Machine.
Figure 47.3. Process definition configuration page
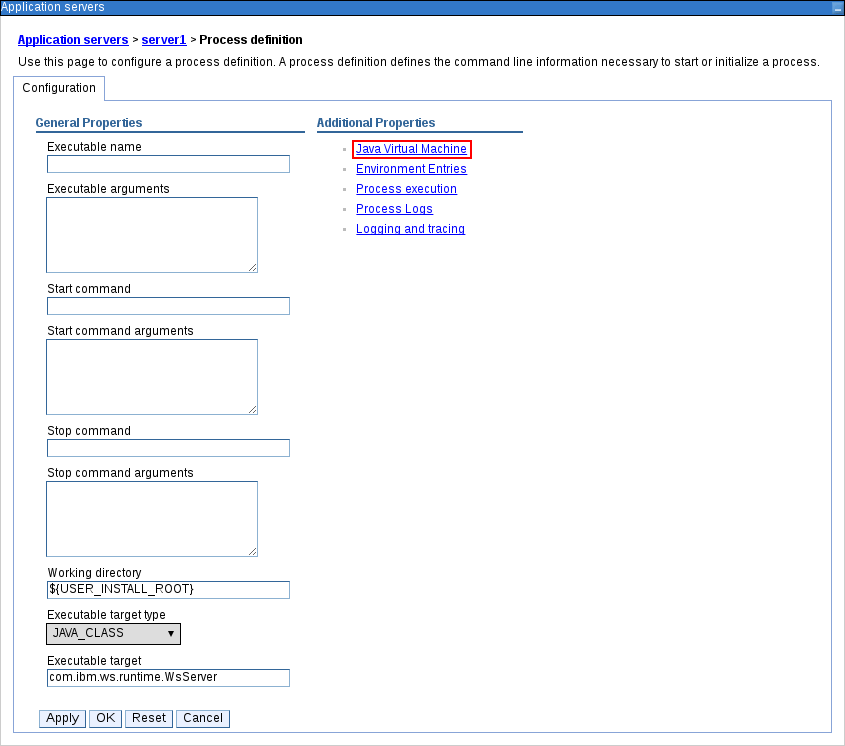
This opens the configuration properties for the JVM that is used to start IBM WebSphere.
-
Set both the Initial heap size and Maximum heap size to
2048and click Apply to increase the Java Virtual Machine (JVM) memory size. KIE Server has been tested with these values. If you do not increase the JVM memory size, IBM WebSphere Application Server freezes or causes deployment errors when deploying KIE Server. - Under Additional Properties, click Custom Properties.
Click New → Custom JVM Properties and add the following properties to IBM WebSphere:
Table 47.4. System properties for KIE Server
Name Value Description kie.server.jms.queues.responsejms/KIE.SERVER.RESPONSEThe JNDI name of JMS queue for responses used by KIE Server.
org.kie.server.domainWSLoginJAAS
LoginContextdomain used to authenticate users when using JMS.org.kie.server.persistence.dsjdbc/jbpmData source JNDI name for KIE Server.
org.kie.server.persistence.tmorg.hibernate.engine.transaction.jta.platform.internal.WebSphereJtaPlatformTransaction manager platform for setting Hibernate properties.
org.kie.server.persistence.dialectExample:
org.hibernate.dialect.H2DialectSpecifies the Hibernate dialect to be used. Set according to data source.
org.kie.executor.jms.queuejms/KIE.SERVER.EXECUTORJob executor JMS queue for KIE Server.
org.kie.executor.jms.cfjms/cf/KIE.SERVER.EXECUTORJob executor JMS connection factory for KIE Server.
org.kie.server.routerExample:
http://localhost:9000(Optional) Specifies one or more URLs for one or more KIE Server routers (Smart Routers) that the application server is a part of in a clustered KIE Server environment.
org.jboss.logging.providerjdkThis property is only required where a
CA SiteMinder TAI (SMTAI)is installed in the environment. Using this property forces Hibernate to useJDKinstead oflog4jfor logging within Dashbuilder.CA SiteMinder TAI (SMTAI)contains an old version oflog4j, which causes conflicts.- Click Save to save the changes to the primary configuration.
47.5. Stopping and restarting IBM WebSphere Application Server
After you have configured all required system properties in IBM WebSphere Application Server, stop and restart the IBM server to ensure that the configurations are applied.
Procedure
In your command terminal, navigate to the IBM WebSphere Application Server /bin directory location that you specified during installation, and run the following commands to stop and restart IBM WebSphere to apply the configuration changes:
sudo ./stopServer.sh <SERVER_NAME>
sudo ./startServer.sh <SERVER_NAME>
Replace <SERVER_NAME> with the IBM WebSphere Application Server name defined in Servers → Server Types → IBM WebSphere Application Servers of the WebSphere Integrated Solutions Console.