
Red Hat Training
A Red Hat training course is available for Red Hat Process Automation Manager
Chapter 8. Generating and editing forms
The following chapter shows you how to automatically generate forms for collecting user data for your mortgage application business process. We have also included a bit more information about editing forms to familiarize you with Red Hat Process Automation Manager form manipulation.
Prerequisites
The business process model has been completed. For more information, see Chapter 5, Creating the MortgageApprovalProcess business process.
8.1. Automatic Form Generation
Red Hat Process Automation Manager enables you to automatically generate forms. For this business process you will automatically generate the Applicant, Property, and Application forms.
Procedure
- Log in to Business Central and click Menu → Design → Projects, then Mortgage Process.
- From the asset list, select the MortgageApprovalProcess business process.
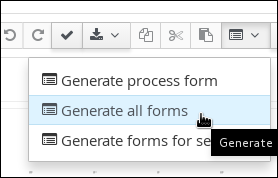
Click on the Form Generation menu in the upper-right menu and select Generate all forms.
- Click Menu → Design → Projects, then Mortgage Process.
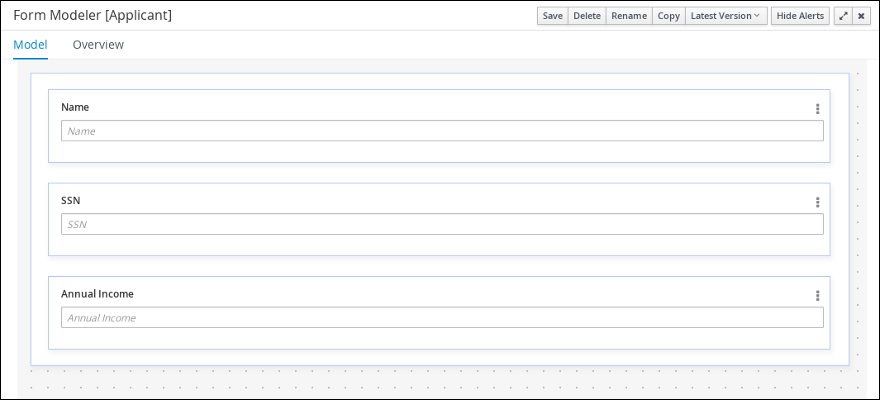
From the asset list, select the Applicant form.
The Applicant form should look as follows:
- Click Menu → Design → Projects, then Mortgage Process.
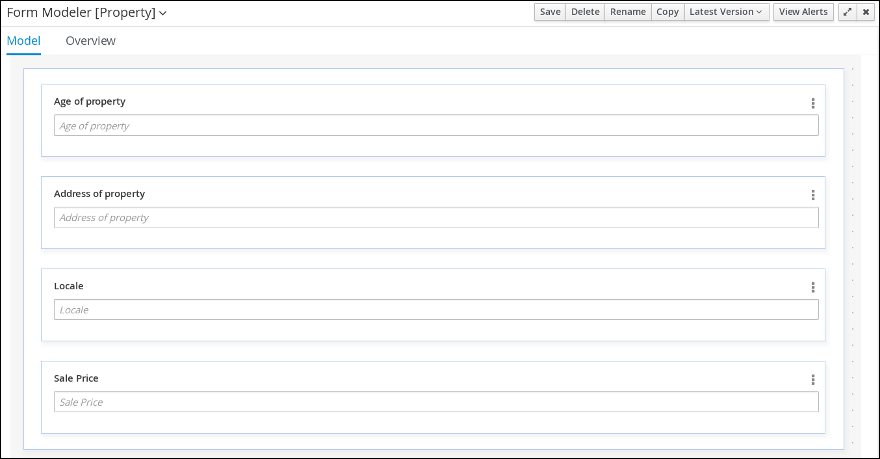
From the asset list, select the Property form. The Property form should look as follows:
- Click Menu → Design → Projects, then Mortgage Process.
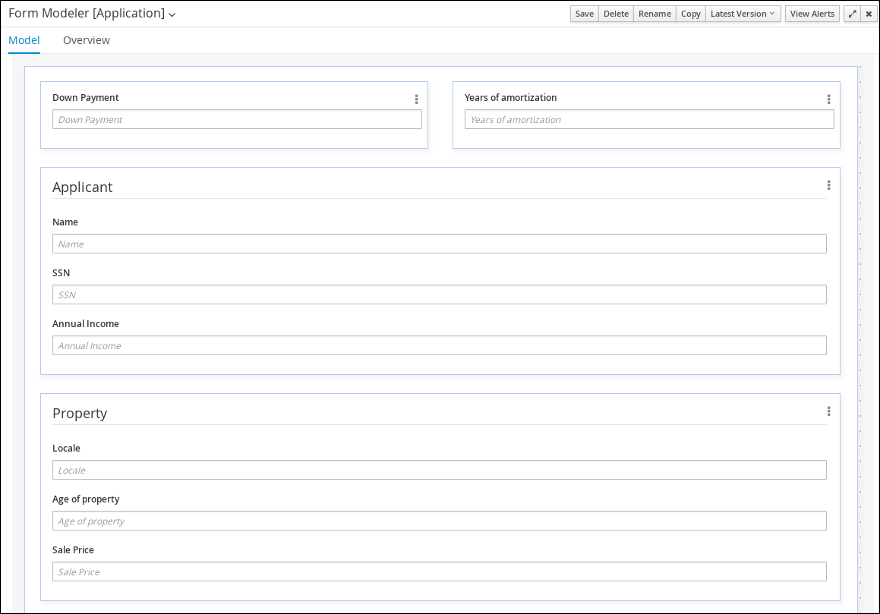
From the asset list, select the Application form. The Application form should look as follows:
- Click on the X in the upper-right corner to close the editor.
8.2. Editing forms (Optional)
The following optional process shows you how to edit the Applicant form that you previously defined as part of this tutorial business process:
Procedure
- Log in to Business Central and click Menu → Design → Projects, then Mortgage Process.
Click the Applicant data object form and add a new Address row.
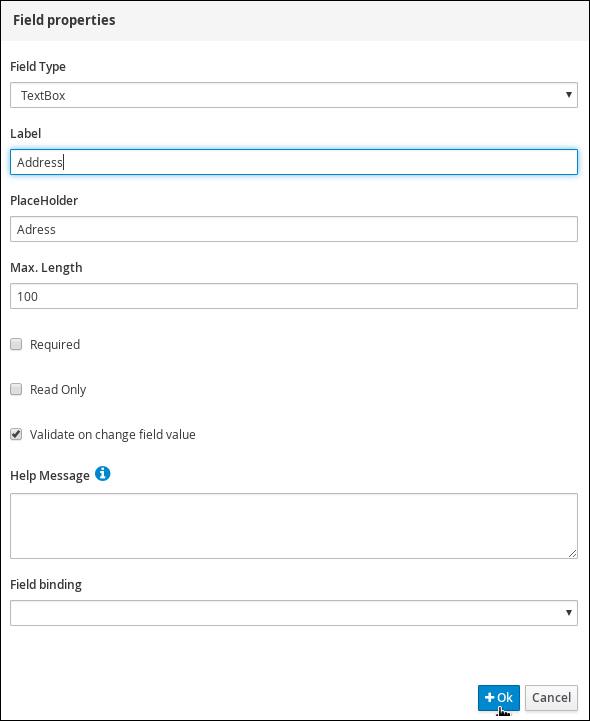
- Expand the Form Controls menu and drag the TextBox field in to the existing form.
Complete the form field properties for the new Address row.
- Click the three vertical dots in the upper-right corner to edit or delete the row.
- Click Save, then click Save to confirm your changes.