
Integrate OpenStack Identity with external user management services
Use Active Directory or Red Hat Identity Management as an external authentication back end
Abstract
Making open source more inclusive
Red Hat is committed to replacing problematic language in our code, documentation, and web properties. We are beginning with these four terms: master, slave, blacklist, and whitelist. Because of the enormity of this endeavor, these changes will be implemented gradually over several upcoming releases. For more details, see our CTO Chris Wright’s message. :leveloffset: +0
Providing feedback on Red Hat documentation
We appreciate your input on our documentation. Tell us how we can make it better.
Using the Direct Documentation Feedback (DDF) function
Use the Add Feedback DDF function for direct comments on specific sentences, paragraphs, or code blocks.
- View the documentation in the Multi-page HTML format.
- Ensure that you see the Feedback button in the upper right corner of the document.
- Highlight the part of text that you want to comment on.
- Click Add Feedback.
- Complete the Add Feedback field with your comments.
- Optional: Add your email address so that the documentation team can contact you for clarification on your issue.
- Click Submit.
Chapter 1. Integrating OpenStack Identity (keystone) with Active Directory
You can integrate OpenStack Identity (keystone) with Microsoft Active Directory Domain Service (AD DS). Identity Service authenticates certain Active Directory Domain Services (AD DS) users but retains authorization settings and critical service accounts in the Identity Service database. As a result, Identity Service has read-only access to AD DS for user account authentication and continues to manage privileges assigned to authenticated accounts.
By integrating the Identity service with AD DS, you allow AD DS users to authenticate to Red Hat OpenStack Platform (RHOSP) to access resources. RHOSP service accounts, such as the Identity Service and the Image service, and authorization management remain in the Identity Service database. Permissions and roles are assigned to the AD DS accounts using Identity Service management tools.
The process to integrate OpenStack Identity with Active Directory includes the following stages:
- Configure Active Directory credentials and export the LDAPS certificate
- Install and configure the LDAPS certificate in OpenStack
- Configure director to use one or more LDAP backends
- Configure Controller nodes to access the Active Directory backend
- Configure Active Directory user or group access to OpenStack projects
- Verify that the domain and user lists are created correctly
- Optional: Create credential files for non-admin users.
1.1. Configuring Active Directory credentials
To configure Active Directory Domain Service (AD DS) to integrate with OpenStack Identity, set up an LDAP account for Identity service to use, create a user group for Red Hat OpenStack users, and export the LDAPS certificate public key to use in the Red Hat OpenStack Platform deployment.
Prerequisites
- Active Directory Domain Services is configured and operational.
- Red Hat OpenStack Platform is configured and operational.
- DNS name resolution is fully functional and all hosts are registered appropriately.
- AD DS authentication traffic is encrypted with LDAPS, using port 636.
- Recommended: Implement AD DS with a high availability or load balancing solution to avoid a single point of failure.
Procedure
Perform these steps on the Active Directory server.
Create the LDAP lookup account. This account is used by Identity Service to query the AD DS LDAP service:
PS C:\> New-ADUser -SamAccountName svc-ldap -Name "svc-ldap" -GivenName LDAP -Surname Lookups -UserPrincipalName svc-ldap@lab.local -Enabled $false -PasswordNeverExpires $true -Path 'OU=labUsers,DC=lab,DC=local'
Set a password for this account, and then enable it. You will be prompted to specify a password that complies with your AD domain’s complexity requirements:
PS C:\> Set-ADAccountPassword svc-ldap -PassThru | Enable-ADAccount
Create a group for RHOSP users, called
grp-openstack. Only members of this group can have permissions assigned in OpenStack Identity.PS C:\> NEW-ADGroup -name "grp-openstack" -groupscope Global -path "OU=labUsers,DC=lab,DC=local"
Create the Project groups:
PS C:\> NEW-ADGroup -name "grp-openstack-demo" -groupscope Global -path "OU=labUsers,DC=lab,DC=local"
PS C:\> NEW-ADGroup -name "grp-openstack-admin" -groupscope Global -path "OU=labUsers,DC=lab,DC=local"
Add the
svc-ldapuser to thegrp-openstackgroup:PS C:\> ADD-ADGroupMember "grp-openstack" -members "svc-ldap"
-
From an AD Domain Controller, use a
Certificates MMCto export your LDAPS certificate’s public key (not the private key) as a DER-encodedx509.cer file. Send this file to the RHOSP administrators. Retrieve the NetBIOS name of your AD DS domain.
PS C:\> Get-ADDomain | select NetBIOSName
NetBIOSName
-----------
LAB
Send this value to the RHOSP administrators.
1.2. Installing the Active Directory LDAPS certificate
OpenStack Identity (keystone) uses LDAPS queries to validate user accounts. To encrypt this traffic, keystone uses the certificate file defined by keystone.conf. To configure the LDAPS certificate, convert the public key received from Active Directory into the .crt format and copy the certificate to a location where keystone will be able to reference it.
When using multiple domains for LDAP authentication, you might receive various errors, such as Unable to retrieve authorized projects, or Peer's Certificate issuer is not recognized. This can arise if keystone uses the incorrect certificate for a certain domain. As a workaround, merge all of the LDAPS public keys into a single .crt bundle, and configure all of your keystone domains to use this file.
Prerequisites
- Active Directory credentials are configured.
- LDAPS certificate is exported from Active Directory.
Procedure
Copy the LDAPS public key to the node running OpenStack Identity and convert the
.certo.crt. This example uses a source certificate file namedaddc.lab.local.cer:# openssl x509 -inform der -in addc.lab.local.cer -out addc.lab.local.crt # cp addc.lab.local.crt /etc/pki/ca-trust/source/anchors
Optional: If you need to run diagnostic commands, such as
ldapsearch, you also need to add the certificate to the RHEL certificate store:Convert the
.certo.pem. This example uses a source certificate file namedaddc.lab.local.cer:# openssl x509 -inform der -in addc.lab.local.cer -out addc.lab.local.pem
Install the
.pemon the Controller node. For example, in Red Hat Enterprise Linux:# cp addc.lab.local.pem /etc/pki/ca-trust/source/anchors/ # update-ca-trust
1.3. Configuring director to use domain-specific LDAP backends
To configure director to use one or more LDAP backends, set the KeystoneLDAPDomainEnable flag to true in your heat templates, and set up environment files with the information about each LDAP backend. Director then uses a separate LDAP backend for each keystone domain.
The default directory for domain configuration files is set to /etc/keystone/domains/. You can override this by setting the required path with the keystone::domain_config_directory hiera key and adding it as an ExtraConfig parameter within an environment file.
Procedure
-
In the heat template for your deployment, set the
KeystoneLDAPDomainEnableflag totrue. This configures thedomain_specific_drivers_enabledoption in keystone within theidentityconfiguration group. -
Add a specification of the LDAP backend configuration by setting the
KeystoneLDAPBackendConfigsparameter intripleo-heat-templates, where you can then specify your required LDAP options. Create a copy of the
keystone_domain_specific_ldap_backend.yamlenvironment file:$ cp /usr/share/openstack-tripleo-heat-templates/environments/services/keystone_domain_specific_ldap_backend.yaml /home/stack/templates/
Edit the
/home/stack/templates/keystone_domain_specific_ldap_backend.yamlenvironment file and set the values to suit your deployment. For example, this parameter create a LDAP configuration for a keystone domain namedtestdomain:parameter_defaults: KeystoneLDAPDomainEnable: true KeystoneLDAPBackendConfigs: testdomain: url: ldaps://192.0.2.250 user: cn=openstack,ou=Users,dc=director,dc=example,dc=com password: RedactedComplexPassword suffix: dc=director,dc=example,dc=com user_tree_dn: ou=Users,dc=director,dc=example,dc=com user_filter: "(memberOf=cn=OSuser,ou=Groups,dc=director,dc=example,dc=com)" user_objectclass: person user_id_attribute: cnNoteThe
keystone_domain_specific_ldap_backend.yamlenvironment file contains the following deprecated write parameters:-
user_allow_create -
user_allow_update -
user_allow_delete
The values for these parameters have no effect on the deployment, and can be safely removed.
-
Optional: Add more domains to the environment file. For example:
    KeystoneLDAPBackendConfigs:
      domain1:
        url: ldaps://domain1.example.com
        user: cn=openstack,ou=Users,dc=director,dc=example,dc=com
        password: RedactedComplexPassword
        ...
      domain2:
        url: ldaps://domain2.example.com
        user: cn=openstack,ou=Users,dc=director,dc=example,dc=com
        password: RedactedComplexPassword
        ...
This results in two domains named
domain1anddomain2; each will have a different LDAP domain with its own configuration.
1.4. Granting the admin user access to the OpenStack Identity domain
To allow the admin user to access the OpenStack Identity (keystone) domain and see the Domain tab, get the ID of the domain and the admin user, and then assign the admin role to the user in the domain.
This does not grant the OpenStack admin account any permissions on the external service domain. In this case, the term domain refers to OpenStack’s usage of the keystone domain.
Procedure
This procedure uses the LAB domain. Replace the domain name with the actual name of the domain that you are configuring.
Get the ID of the
LABdomain:$ openstack domain show LAB +---------+----------------------------------+ | Field | Value | +---------+----------------------------------+ | enabled | True | | id | 6800b0496429431ab1c4efbb3fe810d4 | | name | LAB | +---------+----------------------------------+
Get the ID of the
adminuser from thedefaultdomain:$ openstack user list --domain default | grep admin | 3d75388d351846c6a880e53b2508172a | admin |
Get the ID of the
adminrole:$ openstack role list
The output depends on the external service you are integrating with:
Active Directory Domain Service (AD DS):
+----------------------------------+-----------------+
| ID                               | Name            |
+----------------------------------+-----------------+
| 01d92614cd224a589bdf3b171afc5488 | admin           |
| 034e4620ed3d45969dfe8992af001514 | member          |
| 0aa377a807df4149b0a8c69b9560b106 | ResellerAdmin   |
| 9369f2bf754443f199c6d6b96479b1fa | heat_stack_user |
| cfea5760d9c948e7b362abc1d06e557f | reader          |
| d5cb454559e44b47aaa8821df4e11af1 | swiftoperator   |
| ef3d3f510a474d6c860b4098ad658a29 | service         |
+----------------------------------+-----------------+
Red Hat Identity Manager (IdM):
+----------------------------------+---------------+
| ID                               | Name          |
+----------------------------------+---------------+
| 544d48aaffde48f1b3c31a52c35f01f9 | SwiftOperator |
| 6d005d783bf0436e882c55c62457d33d | ResellerAdmin |
| 785c70b150ee4c778fe4de088070b4cf | admin         |
| 9fe2ff9ee4384b1894a90878d3e92bab | _member_      |
+----------------------------------+---------------+
Use the domain and admin IDs to construct the command that adds the
adminuser to theadminrole of the keystoneLABdomain:# openstack role add --domain 6800b0496429431ab1c4efbb3fe810d4 --user 3d75388d351846c6a880e53b2508172a 785c70b150ee4c778fe4de088070b4cf
1.5. Granting external groups access to Red Hat OpenStack Platform projects
To grant multiple authenticated users access to Red Hat OpenStack Platform (RHOSP) resources, you can authorize certain groups from the external user management service to grant access to RHOSP projects, instead of requiring OpenStack administrators to manually allocate each user to a role in a project. As a result, all members of these groups can access pre-determined projects.
Prerequisites
Ensure that the external service administrator completed the following steps:
-
Creating a group named
grp-openstack-admin. -
Creating a group named
grp-openstack-demo. - Adding your RHOSP users to one of these groups as needed.
-
Adding your users to the
grp-openstackgroup.
-
Creating a group named
-
Create the OpenStack Identity domain. This procedure uses the
LABdomain. -
Create or choose a RHOSP project. This procedure uses a project called
demothat was created with theopenstack project create --domain default --description "Demo Project" democommand.
Procedure
Retrieve a list of user groups from the OpenStack Identity domain:
# openstack group list --domain LAB
The command output depends on the external user management service that you are integrating with:
Active Directory Domain Service (AD DS):
+------------------------------------------------------------------+---------------------+
| ID                                                               | Name                |
+------------------------------------------------------------------+---------------------+
| 185277be62ae17e498a69f98a59b66934fb1d6b7f745f14f5f68953a665b8851 | grp-openstack       |
| a8d17f19f464c4548c18b97e4aa331820f9d3be52654aa8094e698a9182cbb88 | grp-openstack-admin |
| d971bb3bd5e64a454cbd0cc7af4c0773e78d61b5f81321809f8323216938cae8 | grp-openstack-demo  |
+------------------------------------------------------------------+---------------------+
Red Hat Identity Manager (IdM):
+------------------------------------------------------------------+---------------------+
| ID                                                               | Name                |
+------------------------------------------------------------------+---------------------+
| 185277be62ae17e498a69f98a59b66934fb1d6b7f745f14f5f68953a665b8851 | grp-openstack       |
| a8d17f19f464c4548c18b97e4aa331820f9d3be52654aa8094e698a9182cbb88 | grp-openstack-admin |
| d971bb3bd5e64a454cbd0cc7af4c0773e78d61b5f81321809f8323216938cae8 | grp-openstack-demo  |
+------------------------------------------------------------------+---------------------+
Retrieve a list of roles:
# openstack role list
The command output depends on the external user management service that you are integrating with:
Active Directory Domain Service (AD DS):
+----------------------------------+-----------------+
| ID                               | Name            |
+----------------------------------+-----------------+
| 01d92614cd224a589bdf3b171afc5488 | admin           |
| 034e4620ed3d45969dfe8992af001514 | member          |
| 0aa377a807df4149b0a8c69b9560b106 | ResellerAdmin   |
| 9369f2bf754443f199c6d6b96479b1fa | heat_stack_user |
| cfea5760d9c948e7b362abc1d06e557f | reader          |
| d5cb454559e44b47aaa8821df4e11af1 | swiftoperator   |
| ef3d3f510a474d6c860b4098ad658a29 | service         |
+----------------------------------+-----------------+
Red Hat Identity Manager (IdM):
+----------------------------------+---------------+
| ID                               | Name          |
+----------------------------------+---------------+
| 0969957bce5e4f678ca6cef00e1abf8a | ResellerAdmin |
| 1fcb3c9b50aa46ee8196aaaecc2b76b7 | admin         |
| 9fe2ff9ee4384b1894a90878d3e92bab | _member_      |
| d3570730eb4b4780a7fed97eba197e1b | SwiftOperator |
+----------------------------------+---------------+
Grant the user groups access to RHOSP projects by adding them to one or more of these roles. For example, if you want users in the
grp-openstack-demogroup to be general users of thedemoproject, you must add the group to thememberor_member_role, depending on the external service that you are integrating with:Active Directory Domain Service (AD DS):
# openstack role add --project demo --group d971bb3bd5e64a454cbd0cc7af4c0773e78d61b5f81321809f8323216938cae8 member
Red Hat Identity Manager (IdM):
$ openstack role add --project demo --group d971bb3bd5e64a454cbd0cc7af4c0773e78d61b5f81321809f8323216938cae8 _member_
Result
Members of grp-openstack-demo can log in to the dashboard by entering their username and password and entering LAB in the Domain field:
If users receive the error Error: Unable to retrieve container list., and expect to be able to manage containers, then they must be added to the SwiftOperator role.
Additional resources
1.6. Granting external users access to Red Hat OpenStack Platform projects
To grant specific authenticated users from the grp-openstack group access to OpenStack resources, you can grant these users direct access to Red Hat OpenStack Platform (RHOSP) projects. Use this process in cases where you want to grant access to individual users instead of granting access to groups.
Prerequisites
Ensure that the external service administrator completed the following steps:
-
Adding your RHOSP users to the
grp-openstackgroup. -
Creating the OpenStack Identity domain. This procedure uses the
LABdomain.
-
Adding your RHOSP users to the
-
Create or choose a RHOSP project. This procedure uses a project called
demothat was created with theopenstack project create --domain default --description "Demo Project" democommand.
Procedure
Retrieve a list of users from the OpenStack Identity domain:
# openstack user list --domain LAB
 +------------------------------------------------------------------+----------------+
| ID                                                               | Name           |
+------------------------------------------------------------------+----------------+
| 1f24ec1f11aeb90520079c29f70afa060d22e2ce92b2eba7784c841ac418091e | user1          |
| 12c062faddc5f8b065434d9ff6fce03eb9259537c93b411224588686e9a38bf1 | user2          |
| afaf48031eb54c3e44e4cb0353f5b612084033ff70f63c22873d181fdae2e73c | user3          |
| e47fc21dcf0d9716d2663766023e2d8dc15a6d9b01453854a898cabb2396826e | user4          |
+------------------------------------------------------------------+----------------+
Retrieve a list of roles:
# openstack role list
The command output depends on the external user management service that you are integrating with:
Active Directory Domain Service (AD DS):
+----------------------------------+-----------------+
| ID                               | Name            |
+----------------------------------+-----------------+
| 01d92614cd224a589bdf3b171afc5488 | admin           |
| 034e4620ed3d45969dfe8992af001514 | member          |
| 0aa377a807df4149b0a8c69b9560b106 | ResellerAdmin   |
| 9369f2bf754443f199c6d6b96479b1fa | heat_stack_user |
| cfea5760d9c948e7b362abc1d06e557f | reader          |
| d5cb454559e44b47aaa8821df4e11af1 | swiftoperator   |
| ef3d3f510a474d6c860b4098ad658a29 | service         |
+----------------------------------+-----------------+
Red Hat Identity Manager (IdM):
+----------------------------------+---------------+
| ID                               | Name          |
+----------------------------------+---------------+
| 0969957bce5e4f678ca6cef00e1abf8a | ResellerAdmin |
| 1fcb3c9b50aa46ee8196aaaecc2b76b7 | admin         |
| 9fe2ff9ee4384b1894a90878d3e92bab | _member_      |
| d3570730eb4b4780a7fed97eba197e1b | SwiftOperator |
+----------------------------------+---------------+
Grant users access to RHOSP projects by adding them to one or more of these roles. For example, if you want
user1to be a general user of thedemoproject, you add them to thememberor_member_role, depending on the external service that you are integrating with:Active Directory Domain Service (AD DS):
# openstack role add --project demo --user 1f24ec1f11aeb90520079c29f70afa060d22e2ce92b2eba7784c841ac418091e member
Red Hat Identity Manager (IdM):
# openstack role add --project demo --user 1f24ec1f11aeb90520079c29f70afa060d22e2ce92b2eba7784c841ac418091e _member_
If you want
user1to be an administrative user of thedemoproject, add the user to theadminrole:# openstack role add --project demo --user 1f24ec1f11aeb90520079c29f70afa060d22e2ce92b2eba7784c841ac418091e admin
Result
The user1 user is able to log in to the dashboard by entering their external username and password and entering LAB in the Domain field:
If users receive the error Error: Unable to retrieve container list., and expect to be able to manage containers, then they must be added to the SwiftOperator role.
1.7. Viewing the list of OpenStack Identity domains and users
Use the openstack domain list command to list the available entries. Configuring multiple domains in Identity Service enables a new Domain field in the dashboard login page. Users are expected to enter the domain that matches their login credentials.
After you complete the integration, you need to decide whether to create new projects in the Default domain or in newly created keystone domains. You must consider your workflow and how you administer user accounts. If possible, use the Default domain as an internal domain to manage service accounts and the admin project, and keep your external users in a separate domain.
In this example, external accounts need to specify the LAB domain. The built-in keystone accounts, such as admin, must specify Default as their domain.
Procedure
Show the list of domains:
# openstack domain list
+----------------------------------+---------+---------+----------------------------------------------------------------------+
| ID                               | Name    | Enabled | Description                                                          |
+----------------------------------+---------+---------+----------------------------------------------------------------------+
| 6800b0496429431ab1c4efbb3fe810d4 | LAB     | True    |                                                                      |
| default                          | Default | True    | Owns users and projects available on Identity API v2. |
+----------------------------------+---------+---------+----------------------------------------------------------------------+
Show the list of users in a specific domain. This command example specifies the
--domain LABand returns users in the LAB domain that are members of thegrp-openstackgroup:# openstack user list --domain LAB
You can also append
--domain Defaultto show the built-in keystone accounts:# openstack user list --domain Default
1.8. Creating a credentials file for a non-admin user
After you configure users and domains for OpenStack Identity, you might need to create a credentials file for a non-admin user.
Procedure
Create a credentials (RC) file for a non-admin user. This example uses the
user1user in the file.$ cat overcloudrc-v3-user1 # Clear any old environment that may conflict. for key in $( set | awk '{FS="="} /^OS_/ {print $1}' ); do unset $key ; done export OS_USERNAME=user1 export NOVA_VERSION=1.1 export OS_PROJECT_NAME=demo export OS_PASSWORD=RedactedComplexPassword export OS_NO_CACHE=True export COMPUTE_API_VERSION=1.1 export no_proxy=,10.0.0.5,192.168.2.11 export OS_CLOUDNAME=overcloud export OS_AUTH_URL=https://10.0.0.5:5000/v3 export OS_AUTH_TYPE=password export PYTHONWARNINGS="ignore:Certificate has no, ignore:A true SSLContext object is not available" export OS_IDENTITY_API_VERSION=3 export OS_PROJECT_DOMAIN_NAME=Default export OS_USER_DOMAIN_NAME=LAB
1.9. Testing OpenStack Identity integration with an external user management service
To test that OpenStack Identity (keystone) successfully integrated with Active Directory Domain Service (AD DS), test user access to dashboard features.
Prerequisites
- Integration with an external user management service, such as Active Directory (AD) or Red Hat Identity Manager (IdM)
Procedure
-
Create a test user in the external user management service, and add the user to the
grp-openstackgroup. -
In Red Hat OpenStack Platform, add the user to the
_member_role of thedemoproject. - Log in to the dashboard with the credentials of the AD test user.
- Click on each of the tabs to confirm that they are presented successfully without error messages.
- Use the dashboard to build a test instance.
If you experience issues with these steps, log in to the dashboard with the admin account and perform the subsequent steps as that user. If the test is successful, it means that OpenStack is still working as expected and that an issue exists somewhere in the integration settings between OpenStack Identity and Active Directory.
Additional resources
1.10. Troubleshooting Active Directory integration
If you encounter errors when using the Active Directory integration with OpenStack Identity, you might need to test the LDAP connection or test the certificate trust configuration. You might also need to check that the LDAPS port is accessible.
Depending on the error type and location, perform only the relevant steps in this procedure.
Procedure
Test the LDAP connection by using the
ldapsearchcommand to remotely perform test queries against the Active Directory Domain Controller. A successful result here indicates that network connectivity is working, and the AD DS services are up. In this example, a test query is performed against the serveraddc.lab.localon port636:# ldapsearch -Z -x -H ldaps://addc.lab.local:636 -D "svc-ldap@lab.local" -W -b "OU=labUsers,DC=lab,DC=local" -s sub "(cn=*)" cn
Note-
ldapsearchis a part of theopenldap-clientspackage. You can install this using# dnf install openldap-clients - This command expects to find the necessary certificate in your host operating system.
-
If you receive the error
Peer's Certificate issuer is not recognized.while testing theldapsearchcommand, confirm that yourTLS_CACERTDIRpath is correctly set. For example:TLS_CACERTDIR /etc/openldap/certs
As a temporary workaround, consider disabling certificate validation.
ImportantThis setting must not be permanently configured.
In the
/etc/openldap/ldap.conf, set theTLS_REQCERTparameter toallow:TLS_REQCERT allow
If the
ldapsearchquery works after setting this value, you might need to review whether your certificate trusts are correctly configured.Use the
nccommand to check that LDAPS port636is remotely accessible. In this example, a probe is performed against the serveraddc.lab.local. Pressctrl-cto exit the prompt.# nc -v addc.lab.local 636 Ncat: Version 6.40 ( http://nmap.org/ncat ) Ncat: Connected to 192.168.200.10:636. ^C
Failure to establish a connection might indicate a firewall configuration issue.
Chapter 2. Integrating OpenStack Identity (keystone) with Red Hat Identity Manager (IdM)
When you integrate OpenStack Identity (keystone) with Red Hat Identity Manager (IdM), OpenStack Identity authenticates certain Red Hat Identity Management (IdM) users but retains authorization settings and critical service accounts in the Identity Service database. As a result, Identity Service has read-only access to IdM for user account authentication, while retaining management over the privileges assigned to authenticated accounts. You can also use tripleo-ipa or novajoin to enroll your nodes with IdM.
The configuration files for this integration are managed by Puppet. Therefore, any custom configuration that you add might be overwritten the next time you run the openstack overcloud deploy command. You can use director to configure LDAP authentication instead of manually editing the configuration files.
Review the following key terms before you plan and configure the IdM integration:
- Authentication - The process of using a password to verify that the user is who they claim to be.
- Authorization - Validating that authenticated users have proper permissions to the systems they’re attempting to access.
- Domain - Refers to the additional back ends configured in Identity Service. For example, Identity Service can be configured to authenticate users from external IdM environments. The resulting collection of users can be thought of as a domain.
The process to integrate OpenStack Identity with IdM includes the following stages:
- Enroll the undercloud and overcloud in IdM with novajoin
- Implement TLS-e on the undercloud and overcloud with Ansible
- Configure IdM server credentials and export the LDAPS certificate
- Install and configure the LDAPS certificate in OpenStack
- Configure director to use one or more LDAP backends
- Configure Controller nodes to access the IdM backend
- Configure IdM user or group access to OpenStack projects
- Verify that the domain and user lists are created correctly
- Optional: Create credential files for non-admin users
2.1. Planning the Red Hat Identity Manager (IdM) integration
When you plan your OpenStack Identity integration with Red Hat Identity Manager (IdM), ensure that both services are configured and operational and review the impact of the integration on user management and firewall settings.
- Prerequisites
- Red Hat Identity Management is configured and operational.
- Red Hat OpenStack Platform is configured and operational.
- DNS name resolution is fully functional and all hosts are registered appropriately.
- Permissions and roles
- This integration allows IdM users to authenticate to OpenStack and access resources. OpenStack service accounts (such as keystone and glance), and authorization management (permissions and roles) will remain in the Identity Service database. Permissions and roles are assigned to the IdM accounts using Identity Service management tools.
- High availability options
- This configuration creates a dependency on the availability of a single IdM server: Project users will be affected if Identity Service is unable to authenticate to the IdM Server. You can configure keystone to query a different IdM server, should one become unavailable, or you can use a load balancer. Do not use a load balancer when you use IdM with SSSD, as this configuration has failover implemented on the client.
- Outage requirements
- The Identity Service will need to be restarted in order to add the IdM back end.
- Users will be unable to access the dashboard until their accounts have been created in IdM. To reduce downtime, consider pre-staging the IdM accounts well in advance of this change.
- Firewall configuration
Communication between IdM and OpenStack consists of the following:
- Authenticating users
- IdM retrieval of the certificate revocation list (CRL) from the controllers every two hours
- Certmonger requests for new certificates upon expiration
A periodic certmonger task will continue to request new certificates if the initial request fails.
If firewalls are filtering traffic between IdM and OpenStack, you will need to allow access through the following port:
| Source | Destination | Type | Port |
|---|---|---|---|
| OpenStack Controller Node | Red Hat Identity Management | LDAPS | TCP 636 |
2.2. Identity Management (IdM) server recommendations for OpenStack
Red Hat provides the following information to help you integrate your IdM server and OpenStack environment.
For information on preparing Red Hat Enterprise Linux for an IdM installation, see Installing Identity Management.
Run the ipa-server-install command to install and configure IdM. You can use command parameters to skip interactive prompts. Use the following recommendations so that your IdM server can integrate with your Red Hat OpenStack Platform environment:
Table 2.1. Parameter recommendations
| Option | Recommendation |
|---|---|
|
| Note the value you provide. You will need this password when configuring Red Hat OpenStack Platform to work with IdM. |
|
| Note the value you provide. The undercloud and overcloud nodes require network access to this ip address. |
|
| Use this option to install an integrated DNS service on the IdM server. The undercloud and overcloud nodes use the IdM server for domain name resolution. |
|
|
Use this option to use the addresses in |
|
| Use this option to resolve reverse records and zones for the IdM server IP addresses. If neither reverse records or zones are resolvable, IdM creates the reverse zones. This simplifies the IdM deployment. |
|
| You can use both or either of these options to configure your NTP source. Both the IdM server and your OpenStack environment must have correct and synchronized time. |
You must open the firewall ports required by IdM to enable communication with Red Hat OpenStack Platform nodes. For more information, see Opening the ports required by IdM.
Additional resources
2.3. Implementing TLS-e with Ansible
You can use the new tripleo-ipa method to enable SSL/TLS on overcloud endpoints, called TLS everywhere (TLS-e). Due to the number of certificates required, Red Hat OpenStack Platform integrates with Red Hat Identity management (IdM). When you use tripleo-ipa to configure TLS-e, IdM is the certificate authority.
Prerequisites
Ensure that all configuration steps for the undercloud, such as the creation of the stack user, are complete. For more details, see Director Installation and Usage for more details
Procedure
Use the following procedure to implement TLS-e on a new installation of Red Hat OpenStack Platform, or an existing deployment that you want to configure with TLS-e. You must use this method if you deploy Red Hat OpenStack Platform with TLS-e on pre-provisioned nodes.
If you are implementing TLS-e for an existing environment, you are required to run commands such as openstack undercloud install, and openstack overcloud deploy. These procedures are idempotent and only adjust your existing deployment configuration to match updated templates and configuration files.
Configure the
/etc/resolv.conffile:Set the appropriate search domains and the nameserver on the undercloud in
/etc/resolv.conf. For example, if the deployment domain isexample.com, and the domain of the FreeIPA server isbigcorp.com, then add the following lines to /etc/resolv.conf:search example.com bigcorp.com nameserver $IDM_SERVER_IP_ADDR
Install required software:
sudo dnf install -y python3-ipalib python3-ipaclient krb5-devel
Export environmental variables with values specific to your environment.:
export IPA_DOMAIN=bigcorp.com
export IPA_REALM=BIGCORP.COM
export IPA_ADMIN_USER=$IPA_USER
export IPA_ADMIN_PASSWORD=$IPA_PASSWORD
export IPA_SERVER_HOSTNAME=ipa.bigcorp.com
export UNDERCLOUD_FQDN=undercloud.example.com
export USER=stack
export CLOUD_DOMAIN=example.com
NoteThe IdM user credentials must be an administrative user that can add new hosts and services.
Run the
undercloud-ipa-install.yamlansible playbook on the undercloud:ansible-playbook \ --ssh-extra-args "-o StrictHostKeyChecking=no -o UserKnownHostsFile=/dev/null" \ /usr/share/ansible/tripleo-playbooks/undercloud-ipa-install.yaml
Add the following parameters to undercloud.conf
undercloud_nameservers = $IDM_SERVER_IP_ADDR
overcloud_domain_name = example.com
Deploy the undercloud:
openstack undercloud install
Verification
Verify that the undercloud was enrolled correctly by completing the following steps:
List the hosts in IdM:
$ kinit admin
$ ipa host-find
Confirm that
/etc/novajoin/krb5.keytabexists on the undercloud.ls /etc/novajoin/krb5.keytab
The novajoin directory name is for legacy naming purposes only.
Configuring TLS-e on the overcloud
When you deploy the overcloud with TLS everywhere (TLS-e), IP addresses from the Undercloud and Overcloud will automatically be registered with IdM.
Before deploying the overcloud, create a YAML file
tls-parameters.yamlwith contents similar to the following. The values you select will be specific for your environment:parameter_defaults: DnsSearchDomains: ["example.com"] DnsServers: ["192.168.1.13"] CloudDomain: example.com CloudName: overcloud.example.com CloudNameInternal: overcloud.internalapi.example.com CloudNameStorage: overcloud.storage.example.com CloudNameStorageManagement: overcloud.storagemgmt.example.com CloudNameCtlplane: overcloud.ctlplane.example.com IdMServer: freeipa-0.redhat.local IdMDomain: redhat.local IdMInstallClientPackages: False resource_registry: OS::TripleO::Services::IpaClient: /usr/share/openstack-tripleo-heat-templates/deployment/ipa/ipaservices-baremetal-ansible.yaml-
The shown value of the
OS::TripleO::Services::IpaClientparameter overrides the default setting in theenable-internal-tls.yamlfile. You must ensure thetls-parameters.yamlfile followsenable-internal-tls.yamlin theopenstack overcloud deploycommand. - For more information about the parameters that you use to implement TLS-e, see Parameters for tripleo-ipa
-
The shown value of the
Deploy the overcloud. You will need to include the tls-parameters.yaml in the deployment command:
DEFAULT_TEMPLATES=/usr/share/openstack-tripleo-heat-templates/
CUSTOM_TEMPLATES=/home/stack/templates

openstack overcloud deploy \
-e ${DEFAULT_TEMPLATES}/environments/ssl/tls-everywhere-endpoints-dns.yaml \
-e ${DEFAULT_TEMPLATES}/environments/services/haproxy-public-tls-certmonger.yaml \
-e ${DEFAULT_TEMPLATES}/environments/ssl/enable-internal-tls.yaml \
-e ${CUSTOM_TEMPLATES}/tls-parameters.yaml \
...
Confirm each endpoint is using HTTPS by querying keystone for a list of endpoints:
openstack endpoint list
2.4. Enrolling nodes in Red Hat Identity Manager (IdM) with novajoin
Novajoin is the default tool that you use to enroll your nodes with Red Hat Identity Manager (IdM) as part of the deployment process. Red Hat recommends the new ansible-based tripleo-ipa solution over the default novajoin solution to configure your undercloud and overcloud with TLS-e. For more information see Implementing TLS-e with Ansible.
You must perform the enrollment process before you proceed with the rest of the IdM integration. The enrollment process includes the following steps:
- Adding the undercloud node to the certificate authority (CA)
- Adding the undercloud node to IdM
- Optional: Setting the IdM server as the DNS server for the overcloud
- Preparing the environment files and deploying the overcloud
- Testing the overcloud enrollment in IdM and in RHOSP
- Optional: Adding DNS entries for novajoin in IdM
IdM enrollment with novajoin is currently only available for the undercloud and overcloud nodes. Novajoin integration for overcloud instances is expected to be supported in a later release.
2.4.1. Adding the undercloud node to the certificate authority
Before you deploy the overcloud, add the undercloud to the certificate authority (CA) by installing the python3-novajoin package on the undercloud node and running the novajoin-ipa-setup script.
Procedure
On the undercloud node, install the
python3-novajoinpackage:$ sudo dnf install python3-novajoin
On the undercloud node, run the
novajoin-ipa-setupscript, and adjust the values to suit your deployment:$ sudo /usr/libexec/novajoin-ipa-setup \ --principal admin \ --password <IdM admin password> \ --server <IdM server hostname> \ --realm <realm> \ --domain <overcloud cloud domain> \ --hostname <undercloud hostname> \ --precreateUse the resulting One-Time Password (OTP) to enroll the undercloud.
2.4.2. Adding the undercloud node to Red Hat Identity Manager (IdM)
After you add the undercloud node to the certificate authority (CA), register the undercloud with IdM and configure novajoin. Configure the following settings in the [DEFAULT] section of the undercloud.conf file.
Procedure
Enable the
novajoinservice:[DEFAULT] enable_novajoin = true
Set a One-Time Password (OTP) so that you can register the undercloud node with IdM:
ipa_otp = <otp>
Set the overcloud’s domain name to be served by neutron’s DHCP server:
overcloud_domain_name = <domain>
Set the hostname for the undercloud:
undercloud_hostname = <undercloud FQDN>
Set IdM as the nameserver for the undercloud:
undercloud_nameservers = <IdM IP>
For larger environments, review the novajoin connection timeout values. In the
undercloud.conffile, add a reference to a new file calledundercloud-timeout.yaml:hieradata_override = /home/stack/undercloud-timeout.yaml
Add the following options to
undercloud-timeout.yaml. You can specify the timeout value in seconds, for example,5:nova::api::vendordata_dynamic_connect_timeout: <timeout value> nova::api::vendordata_dynamic_read_timeout: <timeout value>
Optional: If you want the local openSSL certificate authority to generate the SSL certificates for the public endpoints in director, set the
generate_service_certificateparameter totrue:generate_service_certificate = true
-
Save the
undercloud.conffile. Run the undercloud deployment command to apply the changes to your existing undercloud:
$ openstack undercloud install
Verification
Verify that the undercloud was enrolled correctly by completing the following steps:
List the hosts in IdM:
$ kinit admin
$ ipa host-find
Confirm that
/etc/novajoin/krb5.keytabexists on the undercloud.ls /etc/novajoin/krb5.keytab
2.4.3. Setting Red Hat Identity Manager (IdM) as the DNS server for the overcloud
To enable automatic detection of your IdM environment and easier enrollment, set IdM as your DNS server. This procedure is optional but recommended.
Procedure
Connect to your undercloud:
$ source ~/stackrc
Configure the control plane subnet to use IdM as the DNS name server:
$ openstack subnet set ctlplane-subnet --dns-nameserver <idm_server_address>
Set the
DnsServersparameter in an environment file to use your IdM server:parameter_defaults: DnsServers: ["<idm_server_address>"]
This parameter is usually defined in a custom
network-environment.yamlfile.
2.4.4. Preparing environment files and deploying the overcloud with novajoin enrollment
To deploy the overcloud with IdM integration, you create and edit environment files to configure the overcloud to use the custom domain parameters CloudDomain and CloudName based on the domains that you define in the overcloud. You then deploy the overcloud with all the environment files and any additional environment files that you need for the deployment.
Procedure
Create a copy of the
/usr/share/openstack-tripleo-heat-templates/environments/predictable-placement/custom-domain.yamlenvironment file:$ cp /usr/share/openstack-tripleo-heat-templates/environments/predictable-placement/custom-domain.yaml \ /home/stack/templates/custom-domain.yaml
Edit the
/home/stack/templates/custom-domain.yamlenvironment file and set theCloudDomainandCloudName*values to suit your deployment:parameter_defaults: CloudDomain: lab.local CloudName: overcloud.lab.local CloudNameInternal: overcloud.internalapi.lab.local CloudNameStorage: overcloud.storage.lab.local CloudNameStorageManagement: overcloud.storagemgmt.lab.local CloudNameCtlplane: overcloud.ctlplane.lab.local
Choose the implementation of TLS appropriate for your environment:
Use the
enable-tls.yamlenvironment file to protect external endpoints with your custom certificate:-
Copy
/usr/share/openstack-tripleo-heat-templates/environments/ssl/enable-tls.yamlto/home/stack/templates. -
Modify the
/home/stack/enable-tls.yamlenvironment file to include your custom certificate and key. Include the following environment files in your deployment to protect internal and external endpoints:
- enable-internal-tls.yaml
- tls-every-endpoints-dns.yaml
- custom-domain.yaml
enable-tls.yaml
openstack overcloud deploy \
  --templates \
  -e /usr/share/openstack-tripleo-heat-templates/environments/ssl/enable-internal-tls.yaml \
  -e /usr/share/openstack-tripleo-heat-templates/environments/ssl/tls-everywhere-endpoints-dns.yaml \
  -e /home/stack/templates/custom-domain.yaml \
  -e /home/stack/templates/enable-tls.yaml
-
Copy
Use the
haproxy-public-tls-certmonger.yamlenvironment file to protect external endpoints with an IdM issued certificate. For this implementation, you must create DNS entries for the VIP endpoints used by novajoin:You must create DNS entries for the VIP endpoints used by novajoin. Identify the overcloud networks located in your custom
network-environment.yaml file in `/home/stack/templates:parameter_defaults: ControlPlaneDefaultRoute: 192.168.24.1 ExternalAllocationPools: - end: 10.0.0.149 start: 10.0.0.101 InternalApiAllocationPools: - end: 172.17.1.149 start: 172.17.1.10 StorageAllocationPools: - end: 172.17.3.149 start: 172.17.3.10 StorageMgmtAllocationPools: - end: 172.17.4.149 start: 172.17.4.10Create a list of virtual IP addresses for each overcloud network in a heat template, for example,
/home/stack/public_vip.yaml.parameter_defaults: ControlFixedIPs: [{'ip_address':'192.168.24.101'}] PublicVirtualFixedIPs: [{'ip_address':'10.0.0.101'}] InternalApiVirtualFixedIPs: [{'ip_address':'172.17.1.101'}] StorageVirtualFixedIPs: [{'ip_address':'172.17.3.101'}] StorageMgmtVirtualFixedIPs: [{'ip_address':'172.17.4.101'}] RedisVirtualFixedIPs: [{'ip_address':'172.17.1.102'}]Add DNS entries to the IdM for each of the VIPs, and zones as needed:
ipa dnsrecord-add lab.local overcloud --a-rec 10.0.0.101
ipa dnszone-add ctlplane.lab.local
ipa dnsrecord-add ctlplane.lab.local overcloud --a-rec 192.168.24.101
ipa dnszone-add internalapi.lab.local
ipa dnsrecord-add internalapi.lab.local overcloud --a-rec 172.17.1.101
ipa dnszone-add storage.lab.local
ipa dnsrecord-add storage.lab.local overcloud --a-rec 172.17.3.101
ipa dnszone-add storagemgmt.lab.local
ipa dnsrecord-add storagemgmt.lab.local overcloud --a-rec 172.17.4.101
Include the following environment files in your deployment to protect internal and external endpoints:
- enable-internal-tls.yaml
- tls-everywhere-endpoints-dns.yaml
- haproxy-public-tls-certmonger.yaml
- custom-domain.yaml
public_vip.yaml
openstack overcloud deploy \
  --templates \
   -e /usr/share/openstack-tripleo-heat-templates/environments/ssl/enable-internal-tls.yaml \
   -e /usr/share/openstack-tripleo-heat-templates/environments/ssl/tls-everywhere-endpoints-dns.yaml \
   -e /usr/share/openstack-tripleo-heat-templates/environments/services/haproxy-public-tls-certmonger.yaml \
   -e /home/stack/templates/custom-domain.yaml \
   -e /home/stack/templates/public-vip.yaml
You cannot use novajoin to implement TLS everywhere (TLS-e) on a pre-existing deployment.
Additional resources
2.4.5. Testing overcloud enrollment in Red Hat Identity Manager (IdM)
After you complete the undercloud and overcloud enrollment in IdM with novajoin, you can test that the enrollment is successful by searching for an overcloud node in IdM and checking that the host entry includes Keytab:True. You can also log in to the overcloud node and confirm that the sssd command can query IdM users.
Locate an overcloud node in IdM and confirm that the host entry includes
Keytab:True:$ ipa host-show overcloud-node-01 Host name: overcloud-node-01.lab.local Principal name: host/overcloud-node-01.lab.local@LAB.LOCAL Principal alias: host/overcloud-node-01.lab.local@LAB.LOCAL SSH public key fingerprint: <snip> Password: False Keytab: True Managed by: overcloud-node-01.lab.local
Log in to the overcloud node and confirm that
sssdcan query IdM users. For example, to query an IdM user namedsusan:$ getent passwd susan uid=1108400007(susan) gid=1108400007(bob) groups=1108400007(susan)
2.5. Configuring Red Hat Identity Manager (IdM) server credentials
To configure the Red Hat Identity Manager (IdM) to integrate with OpenStack Identity, set up an LDAP account for Identity service to use, create a user group for Red Hat OpenStack users, and set up the password for the lookup account.
Prerequisites
- Red Hat Identity Manager (IdM) is configured and operational.
- Red Hat OpenStack Platform (RHOSP) is configured and operational.
- DNS name resolution is fully functional and all hosts are registered appropriately.
- IdM authentication traffic is encrypted with LDAPS, using port 636.
- Recommended: Implement IdM with a high availability or load balancing solution to avoid a single point of failure.
Procedure
Perform this procedure on the IdM server.
Create the LDAP lookup account to use in OpenStack Identity Service to query the IdM LDAP service:
# kinit admin
# ipa user-add
First name: OpenStack
Last name: LDAP
User  [radministrator]: svc-ldap
NoteReview the password expiration settings of this account, once created.
Create a group for RHOSP users, called
grp-openstack. Only members of this group can have permissions assigned in OpenStack Identity.# ipa group-add --desc="OpenStack Users" grp-openstack
Set the
svc-ldapaccount password and add it to thegrp-openstackgroup:# ipa passwd svc-ldap # ipa group-add-member --users=svc-ldap grp-openstack
Login as
svc-ldapuser and change the password when prompted:# kinit svc-ldap
2.6. Installing the Red Hat Identity Manager (IdM) LDAPS certificate
OpenStack Identity (keystone) uses LDAPS queries to validate user accounts. To encrypt this traffic, keystone uses the certificate file defined by keystone.conf. To install the LDAPS certificate, copy the certificate from the Red Hat Identity Manager (IdM) server to a location where keystone will be able to reference it, and convert the certificate from .crt to .pem format.
When using multiple domains for LDAP authentication, you might receive various errors, such as Unable to retrieve authorized projects, or Peer's Certificate issuer is not recognized. This can arise if keystone uses the incorrect certificate for a certain domain. As a workaround, merge all of the LDAPS public keys into a single .crt bundle, and configure all of your keystone domains to use this file.
Prerequisites
- IdM server credentials are configured.
Procedure
In your IdM environment, locate the LDAPS certificate. This file can be located using
/etc/openldap/ldap.conf:TLS_CACERT /etc/ipa/ca.crt
Copy the file to the Controller node that runs the keystone service. For example, the
scpcommand copies theca.crtfile to the nodenode.lab.local:# scp /etc/ipa/ca.crt root@node.lab.local:/root/
Copy the
ca.crtfile to the certificate directory. This is the location that the keystone service will use to access the certificate:# cp ca.crt /etc/pki/ca-trust/source/anchors
Optional: If you need to run diagnostic commands, such as
ldapsearch, you also need to add the certificate to the RHEL certificate store:3. On the Controller node, convert the
.crtto.pemformat:# openssl x509 -in ca.crt -out ca.pem -outform PEM
Install the
.pemon the Controller node. For example, in Red Hat Enterprise Linux:# cp ca.pem /etc/pki/ca-trust/source/anchors/ # update-ca-trust
2.7. Configuring director to use domain-specific LDAP backends
To configure director to use one or more LDAP backends, set the KeystoneLDAPDomainEnable flag to true in your heat templates, and set up environment files with the information about each LDAP backend. Director then uses a separate LDAP backend for each keystone domain.
The default directory for domain configuration files is set to /etc/keystone/domains/. You can override this by setting the required path with the keystone::domain_config_directory hiera key and adding it as an ExtraConfig parameter within an environment file.
Procedure
-
In the heat template for your deployment, set the
KeystoneLDAPDomainEnableflag totrue. This configures thedomain_specific_drivers_enabledoption in keystone within theidentityconfiguration group. -
Add a specification of the LDAP backend configuration by setting the
KeystoneLDAPBackendConfigsparameter intripleo-heat-templates, where you can then specify your required LDAP options. Create a copy of the
keystone_domain_specific_ldap_backend.yamlenvironment file:$ cp /usr/share/openstack-tripleo-heat-templates/environments/services/keystone_domain_specific_ldap_backend.yaml /home/stack/templates/
Edit the
/home/stack/templates/keystone_domain_specific_ldap_backend.yamlenvironment file and set the values to suit your deployment. For example, this parameter create a LDAP configuration for a keystone domain namedtestdomain:parameter_defaults: KeystoneLDAPDomainEnable: true KeystoneLDAPBackendConfigs: testdomain: url: ldaps://192.0.2.250 user: cn=openstack,ou=Users,dc=director,dc=example,dc=com password: RedactedComplexPassword suffix: dc=director,dc=example,dc=com user_tree_dn: ou=Users,dc=director,dc=example,dc=com user_filter: "(memberOf=cn=OSuser,ou=Groups,dc=director,dc=example,dc=com)" user_objectclass: person user_id_attribute: cnNoteThe
keystone_domain_specific_ldap_backend.yamlenvironment file contains the following deprecated write parameters:-
user_allow_create -
user_allow_update -
user_allow_delete
The values for these parameters have no effect on the deployment, and can be safely removed.
-
Optional: Add more domains to the environment file. For example:
    KeystoneLDAPBackendConfigs:
      domain1:
        url: ldaps://domain1.example.com
        user: cn=openstack,ou=Users,dc=director,dc=example,dc=com
        password: RedactedComplexPassword
        ...
      domain2:
        url: ldaps://domain2.example.com
        user: cn=openstack,ou=Users,dc=director,dc=example,dc=com
        password: RedactedComplexPassword
        ...
This results in two domains named
domain1anddomain2; each will have a different LDAP domain with its own configuration.
2.8. Granting the admin user access to the OpenStack Identity domain
To allow the admin user to access the OpenStack Identity (keystone) domain and see the Domain tab, get the ID of the domain and the admin user, and then assign the admin role to the user in the domain.
This does not grant the OpenStack admin account any permissions on the external service domain. In this case, the term domain refers to OpenStack’s usage of the keystone domain.
Procedure
This procedure uses the LAB domain. Replace the domain name with the actual name of the domain that you are configuring.
Get the ID of the
LABdomain:$ openstack domain show LAB +---------+----------------------------------+ | Field | Value | +---------+----------------------------------+ | enabled | True | | id | 6800b0496429431ab1c4efbb3fe810d4 | | name | LAB | +---------+----------------------------------+
Get the ID of the
adminuser from thedefaultdomain:$ openstack user list --domain default | grep admin | 3d75388d351846c6a880e53b2508172a | admin |
Get the ID of the
adminrole:$ openstack role list
The output depends on the external service you are integrating with:
Active Directory Domain Service (AD DS):
+----------------------------------+-----------------+
| ID                               | Name            |
+----------------------------------+-----------------+
| 01d92614cd224a589bdf3b171afc5488 | admin           |
| 034e4620ed3d45969dfe8992af001514 | member          |
| 0aa377a807df4149b0a8c69b9560b106 | ResellerAdmin   |
| 9369f2bf754443f199c6d6b96479b1fa | heat_stack_user |
| cfea5760d9c948e7b362abc1d06e557f | reader          |
| d5cb454559e44b47aaa8821df4e11af1 | swiftoperator   |
| ef3d3f510a474d6c860b4098ad658a29 | service         |
+----------------------------------+-----------------+
Red Hat Identity Manager (IdM):
+----------------------------------+---------------+
| ID                               | Name          |
+----------------------------------+---------------+
| 544d48aaffde48f1b3c31a52c35f01f9 | SwiftOperator |
| 6d005d783bf0436e882c55c62457d33d | ResellerAdmin |
| 785c70b150ee4c778fe4de088070b4cf | admin         |
| 9fe2ff9ee4384b1894a90878d3e92bab | _member_      |
+----------------------------------+---------------+
Use the domain and admin IDs to construct the command that adds the
adminuser to theadminrole of the keystoneLABdomain:# openstack role add --domain 6800b0496429431ab1c4efbb3fe810d4 --user 3d75388d351846c6a880e53b2508172a 785c70b150ee4c778fe4de088070b4cf
2.9. Granting external groups access to Red Hat OpenStack Platform projects
To grant multiple authenticated users access to Red Hat OpenStack Platform (RHOSP) resources, you can authorize certain groups from the external user management service to grant access to RHOSP projects, instead of requiring OpenStack administrators to manually allocate each user to a role in a project. As a result, all members of these groups can access pre-determined projects.
Prerequisites
Ensure that the external service administrator completed the following steps:
-
Creating a group named
grp-openstack-admin. -
Creating a group named
grp-openstack-demo. - Adding your RHOSP users to one of these groups as needed.
-
Adding your users to the
grp-openstackgroup.
-
Creating a group named
-
Create the OpenStack Identity domain. This procedure uses the
LABdomain. -
Create or choose a RHOSP project. This procedure uses a project called
demothat was created with theopenstack project create --domain default --description "Demo Project" democommand.
Procedure
Retrieve a list of user groups from the OpenStack Identity domain:
# openstack group list --domain LAB
The command output depends on the external user management service that you are integrating with:
Active Directory Domain Service (AD DS):
+------------------------------------------------------------------+---------------------+
| ID                                                               | Name                |
+------------------------------------------------------------------+---------------------+
| 185277be62ae17e498a69f98a59b66934fb1d6b7f745f14f5f68953a665b8851 | grp-openstack       |
| a8d17f19f464c4548c18b97e4aa331820f9d3be52654aa8094e698a9182cbb88 | grp-openstack-admin |
| d971bb3bd5e64a454cbd0cc7af4c0773e78d61b5f81321809f8323216938cae8 | grp-openstack-demo  |
+------------------------------------------------------------------+---------------------+
Red Hat Identity Manager (IdM):
+------------------------------------------------------------------+---------------------+
| ID                                                               | Name                |
+------------------------------------------------------------------+---------------------+
| 185277be62ae17e498a69f98a59b66934fb1d6b7f745f14f5f68953a665b8851 | grp-openstack       |
| a8d17f19f464c4548c18b97e4aa331820f9d3be52654aa8094e698a9182cbb88 | grp-openstack-admin |
| d971bb3bd5e64a454cbd0cc7af4c0773e78d61b5f81321809f8323216938cae8 | grp-openstack-demo  |
+------------------------------------------------------------------+---------------------+
Retrieve a list of roles:
# openstack role list
The command output depends on the external user management service that you are integrating with:
Active Directory Domain Service (AD DS):
+----------------------------------+-----------------+
| ID                               | Name            |
+----------------------------------+-----------------+
| 01d92614cd224a589bdf3b171afc5488 | admin           |
| 034e4620ed3d45969dfe8992af001514 | member          |
| 0aa377a807df4149b0a8c69b9560b106 | ResellerAdmin   |
| 9369f2bf754443f199c6d6b96479b1fa | heat_stack_user |
| cfea5760d9c948e7b362abc1d06e557f | reader          |
| d5cb454559e44b47aaa8821df4e11af1 | swiftoperator   |
| ef3d3f510a474d6c860b4098ad658a29 | service         |
+----------------------------------+-----------------+
Red Hat Identity Manager (IdM):
+----------------------------------+---------------+
| ID                               | Name          |
+----------------------------------+---------------+
| 0969957bce5e4f678ca6cef00e1abf8a | ResellerAdmin |
| 1fcb3c9b50aa46ee8196aaaecc2b76b7 | admin         |
| 9fe2ff9ee4384b1894a90878d3e92bab | _member_      |
| d3570730eb4b4780a7fed97eba197e1b | SwiftOperator |
+----------------------------------+---------------+
Grant the user groups access to RHOSP projects by adding them to one or more of these roles. For example, if you want users in the
grp-openstack-demogroup to be general users of thedemoproject, you must add the group to thememberor_member_role, depending on the external service that you are integrating with:Active Directory Domain Service (AD DS):
# openstack role add --project demo --group d971bb3bd5e64a454cbd0cc7af4c0773e78d61b5f81321809f8323216938cae8 member
Red Hat Identity Manager (IdM):
$ openstack role add --project demo --group d971bb3bd5e64a454cbd0cc7af4c0773e78d61b5f81321809f8323216938cae8 _member_
Result
Members of grp-openstack-demo can log in to the dashboard by entering their username and password and entering LAB in the Domain field:
If users receive the error Error: Unable to retrieve container list., and expect to be able to manage containers, then they must be added to the SwiftOperator role.
2.10. Granting external users access to Red Hat OpenStack Platform projects
To grant specific authenticated users from the grp-openstack group access to OpenStack resources, you can grant these users direct access to Red Hat OpenStack Platform (RHOSP) projects. Use this process in cases where you want to grant access to individual users instead of granting access to groups.
Prerequisites
Ensure that the external service administrator completed the following steps:
-
Adding your RHOSP users to the
grp-openstackgroup. -
Creating the OpenStack Identity domain. This procedure uses the
LABdomain.
-
Adding your RHOSP users to the
-
Create or choose a RHOSP project. This procedure uses a project called
demothat was created with theopenstack project create --domain default --description "Demo Project" democommand.
Procedure
Retrieve a list of users from the OpenStack Identity domain:
# openstack user list --domain LAB
 +------------------------------------------------------------------+----------------+
| ID                                                               | Name           |
+------------------------------------------------------------------+----------------+
| 1f24ec1f11aeb90520079c29f70afa060d22e2ce92b2eba7784c841ac418091e | user1          |
| 12c062faddc5f8b065434d9ff6fce03eb9259537c93b411224588686e9a38bf1 | user2          |
| afaf48031eb54c3e44e4cb0353f5b612084033ff70f63c22873d181fdae2e73c | user3          |
| e47fc21dcf0d9716d2663766023e2d8dc15a6d9b01453854a898cabb2396826e | user4          |
+------------------------------------------------------------------+----------------+
Retrieve a list of roles:
# openstack role list
The command output depends on the external user management service that you are integrating with:
Active Directory Domain Service (AD DS):
+----------------------------------+-----------------+
| ID                               | Name            |
+----------------------------------+-----------------+
| 01d92614cd224a589bdf3b171afc5488 | admin           |
| 034e4620ed3d45969dfe8992af001514 | member          |
| 0aa377a807df4149b0a8c69b9560b106 | ResellerAdmin   |
| 9369f2bf754443f199c6d6b96479b1fa | heat_stack_user |
| cfea5760d9c948e7b362abc1d06e557f | reader          |
| d5cb454559e44b47aaa8821df4e11af1 | swiftoperator   |
| ef3d3f510a474d6c860b4098ad658a29 | service         |
+----------------------------------+-----------------+
Red Hat Identity Manager (IdM):
+----------------------------------+---------------+
| ID                               | Name          |
+----------------------------------+---------------+
| 0969957bce5e4f678ca6cef00e1abf8a | ResellerAdmin |
| 1fcb3c9b50aa46ee8196aaaecc2b76b7 | admin         |
| 9fe2ff9ee4384b1894a90878d3e92bab | _member_      |
| d3570730eb4b4780a7fed97eba197e1b | SwiftOperator |
+----------------------------------+---------------+
Grant users access to RHOSP projects by adding them to one or more of these roles. For example, if you want
user1to be a general user of thedemoproject, you add them to thememberor_member_role, depending on the external service that you are integrating with:Active Directory Domain Service (AD DS):
# openstack role add --project demo --user 1f24ec1f11aeb90520079c29f70afa060d22e2ce92b2eba7784c841ac418091e member
Red Hat Identity Manager (IdM):
# openstack role add --project demo --user 1f24ec1f11aeb90520079c29f70afa060d22e2ce92b2eba7784c841ac418091e _member_
If you want
user1to be an administrative user of thedemoproject, add the user to theadminrole:# openstack role add --project demo --user 1f24ec1f11aeb90520079c29f70afa060d22e2ce92b2eba7784c841ac418091e admin
Result
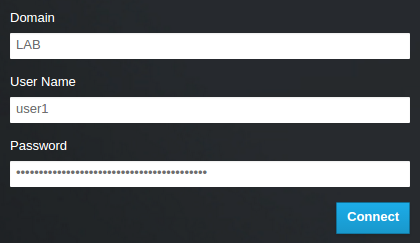
The user1 user is able to log in to the dashboard by entering their external username and password and entering LAB in the Domain field:
If users receive the error Error: Unable to retrieve container list., and expect to be able to manage containers, then they must be added to the SwiftOperator role.
2.11. Viewing the list of OpenStack Identity domains and users
Use the openstack domain list command to list the available entries. Configuring multiple domains in Identity Service enables a new Domain field in the dashboard login page. Users are expected to enter the domain that matches their login credentials.
After you complete the integration, you need to decide whether to create new projects in the Default domain or in newly created keystone domains. You must consider your workflow and how you administer user accounts. If possible, use the Default domain as an internal domain to manage service accounts and the admin project, and keep your external users in a separate domain.
In this example, external accounts need to specify the LAB domain. The built-in keystone accounts, such as admin, must specify Default as their domain.
Procedure
Show the list of domains:
# openstack domain list
+----------------------------------+---------+---------+----------------------------------------------------------------------+
| ID                               | Name    | Enabled | Description                                                          |
+----------------------------------+---------+---------+----------------------------------------------------------------------+
| 6800b0496429431ab1c4efbb3fe810d4 | LAB     | True    |                                                                      |
| default                          | Default | True    | Owns users and projects available on Identity API v2. |
+----------------------------------+---------+---------+----------------------------------------------------------------------+
Show the list of users in a specific domain. This command example specifies the
--domain LABand returns users in the LAB domain that are members of thegrp-openstackgroup:# openstack user list --domain LAB
You can also append
--domain Defaultto show the built-in keystone accounts:# openstack user list --domain Default
2.12. Creating a credentials file for a non-admin user
After you configure users and domains for OpenStack Identity, you might need to create a credentials file for a non-admin user.
Procedure
Create a credentials (RC) file for a non-admin user. This example uses the
user1user in the file.$ cat overcloudrc-v3-user1 # Clear any old environment that may conflict. for key in $( set | awk '{FS="="} /^OS_/ {print $1}' ); do unset $key ; done export OS_USERNAME=user1 export NOVA_VERSION=1.1 export OS_PROJECT_NAME=demo export OS_PASSWORD=RedactedComplexPassword export OS_NO_CACHE=True export COMPUTE_API_VERSION=1.1 export no_proxy=,10.0.0.5,192.168.2.11 export OS_CLOUDNAME=overcloud export OS_AUTH_URL=https://10.0.0.5:5000/v3 export OS_AUTH_TYPE=password export PYTHONWARNINGS="ignore:Certificate has no, ignore:A true SSLContext object is not available" export OS_IDENTITY_API_VERSION=3 export OS_PROJECT_DOMAIN_NAME=Default export OS_USER_DOMAIN_NAME=LAB
2.13. Testing OpenStack Identity integration with an external user management service
To test that OpenStack Identity (keystone) successfully integrated with Active Directory Domain Service (AD DS), test user access to dashboard features.
Prerequisites
- Integration with an external user management service, such as Active Directory (AD) or Red Hat Identity Manager (IdM)
Procedure
-
Create a test user in the external user management service, and add the user to the
grp-openstackgroup. -
In Red Hat OpenStack Platform, add the user to the
_member_role of thedemoproject. - Log in to the dashboard with the credentials of the AD test user.
- Click on each of the tabs to confirm that they are presented successfully without error messages.
- Use the dashboard to build a test instance.
If you experience issues with these steps, log in to the dashboard with the admin account and perform the subsequent steps as that user. If the test is successful, it means that OpenStack is still working as expected and that an issue exists somewhere in the integration settings between OpenStack Identity and Active Directory.
Additional resources
2.14. Troubleshooting Red Hat Identity Manager (IdM) integration
If you encounter errors when using the Red Hat Identity Manager (IdM) integration with OpenStack Identity, you might need to test the LDAP connection or test the certificate trust configuration. You might also need to check that the LDAPS port is accessible.
Depending on the error type and location, perform only the relevant steps in this procedure.
Procedure
Test the LDAP connection by using the
ldapsearchcommand to remotely perform test queries against the IdM server. A successful result here indicates that network connectivity is working, and the IdM services are up. In this example, a test query is performed against the serveridm.lab.localon port636:# ldapsearch -D "cn=directory manager" -H ldaps://idm.lab.local:636 -b "dc=lab,dc=local" -s sub "(objectclass=*)" -w RedactedComplexPassword
Noteldapsearchis a part of theopenldap-clientspackage. You can install this using# dnf install openldap-clients.Use the
nccommand to check that LDAPS port636is remotely accessible. In this example, a probe is performed against the serveridm.lab.local. Pressctrl-cto exit the prompt.# nc -v idm.lab.local 636 Ncat: Version 6.40 ( http://nmap.org/ncat ) Ncat: Connected to 192.168.200.10:636. ^C
Failure to establish a connection could indicate a firewall configuration issue.