
Chapter 1. Active Directory Integration
This chapter describes how to integrate Identity Service (keystone) with Active Directory Domain Services. In this use case, Identity Service authenticates certain Active Directory Domain Services (AD DS) users, while retaining authorization settings and critical service accounts in the Identity Service database. As a result, Identity Service has read-only access to AD DS for user account authentication, while retaining management over the privileges assigned to authenticated accounts.
If you are using director, see Chapter 4, Using domain-specific LDAP backends with director. This is because the configuration files referenced below are managed by Puppet. Consequently, any custom configuration you add might be overwritten whenever you run the openstack overcloud deploy process.
1.1. Key terms
- Authentication - The process of using a password to verify that the user is who they claim to be.
- Authorization - Validating that authenticated users have proper permissions to the resources they are attempting to access.
- Domain - This term is not the same as an AD DS domain, and instead refers to the additional namespaces that are configured in Identity Service for partitioning users, groups, and projects. These separate domains can be configured to authenticate users in different LDAP or AD DS environments.
1.2. Assumptions
This example deployment makes the following assumptions:
- Active Directory Domain Services is configured and operational.
- Red Hat OpenStack Platform is configured and operational.
- DNS name resolution is fully functional and all hosts are registered appropriately.
- AD DS authentication traffic is encrypted with LDAPS, using port 636.
1.3. Impact Statement
These steps allow AD DS users to authenticate to OpenStack and access resources. OpenStack service accounts (such as keystone and glance), and authorization management (permissions, roles, projects) will remain in the Identity Service database. Permissions and roles are assigned to the AD DS accounts using Identity Service management tools.
1.3.1. High Availability options
This configuration creates a dependency on the availability of a single Active Directory Domain Controller; Project users will be affected if Identity Service is unable to authenticate to the AD Domain Controller. A number of options are available to manage this risk; for example, you might configure Identity Service to query a DNS alias or a load balancing appliance, rather than an individual AD Domain Controller. You can also configure keystone to query a different Domain Controller, should one become unavailable. See Section 1.14, “Configure high availability” for more information.
1.4. Outage requirements
- The Identity Service will need to be restarted to add the AD DS back end.
- The Compute services on all nodes will need to be restarted in order to switch over to keystone v3.
- Users will be unable to access the dashboard until their accounts have been created in AD DS. To reduce downtime, consider pre-staging the AD DS accounts well in advance of this change.
1.5. Firewall configuration
If firewalls are filtering traffic between AD DS and OpenStack, you will need to allow access through the following port:
| Source | Destination | Type | Port |
|---|---|---|---|
| OpenStack Controller Node | Active Directory Domain Controller | LDAPS | TCP 636 |
1.6. Configure Active Directory Domain Services
This section describes the tasks that Active Directory administrators will need to complete:
Table 1.1. Configuration steps
| Task | Details |
| Create a service account. |
This can be named according to your naming convention for service accounts, for example: |
| Create a user group. |
If a user needs access to OpenStack, they must be a member of this group. This can be named according to your naming convention for user groups, for example: |
| Create the Project groups. |
Each OpenStack Project will require a corresponding AD group. For example, |
| Configure the service account. |
The service account |
| Export the LDAPS public key. |
Export the public key (not the private key) in the following format: |
| Send the key to the OpenStack administrators. | The OpenStack administrators will use this key to encrypt LDAPS communications between OpenStack and Active Directory. |
| Retrieve the NetBIOS name of your AD DS domain. | The OpenStack administrators will use this name for the Keystone domain, allowing consistent domain naming between the environments. |
For example, the procedure below shows the PowerShell commands that would be run on the Active Directory Domain Controller:
Create the LDAP lookup account. This account is used by Identity Service to query the AD DS LDAP service:
PS C:\> New-ADUser -SamAccountName svc-ldap -Name "svc-ldap" -GivenName LDAP -Surname Lookups -UserPrincipalName svc-ldap@lab.local -Enabled $false -PasswordNeverExpires $true -Path 'OU=labUsers,DC=lab,DC=local'
Set a password for this account, and then enable it. You will be prompted to specify a password that complies with your AD domain’s complexity requirements:
PS C:\> Set-ADAccountPassword svc-ldap -PassThru | Enable-ADAccount
Create a group for OpenStack users, called
grp-openstack.PS C:\> NEW-ADGroup -name "grp-openstack" -groupscope Global -path "OU=labUsers,DC=lab,DC=local"
Create the Project groups:
PS C:\> NEW-ADGroup -name "grp-openstack-demo" -groupscope Global -path "OU=labUsers,DC=lab,DC=local"
PS C:\> NEW-ADGroup -name "grp-openstack-admin" -groupscope Global -path "OU=labUsers,DC=lab,DC=local"
Add the
svc-ldapuser to thegrp-openstackgroup:PS C:\> ADD-ADGroupMember "grp-openstack" -members "svc-ldap"
-
From an AD Domain Controller, use a
Certificates MMCto export your LDAPS certificate’s public key (not the private key) as a DER-encodedx509.cer file. Send this file to the OpenStack administrators. Retrieve the NetBIOS name of your AD DS domain.
PS C:\> Get-ADDomain | select NetBIOSName
NetBIOSName
-----------
LAB
Send this value to the OpenStack administrators.
1.7. Configure the LDAPS certificate
When using multiple domains for LDAP authentication, you might receive various errors, such as Unable to retrieve authorized projects, or Peer's Certificate issuer is not recognized. This can arise if keystone uses the incorrect certificate for a certain domain. As a workaround, merge all of the LDAPS public keys into a single .crt bundle, and configure all of your keystone domains to use this file.
Keystone uses LDAPS queries to validate user accounts. To encrypt this traffic, keystone uses the certificate file defined by keystone.conf. This procedure converts the public key received from Active Directory into the .crt format, and copies to a location where keystone will be able to reference it.
Copy the LDAPS public key to the node running OpenStack Identity (keystone), and convert the
.certo.crt. This example uses a source certificate file namedaddc.lab.local.cer:# openssl x509 -outform der -in addc.lab.local.pem -out addc.lab.local.crt # cp addc.lab.local.crt /etc/pki/ca-trust/source/anchors
Optionally, if you need to run diagnostic commands, such as ldapsearch, you will also need to add the certificate to the RHEL certificate store:
Convert the
.certo.pem. This example uses a source certificate file namedaddc.lab.local.cer:# openssl x509 -inform der -in addc.lab.local.cer -out addc.lab.local.pem
Install the
.pemon your OpenStack controller. For example, in Red Hat Enterprise Linux:# cp addc.lab.local.pem /etc/pki/ca-trust/source/anchors/ # update-ca-trust
1.8. Configure Identity Service
These steps prepare Identity Service (keystone) for integration with AD DS.
If you are using director, note that the configuration files referenced below are managed by Puppet. Consequently, any custom configuration you add might be overwritten whenever you run the openstack overcloud deploy process. To apply these settings to director-based deployments, see Chapter 4, Using domain-specific LDAP backends with director.
1.8.1. Configure the controller
If you intend to update any configuration files, you need to be aware that certain OpenStack services now run within containers; this applies to keystone, nova, and cinder, among others. As a result, there are certain administration practices to consider:
-
Do not update any configuration file you might find on the physical node’s host operating system, for example,
/etc/cinder/cinder.conf. This is because the containerized service does not reference this file. Do not update the configuration file running within the container. This is because any changes are lost once you restart the container.
Instead, if you need to add any changes to containerized services, you will need to update the configuration file that is used to generate the container. These are stored within
/var/lib/config-data/puppet-generated/For example:
-
keystone:
/var/lib/config-data/puppet-generated/keystone/etc/keystone/keystone.conf -
cinder:
/var/lib/config-data/puppet-generated/cinder/etc/cinder/cinder.conf nova:
/var/lib/config-data/puppet-generated/nova/etc/nova/nova.confAny changes will then be applied once you restart the service. For example:
sudo systemctl restart tripleo_keystone
Perform this procedure on each OpenStack node running the keystone service:
Configure SELinux:
# setsebool -P authlogin_nsswitch_use_ldap=on
The output might include messages similar to this. They can be ignored:
Full path required for exclude: net:[4026532245].
Create the
domainsdirectory:# mkdir /var/lib/config-data/puppet-generated/keystone/etc/keystone/domains/ # chown 42425:42425 /var/lib/config-data/puppet-generated/keystone/etc/keystone/domains/
Configure keystone to use multiple back ends:
NoteYou might need to install
crudiniusingdnf install crudini.# crudini --set /var/lib/config-data/puppet-generated/keystone/etc/keystone/keystone.conf identity domain_specific_drivers_enabled true # crudini --set /var/lib/config-data/puppet-generated/keystone/etc/keystone/keystone.conf identity domain_config_dir /etc/keystone/domains # crudini --set /var/lib/config-data/puppet-generated/keystone/etc/keystone/keystone.conf assignment driver sql
NoteIf you are using director, note that
/var/lib/config-data/puppet-generated/keystone/etc/keystone/keystone.confis managed by Puppet. Consequently, any custom configuration you add might be overwritten whenever you run theopenstack overcloud deployprocess. As a result, you might need to re-add this configuration manually each time. For director-based deployments, see Chapter 4, Using domain-specific LDAP backends with director.Enable multiple domains in dashboard. Add these lines to
/var/lib/config-data/puppet-generated/horizon/etc/openstack-dashboard/local_settings:OPENSTACK_API_VERSIONS = { "identity": 3 } OPENSTACK_KEYSTONE_MULTIDOMAIN_SUPPORT = True OPENSTACK_KEYSTONE_DEFAULT_DOMAIN = 'Default'NoteIf you are using director, note that
/var/lib/config-data/puppet-generated/horizon/etc/openstack-dashboard/local_settingsis managed by Puppet. Consequently, any custom configuration you add might be overwritten whenever you run theopenstack overcloud deployprocess. As a result, you might need to re-add this configuration manually each time.Restart the horizon container to apply the settings:
$ sudo systemctl restart tripleo_horizon
Configure an additional back end:
In this example,
LABis the NetBIOS name to use as the Identity Service domain.Create the keystone domain for AD DS integration.
Use the NetBIOS name value retrieved previously as the domain name. This approach allows you to present a consistent domain name to users during the login process. For example, if the NetBIOS name is
LAB:$ openstack domain create LAB
NoteIf this command is not available, check that you have enabled keystone v3 for your command line session by running
# source overcloudrc-v3.Create the configuration file:
To add the AD DS back end, enter the LDAP settings in a new file called
/var/lib/config-data/puppet-generated/keystone/etc/keystone/domains/keystone.LAB.conf(whereLABis the NetBIOS name retrieved previously). You will need to edit the sample settings below to suit your AD DS deployment:[ldap] url = ldaps://addc.lab.local:636 user = CN=svc-ldap,OU=labUsers,DC=lab,DC=local password = RedactedComplexPassword suffix = DC=lab,DC=local user_tree_dn = OU=labUsers,DC=lab,DC=local user_objectclass = person user_filter = (|(memberOf=cn=grp-openstack,OU=labUsers,DC=lab,DC=local)(memberOf=cn=grp-openstack-admin,OU=labUsers,DC=lab,DC=local)(memberOf=memberOf=cn=grp-openstack-demo,OU=labUsers,DC=lab,DC=local)) user_id_attribute = sAMAccountName user_name_attribute = sAMAccountName user_mail_attribute = mail user_pass_attribute = user_enabled_attribute = userAccountControl user_enabled_mask = 2 user_enabled_default = 512 user_attribute_ignore = password,tenant_id,tenants group_objectclass = group group_tree_dn = OU=labUsers,DC=lab,DC=local group_filter = (CN=grp-openstack*) group_id_attribute = cn group_name_attribute = name use_tls = False tls_cacertfile =/etc/pki/ca-trust/source/anchors/anchorsaddc.lab.local.pem query_scope = sub chase_referrals = false [identity] driver = ldap
Explanation of each setting:
Setting Description urlThe AD Domain Controller to use for authentication. Uses LDAPS port
636.userThe Distinguished Name of an AD account to use for LDAP queries. For example, you can locate the Distinguished Name value of the svc-ldap account in AD using
Get-ADuser svc-ldap | select DistinguishedNamepasswordThe plaintext password of the AD account used above.
suffixThe Distinguished Name of your AD domain. You can locate this value using
Get-ADDomain | select DistinguishedNameuser_tree_dnThe Organizational Unit (OU) that contains the OpenStack accounts.
user_objectclassDefines the type of LDAP user. For AD, use the
persontype.user_filterFilters the users presented to Identity Service. As a result, only members of the grp-openstack group can have permissions defined in Identity Service. This value requires the full Distinguished Name of the group:
Get-ADGroup grp-openstack | select DistinguishedNameuser_id_attributeMaps the AD value to use for user IDs.
user_name_attributeMaps the AD value to use for names.
user_mail_attributeMaps the AD value to use for user email addresses.
user_pass_attributeLeave this value blank.
user_enabled_attributeThe AD setting that validates whether the account is enabled.
user_enabled_maskDefines the value to check to determine whether an account is enabled. Used when booleans are not returned.
user_enabled_defaultThe AD value that indicates that an account is enabled.
user_attribute_ignoreDefines user attributes that Identity Service should disregard.
group_objectclassMaps the AD value to use for groups.
group_tree_dnThe Organizational Unit (OU) that contains the user groups.
group_filterFilters the groups presented to Identity Service.
group_id_attributeMaps the AD value to use for group IDs.
group_name_attributeMaps the AD value to use for group names.
use_tlsDefines whether TLS is to be used. This needs to be disabled if you are encrypting with LDAPS rather than STARTTLS.
tls_cacertfileSpecifies the path to the .crt certificate file.
query_scopeConfigures Identity Service to also search within nested child OUs, when locating users that are members of the
grp-openstackgroup.chase_referralsSet to
false, this setting preventspython-ldapfrom chasing all referrals with anonymous access.
Change ownership of the configuration file to the keystone user:
# chown 42425:42425 /var/lib/config-data/puppet-generated/keystone/etc/keystone/domains/keystone.LAB.conf
Restart the keystone service to apply the changes:
# sudo podman exec -it keystone pkill -HUP -f keystone
Grant the
adminuser access to the domain:NoteThis does not grant the OpenStack admin account any permissions on the actual AD DS domain. In this case, the term domain refers to OpenStack’s usage of the keystone domain.
Get the
IDof theLABdomain:# openstack domain show LAB +---------+----------------------------------+ | Field | Value | +---------+----------------------------------+ | enabled | True | | id | 6800b0496429431ab1c4efbb3fe810d4 | | name | LAB | +---------+----------------------------------+
Get the
IDvalue of the admin user:# openstack user list --domain default | grep admin | 3d75388d351846c6a880e53b2508172a | admin |
Get the
IDvalue of the admin role:# openstack role list +----------------------------------+-----------------+ | ID | Name | +----------------------------------+-----------------+ | 01d92614cd224a589bdf3b171afc5488 | admin | | 034e4620ed3d45969dfe8992af001514 | member | | 0aa377a807df4149b0a8c69b9560b106 | ResellerAdmin | | 9369f2bf754443f199c6d6b96479b1fa | heat_stack_user | | cfea5760d9c948e7b362abc1d06e557f | reader | | d5cb454559e44b47aaa8821df4e11af1 | swiftoperator | | ef3d3f510a474d6c860b4098ad658a29 | service | +----------------------------------+-----------------+
Use the returned domain and admin IDs to construct the command that adds the
adminuser to theadminrole of the keystoneLABdomain:# openstack role add --domain 6800b0496429431ab1c4efbb3fe810d4 --user 3d75388d351846c6a880e53b2508172a 785c70b150ee4c778fe4de088070b4cf
View the list of users in the AD DS domain by adding the NetBIOS name to the command:
NoteIt might take some time for the LDAP to become queryable after a reboot or service restart.
# openstack user list --domain LAB
View the service accounts in the local Identity Service database:
# openstack user list --domain default
1.8.2. Allow Active Directory group members to access Projects
To allow authenticated users access to OpenStack resources, the recommended method is to authorize certain Active Directory groups to grant access to Projects. This saves the OpenStack administrators from having to allocate each user to a role in a Project. Instead, the Active Directory groups are granted roles in Projects. As a result, Active Directory users that are members of these Active Directory groups will be able to access pre-determined Projects.
If you would prefer to manually manage the authorization of individual Active Directory users, see Section 1.8.3, “Allow Active Directory users to access Projects”.
This section presumes that the Active Directory administrator has already completed these steps:
-
Create a group named
grp-openstack-adminin Active Directory. -
Create a group named
grp-openstack-demoin Active Directory. - Add your Active Directory users to one of the above groups, as needed.
-
Add your Active Directory users to the
grp-openstackgroup. -
Have a designated project in mind. This example uses a project called
demo, created usingopenstack project create --domain default --description "Demo Project" demo.
These steps assign a role to an AD group. Group members will then have permission to access OpenStack resources.
Retrieve a list of AD groups:
# openstack group list --domain LAB +------------------------------------------------------------------+---------------------+ | ID | Name | +------------------------------------------------------------------+---------------------+ | 185277be62ae17e498a69f98a59b66934fb1d6b7f745f14f5f68953a665b8851 | grp-openstack | | a8d17f19f464c4548c18b97e4aa331820f9d3be52654aa8094e698a9182cbb88 | grp-openstack-admin | | d971bb3bd5e64a454cbd0cc7af4c0773e78d61b5f81321809f8323216938cae8 | grp-openstack-demo | +------------------------------------------------------------------+---------------------+
Retrieve a list of roles:
# openstack role list
+----------------------------------+-----------------+
| ID                               | Name            |
+----------------------------------+-----------------+
| 01d92614cd224a589bdf3b171afc5488 | admin           |
| 034e4620ed3d45969dfe8992af001514 | member          |
| 0aa377a807df4149b0a8c69b9560b106 | ResellerAdmin   |
| 9369f2bf754443f199c6d6b96479b1fa | heat_stack_user |
| cfea5760d9c948e7b362abc1d06e557f | reader          |
| d5cb454559e44b47aaa8821df4e11af1 | swiftoperator   |
| ef3d3f510a474d6c860b4098ad658a29 | service         |
+----------------------------------+-----------------+
Grant the Active Directory groups access to Projects by adding them to one or more of these roles. For example, if you want users in the
grp-openstack-demogroup to be general users of thedemoproject, you must add the group to thememberrole:# openstack role add --project demo --group d971bb3bd5e64a454cbd0cc7af4c0773e78d61b5f81321809f8323216938cae8 member
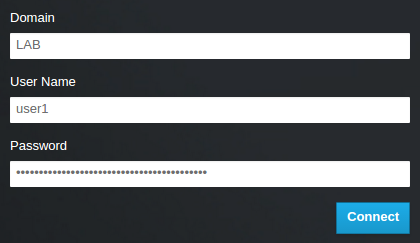
As a result, members of grp-openstack-demo are able to log in to the dashboard by entering their AD DS username and password, when also entering LAB in the Domain field:
If users receive the error Error: Unable to retrieve container list., and expect to be able to manage containers, then they must be added to the SwiftOperator role.
1.8.3. Allow Active Directory users to access Projects
AD DS users that are members of the grp-openstack AD group can be granted permission to log in to a Project in the dashboard:
Retrieve a list of AD users:
# openstack user list --domain LAB +------------------------------------------------------------------+----------------+ | ID | Name | +------------------------------------------------------------------+----------------+ | 1f24ec1f11aeb90520079c29f70afa060d22e2ce92b2eba7784c841ac418091e | user1 | | 12c062faddc5f8b065434d9ff6fce03eb9259537c93b411224588686e9a38bf1 | user2 | | afaf48031eb54c3e44e4cb0353f5b612084033ff70f63c22873d181fdae2e73c | user3 | | e47fc21dcf0d9716d2663766023e2d8dc15a6d9b01453854a898cabb2396826e | user4 | +------------------------------------------------------------------+----------------+
Retrieve a list of roles:
# openstack role list
+----------------------------------+-----------------+
| ID                               | Name            |
+----------------------------------+-----------------+
| 01d92614cd224a589bdf3b171afc5488 | admin           |
| 034e4620ed3d45969dfe8992af001514 | member          |
| 0aa377a807df4149b0a8c69b9560b106 | ResellerAdmin   |
| 9369f2bf754443f199c6d6b96479b1fa | heat_stack_user |
| cfea5760d9c948e7b362abc1d06e557f | reader          |
| d5cb454559e44b47aaa8821df4e11af1 | swiftoperator   |
| ef3d3f510a474d6c860b4098ad658a29 | service         |
+----------------------------------+-----------------+
Grant users access to Projects by adding them to one or more of these roles. For example, if you want
user1to be a general user of thedemoproject, you add them to thememberrole:# openstack role add --project demo --user 1f24ec1f11aeb90520079c29f70afa060d22e2ce92b2eba7784c841ac418091e member
Or, if you want
user1to be an administrative user of thedemoproject, you add them to theadminrole:# openstack role add --project demo --user 1f24ec1f11aeb90520079c29f70afa060d22e2ce92b2eba7784c841ac418091e admin
As a result,
user1is able to log in to the dashboard by entering their AD DS username and password, when also enteringLABin theDomainfield:
If users receive the error Error: Unable to retrieve container list., and expect to be able to manage containers, then they must be added to the SwiftOperator role.
1.9. Grant access to the Domain tab
To allow the admin user to see the Domain tab, you will need to assign it the admin role in the default domain:
Find the
adminuser’s UUID:$ openstack user list | grep admin | a6a8adb6356f4a879f079485dad1321b | admin |
Add the
adminrole in thedefaultdomain to theadminuser:$ openstack role add --domain default --user a6a8adb6356f4a879f079485dad1321b admin
As a result, the
adminuser can now see theDomaintab.
1.10. Creating a new project
After you have completed these integration steps, when you create a new project you will need to decide whether to create it in the Default domain, or in the keystone domain you’ve just created. This decision can be reached by considering your workflow, and how you administer user accounts. The Default domain can be be thought of as an internal domain, used to manage service accounts and the admin project. For separation purposes, you might want to keep your AD-backed users in a separate keystone domain.
1.11. Changes to the dashboard log in process
Configuring multiple domains in Identity Service enables a new Domain field in the dashboard login page.
Users are expected to enter the domain that matches their login credentials. This field must be manually filled with one of the domains present in keystone. Use the openstack command to list the available entries.
In this example, AD DS accounts will need to specify the LAB domain. The built-in keystone accounts, such as admin, must specify Default as their domain:
# openstack domain list
+----------------------------------+---------+---------+----------------------------------------------------------------------+
| ID                               | Name    | Enabled | Description                                                          |
+----------------------------------+---------+---------+----------------------------------------------------------------------+
| 6800b0496429431ab1c4efbb3fe810d4 | LAB     | True    |                                                                      |
| default                          | Default | True    | Owns users and projects available on Identity API v2. |
+----------------------------------+---------+---------+----------------------------------------------------------------------+
1.12. Changes to the command line
For certain commands, you might need to specify the applicable domain. For example, appending --domain LAB in this command returns users in the LAB domain (that are members of the grp-openstack group):
# openstack user list --domain LAB
Appending --domain Default returns the built-in keystone accounts:
# openstack user list --domain Default
1.13. Test AD DS integration
This procedure validates AD DS integration by testing user access to dashboard features:
-
Create a test user in AD, and add the user to the
grp-openstackAD DS group. -
Add the user to the
_member_role of thedemoproject. - Log in to the dashboard using the credentials of the AD test user.
- Click on each of the tabs to confirm that they are presented successfully without error messages.
- Use the dashboard to build a test instance.
If you experience issues with these steps, perform steps 3-5 with the built-in admin account. If successful, this demonstrates that OpenStack is still working as expected, and that an issue exists somewhere within the AD ←→ Identity integration settings. See Section 1.16, “Troubleshooting”.
1.14. Configure high availability
With keystone v3 enabled, you can make this configuration highly available by listing multiple AD Domain Controllers in the configuration file for that domain.
Add a second server to the
urlentry. For example, updating theurlsetting in thekeystone.LAB.conffile will have keystone send all query traffic to the first Domain Controller in the list,addc.lab.local:url = ldaps://addc.lab.local,ldaps://addc2.lab.local
If a query to addc.lab.local fails due to it being unavailable, Identity Service will attempt to query the next server in the list:
addc2.lab.local. Note that this configuration does not perform queries in a round-robin fashion, so cannot be considered a load-balancing solution.Set the network timeout in
/etc/openldap/ldap.conf:NETWORK_TIMEOUT 2
In addition, if you have firewalls configured between the controller and the domain controllers, then you should not configure the domain controllers to silently drop packets from the controller. This will allow python-keystoneclient to properly detect outages and redirect the request to the next domain controller in the list.
There might be connection delays while queries are being redirected to the second LDAP server in the list. This is because the connection to the first server must first time out before the second is attempted.
1.15. Create a RC file for a non-admin user
You might need to create a RC file for a non-admin user. For example:
$ cat overcloudrc-v3-user1
# Clear any old environment that may conflict.
for key in $( set | awk '{FS="="}  /^OS_/ {print $1}' ); do unset $key ; done
export OS_USERNAME=user1
export NOVA_VERSION=1.1
export OS_PROJECT_NAME=demo
export OS_PASSWORD=RedactedComplexPassword
export OS_NO_CACHE=True
export COMPUTE_API_VERSION=1.1
export no_proxy=,10.0.0.5,192.168.2.11
export OS_CLOUDNAME=overcloud
export OS_AUTH_URL=https://10.0.0.5:5000/v3
export OS_AUTH_TYPE=password
export PYTHONWARNINGS="ignore:Certificate has no, ignore:A true
SSLContext object is not available"
export OS_IDENTITY_API_VERSION=3
export OS_PROJECT_DOMAIN_NAME=Default
export OS_USER_DOMAIN_NAME=LAB
1.16. Troubleshooting
1.16.1. Test LDAP connections
This command expects to find the necessary certificate in your host operating system. See the Configure the LDAPS certificate section for more information.
Use ldapsearch to remotely perform test queries against the Active Directory Domain Controller. A successful result here indicates that network connectivity is working, and the AD DS services are up. In this example, a test query is performed against the server addc.lab.local on port 636:
# ldapsearch -Z -x -H ldaps://addc.lab.local:636 -D "svc-ldap@lab.local" -W -b "OU=labUsers,DC=lab,DC=local" -s sub "(cn=*)" cn
ldapsearch is a part of the openldap-clients package. You can install this using # dnf install openldap-clients
1.16.2. Test the Certificate Trust Configuration
If you receive the error Peer's Certificate issuer is not recognized. while testing with ldapsearch, confirm that your TLS_CACERTDIR path is correctly set. For example:
- /etc/openldap/ldap.conf
TLS_CACERTDIR /etc/openldap/certs
As a temporary workaround, you may want to consider disabling certificate validation.
This setting must not be permanently configured:
-
/etc/openldap/ldap.conf
TLS_REQCERT allow
If the ldapsearch query works after setting this value, you might need to review whether your certificate trusts are correctly configured.
1.16.3. Test port access
Use nc to check that LDAPS port 636 is remotely accessible. In this example, a probe is performed against the server addc.lab.local. Press ctrl-c to exit the prompt.
# nc -v addc.lab.local 636
Ncat: Version 6.40 ( http://nmap.org/ncat )
Ncat: Connected to 192.168.200.10:636.
^C
Failure to establish a connection could indicate a firewall configuration issue.