
Chapter 5. Execute the Restore Procedure
If an error occurs during an update or upgrade, you can restore either the undercloud or overcloud Control Plane nodes or both so that they assume their previous state.
Generally, the steps are:
- Burn the bootable ISO image to a DVD, or load it through ILO remote access.
- Boot the node that requires restoration from the recovery medium.
-
Select Recover <hostname>, where
<hostname>is the name of the node to restore. -
Login as
root - Recover the backup.
5.1. Restore the Undercloud
If an error occurs during a fast-forward upgrade, you can restore the undercloud node to its previously saved state using the ISO image created using the Section 4.1, “Back Up the Undercloud” procedure. The back up procedure stores the ISO images on the backup node in the folders created during the Section 2.2, “Create and Export the Backup Directory” step.
Procedure
- Shutdown the undercloud node. Ensure that the undercloud node is shutdown completely before proceeding.
-
Restore the undercloud node by booting it with the ISO image created during the backup process. The ISO image is located under the
/ctl_plane_backupsdirectory of the Backup node. During the boot phase a boot menu will appear.
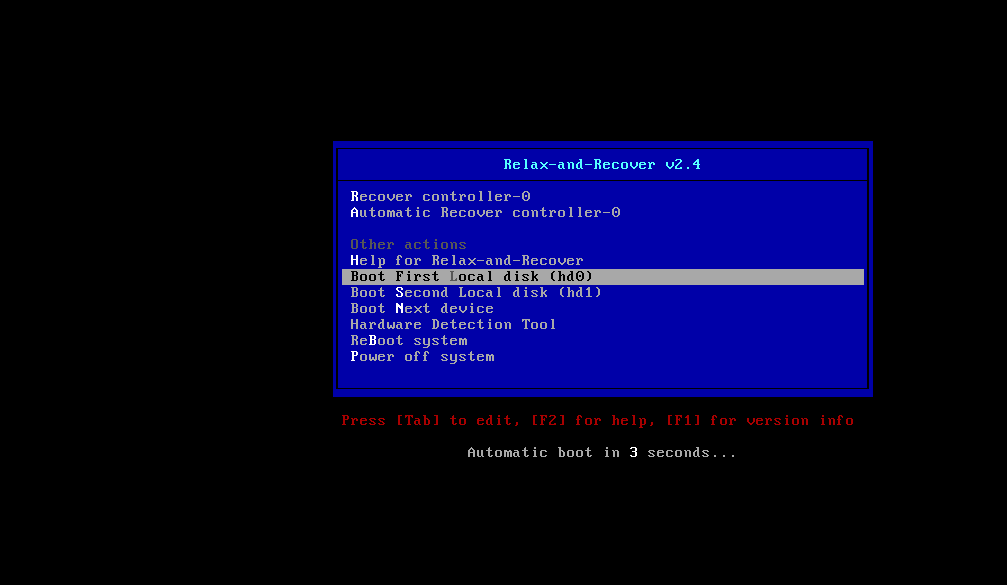
Select
Recover <Undercloud Node>where<Undercloud Node>is the name of the Undercloud node.NoteDO NOT select
Automatic Recover <Undercloud Node>. It could lead to an SELinux context mismatch.You should see the following:
Welcome to Relax-and-Recover. Run "rear recover" to restore your system!
RESCUE <Undercloud Node>:~ # rear recover
The image restore should progress quickly. Once complete, the console should echo the following:
Finished recovering your system
Exiting rear recover
Running exit tasks
Once the command line interface is available, the image is restored. Switch the node off.
RESCUE <Undercloud Node>:~ # poweroff
On boot up, the node will resume with its previous state.
5.2. Restore the Control Plane
If an error occurs during a fast-forward upgrade, you can restore the Control Plane nodes to their previously saved state using the ISO images created using the Section 4.2, “Back up the control plane” procedure. To restore the control plane, you must restore all Control Plane nodes to the previous state to ensure state consistency.
- Shutdown each Control Plane node. Ensure that the Control Plane nodes are shutdown completely before proceeding.
-
Restore the Control Plane nodes by booting them with the ISO image created during the backup process. The ISO images are located under the
/ctl_plane_backupsdirectory of the Backup node. During the boot phase a boot menu will appear.
Select
Recover <Control Plane Node>where<Control Plane Node>is the name of the Control Plane node.NoteDO NOT select
Automatic Recover <Control Plane Node>. It could lead to an SELinux context mismatch.You should see the following:
Welcome to Relax-and-Recover. Run "rear recover" to restore your system!
RESCUE <Control Plane Node>:~ # rear recover
The image restore should progress quickly. Once complete, the console should echo the following:
Finished recovering your system
Exiting rear recover
Running exit tasks
Once the command line interface is available, the image is restored. Switch the node off.
RESCUE <Control Plane Node>:~ # poweroff
On boot up, the node will resume with its previous state.
Check the status of pacemaker to ensure the services are running properly.
# pcs status