
Chapter 1. Deploy OpenShift Container Storage using local storage devices
Deploying OpenShift Container Storage on OpenShift Container Platform using local storage devices provides you with the option to create internal cluster resources. Follow this deployment method to use local storage to back persistent volumes for your OpenShift Container Platform applications.
Use this section to deploy OpenShift Container Storage on IBM Z infrastructure where OpenShift Container Platform is already installed.
To deploy Red Hat OpenShift Container Storage using local storage, follow these steps:
1.1. Requirements for installing OpenShift Container Storage using local storage devices
Node requirements
The cluster must consist of at least three OpenShift Container Platform worker nodes with locally attached-storage devices on each of them.
- Each of the three selected nodes must have at least one raw block device available to be used by OpenShift Container Storage.
- The devices you use must be empty; the disks must not include physical volumes (PVs), volume groups (VGs), or logical volumes (LVs) remaining on the disk.
See the Resource requirements section in Planning guide.
- For storage nodes, FCP storage devices are required. DASD is not supported.
- Multicloud Object Gateway is not supported.
Minimum starting node requirements [Technology Preview]
An OpenShift Container Storage cluster will be deployed with minimum configuration when the standard deployment resource requirement is not met. See Resource requirements section in Planning guide.
1.2. Installing Red Hat OpenShift Container Storage Operator
You can install Red Hat OpenShift Container Storage Operator using the Red Hat OpenShift Container Platform Operator Hub.
Prerequisites
- Access to an OpenShift Container Platform cluster using an account with cluster-admin and Operator installation permissions.
- You have at least three worker nodes in the RHOCP cluster.
- For additional resource requirements, see Planning your deployment.
When you need to override the cluster-wide default node selector for OpenShift Container Storage, you can use the following command in command line interface to specify a blank node selector for the
openshift-storagenamespace (create openshift-storage namespace in this case):$ oc annotate namespace openshift-storage openshift.io/node-selector=
-
Taint a node as
infrato ensure only Red Hat OpenShift Container Storage resources are scheduled on that node. This helps you save on subscription costs. For more information, see How to use dedicated worker nodes for Red Hat OpenShift Container Storage chapter in Managing and Allocating Storage Resources guide.
Procedure
- Navigate in the web console to the click Operators → OperatorHub.
- Scroll or type a keyword into the Filter by keyword box to search for OpenShift Container Storage Operator.
- Click Install on the OpenShift Container Storage operator page.
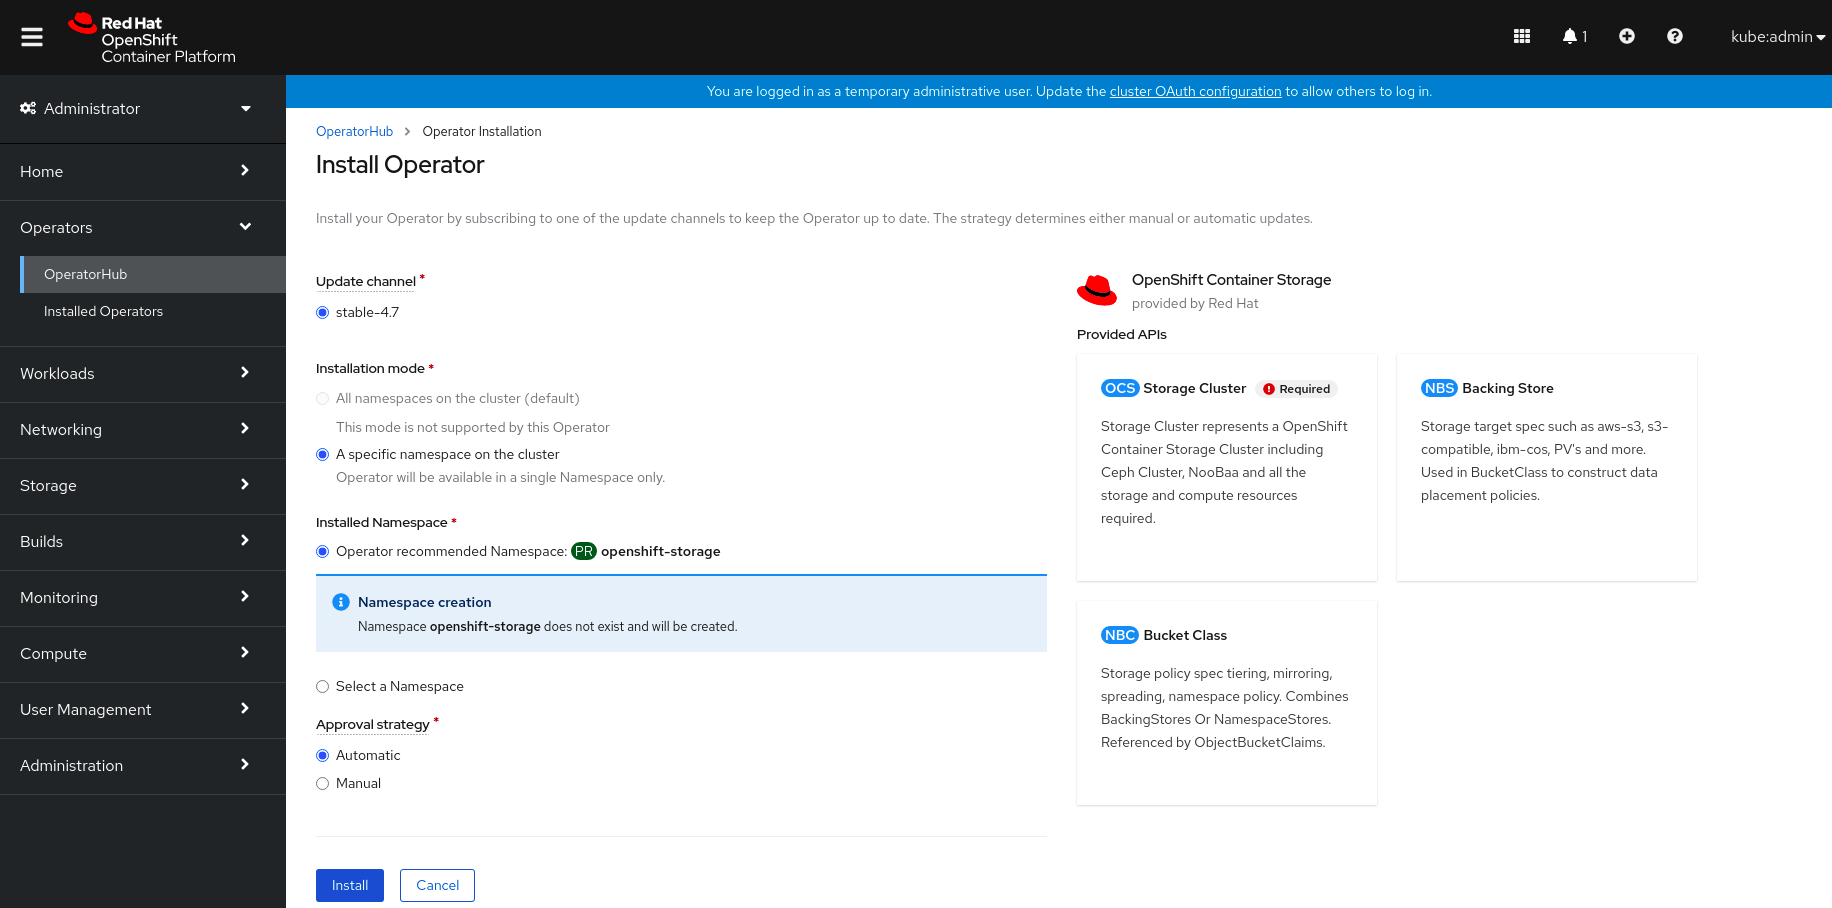
On the Install Operator page, the following required options are selected by default:
- Update Channel as stable-4.7.
- Installation Mode as A specific namespace on the cluster.
-
Installed Namespace as Operator recommended namespace openshift-storage. If Namespace
openshift-storagedoes not exist, it will be created during the operator installation. - Select Approval Strategy as Automatic or Manual.
Click Install.
If you selected Automatic updates, then the Operator Lifecycle Manager (OLM) automatically upgrades the running instance of your Operator without any intervention.
If you selected Manual updates, then the OLM creates an update request. As a cluster administrator, you must then manually approve that update request to have the Operator updated to the new version.
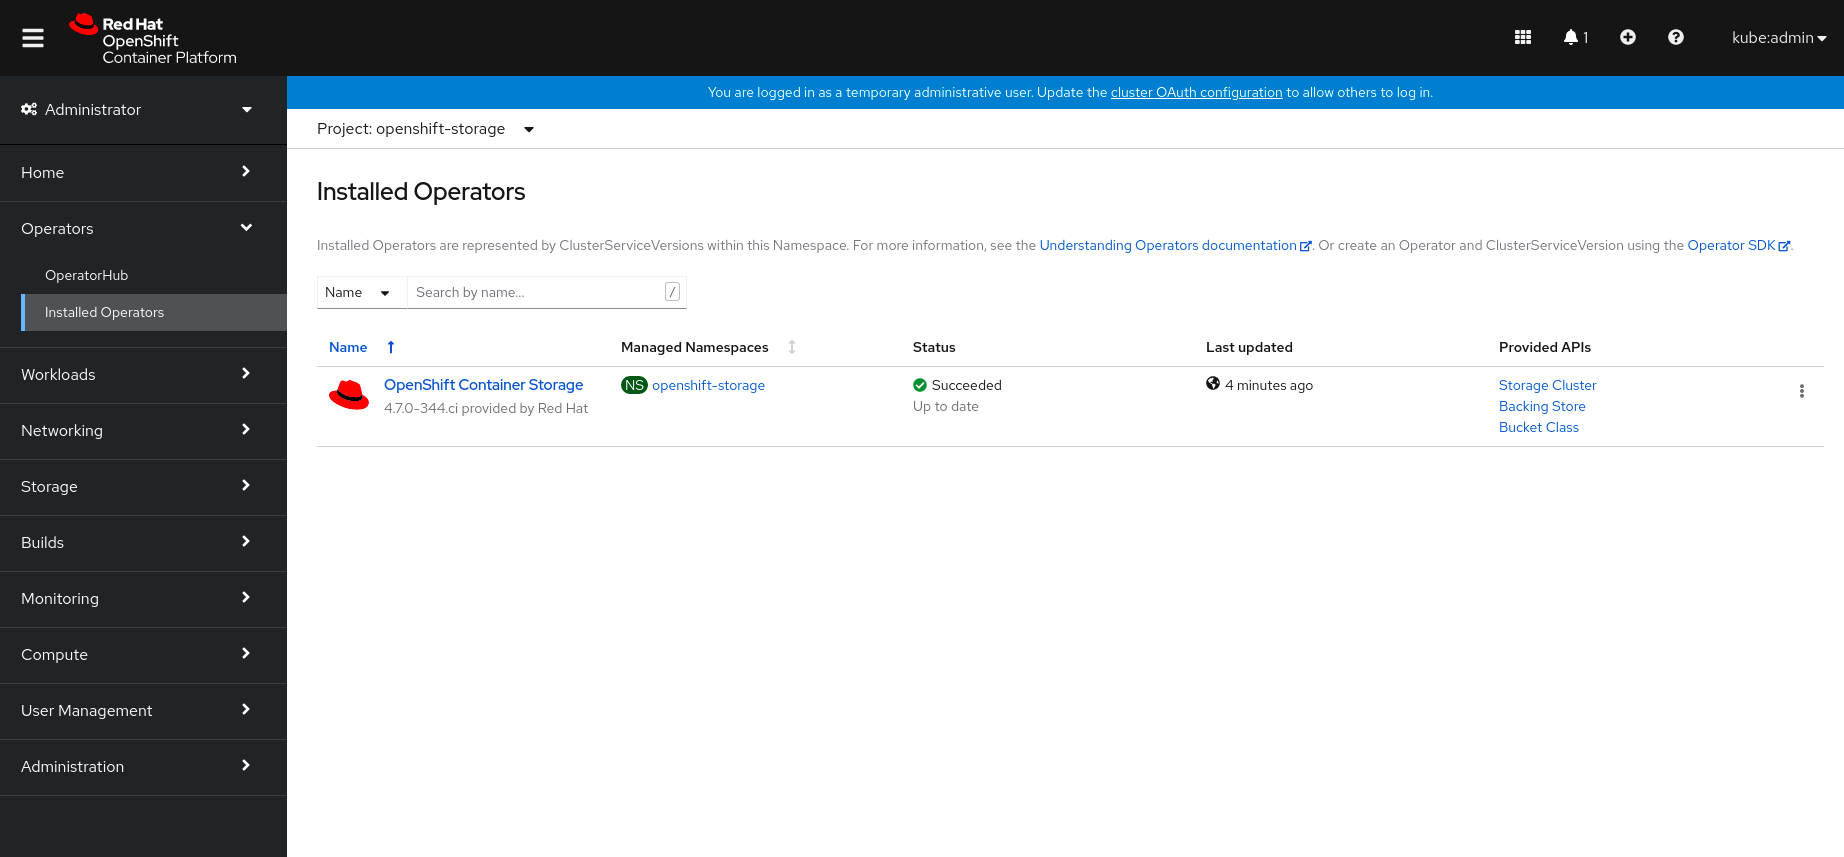
Verification steps
Verify that the OpenShift Container Storage Operator shows a green tick indicating successful installation.
Next steps
- Create OpenShift Container Storage cluster.
For information, see Creating OpenShift Container Storage cluster on IBM Z.
1.3. Installing Local Storage Operator
Procedure
- Log in to the OpenShift Web Console.
- Click Operators → OperatorHub.
- Search for Local Storage Operator from the list of operators and click on it.
- Click Install.
Set the following options on the Install Operator page:
- Update Channel as stable-4.7
- Installation Mode as A specific namespace on the cluster.
- Installed Namespace as Operator recommended namespace openshift-local-storage.
- Approval Strategy as Automatic
- Click Install.
-
Verify that the Local Storage Operator shows the Status as
Succeeded.
1.4. Finding available storage devices (optional)
This step is additional information and can be skipped as the disks are automatically discovered during storage cluster creation. Use this procedure to identify the device names for each of the three or more worker nodes that you have labeled with the OpenShift Container Storage label cluster.ocs.openshift.io/openshift-storage='' before creating Persistent Volumes (PV) for IBM Z.
Procedure
List and verify the name of the worker nodes with the OpenShift Container Storage label.
$ oc get nodes -l=cluster.ocs.openshift.io/openshift-storage=
Example output:
NAME          STATUS   ROLES    AGE     VERSION
bmworker01    Ready    worker   6h45m   v1.16.2
bmworker02    Ready    worker   6h45m   v1.16.2
bmworker03    Ready    worker   6h45m   v1.16.2
Log in to each worker node that is used for OpenShift Container Storage resources and find the unique
by-iddevice name for each available raw block device.$ oc debug node/<node name>
Example output:
$ oc debug node/bmworker01
Starting pod/bmworker01-debug ...
To use host binaries, run `chroot /host`
Pod IP: 10.0.135.71
If you don't see a command prompt, try pressing enter.
sh-4.2# chroot /host
sh-4.4# lsblk
NAME                         MAJ:MIN RM   SIZE RO TYPE MOUNTPOINT
loop0                          7:0    0   500G  0 loop
sda                            8:0    0   120G  0 disk
|-sda1                         8:1    0   384M  0 part /boot
`-sda4                         8:4    0 119.6G  0 part
`-coreos-luks-root-nocrypt   253:0    0 119.6G  0 dm   /sysroot
sdb                            8:16   0   500G  0 disk
In this example, for
bmworker01, the available local device issdb.Identify the unique ID for each of the devices selected in Step 2.
sh-4.4#ls -l /dev/disk/by-id/  | grep sdb
lrwxrwxrwx. 1 root root  9 Feb  3 16:49 scsi-360050763808104bc2800000000000259 -> ../../sdb
lrwxrwxrwx. 1 root root  9 Feb  3 16:49 scsi-SIBM_2145_00e020412f0aXX00 -> ../../sdb
lrwxrwxrwx. 1 root root  9 Feb  3 16:49 scsi-0x60050763808104bc2800000000000259 -> ../../sdb
In the above example, the ID for the local device
sdbscsi-0x60050763808104bc2800000000000259
- Repeat the above step to identify the device ID for all the other nodes that have the storage devices to be used by OpenShift Container Storage. See this Knowledge Base article for more details.
1.5. Creating OpenShift Container Storage cluster on IBM Z
Use this procedure to create storage cluster on IBM Z.
Prerequisites
- Ensure that all the requirements in the Requirements for installing OpenShift Container Storage using local storage devices section are met.
- You must have three worker nodes with the same storage type and size attached to each node (for example, 200 GB) to use local storage devices on IBM Z or LinuxONE.
Procedure
- Log into the OpenShift Web Console.
Click Operators → Installed Operators to view all the installed operators.
Ensure that the Project selected is openshift-storage.
Figure 1.1. OpenShift Container Storage Operator page
Click OpenShift Container Storage.
Figure 1.2. Details tab of OpenShift Container Storage

Click Create Instance link of Storage Cluster.
Figure 1.3. Create Storage Cluster page

- Select Internal-Attached devices for the Select Mode. By default, Internal is selected.
Create a storage cluster using the wizard that includes disk discovery, storage class creation, and storage cluster creation.
You are prompted to install the Local Storage Operator if it is not already installed. Click Install and install the operator as described in Installing Local Storage Operator.
- Discover disks
You can discover a list of potentially usable disks on the selected nodes. Block disks and partitions that are not in use and available for provisioning persistent volumes (PVs) are discovered.
Figure 1.4. Discovery Disks wizard page

Choose one of the following:
- All nodes to discover disks in all the nodes.
Select nodes to discover disks from a subset of the listed nodes.
To find specific worker nodes in the cluster, you can filter nodes on the basis of Name or Label. Name allows you to search by name of the node and Label allows you to search by selecting the predefined label.
If the nodes selected do not match the OpenShift Container Storage cluster requirement of an aggregated 30 CPUs and 72 GiB of RAM, a minimal cluster will be deployed. For minimum starting node requirements, see Resource requirements section in Planning guide.
NoteIf the nodes to be selected are tainted and not discovered in the wizard, follow the steps provided in the Red Hat Knowledgebase Solution as a workaround.
- Click Next.
- Create Storage Class
You can create a dedicated storage class to consume storage by filtering a set of storage volumes.
Figure 1.5. Create Storage Class wizard page
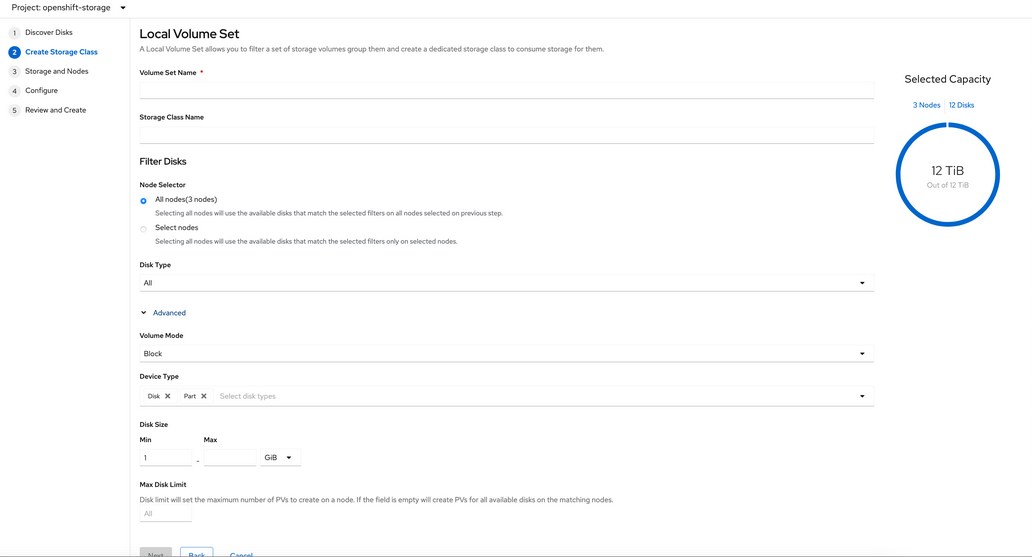
- Enter the Volume Set Name.
- Enter the Storage Class Name. By default, the volume set name appears for the storage class name.
The nodes selected for disk discovery in the earlier step are displayed in the Filter Disks section. Choose one of the following:
- All nodes to select all the nodes for which you discovered the devices.
Select nodes to select a subset of the nodes for which you discovered the devices.
To find specific worker nodes in the cluster, you can filter nodes on the basis of Name or Label. Name allows you to search by name of the node and Label allows you to search by selecting the predefined label.
It is recommended that the worker nodes are spread across three different physical nodes, racks or failure domains for high availability.
NoteEnsure OpenShift Container Storage rack labels are aligned with physical racks in the datacenter to prevent a double node failure at the failure domain level.
Select the required Disk Type. The following options are available:
All
Selects all types of disks present on the nodes. By default, this option is selected.
SSD/NVME
Selects only SSD NVME type of disks.
HDD
Selects only HDD type of disks.
In the Advanced section, you can set the following:
Volume Mode
Block is selected by default.
Disk Size
Minimum and maximum available size of the device that needs to be included.
NoteYou must set a minimum size of 100GB for the device.
Max Disk Limit
This indicates the maximum number of PVs that can be created on a node. If this field is left empty, then PVs are created for all the available disks on the matching nodes.
(Optional) You can view the selected capacity of the disks on the selected nodes using the Select Capacity chart.
This chart might take a few minutes to reflect the disks that are discovered in the previous step.
You can click on the Nodes and Disks links on the chart to bring up the list of nodes and disks to view more details.
Figure 1.6. List of selected nodes
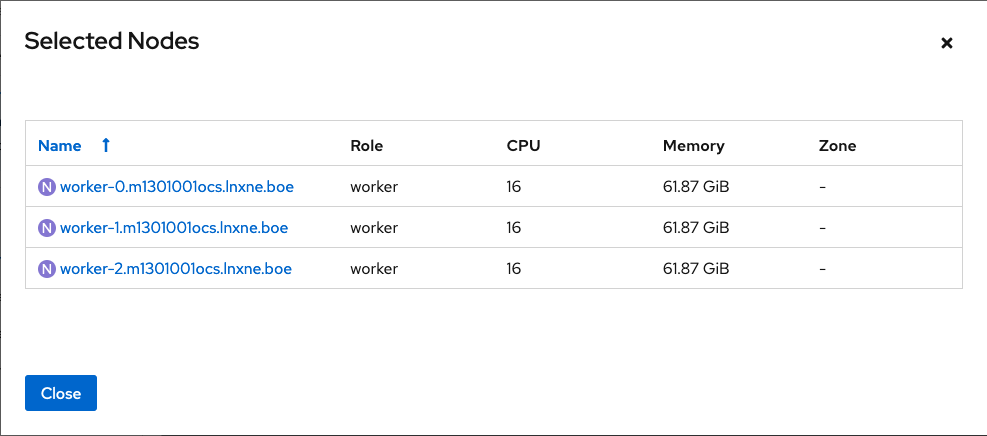
Figure 1.7. List of selected disks

- Click Next.
Click Yes in the message alert to confirm the creation of the storage class.
After the local volume set and storage class are created, it is not possible to go back to the step.
- Create Storage Cluster
Figure 1.8. Create Storage Cluster wizard page

Select the required storage class.
You might need to wait a couple of minutes for the storage nodes corresponding to the selected storage class to get populated. The nodes corresponding to the storage class are displayed based on the storage class that you selected from the drop down list.
Click Next.
Figure 1.9. Create Storage Cluster wizard configure page
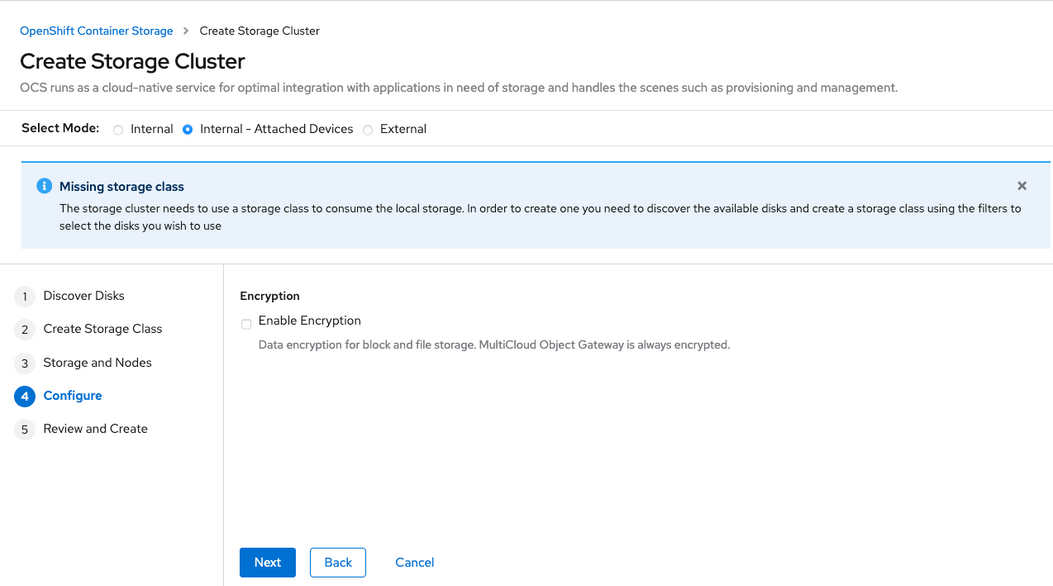
(Optional) In the Encryption section, set the toggle to Enabled to enable data encryption on the cluster.
- Click Next to review your storage cluster.
Click Create.
Figure 1.10. Create Storage Cluster wizard create and review page
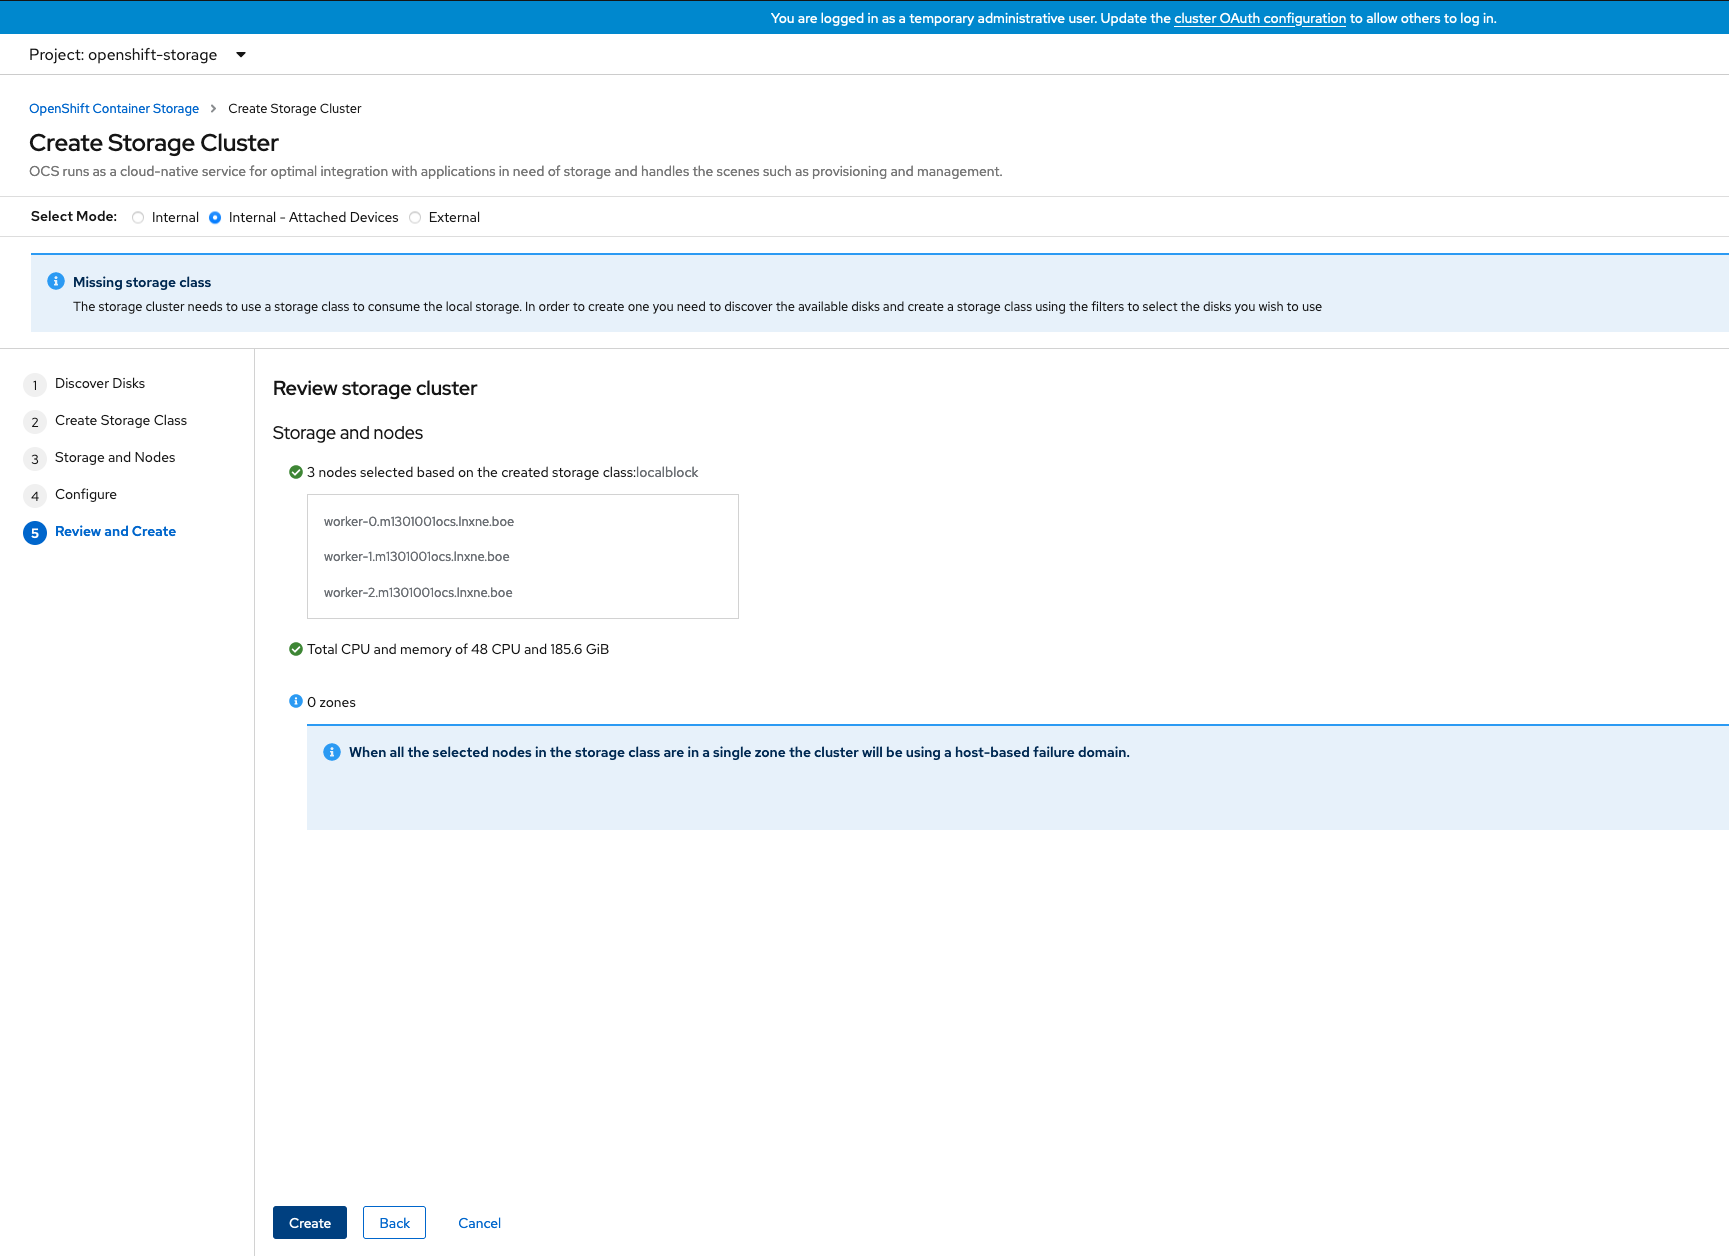
The Create button is enabled only when a minimum of three nodes are selected. A new storage cluster of three volumes will be created with one volume per worker node. The default configuration uses a replication factor of 3.
To expand the capacity of the initial cluster, see Scaling Storage guide.
Verification steps
See Verifying your OpenShift Container Storage installation.