
Chapter 2. Scaling up storage capacity
Depending on the type of your deployment, you can choose one of the following procedures to scale up storage capacity.
- For AWS, VMware, or Azure infrastructures using dynamic or automated provisioning of storage devices, see Section 2.2, “Scaling up storage by adding capacity to your OpenShift Container Storage nodes”
- For bare metal, Amazon EC2 I3, or VMware infrastructures using local storage devices, see Section 2.3, “Scaling up storage by adding capacity to your OpenShift Container Storage nodes using local storage devices”
- For IBM Z or LinuxONE infrastructures using local storage devices, see Section 2.5, “Scaling up storage by adding capacity to your OpenShift Container Storage nodes on IBM Z or LinuxONE infrastructure”
- For IBM Power Systems using local storage devices, see Section 2.4, “Scaling up storage by adding capacity to your OpenShift Container Storage nodes on IBM Power Systems infrastructure using local storage devices”
If you want to scale using a storage class other than the one provisioned during deployment, you must also define an additional storage class before you scale. See Creating a storage class for details.
OpenShift Container Storage does not support heterogeneous OSD sizes.
2.1. Creating a Storage Class
You can define a new storage class to dynamically provision storage from an existing provider.
Using storage classes other than the default for your provider is a Technology Preview feature.
Technology Preview features are not supported with Red Hat production service level agreements (SLAs) and might not be functionally complete. Red Hat does not recommend using them in production. These features provide early access to upcoming product features, enabling customers to test functionality and provide feedback during the development process.
For more information, see Technology Preview Features Support Scope.
Prerequisites
- Administrator access to OpenShift web console.
Procedure
- Log in to OpenShift Web Console.
- Click Storage → Storage Classes.
- Click Create Storage Class.
- Enter the storage class Name and Description.
- Select the required Reclaim Policy and Provisioner.
- Click Create to create the Storage Class.
Verification steps
- Click Storage → Storage Classes and verify that you can see the new storage class.
2.2. Scaling up storage by adding capacity to your OpenShift Container Storage nodes
Use this procedure to add storage capacity and performance to your configured Red Hat OpenShift Container Storage worker nodes on the following infrastructures:
- AWS
- VMware vSphere
- Microsoft Azure
Prerequisites
- A running OpenShift Container Storage Platform.
- Administrative privileges on the OpenShift Web Console.
- To scale using a storage class other than the one provisioned during deployment, first define an additional storage class. See Creating a storage class for details.
Procedure
- Log in to the OpenShift Web Console.
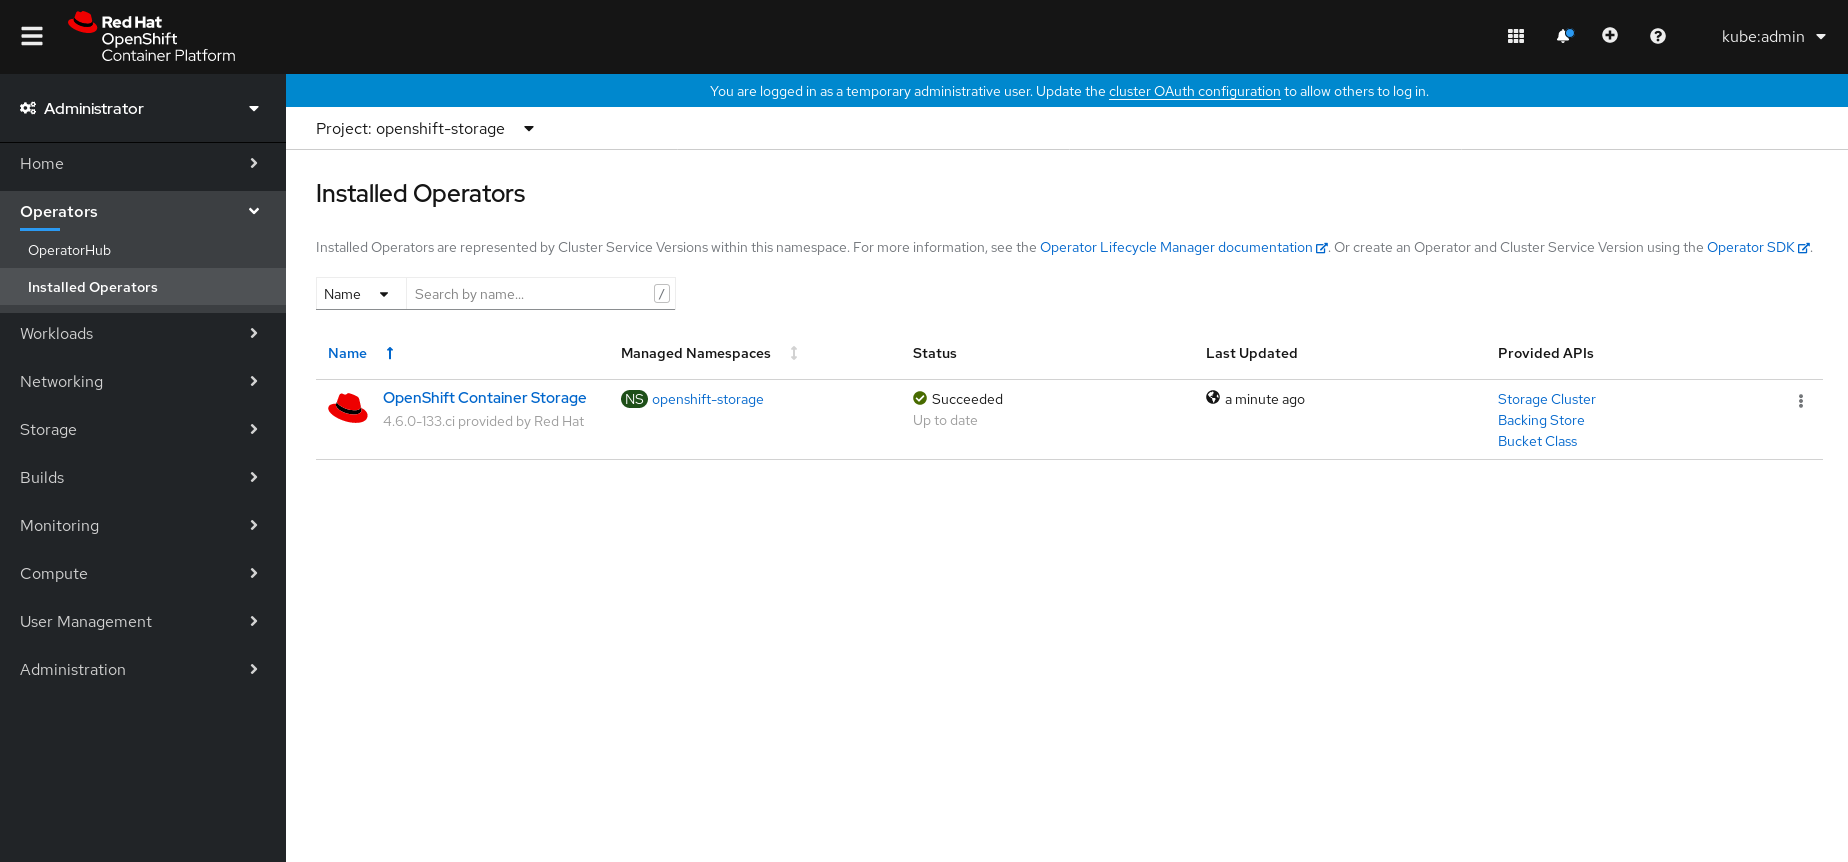
- Click on Operators → Installed Operators.
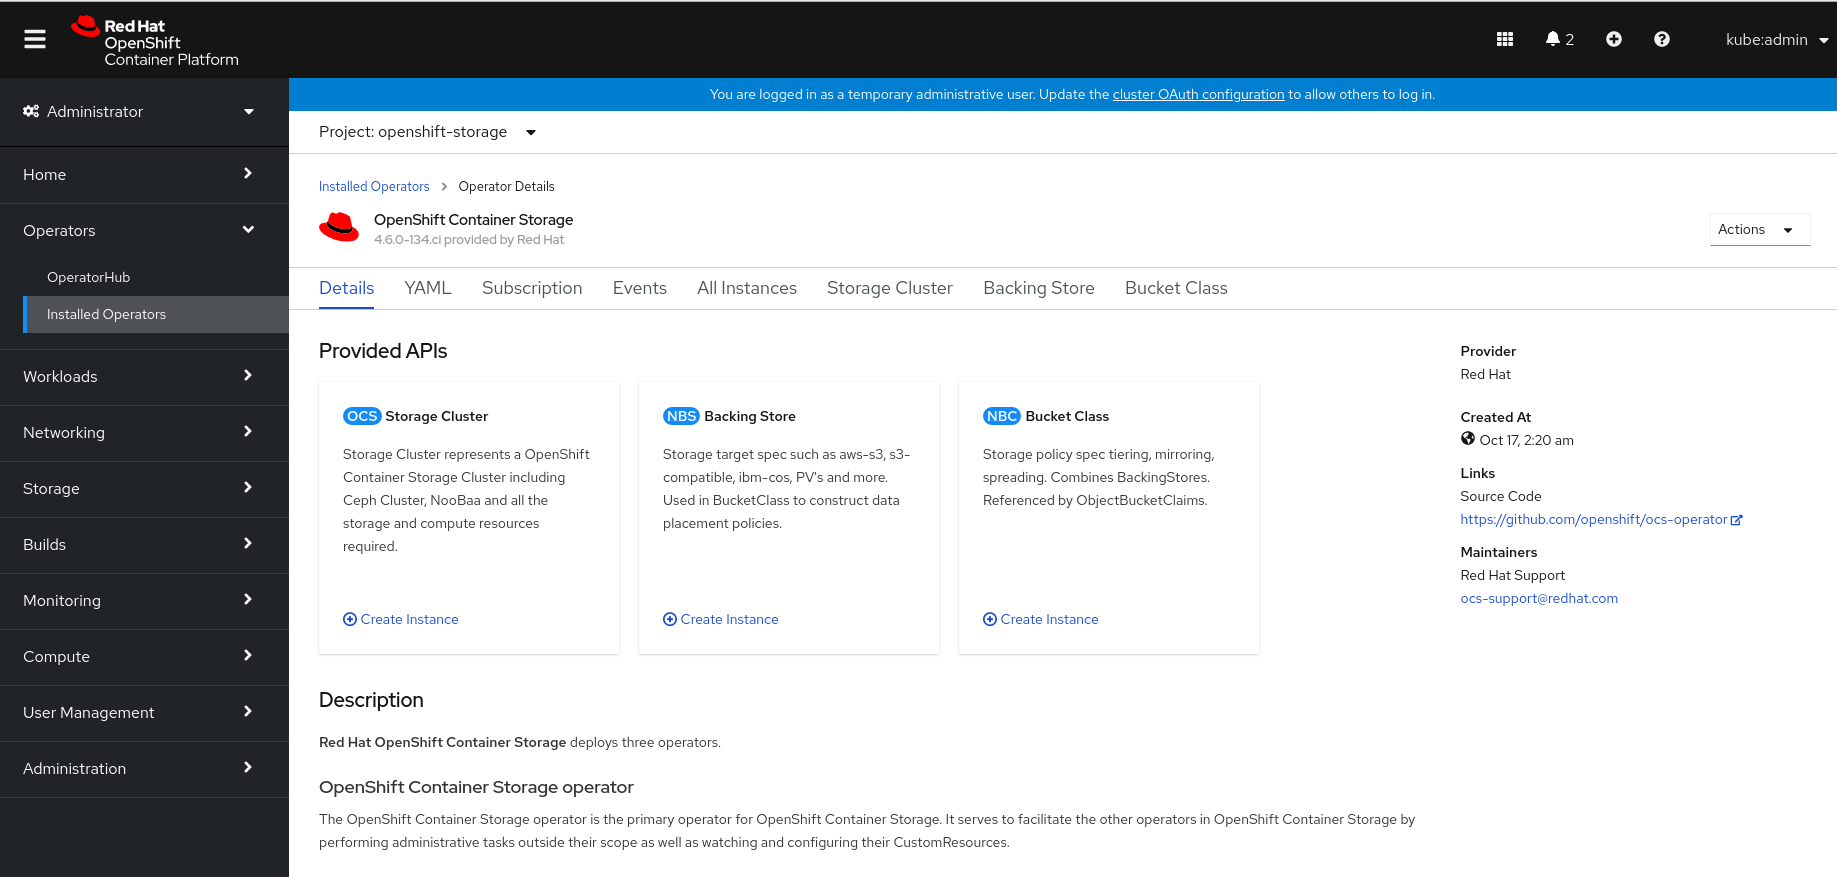
Click OpenShift Container Storage Operator.

Click Storage Cluster tab.

- The visible list should have only one item. Click (⋮) on the far right to extend the options menu.
Select Add Capacity from the options menu.
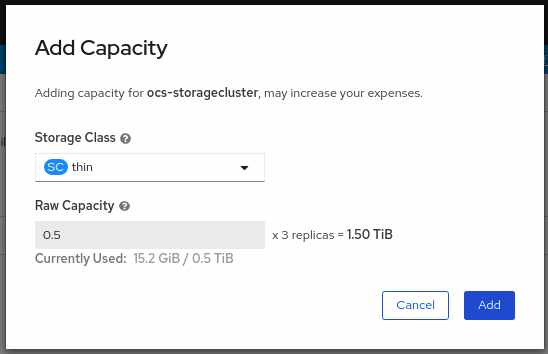
Select a storage class.
Set the storage class to
gp2on AWS,thinon VMware, ormanaged_premiumon Microsoft Azure if you are using the default storage class generated during deployment. If you have created other storage classes, select whichever is appropriate.ImportantUsing storage classes other than the default for your provider is a Technology Preview feature.
Technology Preview features are not supported with Red Hat production service level agreements (SLAs) and might not be functionally complete. Red Hat does not recommend using them in production. These features provide early access to upcoming product features, enabling customers to test functionality and provide feedback during the development process.
For more information, see Technology Preview Features Support Scope.
The Raw Capacity field shows the size set during storage class creation. The total amount of storage consumed is three times this amount, because OpenShift Container Storage uses a replica count of 3.
- Click Add and wait for the cluster state to change to Ready.
Verification steps
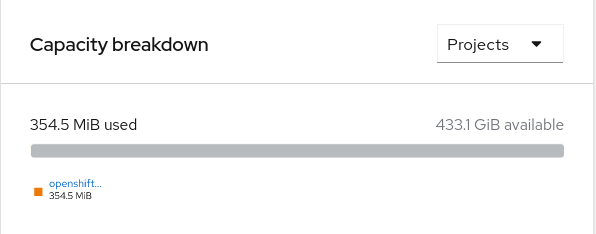
Navigate to Overview → Persistent Storage tab, then check the Capacity breakdown card.

Note that the capacity increases based on your selections.
Verify that the new OSDs and their corresponding new PVCs are created.
To view the state of the newly created OSDs:
- Click Workloads → Pods from the OpenShift Web Console.
-
Select
openshift-storagefrom the Project drop-down list.
To view the state of the PVCs:
- Click Storage → Persistent Volume Claims from the OpenShift Web Console.
-
Select
openshift-storagefrom the Project drop-down list.
(Optional) If data encryption is enabled on the cluster, verify that the new OSD devices are encrypted.
Identify the node(s) where the new OSD pod(s) are running.
$ oc get -o=custom-columns=NODE:.spec.nodeName pod/<OSD pod name>
For example:
oc get -o=custom-columns=NODE:.spec.nodeName pod/rook-ceph-osd-0-544db49d7f-qrgqm
For each of the nodes identified in previous step, do the following:
Create a debug pod and open a chroot environment for the selected host(s).
$ oc debug node/<node name>
$ chroot /host
Run “lsblk” and check for the “crypt” keyword beside the
ocs-devicesetname(s)$ lsblk
Cluster reduction is not currently supported, regardless of whether reduction would be done by removing nodes or OSDs.
2.3. Scaling up storage by adding capacity to your OpenShift Container Storage nodes using local storage devices
Use this procedure to add storage capacity (additional storage devices) to your configured local storage based OpenShift Container Storage worker nodes on bare metal and VMware infrastructures.
Scaling up storage on Amazon EC2 I3 is a Technology Preview feature. Technology Preview features are not supported with Red Hat production service level agreements (SLAs) and might not be functionally complete. Red Hat does not recommend using them in production. These features provide early access to upcoming product features, enabling customers to test functionality and provide feedback during the development process.
For Amazon EC2 I3 infrastructure, adding nodes is the only option for adding capacity, as deployment is done using both the available NVMe devices.
Prerequisites
- You must be logged into the OpenShift Container Platform cluster.
You must have installed local storage operator. Use any of the following procedures applicable to your infrastructure:
-
If you have upgraded from a previous version of OpenShift Container Storage, create a
LocalVolumeSetobject to enable automatic provisioning of devices as described in Post-update configuration changes. -
If you upgraded to OpenShift Container Storage 4.6 from a previous version, ensure that you have followed post-upgrade procedures to create the
LocalVolumeDiscoveryobject. See Post-update configuration changes for details. - You must have three OpenShift Container Platform worker nodes with the same storage type and size attached to each node (for example, 2TB NVMe drive) as the original OpenShift Container Storage StorageCluster was created with.
Procedure
To add capacity, you can either use a storage class that you provisioned during the deployment or any other storage class that matches the filter.
On the OpenShift web console, click on Operators → Installed Operators.
- Click OpenShift Container Storage Operator.
Click Storage Cluster tab.
- The visible list should have only one item. Click (⋮) on the far right to extend the options menu.
Select Add Capacity from the options menu.
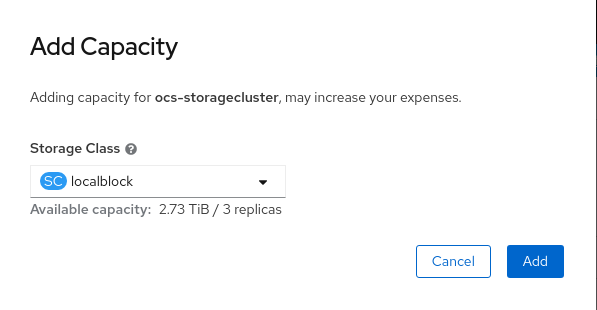
- Select the Storage Class for which you added disks or the new storage class depending on your requirement. Available Capacity displayed is based on the local disks available in storage class.
Click Add.
You might need to wait a couple of minutes for the storage cluster to reach Ready state.
Verification steps
Navigate to Overview → Persistent Storage tab, then check the Capacity breakdown card.

Note that the capacity increases based on your selections.
Verify that the new OSDs and their corresponding new PVCs are created.
To view the state of the newly created OSDs:
- Click Workloads → Pods from the OpenShift Web Console.
-
Select
openshift-storagefrom the Project drop-down list.
To view the state of the PVCs:
- Click Storage → Persistent Volume Claims from the OpenShift Web Console.
-
Select
openshift-storagefrom the Project drop-down list.
(Optional) If data encryption is enabled on the cluster, verify that the new OSD devices are encrypted.
Identify the node(s) where the new OSD pod(s) are running.
$ oc get -o=custom-columns=NODE:.spec.nodeName pod/<OSD pod name>
For example:
oc get -o=custom-columns=NODE:.spec.nodeName pod/rook-ceph-osd-0-544db49d7f-qrgqm
For each of the nodes identified in previous step, do the following:
Create a debug pod and open a chroot environment for the selected host(s).
$ oc debug node/<node name>
$ chroot /host
Run “lsblk” and check for the “crypt” keyword beside the
ocs-devicesetname(s)$ lsblk
OpenShift Container Storage does not support cluster reduction either by reducing OSDs or reducing nodes.
2.4. Scaling up storage by adding capacity to your OpenShift Container Storage nodes on IBM Power Systems infrastructure using local storage devices
Use this procedure to add storage capacity (additional storage devices) to your configured local storage based OpenShift Container Storage worker nodes on IBM Power Systems infrastructures.
Prerequisites
- You must be logged into OpenShift Container Platform (RHOCP) cluster.
You must have installed local storage operator. Use the following procedures, see
- You must have three OpenShift Container Platform worker nodes with the same storage type and size attached to each node (for example, 0.5TB SSD) as the original OpenShift Container Storage StorageCluster was created with.
Procedure
To add storage capacity to OpenShift Container Platform nodes with OpenShift Container Storage installed, you need to
- Add a new disk that is, minimum of one device per worker node in your Openshift Container Platform (RHOCP) cluster.
Check if the new disk is added to the node by running lsblk inside node.
$ oc debug node/worker-0
$lsblk
Example output:
Creating debug namespace/openshift-debug-node-ggrqr ...
Starting pod/worker-2-debug ...
To use host binaries, run `chroot /host`
Pod IP: 192.168.88.23
If you don't see a command prompt, try pressing enter.
sh-4.4# chroot /host
sh-4.4# lsblk
NAME                         MAJ:MIN RM  SIZE RO TYPE MOUNTPOINT
loop0                          7:0    0  256G  0 loop
vda                          252:0    0   40G  0 disk
|-vda1                       252:1    0    4M  0 part
|-vda2                       252:2    0  384M  0 part /boot
`-vda4                       252:4    0 39.6G  0 part
  `-coreos-luks-root-nocrypt 253:0    0 39.6G  0 dm   /sysroot
vdb                          252:16   0  512B  1 disk
vdc                          252:32   0  256G  0 disk
vdd                          252:48   0  256G  0 disk
sh-4.4#
sh-4.4#
Removing debug pod ...
Removing debug namespace/openshift-debug-node-ggrqr ...
- Newly added disk will automatically gets discovered by LocalVolumeSet.
Display the newly created PVs with
storageclassname used inlocalVolumeSetCR.$ oc get pv | grep localblock | grep Available
Example output:
local-pv-290020c2   256Gi   RWO     Delete  Available   localblock      2m35s
local-pv-7702952c   256Gi   RWO     Delete  Available   localblock      2m27s
local-pv-a7a567d    256Gi   RWO     Delete  Available   localblock      2m22s
...
There are three more available PVs of same size which will be used for new OSDs.
- Navigate to the OpenShift Web Console.
- Click on Operators on the left navigation bar.
- Select Installed Operators.
In the window, click OpenShift Container Storage Operator:
In the top navigation bar, scroll right and click Storage Cluster tab.
- The visible list should have only one item. Click (⋮) on the far right to extend the options menu.
Select Add Capacity from the options menu.
From this dialog box, set the Storage Class name to the name used in the
localVolumesetCR. Available Capacity displayed is based on the local disks available in storage class.- Once you are done with your setting, click Add. You might need to wait a couple of minutes for the storage cluster to reach Ready state.
Verify that the new OSDs and their corresponding new PVCs are created.
$ oc get -n openshift-storage pods -l app=rook-ceph-osd
Example output:
NAME                               READY   STATUS    RESTARTS   AGE
rook-ceph-osd-0-6f8655ff7b-gj226   1/1     Running   0          1h
rook-ceph-osd-1-6c66d77f65-cfgfq   1/1     Running   0          1h
rook-ceph-osd-2-69f6b4c597-mtsdv   1/1     Running   0          1h
rook-ceph-osd-3-c784bdbd4-w4cmj    1/1     Running   0          5m
rook-ceph-osd-4-6d99845f5b-k7f8n   1/1     Running   0          5m
rook-ceph-osd-5-fdd9897c9-r9mgb    1/1     Running   0          5m
In the above example, osd-3, osd-4, and osd-5 are the newly added pods to the OpenShift Container Storage cluster.
$ oc get pvc -n openshift-storage |grep localblock
Example output:
ocs-deviceset-localblock-0-data-0-sfsgf   Bound    local-pv-8137c873      256Gi     RWO    localblock  1h
ocs-deviceset-localblock-0-data-1-qhs9m   Bound    local-pv-290020c2      256Gi     RWO    localblock  10m
ocs-deviceset-localblock-1-data-0-499r2   Bound    local-pv-ec7f2b80      256Gi     RWO    localblock  1h
ocs-deviceset-localblock-1-data-1-p9rth   Bound    local-pv-a7a567d       256Gi     RWO    localblock  10m
ocs-deviceset-localblock-2-data-0-8pzjr   Bound    local-pv-1e31f771      256Gi     RWO    localblock  1h
ocs-deviceset-localblock-2-data-1-7zwwn   Bound    local-pv-7702952c      256Gi     RWO    localblock  10m
In the above example, we see three new PVCs are created.
Verification steps
Navigate to Overview → Persistent Storage tab, then check the Capacity breakdown card.
Note that the capacity increases based on your selections.
ImportantOpenShift Container Storage does not support cluster reduction either by reducing OSDs or reducing nodes.
2.5. Scaling up storage by adding capacity to your OpenShift Container Storage nodes on IBM Z or LinuxONE infrastructure
Use this procedure to add storage capacity and performance to your configured Red Hat OpenShift Container Storage worker nodes.
Prerequisites
- A running OpenShift Container Storage Platform.
- Administrative privileges on the OpenShift Web Console.
- To scale using a storage class other than the one provisioned during deployment, first define an additional storage class. See Creating a storage class for details.
Procedure
Add additional hardware resources with zFCP disks
List all the disks with the following command.
$ lszdev
Example output:
TYPE         ID                                              ON   PERS  NAMES
zfcp-host    0.0.8204                                        yes  yes
zfcp-lun     0.0.8204:0x102107630b1b5060:0x4001402900000000  yes  no    sda sg0
zfcp-lun     0.0.8204:0x500407630c0b50a4:0x3002b03000000000  yes  yes   sdb sg1
qeth         0.0.bdd0:0.0.bdd1:0.0.bdd2                      yes  no    encbdd0
generic-ccw  0.0.0009                                        yes  no
A SCSI disk is represented as a
zfcp-lunwith the structure<device-id>:<wwpn>:<lun-id>in the ID section. The first disk is used for the operating system. The device id for the new disk can be the same.Append a new SCSI disk with the following command.
$ chzdev -e 0.0.8204:0x400506630b1b50a4:0x3001301a00000000
NoteThe device ID for the new disk must be the same as the disk to be replaced. The new disk is identified with its WWPN and LUN ID.
List all the FCP devices to verify the new disk is configured.
$ lszdev zfcp-lun
TYPE         ID                                              ON   PERS  NAMES
zfcp-lun     0.0.8204:0x102107630b1b5060:0x4001402900000000 yes  no    sda sg0
zfcp-lun     0.0.8204:0x500507630b1b50a4:0x4001302a00000000  yes  yes   sdb sg1
zfcp-lun     0.0.8204:0x400506630b1b50a4:0x3001301a00000000  yes  yes   sdc sg2
- Navigate to the OpenShift Web Console.
- Click Operators on the left navigation bar.
- Select Installed Operators.
In the window, click OpenShift Container Storage Operator:

In the top navigation bar, scroll right and click Storage Cluster tab.
- Click (⋮) next to the visible list to extend the options menu.
Select Add Capacity from the options menu.
The Raw Capacity field shows the size set during storage class creation. The total amount of storage consumed is three times this amount, because OpenShift Container Storage uses a replica count of 3.
- Click Add and wait for the cluster state to change to Ready.
Verification steps
Navigate to Overview → Persistent Storage tab, then check the Capacity breakdown card.
- Note that the capacity increases based on your selections.
Cluster reduction is not currently supported, regardless of whether reduction would be done by removing nodes or OSDs.