
Chapter 2. Deploying using local storage devices
Deploying OpenShift Container Storage on OpenShift Container Platform using local storage devices provides you with the option to create internal cluster resources. This will result in the internal provisioning of the base services, which helps to make additional storage classes available to applications.
Use this section to deploy OpenShift Container Storage on VMware where OpenShift Container Platform is already installed.
2.1. Overview of deploying with internal local storage
To deploy Red Hat OpenShift Container Storage using local storage, follow these steps:
- Understand the requirements for installing OpenShift Container Storage using local storage devices.
For Red Hat Enterprise Linux based hosts, enabling file system access for containers on Red Hat Enterprise Linux based nodes.
NoteSkip this step for Red Hat Enterprise Linux CoreOS (RHCOS).
- Install the Red Hat OpenShift Container Storage Operator.
- Install Local Storage Operator.
- Find the available storage devices.
- Creating OpenShift Container Storage cluster service on VMware.
2.2. Requirements for installing OpenShift Container Storage using local storage devices
You must have at least three OpenShift Container Platform worker nodes in the cluster with locally attached storage devices on each of them.
- Each of the three selected nodes must have at least one raw block device available to be used by OpenShift Container Storage.
- For minimum starting node requirements, see Resource requirements section in Planning guide.
- The devices to be used must be empty, that is, there should be no PVs, VGs, or LVs remaining on the disks.
You must have a minimum of three labeled nodes.
- It is recommended that the worker nodes are spread across three different physical nodes, racks or failure domains for high availability.
Each node that has local storage devices to be used by OpenShift Container Storage must have a specific label to deploy OpenShift Container Storage pods. To label the nodes, use the following command:
$ oc label nodes <NodeNames> cluster.ocs.openshift.io/openshift-storage=''
- There should not be any storage providers managing locally mounted storage on the storage nodes that would conflict with the use of Local Storage Operator for Red Hat OpenShift Container Storage.
- The Local Storage Operator version must match the Red Hat OpenShift Container Platform version in order to have the Local Storage Operator fully supported with Red Hat OpenShift Container Storage. The Local Storage Operator does not get upgraded when Red Hat OpenShift Container Platform is upgraded.
2.3. Enabling file system access for containers on Red Hat Enterprise Linux based nodes
Deploying OpenShift Container Platform on a Red Hat Enterprise Linux base in a user provisioned infrastructure (UPI) does not automatically provide container access to the underlying Ceph file system.
This process is not necessary for hosts based on Red Hat Enterprise Linux CoreOS.
Procedure
Perform the following steps on each node in your cluster.
- Log in to the Red Hat Enterprise Linux based node and open a terminal.
Verify that the node has access to the rhel-7-server-extras-rpms repository.
# subscription-manager repos --list-enabled | grep rhel-7-server
If you do not see both
rhel-7-server-rpmsandrhel-7-server-extras-rpmsin the output, or if there is no output, run the following commands to enable each repository.# subscription-manager repos --enable=rhel-7-server-rpms # subscription-manager repos --enable=rhel-7-server-extras-rpms
Install the required packages.
# yum install -y policycoreutils container-selinux
Persistently enable container use of the Ceph file system in SELinux.
# setsebool -P container_use_cephfs on
2.4. Installing Red Hat OpenShift Container Storage Operator
You can install Red Hat OpenShift Container Storage Operator using the Red Hat OpenShift Container Platform Operator Hub. For information about the hardware and software requirements, see Planning your deployment.
Prerequisites
- You must be logged into the OpenShift Container Platform cluster.
- You must have at least three worker nodes in the OpenShift Container Platform cluster.
When you need to override the cluster-wide default node selector for OpenShift Container Storage, you can use the following command in command line interface to specify a blank node selector for the openshift-storage namespace:
$ oc annotate namespace openshift-storage openshift.io/node-selector=
Procedure
Click Operators → OperatorHub in the left pane of the OpenShift Web Console.
Figure 2.1. List of operators in the Operator Hub
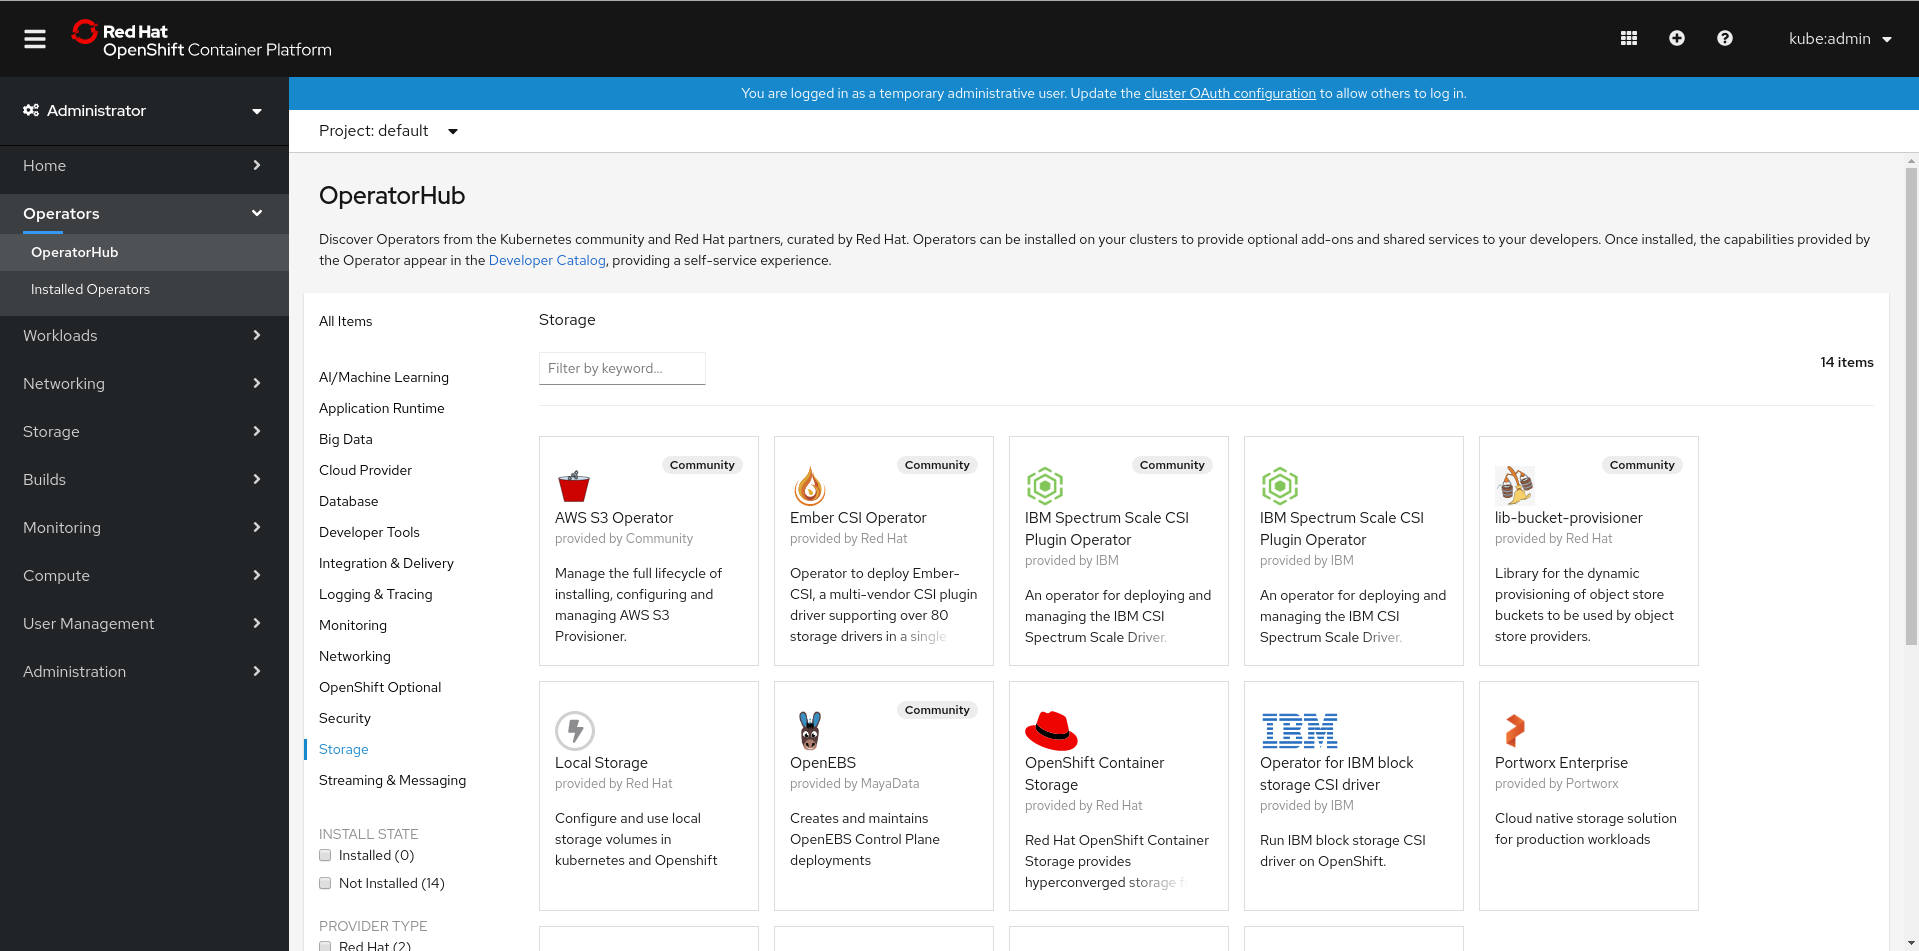
Click on OpenShift Container Storage.
You can use the Filter by keyword text box or the filter list to search for OpenShift Container Storage from the list of operators.
- On the OpenShift Container Storage operator page, click Install.
On the Install Operator page, ensure the following options are selected:
- Update Channel as stable-4.5
- Installation Mode as A specific namespace on the cluster
-
Installed Namespace as Operator recommended namespace PR openshift-storage. If Namespace
openshift-storagedoes not exist, it will be created during the operator installation. Select Approval Strategy as Automatic or Manual. Approval Strategy is set to Automatic by default.
Approval Strategy as Automatic.
NoteWhen you select the Approval Strategy as Automatic, approval is not required either during fresh installation or when updating to the latest version of OpenShift Container Storage.
- Click Install
- Wait for the install to initiate. This may take up to 20 minutes.
- Click Operators → Installed Operators
-
Ensure the Project is
openshift-storage. By default, the Project isopenshift-storage. - Wait for the Status of OpenShift Container Storage to change to Succeeded.
Approval Strategy as Manual.
NoteWhen you select the Approval Strategy as Manual, approval is required during fresh installation or when updating to the latest version of OpenShift Container Storage.
- Click Install.
- On the Installed Operators page, click ocs-operator.
- On the Subscription Details page, click the Install Plan link.
- On the InstallPlan Details page, click Preview Install Plan.
- Review the install plan and click Approve.
- Wait for the Status of the Components to change from Unknown to either Created or Present.
- Click Operators → Installed Operators
-
Ensure the Project is
openshift-storage. By default, the Project isopenshift-storage. - Wait for the Status of OpenShift Container Storage to change to Succeeded.
Verification steps
- Verify that OpenShift Container Storage Operator shows the Status as Succeeded on the Installed Operators dashboard.
2.5. Installing Local Storage Operator
Use this procedure to install the Local Storage Operator from the Operator Hub before creating OpenShift Container Storage clusters on local storage devices.
Prerequisites
Create a namespace called
local-storageas follows:- Click Administration → Namespaces in the left pane of the OpenShift Web Console.
- Click Create Namespace.
-
In the Create Namespace dialog box, enter
local-storagefor Name. - Select No restrictions option for Default Network Policy.
- Click Create.
Procedure
- Click Operators → OperatorHub in the left pane of the OpenShift Web Console.
- Search for Local Storage Operator from the list of operators and click on it.
Click Install.
Figure 2.2. Install Operator page
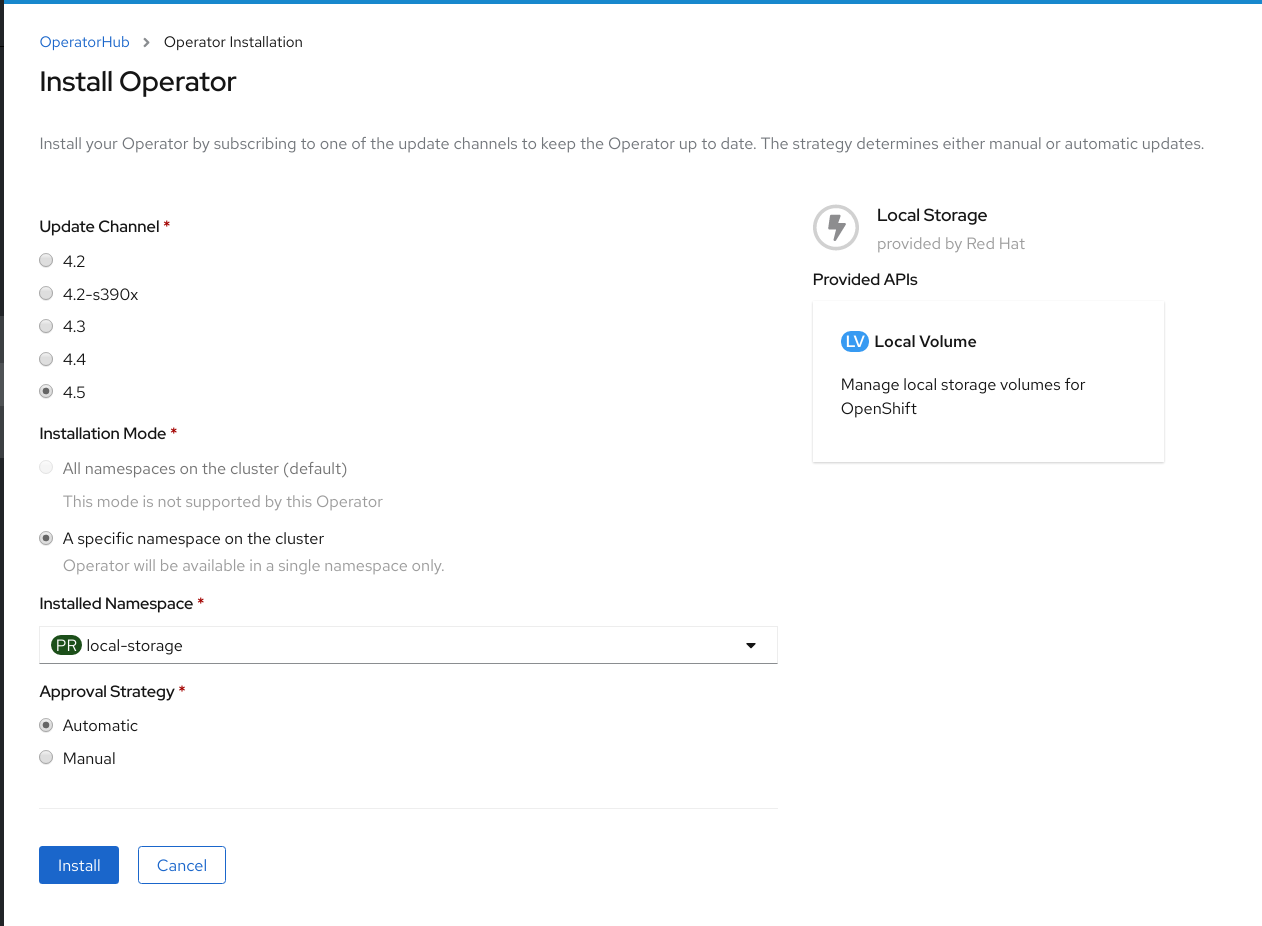
On the Install Operator page, ensure the following options are selected
- Update Channel as stable-4.5
- Installation Mode as A specific namespace on the cluster
- Installed Namespace as local-storage.
- Approval Strategy as Automatic
- Click Install.
-
Verify that the Local Storage Operator shows the Status as
Succeeded.
2.6. Finding available storage devices
Use this procedure to identify the device names for each of the three or more nodes that you have labeled with the OpenShift Container Storage label cluster.ocs.openshift.io/openshift-storage='' before creating PVs.
Procedure
List and verify the name of the nodes with the OpenShift Container Storage label.
$ oc get nodes -l cluster.ocs.openshift.io/openshift-storage=
Example output:
NAME        STATUS   ROLES    AGE    VERSION
compute-0   Ready    worker   106m   v1.18.3+2cf11e2
compute-1   Ready    worker   106m   v1.18.3+2cf11e2
compute-2   Ready    worker   106m   v1.18.3+2cf11e2
Log in to each node that is used for OpenShift Container Storage resources and find the unique
by-iddevice name for each available raw block device.$ oc debug node/<Nodename>
Example output:
$ oc debug node/compute-0
Starting pod/compute-0-debug ...
To use host binaries, run `chroot /host`
Pod IP: 10.1.50.36
If you don't see a command prompt, try pressing enter.
sh-4.2# chroot /host
sh-4.4# lsblk
NAME                         MAJ:MIN RM   SIZE RO TYPE MOUNTPOINT
sda                            8:0    0   120G  0 disk
|-sda1                         8:1    0   384M  0 part /boot
|-sda2                         8:2    0   127M  0 part /boot/efi
|-sda3                         8:3    0     1M  0 part
`-sda4                         8:4    0 119.5G  0 part
  `-coreos-luks-root-nocrypt 253:0    0 119.5G  0 dm   /sysroot
nvme0n1                      259:0    0   1.5T  0 disk
In this example, for
compute-0, the available local device isnvme0n1.Identify the unique ID for each of the devices selected in Step 2.
sh-4.4#
ls -l /dev/disk/by-id/ | grep nvme0n1
lrwxrwxrwx. 1 root root 13 Aug 19 06:41 nvme-Dell_Express_Flash_NVMe_P4610_1.6TB_SFF_PHLN951601QF1P6AGN -> ../../nvme0n1
lrwxrwxrwx. 1 root root 13 Aug 19 06:41 nvme-eui.01000000010000005cd2e4895e0e5251 -> ../../nvme0n1
In the above example, the ID for the local device 'nvme0n1` is
nvme-eui.01000000010000005cd2e4895e0e5251
- Repeat the above step to identify the device ID for all the other nodes that have the storage devices to be used by OpenShift Container Storage. See this Knowledge Base article for more details.
2.7. Creating OpenShift Container Storage cluster on VMware
Use this procedure to create storage cluster on VMware infrastructure.
VMware supports the following three types of local storage:
- Virtual machine disk (VMDK)
- Raw device mapping (RDM)
- VMDirectPath I/O
Prerequisites
- Ensure that all the requirements in the Requirements for installing OpenShift Container Storage using local storage devices section are met.
- You must have three worker nodes with the same storage type and size attached to each node to use local storage devices on VMware.
-
For VMs on VMware, ensure the
disk.EnableUUIDoption is set toTRUE. You need to have vCenter account privileges to configure the VMs. For more information, see Required vCenter account privileges. To set thedisk.EnableUUIDoption, use the Advanced option of the VM Options in the Customize hardware tab. For more information, see Creating Red Hat Enterprise Linux CoreOS (RHCOS) machines in vSphere. Verify your OpenShift Container Platform worker nodes are labeled for OpenShift Container Storage:
$ oc get nodes -l cluster.ocs.openshift.io/openshift-storage -o jsonpath='{range .items[*]}{.metadata.name}{"\n"}'
To identify storage devices on each node, refer to Finding available storage devices.
Procedure
Create the LocalVolume CR for block PVs.
Example of
LocalVolumeCRlocal-storage-block.yamlusing OpenShift Container Storage label as node selector:apiVersion: local.storage.openshift.io/v1 kind: LocalVolume metadata: name: local-block namespace: local-storage labels: app: ocs-storagecluster spec: nodeSelector: nodeSelectorTerms: - matchExpressions: - key: cluster.ocs.openshift.io/openshift-storage operator: In values: - "" storageClassDevices: - storageClassName: localblock volumeMode: Block devicePaths: - /dev/disk/by-id/nvme-eui.01000000010000005cd2e4895e0e5251 # <-- modify this line - /dev/disk/by-id/nvme-eui.01000000010000005cd2e4ea2f0f5251 # <-- modify this line - /dev/disk/by-id/nvme-eui.01000000010000005cd2e4de2f0f5251 # <-- modify this lineCreate
LocalVolumeCR for block PVs.$ oc create -f local-storage-block.yaml
Example output:
localvolume.local.storage.openshift.io/local-block created
Check if the pods are created.
$ oc -n local-storage get pods
Example output:
NAME                                      READY   STATUS    RESTARTS   AGE
local-block-local-diskmaker-5brzv         1/1     Running   0          31s
local-block-local-diskmaker-8sxcs         1/1     Running   0          31s
local-block-local-diskmaker-s7s9p         1/1     Running   0          31s
local-block-local-provisioner-9cbw8       1/1     Running   0          31s
local-block-local-provisioner-cpddv       1/1     Running   0          31s
local-block-local-provisioner-f6h7h       1/1     Running   0          31s
local-storage-operator-75b9776b75-vwdzh   1/1     Running   0          12m
Check the new
localblockStorageClass.$ oc get sc | grep localblock
Example output:
localblock kubernetes.io/no-provisioner Delete WaitForFirstConsumer false 96s
Check the PVs that are created with the
Availablestatus.$ oc get pv
Example output:
NAME                CAPACITY   ACCESS MODES   RECLAIM POLICY   STATUS      CLAIM   STORAGECLASS   REASON   AGE
local-pv-264b0256   1490Gi     RWO            Delete           Available           localblock              108s
local-pv-8b0e9b53   1490Gi     RWO            Delete           Available           localblock              99s
local-pv-8dcc8c60   1490Gi     RWO            Delete           Available           localblock              98s
Create the OpenShift Container Storage Cluster Service that uses the
localblockStorage Class.- Log into the OpenShift Web Console.
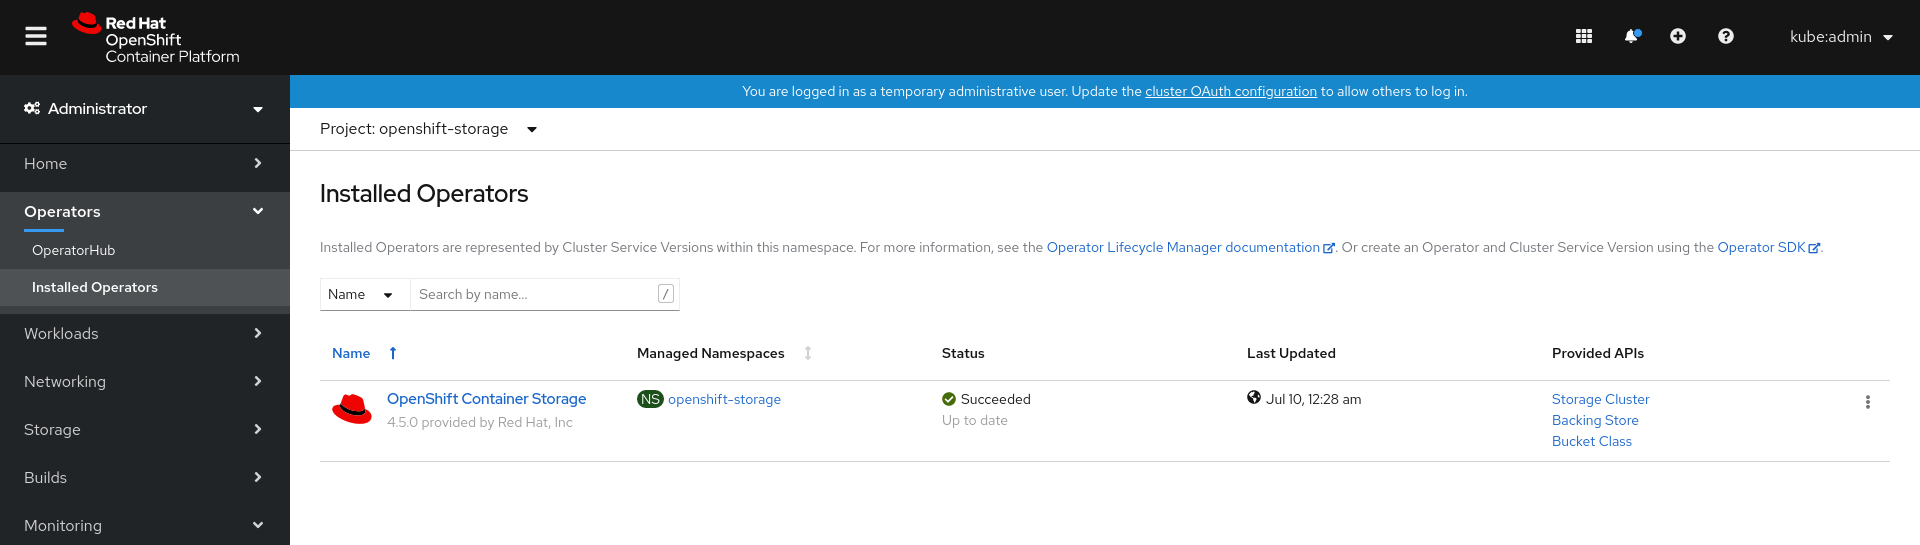
- Click Operators → Installed Operators from the OpenShift Web Console to view the installed operators. Ensure that the Project selected is openshift-storage.
On the Installed Operators page, click Openshift Container Storage.
Figure 2.3. OpenShift Container Storage Operator page
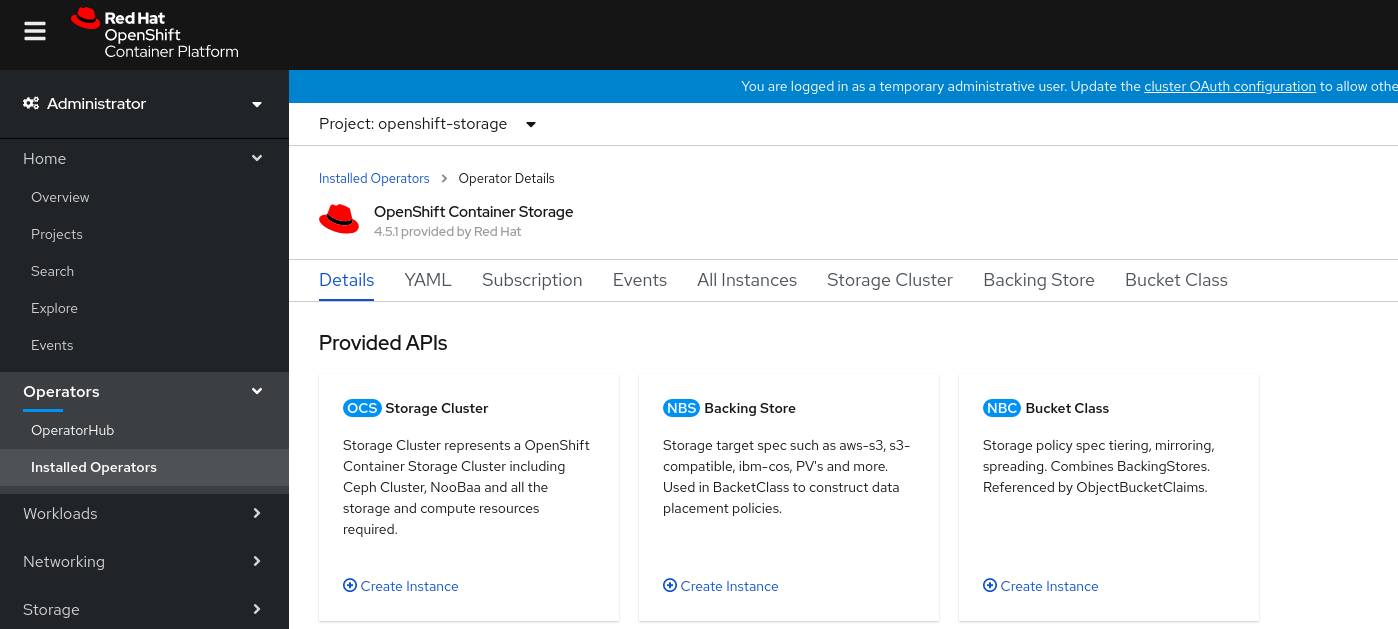
On the Installed Operators → Operator Details page, perform either of the following to create a Storage Cluster Service.
On the Details tab → Provided APIs → OCS Storage Cluster, click Create Instance.
Figure 2.4. Operator Details Page
Alternatively, select the Storage cluster tab and click Create OCS Cluster Service.
Figure 2.5. Storage Cluster tab

On the Create Storage Cluster page, ensure that the following options are selected:
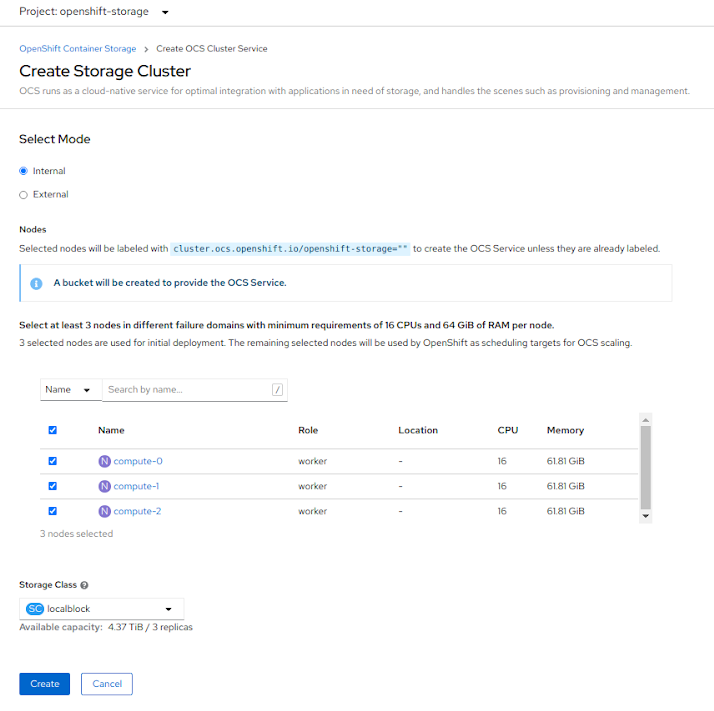
- Leave Select Mode as Internal.
In the Nodes section, for the use of OpenShift Container Storage service, select a minimum of three or a multiple of three worker nodes from the available list.
It is recommended that the worker nodes are spread across three different physical nodes, racks or failure domains for high availability.
NoteTo find specific worker nodes in the cluster, you can filter nodes on the basis of Name or Label.
- Name allows you to search by name of the node
- Label allows you to search by selecting the predefined label
- Use vCenter anti-affinity to align OpenShift Container Storage rack labels with physical nodes and racks in the data center to avoid scheduling two worker nodes on the same physical chassis.
For minimum starting node requirements, see Resource requirements section in Planning guide.
- Select localblock from the Storage Class dropdown list.
Click Create.
NoteThe Create button is enabled only after selecting a minimum of three worker nodes.
Upon successful deployment, a storage cluster with three storage devices gets created. These devices get distributed across three of the selected nodes. The configuration uses a replication factor of 3. To scale the initial cluster, see Scaling storage nodes.
Verification steps
See Verifying your OpenShift Container Storage installation.