
Chapter 2. Deploying OpenShift Container Storage on Microsoft Azure
You can deploy OpenShift Container Storage on Microsoft Azure installer-provisioned infrastructure (IPI). The deployment process consists of the following main parts:
- Install the OpenShift Container Storage Operator by following the instructions in Section 2.1, “Installing Red Hat OpenShift Container Storage Operator using the Operator Hub”.
- Create the OpenShift Container Storage service by following the instructions in Section 2.2, “Creating an OpenShift Container Storage service”.
- (Optional) Create a backing store over Azure Blob by following the instructions in Section 2.3, “Creating a new backing store”.
2.1. Installing Red Hat OpenShift Container Storage Operator using the Operator Hub
You can install Red Hat OpenShift Container Storage on Microsoft Azure platform using Red Hat OpenShift Container Platform Operator Hub. For information about hardware and software requirements, see Chapter 1, Planning OpenShift Container Storage deployment on Microsoft Azure.
Prerequisites
- Log in to OpenShift Container Platform cluster.
- You must have at least three worker nodes in the OpenShift Container Platform cluster.
You must create a namespace called
openshift-storageas follows:- Click Administration → Namespaces in the left pane of the OpenShift Web Console.
- Click Create Namespace.
-
In the Create Namespace dialog box, enter
openshift-storagefor Name andopenshift.io/cluster-monitoring=truefor Labels. This label is required to get the dashboards. - Select No restrictions option for Default Network Policy.
- Click Create.
When you need to override the cluster-wide default node selector for OpenShift Container Storage, you can use the following command in command line interface to specify a blank node selector for the openshift-storage namespace:
$ oc annotate namespace openshift-storage openshift.io/node-selector=
Procedure
- Click Operators → OperatorHub in the left pane of the OpenShift Web Console.
Click on OpenShift Container Storage.
You can use the Filter by keyword text box or the filter list to search for OpenShift Container Storage from the list of operators.
- On the OpenShift Container Storage operator page, click Install.
On the Install Operator page, ensure the following options are selected:
- Update Channel as stable-4.4
- Installation Mode as A specific namespace on the cluster.
-
Installed Namespace as Operator recommended namespace PR openshift-storage. If Namespace
openshift-storagedoes not exist, it will be created during the operator installation. Select Approval Strategy as Automatic or Manual. Approval Strategy is set to Automatic by default.
Approval Strategy as Automatic.
NoteWhen you select the Approval Strategy as Automatic, approval is not required either during fresh installation or when updating to the latest version of OpenShift Container Storage.
- Click Install
- Wait for the install to initiate. This may take up to 20 minutes.
- Click Operators → Installed Operators
-
Ensure the Project is
openshift-storage. By default, the Project isopenshift-storage. - Wait for the Status of OpenShift Container Storage to change to Succeeded.
Approval Strategy as Manual.
NoteWhen you select the Approval Strategy as Manual, approval is required during fresh installation or when updating to the latest version of OpenShift Container Storage.
- Click Install
- On the Installed Operators page, click ocs-operator.
- On the Subscription Details page, click the Install Plan link.
- On the InstallPlan Details page, click Preview Install Plan
- Review the install plan and click Approve.
- Wait for the Status of the Components to change from Unknown to either Created or Present.
- Click Operators → Installed Operators
-
Ensure the Project is
openshift-storage. By default, the Project isopenshift-storage. - Wait for the Status of OpenShift Container Storage to change to Succeeded.
Verification steps
-
Verify that OpenShift Container Storage Operator show the Status as
Succeeded.
2.2. Creating an OpenShift Container Storage service
You need to create a new OpenShift Container Storage service after you install OpenShift Container Storage operator.
Prerequisites
- OpenShift Container Storage operator must be installed from the Operator Hub. For more information, see Installing OpenShift Container Storage Operator using the Operator Hub.
Procedure
- Click Operators → Installed Operators from the left pane of the OpenShift Web Console to view the installed operators.
- On the Installed Operator page, select openshift-storage from the Project drop down list to switch to the openshift-storage project.
Click OpenShift Container Storage operator.
OpenShift Container Storage operator creates a OCSInitialization resource automatically.
On the OpenShift Container Storage operator page, scroll right and click the Storage Cluster tab.
Figure 2.1. OpenShift Container Storage Operator page
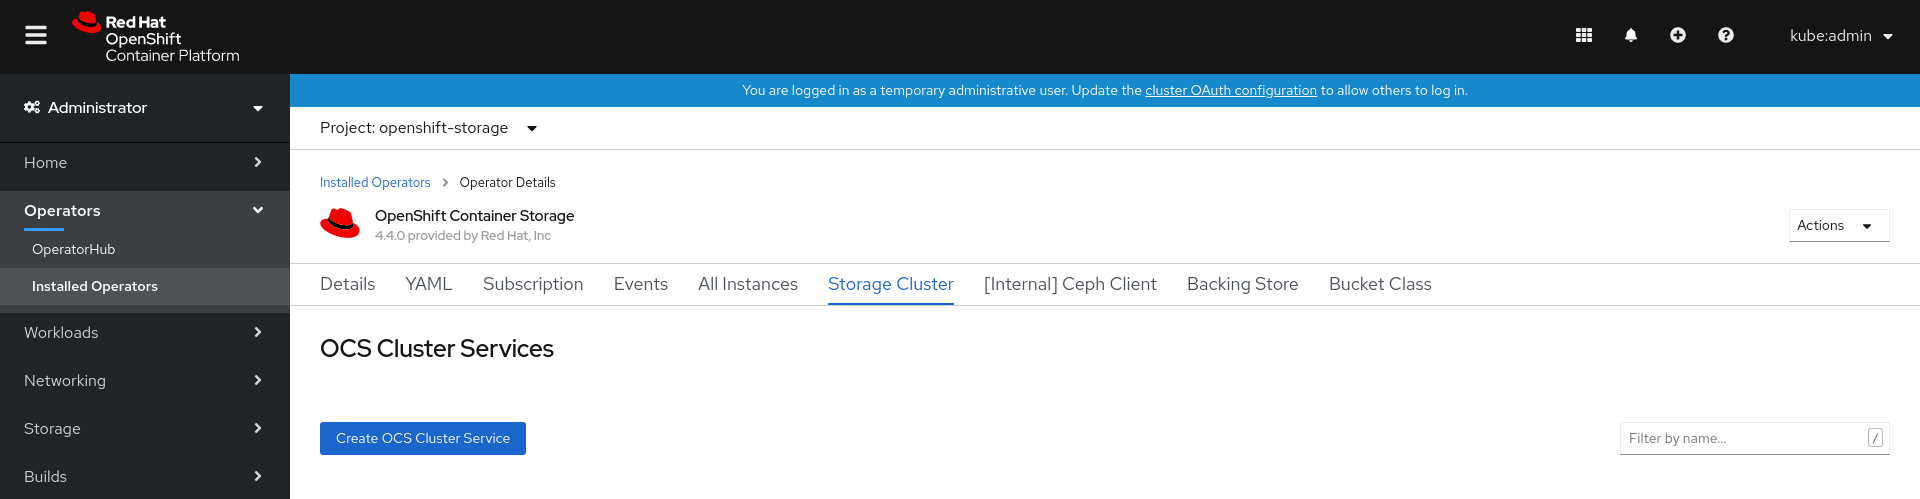
On the OCS Cluster Services page, click Create OCS Cluster Service.
Figure 2.2. Create New OCS Service page

On the Create New OCS Service page, perform the following:
- Select at least three worker nodes from the available list of nodes for the use of OpenShift Container Storage service. Ensure that the nodes are in different Location.
Storage Class is set by default depending on the platform.
managed-premiumis the default storage for Azure.Select OCS Service Capacity from the drop down list.
NoteOnce you select the initial storage capacity here, you can add more capacity only in this increment.
Click Create.
The Create button is enabled only after you select three nodes. A new storage cluster of three volumes will be created with one volume per worker node. The default configuration uses a replication factor of 3.
Verification steps
- To verify that OpenShift Container Storage is successfully installed, see Verifying OpenShift Container Storage deployment.
2.3. Creating a new backing store
This procedure is not mandatory. However, it is recommended to perform this procedure.
When you install OpenShift Container Storage on Microsoft Azure platform, noobaa-default-bucket-class places data on noobaa-default-backing-store instead of Azure blob storage. Hence, to use OpenShift Container Storage Multicloud Object Gateway (MCG) managed object storage backed by Azure Blob storage, you need to perform the following procedure.
Before you begin
- Log in to Azure web console.
- Create Azure Blob storage account for MCG to store object data as described in Create a BlockBlobStorage account. Make sure to set Account kind as BlobStorage and connectivity method as public endpoint.
-
Locate access keys of the Blob storage account and note down the value for
key1for later use. - Create a new Container within the new Blob storage account with public access level set as private.
Prerequisites
- Administrator access to OpenShift.
Procedure
To configure MCG to use Azure Blob storage account:
- Log in to OpenShift Container Platform web console.
- Click Operators → Installed Operators from the left pane of the OpenShift Web Console to view the installed operators.
- Click OpenShift Container Storage Operator.
On the OpenShift Container Storage Operator page, scroll right and click the Backing Store tab.
Figure 2.3. OpenShift Container Storage Operator page with backing store tab

Click Create Backing Store.
Figure 2.4. Create Backing Store page

On the Create New Backing Store page, perform the following:
- Enter a name for Backing Store Name.
- Select Azure Blob as the Provider.
- Click Switch to Credentials.
- Enter the Account Name of Azure Blob storage account you created earlier.
-
Enter the value of
key1of the Azure storage account you noted down earlier. - Enter the name of the container that you created inside the Azure storage account for Target Blob Container. This allows you to create a connection that tells MCG that it can use this container for the system.
- Click Create Backing Store.
- In the OpenShift Container Platform web console, click Installed Operators → OpenShift Container Storage → Bucket Class.
-
Edit
noobaa-default-bucket-classYAML specification fieldspec: placementPolicy: tiers: -backingStores:to use the newly created backing store instead ofnoobaa-default-backing-store.
Verification steps
Run the following command by using the MCG command line tool
noobaa(frommcg rpmpackage) to verify that the Azure backing store that you created is inReadystate.$ noobaa status -n openshift-storage
Verify that the output shows the default bucket class in
Readystate and uses the expected backing store.. . . ------------------ - Backing Stores - ------------------ NAME TYPE TARGET-BUCKET PHASE AGE noobaa-azure-backing-store azure-blob noobaabucketcontainer Ready 10m27s noobaa-default-backing-store s3-compatible nb.1595507787728.apps.mbukatov20200723a.azure.qe.rh-ocs.com Ready 1h58m20s ------------------ - Bucket Classes - ------------------ NAME PLACEMENT PHASE AGE noobaa-default-bucket-class {Tiers:[{Placement: BackingStores:[noobaa-azure-backing-store]}]} Ready 1h58m21s
2.4. Verifying OpenShift Container Storage deployment
Use this section to verify that OpenShift Container Storage is deployed correctly.
2.4.1. Verifying the state of the pods
To determine if OpenShift Container Storage is deployed successfully, you can verify that the pods are in running state.
Procedure
- Click Workloads → Pods from the left pane of the OpenShift Web Console.
Select openshift-storage from the Project drop down list.
For more information on the amount of pods to expect for each component and how the amount of pods varies depending on the number of nodes and OSDs, see Table 2.1, “Pods corresponding to storage components for a three worker node cluster”
Verify that the following pods are in running and completed state by clicking on the Running and the Completed tabs:
Table 2.1. Pods corresponding to storage components for a three worker node cluster
Component No. of pods Name of the pod Number of pods that you must see for the following components:
OpenShift Container Storage Operator
1
ocs-operator-*Rook-ceph Operator
1
rook-ceph-operator-*Multicloud Object Gateway
4
-
noobaa-operator-* -
noobaa-core-* -
nooba-db-* -
noobaa-endpoint-*
Mon
3
-
rook-ceph-mon-* -
rook-ceph-mon-* rook-ceph-mon-*(on different nodes)
rook-ceph-mgr
1
rook-ceph-mgr-*(on storage node)MDS
2
rook-ceph-mds-ocs-storagecluster-cephfilesystem-*(2 pods on different storage nodes)lib-bucket-provisioner
1
lib-bucket-provisioner--*(on any node)Number of pods for CSI vary depending on the number of nodes selected as storage nodes (a minimum of 3 nodes)
CSI
10
cephfs(at least 5 pods)-
csi-cephfsplugin-*(1 on each node where storage is consumed, that is, 3 pods on different nodes) -
csi-cephfsplugin-provisioner-*(2 pods on different storage nodes if available)
-
rbd(at least 5 pods in total)-
csi-rbdplugin-*(one on each node where storage is consumed, that is, 3 pods on different nodes) -
csi-rbdplugin-provisioner-*(2 pods on different storage nodes if available)
-
rook-ceph-drain-canary
3
rook-ceph-drain-canary-*(3 pods, that is, one on each storage node)rook-ceph-crashcollector
3
rook-ceph-crashcollector-*(3 pods)Number of OSDs vary depending on
CountandReplicadefined for each StorageDeviceSet in StorageCluster.OSD
6
-
rook-ceph-osd-*(3 pods across different nodes) -
rook-ceph-osd-prepare-ocs-deviceset-*(3 pods across different nodes)
-
2.4.2. Verifying the OpenShift Container Storage cluster is healthy
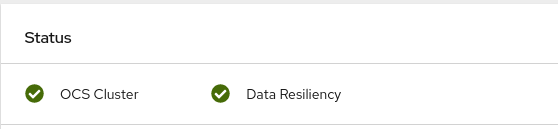
Click Home → Overview from the left pane of the OpenShift Web Console and click Persistent Storage tab.
In the Status card, verify that OCS Cluster has a green tick mark as shown in the following image:
Figure 2.5. Health status card in Persistent Storage Overview Dashboard
In the Details card, verify that the cluster information is displayed appropriately as follows:
Figure 2.6. Details card in Persistent Storage Overview Dashboard

For more information on verifying the health of OpenShift Container Storage cluster using the persistent storage dashboard, see Monitoring OpenShift Container Storage.
2.4.3. Verifying the Multicloud Object Gateway is healthy
Click Home → Overview from the left pane of the OpenShift Web Console and click the Object Service tab.
In the Status card, verify that the Multicloud Object Gateway (MCG) storage displays a green tick icon as shown in following image:
Figure 2.7. Health status card in Object Service Overview Dashboard

In the Details card, verify that the MCG information is displayed appropriately as follows:
Figure 2.8. Details card in Object Service Overview Dashboard

For more information on verifying the health of OpenShift Container Storage cluster using the object service dashboard, see Monitoring OpenShift Container Storage.
2.4.4. Verifying that the storage classes are created and listed
You can verify that the storage classes are created and listed as follows:
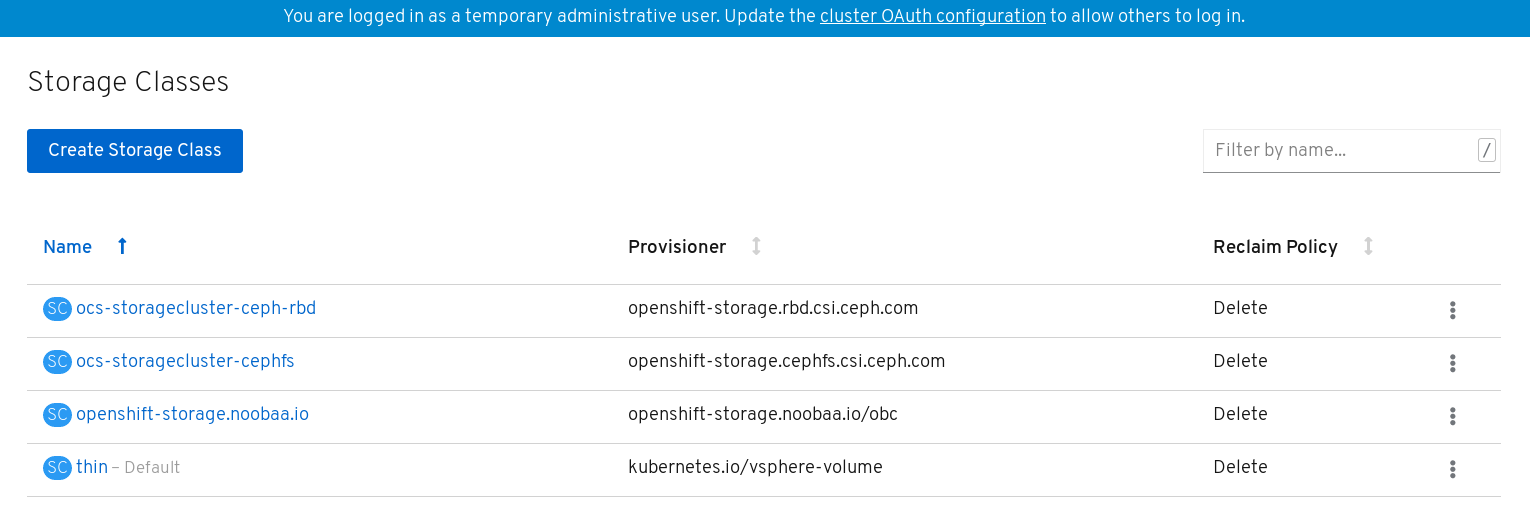
Click Storage → Storage Classes from the left pane of the OpenShift Web Console.
Verify that the following three storage classes are created with the OpenShift Container Storage cluster creation:
-
ocs-storagecluster-ceph-rbd -
ocs-storagecluster-cephfs -
openshift-storage.noobaa.io
-