5.8. Red Hat Enterprise Linux 5 rhn_register Client
Red Hat Enterprise Linux 5 introduces a new version of
rhn_register. The new version of this application works with the yum-based RHN client that will replace up2date. The rhn_register application included as part of Red Hat Enterprise Linux 4 and earlier will continue to operate as expected.
The
rhn_register application runs as part of the firstboot process. The first time a newly-installed Red Hat Enterprise Linux 5 system is booted, an application that performs the initial configuration of your system uses rhn_register to register your system with RHN.
If you should need to re-register your system at a later time, you can use
rhn_register to do so. You can execute the command rhn_register from the command line as root. If you have never registered, you can start rhn_register by selecting Applications (the main menu on the panel) ⇒ System Tools ⇒ Package Updater. (You will be asked to enter the root password.) The yum-based client then triggers rhn_register if there is no /etc/sysconfig/rhn/systemid file on the system.
If you have already registered before and
/etc/sysconfig/rhn/systemid exists on the system, rhn_register first asks if you are sure that you would like to register in this way. Doing so may create a duplicate system profile in RHN. Consider using rhnreg_ks and activation keys to re-register a system without creating a duplicate entry.
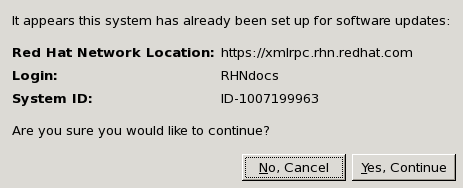
Figure 5.16. Verify Re-Registration
If you are certain you would like to re-register this way, select the Yes, Continue button.
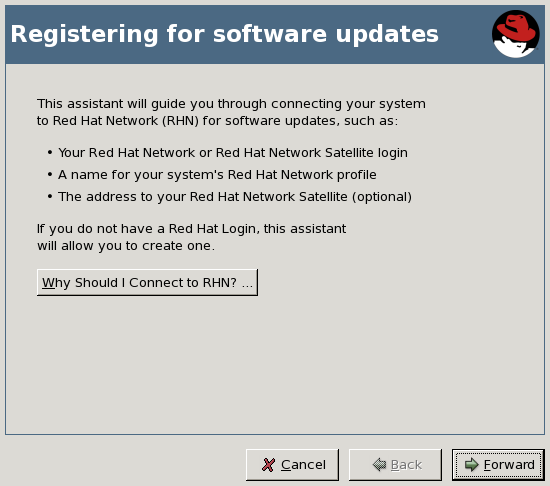
Figure 5.17. Registering for Software Updates
This first page describes the purpose of the application. To learn more about the benefits of RHN, press the Why Should I Connect to RHN? button. Otherwise, press the Forward button to continue.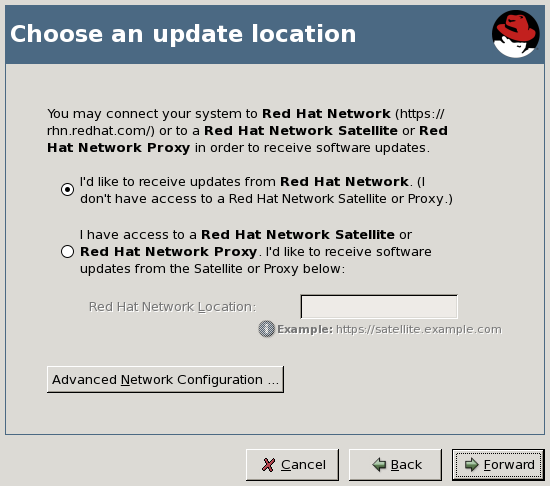
Figure 5.18. Choose an Update Location
This page allows you to select the source of your software updates - either from RHN's Hosted environment or from an RHN Satellite Server or RHN Proxy Server. If your organization has a Satellite or Proxy, select the second radio button and enter the URL of your Satellite or Proxy into the Red Hat Network Location field.If you connect to the internet through an HTTP Proxy, press the Advanced Network Configuration button. In the next window, use the appropriate fields for your HTTP proxy; if your proxy requires authentication, enter the username and password here. When finished, press the Close button to continue. You are returned to the Choose an Update Location page. Press Forward to continue.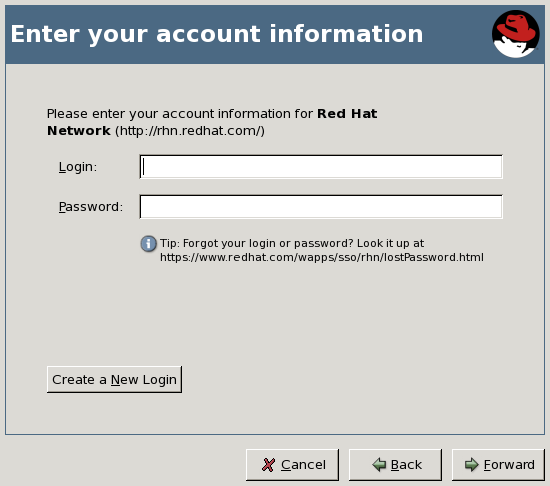
Figure 5.19. Enter Your Account Information
This page requires you to enter your account information, if you already have an RHN account, or to create a new account if you do not. To create a new RHN account, press the Create a New Account button. Fill in the fields that are marked with an asterisk and any other information you wish to enter. Press the Create New Login button to create your new login.Note
If you are registering to RHN Hosted as part of an organization, please do not create a new account through this screen. Contact your Organization Administrator and request that they create an account for you, then provide that information in the Enter Your Account Information page. Otherwise, you may not be correctly associated with your organization or its resources.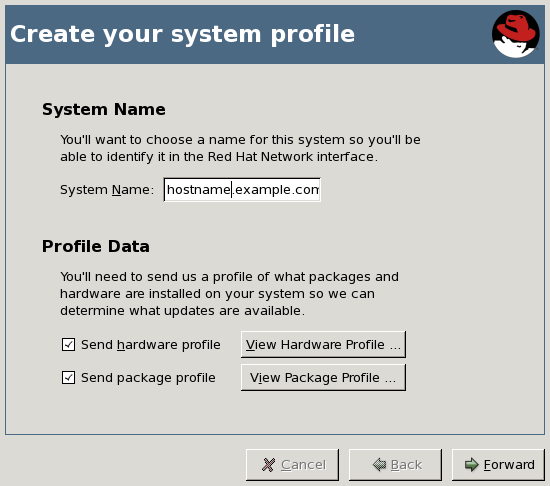
Figure 5.20. Create Your System Profile
This page allows you to select a profile name for the system you are registering. The default name for any system is that system's hostname, although you may change it as you like. You can also select whether to report hardware and package information to RHN. It is recommended that you choose to report this information; doing so allows RHN to automatically subscribe your system to the base and child channels most appropriate to your system. If you wish, you may press either the View Hardware Profile or View Package Profile button to view the information thatrhn_registeruploads to RHN in this step.Note
This automatic registration does not automatically subscribe your system to optional child channels, such as the RHN Tools channel. If you wish to register a system and have them automatically subscribed to a set of channels of your choice, consider using a kickstart profile orrhnreg_ksand activation keys to do so.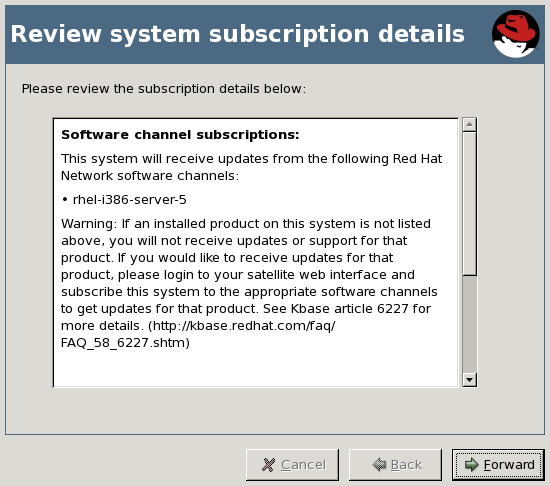
Figure 5.21. Review System Subscription Details
This page displays the base and child channel information to which your system has been subscribed. Take a moment to review the channels, and then press Forward to continue.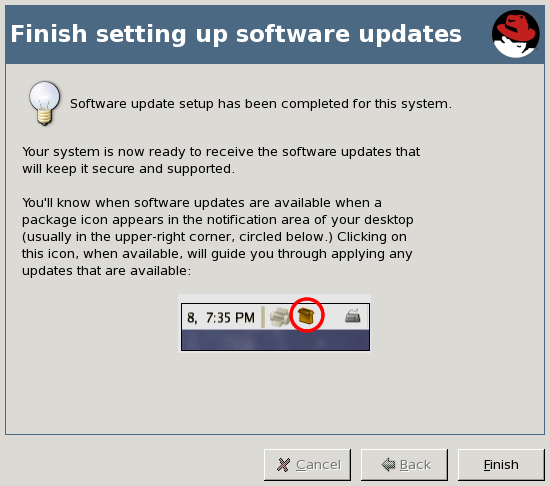
Figure 5.22. Finish Setting Up Software Updates
This page indicates that you have successfully registered a Red Hat Enterprise Linux 5 system with RHN. From this point, you do not have to do anything to receive software updates. A package icon will appear in the upper right corner of your desktop when updates are available. Click on this icon to apply available updates. Click Finish to exit the wizard.If you do not have any entitlements available for this system, this final page indicates that the registration has failed. This does not mean that the system profile has not been stored with RHN, only that you will not receive automatic updates without manual intervention. You can always login to the RHN web interface and either purchase additional entitlements or shift an entitlement from another system in order to entitle this one. Click the Exit software update setup button to exit the wizard.

