
Red Hat Training
A Red Hat training course is available for Red Hat Fuse
Chapter 3. JBoss Integration and SOA Development
3.1. JBoss Integration and SOA Development
The JBoss Integration and SOA Development plug-in is provided to support JBoss Fuse Service Works in JBoss Developer Studio. It provides the following features:
- Creation of SwitchYard projects
- Adding SwitchYard capabilities to existing Maven based JBoss Developer Studio projects
- Configuration of SwitchYard capabilities
- A graphical editor for editing SwitchYard application configuration
- Java2WSDL
- XML catalog entries for SwitchYard configuration schema
- Integration supporting the SwitchYard Maven plug-in (org.switchyard:switchyard-plugin)
- Support for workspace deployment of SwitchYard projects
The JBoss Integration and SOA Development plug-in is provided by the JBoss Development Studio Integration Stack.
3.2. Installing JBoss Developer Studio Integration Stack
JBoss Developer Studio Integration Stack is not packaged as part of JBoss Developer Studio installations. These plug-ins must be installed independently through JBoss Central, as detailed in the procedure below.
Procedure 3.1. Install JBoss Developer Studio Integration Stack
- Start JBoss Developer Studio.
- In JBoss Central, select the Software/Update tab. Scroll through the list to locate JBoss Developer Studio Integration Stack. Select the check box next to JBoss Integration and SOA Development and click .

Figure 3.1. Find JBoss Developer Studio Integration Stack in JBoss Central Software/Update Tab
- In the Install wizard, ensure the check boxes are selected for the software you want to install and click . It is recommended that you install all of the selected components.
- Review the details of the items listed for install and click . After reading and agreeing to the license(s), click I accept the terms of the license agreement(s) and click . The Installing Software window opens and reports the progress of the installation.
- During the installation process you may receive warnings about installing unsigned content. If this is the case, check the details of the content and if satisfied click to continue with the installation.
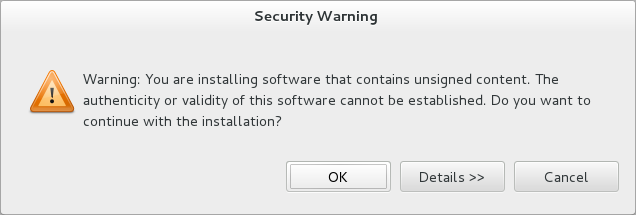
Figure 3.2. Warning Prompt for Installing Unsigned Content
- Once installing is complete, you are prompted to restart the IDE. Click to restart now and if you need to save any unsaved changes to open projects. Note that changes do not take effect until the IDE is restarted.
Once installed, you may need to complete additional configuration actions before you can use the individual JBoss Developer Studio Integration Stack components. For plug-in specific configuration information, see the appropriate Red Hat JBoss product documentation available from https://access.redhat.com/site/documentation on the Red Hat Customer Portal.
Important
The installation method for early releases of JBoss Developer Studio Integration Stack may vary from that given here. For instructions, see the appropriate Red Hat JBoss product documentation available from https://access.redhat.com/site/documentation on the Red Hat Customer Portal.
3.3. Helpful Tips
- Honor all XML schema locations
- After installation, go to → → → and ensure
Honor all XML schema locationscheck box is cleared. This prevents erroneous XML validation errors from appearing onswitchyard.xmlfiles. - DTD warning
- Importing SwitchYard quickstarts into JBoss Developer Studio results in non-fatal warnings regarding
log4j.dtd. These can be safely ignored. To stop receiving the warning, ensure the filelog4j.xmlis closed before starting a project. - JavaSE-1.6 error message
- When commencing a project, a warning may be displayed saying "Build path specifies execution environment JavaSE-1.6". To disable this warning, go to your Java preferences and ensure that JavaSE-1.7 JDK is checked to support JavaSE-1.6 environments.
3.4. Running Quickstarts from JBoss Developer Studio
Overview
This topic demonstrates how to import a quickstart application to JBoss Developer Studio and then deploy it to a running application server.
Prerequisites
The JBoss Integration and SOA Development tools must be installed from the JBoss Developer Studio Integration Stack.
- Open JBoss Developer Studio.
- Click → → → .
- Select and navigate to the quickstart directory, for example,
EAP_HOME/quickstarts/switchyard/bean-serviceand then select .The import tool scans the directory to locate the associatedpom.xmlfile. - Click .
- The quickstart is listed in the Project Explorer view. You can expand the project to explore its contents.
- In the Project Explorer view, right-click on the project's name and click → → .
Result
The quickstart application is deployed to the server and enabled by default.
3.5. Import Projects From a Git Repository in JBoss Developer Studio
JBoss Developer Studio can be configured to connect to a central Git asset repository. The repository is where versions of rules, models, functions and processes are stored. This Git repository must already be defined by the KIE Workbench.
- Start the Red Hat JBoss EAP server (if not already running) by selecting the server from the server tab and click the start icon.
- Select → and expand Git. Select and click Next.
- Select the repository source as and click Next.
- Enter the details of the Git repository in the next window and click Next.
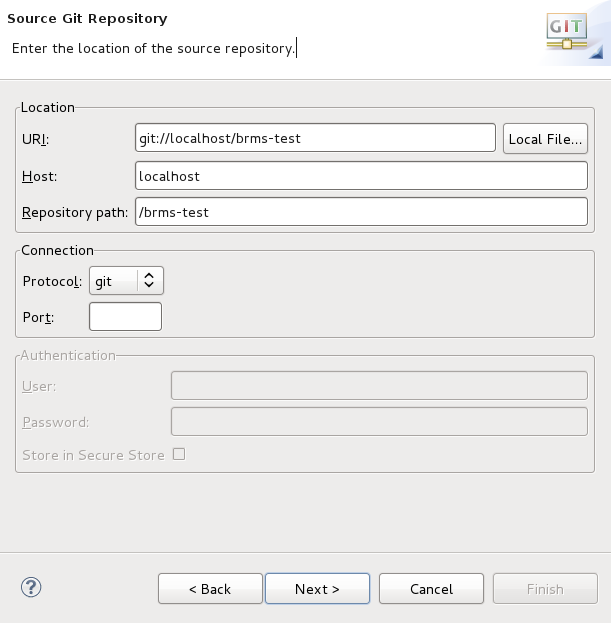
Figure 3.3. Git Repository Details
- Select which branch you want to import in the next window and click Next.
- You are presented with the option to define the local storage for this project. Enter (or select) a non-empty directory, make any configuration changes and click Next.
- Import the project as a general project in the next window and click Next. Name this project and click Finish.
3.6. Setting a New Rules Runtime in JBoss Developer Studio
Setting this runtime provides an environment for new rules sets. It consists of a collection of jar files which are then utilized in rules creation. Once you have set up a runtime, you can go about adding and modifying rules in JBoss Developer Studio.
- Download and unzip the runtime jars files located in the
jboss-brms-engine.ziparchive of the JBoss BRMS Deployable zip archive (available from Red Hat Customer Portal). - From the Red Hat JBoss Developer Studio menu, select Window and click Preferences.
- Select → → .
- Click Add; provide a name for the new runtime, and click Browse to navigate to the directory where the runtime is located.
- Click OK, select the new runtime and click OK again. A dialog box indicates, if you have existing projects, that JBoss Developer Studio must be restarted to update the Runtime.
3.7. Editing the SwitchYard Configuration File
The JBoss Integration and SOA Development plug-in for JBoss Developer Studio provides a graphical editor for creating and maintaining your SwitchYard configuration file (
switchyard.xml).
Assuming you have the plug-in installed, when you open a
switchyard.xml file, by default it opens with the SwitchYard Visual Multipage Editor.
From here you can choose between three tabs (or views):
- Design
- This is the primary graphical interface for building your SwitchYard application. From here you can interact with and configure each of the application's entities, and add new entities from the Palette. The visual design is automatically converted into XML which you can view from the Source tab.
- Domain
- In this tab you can set additional configuration such as Domain Properties and Security Configurations. You can also enable message tracing from here.
- Source
- From the Source tab you can see the source XML which is generated automatically from the entities configured in the Design tab.
Note
Users cannot modify theswitchyard.xmlfile directly from the Source tab.
- Q: Why should I use the graphical editor?
- Q: How can I modify the switchyard.xml file directly within JBoss Developer Studio?
Q:
Why should I use the graphical editor?
A:
- The editor automatically manages dependencies for a project. For example, when you add a new binding or implementation to a composite, the editor adds the necessary info to
switchyard.xmland the necessary Maven dependencies to thepom.xml. If you forget to update thepom.xml, the project fails to build (validate). - The editor automatically manages namespaces based on the features being used and the configuration level of the project.
- The editor provides syntax and semantic validation, such as missing transformations and unused references.
Q:
How can I modify the
switchyard.xml file directly within JBoss Developer Studio?
A:
- Navigate to the
src/main/resources/META-INF/switchyard.xmlfile in the Project Explorer window. - Right-click on the file and select → .
Important
- Close the
switchyard.xmlfile (as presented by the SwitchYard Visual Multipage Editor) before opening it with the XML Editor to avoid synchronization issues. - After completing your source edits, close the file and synchronize the model for the visual editor: right-click on the project in the Project Explorer, then select → .
Note
The default editor for this file now is the XML Editor. To change it back to the graphical editor, right-click on the file and select → .
Warning
Red Hat recommends using the graphical editor to prevent corruption of the
switchyard.xml file. If the editor does not suit your needs, please consider submitting a request for enhancement.