
Red Hat Training
A Red Hat training course is available for Red Hat JBoss Enterprise Application Platform
4.2. Configure Maven
4.2.1. About Maven
4.2.2. Configure the Maven Settings
4.2.3. Configure Maven for Red Hat JBoss Developer Studio
4.2.3.1. Configure Maven for Use with Red Hat JBoss Developer Studio
Procedure 4.3. Configure Maven in Red Hat JBoss Developer Studio
- Click →, expand JBoss Tools and select JBoss Maven Integration.
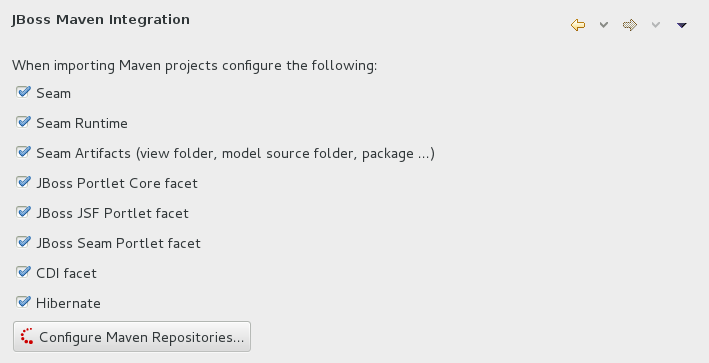
Figure 4.7. JBoss Maven Integration Pane in the Preferences Window
- Click .
- Click to configure the JBoss GA Tech Preview Maven repository. Complete the
Add Maven Repositorydialog as follows:- Set the Profile ID, Repository ID, and Repository Name values to
jboss-ga-repository. - Set the Repository URL value to
http://maven.repository.redhat.com/techpreview/all. - Click the checkbox to enable the Maven repository.
- Click
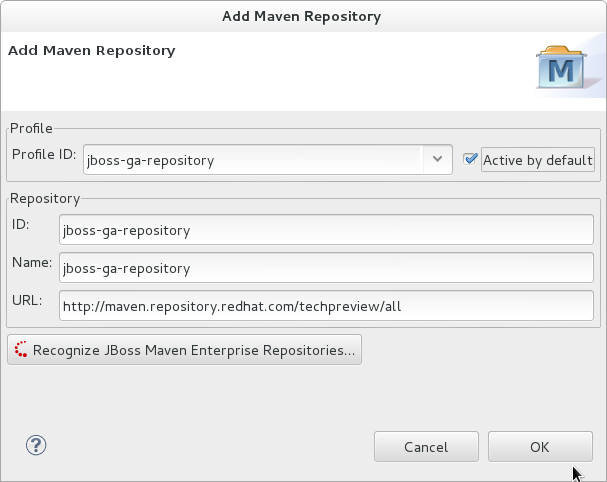
Figure 4.8. Add Maven Repository - JBoss Tech Preview
- Click to configure the JBoss Early Access Maven repository. Complete the
Add Maven Repositorydialog as follows:- Set the Profile ID, Repository ID, and Repository Name values to
jboss-earlyaccess-repository. - Set the Repository URL value to
http://maven.repository.redhat.com/earlyaccess/all/. - Click the checkbox to enable the Maven repository.
- Click
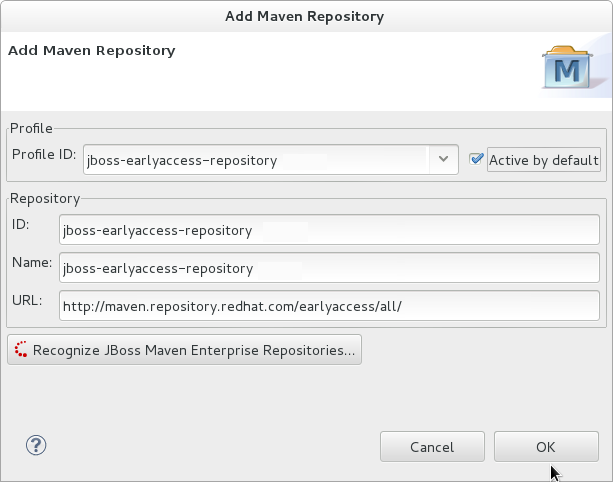
Figure 4.9. Add Maven Repository - JBoss Early Access
- Review the repositories and click .

Figure 4.10. Review Maven Repositories
- You are prompted with the message "Are you sure you want to update the file 'MAVEN_HOME/settings.xml'?". Click to update the settings. Click to close the dialog.The JBoss EAP Maven repository is now configured for use with Red Hat JBoss Developer Studio.
4.2.4. Configure Maven for Command Line
4.2.4.1. Download and Install Maven
- Go to Apache Maven Project - Download Maven and download the latest distribution for your operating system.
- See the Maven documentation for information on how to download and install Apache Maven for your operating system.
4.2.4.2. Configure the Maven Settings for Use with Command Line
- You can copy the preconfigured
settings.xmlfile that ships with the quickstarts. - You can manually edit the Maven
settings.xmlfile.
You must install Maven before you configure the settings. For more information, see: Section 4.2.4.1, “Download and Install Maven”
Procedure 4.4. Configure Maven Using the Settings Shipped with the Quickstart Examples
settings.xml file that is configured to use the online JBoss EAP Maven repository. If you have downloaded the quickstarts, this is the easiest way to configure the settings.
- This procedure overwrites the existing Maven settings file, so you must back up the existing Maven
settings.xmlfile.- Locate the Maven install directory for your operating system. It is usually installed in
USER_HOME/.m2/directory.- For Linux or Mac, this is:
~/.m2/ - For Windows, this is:
\Documents and Settings\USER_NAME\.m2\or\Users\USER_NAME\.m2\
- If you have an existing
USER_HOME/.m2/settings.xmlfile, rename it or make a backup copy so you can restore it later.
- If have not yet downloaded the quickstarts, follow the instructions here: Section 3.4.1, “Download the Quickstarts”.
- Copy the
QUICKSTART_HOME/settings.xmlfile to theUSER_HOME/.m2/directory. - If you modify the
settings.xmlfile while Red Hat JBoss Developer Studio is running, follow the procedure at the end of this topic entitled Refresh the Red Hat JBoss Developer Studio User Settings.
Procedure 4.5. Manually Edit and Configure the Maven Settings To Use the Online JBoss EAP Maven Repository
- Locate the Maven install directory for your operating system. It is usually installed in
USER_HOME/.m2/directory.- For Linux or Mac, this is
~/.m2/ - For Windows, this is
\Documents and Settings\USER_NAME\.m2\or\Users\USER_NAME\.m2\
- If you do not find a
settings.xmlfile, copy thesettings.xmlfile from theUSER_HOME/.m2/conf/directory into theUSER_HOME/.m2/directory. - Copy the following XML into the
<profiles>element of the file.<!-- Configure the JBoss GA Maven repository --> <profile> <id>jboss-ga-repository</id> <repositories> <repository> <id>jboss-ga-repository</id> <url>http://maven.repository.redhat.com/techpreview/all</url> <releases> <enabled>true</enabled> </releases> <snapshots> <enabled>false</enabled> </snapshots> </repository> </repositories> <pluginRepositories> <pluginRepository> <id>jboss-ga-plugin-repository</id> <url>http://maven.repository.redhat.com/techpreview/all</url> <releases> <enabled>true</enabled> </releases> <snapshots> <enabled>false</enabled> </snapshots> </pluginRepository> </pluginRepositories> </profile> <!-- Configure the JBoss Early Access Maven repository --> <profile> <id>jboss-earlyaccess-repository</id> <repositories> <repository> <id>jboss-earlyaccess-repository</id> <url>http://maven.repository.redhat.com/earlyaccess/all/</url> <releases> <enabled>true</enabled> </releases> <snapshots> <enabled>false</enabled> </snapshots> </repository> </repositories> <pluginRepositories> <pluginRepository> <id>jboss-earlyaccess-plugin-repository</id> <url>http://maven.repository.redhat.com/earlyaccess/all/</url> <releases> <enabled>true</enabled> </releases> <snapshots> <enabled>false</enabled> </snapshots> </pluginRepository> </pluginRepositories> </profile>Copy the following XML into the<activeProfiles>element of thesettings.xmlfile.<activeProfile>jboss-ga-repository</activeProfile> <activeProfile>jboss-earlyaccess-repository</activeProfile>
- If you modify the
settings.xmlfile while Red Hat JBoss Developer Studio is running, follow the procedure at the end of this topic entitled Refresh the Red Hat JBoss Developer Studio User Settings.
Procedure 4.6. Refresh the Red Hat JBoss Developer Studio User Settings
settings.xml file while Red Hat JBoss Developer Studio is running, you must refresh the user settings.
- From the menu, choose → .
- In the Preferences Window, expand Maven and choose User Settings.
- Click the button to refresh the Maven user settings in Red Hat JBoss Developer Studio.

Figure 4.11. Update Maven User Settings
Important
- Missing artifact ARTIFACT_NAME
- [ERROR] Failed to execute goal on project PROJECT_NAME; Could not resolve dependencies for PROJECT_NAME
~/.m2/repository/ subdirectory on Linux, or the %SystemDrive%\Users\USERNAME\.m2\repository\ subdirectory on Windows.