
Chapter 3. Creating a Fuse Online integration that is triggered by an API call
To trigger execution of an integration on demand, start the integration with a REST API service that you provide. Integrations that start this way are referred to as API provider integrations. An API provider integration allows REST API clients to invoke commands that trigger execution of the integration.
When Fuse Online publishes an API provider integration, any client with network access to the integration endpoints can trigger execution of the integration.
By default, Fuse Online annotates an API provider integration’s API service definition for use with 3scale.
The following topics provide information and instructions for creating API provider integrations:
3.1. Creating an API provider integration
To create an API provider integration, provide an OpenAPI document (.json, .yaml, or .yml file) that defines the operations that the integration can perform. Fuse Online creates an execution flow for each operation. Edit the flow for each operation to add connections and steps that process integration data according to the requirements for that operation.
Prerequisites
You are able to provide or define an OpenAPI document for the REST API operations that you want the integration to perform.
To experiment, download the raw version of the
task-api.jsonfile, which is an OpenAPI document for an API provider quickstart. You can upload this file when Fuse Online prompts you to provide an OpenAPI document. Alternatively, you can specify the URL for the rawtask-api.jsonfile, which is https://raw.githubusercontent.com/syndesisio/syndesis-quickstarts/1.10/api-provider/task-api.json.- You have a plan for the flow for each OpenAPI operation.
- You created a connection for each application or service that you want to add to an operation’s flow.
Procedure
- In Fuse Online, in the left navigation panel, click Integrations.
- Click Create Integration.
- On the Choose a connection page, click API Provider.
On the Start integration with an API call page:
- If you have an OpenAPI document that defines the REST API operations, upload the OpenAPI document.
- If you need to define the OpenAPI document, select Create a new OpenAPI 3.x document or Create a new OpenAPI 2.x document.
Click Next.
If you uploaded a document, review or edit it:
- Click Review/Edit to open the API Designer editor.
Review and edit as needed.
Optionally, if your document uses the OpenAPI 2 specification, you can click Convert to OpenAPI 3 if you want the API Designer to convert your document to conform with the OpenAPI 3 specification.
- In the upper right, click Save or Cancel to close the editor.
- Click Next.
If you are creating a document, then in the API Designer editor that Fuse Online opens:
- Define the OpenAPI document as described in Creating a REST API definition in API Designer.
- In the upper right, click Save, which closes the editor.
- Click Next.
Result
Fuse Online displays a list of the operations that the OpenAPI document defines.
Next step
For each operation, define a flow that executes that operation.
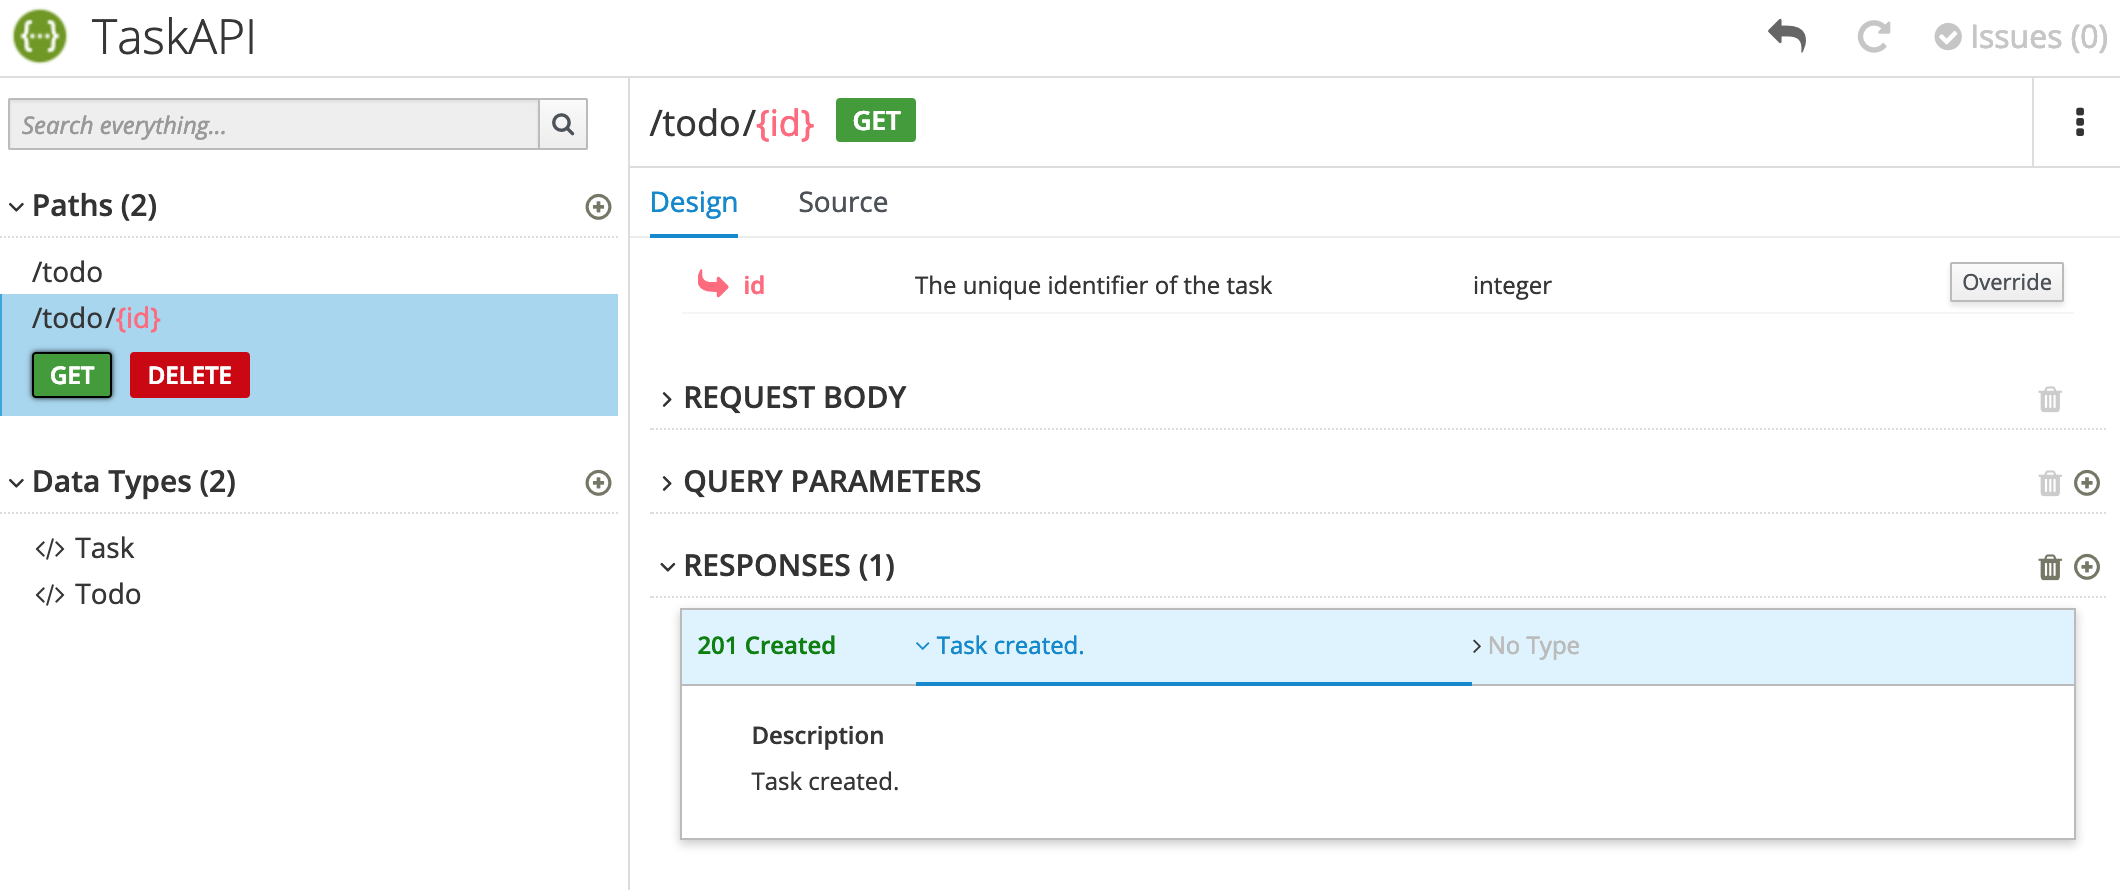
3.1.1. Creating a REST API definition in API Designer
The following steps describe how to create a REST API definition.
About the example
The Task Management API example simulates a simple API that sales consultants might use to track the tasks that they need to do when interacting with customer contacts. Example "to-do" tasks might be "create an account for a new contact" or "place an order for an existing contact". To implement the Task Management API example, you create two paths - one for tasks and one for a specific task. You then define operations to create a task, retrieve all tasks or a specific task, update a task, and delete a task.
Prerequisite
-
You know the endpoints for the API that you want to create. For the Task Management API example, there are two endpoints:
/todoand/todo/{id}.
Procedure
Click New API. A new API page opens.
By default, API Designer uses the OpenAPI 3 specification. If you want to use the OpenAPI 2 specification, click the arrow next to the New API button and then select OpenAPI 2.
NoteIf you open an API based on the OpenAPI 2 specification, you can use the API Designer’s Convert to OpenAPI 3 option to convert the API to comply with the OpenAPI 3 specification.
To change the API name:
-
Hover the cursor over the name and then click the edit icon (
 ) that appears.
- Edit the name. For example, type Task API.
- Click the checkmark icon to confirm the name change.
-
Hover the cursor over the name and then click the edit icon (
Optionally:
- Provide a version number and a description.
- Add your contact information (name, email address, and URL).
- Select a license.
- Define tags.
- Define one or more servers.
- Configure a security scheme.
- Specify security requirements.
Define a relative path to each individual endpoint of the API. The field name must begin with a slash (/).
For the Task Management API example, create two paths:
-
A path for tasks:
/todo A path for a specific task by ID:
/todo/{id}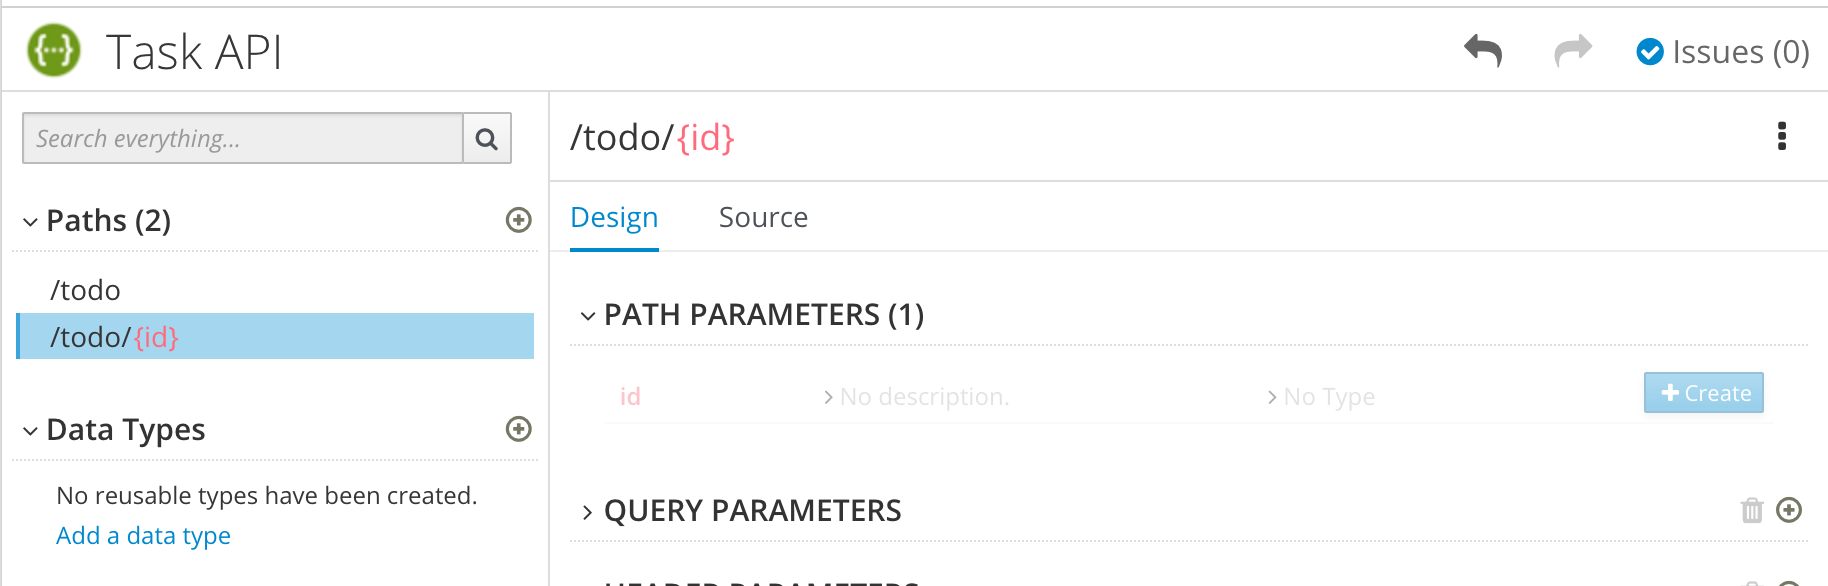
-
A path for tasks:
Specify the type of any path parameters.
For the example
idparameter:In the Paths list, click
/todo/{id}.The id parameter appears in the PATH PARAMETERS section.
- Click Create.
- For the description, type: The ID of the task to find.
For the type, select integer as 32-Bit integer.

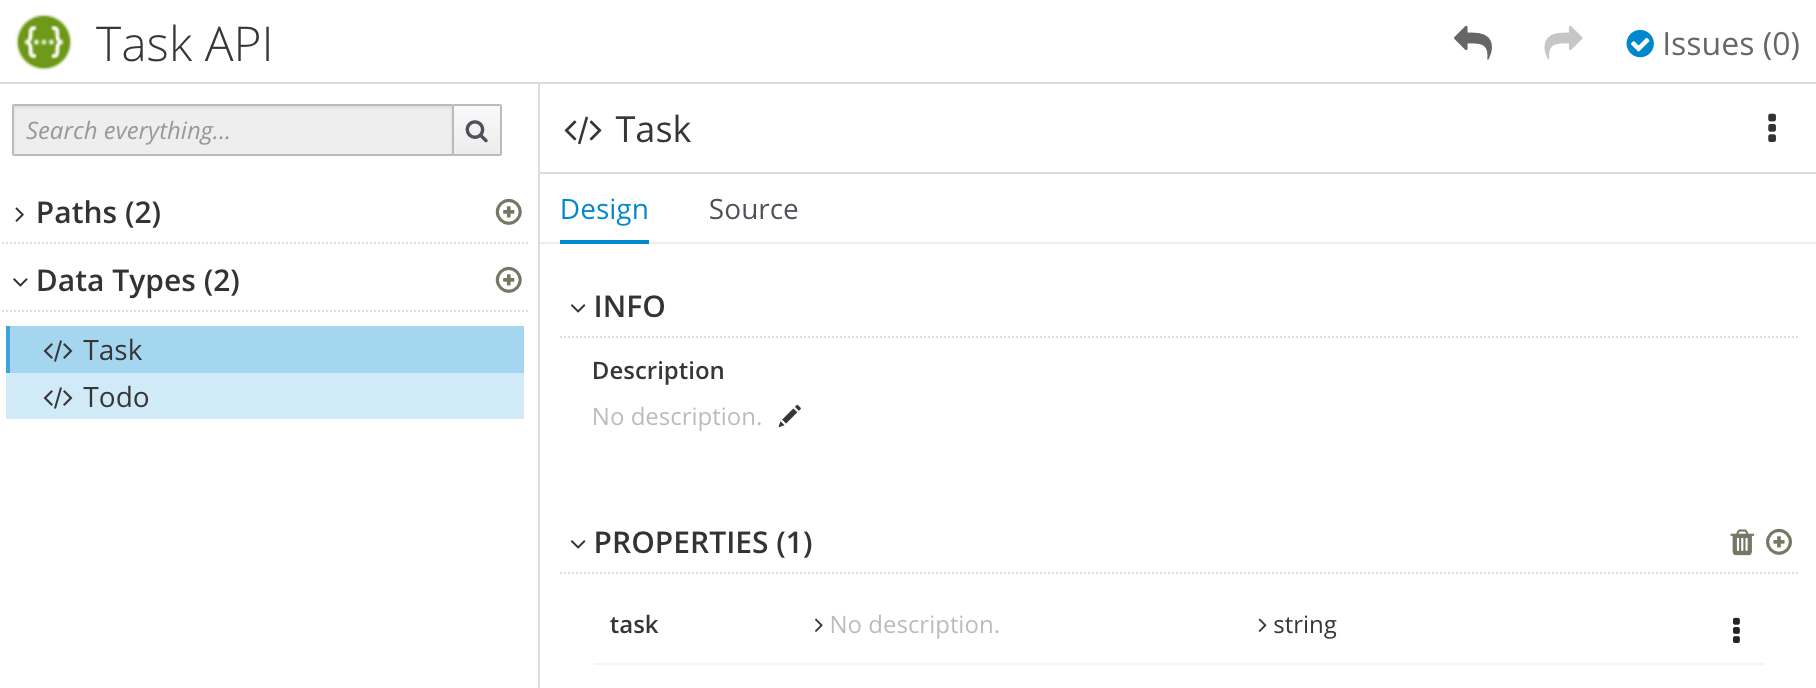
In the Data Types section, define reusable types for the API.
- Click Add a data type.
- In the Add Data Type dialog, type a name. For the Task Management API example, type Todo.
Optionally, you can provide an example from which API Designer creates the data type’s schema. You can then edit the generated schema.
For the Task Management API example, start with the following JSON example:
{ "id": 1, "task": "my task", "completed": false }- Optionally, you can choose to create a REST Resource with the data type.
Click Save. If you provided an example, API Designer generates a schema from the example:

- Optionally, you can add edit the schema properties and add new ones.
For the Task Management API example, create another data type named Task with one property named task of type string.
For each path, define operations (GET, PUT, POST, DELETE, OPTIONS, HEAD, or PATCH).
For the Task Management API example, define the operations as described in the following table:
Table 3.1. Task Management API operations
Path Operation Description Request Body Response /todoPOST
Create a new task.
Media Type:
application/jsonData Type: TaskStatus Code: 201 Description: Task created
Response Body: Media Type:
application/jsonData Type: Todo
/todoGET
Get all tasks.
Not applicable
- Status Code: 200 Description: Task deleted
- Status Code: 400 Description: Task not deleted
/todo/{id}GET
Get a task by ID.
Not applicable
-
Status Code: 200 Description: Task found for ID Response Body: Media Type:
application/jsonData type: Task - Status Code: 404 Description: No task with provided identifier found.
/todo/{id}UPDATE
Update a task by ID.
Request Body type: Task
- Status Code: 200 Description: Completed
- Status Code: 400 Description: Task not updated
/todo/{id}DELETE
Delete a task by ID.
Not applicable
- Status Code: 200 Description: Task deleted
- Status Code: 400 Description: Task not deleted
- Resolve any issues, as described in Resolving validation issues in API Designer.
Additional resources
- For information about the OpenAPI Specification, go to: https://github.com/OAI/OpenAPI-Specification
3.1.2. Resolving validation issues in API Designer
When you create and edit an API, API Designer identifies issues that you must resolve with an exclamation (!) icon and also with a list of issues in the API Designer title bar.
Prerequisites
- Open an API in API Designer.
Procedure
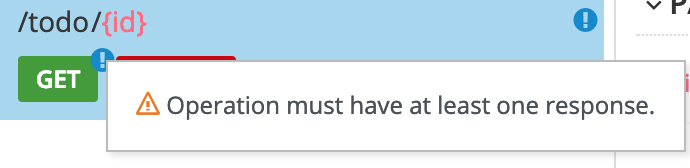
Find an issue indicated by an exclamation (!) icon. For example:

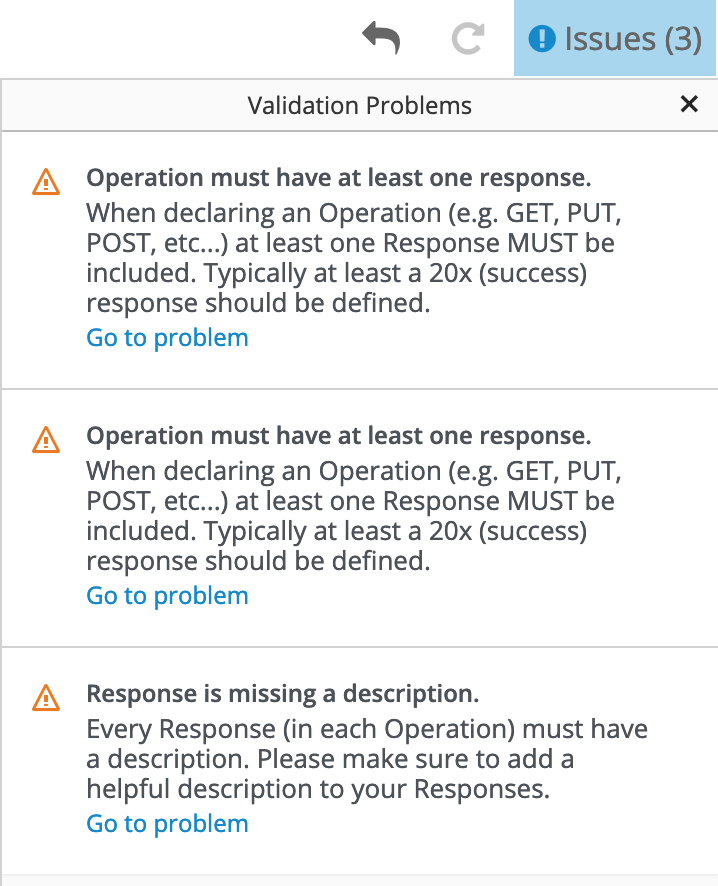
Click the exclamation icon to view a description of the issue. For example:
Based on the information provided by the issue description, navigate to the location of the issue and fix it.
For example, to fix the "Operation must have at least one response" issue, click the GET operation to open it and then click Add a response.
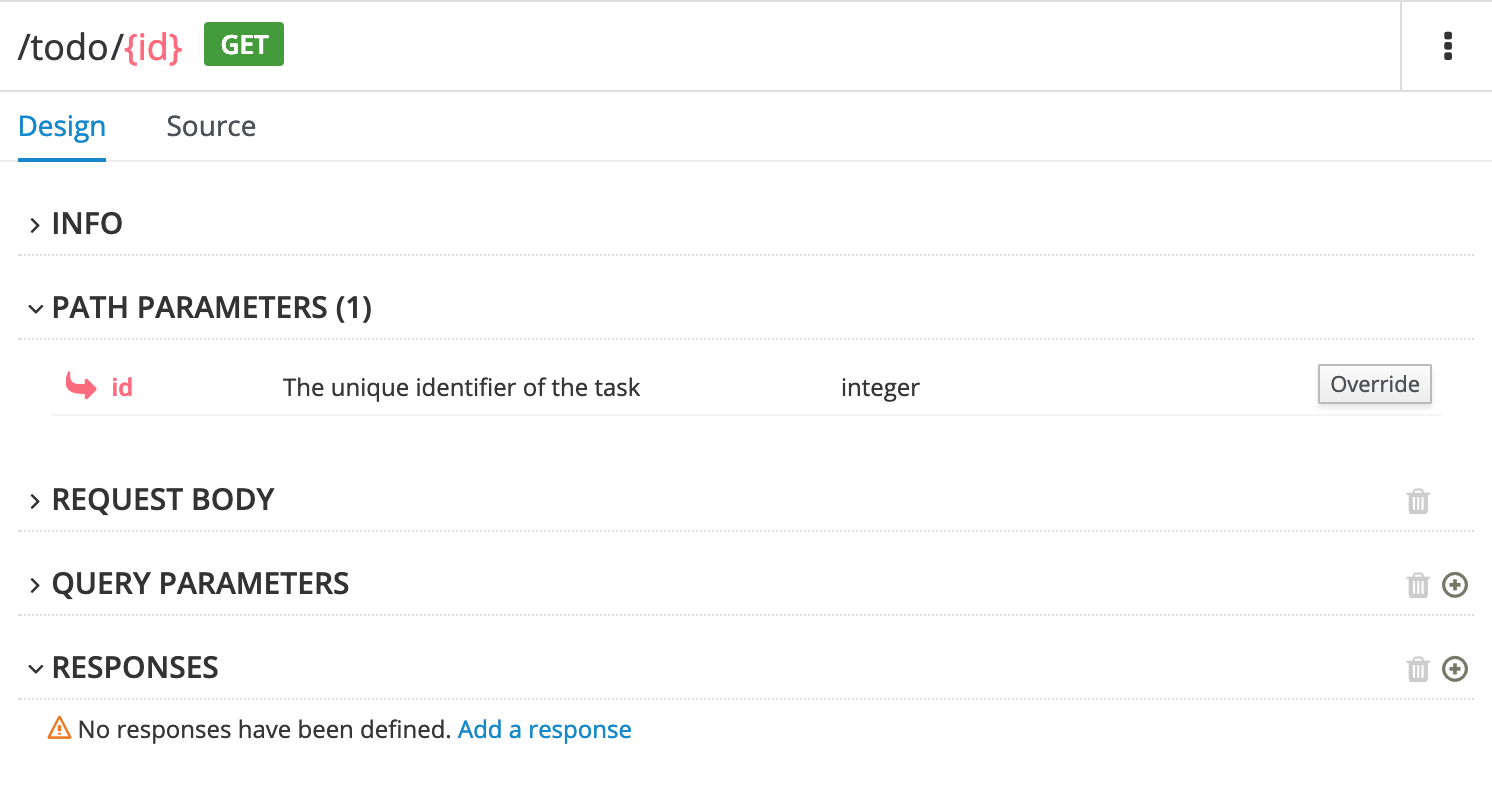
After you type a description for the response, the issue is resolved and the exclamation icon disappears:
For a summary of all issues:
Click the Issues link in the upper right corner.

Click Go to a problem for a specific issue to go to the location of the issue so that you can resolve it.
3.2. Defining the operation flows for an API provider integration
The OpenAPI document that defines your REST API service defines the operations that the service can perform. After you create an API provider integration, you can edit the flow for each operation.
Each operation has exactly one flow. In an operation flow, you can add connections to other applications and services, as well as steps that operate on data between connections.
As you add to operation flows, you might find that you need to update the OpenAPI document that the API provider integration is based on. To do this, click View/Edit API Definition in the upper right of a page in which you are editing your API provider integration. This displays your document in the API Designer editor. In your OpenAPI definition, as long as each operation has a unique operationId property, you can save your updates in API Designer and Fuse Online can synchronize the API provider integration’s flow definitions to have your updates.
Prerequisites
- You created an API provider integration, gave it a name, and saved it.
- You created a connection to each application or service that you want an operation flow to connect to. For details, see the information about creating connections.
- Fuse Online is displaying the list of operations that the API defines.
Procedure
- In the Operations list page, for the operation whose flow you want to define, click Create flow.
For each connection that you want to add to this flow:
- In the flow visualization, click the plus sign to add a connection at that location.
- Click the connection that you want to add.
- Select the action that you want this connection to perform.
- Configure the action by entering data in the labeled fields.
- Click Next.
Add all desired connections to the flow before you continue.
In this operation flow, to process data between connections:
- In the flow visualization, click the plus sign where you want to add a step.
- Click the step that you want to add.
- Configure the step by entering data in the labeled fields.
Click Next.
For help, see Adding steps between connections.
If you want to add another step that processes data between connections, repeat this subset of instructions.
Map data to fields in the next connection:
-
In the flow visualization, check for data type mismatch
 icons, which indicate that the connection cannot process the incoming data. You need to add a data mapper step here.
For each data mismatch icon in the flow visualization:
- Click the plus sign that is just before that step.
- Click Data Mapper.
- Define the needed mappings. For help, see Mapping integration data to fields in the next connection.
- Click Done to add the data mapper step to the flow.
-
In the flow visualization, check for data type mismatch
In the flow visualization, on the Provided API Return Path step, click Configure.
Every API provider integration finishes each operation flow by sending a response to the REST API caller that triggered execution of the operation flow. The response contains one of the return codes that you configure for the Provided API Return Path step that finishes the operation’s flow. Configure the return path step as follows:
- Under Default Response, in the Return Code field, accept the default response that Fuse Online displays, or click the down caret and scroll to select the default response that you want. The flow sends this response when execution of the operation flow does not return any of the configured error responses. Typically, the default response return code indicates a successful operation.
Under Error Handling, indicate whether you want to include the error message in the body of the returned message.
During development, you typically want to return the error message. In production, however, you might want to hide the error message if it contains sensitive or proprietary information. The error message is a JSON formatted string that contains
responseCode,category,message, anderrorelements, for example:{ responseCode: 404, category: "ENTITY_NOT_FOUND_ERROR", message: "SQL SELECT did not SELECT any records" error: SYNDESIS_CONNECTION_ERROR }Note that during development, the most reliable way to know that an error happened is to check the
HTTP_RESPONSE STATUSheader in the response to the caller. You can also check the integration pod’s log forINFOmessages. The integration’s Activity log shows a successful exchange and errors are not always visible in the Activity log.Under Error Response Codes, Fuse Online displays an entry for each error that a connection in the flow might return. For each error, accept the 200 All is good default return code or click to select another HTTP status return code.
The return codes that you can select from, are the return codes that the OpenAPI document defines for the operation that this flow executes. If Fuse Online does not display a return code that you need, you can edit the OpenAPI document to add it.
To do this, in the upper right, click View/Edit API Definition. Edit the OpenAPI document as needed. When you are done, save the OpenAPI document. Fuse Online returns to editing the Provided API Return Path and reflects any changes that you saved.
- Click Next to complete configuration of the return path.
When this flow has all needed connections and steps and there are no data mismatch icons, or when you no longer want to edit the flow for now, do one of the following:
- Publish — To start running the integration, in the upper right, click Publish. This builds the integration, deploys the REST API service to OpenShift, and makes the integration available to be executed. You can publish the integration each time that you complete the creation of an operation’s flow or each time that you edit an operation’s flow.
- Save — To display the list of operations, in the upper right, click Save.
Repeat this procedure to edit another operation’s flow.
Testing API provider integrations
Testing API provider integrations running on one of these platforms:
- OpenShift Online
- OpenShift Dedicated
- OpenShift Container Platform when API discovery is disabled
You can use the
curlutility to confirm that the integration is working as expected. In thecurlcommand, specify the external URL that Fuse Online displays after it publishes the API provider integration. For examples of doing this, see Testing the example API provider quickstart integration.Testing API provider integrations running on OpenShift Container Platform when API discovery is enabled
Red Hat 3scale publishes your API provider integration. To test the integration, open the 3scale dashboard to obtain the integration’s URL.
You can disable discovery for an API provider integration if, for example, you do not want Red Hat 3scale to control access to the integration’s API or you want to test the API provider integration in Fuse Online. If you disable discovery, Fuse Online republishes the integration and provides an external URL for invoking and testing integration execution. To do this, in Fuse Online go to the integration’s summary page. On this page, click Disable discovery. Fuse Online republishes the integration and provides the integration’s URL. For examples of how to test an integration, see Testing the example API provider quickstart integration. After testing, you can re-enable discovery for the API provider integration so that 3scale publishes it.
You can enable or disable discovery for each API provider integration.