
Chapter 10. Configure Red Hat Gluster Storage for Hosted Engine using the Web Console
Ensure that disks specified as part of this deployment process do not have any partitions or labels.
Log into the Web Console
Browse to the Web Console management interface of the first hyperconverged host, for example, https://node1.example.com:9090/, and log in with the credentials you created in Section 5.1, “Installing hyperconverged hosts”.
Start the deployment wizard
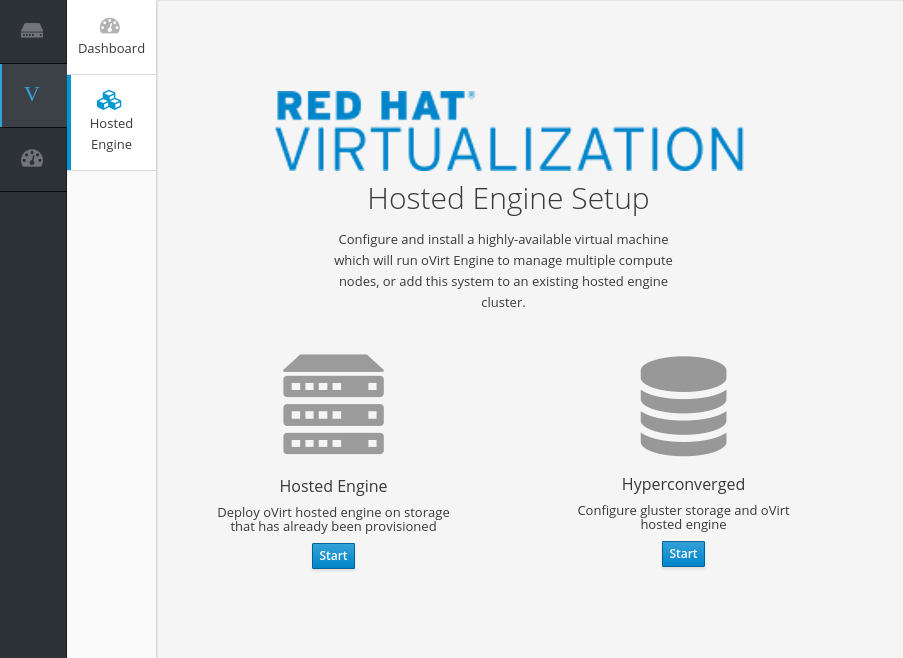
Click Virtualization → Hosted Engine and click Start underneath Hyperconverged.
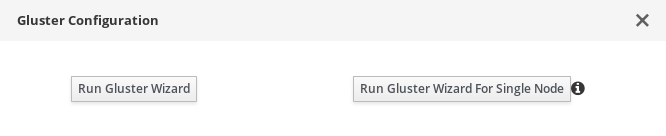
The Gluster Configuration window opens.
Click the Run Gluster Wizard button.
The Gluster Deployment window opens in 3 node mode.
Specify hosts
-
If your hosts do not use multiple networks, check the
Use same hostname for storage and public networkcheckbox. -
If your hosts use IPv6 networking, check the
Select if hosts are using IPv6checkbox. Your hosts must use FQDNs if you select this option; IPv6 addresses are not supported. Specify the back-end (storage network) and front-end (public network) FQDNs of the hyperconverged hosts.
In the
Host1field, specify the FQDN of the hyperconverged host that can SSH to other hosts without a password using key-based authentication.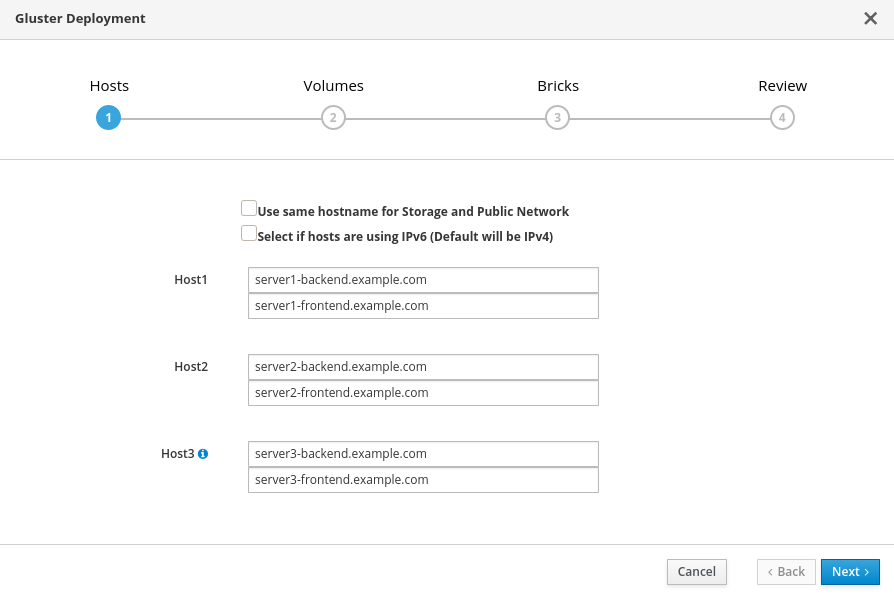
- Click Next.
-
If your hosts do not use multiple networks, check the
Specify volumes
Specify the volumes to create.
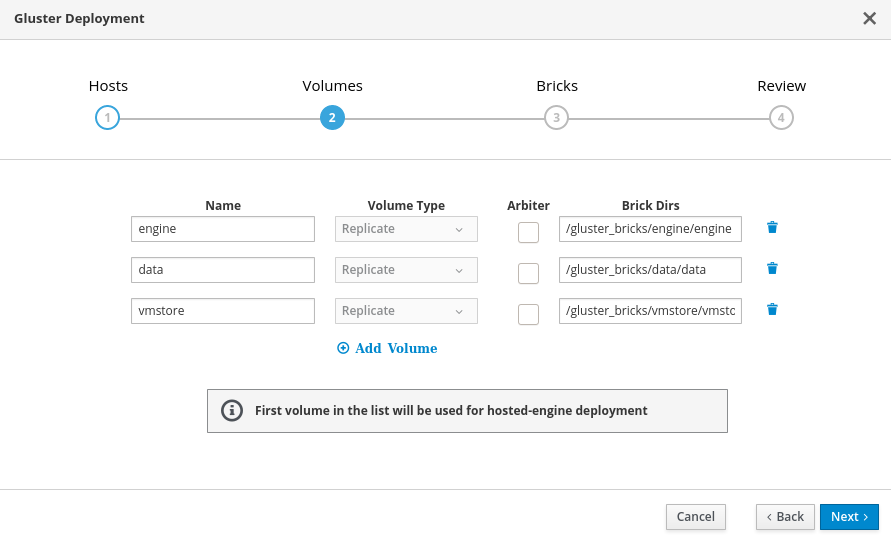
- Name
- Specify the name of the volume to be created.
- Volume Type
- Only replicated volumes are supported for three-node deployments.
- Arbiter
- Specify whether to create the volume with an arbiter brick. If this box is checked, the third disk stores only metadata.
- Brick Dirs
-
The directory that contains this volume’s bricks. Use a brick path of the format
gluster_bricks/<volname>/<volname>.
The default values are correct for most installations.
If you need more volumes, click Add Volumes to add another row and enter your extra volume details.
Specify bricks
Enter details of the bricks to be created.

- RAID Type
- Specify the RAID configuration of the host. Supported values are raid5, raid6, and jbod. Setting this option ensures that your storage is correctly tuned for your RAID configuration.
- Stripe Size
- Specify the RAID stripe size in KB. This can be ignored for jbod configurations.
- Data Disk Count
- Specify the number of data disks in your host’s RAID volume. This can be ignored for jbod configurations.
- Blacklist Gluster Devices
-
Prevents the disk that is specified as a Gluster brick from using a multipath device name. If you want to use a multipath device name, uncheck this checkbox and use the
/dev/mapper/<WWID>format to specify your device in theDevicefield. - Select Host
- If your hosts should use different device names or sizes, use this drop-down menu to change to the host you want to configure.
- LV Name
- The name of the logical volume to be created. This is pre-filled with the name that you specified on the previous page of the wizard.
- Device Name
-
Specify the raw device you want to use in the format
/dev/sdc. Use/dev/mapper/<WWID>format for multipath devices. Use/dev/mapper/luks_<name>format for devices using Network-Bound Disk Encryption. - LV Size
- Specify the size of the logical volume to create in GiB. Do not enter units, only the number. This number should be the same for all bricks in a replicated set. Arbiter bricks can be smaller than other bricks in their replication set.
- Recommendation for LV size
- Logical volume for engine brick must be a thick LV of size 100GB, other bricks created as thin LV reserving 16GB for thinpool metadata and 16GB reserved for spare metadata.
Example:
If the host has a disk of size 1TB, then
engine brick size = 100GB ( thick LV )
Pool metadata size = 16GB
Spare metadata size = 16GB
Available space for thinpool = 1TB - ( 100GB + 16GB + 16GB ) = 868 GB
Other bricks for volumes can be created with the available thinpool storage space of 868GB, for example, vmstore brick with 200GB and data brick with 668GB.
- Enable Dedupe & Compression
Specify whether to provision the volume using VDO for compression and deduplication at deployment time. The logical size of the brick is expanded to 10 times the size of physical volume as part of VDO space savings.
NoteEnsure to enable
Dedupe & Compressionon all the bricks which are part of the volume.- Configure LV Cache
Optionally, check this checkbox to configure a small, fast SSD device as a logical volume cache for a larger, slower logical volume.
- Add the device path to the SSD field.
- Specify the Thinpool device to attach the cache device to.
- Add the size to the LV Size (GB) field.
- Set the Cache Mode used by the device.
WarningTo avoid data loss when using write-back mode, Red Hat recommends using two separate SSD/NVMe devices. Configuring the two devices in a RAID-1 configuration (via software or hardware), significantly reduces the potential of data loss from lost writes.
For further information about lvmcache configuration, see LVM cache logical volumes in the Red Hat Enterprise Linux 8 documentation.
Review and edit configuration
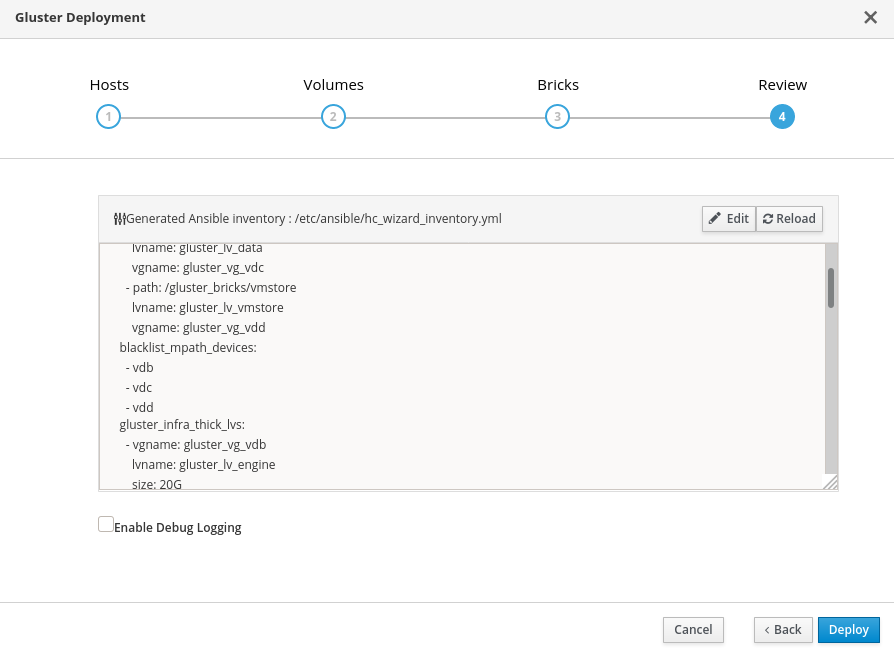
Click Edit to begin editing the generated deployment configuration file.
Make any changes required and click Save.
Review the configuration file.
If all configuration details are correct, click Deploy.
Wait for deployment to complete
You can watch the progress of the deployment in the text field.
The window displays Successfully deployed gluster when complete.

Click Continue to Hosted Engine Deployment and continue the deployment process with the instructions in Chapter 11, Deploy the Hosted Engine using the Web Console.
If deployment fails, click Clean up to remove any potentially incorrect changes to the system. If your deployment uses Network-Bound Disk Encryption, you must then follow the process in Cleaning up Network-Bound Disk Encryption after a failed deployment.
When cleanup is complete, click Redeploy. This returns you to the Review and edit configuration tab so that you can correct any issues in the generated configuration file before reattempting deployment.