
Chapter 9. Managing Gluster volumes using the Web Console
9.1. Accessing the Gluster Management dashboard
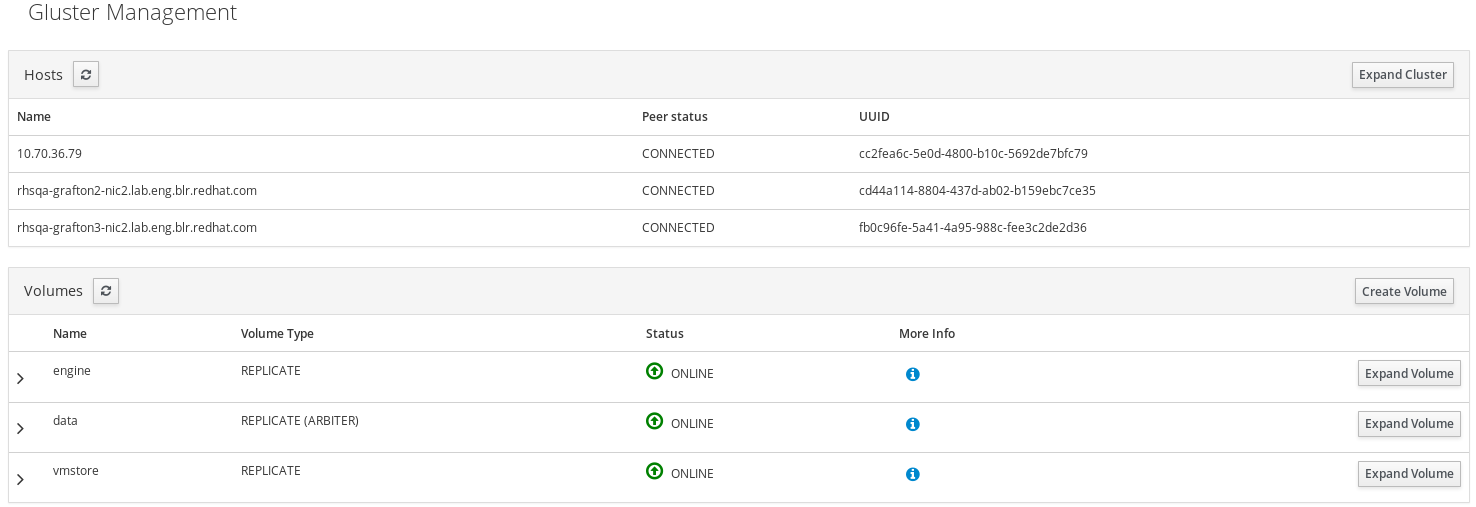
The Gluster Management dashboard lets you view information about the currently configured Gluster volumes in your hyperconverged cluster.
To access the Gluster Management dashboard:
Click Virtualization → Hosted Engine to reach the Hosted Engine dashboard.
The Hosted Engine dashboard in the Web Console
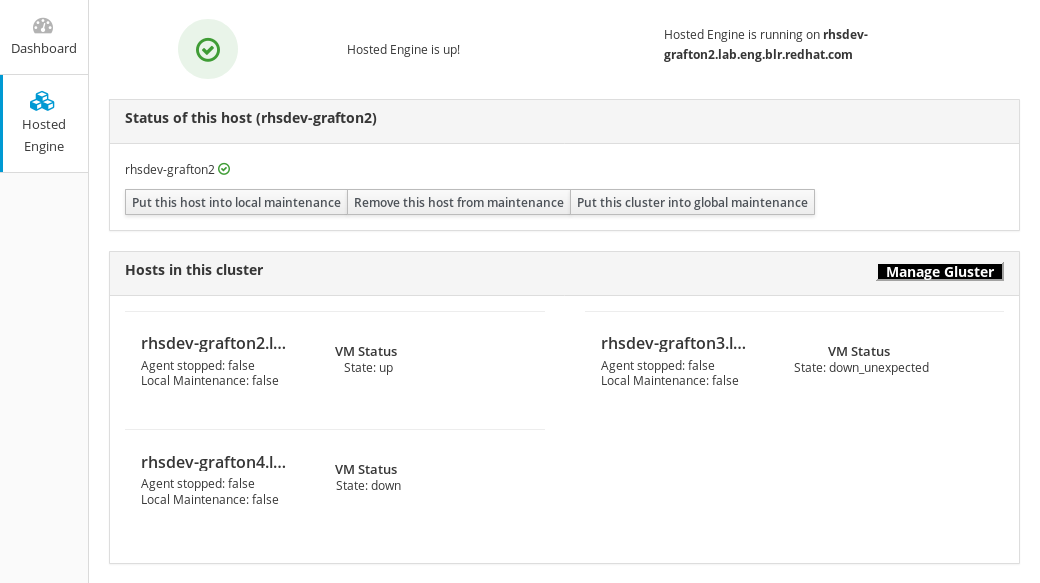
Click Manage Gluster to reach the Gluster Management dashboard.
The Gluster Management dashboard in the Web Console

9.2. Expanding volume from Web console
Follow these instructions to use the Web Console to expand your volume.
Prerequisites
- Verify that your scaling plans are supported: Requirements for scaling.
Procedure
- Log in to the Web Console.
Click Virtualization → Hosted Engine and then click Manage Gluster.
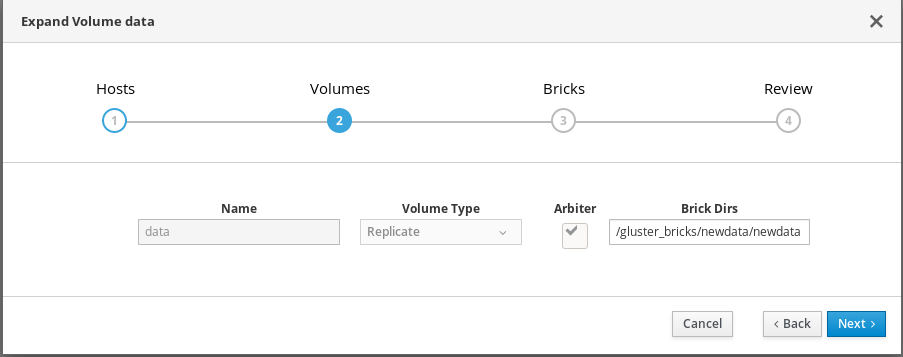
Click Expand volume button beside the volume you want to expand. The expand volume data page opens.

- On the Hosts tab, verify the Host details and click Next.
On the Volumes tab, specify the details of the brick path to be configured for the new disk.
On the Bricks tab, specify the details of the disks to be used to expand the Gluster volume.

On the Review tab, check the generated file for any problems. Here, Enable debug logging, runs ansible-playbook in verbose mode, and provides more logs to add information. When you are satisfied, click Deploy.

9.3. Expanding volume from Red Hat Virtualization Manager
Follow this section to expand an existing volume across new bricks on new hyperconverged nodes.
Prerequisites
- Verify that your scaling plans are supported: Requirements for scaling.
- If your existing deployment uses certificates signed by a Certificate Authority for encryption, prepare the certificates required for the new nodes.
Install three physical machines to serve as the new hyperconverged nodes.
Follow the instructions in Install Physical Host Machines.
Configure key-based SSH authentication without a password.
Configure this from the node that is running the Web Console to all new nodes, and from the first new node to all other new nodes.
ImportantRHHI for Virtualization expects key-based SSH authentication without a password between these nodes for both IP addresses and FQDNs. Ensure that you configure key-based SSH authentication between these machines for the IP address and FQDN of all storage and management network interfaces.
Follow the instructions in Using key-based authentication to configure key-based SSH authentication without a password.
Procedure
Create new bricks
Create the bricks on the servers you want to expand your volume across by following the instructions in Creating bricks using ansible or Creating bricks above a VDO layer using ansible depending on your requirements.
ImportantIf the
path:defined does not begin with/rhgsthe bricks are not detected automatically by the Administration Portal. Synchronize the host storage after running thecreate_brick.ymlplaybook to synchronize the new bricks to the Administration Portal.- Click Compute → Hosts and select the host.
- Click Storage Devices.
- Click Sync.
Repeat for each host that has new bricks.
Add new bricks to the volume
- Log in to RHV Administration Console.
- Click Storage → Volumes and select the volume to expand.
- Click the Bricks tab.
- Click Add. The Add Bricks window opens.
Add new bricks.
- Select the brick host from the Host dropdown menu.
- Select the brick to add from the Brick Directory dropdown menu and click Add.
- When all bricks are listed, click OK to add bricks to the volume.
The volume automatically syncs the new bricks.
9.4. Expanding the hyperconverged cluster by adding a new volume on new nodes using the Web Console
Follow these instructions to use the Web Console to expand your hyperconverged cluster with a new volume on new nodes.
Prerequisites
- Verify that your scaling plans are supported: Requirements for scaling.
- If your existing deployment uses certificates signed by a Certificate Authority for encryption, prepare the certificates that will be required for the new nodes.
Install three physical machines to serve as the new hyperconverged nodes.
Follow the instructions in Deploying Red Hat Hyperconverged Infrastructure for Virtualization.
Configure key-based SSH authentication without a password.
Configure this from the node that is running the Web Console to all new nodes, and from the first new node to all other new nodes.
ImportantRHHI for Virtualization expects key-based SSH authentication without a password between these nodes for both IP addresses and FQDNs. Ensure that you configure key-based SSH authentication between these machines for the IP address and FQDN of all storage and management network interfaces.
Follow the instructions in Using key-based authentication to configure key-based SSH authentication without a password.
Procedure
- Log in to the Web Console.
- Click Virtualization → Hosted Engine and then click Manage Gluster.
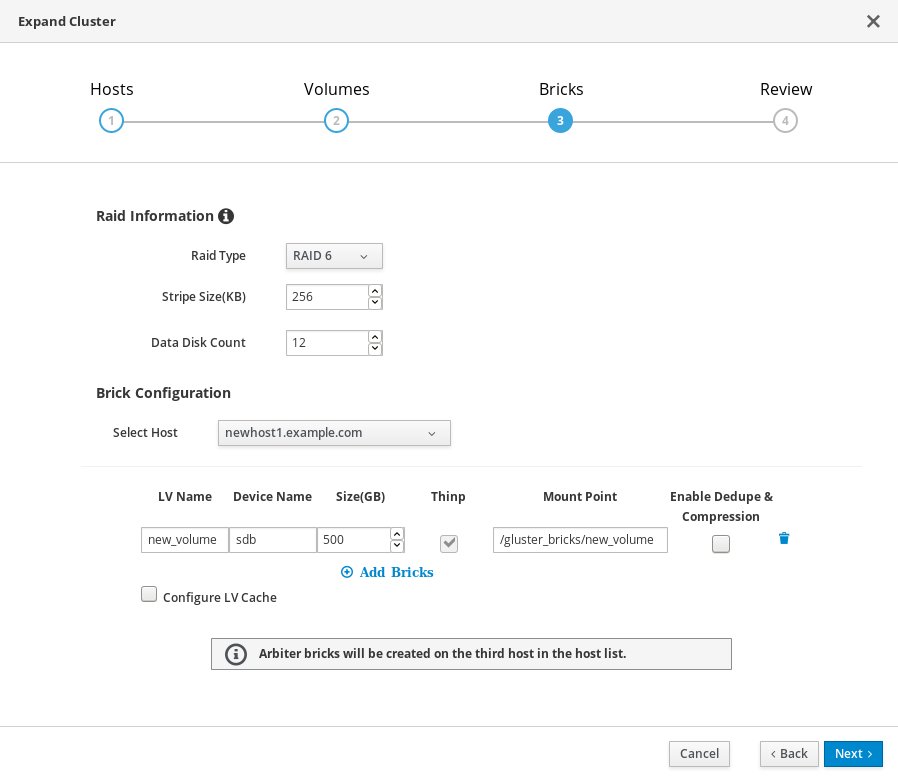
Click Expand Cluster. The Gluster Deployment window opens.
On the Hosts tab, enter the FQDN or IP address of the new hyperconverged nodes and click Next.

On the Volumes tab, specify the details of the volume you want to create.

On the Bricks tab, specify the details of the disks to be used to create the Gluster volume.
On the Review tab, check the generated file for any problems. When you are satisfied, click Deploy.
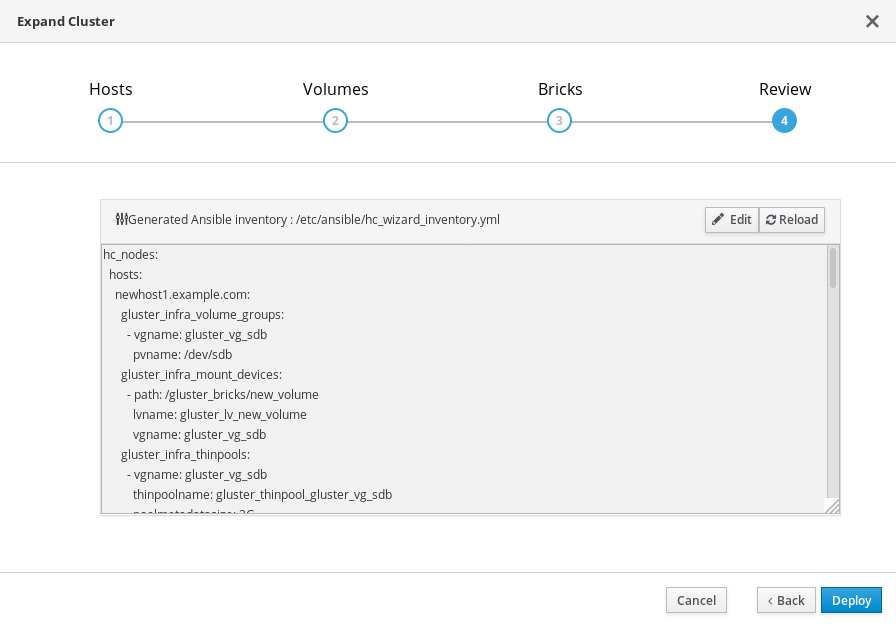
Deployment takes some time to complete. The following screen appears when the cluster has been successfully expanded.

9.5. Creating an additional Gluster volume using the Web Console
Follow these instructions to use the Web Console to create a new Red Hat Gluster Storage volume using raw disks that are available on hyperconverged hosts in your cluster.
Prerequisites
- Verify that the raw disk drives you plan to use for the new volume are visible under the Drives section of the Storage Dashboard, and do not have any file systems listed on their Drive Overview page.
Procedure
- Log in to the Web Console.
- Click Virtualization → Hosted Engine and then click Manage Gluster.
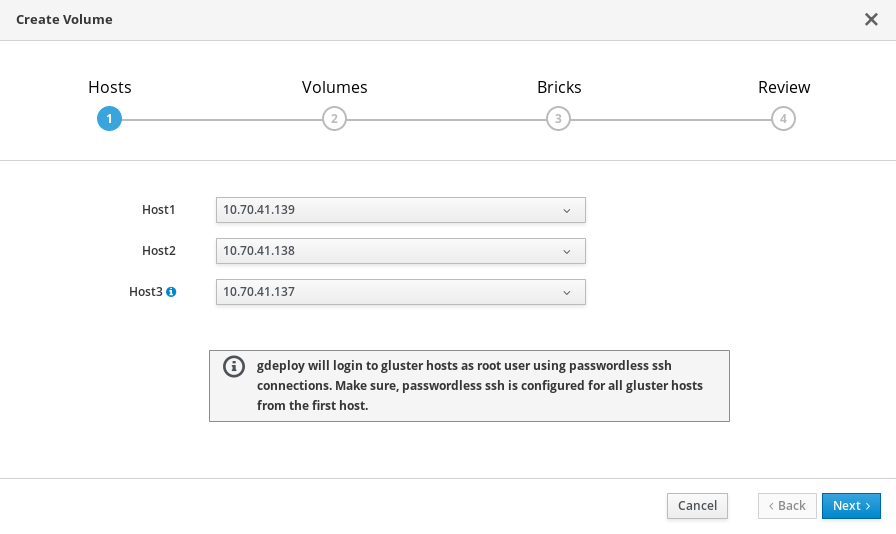
Click Create Volume. The Create Volume window opens.
On the Hosts tab, select three different hyperconverged hosts with unused disks and click Next.
On the Volumes tab, specify the details of the volume you want to create and click Next.

On the Bricks tab, specify the details of the disks to be used to create the volume and click Next.

On the Review tab, check the generated configuration file for any incorrect information. When you are satisfied, click Deploy.
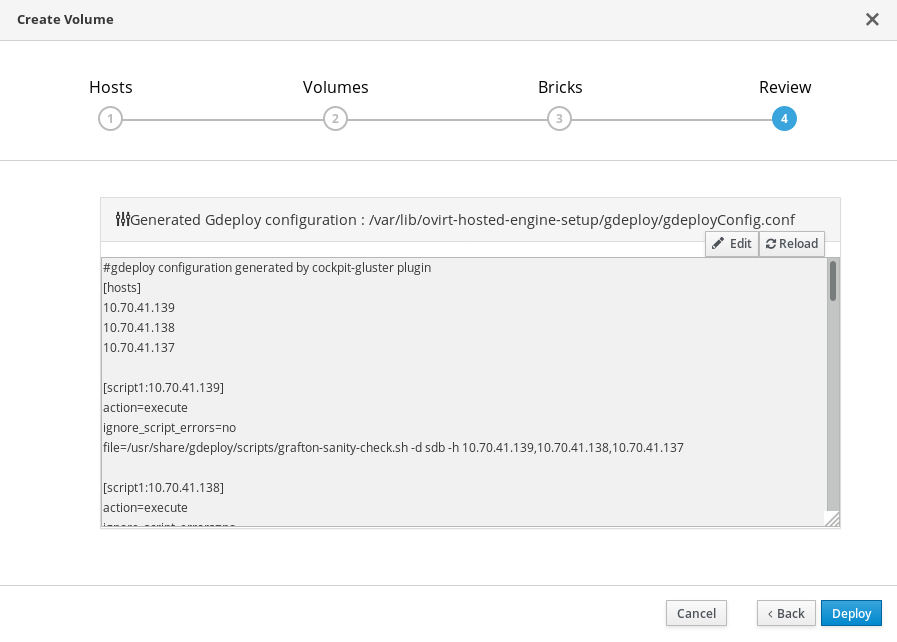
The following screen is displayed when deployment completes successfully.
