
Chapter 2. Configure high availability using fencing policies
Fencing allows a cluster to enforce performance and availability policies and react to unexpected host failures by automatically rebooting hyperconverged hosts.
Several policies specific to Red Hat Gluster Storage must be enabled to ensure that fencing activities do not disrupt storage services in a Red Hat Hyperconverged (RHHI for Virtualization) Infrastructure deployment.
This requires enabling and configuring fencing at both the cluster level and at the host level. See the following sections for details.
2.1. Configuring Fencing Policies in the Cluster
- In the Administration Portal, click Compute → Clusters.
- Select the cluster and click Edit. The Edit Cluster window opens.
- Click the Fencing policy tab.
- Check the Enable fencing checkbox.
Check the checkboxes for at least the following fencing policies:
- Skip fencing if gluster bricks are up
- Skip fencing if gluster quorum not met
See Appendix A, Fencing Policies for Red Hat Gluster Storage for details on the effects of these policies.
- Click OK to save settings.
2.2. Configuring Fencing Parameters on the Hosts
- In the Administration Portal, click Compute → Hosts.
- Select the host to configure, and click Edit to open the Edit Host window.
Click the Power Management tab.
Figure 2.1. Power Management Settings
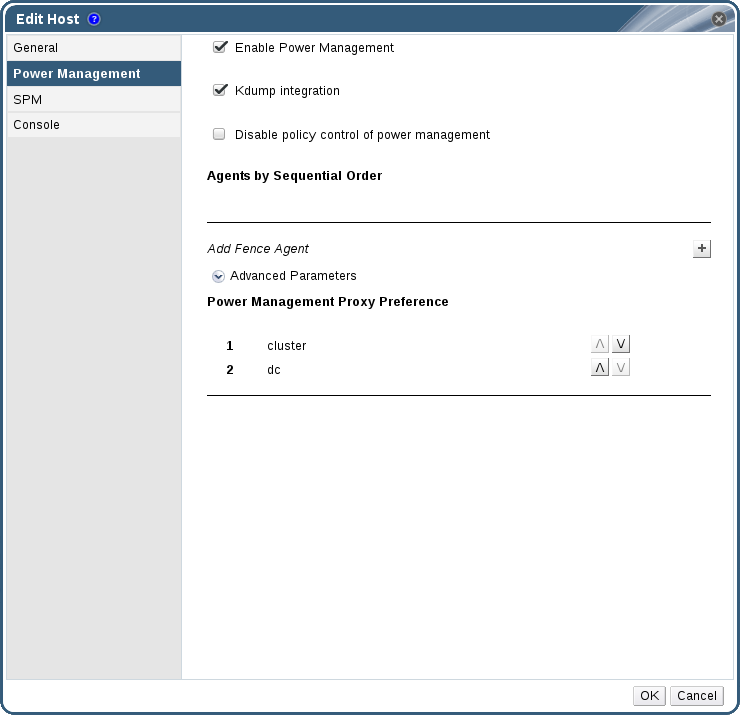
- Check the Enable Power Management check box. This enables other fields on the tab.
Check the Kdump integration check box to prevent the host from fencing while performing a kernel crash dump.
ImportantWhen you enable Kdump integration on an existing host, the host must be reinstalled for kdump to be configured. See Chapter 12, Reinstalling a hyperconverged host for instructions on reinstalling a host.
Click the plus (+) button to add a new power management device. The Edit fence agent window opens.
Figure 2.2. Edit fence agent
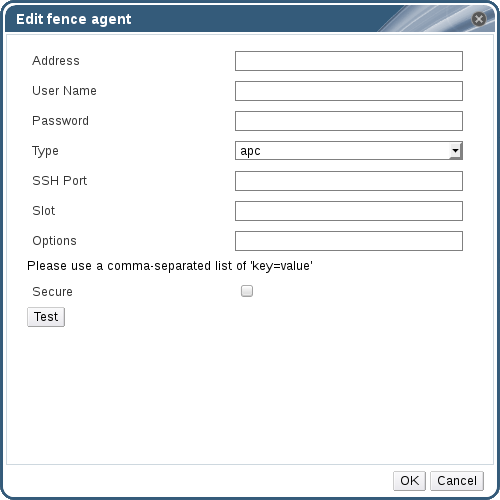
- Enter the Address, User Name, and Password of the power management device.
- Select the power management device Type from the drop-down list.
- Enter the SSH Port number used by the power management device to communicate with the host.
- Enter the Slot number used to identify the blade of the power management device.
- Enter the Options for the power management device. Use a comma-separated list of key=value entries.
- Check the Secure check box to enable the power management device to connect securely to the host.
Click the Test button to ensure the settings are correct. Test Succeeded, Host Status is: on displays upon successful verification.
WarningPower management parameters (userid, password, options, etc.) are tested by Red Hat Virtualization Manager in two situations: during setup, and when parameter values are manually changed in Red Hat Virtualization Manager. If you choose to ignore alerts about incorrect parameters, or if the parameters are changed on the power management hardware without the corresponding change in Red Hat Virtualization Manager, fencing is likely to fail.
- Click OK to finish adding the fence agent.
- Click OK to save your host configuration.
You are returned to the list of hosts. Note that the exclamation mark (!) next to the host’s name has now disappeared, signifying that power management has been successfully configured.