
Chapter 5. Configuring a single node RHHI for Virtualization deployment
5.1. Configuring Red Hat Gluster Storage on a single node
Ensure that disks specified as part of this deployment process do not have any partitions or labels.
Log into the Web Console
Browse to the the Web Console management interface of the first hyperconverged host, for example, https://node1.example.com:9090/, and log in with the credentials you created in the previous section.
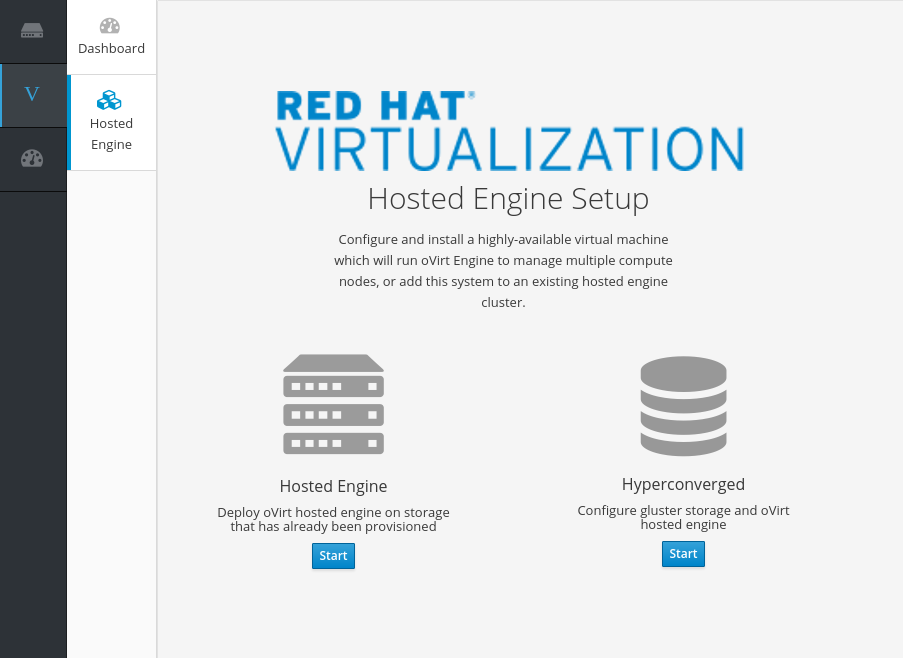
Start the deployment wizard
Click Virtualization → Hosted Engine and click Start underneath Hyperconverged.
The Gluster Configuration window opens.
Click the Run Gluster Wizard for Single Node button.
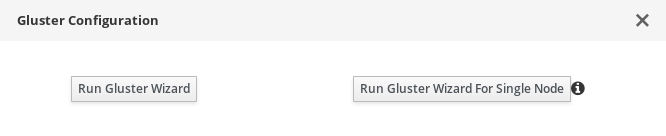
The Gluster Deployment window opens in single node mode.
Specify hyperconverged host
Specify the back-end FQDN on the storage network of the hyperconverged host and click Next.

Specify volumes
Specify the volumes to create.
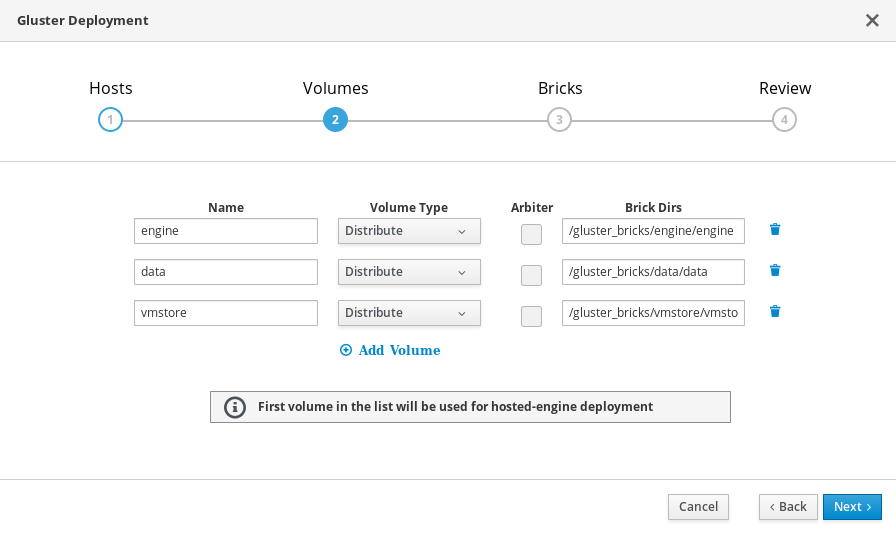
- Name
- Specify the name of the volume to be created.
- Volume Type
- Specify a Distribute volume type. Only distributed volumes are supported for single node deployments.
- Brick Dirs
- The directory that contains this volume’s bricks.
Specify bricks
Specify the bricks to create.
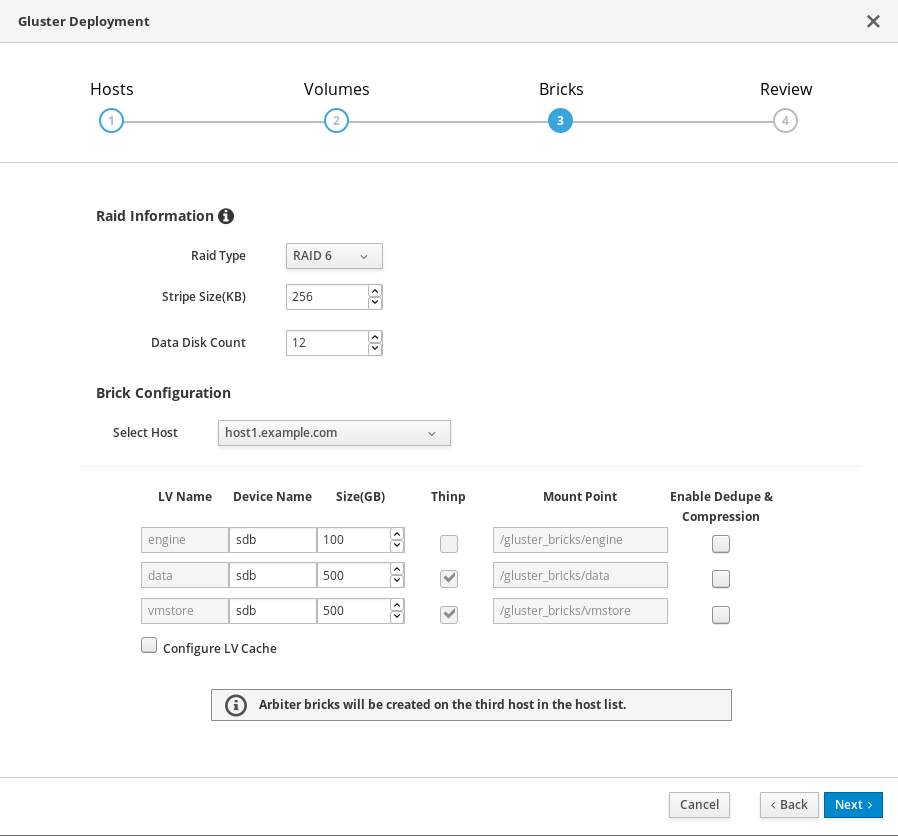
- RAID
- Specify the RAID configuration to use. This should match the RAID configuration of your host. Supported values are raid5, raid6, and jbod. Setting this option ensures that your storage is correctly tuned for your RAID configuration.
- Stripe Size
- Specify the RAID stripe size in KB. Do not enter units, only the number. This can be ignored for jbod configurations.
- Disk Count
- Specify the number of data disks in a RAID volume. This can be ignored for jbod configurations.
- LV Name
- The name of the logical volume to be created. This is pre-filled with the name that you specified on the previous page of the wizard.
- Device
Specify the raw device you want to use. Red Hat recommends an unpartitioned device.
With multipath devices
If the environment has multipath devices for the Gluster deployment from the cockpit, use multipath WWIDs.
For example:/dev/mapper/3600508b1001caab032303683327a6a2e instead of /dev/sdb
Without the multipath devices
If there are no multipath devices in the environment. Blacklist these devices.
NoteBlacklist: Listing of specific devices that will not be considered for multipath.
There are different ways to blacklist the device. For more information, refer to RHEL 7 DM Multipath, chapter 4.2.
To blacklist the device /dev/sdb
- Create a directory: /etc/multipath/conf.d/
Create a file under this directory with the following content: blacklist {
devnodes "<device>"
}
For example:[root@ ~]# cat /etc/multipath/conf.d/99-custom-multipath.conf blacklist { devnodes "sdb" }ImportantLocal disks should not have multipath names. Use lsblk command to check for multipath names.
If there are multipath names on the disks, after blacklisting the disks,reboot the hosts.
- Size
- Specify the size of the logical volume to create in GB. Do not enter units, only the number. This number should be the same for all bricks in a replicated set. Arbiter bricks can be smaller than other bricks in their replication set.
- Mount Point
- The mount point for the logical volume. This is pre-filled with the brick directory that you specified on the previous page of the wizard.
- Thinp
-
This option is enabled and volumes are thinly provisioned by default, except for the
enginevolume, which must be thickly provisioned. - Enable Dedupe & Compression
- Specify whether to provision the volume using VDO for compression and deduplication at deployment time.
- Logical Size (GB)
- Specify the logical size of the VDO volume. This can be up to 10 times the size of the physical volume, with an absolute maximum logical size of 4 PB.
- Configure LV Cache
Optionally, check this checkbox to configure a small, fast SSD device as a logical volume cache for a larger, slower logical volume. Add the device path to the SSD field, the size to the LV Size (GB) field, and set the Cache Mode used by the device.
WarningTo avoid data loss when using write-back mode, Red Hat recommends using two separate SSD/NVMe devices. Configuring the two devices in a RAID-1 configuration (via software or hardware), significantly reduces the potential of data loss from lost writes.
For further information about lvmcache configuration, see Red Hat Enterprise Linux 7 LVM Administration.
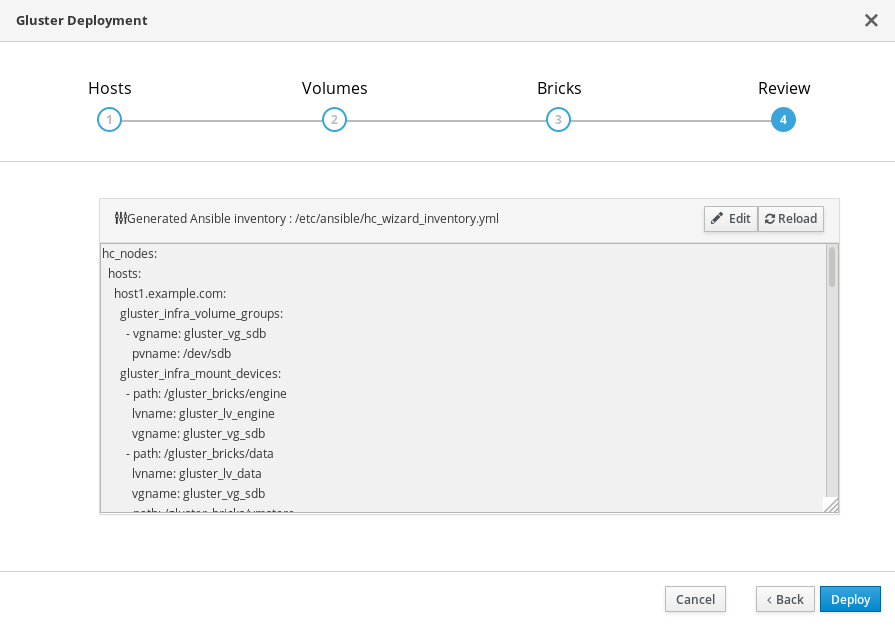
Review and edit configuration
Review the contents of the generated configuration file and click Edit to modify the file, and Save to keep your changes.
Click Deploy when you are satisfied with the configuration file.
Wait for deployment to complete
You can watch the deployment process in the text field.
The window displays Successfully deployed gluster when complete.
Click Continue to Hosted Engine Deployment and continue the deployment process with the instructions in Section 5.2, “Deploy the Hosted Engine on a single node using the Web Console”.
If deployment fails, click the Redeploy button. This returns you to the Review and edit configuration tab so that you can correct any issues in the generated configuration file before reattempting deployment.
If you want to start over again from scratch, run the following command to clean up the attempted deployment.
# ansible-playbook -i /etc/ansible/hc_wizard_inventory.yml /etc/ansible/roles/gluster.ansible/playbooks/hc-ansible-deployment/tasks/gluster_cleanup.yml
5.2. Deploy the Hosted Engine on a single node using the Web Console
This section shows you how to deploy the Hosted Engine on a single node using the Web Console. Following this process results in Red Hat Virtualization Manager running in a virtual machine on your node, and managing that virtual machine. It also configures a Default cluster consisting only of that node, and enables Red Hat Gluster Storage functionality and the virtual-host tuned performance profile for the cluster of one.
Prerequisites
- Configure Red Hat Gluster Storage on a single node
Gather the information you need for Hosted Engine deployment
Have the following information ready before you start the deployment process.
- IP address for a pingable gateway to the hyperconverged host
- IP address of the front-end management network
- Fully-qualified domain name (FQDN) for the Hosted Engine virtual machine
- MAC address that resolves to the static FQDN and IP address of the Hosted Engine
Procedure
Open the Hosted Engine Deployment wizard
If you continued directly from the end of Configure Red Hat Gluster Storage on a single node, the wizard is already open.
Otherwise:
- Click Virtualization → Hosted Engine.
- Click Start underneath Hyperconverged.
Click Use existing configuration.
ImportantIf the previous deployment attempt failed, click Clean up instead of Use existing configuration to discard the previous attempt and start from scratch.
Specify virtual machine details

Enter the following details:
- Engine VM FQDN
-
The fully qualified domain name to be used for the Hosted Engine virtual machine, for example,
engine.example.com. - MAC Address
The MAC address associated with the Engine VM FQDN.
ImportantThe pre-populated MAC address must be replaced.
- Root password
- The root password to be used for the Hosted Engine virtual machine.
- Click Next. Your FQDNs are validated before the next screen appears.
Specify virtualization management details
Enter the password to be used by the
adminaccount in the Administration Portal. You can also specify notification behaviour here.
- Click Next.
Review virtual machine configuration
Ensure that the details listed on this tab are correct. Click Back to correct any incorrect information.

- Click Prepare VM.
Wait for virtual machine preparation to complete.

If preparation does not occur successfully, see Viewing Hosted Engine deployment errors.
- Click Next.
Specify storage for the Hosted Engine virtual machine
Specify the back-end address and location of the
enginevolume.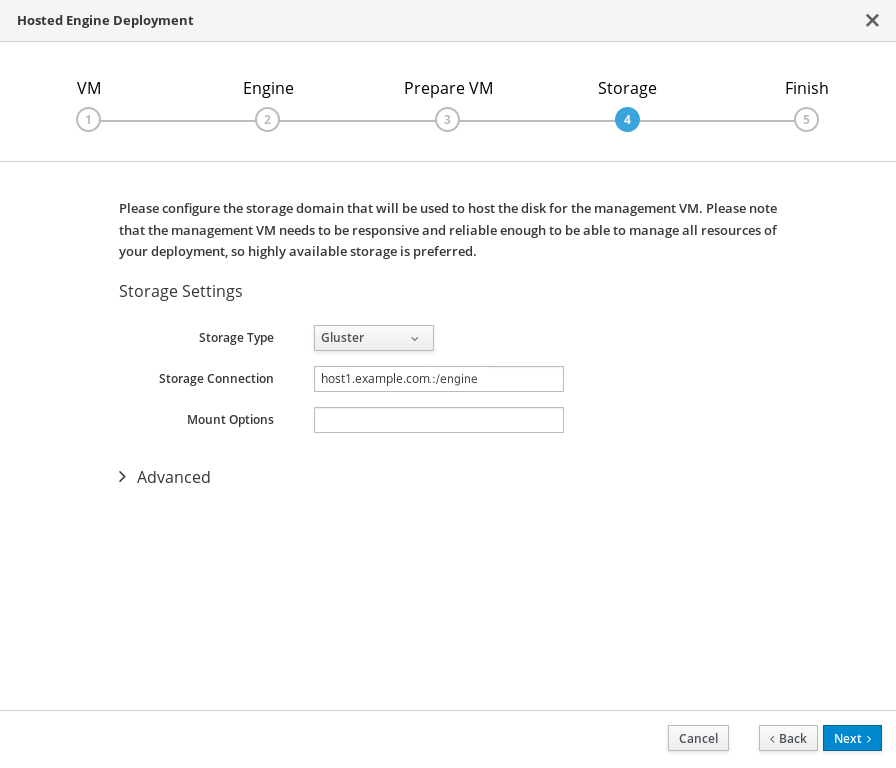
- Click Next.
Finalize Hosted Engine deployment
Review your deployment details and verify that they are correct.
NoteThe responses you provided during configuration are saved to an answer file to help you reinstall the hosted engine if necessary. The answer file is created at
/etc/ovirt-hosted-engine/answers.confby default. This file should not be modified manually without assistance from Red Hat Support.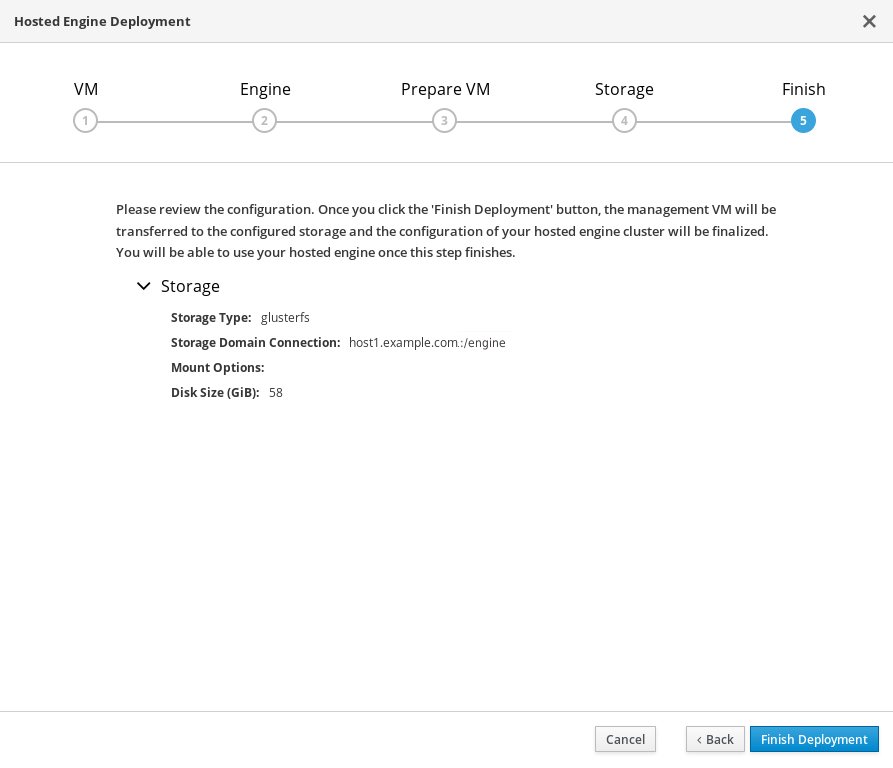
- Click Finish Deployment.
Wait for deployment to complete
This takes up to 30 minutes.
The window displays the following when complete.
 Important
If deployment does not complete successfully, see Viewing Hosted Engine deployment errors.
Click Close.
Verify hosted engine deployment
Browse to the Administration Portal (for example, http://engine.example.com/ovirt-engine) and verify that you can log in using the administrative credentials you configured earlier. Click Dashboard and look for your hosts, storage domains, and virtual machines.
