
Chapter 7. Configure Red Hat Gluster Storage for Hosted Engine using the Cockpit UI
Ensure that disks specified as part of this deployment process do not have any partitions or labels.
Log into the Cockpit UI
Browse to the Cockpit management interface of the first virtualization host, for example, https://node1.example.com:9090/, and log in with the credentials you created in Chapter 5, Install Host Physical Machines.
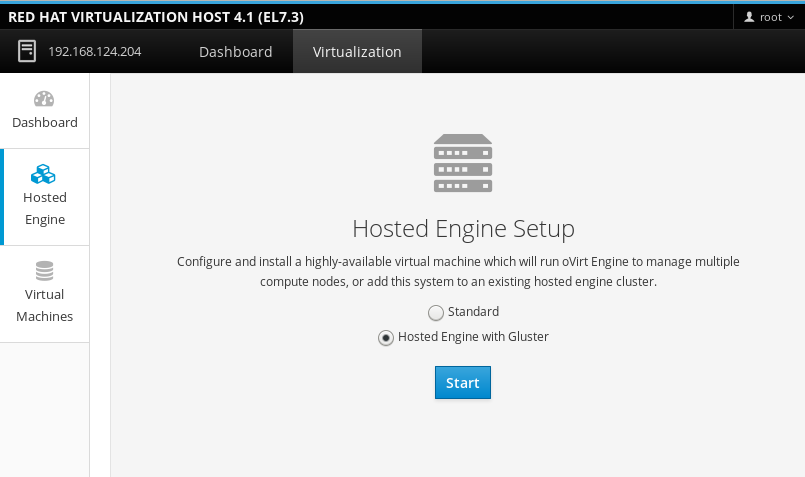
Start the deployment wizard
Click Virtualization > Hosted Engine, select Hosted Engine with Gluster, and click Start. The deployment wizard appears.
Deployment wizard: Specify storage hosts
Specify the back-end gluster network addresses (not the management network addresses) of the three virtualization hosts. The virtualization host that can SSH using key pairs should be listed first, as it is the host that will run gdeploy and the hosted engine.
NoteIf you plan to create an arbitrated replicated volume, ensure that you specify the host with the arbiter brick as Host3 on this screen.

Click Next.
Deployment wizard: Specify packages
There is no need to install packages. Delete any values from these fields and uncheck the boxes.
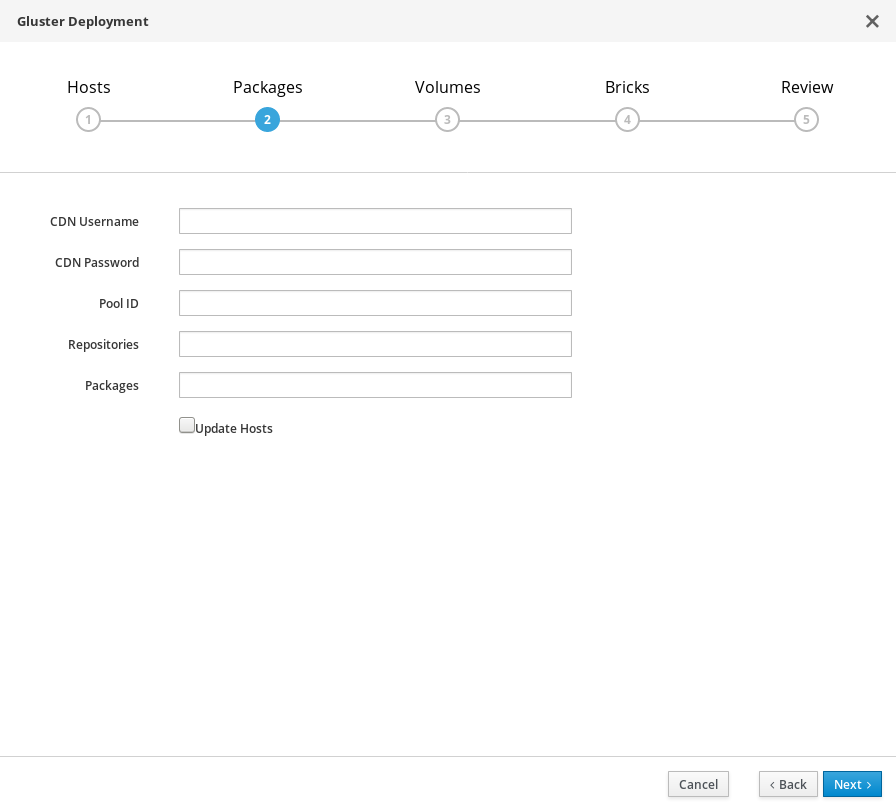
Click Next.
Deployment wizard: Specify volumes
Specify the volumes to be created.
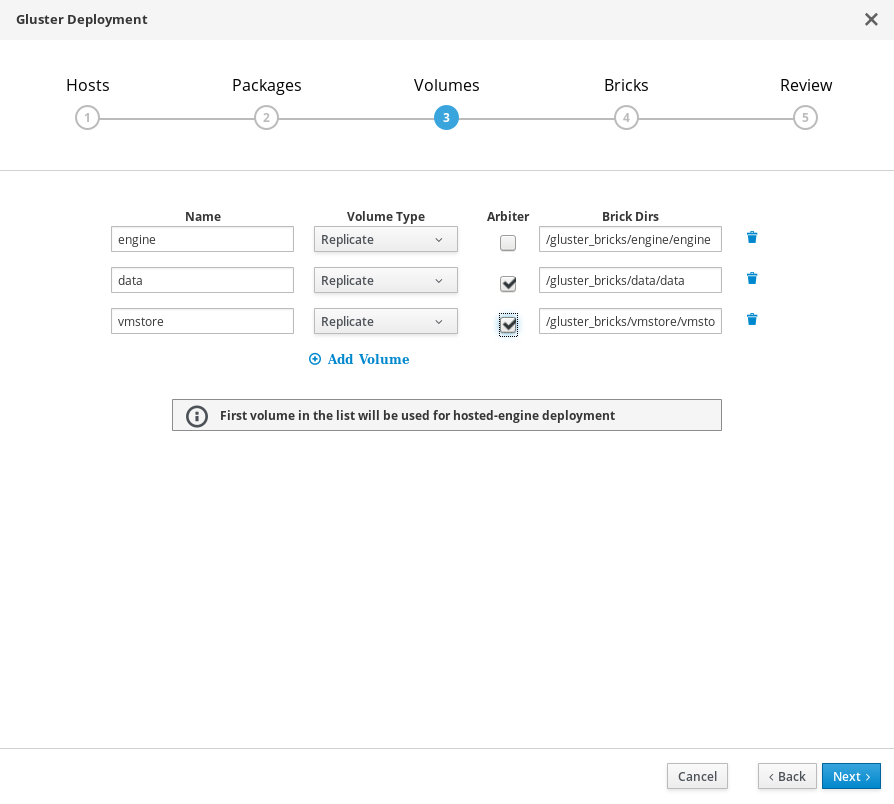
- Name
- Specify the name of the volume to be created.
- Volume Type
- Specify a Replicate volume type. Only replicated volumes are supported for this release.
- Arbiter
- Specify whether to create the volume with an arbiter brick. If this box is checked, the third disk stores only metadata.
- Brick Dirs
- The directory that contains this volume’s bricks.
The default values are correct for most installations.
Deployment wizard: Specify bricks
Specify the bricks to be created.
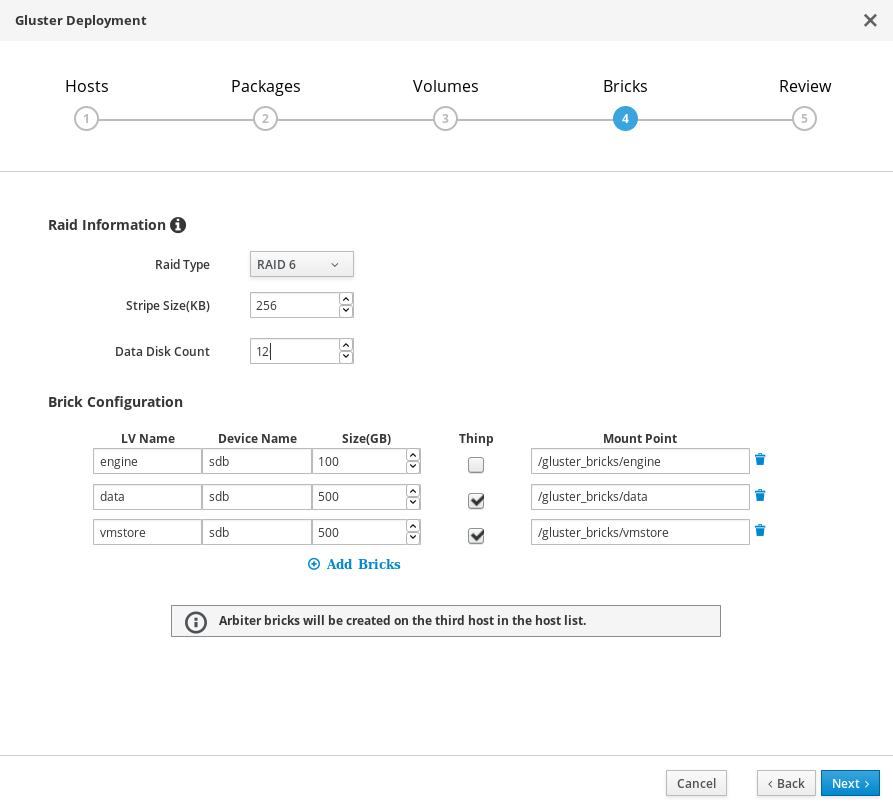
- LV Name
- Specify the name of the logical volume to be created.
- Device
- Specify the raw device you want to use. Red Hat recommends an unpartitioned device.
- Size
- Specify the size of the logical volume to create in GB. Do not enter units, only the number.
- Mount Point
- Specify the mount point for the logical volume. This should match the brick directory that you specified on the previous page of the wizard.
- Thinp
- Specify whether to provision the volume thinly or not. Note that thick provisioning is recommended for the engine volume.
- RAID
- Specify the RAID configuration to use. This should match the RAID configuration of your host. Supported values are raid5, raid6, and jbod.
- Stripe Size
- Specify the RAID stripe size in KB. Do not enter units, only the number. This can be ignored for JBOD configurations.
- Disk Count
- Specify the number of data disks in a RAID volume. This can be ignored for JBOD configurations.
Deployment wizard: Review and edit configuration
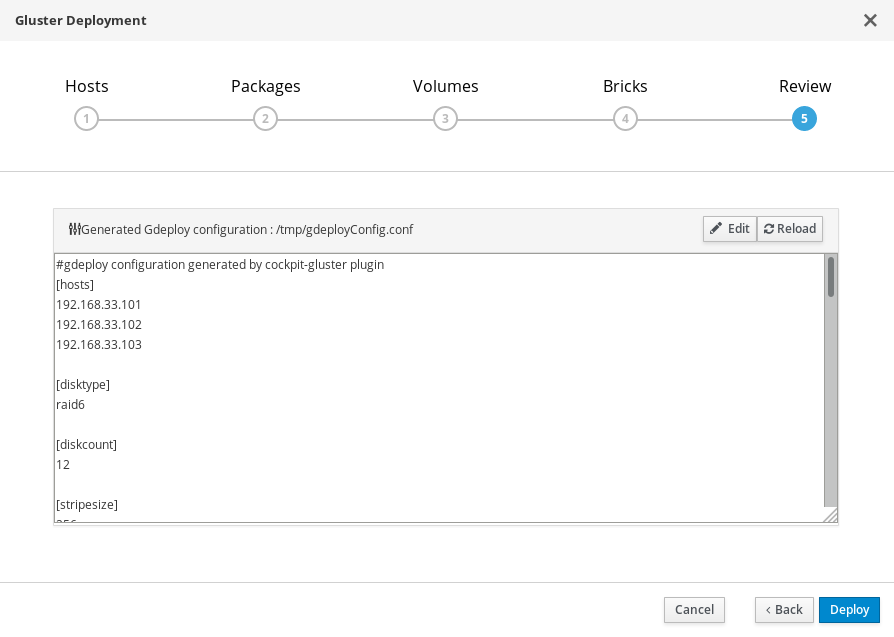
- Click Edit to begin editing the generated gdeployConfig.conf file.
(Optional) Configure Transport Layer Security (TLS/SSL)
This can be configured during or after deployment. If you want to configure TLS/SSL encryption as part of deployment, see one of the following sections:
Review the configuration file
When you are satisfied with the configuration details, click Save and then click Deploy.
Wait for deployment to complete
You can watch the deployment process in the text field as the gdeploy process runs using the generated configuration file.
In case of deployment failure
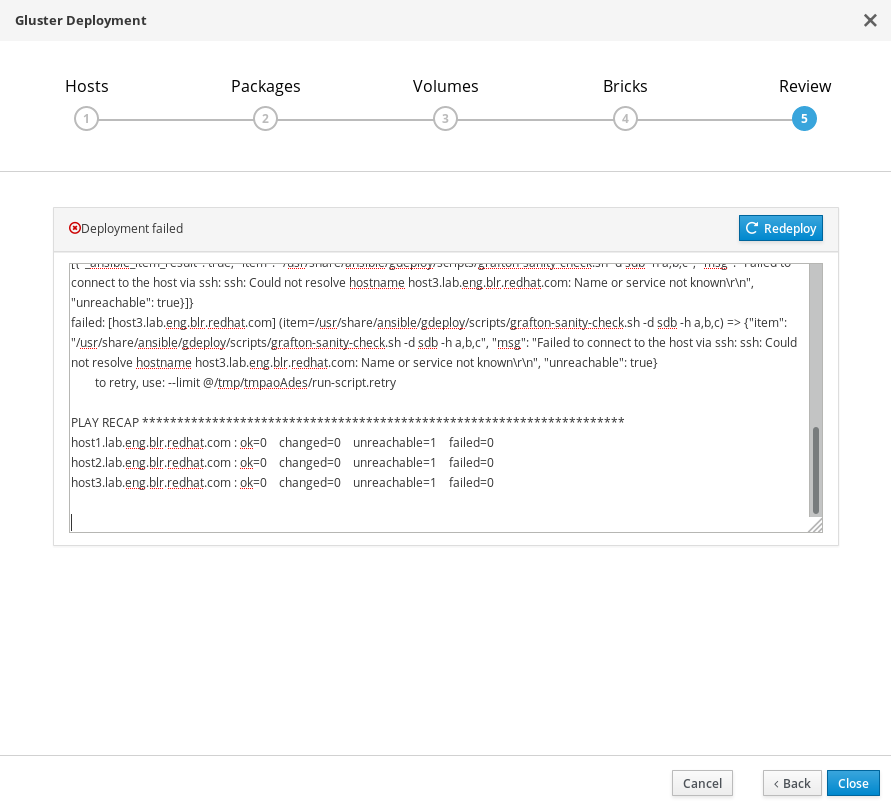
If deployment fails, click the Redeploy button. This returns you to the Review and edit configuration tab so that you can correct any issues in the generated configuration file before reattempting deployment.
It may be necessary to clean up previous deployment attempts before you try again. Follow the steps in Chapter 11, Cleaning up Automated Red Hat Gluster Storage Deployment Errors to clean up previous attempts.
The deployment script completes and displays Successfully deployed gluster.
