
Chapter 2. Securing the Apache Karaf Container
Abstract
The Apache Karaf container is secured using JAAS. By defining JAAS realms, you can configure the mechanism used to retrieve user credentials. You can also refine access to the container’s administrative interfaces by changing the default roles.
2.1. JAAS Authentication
Abstract
The Java Authentication and Authorization Service (JAAS) provides a general framework for implementing authentication in a Java application. The implementation of authentication is modular, with individual JAAS modules (or plug-ins) providing the authentication implementations.
For background information about JAAS, see the JAAS Reference Guide.
2.1.1. Default JAAS Realm
This section describes how to manage user data for the default JAAS realm in a Karaf container.
Default JAAS realm
The Karaf container has a predefined JAAS realm, the karaf realm, which is used by default to secure all aspects of the container.
How to integrate an application with JAAS
You can use the karaf realm in your own applications. Simply configure karaf as the name of the JAAS realm that you want to use.
Default JAAS login modules
When you start the Karaf container for the first time, it is configured to use the karaf default realm. In this default configuration, the karaf realm deploys five JAAS login modules, which are enabled simultaneously. To see the deployed login modules, enter the jaas:realms console command, as follows:
Index │ Realm Name │ Login Module Class Name
──────┼────────────┼───────────────────────────────────────────────────────────────
1     │ karaf      │ org.apache.karaf.jaas.modules.properties.PropertiesLoginModule
2     │ karaf      │ org.apache.karaf.jaas.modules.publickey.PublickeyLoginModule
3     │ karaf      │ org.apache.karaf.jaas.modules.audit.FileAuditLoginModule
4     │ karaf      │ org.apache.karaf.jaas.modules.audit.LogAuditLoginModule
5     │ karaf      │ org.apache.karaf.jaas.modules.audit.EventAdminAuditLoginModule
Whenever a user attempts to log in, authentication proceeds through the five modules in list order. A flag value for each module specifies whether the module must complete successfully for authentication to succeed. Flag values also specify whether the authentication process stops after a module completes, or whether it proceeds to the next module.
The Optional flag is set for all five authentication modules. The Optional flag setting causes authentication process to always pass from one module to the next, regardless of whether the current module completes successfully. The flag values in the Karaf JAAS realm are hard-coded, and cannot be changed. For more information about flags, see Table 2.1, “Flags for Defining a JAAS Module”.
In a Karaf container, both the properties login module and the public key login module are enabled. When JAAS authenticates a user, it tries first of all to authenticate the user with the properties login module. If that fails, it then tries to authenticate the user with the public key login module. If that module also fails, an error is raised.
2.1.1.1. Authentication audit logging modules
Within the list of default modules in a Karaf container, only the first two modules are used to verify user identity. The remaining modules are used to log the audit trail of successful and failed login attempts. The default realm includes the following audit logging modules:
- org.apache.karaf.jaas.modules.audit.LogAuditLoginModule
-
This module records information about authentication attempts by using the loggers that are configured for the Pax logging infrastructure in the file
etc/org.ops4j.pax.logging.cfg. For more information, see JAAS Log Audit Login Module. - org.apache.karaf.jaas.modules.audit.FileAuditLoginModule
- This module records information about authentication attempts directly to a file that you specify. It does not use the logging infrastructure. For more information, see JAAS File Audit Login Module.
- org.apache.karaf.jaas.modules.audit.EventAdminAuditLoginModule
- This module tracks authentication attempts using the OSGi Event Admin service.
Configuring users in the properties login module
The properties login module is used to store username/password credentials in a flat file format. To create a new user in the properties login module, open the InstallDir/etc/users.properties file using a text editor and add a line with the following syntax:
Username=Password[,UserGroup|Role][,UserGroup|Role]...
For example, to create the jdoe user with password, topsecret, and role, admin, you could create an entry like the following:
jdoe=topsecret,admin
Where the admin role gives full administrative privileges to the jdoe user.
Configuring user groups in the properties login module
Instead of (or in addition to) assigning roles directly to users, you also have the option of adding users to user groups in the properties login module. To create a user group in the properties login module, open the InstallDir/etc/users.properties file using a text editor and add a line with the following syntax:
_g_\:GroupName=Role1,Role2,...
For example, to create the admingroup user group with the roles, group and admin, you could create an entry like the following:
_g_\:admingroup=group,admin
You could then add the majorclanger user to the admingroup, by creating the following user entry:
majorclanger=secretpass,_g_:admingroup
Configuring the public key login module
The public key login module is used to store SSH public key credentials in a flat file format. To create a new user in the public key login module, open the InstallDir/etc/keys.properties file using a text editor and add a line with the following syntax:
Username=PublicKey[,UserGroup|Role][,UserGroup|Role]...
For example, you can create the jdoe user with the admin role by adding the following entry to the InstallDir/etc/keys.properties file (on a single line):
jdoe=AAAAB3NzaC1kc3MAAACBAP1/U4EddRIpUt9KnC7s5Of2EbdSPO9EAMMeP4C2USZpRV1AIlH7WT2NWPq/xfW6MPbLm1Vs14E7gB00b/JmYLdrmVClpJ+f6AR7ECLCT7up1/63xhv4O1fnfqimFQ8E+4P208UewwI1VBNaFpEy9nXzrith1yrv8iIDGZ3RSAHHAAAAFQCXYFCPFSMLzLKSuYKi64QL8Fgc9QAAAnEA9+GghdabPd7LvKtcNrhXuXmUr7v6OuqC+VdMCz0HgmdRWVeOutRZT+ZxBxCBgLRJFnEj6EwoFhO3zwkyjMim4TwWeotifI0o4KOuHiuzpnWRbqN/C/ohNWLx+2J6ASQ7zKTxvqhRkImog9/hWuWfBpKLZl6Ae1UlZAFMO/7PSSoAAACBAKKSU2PFl/qOLxIwmBZPPIcJshVe7bVUpFvyl3BbJDow8rXfskl8wO63OzP/qLmcJM0+JbcRU/53Jj7uyk31drV2qxhIOsLDC9dGCWj47Y7TyhPdXh/0dthTRBy6bqGtRPxGa7gJov1xm/UuYYXPIUR/3x9MAZvZ5xvE0kYXO+rx,admin
Do not insert the entire contents of an id_rsa.pub file here. Insert just the block of symbols which represents the public key itself.
Configuring user groups in the public key login module
Instead of (or in addition to) assigning roles directly to users, you also have the option of adding users to user groups in the public key login module. To create a user group in the public key login module, open the InstallDir/etc/keys.properties file using a text editor and add a line with the following syntax:
_g_\:GroupName=Role1,Role2,...
For example, to create the admingroup user group with the roles, group and admin, you could create an entry like the following:
_g_\:admingroup=group,admin
You could then add the jdoe user to the admingroup, by creating the following user entry:
jdoe=AAAAB3NzaC1kc3MAAACBAP1/U4EddRIpUt9KnC7s5Of2EbdSPO9EAMMeP4C2USZpRV1AIlH7WT2NWPq/xfW6MPbLm1Vs14E7gB00b/JmYLdrmVClpJ+f6AR7ECLCT7up1/63xhv4O1fnfqimFQ8E+4P208UewwI1VBNaFpEy9nXzrith1yrv8iIDGZ3RSAHHAAAAFQCXYFCPFSMLzLKSuYKi64QL8Fgc9QAAAnEA9+GghdabPd7LvKtcNrhXuXmUr7v6OuqC+VdMCz0HgmdRWVeOutRZT+ZxBxCBgLRJFnEj6EwoFhO3zwkyjMim4TwWeotifI0o4KOuHiuzpnWRbqN/C/ohNWLx+2J6ASQ7zKTxvqhRkImog9/hWuWfBpKLZl6Ae1UlZAFMO/7PSSoAAACBAKKSU2PFl/qOLxIwmBZPPIcJshVe7bVUpFvyl3BbJDow8rXfskl8wO63OzP/qLmcJM0+JbcRU/53Jj7uyk31drV2qxhIOsLDC9dGCWj47Y7TyhPdXh/0dthTRBy6bqGtRPxGa7gJov1xm/UuYYXPIUR/3x9MAZvZ5xvE0kYXO+rx,_g_:admingroup
Encrypting the stored passwords
By default, passwords are stored in the InstallDir/etc/users.properties file in plaintext format. To protect the passwords in this file, you must set the file permissions of the users.properties file so that it can be read only by administrators. To provide additional protection, you can optionally encrypt the stored passwords using a message digest algorithm.
To enable the password encryption feature, edit the InstallDir/etc/org.apache.karaf.jaas.cfg file and set the encryption properties as described in the comments. For example, the following settings would enable basic encryption using the MD5 message digest algorithm:
encryption.enabled = true
encryption.name = basic
encryption.prefix = {CRYPT}
encryption.suffix = {CRYPT}
encryption.algorithm = MD5
encryption.encoding = hexadecimal
The encryption settings in the org.apache.karaf.jaas.cfg file are applied only to the default karaf realm in a Karaf container. They have no effect on a custom realm.
For more details about password encryption, see Section 2.1.10, “Encrypting Stored Passwords”.
Overriding the default realm
If you want to customise the JAAS realm, the most convenient approach to take is to override the default karaf realm by defining a higher ranking karaf realm. This ensures that all of the Red Hat Fuse security components switch to use your custom realm. For details of how to define and deploy custom JAAS realms, see Section 2.1.2, “Defining JAAS Realms”.
2.1.2. Defining JAAS Realms
When defining a JAAS realm in the OSGi container, you cannot put the definitions in a conventional JAAS login configuration file. Instead, the OSGi container uses a special jaas:config element for defining JAAS realms in a blueprint configuration file. The JAAS realms defined in this way are made available to all of the application bundles deployed in the container, making it possible to share the JAAS security infrastructure across the whole container.
Namespace
The jaas:config element is defined in the http://karaf.apache.org/xmlns/jaas/v1.0.0 namespace. When defining a JAAS realm you need to include the line shown in Example 2.1, “JAAS Blueprint Namespace”.
Example 2.1. JAAS Blueprint Namespace
xmlns:jaas="http://karaf.apache.org/xmlns/jaas/v1.0.0"
Configuring a JAAS realm
The syntax for the jaas:config element is shown in Example 2.2, “Defining a JAAS Realm in Blueprint XML”.
Example 2.2. Defining a JAAS Realm in Blueprint XML
<blueprint xmlns="http://www.osgi.org/xmlns/blueprint/v1.0.0"
           xmlns:jaas="http://karaf.apache.org/xmlns/jaas/v1.0.0">

    <jaas:config name="JaasRealmName"
                 rank="IntegerRank">
        <jaas:module className="LoginModuleClassName"
                     flags="[required|requisite|sufficient|optional]">
            Property=Value
            ...
        </jaas:module>
        ...
        <!-- Can optionally define multiple modules -->
        ...
    </jaas:config>

</blueprint>
The elements are used as follows:
jaas:configDefines the JAAS realm. It has the following attributes:
-
name— specifies the name of the JAAS realm. -
rank— specifies an optional rank for resolving naming conflicts between JAAS realms . When two or more JAAS realms are registered under the same name, the OSGi container always picks the realm instance with the highest rank. If you decide to override the default realm,karaf, you should specify arankof100or more, so that it overrides all of the previously installedkarafrealms.
-
jaas:moduleDefines a JAAS login module in the current realm.
jaas:modulehas the following attributes:-
className— the fully-qualified class name of a JAAS login module. The specified class must be available from the bundle classloader. flags— determines what happens upon success or failure of the login operation. Table 2.1, “Flags for Defining a JAAS Module” describes the valid values.Table 2.1. Flags for Defining a JAAS Module
Value Description requiredAuthentication of this login module must succeed. Always proceed to the next login module in this entry, irrespective of success or failure.
requisiteAuthentication of this login module must succeed. If success, proceed to the next login module; if failure, return immediately without processing the remaining login modules.
sufficientAuthentication of this login module is not required to succeed. If success, return immediately without processing the remaining login modules; if failure, proceed to the next login module.
optionalAuthentication of this login module is not required to succeed. Always proceed to the next login module in this entry, irrespective of success or failure.
The contents of a
jaas:moduleelement is a space separated list of property settings, which are used to initialize the JAAS login module instance. The specific properties are determined by the JAAS login module and must be put into the proper format.NoteYou can define multiple login modules in a realm.
-
Converting standard JAAS login properties to XML
Red Hat Fuse uses the same properties as a standard Java login configuration file, however Red Hat Fuse requires that they are specified slightly differently. To see how the Red Hat Fuse approach to defining JAAS realms compares with the standard Java login configuration file approach, consider how to convert the login configuration shown in Example 2.3, “Standard JAAS Properties”, which defines the PropertiesLogin realm using the Red Hat Fuse properties login module class, PropertiesLoginModule:
Example 2.3. Standard JAAS Properties
PropertiesLogin {
    org.apache.activemq.jaas.PropertiesLoginModule required
        org.apache.activemq.jaas.properties.user="users.properties"
        org.apache.activemq.jaas.properties.group="groups.properties";
};
The equivalent JAAS realm definition, using the jaas:config element in a blueprint file, is shown in Example 2.4, “Blueprint JAAS Properties”.
Example 2.4. Blueprint JAAS Properties
<blueprint xmlns="http://www.osgi.org/xmlns/blueprint/v1.0.0"
  xmlns:jaas="http://karaf.apache.org/xmlns/jaas/v1.0.0"
  xmlns:ext="http://aries.apache.org/blueprint/xmlns/blueprint-ext/v1.0.0">

  <jaas:config name="PropertiesLogin">
    <jaas:module flags="required"
      className="org.apache.activemq.jaas.PropertiesLoginModule">
        org.apache.activemq.jaas.properties.user=users.properties
        org.apache.activemq.jaas.properties.group=groups.properties
    </jaas:module>
  </jaas:config>

</blueprint>Do not use double quotes for JAAS properties in the blueprint configuration.
Example
Red Hat Fuse also provides an adapter that enables you to store JAAS authentication data in an X.500 server. Example 2.5, “Configuring a JAAS Realm” defines the LDAPLogin realm to use Red Hat Fuse’s LDAPLoginModule class, which connects to the LDAP server located at ldap://localhost:10389.
Example 2.5. Configuring a JAAS Realm
<?xml version="1.0" encoding="UTF-8"?>
<blueprint xmlns="http://www.osgi.org/xmlns/blueprint/v1.0.0"
  xmlns:jaas="http://karaf.apache.org/xmlns/jaas/v1.0.0"
  xmlns:ext="http://aries.apache.org/blueprint/xmlns/blueprint-ext/v1.0.0">

  <jaas:config name="LDAPLogin" rank="200">
    <jaas:module flags="required"
      className="org.apache.karaf.jaas.modules.ldap.LDAPLoginModule">
        initialContextFactory=com.sun.jndi.ldap.LdapCtxFactory
        connection.username=uid=admin,ou=system
        connection.password=secret
        connection.protocol=
        connection.url = ldap://localhost:10389
        user.base.dn = ou=users,ou=system
        user.filter = (uid=%u)
        user.search.subtree = true
        role.base.dn = ou=users,ou=system
        role.filter = (uid=%u)
        role.name.attribute = ou
        role.search.subtree = true
        authentication = simple
    </jaas:module>
  </jaas:config>
</blueprint>
For a detailed description and example of using the LDAP login module, see Section 2.1.7, “JAAS LDAP Login Module”.
2.1.3. JAAS Properties Login Module
The JAAS properties login module stores user data in a flat file format (where the stored passwords can optionally be encrypted using a message digest algorithm). The user data can either be edited directly, using a simple text editor, or managed using the jaas:* console commands.
For example, a Karaf container uses the JAAS properties login module by default and stores the associated user data in the InstallDir/etc/users.properties file.
Supported credentials
The JAAS properties login module authenticates username/password credentials, returning the list of roles associated with the authenticated user.
Implementation classes
The following classes implement the JAAS properties login module:
org.apache.karaf.jaas.modules.properties.PropertiesLoginModule- Implements the JAAS login module.
org.apache.karaf.jaas.modules.properties.PropertiesBackingEngineFactory-
Must be exposed as an OSGi service. This service makes it possible for you to manage the user data using the
jaas:*console commands from the Apache Karaf shell (see Apache Karaf Console Reference).
Options
The JAAS properties login module supports the following options:
users- Location of the user properties file.
Format of the user properties file
The user properties file is used to store username, password, and role data for the properties login module. Each user is represented by a single line in the user properties file, where a line has the following form:
Username=Password[,UserGroup|Role][,UserGroup|Role]...
User groups can also be defined in this file, where each user group is represented by a single line in the following format:
_g_\:GroupName=Role1[,Role2]...
For example, you can define the users, bigcheese and guest, and the user groups, admingroup and guestgroup, as follows:
# Users
bigcheese=cheesepass,_g_:admingroup
guest=guestpass,_g_:guestgroup

# Groups
_g_\:admingroup=group,admin
_g_\:guestgroup=viewer
Sample Blueprint configuration
The following Blueprint configuration shows how to define a new karaf realm using the properties login module, where the default karaf realm is overridden by setting the rank attribute to 200:
<?xml version="1.0" encoding="UTF-8"?>
<blueprint xmlns="http://www.osgi.org/xmlns/blueprint/v1.0.0"
  xmlns:jaas="http://karaf.apache.org/xmlns/jaas/v1.0.0"
  xmlns:cm="http://aries.apache.org/blueprint/xmlns/blueprint-cm/v1.1.0"
  xmlns:ext="http://aries.apache.org/blueprint/xmlns/blueprint-ext/v1.0.0">

  <type-converters>
    <bean class="org.apache.karaf.jaas.modules.properties.PropertiesConverter"/>
  </type-converters>

<!--Allow usage of System properties, especially the karaf.base property-->
  <ext:property-placeholder
       placeholder-prefix="$[" placeholder-suffix="]"/>

  <jaas:config name="karaf" rank="200">
    <jaas:module flags="required"
className="org.apache.karaf.jaas.modules.properties.PropertiesLoginModule">
        users= $[karaf.base]/etc/users.properties
    </jaas:module>
  </jaas:config>

  <!-- The Backing Engine Factory Service for the PropertiesLoginModule -->
  <service interface="org.apache.karaf.jaas.modules.BackingEngineFactory">
    <bean class="org.apache.karaf.jaas.modules.properties.PropertiesBackingEngineFactory"/>
  </service>

</blueprint>
Remember to export the BackingEngineFactory bean as an OSGi service, so that the jaas:* console commands can manage the user data.
2.1.4. JAAS OSGi Config Login Module
Overview
The JAAS OSGi config login modules leverages the OSGi Config Admin Service to store user data. This login module is fairly similar to the JAAS properties login module (for example, the syntax of the user entries is the same), but the mechanism for retrieving user data is based on the OSGi Config Admin Service.
The user data can be edited directly by creating a corresponding OSGi configuration file, etc/PersistentID.cfg or using any method of configuration that is supported by the OSGi Config Admin Service. The jaas:* console commands are not supported, however.
Supported credentials
The JAAS OSGi config login module authenticates username/password credentials, returning the list of roles associated with the authenticated user.
Implementation classes
The following classes implement the JAAS OSGi config login module:
org.apache.karaf.jaas.modules.osgi.OsgiConfigLoginModule- Implements the JAAS login module.
There is no backing engine factory for the OSGi config login module, which means that this module cannot be managed using the jaas:* console commands.
Options
The JAAS OSGi config login module supports the following options:
pid- The persistent ID of the OSGi configuration containing the user data. In the OSGi Config Admin standard, a persistent ID references a set of related configuration properties.
Location of the configuration file
The location of the configuration file follows the usual convention where the configuration for the persistent ID, PersistentID, is stored in the following file:
InstallDir/etc/PersistentID.cfg
Format of the configuration file
The PersistentID.cfg configuration file is used to store username, password, and role data for the OSGi config login module. Each user is represented by a single line in the configuration file, where a line has the following form:
Username=Password[,Role][,Role]...
User groups are not supported in the JAAS OSGi config login module.
Sample Blueprint configuration
The following Blueprint configuration shows how to define a new karaf realm using the OSGi config login module, where the default karaf realm is overridden by setting the rank attribute to 200:
<?xml version="1.0" encoding="UTF-8"?>
<blueprint xmlns="http://www.osgi.org/xmlns/blueprint/v1.0.0"
  xmlns:jaas="http://karaf.apache.org/xmlns/jaas/v1.0.0"
  xmlns:cm="http://aries.apache.org/blueprint/xmlns/blueprint-cm/v1.1.0"
  xmlns:ext="http://aries.apache.org/blueprint/xmlns/blueprint-ext/v1.0.0">

  <jaas:config name="karaf" rank="200">
    <jaas:module flags="required"
className="org.apache.karaf.jaas.modules.osgi.OsgiConfigLoginModule">
        pid = org.jboss.example.osgiconfigloginmodule
    </jaas:module>
  </jaas:config>

</blueprint>
In this example, the user data will be stored in the file, InstallDir/etc/org.jboss.example.osgiconfigloginmodule.cfg, and it is not possible to edit the configuration using the jaas:* console commands.
2.1.5. JAAS Public Key Login Module
The JAAS public key login module stores user data in a flat file format, which can be edited directly using a simple text editor. The jaas:* console commands are not supported, however.
For example, a Karaf container uses the JAAS public key login module by default and stores the associated user data in the InstallDir/etc/keys.properties file.
Supported credentials
The JAAS public key login module authenticates SSH key credentials. When a user tries to log in, the SSH protocol uses the stored public key to challenge the user. The user must possess the corresponding private key in order to answer the challenge. If login is successful, the login module returns the list of roles associated with the user.
Implementation classes
The following classes implement the JAAS public key login module:
org.apache.karaf.jaas.modules.publickey.PublickeyLoginModule- Implements the JAAS login module.
There is no backing engine factory for the public key login module, which means that this module cannot be managed using the jaas:* console commands.
Options
The JAAS public key login module supports the following options:
users- Location of the user properties file for the public key login module.
Format of the keys properties file
The keys.properties file is used to store username, public key, and role data for the public key login module. Each user is represented by a single line in the keys properties file, where a line has the following form:
Username=PublicKey[,UserGroup|Role][,UserGroup|Role]...
Where the PublicKey is the public key part of an SSH key pair (typically found in a user’s home directory in ~/.ssh/id_rsa.pub in a UNIX system).
For example, to create the user jdoe with the admin role, you would create an entry like the following:
jdoe=AAAAB3NzaC1kc3MAAACBAP1/U4EddRIpUt9KnC7s5Of2EbdSPO9EAMMeP4C2USZpRV1AIlH7WT2NWPq/xfW6MPbLm1Vs14E7gB00b/JmYLdrmVClpJ+f6AR7ECLCT7up1/63xhv4O1fnfqimFQ8E+4P208UewwI1VBNaFpEy9nXzrith1yrv8iIDGZ3RSAHHAAAAFQCXYFCPFSMLzLKSuYKi64QL8Fgc9QAAAnEA9+GghdabPd7LvKtcNrhXuXmUr7v6OuqC+VdMCz0HgmdRWVeOutRZT+ZxBxCBgLRJFnEj6EwoFhO3zwkyjMim4TwWeotifI0o4KOuHiuzpnWRbqN/C/ohNWLx+2J6ASQ7zKTxvqhRkImog9/hWuWfBpKLZl6Ae1UlZAFMO/7PSSoAAACBAKKSU2PFl/qOLxIwmBZPPIcJshVe7bVUpFvyl3BbJDow8rXfskl8wO63OzP/qLmcJM0+JbcRU/53Jj7uyk31drV2qxhIOsLDC9dGCWj47Y7TyhPdXh/0dthTRBy6bqGtRPxGa7gJov1xm/UuYYXPIUR/3x9MAZvZ5xvE0kYXO+rx,admin
Do not insert the entire contents of the id_rsa.pub file here. Insert just the block of symbols which represents the public key itself.
User groups can also be defined in this file, where each user group is represented by a single line in the following format:
_g_\:GroupName=Role1[,Role2]...
Sample Blueprint configuration
The following Blueprint configuration shows how to define a new karaf realm using the public key login module, where the default karaf realm is overridden by setting the rank attribute to 200:
<?xml version="1.0" encoding="UTF-8"?>
<blueprint xmlns="http://www.osgi.org/xmlns/blueprint/v1.0.0"
  xmlns:jaas="http://karaf.apache.org/xmlns/jaas/v1.0.0"
  xmlns:cm="http://aries.apache.org/blueprint/xmlns/blueprint-cm/v1.1.0"
  xmlns:ext="http://aries.apache.org/blueprint/xmlns/blueprint-ext/v1.0.0">

<!--Allow usage of System properties, especially the karaf.base property-->
  <ext:property-placeholder
       placeholder-prefix="$[" placeholder-suffix="]"/>

  <jaas:config name="karaf" rank="200">
    <jaas:module flags="required"
className="org.apache.karaf.jaas.modules.publickey.PublickeyLoginModule">
        users = $[karaf.base]/etc/keys.properties
    </jaas:module>
  </jaas:config>

</blueprint>
In this example, the user data will be stored in the file, InstallDir/etc/keys.properties, and it is not possible to edit the configuration using the jaas:* console commands.
2.1.6. JAAS JDBC Login Module
Overview
The JAAS JDBC login module enables you to store user data in a database back-end, using Java Database Connectivity (JDBC) to connect to the database. Hence, you can use any database that supports JDBC to store your user data. To manage the user data, you can use either the native database client tools or the jaas:* console commands (where the backing engine uses configured SQL queries to perform the relevant database updates).
You can combine multiple login modules with each login module providing both the authentication and authorization components. For example, you can combine default PropertiesLoginModule with JDBCLoginModule to ensure access to the system.
User groups are not supported in the JAAS JDBC login module.
Supported credentials
The JAAS JDBC Login Module authenticates username/password credentials, returning the list of roles associated with the authenticated user.
Implementation classes
The following classes implement the JAAS JDBC Login Module:
org.apache.karaf.jaas.modules.jdbc.JDBCLoginModule- Implements the JAAS login module.
org.apache.karaf.jaas.modules.jdbc.JDBCBackingEngineFactory-
Must be exposed as an OSGi service. This service makes it possible for you to manage the user data using the
jaas:*console commands from the Apache Karaf shell (see olink:FMQCommandRef/Consolejaas).
Options
The JAAS JDBC login module supports the following options:
- datasource
The JDBC data source, specified either as an OSGi service or as a JNDI name. You can specify a data source’s OSGi service using the following syntax:
osgi:ServiceInterfaceName[/ServicePropertiesFilter]
The ServiceInterfaceName is the interface or class that is exported by the data source’s OSGi service (usually
javax.sql.DataSource).Because multiple data sources can be exported as OSGi services in a Karaf container, it is usually necessary to specify a filter, ServicePropertiesFilter, to select the particular data source that you want. Filters on OSGi services are applied to the service property settings and follow a syntax that is borrowed from LDAP filter syntax.
- query.password
-
The SQL query that retrieves the user’s password. The query can contain a single question mark character,
?, which is substituted by the username at run time. - query.role
-
The SQL query that retrieves the user’s roles. The query can contain a single question mark character,
?, which is substituted by the username at run time. - insert.user
-
The SQL query that creates a new user entry. The query can contain two question marks,
?, characters: the first question mark is substituted by the username and the second question mark is substituted by the password at run time. - insert.role
-
The SQL query that adds a role to a user entry. The query can contain two question marks,
?, characters: the first question mark is substituted by the username and the second question mark is substituted by the role at run time. - delete.user
-
The SQL query that deletes a user entry. The query can contain a single question mark character,
?, which is substituted by the username at run time. - delete.role
-
The SQL query that deletes a role from a user entry. The query can contain two question marks,
?, characters: the first question mark is substituted by the username and the second question mark is substituted by the role at run time. - delete.roles
-
The SQL query that deletes multiple roles from a user entry. The query can contain a single question mark character,
?, which is substituted by the username at run time.
Example of setting up a JDBC login module
To set up a JDBC login module, perform the following main steps:
Create the database tables
Before you can set up the JDBC login module, you must set up a users table and a roles table in the backing database to store the user data. For example, the following SQL commands show how to create a suitable users table and roles table:
CREATE TABLE users (
  username VARCHAR(255) NOT NULL,
  password VARCHAR(255) NOT NULL,
  PRIMARY KEY (username)
);
CREATE TABLE roles (
  username VARCHAR(255) NOT NULL,
  role VARCHAR(255) NOT NULL,
  PRIMARY KEY (username,role)
);
The users table stores username/password data and the roles table associates a username with one or more roles.
Create the data source
To use a JDBC datasource with the JDBC login module, the correct approach to take is to create a data source instance and export the data source as an OSGi service. The JDBC login module can then access the data source by referencing the exported OSGi service. For example, you could create a MySQL data source instance and expose it as an OSGi service (of javax.sql.DataSource type) using code like the following in a Blueprint file:
<blueprint xmlns:xsi="http://www.w3.org/2001/XMLSchema-instance"
           xmlns="http://www.osgi.org/xmlns/blueprint/v1.0.0">
  <bean id="mysqlDatasource"
        class="com.mysql.jdbc.jdbc2.optional.MysqlDataSource">
    <property name="serverName" value="localhost"></property>
    <property name="databaseName" value="DBName"></property>
    <property name="port" value="3306"></property>
    <property name="user" value="DBUser"></property>
    <property name="password" value="DBPassword"></property>
  </bean>

  <service id="mysqlDS" interface="javax.sql.DataSource"
        ref="mysqlDatasource">
    <service-properties>
        <entry key="osgi.jndi.service.name" value="jdbc/karafdb"/>
    </service-properties>
  </service>
</blueprint>
The preceding Blueprint configuration should be packaged and installed in the Karaf container as an OSGi bundle.
Specify the data source as an OSGi service
After the data source has been instantiated and exported as an OSGi service, you are ready to configure the JDBC login module. In particular, the datasource option of the JDBC login module can reference the data source’s OSGi service using the following syntax:
osgi:javax.sql.DataSource/(osgi.jndi.service.name=jdbc/karafdb)
Where javax.sql.DataSource is the interface type of the exported OSGi service and the filter, (osgi.jndi.service.name=jdbc/karafdb), selects the particular javax.sql.DataSource instance whose osgi.jndi.service.name service property has the value, jdbc/karafdb.
For example, you can use the following Blueprint configuration to override the karaf realm with a JDBC login module that references the sample MySQL data source:
<?xml version="1.0" encoding="UTF-8"?>
<blueprint xmlns="http://www.osgi.org/xmlns/blueprint/v1.0.0"
  xmlns:jaas="http://karaf.apache.org/xmlns/jaas/v1.0.0"
  xmlns:cm="http://aries.apache.org/blueprint/xmlns/blueprint-cm/v1.1.0"
  xmlns:ext="http://aries.apache.org/blueprint/xmlns/blueprint-ext/v1.0.0">

<!--Allow usage of System properties, especially the karaf.base property-->
  <ext:property-placeholder
       placeholder-prefix="$[" placeholder-suffix="]"/>

  <jaas:config name="karaf" rank="200">
    <jaas:module flags="required"
      className="org.apache.karaf.jaas.modules.jdbc.JDBCLoginModule">
        datasource = osgi:javax.sql.DataSource/(osgi.jndi.service.name=jdbc/karafdb)
        query.password = SELECT password FROM users WHERE username=?
        query.role = SELECT role FROM roles WHERE username=?
        insert.user = INSERT INTO users VALUES(?,?)
        insert.role = INSERT INTO roles VALUES(?,?)
        delete.user = DELETE FROM users WHERE username=?
        delete.role = DELETE FROM roles WHERE username=? AND role=?
        delete.roles = DELETE FROM roles WHERE username=?
    </jaas:module>
  </jaas:config>

  <!-- The Backing Engine Factory Service for the JDBCLoginModule -->
  <service interface="org.apache.karaf.jaas.modules.BackingEngineFactory">
    <bean class="org.apache.karaf.jaas.modules.jdbc.JDBCBackingEngineFactory"/>
  </service>

</blueprint>The SQL statements shown in the preceding configuration are in fact the default values of these options. Hence, if you create user and role tables consistent with these SQL statements, you could omit the options settings and rely on the defaults.
In addition to creating a JDBCLoginModule, the preceding Blueprint configuration also instantiates and exports a JDBCBackingEngineFactory instance, which enables you to manage the user data using the jaas:* console commands.
2.1.7. JAAS LDAP Login Module
Overview
The JAAS LDAP login module enables you to store user data in an LDAP database. To manage the stored user data, use a standard LDAP client tool. The jaas:* console commands are not supported.
For more details about using LDAP with Red Hat Fuse see LDAP Authentication Tutorial.
User groups are not supported in the JAAS LDAP login module.
Supported credentials
The JAAS LDAP Login Module authenticates username/password credentials, returning the list of roles associated with the authenticated user.
Implementation classes
The following classes implement the JAAS LDAP Login Module:
org.apache.karaf.jaas.modules.ldap.LDAPLoginModule- Implements the JAAS login module. It is preloaded in the Karaf container, so you do not need to install its bundle.
There is no backing engine factory for the LDAP Login Module, which means that this module cannot be managed using the jaas:* console commands.
Options
The JAAS LDAP login module supports the following options:
authenticationSpecifies the authentication method used when binding to the LDAP server. Valid values are
-
simple— bind with user name and password authentication, requiring you to set theconnection.usernameandconnection.passwordproperties. none— bind anonymously. In this case theconnection.usernameandconnection.passwordproperties can be left unassigned.NoteThe connection to the directory server is used only for performing searches. In this case, an anonymous bind is often preferred, because it is faster than an authenticated bind (but you would also need to ensure that the directory server is sufficiently protected, for example by deploying it behind a firewall).
-
connection.urlSpecifies specify the location of the directory server using an ldap URL, ldap://Host:Port. You can optionally qualify this URL, by adding a forward slash,
/, followed by the DN of a particular node in the directory tree. To enable SSL security on the connection, you need to specify theldaps:scheme in the URL— for example, ldaps://Host:Port. You can also specify multiple URLs, as a space-separated list, for example:connection.url=ldap://10.0.0.153:2389 ldap://10.10.178.20:389
connection.username-
Specifies the DN of the user that opens the connection to the directory server. For example,
uid=admin,ou=system. If the DN contains a whitespace,LDAPLoginModulecannot parse it. The only solution is to add double quotes around the DN name that contains the whitespace and then add the blackslash to escape the quotes. For example,uid=admin,ou=\"system index\". connection.password-
Specifies the password that matches the DN from
connection.username. In the directory server, the password is normally stored as auserPasswordattribute in the corresponding directory entry. context.com.sun.jndi.ldap.connect.pool-
If
true, enables connection pooling for LDAP connections. Default isfalse. context.com.sun.jndi.ldap.connect.timeout- Specifies the timeout for creating a TCP connection to the LDAP server, in units of milliseconds. We recommend that you set this property explicitly, because the default value is infinite, which can result in a hung connection attempt.
context.com.sun.jndi.ldap.read.timeout- Specifies the read timeout for an LDAP operation, in units of milliseconds. We recommend that you set this property explicitly, because the default value is infinite.
context.java.naming.referralAn LDAP referral is a form of indirection supported by some LDAP servers. The LDAP referral is an entry in the LDAP server which contains one or more URLs (usually referencing a node or nodes in another LDAP server). The
context.java.naming.referralproperty can be used to enable or disable referral following. It can be set to one of the following values:-
followto follow the referrals (assuming it is supported by the LDAP server), -
ignoreto silently ignore all referrals, -
throwto throw aPartialResultExceptionwhenever a referral is encountered.
-
disableCache-
The user and role caches can be disabled by setting this property to
true. Default isfalse. initial.context.factory-
Specifies the class of the context factory used to connect to the LDAP server. This must always be set to
com.sun.jndi.ldap.LdapCtxFactory. role.base.dn-
Specifies the DN of the subtree of the DIT to search for role entries. For example,
ou=groups,ou=system. role.filterSpecifies the LDAP search filter used to locate roles. It is applied to the subtree selected by
role.base.dn. For example,(member=uid=%u). Before being passed to the LDAP search operation, the value is subjected to string substitution, as follows:-
%uis replaced by the user name extracted from the incoming credentials, and -
%dnis replaced by the RDN of the corresponding user in the LDAP server (which was found by matching against theuser.filterfilter). -
%fqdnis replaced by the DN of the corresponding user in the LDAP server (which was found by matching against theuser.filterfilter).
-
role.mappingSpecifies the mapping between LDAP groups and JAAS roles. If no mapping is specified, the default mapping is for each LDAP group to map to the corresponding JAAS role of the same name. The role mapping is specified with the following syntax:
ldap-group=jaas-role(,jaas-role)*(;ldap-group=jaas-role(,jaas-role)*)*
Where each LDAP group,
ldap-group, is specified by its Common Name (CN).For example, given the LDAP groups,
admin,devop, andtester, you could map them to JAAS roles, as follows:role.mapping=admin=admin;devop=admin,manager;tester=viewer
role.name.attribute-
Specifies the attribute type of the role entry that contains the name of the role/group. If you omit this option, the role search feature is effectively disabled. For example,
cn. role.search.subtree-
Specifies whether the role entry search scope includes the subtrees of the tree selected by
role.base.dn. Iftrue, the role lookup is recursive (SUBTREE). Iffalse, the role lookup is performed only at the first level (ONELEVEL). ssl-
Specifies whether the connection to the LDAP server is secured using SSL. If
connection.urlstarts with ldaps:// SSL is used regardless of this property. ssl.provider- Specifies the SSL provider to use for the LDAP connection. If not specified, the default SSL provider is used.
ssl.protocol-
Specifies the protocol to use for the SSL connection. You must set this property to
TLSv1, in order to prevent the SSLv3 protocol from being used (POODLE vulnerability). ssl.algorithm-
Specifies the algorithm used by the trust store manager. For example,
PKIX. ssl.keystore-
The ID of the keystore that stores the LDAP client’s own X.509 certificate (required only if SSL client authentication is enabled on the LDAP server). The keystore must be deployed using a
jaas:keystoreelement (see the section called “Sample configuration for Apache DS”). ssl.keyalias-
The keystore alias of the LDAP client’s own X.509 certificate (required only if there is more than one certificate stored in the keystore specified by
ssl.keystore). ssl.truststore-
The ID of the keystore that stores trusted CA certificates, which are used to verify the LDAP server’s certificate (the LDAP server’s certificate chain must be signed by one of the certificates in the truststore). The keystore must be deployed using a
jaas:keystoreelement. user.base.dn-
Specifies the DN of the subtree of the DIT to search for user entries. For example,
ou=users,ou=system. user.filterSpecifies the LDAP search filter used to locate user credentials. It is applied to the subtree selected by
user.base.dn. For example,(uid=%u). Before being passed to the LDAP search operation, the value is subjected to string substitution, as follows:-
%uis replaced by the user name extracted from the incoming credentials.
-
user.search.subtree-
Specifies whether the user entry search scope includes the subtrees of the tree selected by
user.base.dn. Iftrue, the user lookup is recursive (SUBTREE). Iffalse, the user lookup is performed only at the first level (ONELEVEL).
Sample configuration for Apache DS
The following Blueprint configuration shows how to define a new karaf realm using the LDAP login module, where the default karaf realm is overridden by setting the rank attribute to 200, and the LDAP login module connects to an Apache Directory Server:
<?xml version="1.0" encoding="UTF-8"?>
<blueprint xmlns="http://www.osgi.org/xmlns/blueprint/v1.0.0"
xmlns:jaas="http://karaf.apache.org/xmlns/jaas/v1.0.0"
xmlns:cm="http://aries.apache.org/blueprint/xmlns/blueprint-cm/v1.1.0"
xmlns:ext="http://aries.apache.org/blueprint/xmlns/blueprint-ext/v1.0.0">
<jaas:config name="karaf" rank="100">
<jaas:module className="org.apache.karaf.jaas.modules.ldap.LDAPLoginModule" flags="sufficient">
debug=true
<!-- LDAP Configuration -->
initialContextFactory=com.sun.jndi.ldap.LdapCtxFactory
<!-- multiple LDAP servers can be specified as a space separated list of URLs -->
connection.url=ldap://10.0.0.153:2389 ldap://10.10.178.20:389
<!-- authentication=none -->
authentication=simple
connection.username=cn=Directory Manager
connection.password=directory
<!-- User Info -->
user.base.dn=dc=redhat,dc=com
user.filter=(&(objectClass=InetOrgPerson)(uid=%u))
user.search.subtree=true
<!-- Role/Group Info-->
role.base.dn=dc=redhat,dc=com
role.name.attribute=cn
<!--
The 'dc=redhat,dc=com' used in the role.filter
below is the user.base.dn.
-->
<!-- role.filter=(uniquemember=%dn,dc=redhat,dc=com) -->
role.filter=(&(objectClass=GroupOfUniqueNames)(UniqueMember=%fqdn))
role.search.subtree=true
<!-- role mappings - a ';' separated list -->
role.mapping=JBossAdmin=admin;JBossMonitor=viewer
<!-- LDAP context properties -->
context.com.sun.jndi.ldap.connect.timeout=5000
context.com.sun.jndi.ldap.read.timeout=5000
<!-- LDAP connection pooling -->
<!-- http://docs.oracle.com/javase/jndi/tutorial/ldap/connect/pool.html -->
<!-- http://docs.oracle.com/javase/jndi/tutorial/ldap/connect/config.html -->
context.com.sun.jndi.ldap.connect.pool=true
<!-- How are LDAP referrals handled?
Can be `follow`, `ignore` or `throw`. Configuring `follow` may not work on all LDAP servers, `ignore` will
silently ignore all referrals, while `throw` will throw a partial results exception if there is a referral.
-->
context.java.naming.referral=ignore
<!-- SSL configuration -->
ssl=false
ssl.protocol=SSL
<!-- matches the keystore/truststore configured below -->
ssl.truststore=ks
ssl.algorithm=PKIX
<!-- The User and Role caches can be disabled - 6.3.0 179 and later -->
disableCache=true
</jaas:module>
</jaas:config>
<!-- Location of the SSL truststore/keystore
<jaas:keystore name="ks" path="file:///${karaf.home}/etc/ldap.truststore" keystorePassword="XXXXXX" />
-->
</blueprint>
In order to enable SSL, you must remember to use the ldaps scheme in the connection.url setting.
You must set ssl.protocol to TLSv1 (or later), in order to protect against the Poodle vulnerability (CVE-2014-3566)
Filter settings for different directory servers
The most significant differences between directory servers arise in connection with setting the filter options in the LDAP login module. The precise settings depend ultimately on the organisation of your DIT, but the following table gives an idea of the typical role filter settings required for different directory servers:
| Directory Server | Typical Filter Settings |
|---|---|
| 389-DS Red Hat DS |
user.filter=(&(objectClass=InetOrgPerson)(uid=%u)) role.filter=(uniquemember=%fqdn) |
| MS Active Directory |
user.filter=(&(objectCategory=person)(samAccountName=%u)) role.filter=(uniquemember=%fqdn) |
| Apache DS |
user.filter=(uid=%u) role.filter=(member=uid=%u) |
| OpenLDAP |
user.filter=(uid=%u) role.filter=(member:=uid=%u) |
In the preceding table, the & symbol (representing the logical And operator) is escaped as & because the option settings will be embedded in a Blueprint XML file.
2.1.8. JAAS Log Audit Login Module
The login module org.apache.karaf.jaas.modules.audit.LogAuditLoginModule provides robust logging of authentication attempts. It supports standard log management capabilities such as setting a maximum file size, log rotation, file compression, and filtering. You establish settings for these options in the logging configuration file.
By default, authentication audit logging is disabled. Enabling logging requires you to define a logging configuration and an audit configuration, and then link the two together. In the logging configuration you specify properties for a file appender process, and a logger process. The file appender publishes information about authentication events to a specified file. The logger is a mechanism that captures information about authentication events and makes it available to the appenders that you specify. You define the logging configuration in the standard Karaf Log4j logging configuration file, etc/org.ops4j.pax.logging.cfg.
The audit configuration enables audit logging and links to the logging infrastructure to be used. You define the audit configuration in the file etc/org.apache.karaf.jaas.cfg.
Appender configuration
By default, the standard Karaf Log4j configuration file (etc/org.ops4j.pax.logging.cfg) defines an audit logging appender with the name AuditRollingFile.
The following excerpt from a sample configuration file shows the properties of an appender that writes to an audit log file at ${karaf.data}/security/audit.log:
# Audit file appender
log4j2.appender.audit.type = RollingRandomAccessFile
log4j2.appender.audit.name = AuditRollingFile
log4j2.appender.audit.fileName = ${karaf.data}/security/audit.log
log4j2.appender.audit.filePattern = ${karaf.data}/security/audit.log.%i
log4j2.appender.audit.append = true
log4j2.appender.audit.layout.type = PatternLayout
log4j2.appender.audit.layout.pattern = ${log4j2.pattern}
log4j2.appender.audit.policies.type = Policies
log4j2.appender.audit.policies.size.type = SizeBasedTriggeringPolicy
log4j2.appender.audit.policies.size.size = 8MB
To use the appender, you must configure a logger that provides the information for the appender to publish to a log file.
Logger configuration
By default, the Karaf Log4j configuration file etc/org.ops4j.pax.logging.cfg establishes an audit logger with the name org.apache.karaf.jaas.modules.audit. In the following excerpt from a sample configuration file, the default logger is configured to provide information about authentication events to an appender with the name AuditRollingFile:
log4j2.logger.audit.name = org.apache.karaf.jaas.modules.audit
log4j2.logger.audit.level = INFO
log4j2.logger.audit.additivity = false
log4j2.logger.audit.appenderRef.AuditRollingFile.ref = AuditRollingFile
The value of log4j2.logger.audit.appenderRef.AuditRollingFile.ref must match the value of log4j2.appender.audit.name in the Audit file appender section of etc/org.ops4j.pax.logging.cfg.
2.1.8.1. Enabling Authentication Audit Logging
After you establish the logging configuration, you can turn on audit logging and connect the logging configuration to the audit configuration.
To enable audit logging, insert the following lines in etc/org.apache.karaf.jaas.cfg:
audit.log.enabled = true
audit.log.logger = <logger.name>
audit.log.level = <level>
The <logger.name> represents in dot-separated format any standard logger (category) name that is established by the Apache Log4J and Log4J2 libraries, for example, org.jboss.fuse.audit or com.example.audit. The <level>` represents a log level setting, such as WARN, INFO, TRACE, or DEBUG.
For example, in the following excerpt from a sample audit configuration file, the audit log is enabled and it is configured to use the audit logger with the name org.apache.karaf.jaas.modules.audit:
audit.log.enabled = true
audit.log.logger = org.apache.karaf.jaas.modules.audit
audit.log.level = INFO
The value for audit.log.logger must match the value of log4j2.logger.audit.name in the Karaf Log4j configuration file (etc/org.ops4j.pax.logging.cfg).
After you update a file, the Apache Felix File Install bundle detects the change and updates the configuration in the Apache Felix Configuration Administration Service (Config Admin). The settings from the Config Admin are then passed to the logging infrastructure.
Apache Karaf shell commands for updating configuration files
You can edit configuration files in <FUSE_HOME>/etc directly, or you can run Apache Karaf config:* commands to update the Config Admin.
When you use the config* commands to update the configuration, the Apache Felix File Install bundle is notified about the changes and automatically updates the relevant etc/*.cfg files.
Example: Using a config command to list the properties for the JAAS realm
To list the properties in the JAAS realm, from a shell prompt, type the following command:
config:property-list --pid org.apache.karaf.jaas
The command returns the current properties for the realm, for example:
   audit.log.enabled = true
   audit.log.level = INFO
   audit.log.logger = org.apache.karaf.jaas.modules.audit
   encryption.algorithm = MD5
   encryption.enabled = false
   encryption.encoding = hexadecimal
   encryption.name =
   encryption.prefix = {CRYPT}
   encryption.suffix = {CRYPT}
Example: Using a config command to change the audit log level
To change the audit log level for the realm to DEBUG, from a shell prompt, type the following command: config:property-set --pid org.apache.karaf.jaas audit.log.level DEBUG
To verify that the change is effective, list the properties again to check the value for audit.log.level.
2.1.9. JAAS File Audit Login Module
The authentication module org.apache.karaf.jaas.modules.audit.FileAuditLoginModule provides basic logging of authentication attempts. The File Audit Login module writes directly to a specified file. Configuration is simple, because it does not rely on the Pax logging infrastructure. But unlike the Log Audit Login Module, it does not support log management features, such as pattern filtering, log file rotation, and so forth.
To enable audit logging with the FileAuditLoginModule, insert the following lines in etc/org.apache.karaf.jaas.cfg:
audit.file.enabled = true
audit.file.file = ${karaf.data}/security/audit.logTypically, you would not configure audit logging through both the File Audit Login Module and the Log Audit Login Module. If you enable logging through both modules, you can avoid loss of data by configuring each module to use a unique target log file.
2.1.10. Encrypting Stored Passwords
By default, the JAAS login modules store passwords in plaintext format. Although you can (and should) protect such data by setting file permissions appropriately, you can provide additional protection to passwords by storing them in an obscured format (using a message digest algorithm).
Red Hat Fuse provides a set of options for enabling password encryption, which can be combined with any of the JAAS login modules (except the public key login module, where it is not needed).
Although message digest algorithms are difficult to crack, they are not invulnerable to attack (for example, see the Wikipedia article on cryptographic hash functions). Always use file permissions to protect files containing passwords, in addition to using password encryption.
Options
You can optionally enable password encryption for JAAS login modules by setting the following login module properties. To do so, either edit the InstallDir/etc/org.apache.karaf.jaas.cfg file or deploy your own blueprint file as described in the section called “Example of a login module with Jasypt encryption”.
encryption.enabled-
Set to
true, to enable password encryption. encryption.name- Name of the encryption service, which has been registered as an OSGi service.
encryption.prefix- Prefix for encrypted passwords.
encryption.suffix- Suffix for encrypted passwords.
encryption.algorithmSpecifies the name of the encryption algorithm— for example,
MD5orSHA-1. You can specify one of the following encryption algorithms:-
MD2 -
MD5 -
SHA-1 -
SHA-256 -
SHA-384 -
SHA-512
-
encryption.encoding-
Encrypted passwords encoding:
hexadecimalorbase64. encryption.providerName(Jasypt only)-
Name of the
java.security.Providerinstance that is to provide the digest algorithm. encryption.providerClassName(Jasypt only)- Class name of the security provider that is to provide the digest algorithm
encryption.iterations(Jasypt only)- Number of times to apply the hash function recursively.
encryption.saltSizeBytes(Jasypt only)- Size of the salt used to compute the digest.
encryption.saltGeneratorClassName(Jasypt only)- Class name of the salt generator.
role.policy-
Specifies the policy for identifying role principals. Can have the values,
prefixorgroup. role.discriminator- Specifies the discriminator value to be used by the role policy.
Encryption services
There are two encryption services provided by Fuse:
-
encryption.name = basic, described in the section called “Basic encryption service”, -
encryption.name = jasypt, described in the section called “Jasypt encryption”.
You can also create your own encryption service. To do so, you need to:
-
Implement the
org.apache.karaf.jaas.modules.EncryptionServiceinterface, and - Expose your implementation as OSGI service.
The following listing shows how to expose a custom encryption service to the OSGI container:
<blueprint xmlns="http://www.osgi.org/xmlns/blueprint/v1.0.0">

    <service interface="org.apache.karaf.jaas.modules.EncryptionService">
        <service-properties>
            <entry key="name" value="jasypt" />
        </service-properties>
        <bean class="org.apache.karaf.jaas.jasypt.impl.JasyptEncryptionService"/>
    </service>
    ...
</blueprint>
Basic encryption service
The basic encryption service is installed in the Karaf container by default and you can reference it by setting the encryption.name property to the value, basic. In the basic encryption service, the message digest algorithms are provided by the SUN security provider (the default security provider in the Oracle JDK).
Jasypt encryption
The Jasypt encryption service is normally installed by default on Karaf. If necessary, you can install it explicitly by installing the jasypt-encryption feature, as follows:
JBossA-MQ:karaf@root> features:install jasypt-encryption
This command installs the requisite Jasypt bundles and exports Jasypt encryption as an OSGi service, so that it is available for use by JAAS login modules.
For more information about Jasypt encryption, see the Jasypt documentation.
Example of a login module with Jasypt encryption
By default, the passwords are stored in clear form in the etc/users.properties file. It is possible to enable encryption by installing jasypt-encryption feature and modifying the etc/org.apache.karaf.jaas.cfg configuration file.
Install feature
jasypt-encryption. This will install thejasyptservice.karaf@root> features:install jasypt-encryption
Now you can use the
jaascommands to create users.Open the
$FUSE_HOME/etc/org.apache.karaf.jaas.cfgfile and modify it as follows. Set theencryption.enabled = true,encryption.name = jasypt, and in this caseencryption.algorithm = SHA-256. There are otherencryption.algorithmoptions available, you can set it as per your requirement.# # Boolean enabling / disabling encrypted passwords # encryption.enabled = true # # Encryption Service name # the default one is 'basic' # a more powerful one named 'jasypt' is available # when installing the encryption feature # encryption.name = jasypt # # Encryption prefix # encryption.prefix = {CRYPT} # # Encryption suffix # encryption.suffix = {CRYPT} # # Set the encryption algorithm to use in Karaf JAAS login module # Supported encryption algorithms follow: # MD2 # MD5 # SHA-1 # SHA-256 # SHA-384 # SHA-512 # encryption.algorithm = SHA-256Enter
jaas:realmscommand on the Karaf console to view the deployed login modules.karaf@root()> jaas:realms Index │ Realm Name │ Login Module Class Name ──────┼────────────┼─────────────────────────────────────────────────────────────── 1 │ karaf │ org.apache.karaf.jaas.modules.properties.PropertiesLoginModule 2 │ karaf │ org.apache.karaf.jaas.modules.publickey.PublickeyLoginModule 3 │ karaf │ org.apache.karaf.jaas.modules.audit.FileAuditLoginModule 4 │ karaf │ org.apache.karaf.jaas.modules.audit.LogAuditLoginModule 5 │ karaf │ org.apache.karaf.jaas.modules.audit.EventAdminAuditLoginModule
Enter the following commands to create users.
karaf@root()> jaas:realm-manage --index 1

karaf@root()> jaas:user-list

User Name │ Group      │ Role

──────────┼────────────┼──────────────

admin     │ admingroup │ admin

admin     │ admingroup │ manager

admin     │ admingroup │ viewer

admin     │ admingroup │ systembundles

admin     │ admingroup │ ssh

karaf@root()> jaas:useradd usertest test123

karaf@root()> jaas:group-add usertest admingroup

karaf@root()> jaas:update

karaf@root()> jaas:realm-manage --index 1

karaf@root()> jaas:user-list

User Name │ Group      │ Role

──────────┼────────────┼──────────────

admin     │ admingroup │ admin

admin     │ admingroup │ manager

admin     │ admingroup │ viewer

admin     │ admingroup │ systembundles

admin     │ admingroup │ ssh

usertest  │ admingroup │ admin

usertest  │ admingroup │ manager

usertest  │ admingroup │ viewer

usertest  │ admingroup │ systembundles

usertest  │ admingroup │ ssh
Now if you look at the
$FUSE_HOME/etc/users.propertiesfile you can see that the userusertestis added to the file.admin = {CRYPT}WXX+4PM2G7nT045ly4iS0EANsv9H/VwmStGIb9bcbGhFH5RgMuL0D3H/GVTigpga{CRYPT},_g_:admingroup _g_\:admingroup = group,admin,manager,viewer,systembundles,ssh usertest = {CRYPT}33F5E76E5FF97F3D27D790AAA1BEE36057410CCDBDBE2C792239BB2853D17654315354BB8B608AD5{CRYPT},_g_:admingroup-
You can test the newly created login in a different terminal as you have already run a
jaas:updatecommand.
2.1.11. JAAS integration with HTTP Basic Authentication
You can use Servlet REST to define REST endpoints in Camel routes using REST DSL. The following example shows how the REST endpoint which is protected by HTTP Basic Authentication delegates user authentication to the Karaf JAAS service.
Procedure
Assuming that you have installed Apache Camel in
CamelInstallDir, you can find the example in the following directory:CamelInstallDir/examples/camel-example-servlet-rest-karaf-jaas
Use Maven to build and install the example as an OSGi bundle. Open a command prompt, switch the current directory to
CamelInstallDir/examples/camel-example-servlet-rest-karaf-jaas, and enter the following command:mvn install
To copy the security configuration file to the
KARAF_HOME/etcfolder, enter the following command:cp src/main/resources/org.ops4j.pax.web.context-camelrestdsl.cfg $KARAF_HOME/etc
To install Apache Camel in Karaf enter the following commands in the Karaf shell console:
feature:repo-add camel ${project.version}
feature:install camel
The
camel-servlet,camel-jacksonandwarKaraf features are also required, enter the following commands to install these features:feature:install camel-servlet feature:install camel-jackson feature:install war
To install the
camel-example-servlet-rest-karaf-jaasexample, enter the following command:install -s mvn:org.apache.camel.example/camel-example-servlet-rest-karaf-jaas/${project.version}
Result
To confirm that the application is running, you can view the application log files by entering the following command (use ctrl+c to stop tailing the log):
log:tail
The REST user endpoint supports the following operations:
-
GET /user/{id}- to view a user with the given id -
GET /user/final- to view all users -
PUT /user- to update/create an user
The view operations uses HTTP GET, and update the update operation uses HTTP PUT.
2.1.11.1. Accessing the REST service from a web browser
From a web browser you can access the services using the following examples (you need to input admin as the user and admin as the password in the pop-up dialog box):
Example: View user id 123
http://localhost:8181/camel-example-servlet-rest-blueprint/rest/user/123
Example: List all users
http://localhost:8181/camel-example-servlet-rest-blueprint/rest/user/findAll
2.1.11.2. Accessing the REST service from the command line
From the command line you can use curl to access the REST user endpoint as demonstrated in the following examples:
Example: View user id 123
curl -X GET -H "Accept: application/json" --basic -u admin:admin http://localhost:8181/camel-example-servlet-rest-blueprint/rest/user/123
Example: View all users
curl -X GET -H "Accept: application/json" --basic -u admin:admin http://localhost:8181/camel-example-servlet-rest-blueprint/rest/user/findAll
Example: Create or update user id 234
curl -X PUT -d "{ \"id\": 234, \"name\": \"John Smith\"}" -H "Accept: application/json" --basic -u admin:admin http://localhost:8181/camel-example-servlet-rest-blueprint/rest/user
2.2. Role-Based Access Control
Abstract
This section describes the role-based access control (RBAC) feature, which is enabled by default in the Karaf container. You can immediately start taking advantage of the RBAC feature, simply by adding one of the standard roles (such as manager or admin) to a user’s credentials. For more advanced usage, you have the option of customizing the access control lists, in order to control exactly what each role can do. Finally, you have the option of applying custom ACLs to your own OSGi services.
2.2.1. Overview of Role-Based Access Control
By default, the Fuse role-based access control protects access through the Fuse Management Console, JMX connections, and the Karaf command console. To use the default levels of access control, simply add any of the standard roles to your user authentication data (for example, by editing the users.properties file). You also have the option of customizing access control, by editing the relevant Access Control List (ACL) files.
Mechanisms
Role-based access control in Karaf is based on the following mechanisms:
- JMX Guard
- The Karaf container is configured with a JMX guard, which intercepts every incoming JMX invocation and filters the invocation through the configured JMX access control lists. The JMX guard is configured at the JVM level, so it intercepts every JMX invocation, without exception.
- OSGi Service Guard
- For any OSGi service, it is possible to configure an OSGi service guard. The OSGi service guard is implemented as a proxy object, which interposes itself between the client and the original OSGi service. An OSGi service guard must be explicitly configured for each OSGi service: it is not installed by default (except for the OSGi services that represent Karaf console commands, which are preconfigured for you).
Types of protection
The Fuse implementation of role-based access control is capable of providing the following types of protection:
- Fuse Console (Hawtio)
- Container access through the Fuse Console (Hawtio) is controlled by the JMX ACL files. The REST/HTTP service that provides the Fuse Console is implemented using Jolokia technology, which is layered above JMX. Hence, ultimately, all Fuse Console invocations pass through JMX and are regulated by JMX ACLs.
- JMX
- Direct access to the Karaf container’s JMX port is regulated by the JMX ACLs. Moreover, any additional JMX ports opened by an application running in the Karaf container would also be regulated by the JMX ACLs, because the JMX guard is set at the JVM level.
- Karaf command console
Access to the Karaf command console is regulated by the command console ACL files. Access control is applied no matter how the Karaf console is accessed. Whether accessing the command console through the Fuse Console or through the SSH protocol, access control is applied in both cases.
NoteIn the special case where you start up the Karaf container directly at the command line (for example, using the
./bin/fusescript) and no user authentication is performed, you automatically get the roles specified by thekaraf.local.rolesproperty in theetc/system.propertiesfile.- OSGi services
- For any OSGi service deployed in the Karaf container, you can optionally enable an ACL file, which restricts method invocations to specific roles.
Adding roles to users
In the system of role-based access control, you can give users permissions by adding roles to their user authentication data. For example, the following entry in the etc/users.properties file defines the admin user and grants the admin role.
admin = secretpass,group,admin,manager,viewer,systembundles,ssh
You also have the option of defining user groups and then assigning users to a particular user group. For example, you could define and use an admingroup user group as follows:
admin = secretpass, _g_:admingroup

_g_\:admingroup = group,admin,manager,viewer,systembundles,ssh
User groups are not supported by every type of JAAS login module.
Standard roles
Table 2.2, “Standard Roles for Access Control” lists and describes the standard roles that are used throughout the JMX ACLs and the command console ACLs.
Table 2.2. Standard Roles for Access Control
| Roles | Description |
|---|---|
|
| Grants read-only access to the Karaf container. |
|
| Grants read-write access at the appropriate level for ordinary users, who want to deploy and run applications. But blocks access to sensitive Karaf container configuration settings. |
|
| Grants unrestricted access to the Karaf container. |
|
| Grants users permission to connect to the Karaf command console (through the ssh port). |
ACL files
The standard set of ACL files are located under the etc/auth/ directory of the Fuse installation, as follows:
etc/auth/jmx.acl[.*].cfg- JMX ACL files.
etc/auth/org.apache.karaf.command.acl.*.cfg- Command console ACL files.
Customizing role-based access control
A complete set of JMX ACL files and command console ACL files are provided by default. You are free to customize these ACLs as required to suit the requirements of your system. Details of how to do this are given in the following sections.
Additional properties for controlling access
The system.properties file under the etc directory provides the following additional properties for controlling access through the Karaf command console and the Fuse Console (Hawtio):
karaf.local.roles- Specifies the roles that apply when a user starts up the Karaf container console locally (for example, by running the script).
hawtio.roles- Specifies the roles that are allowed to access the Karaf container through the Fuse Console. This constraint is applied in addition to the access control defined by the JMX ACL files.
karaf.secured.command.compulsory.roles-
Specifies the default roles required to invoke a Karaf console command, in case the console command is not configured explicitly by a command ACL file,
etc/auth/org.apache.karaf.command.acl.*.cfg. A user must be configured with at least one of the roles from the list in order to invoke the command. The value is specified as a comma-separated list of roles.
2.2.2. Customizing the JMX ACLs
The JMX ACLs are stored in the OSGi Config Admin Service and are normally accessible as the files, etc/auth/jmx.acl.*.cfg. This section explains how you can customize the JMX ACLs by editing these files yourself.
Architecture
Figure 2.1, “Access Control Mechanism for JMX” shows an overview of the role-based access control mechanism for JMX connections to the Karaf container.
Figure 2.1. Access Control Mechanism for JMX
How it works
JMX access control works by providing remote access to JMX through a special javax.management.MBeanServer object. This object acts as a proxy by invoking an org.apache.karaf.management.KarafMBeanServerGuard object, which is referred to as JMX guard. JMX guard is available without special configuration in startup files.
JMX access control is applied as follows:
- For every non-local JMX invocation, JMX guard is called before the actual MBean invocation.
- The JMX Guard looks up the relevant ACL for the MBean the user is trying to access (where the ACLs are stored in the OSGi Config Admin service).
- The ACL returns the list of roles that are allowed to make this particular invocation on the MBean.
- The JMX Guard checks the list of roles against the current security subject (the user that is making the JMX invocation), to see whether the current user has any of the required roles.
-
If no matching role is found, the JMX invocation is blocked and a
SecurityExceptionis raised.
Location of JMX ACL files
The JMX ACL files are located in the InstallDir/etc/auth directory, where the ACL file names obey the following convention:
etc/auth/jmx.acl[.*].cfg
Technically, the ACLs are mapped to OSGi persistent IDs (PIDs), matching the pattern, jmx.acl[.*]. It just so happens that the Karaf container stores OSGi PIDs as files, PID.cfg, under the etc/ directory by default.
Mapping MBeans to ACL file names
The JMX Guard applies access control to every MBean class that is accessed through JMX (including any MBeans you define in your own application code). The ACL file for a specific MBean class is derived from the MBean’s Object Name, by prefixing it with jmx.acl. For example, given the MBean whose Object Name is given by org.apache.camel:type=context, the corresponding PID would be:
jmx.acl.org.apache.camel.context
The OSGi Config Admin service stores this PID data in the following file:
etc/auth/jmx.acl.org.apache.camel.context.cfg
ACL file format
Each line of a JMX ACL file is an entry in the following format:
Pattern = Role1[,Role2][,Role3]...
Where Pattern is a pattern that matches a method invocation on an MBean, and the right-hand side of the equals sign is a comma-separated list of roles that give a user permission to make that invocation. In the simplest cases, the Pattern is simply a method name. For example, as in the following settings for the jmx.acl.hawtio.OSGiTools MBean (from the jmx.acl.hawtio.OSGiTools.cfg file):
getResourceURL = admin, manager, viewer
getLoadClassOrigin = admin, manager, viewer
It is also possible to use the wildcard character, *, to match multiple method names. For example, the following entry gives permission to invoke all method names starting with set:
set* = admin, manager, viewer
But the ACL syntax is also capable of defining much more fine-grained control of method invocations. You can define patterns to match methods invoked with specific arguments or even arguments that match a regular expression. For example, the ACL for the org.apache.karaf.config MBean package exploits this capability to prevent ordinary users from modifying sensitive configuration settings. The create method from this package is restricted, as follows:
create(java.lang.String)[/jmx[.]acl.*/] = admin
create(java.lang.String)[/org[.]apache[.]karaf[.]command[.]acl.+/] = admin
create(java.lang.String)[/org[.]apache[.]karaf[.]service[.]acl.+/] = admin
create(java.lang.String) = admin, manager
In this case, the manager role generally has permission to invoke the create method, but only the admin role has permission to invoke create with a PID argument matching jmx.acl.*, org.apache.karaf.command.acl.*, or org.apache.karaf.service.*.
For complete details of the ACL file format, please see the comments in the etc/auth/jmx.acl.cfg file.
ACL file hierarchy
Because it is often impractical to provide an ACL file for every single MBean, you have the option of specifying an ACL file at the level of a Java package, which provides default settings for all of the MBeans in that package. For example, the org.apache.cxf.Bus MBean could be affected by ACL settings at any of the following PID levels:
jmx.acl.org.apache.cxf.Bus
jmx.acl.org.apache.cxf
jmx.acl.org.apache
jmx.acl.org
jmx.acl
Where the most specific PID (top of the list) takes precedence over the least specific PID (bottom of the list).
Root ACL definitions
The root ACL file, jmx.acl.cfg, is a special case, because it supplies the default ACL settings for all MBeans. The root ACL has the following settings by default:
list* = admin, manager, viewer
get* = admin, manager, viewer
is* = admin, manager, viewer
set* = admin
* = admin
This implies that the typical read method patterns (list*, get*, is*) are accessible to all standard roles, but the typical write method patterns and other methods (set* and \*) are accessible only to the admin role, admin.
Package ACL definitions
Many of the standard JMX ACL files provided in etc/auth/jmx.acl[.*].cfg apply to MBean packages. For example, the ACL for the org.apache.camel.endpoints MBean package is defined with the following permissions:
is* = admin, manager, viewer
get* = admin, manager, viewer
set* = admin, manager
ACL for custom MBeans
If you define custom MBeans in your own application, these custom MBeans are automatically integrated with the ACL mechanism and protected by the JMX Guard when you deploy them into the Karaf container. By default, however, your MBeans are typically protected only by the default root ACL file, jmx.acl.cfg. If you want to define a more fine-grained ACL for your MBean, create a new ACL file under etc/auth, using the standard JMX ACL file naming convention.
For example, if your custom MBean class has the JMX Object Name, org.example:type=MyMBean, create a new ACL file under the etc/auth directory called:
jmx.acl.org.example.MyMBean.cfg
Dynamic configuration at run time
Because the OSGi Config Admin service is dynamic, you can change ACL settings while the system is running, and even while a particular user is logged on. Hence, if you discover a security breach while the system is running, you can immediately restrict access to certain parts of the system by editing the relevant ACL file, without having to restart the Karaf container.
2.2.3. Customizing the Command Console ACLs
The command console ACLs are stored in the OSGi Config Admin Service and are normally accessible as the files, etc/auth/org.apache.karaf.command.acl.*.cfg. This section explains how you can customize the command console ACLs by editing these files yourself.
Architecture
Figure 2.2, “Access Control Mechanism for OSGi Services” shows an overview of the role-based access control mechanism for OSGi services in the Karaf container.
Figure 2.2. Access Control Mechanism for OSGi Services

How it works
The mechanism for command console access control is, in fact, based on the generic access control mechanism for OSGi services. It so happens that console commands are implemented and exposed as OSGi services. The Karaf console itself discovers the available commands through the OSGi service registry and accesses the commands as OSGi services. Hence, the access control mechanism for OSGi services can be used to control access to console commands.
The mechanism for securing OSGi services is based on OSGi Service Registry Hooks. This is an advanced OSGi feature that makes it possible to hide OSGi services from certain consumers and to replace an OSGi service with a proxy service.
When a service guard is in place for a particular OSGi service, a client invocation on the OSGi service proceeds as follows:
- The invocation does not go directly to the requested OSGi service. Instead, the request is routed to a replacement proxy service, which has the same service properties as the original service (and some extra ones).
- The service guard looks up the relevant ACL for the target OSGi service (where the ACLs are stored in the OSGi Config Admin service).
- The ACL returns the list of roles that are allowed to make this particular method invocation on the service.
-
If no ACL is found for this command, the service guard defaults to the list of roles specified in the
karaf.secured.command.compulsory.rolesproperty in theetc/system.propertiesfile. - The service guard checks the list of roles against the current security subject (the user that is making the method invocation), to see whether the current user has any of the required roles.
-
If no matching role is found, the method invocation is blocked and a
SecurityExceptionis raised. - Alternatively, if a matching role is found, the method invocation is delegated to the original OSGi service.
Configuring default security roles
For any commands that do not have a corresponding ACL file, you specify a default list of security roles by setting the karaf.secured.command.compulsory.roles property in the etc/system.properties file (specified as a comma-separated list of roles).
Location of command console ACL files
The command console ACL files are located in the InstallDir/etc/auth directory, with the prefix, org.apache.karaf.command.acl.
Mapping command scopes to ACL file names
The command console ACL file names obey the following convention:
etc/auth/org.apache.karaf.command.acl.CommandScope.cfg
Where the CommandScope corresponds to the prefix for a particular group of Karaf console commands. For example, the feature:install and features:uninstall commands belong to the feature command scope, which has the corresponding ACL file, org.apache.karaf.command.acl.features.cfg.
ACL file format
Each line of a command console ACL file is an entry in the following format:
Pattern = Role1[,Role2][,Role3]...
Where Pattern is a pattern that matches a Karaf console command from the current command scope, and the right-hand side of the equals sign is a comma-separated list of roles that give a user permission to make that invocation. In the simplest cases, the Pattern is simply an unscoped command name. For example, the org.apache.karaf.command.acl.feature.cfg ACL file includes the following rules for the feature commands:
list = admin, manager, viewer
repo-list = admin, manager, viewer
info = admin, manager, viewer
version-list = admin, manager, viewer
repo-refresh = admin, manager
repo-add = admin, manager
repo-remove = admin, manager
install = admin
uninstall = admin
If no match is found for a specific command name, it is assumed that no role is required for this command and it can be invoked by any user.
You can also define patterns to match commands invoked with specific arguments or even arguments that match a regular expression. For example, the org.apache.karaf.command.acl.bundle.cfg ACL file exploits this capability to prevent ordinary users from invoking the bundle:start and bundle:stop commands with the -f (force) flag (which must be specified to manage system bundles). This restriction is coded as follows in the ACL file:
start[/.*[-][f].*/] = admin
start = admin, manager
stop[/.*[-][f].*/] = admin
stop = admin, manager
In this case, the manager role generally has permission to invoke the bundle:start and bundle:stop commands, but only the admin role has permission to invoke these commands with the force option, -f.
For complete details of the ACL file format, please see the comments in the etc/auth/org.apache.karaf.command.acl.bundle.cfg file.
Dynamic configuration at run time
The command console ACL settings are fully dynamic, which means you can change the ACL settings while the system is running and the changes will take effect within a few seconds, even for users that are already logged on.
2.2.4. Defining ACLs for OSGi Services
It is possible to define a custom ACL for any OSGi service (whether system level or application level). By default, OSGi services do not have access control enabled (with the exception of the OSGi services that expose Karaf console commands, which are pre-configured with command console ACL files). This section explains how to define a custom ACL for an OSGi service and how to invoke methods on that service using a specified role.
ACL file format
An OSGi service ACL file has one special entry, which identifies the OSGi service to which this ACL applies, as follows:
service.guard = (objectClass=InterfaceName)
Where the value of service.guard is an LDAP search filter that is applied to the registry of OSGi service properties in order to pick out the matching OSGi service. The simplest type of filter, (objectClass=InterfaceName), picks out an OSGi service with the specified Java interface name, InterfaceName.
The remaining entries in the ACL file are of the following form:
Pattern = Role1[,Role2][,Role3]...
Where Pattern is a pattern that matches a service method, and the right-hand side of the equals sign is a comma-separated list of roles that give a user permission to make that invocation. The syntax of these entries is essentially the same as the entries in a JMX ACL file—see the section called “ACL file format”.
How to define an ACL for a custom OSGi service
To define an ACL for a custom OSGi service, perform the following steps:
It is customary to define an OSGi service using a Java interface (you could use a regular Java class, but this is not recommended). For example, consider the Java interface,
MyService, which we intend to expose as an OSGi service:package org.example; public interface MyService { void doit(String s); }To expose the Java interface as an OSGi service, you would typically add a
serviceelement to an OSGi Blueprint XML file (where the Blueprint XML file is typically stored under thesrc/main/resources/OSGI-INF/blueprintdirectory in a Maven project). For example, assuming thatMyServiceImplis the class that implements theMyServiceinterface, you could expose theMyServiceOSGi service as follows:<?xml version="1.0" encoding="UTF-8"?> <blueprint xmlns="http://www.osgi.org/xmlns/blueprint/v1.0.0" xmlns:xsi="http://www.w3.org/2001/XMLSchema-instance" default-activation="lazy"> <bean id="myserviceimpl" class="org.example.MyServiceImpl"/> <service id="myservice" ref="myserviceimpl" interface="org.example.MyService"/> </blueprint>To define an ACL for the the OSGi service, you must create an OSGi Config Admin PID with the prefix,
org.apache.karaf.service.acl.For example, in the case of a Karaf container (where the OSGi Config Admin PIDs are stored as
.cfgfiles under theetc/auth/directory), you can create the following ACL file for theMyServiceOSGi service:etc/auth/org.apache.karaf.service.acl.myservice.cfg
NoteIt does not matter exactly how you name this file, as long as it starts with the required prefix,
org.apache.karaf.service.acl. The corresponding OSGi service for this ACL file is actually specified by a property setting in this file (as you will see in the next step).Specify the contents of the ACL file in a format like the following:
service.guard = (objectClass=InterfaceName)
Pattern = Role1[,Role2][,Role3]...
The
service.guardsetting specifies theInterfaceNameof the OSGi service (using the syntax of an LDAP search filter, which is applied to the OSGi service properties). The other entries in the ACL file consist of a methodPattern, which associates a matching method to the specified roles. For example, you could define a simple ACL for theMyServiceOSGi service with the following settings in theorg.apache.karaf.service.acl.myservice.cfgfile:service.guard = (objectClass=org.example.MyService) doit = admin, manager, viewer
Finally, in order to enable the ACL for this OSGi service, you must edit the
karaf.secured.servicesproperty in theetc/system.propertiesfile. The value of thekaraf.secured.servicesproperty has the syntax of an LDAP search filter (which gets applied to the OSGi service properties). In general, to enable ACLs for an OSGi service,ServiceInterface, you must modify this property as follows:karaf.secured.services=(|(objectClass=ServiceInterface)(...ExistingPropValue...))
For example, to enable the
MyServiceOSGi service:karaf.secured.services=(|(objectClass=org.example.MyService)(&(osgi.command.scope=*)(osgi.command.function=*)))
The initial value of the
karaf.secured.servicesproperty has the settings to enable the command console ACLs. If you delete or corrupt these entries, the command console ACLs might stop working.
How to invoke an OSGi service secured with RBAC
If you are writing Java code to invoke methods on a custom OSGi service (that is, implementing a client of the OSGi service), you must use the Java security API to specify the role you are using to invoke the service. For example, to invoke the MyService OSGi service using the manager role, you could use code like the following:
// Java
import javax.security.auth.Subject;
import org.apache.karaf.jaas.boot.principal.RolePrincipal;
// ...
Subject s = new Subject();
s.getPrincipals().add(new RolePrincipal("Deployer"));
Subject.doAs(s, new PrivilegedAction() {
  public Object run() {
    svc.doit("foo"); // invoke the service
  }
}
This example uses the Karaf role type, org.apache.karaf.jaas.boot.principal.RolePrincipal. If necessary, you could use your own custom role class instead, but in that case you would have to specify your roles using the syntax className:roleName in the OSGi service’s ACL file.
How to discover the roles required by an OSGi service
When you are writing code against an OSGi service secured by an ACL, it can sometimes be useful to check what roles are allowed to invoke the service. For this purpose, the proxy service exports an additional OSGi property, org.apache.karaf.service.guard.roles. The value of this property is a java.util.Collection object, which contains a list of all the roles that could possibly invoke a method on that service.
2.3. How to Use Encrypted Property Placeholders
When securing a Karaf container, do not use plain text passwords in configuration files. One way to avoid using plain text passwords is to use encrypted property placeholders whenever possible. See the following topics for details:
2.3.1. About the master password for encrypting values
To use Jasypt to encrypt a value, a master password is required. It is up to you or an administrator to choose the master password. Jasypt provides several ways to set the master password.
One way is to specify the master password in plain text in a Blueprint configuration, for example:
<blueprint xmlns="http://www.osgi.org/xmlns/blueprint/v1.0.0"
   	xmlns:enc="http://karaf.apache.org/xmlns/jasypt/v1.0.0">

  <enc:property-placeholder>
    <enc:encryptor class="org.jasypt.encryption.pbe.StandardPBEStringEncryptor">
      <property name="config">
        <bean class="org.jasypt.encryption.pbe.config.EnvironmentStringPBEConfig">
          <property name="algorithm" value="PBEWithMD5AndDES" />
          <property name="password" value="myPassword" />
        </bean>
      </property>
    </enc:encryptor>
  </enc:property-placeholder>

</blueprint>
Instead of specifying the master password in plain text, you can do one of the following:
Set an environment variable to your master password. In the Blueprint configuration file, specify this environment variable as the value of the
passwordEnvNameproperty. For example, if you set theMASTER_PWenvironment variable to your master password, then you would have this entry in your Blueprint configuration file:<property name="passwordEnvName" value="MASTER_PW">Set a Karaf system property to your master password. In the Blueprint configuration file, specify this system property as the value of the
passwordSysproperty. For example, if you set thekaraf.passwordsystem property to your master password, then you would have this entry in your Blueprint configuration file:<property name="passwordSys" value="karaf.password">
2.3.2. Using encrypted property placeholders
Use encrypted property placeholders in Blueprint configuration files when securing a Karaf container.
Prerequisites
- You know the master password for encrypting values.
Procedure
Plan to use the default encryption algorithm, which is
PBEWithMD5AndDES, or choose the encryption algorithm to use as follows:Discover which algorithms are supported in your current Java environment by running the
jasypt:list-algorithmscommand:karaf@root()> jasypt:list-algorithms
There are no arguments or options. The output is a list of the identifiers for supported digest and Password Based Encryption (PBE) algorithms. The list includes algorithms provided by the Bouncy Castle library, which is part of Fuse 7.8. This list can be long. A short portion of it would look like this:
karaf@root()> jasypt:list-algorithms DIGEST ALGORITHMS: - 1.0.10118.3.0.55 - 1.2.804.2.1.1.1.1.2.2.1 ... - 2.16.840.1.101.3.4.2.9 - BLAKE2B-160 - BLAKE2B-256 ... - MD4 - MD5 - OID.1.0.10118.3.0.55 ... - SHA3-512 - SKEIN-1024-1024 - SKEIN-1024-384 ... - TIGER - WHIRLPOOL PBE ALGORITHMS: - PBEWITHHMACSHA1ANDAES_128 - PBEWITHHMACSHA1ANDAES_256 ... - PBEWITHSHA1ANDRC2_128 - PBEWITHSHA1ANDRC2_40 ... - PBEWITHSHAANDIDEA-CBC - PBEWITHSHAANDTWOFISH-CBC- Examine the list and find the identifier for the encryption algorithm that you want to use. You might want to consult with security experts at your site for help with choosing the algorithm.
To encrypt a sensitive configuration value, such as a password to be used in a configuration file, run the
jasypt:encryptcommand. The command has the following format:jasypt:encrypt [options] [input]When you invoke this command without specifying any options, and you do not specify the value that you want to encrypt, the command prompts you for your master password and for the value to encrypt, and applies defaults for other options. For example:
karaf@root()> jasypt:encrypt
Master password: ********
Master password (repeat): ********
Data to encrypt: *****
Data to encrypt (repeat): *****
Algorithm used: PBEWithMD5AndDES
Encrypted data: oT8/LImAFQmOfXxuFGRDTAjD1l1+GxKL+TnHxFNwX4A=
Invoke the
jasypt:encryptcommand for each value that you want to encrypt.To change the default behavior, specify one or more of the following options:
Option Description Example -wor--password-propertyFollow this option with an environment variable or a system property that is set to the value of your master password. Jasypt uses this value, in conjunction with an encryption algorithm, to derive the encryption key.
If you do not specify the
-wor the-Woption, after you invoke the command, it prompts you to enter and confirm your master password.-w MASTER_PW-Wor--passwordFollow this option with the plain text value of your chosen master password. The plain text value of your master password appears in history.
Jasypt uses this value, in conjunction with an encryption algorithm, to derive the encryption key.
If you do not specify the
-wor the-Woption, after you invoke the command, it prompts you to enter and confirm your master password.-W "M@s!erP#"-aor--algorithmFollow this option with the identifier for the algorithm that you want the
jasypt:encryptcommand to use to derive the initial cryptographic key. The default isPBEWithMD5AndDES.All algorithms that are in the list that the
jasypt-list-algorithmscommand outputs are supported. Auto-completion is available when specifying algorithm names on the command line.For example:
-a PBEWITHMD5ANDRC2-ior--iterationsFollow this option with an integer that indicates the number of times to iteratively create a hash of the initial key. Each iteration takes the previous hash result and hashes it again. The result is the final encryption key. The default is 1000.
For example:
-i 5000-hor--hexSpecify this option to obtain hexadecimal output. The default output is Base64.
For example:
-h--helpDisplays information about command syntax and options.
jasypt:encrypt --helpCreate a properties file that contains the encrypted values that you obtained by running the
jasypt:encryptcommand. Wrap each encrypted value in theENC()function.For example, suppose you want to store some LDAP credentials in the
etc/ldap.propertiesfile. The file content would be something like this:#ldap.properties ldap.password=ENC(VMJ5S566MEDhQ5r6jiIqTB+fao3NN4pKnQ9xU0wiDCg=) ldap.url=ldap://192.168.1.74:10389
Add the required namespaces for the encrypted property placeholders to your
blueprint.xmlfile. These namespaces are for Aries extensions and Apache Karaf Jasypt. For example:<blueprint xmlns="http://www.osgi.org/xmlns/blueprint/v1.0.0" xmlns:ext="http://aries.apache.org/blueprint/xmlns/blueprint-ext/v1.0.0" xmlns:enc="http://karaf.apache.org/xmlns/jasypt/v1.0.0"> ... </blueprint>
Configure the identifier for the Jasypt encryption algorithm that you used and the location of the properties file. The following example shows how to:
-
Configure the
ext:property-placeholderelement to read properties from theetc/ldap.propertiesfile. Configure the
enc:property-placeholderelement to:-
Identify the
PBEWithMD5AndDESencryption algorithm. Read the master password from an environment variable,
JASYPT_ENCRYPTION_PASSWORD, that you defined in the Karafbin/setenvfile.<blueprint xmlns="http://www.osgi.org/xmlns/blueprint/v1.0.0" xmlns:ext="http://aries.apache.org/blueprint/xmlns/blueprint-ext/v1.0.0" xmlns:enc="http://karaf.apache.org/xmlns/jasypt/v1.0.0"> <ext:property-placeholder> <ext:location>file:etc/ldap.properties</ext:location> </ext:property-placeholder> <enc:property-placeholder> <enc:encryptor class="org.jasypt.encryption.pbe.StandardPBEStringEncryptor"> <property name="config"> <bean class="org.jasypt.encryption.pbe.config.EnvironmentStringPBEConfig"> <property name="algorithm" value="PBEWithMD5AndDES" /> <property name="passwordEnvName" value="JASYPT_ENCRYPTION_PASSWORD" /> </bean> </property> </enc:encryptor> </enc:property-placeholder> … </blueprint>
-
Identify the
-
Configure the
Configuring the initialization vector property
The following algorithms require an initialization vector property named ivGenerator to be added to the blueprint configuration:
PBEWITHHMACSHA1ANDAES_128
PBEWITHHMACSHA1ANDAES_256
PBEWITHHMACSHA224ANDAES_128
PBEWITHHMACSHA224ANDAES_256
PBEWITHHMACSHA256ANDAES_128
PBEWITHHMACSHA256ANDAES_256
PBEWITHHMACSHA384ANDAES_128
PBEWITHHMACSHA384ANDAES_256
PBEWITHHMACSHA512ANDAES_128
PBEWITHHMACSHA512ANDAES_256
The following example shows how to add the ivGenerator property to the blueprint configuration, if required:
<enc:property-placeholder>
  <enc:encryptor class="org.jasypt.encryption.pbe.StandardPBEStringEncryptor">
    <property name="config">
      <bean class="org.jasypt.encryption.pbe.config.EnvironmentStringPBEConfig">
        <property name="algorithm" value="PBEWITHHMACSHA1ANDAES_128"/>
        <property name="passwordEnvName" value="JASYPT_ENCRYPTION_PASSWORD"/>
        <property name="ivGenerator">
          <bean class="org.jasypt.iv.RandomIvGenerator" />
        </property>
      </bean>
    </property>
  </enc:encryptor>
</enc:property-placeholder>
LDAP JAAS realm configuration that uses encrypted property placeholders
The following example adds to the blueprint.xml file in the previous example by showing an LDAP JAAS realm configuration that uses Jasypt encrypted property placeholders.
When you use the process described in this topic to encrypt properties you cannot use the @PropertyInject annotation to decrypt the properties. Instead, use XML to inject properties into Java objects, as shown in this Blueprint example.
In this example, during container initialization, the ${ldap.password} placeholder is replaced with the decrypted value of the ldap.password property from the etc/ldap.properties file.
<blueprint xmlns="http://www.osgi.org/xmlns/blueprint/v1.0.0"
 	xmlns:ext="http://aries.apache.org/blueprint/xmlns/blueprint-ext/v1.0.0"
 	xmlns:enc="http://karaf.apache.org/xmlns/jasypt/v1.0.0">

  <ext:property-placeholder>
    <location>file:etc/ldap.properties</location>
  </ext:property-placeholder>

  <enc:property-placeholder>
    <enc:encryptor class="org.jasypt.encryption.pbe.StandardPBEStringEncryptor">
      <property name="config">
        <bean class="org.jasypt.encryption.pbe.config.EnvironmentStringPBEConfig">
          <property name="algorithm" value="PBEWithMD5AndDES" />
          <property name="passwordEnvName" value="JASYPT_ENCRYPTION_PASSWORD" />
        </bean>
      </property>
    </enc:encryptor>
  </enc:property-placeholder>

  <jaas:config name="karaf" rank="200">
    <jaas:module className="org.apache.karaf.jaas.modules.ldap.LDAPLoginModule" flags="required">
      initialContextFactory=com.sun.jndi.ldap.LdapCtxFactory
      debug=true
        connectionURL=${ldap.url}
        connectionUsername=cn=mqbroker,ou=Services,ou=system,dc=jbossfuse,dc=com
        connectionPassword=${ldap.password}
        connectionProtocol=
        authentication=simple
        userRoleName=cn
        userBase = ou=User,ou=ActiveMQ,ou=system,dc=jbossfuse,dc=com
        userSearchMatching=(uid={0})
        userSearchSubtree=true
        roleBase = ou=Group,ou=ActiveMQ,ou=system,dc=jbossfuse,dc=com
        roleName=cn
        roleSearchMatching= (member:=uid={1})
        roleSearchSubtree=true
    </jaas:module>
  </jaas:config>

</blueprint>
Examples of specifying environment variables or system properties
Rather than specifying your plain text master password when you encrypt a value, you can specify an environment variable or a system property that is set to your master password. For example, suppose that the bin/setenv file contains:
export MASTER_PASSWORD=passw0rd
You can encrypt a value with this command:
karaf@root()> jasypt:encrypt -w MASTER_PASSWORD "$en$!t!ve"
Algorithm used: PBEWithMD5AndDES
Encrypted data: /4DZCwqXD7cQ++TKQjt9QzmmcWv7TwmylCPkHumv2LQ=
If your etc/system.properties file contains:
master.password=passw0rd
You can encrypt a value with this command:
karaf@root()> jasypt:encrypt -w master.password "$en$!t!ve"
Algorithm used: PBEWithMD5AndDES
Encrypted data: 03+8UTJJtEXxHaJkVCmzhqLMUYtT8TBG2RMvOBQlfmQ=
2.3.3. Invoking the jasypt:digest command
A Jasypt digest is the result of applying cryptographic hash functions, such as MD5, to a value. Generating a digest is a type of one-way encryption. You cannot generate a digest and then reconstruct the original value from the digest. For especially sensitive values, you might want to generate a digest rather than encrypting a value. You can then specify the digest as a property placeholder.
The format for invoking the command to generate a digest is as follows:
jasypt:digest [options] [input]
If you do not specify any options, and you do not specify the input for which to create a digest, the command prompts you to specify the value that you want to encrypt and applies default values for options. For example:
karaf@root()> jasypt:digest
Input data to digest: ********
Input data to digest (repeat): ********
Algorithm used: MD5
Digest value: 8D4C0B3D5EE133BCFD7585A90F15C586741F814BC527EAE2A386B9AA6609B926AD9B3C418937251373E08F18729AD2C93815A7F14D878AA0EF3268AA04729A614ECAE95029A112E9AD56FEDD3FD7E28B73291C932B6F4C894737FBDE21AB382
The following example shows specification of the input argument on the command line:
karaf@root()> jasypt:digest ImportantPassword
This command applies default options and generates a digest that provides a one-way encryption of ImportantPassword. The command output looks something like this:
karaf@root()> jasypt:digest ImportantPassword
Algorithm used: MD5
Digest value: 0bL90nno/nHiTEdzx3dKa61LBDcWQQZMpjaONtY3b1fJBuDWbWTTtZ6tE5eOOPKh7orLTXS7XRt2blA2DrfnjWIlIETjge9n
Invoke the jasypt:digest command for each value for which you want one-way encryption.
To change the default behavior, specify one or more of the following options:
| Option | Description | Example |
|---|---|---|
|
|
Follow this option with the identifier for the digest algorithm that you want the
All digest algorithms that are in the list that the |
For example: |
|
| Follow this option with an integer that indicates the number of times to iteratively create a hash of the initial digest. Each iteration takes the previous hash result and hashes it again. The result is the final digest. The default is 1000. |
For example: |
|
|
Follow this option with an integer that indicates the number of bytes in the salt that |
For example: |
|
| Specify this option to obtain hexadecimal output. The default output is Base64. |
For example: |
|
| Displays information about command syntax and options. |
|
After you obtain a digest, you can use it in the same way as described in Using encrypted property placeholders.
If you use non-default values, the calculation takes longer. For example:
karaf@root()> jasypt:digest --iterations 1000000 --salt-size 32 -a SHA-512 --hex passw0rd
Algorithm used: SHA-512
Digest value: 4007A85C4932A399D8376B4F2B3221E34F0AF349BB152BEAC80F03BEB2B368DA7900F0990C186DB36D61741FA147B96DC9F73481991506FAA3662EA1693642CDAB89EB7E6B1DC21E1443D06D70A5842EB2851D37E262D5FC77A1D0909B3B2783
2.3.4. Invoking the jasypt:decrypt command
To verify the original value of an encryptyed placeholder, invoke the jasypt:decrypt command on the placeholder. You must have generated the placeholder by invoking the jasypt:encrypt command. You must know:
- The master password or the environment variable or system property that is set to the master password.
-
The algorithm that the
jasypt:encryptcommand used to encrypt the value. -
The number of iterations that the
jasypt:encryptcommand used to encrypt the original value.
The format for invoking the jasypt:decrypt command is as follows:
jasypt:decrypt [options] [input]
If you do not specify any options, and you do not specify the encrypted input that you want to decrypt, then the command prompts you for your master password and for the value to decrypt, and applies default values for other options. For this example decryption to be successful, the jasypt:encrypt command must have used the defaults to encrypt the value. For example:
karaf@root()> jasypt:decrypt
Master password: ********
Data to decrypt: ********************************************
Algorithm used: PBEWithMD5AndDES
Decrypted data: $en$!t!ve
This command uses the master password that you specify and the default algorithm, which is PBEWithMD5AndDES, to create a decryption key. The command then uses this decryption key to decrypt the value that you enter at the prompt.
To change the default behavior, specify one or more of the following options:
| Option | Description | Example |
|---|---|---|
|
| Follow this option with an environment variable or a system property that is set to the value of your master password. Jasypt uses this value, in conjunction with the decryption algorithm, to derive the initial decryption key.
If you do not specify the |
|
|
| Follow this option with the plain text value of your chosen master password. The plain text value of your master password appears in history. Jasypt uses this value, in conjunction with the decryption algorithm, to derive the initial decryption key.
If you do not specify the |
|
|
|
Follow this option with the identifier for the algorithm that you want the
The
All algorithms that are in the list that the |
For example: |
|
| Follow this option with an integer that indicates the number of times to iteratively create a hash of the initial key. Each iteration takes the previous hash result and hashes it again. The result is the final decryption key. The default is 1000.
The |
For example: |
|
| Specify this option to obtain hexadecimal output. The default output is Base64. |
For example: |
|
| Use fixed IV generator for decryption of passwords encrypted with previous versions of Jasypt. |
For example: |
|
| Displays information about command syntax and options. |
|
Examples of specifying environment variables or system properties
Rather than specifying your plain text master password when you decrypt a value, you can specify an environment variable or a system property that is set to your master password. For example, suppose that the bin/setenv file contains:
export MASTER_PASSWORD=passw0rd
You can decrypt a value with this command:
karaf@root()> jasypt:decrypt -a -w MASTER_PASSWORD
Data to decrypt: ********************************************
Algorithm used: PBEWithMD5AndDES
Decrypted data: $en$!t!ve
If your etc/system.properties file contains:
master.password=passw0rd
You can decrypt a value with this command:
karaf@root()> jasypt:decrypt -w master.password
Data to decrypt: ********************************************
Algorithm used: PBEWithMD5AndDES
Decrypted data: $en$!t!ve
2.4. Enabling Remote JMX SSL
Overview
Red Hat JBoss Fuse provides a JMX port that allows remote monitoring and management of Karaf containers using MBeans. By default, however, the credentials that you send over the JMX connection are unencrypted and vulnerable to snooping. To encrypt the JMX connection and protect against password snooping, you need to secure JMX communications by configuring JMX over SSL.
To configure JMX over SSL, perform the following steps:
After you have configured JMX over SSL access, you should test the connection.
If you are planning to enable SSL/TLS security, you must ensure that you explicitly disable the SSLv3 protocol, in order to safeguard against the Poodle vulnerability (CVE-2014-3566). For more details, see Disabling SSLv3 in JBoss Fuse 6.x and JBoss A-MQ 6.x.
If you configure JMX over SSL while Red Hat JBoss Fuse is running, you will need to restart it.
Prerequisites
If you haven’t already done so, you need to:
-
Set your
JAVA_HOMEenvironment variable Configure a Karaf user with the
adminroleEdit the
InstallDir/etc/users.propertiesfile and add the following entry, on a single line:admin=YourPassword,adminThis creates a new user with username,
admin, password,YourPassword, and theadminrole.
Create the jbossweb.keystore file
Open a command prompt and make sure you are in the etc/ directory of your Karaf installation:
cd etc
At the command line, using a -dname value (Distinguished Name) appropriate for your application, type this command:
$JAVA_HOME/bin/keytool -genkey -v -alias jbossalias -keyalg RSA -keysize 1024 -keystore jbossweb.keystore -validity 3650 -keypass JbossPassword -storepass JbossPassword -dname "CN=127.0.0.1, OU=RedHat Software Unit, O=RedHat, L=Boston, S=Mass, C=USA"
Type the entire command on a single command line.
The command returns output that looks like this:
Generating 1,024 bit RSA key pair and self-signed certificate (SHA256withRSA) with a validity of 3,650 days
	for: CN=127.0.0.1, OU=RedHat Software Unit, O=RedHat, L=Boston, ST=Mass, C=USA
New certificate (self-signed):
[
[
  Version: V3
  Subject: CN=127.0.0.1, OU=RedHat Software Unit, O=RedHat, L=Boston, ST=Mass, C=USA
  Signature Algorithm: SHA256withRSA, OID = 1.2.840.113549.1.1.11

  Key:  Sun RSA public key, 1024 bits
  modulus: 1123086025790567043604962990501918169461098372864273201795342440080393808
     1594100776075008647459910991413806372800722947670166407814901754459100720279046
     3944621813738177324031064260382659483193826177448762030437669318391072619867218
     036972335210839062722456085328301058362052369248473659880488338711351959835357
  public exponent: 65537
  Validity: [From: Thu Jun 05 12:19:52 EDT 2014,
               To: Sun Jun 02 12:19:52 EDT 2024]
  Issuer: CN=127.0.0.1, OU=RedHat Software Unit, O=RedHat, L=Boston, ST=Mass, C=USA
  SerialNumber: [    4666e4e6]

Certificate Extensions: 1
[1]: ObjectId: 2.5.29.14 Criticality=false
SubjectKeyIdentifier [
KeyIdentifier [
0000: AC 44 A5 F2 E6 2F B2 5A   5F 88 FE 69 60 B4 27 7D  .D.../.Z_..i`.'.
0010: B9 81 23 9C                                        ..#.
]
]

]
  Algorithm: [SHA256withRSA]
  Signature:
0000: 01 1D 95 C0 F2 03 B0 FD   CF 3A 1A 14 F5 2E 04 E5  .........:......
0010: DD 18 DD 0E 24 60 00 54   35 AE FE 36 7B 38 69 4C  ....$`.T5..6.8iL
0020: 1E 85 0A AF AE 24 1B 40   62 C9 F4 E5 A9 02 CD D3  .....$.@b.......
0030: 91 57 60 F6 EF D6 A4 84   56 BA 5D 21 11 F7 EA 09  .W`.....V.]!....
0040: 73 D5 6B 48 4A A9 09 93   8C 05 58 91 6C D0 53 81  s.kHJ.....X.l.S.
0050: 39 D8 29 59 73 C4 61 BE   99 13 12 89 00 1C F8 38  9.)Ys.a........8
0060: E2 BF D5 3C 87 F6 3F FA   E1 75 69 DF 37 8E 37 B5  ...<..?..ui.7.7.
0070: B7 8D 10 CC 9E 70 E8 6D   C2 1A 90 FF 3C 91 84 50  .....p.m....<..P

]
[Storing jbossweb.keystore]
Check whether InstallDir/etc now contains the file, jbossweb.keystore.
Create and deploy the keystore.xml file
-
Using your favorite XML editor, create and save the
keystore.xmlfile in the<installDir>/jboss-fuse-7.8.0.fuse-780038-redhat-00001/etcdirectory. Include this text in the file:
<blueprint xmlns="http://www.osgi.org/xmlns/blueprint/v1.0.0"
xmlns:jaas="http://karaf.apache.org/xmlns/jaas/v1.0.0">
<jaas:keystore name="sample_keystore"
rank="1"
path="file:etc/jbossweb.keystore"
keystorePassword="JbossPassword"
keyPasswords="jbossalias=JbossPassword" />
</blueprint>
Deploy the
keystore.xmlfile to the Karaf container, by copying it into theInstallDir/deploydirectory (the hot deploy directory).NoteSubsequently, if you need to undeploy the
keystore.xmlfile, you can do so by deleting thekeystore.xmlfile from thedeploy/directory while the Karaf container is running.
Add the required properties to org.apache.karaf.management.cfg
Edit the InstallDir/etc/org.apache.karaf.management.cfg file to include these properties at the end of the file:
secured = true
secureProtocol = TLSv1
keyAlias = jbossalias
keyStore = sample_keystore
trustStore = sample_keystore
You must set secureProtocol to TLSv1, in order to protect against the Poodle vulnerability (CVE-2014-3566)
You can optionally set the enabledCipherSuites property to list specific cipher suites to be used for JMX TLS connections. Setting this property will override default cipher suites.
Restart the Karaf container
You must restart the Karaf container for the new JMX SSL/TLS settings to take effect.
Testing the Secure JMX connection
Open a command prompt and make sure you are in the
etc/directory of your Fuse installation:cd <installDir>/jboss-fuse-7.8.0.fuse-780038-redhat-00001/etcOpen a terminal, and start up JConsole by entering this command:
jconsole -J-Djavax.net.debug=ssl -J-Djavax.net.ssl.trustStore=jbossweb.keystore -J-Djavax.net.ssl.trustStoreType=JKS -J-Djavax.net.ssl.trustStorePassword=JbossPassword
Where the
-J-Djavax.net.ssl.trustStoreoption specifies the location of thejbossweb.keystorefile (make sure this location is specified correctly, or the SSL/TLS handshake will fail). The-J-Djavax.net.debug=sslsetting enables logging of SSL/TLS handshake messages, so you can verify that SSL/TLS has been successfully enabled.ImportantType the entire command on the same command line.
-
When JConsole opens, select the option
Remote Processin theNew Connectionwizard. Under the
Remote Processoption, enter the following value for theservice:jmx:<protocol>:<sap>connection URL:service:jmx:rmi://localhost:44444/jndi/rmi://localhost:1099/karaf-root
And fill in the
Username, andPasswordfields with valid JAAS credentials (as set in theetc/users.propertiesfile):Username: admin Password:
YourPassword
2.5. Using an Elytron credential store
Fuse includes the Elytron credential store feature that is part of JBoss EAP. A credential store can safely secure sensitive text strings by encrypting them in a storage file. Each container can have exactly one credential store.
In secure configurations, a typical problem is how to store passwords. For example, consider passwords for database access from various applications. For many authentication methods, passwords must be available in clear text before a server can send credentials to a database server. Storage of clear text passwords in text configuration files is generally not a good idea.
An Elytron credential store solves this problem. You securely store passwords and other sensitive values in a credential store, which is an encrypted file that complies with the PKCS#12 specification. A credential store does not store unencrypted values. The credential store uses PBE (Password Based Encryption) to encrypt both sensitive values, such as passwords, and the store itself.
The following topics provide details:
- Section 2.5.1, “Putting a credential store into use”
- Section 2.5.2, “Behavior when system properties hold credential store configuration”
- Section 2.5.3, “Description of credential store system properties and environment variables”
-
Section 2.5.4, “
credential-store:createcommand reference” -
Section 2.5.5, “
credential-store:storecommand reference” -
Section 2.5.6, “
credential-store:listcommand reference” -
Section 2.5.7, “
credential-store:removecommand reference” - Section 2.5.8, “Example of Configuration Admin properties enabling credential store use”
2.5.1. Putting a credential store into use
In an Apache Karaf container that is running Fuse, to put a credential store into use, create and configure the credential store and then add values to it. Fuse continues to run and the credential store is available for use.
Prerequisites
You want to use the following defaults when you create the credential store:
- Create a PKCS#12 credential store.
-
Apply the
masked-SHA1-DES-EDEalgorithm to encrypt the credential store. - Iterate through the algorithm 200000 times.
-
Locate the credential store at
${karaf.etc}/credential.store.p12.
-
You want to save credential store configuration in
${karaf.etc}/system.properties.
If you need to change any of these behaviors, see the information about invoking the credential-store:create command.
Procedure
Choose a credential store password.
Later, when you add values to the credential store or when you want to decrypt values, a credential store command uses your credential store password to encrypt and decrypt the values.
Invoke the
credential-store:createcommand, which prompts you to enter your chosen credential store password:karaf@root()> credential-store:create --persist Credential store password: ***** Credential store password (repeat): ***** Credential store configuration was persisted in ${karaf.etc}/system.properties and is effective. Credential store was written to /data/servers/fuse-karaf-7.4.0.fuse-740060/etc/credential.store.p12 By default, only system properties are encrypted. Encryption of configuration admin properties can be enabled by setting felix.cm.pm=elytron in etc/config.properties.The command writes something like the following configuration in
etc/system.properties:credential.store.location = /data/servers/fuse-karaf-7.4.0.fuse-740060/etc/credential.store.p12 credential.store.protection.algorithm = masked-SHA1-DES-EDE credential.store.protection.params = MDkEKFJId25PaXlVQldKUWw5R2tLclhZQndpTGhhVXJsWG5lNVJMbTFCZEMCAwMNQAQI0Whepb7H1BA= credential.store.protection = m+1BcfRyCnI=
Add an encrypted value to the credential store by invoking the
credential-store:storecommand as follows:credential-store:store aliasReplace
aliaswith a unique key value. Later, to retrieve the encrypted value that you are adding to the credential store, tools use this alias. For example, suppose you use thedb.passwordsystem property in code, and youretc/system.propertiesfile has an entry that sets thedb.passwordproperty to the actual password for the database. The recommendation is to specify your system property,db.password, as the alias.After you invoke this command, it prompts you to enter and confirm the sensitive value that you want to add to the credential store. Continuing with the
db.passwordalias example, at the prompt, you would enter the actual password for the database:karaf@root()> credential-store:store db.password Secret value to store: ****** Secret value to store (repeat): ****** Value stored in the credential store. To reference it use: CS:db.password
Update an entry in your
etc/system.propertiesfile or add a new entry. The entry that you update or add sets the alias that you specified in thecredential-store:storecommand to the reference value that the command outputs. For example:db.password = CS:db.password
When Fuse is running with a configured credential store, it dynamically replaces each instance of, for example, the
db.passwordsystem property, with the actual secret value that is in the credential store.-
In the
credential-store:storecommand, if the alias that you specified is a system property that is already in use, skip to the next step. If code is not already using the alias that you specified for the secret, then in each file that requires the secret, specify the alias, which you added as a system property in the previous step. For example, code would refer todb.password. - Repeat the previous three steps for each value that you want to add to the credential store.
Results
The credential store is ready for use. When Fuse starts or when the credential store bundle restarts, it processes system properties to find any that reference credential store entries. For each system property that does, Fuse obtains the associated value from the credential store and replaces the system property with the actual secret value. The actual secret value is then available to all components, bundles, and code that contain instances of that system property.
2.5.2. Behavior when system properties hold credential store configuration
Suppose that a credential store is in use and you are using system properties to hold its configuration parameters. When Fuse starts it processes all system properties. Fuse replaces system properties that are set to values that have the CS: prefix with the associated value that is in the credential store. Fuse proxies the java.lang:type=Runtime JMX MBean so that each call to the JMX getSystemProperties() method hides decrypted values.
For example, consider a credential store with one entry:
karaf@root()> credential-store:list --show-secrets
Alias       │ Reference      │ Secret value
────────────┼────────────────┼─────────────
db.password │ CS:db.password │ sec4et
Assume that after you added this entry to the credential store, you edited the etc/system.properties file to add this entry:
db.password = CS:db.password
When Fuse starts or when you restart the org.jboss.fuse.modules.fuse-credential-store-core bundle, Fuse checks for any references to the db.password system property. For each reference, Fuse uses the CS:db.password alias to obtain the associated value from credential store. You can check this by invoking the following command:
karaf@root()> system:property db.password
sec4et
However, if you use JMX to check this, the value from the credential store is hidden:
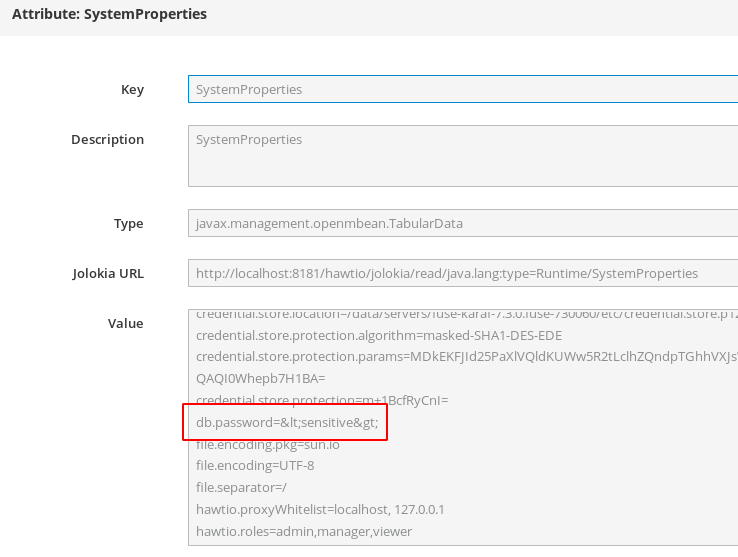
2.5.3. Description of credential store system properties and environment variables
You can use system properties or environment variables to hold credential store configuration parameters. The options that you specify when you create a credential store determine:
- Whether you must set the properties or variables yourself.
- The exact value that a property or variable is, or must be, set to.
An understanding of the properties/variables helps you understand how a credential store works.
When you invoke the credential-store:create command and specify only the --persist option, the command sets system properties to credential store configuration parameters. You do not need to explicitly set credential store system properties.
To use credential store environment variables instead or to change the default behavior of the credential-store:create command, see credential-store:create command reference for details about options that you can specify when you create a credential store.
When you invoke the command that creates a credential store, any options that you specify determine the settings of the credential store properties or variables. If you must set properties or variables yourself, output from the credential-store:create command contains instructions for doing that. In other words, it is never up to you to decide what the setting of credential store system properties or environment variables should be. Execution of the credential-store:create command always determines the settings.
The following table describes the credential store properties and variables. For a particular parameter, if both the environment variable and the system property are set, the environment variable setting has precedence.
| Name | Description |
|---|---|
|
Environment variable:
System property: | The Password Based Encryption (PBE) algorithm that credential store commands use to derive an encryption key. |
|
Environment variable:
System property: | Location of the credential store. |
|
Environment variable:
System property: | Parameters that a credential store uses to derive an encryption key. Parameters include iteration count, initial vector, and salt. |
|
Environment variable:
System property: |
Password that a credential store command must decrypt to recover passwords or other secure data from a credential store. When you invoke the |
2.5.4. credential-store:create command reference
To create and configure a credential store, invoke the credential-store:create command, which has the following format:
credential-store:create [options]
When you do not specify any options, the command does the following:
- Prompts you for your chosen credential store password.
- Creates a PKCS#12 credential store
-
Use the
masked-SHA1-DES-EDEalgorithm to encrypt the credential store - Iterates through the algorithm 200000 times
-
Locates the credential store at
${karaf.etc}/credential.store.p12 - Does not store the credential store configuration
The following table describes the options, which you can specify to change the default behavior.
| Option | Description |
|---|---|
|
| Follow this option with an environment variable or a system property that is set to the value of your master password. The credential store uses this value, in conjunction with an algorithm, to derive the encryption or decryption key.
If you do not specify the
For example: |
|
| Follow this option with the plain text value of your chosen master password. The plain text value of your master password appears in history. The credential store uses this value, in conjunction with an algorithm, to derive the encryption or decryption key.
If you do not specify the
For example: |
|
| Forces creation of the credential store. If a credential store exists at the intended location of the new credential store, specification of this option causes the command to overwrite the existing credential store. Any content in the existing credential store is lost. The default behavior is that the command does not create a credential store if there is already a credential store in the intended location. |
|
|
Specifies the location for the new credential store. The recommendation is to use the default location, which is |
|
| Follow this option with an integer that indicates the number of times to iteratively apply the encryption algorithm being used. Each iteration takes the previous result and applies the algorithm again. The result is the final masked password. The default is 200000. |
|
|
Follow this option with the identifier for the algorithm that you want the |
|
|
Stores the configuration of the new credential store in
A reason to omit this option is because you want to see the credential store configuration parameter values. Or, you might omit this option because you plan to pass credential store configuration parameters to an application without using the |
|
| Displays information about command syntax and options. |
Example of creating a credential store without specifying --persist
The following command creates a credential store but does not save the credential store configuration in ${karaf.etc}/system.properties. The command uses the masked-SHA1-DES-EDE algorithm, which is the default.
karaf@root()> credential-store:create
Credential store password: *****
Credential store password (repeat): *****

Credential store was written to /data/servers/fuse-karaf-7.4.0.fuse-740060/etc/credential.store.p12

By default, only system properties are encrypted.
Encryption of configuration admin properties can be enabled by
setting felix.cm.pm=elytron in etc/config.properties.

Credential store configuration was not persisted and is not
effective. Please use one of the following configuration options and restart Fuse.
Option #1: Configure these system properties (e.g., in etc/system.properties):
 - credential.store.protection.algorithm=masked-SHA1-DES-EDE
 - credential.store.protection.params=MDkEKGdOSkpRWXpndjhkVVZYbHF4elVpbUszNW0wc3NXczhNS1A5cVlhZzcCAwMNQAQIDPzQ+BDGwX4=
 - credential.store.protection=0qudlx1XZFM=
 - credential.store.location=/data/servers/fuse-karaf-7.4.0.fuse-740060/etc/credential.store.p12
Option #2: Configure these environmental variables (e.g., in bin/setenv):
 - CREDENTIAL_STORE_PROTECTION_ALGORITHM=masked-SHA1-DES-EDE
 - CREDENTIAL_STORE_PROTECTION_PARAMS=MDkEKGdOSkpRWXpndjhkVVZYbHF4elVpbUszNW0wc3NXczhNS1A5cVlhZzcCAwMNQAQIDPzQ+BDGwX4=
 - CREDENTIAL_STORE_PROTECTION=0qudlx1XZFM=
 - CREDENTIAL_STORE_LOCATION=/data/servers/fuse-karaf-7.4.0.fuse-740060/etc/credential.store.p12
2.5.5. credential-store:store command reference
To add an encrypted value to the credential store, invoke the credential-store:store command, which has the following format:
credential-store:store alias [secret]
Replace alias with a unique key value. To retrieve the encrypted value that you are adding to the credential store, tools use this alias.
Optionally, replace secret with the value that you want to encrypt and add to the credential store. Typically, this is a password, but it can be any value that you want to encrypt.
If you specify secret on the command line, its plain text value appears in history. If you do not specify secret on the command line, then the command prompts you for it and the value does not appear in history.
To view information about the command, enter:
credential-store:store --help.
The following command line is an example of adding an entry to the credential store:
karaf@root()> credential-store:store db.password sec4et
Value stored in the credential store. To reference it use: CS:db.password
The credential store now has an entry that can be referenced by specifying CS:db.password.
2.5.6. credential-store:list command reference
To obtain the alias for an entry in the credential store, invoke the credential-store:list command, which display a list of all entries in the credential store. For example:
karaf@root()> credential-store:list
Alias        │ Reference
─────────────┼───────────────
db.password  │ CS:db.password
db2.password | CS:db2.password
To also list decryptions of the secret values that are encrypted in the credential store, invoke the command as follows:
karaf@root()> credential-store:list --show-secrets
Alias        │ Reference       │ Secret value
─────────────┼─────────────────┼─────────────
db.password  │ CS:db.password  │ sec4et
db2.password | CS:db2.password | t0pSec4et
To view information about the command:
karaf@root()> credential-store:list --help
2.5.7. credential-store:remove command reference
To remove an entry from a credential store, invoke the credential-store:remove command, which has the following format:
credential-store:remove alias
Replace alias with the unique key value that you specified for the alias argument when you added the entry to the credential store. Do not specify the CS: prefix. You can invoke the credential-store:list command to obtain the alias.
The credential-store:remove command checks the credential store for an entry that has the alias that you specified, and if found, removes it. For example:
karaf@root()> credential-store:remove db.password

Alias        │ Reference       │ Secret value
─────────────┼─────────────────┼─────────────
db2.password | CS:db2.password | t0pSec4et
To view information about the command:
karaf@root()> credential-store:remove --help
2.5.8. Example of Configuration Admin properties enabling credential store use
In a development environment, you can use Configuration Admin service properties to enable the use of a credential store. Configuration Admin properties are defined in etc/*.cfg files.
The use of Configuration Admin properties to enable the use of a credential store is a Technology Preview feature only. Technology Preview features are not supported with Red Hat production service level agreements (SLAs) and might not be functionally complete. Red Hat does not recommend using them in production. These features provide early access to upcoming product features, enabling customers to test functionality and provide feedback during the development process. For more information about the support scope of Red Hat Technology Preview features, see https://access.redhat.com/support/offerings/techpreview/.
Preparation
-
Invoke the
credential-store:createcommand to create a credential store. Seecredential-store:create command reference. -
Enable the use of Configuration Admin properties by editing the
etc/config.propertiesfile to uncomment the line that containsfelix.cm.pm = elytron:
# When uncommented, configuration properties handled by Configuration Admin service will be encrypted when storing
# in etc/ and in bundle data. Values of the properties will actually be aliases to credential store entries.
# Please consult the documentation for more details.
felix.cm.pm = elytron
What happens when Fuse starts
The
felix.configadminbundle:-
Delays registering the
ConfigurationAdminservice because thefelix.cm.pmproperty is set. -
Waits for the availability of the
org.apache.felix.cm.PersistenceManagerOSGiservice with thename=cmOSGi service registration property.
-
Delays registering the
The Fuse credential store bundle:
-
Loads the credential store by using the values set for the
credential.store.* system properties orCREDENTIAL_STORE_* environment variables. -
Registers an OSGi service that implements the the
org.apache.felix.cm.PersistenceManagerOSGiservice.
If anything fails, the credential store bundle registers the
PersistenceManagerservice, which does nothing special. When something is broken or when the credential store is not available, Fuse should be able to read unencrypted configuration values. Encrypted values, specified with theCS:prefix are lost unless you remember the original values or you are able to recover the credential store and its configuration.-
Loads the credential store by using the values set for the
-
The
felix.configadminprocess uses the new persistence manager service to load and store the credential store configuration.
Example
Suppose the credential store has two entries:
karaf@root()> credential-store:list --show-secrets
Alias       │ Reference      │ Secret value
────────────┼────────────────┼─────────────
db.password │ CS:db.password │ sec4et
http.port   │ CS:http.port   │ 8182
In a Configuration Admin service configuration, you choose to use the alias for a sensitive value instead of the actual value. For example, you change a web configuration property as follows:
karaf@root()> config:property-list --pid org.ops4j.pax.web
   javax.servlet.context.tempdir = /data/servers/fuse-karaf-7.4.0.fuse-740060/data/pax-web-jsp
   org.ops4j.pax.web.config.file = /data/servers/fuse-karaf-7.4.0.fuse-740060/etc/undertow.xml
   org.ops4j.pax.web.session.cookie.httpOnly = true
   org.osgi.service.http.port = 8181

karaf@root()> config:property-set --pid org.ops4j.pax.web org.osgi.service.http.port CS:http.port

karaf@root()> config:property-list --pid org.ops4j.pax.web
   javax.servlet.context.tempdir = /data/servers/fuse-karaf-7.4.0.fuse-740060/data/pax-web-jsp
   org.ops4j.pax.web.config.file = /data/servers/fuse-karaf-7.4.0.fuse-740060/etc/undertow.xml
   org.ops4j.pax.web.session.cookie.httpOnly = true
   org.osgi.service.http.port = CS:http.port
In logs, the actual value, 8182 can appear, as you can see at the end of the following line. Whether a log shows the actual text value is determined by the component that consumes the encrypted value.
2019-03-12 15:36:25,648 INFO {paxweb-config-2-thread-1} (ServerControllerImpl.java:458) : Starting undertow http listener on 0.0.0.0:8182
In the previous commands, the second config:property-list --pid org.ops4j.pax.web command displays CS:http.port instead of 8182, though the property has a numeric value. The pax-web-undertow process starts on this port. This is because OSGi hooks prevent the felix.fileinstall process, which shows the output of the config:property-list --pid org.ops4j.pax.web command, from seeing decrypted (dereferenced) values. This is also the reason why the etc/org.ops4j.pax.web.cfg file does not store decrypted (dereferenced) values, but instead stores, for example:
org.osgi.service.http.port = CS:http.port

org.ops4j.pax.web.config.file = ${karaf.etc}/undertow.xml
org.ops4j.pax.web.session.cookie.httpOnly = true

javax.servlet.context.tempdir = ${karaf.data}/pax-web-jsp