Chapter 11. Configuring VLANs in the web console
This section describes how to configure Virtual Local Area Network (VLAN). A VLAN is a logical network within a physical network. The VLAN interface tags packets with the VLAN ID as they pass through the interface, and removes tags of returning packets.
11.1. Configuring VLAN tagging by using the RHEL web console
Use the RHEL web console to configure VLAN tagging if you prefer to manage network settings using a web browser-based interface.
Prerequisites
- The interface you plan to use as a parent to the virtual VLAN interface supports VLAN tags.
If you configure the VLAN on top of a bond interface:
- The ports of the bond are up.
-
The bond is not configured with the
fail_over_mac=followoption. A VLAN virtual device cannot change its MAC address to match the parent’s new MAC address. In such a case, the traffic would still be sent with the incorrect source MAC address. - The bond is usually not expected to get IP addresses from a DHCP server or IPv6 auto-configuration. Ensure it by disabling the IPv4 and IPv6 protocol creating the bond. Otherwise, if DHCP or IPv6 auto-configuration fails after some time, the interface might be brought down.
- The switch, the host is connected to, is configured to support VLAN tags. For details, see the documentation of your switch.
Procedure
-
Select the
Networkingtab in the navigation on the left side of the screen. -
Click in the
Interfacessection. - Select the parent device.
- Enter the VLAN ID.
Enter the name of the VLAN device or keep the automatically-generated name.
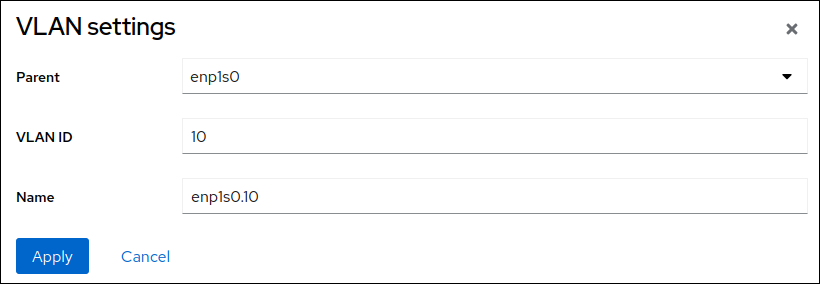
- Click .
By default, the VLAN device uses a dynamic IP address. If you want to set a static IP address:
-
Click the name of the VLAN device in the
Interfacessection. -
Click
Editnext to the protocol you want to configure. -
Select
Manualnext toAddresses, and enter the IP address, prefix, and default gateway. -
In the
DNSsection, click the button, and enter the IP address of the DNS server. Repeat this step to set multiple DNS servers. -
In the
DNS search domainssection, click the button, and enter the search domain. If the interface requires static routes, configure them in the
Routessection.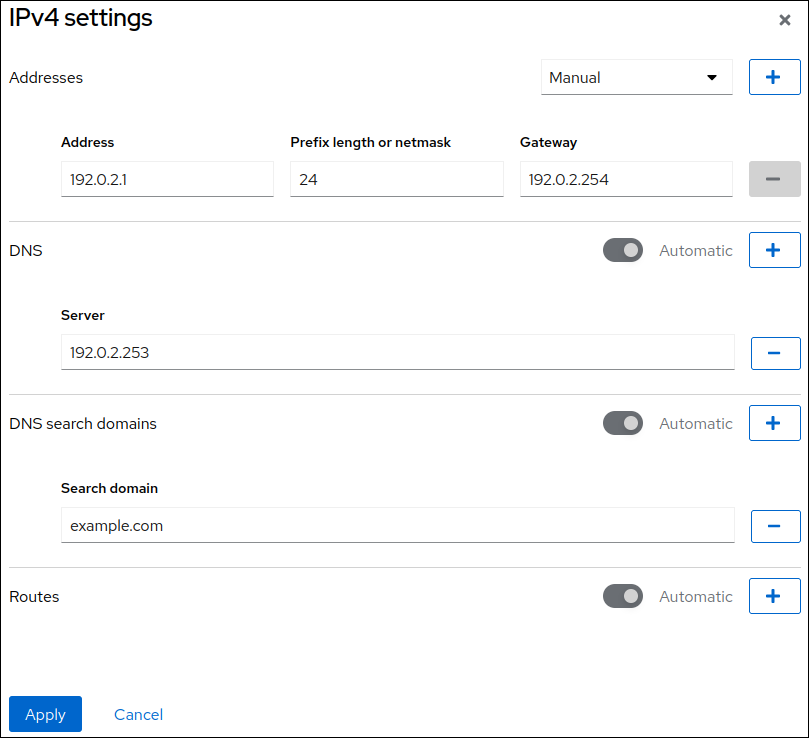
- Click
-
Click the name of the VLAN device in the
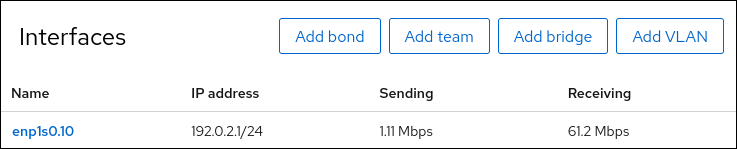
Verification
Select the
Networkingtab in the navigation on the left side of the screen, and check if there is incoming and outgoing traffic on the interface: