
Chapter 2. Configuring Identity Management for smart card authentication
Identity Management (IdM) supports smart card authentication with:
- User certificates issued by the IdM certificate authority
- User certificates issued by an external certificate authority
You can configure smart card authentication in IdM for both types of certificates. In this scenario, the rootca.pem CA certificate is the file containing the certificate of a trusted external certificate authority.
For information about smart card authentication in IdM, see Understanding smart card authentication.
For more details on configuring smart card authentication:
- Configuring the IdM server for smart card authentication
- Configuring the IdM client for smart card authentication
- Adding a certificate to a user entry in the IdM Web UI
- Adding a certificate to a user entry in the IdM CLI
- Installing tools for managing and using smart cards
- Storing a certificate on a smart card
- Logging in to IdM with smart cards
- Configuring GDM access using smart card authentication
- Configuring su access using smart card authentication
2.1. Configuring the IdM server for smart card authentication
If you want to enable smart card authentication for users whose certificates have been issued by the certificate authority (CA) of the <EXAMPLE.ORG> domain that your Identity Management (IdM) CA trusts, you must obtain the following certificates so that you can add them when running the ipa-advise script that configures the IdM server:
- The certificate of the root CA that has either issued the certificate for the <EXAMPLE.ORG> CA directly, or through one or more of its sub-CAs. You can download the certificate chain from a web page whose certificate has been issued by the authority. For details, see Steps 1 - 4a in Configuring a browser to enable certificate authentication.
-
The IdM CA certificate. You can obtain the CA certificate from the
/etc/ipa/ca.crtfile on the IdM server on which an IdM CA instance is running. - The certificates of all of the intermediate CAs; that is, intermediate between the <EXAMPLE.ORG> CA and the IdM CA.
To configure an IdM server for smart card authentication:
- Obtain files with the CA certificates in the PEM format.
-
Run the built-in
ipa-advisescript. - Reload the system configuration.
Prerequisites
- You have root access to the IdM server.
- You have the root CA certificate and all the intermediate CA certificates.
Procedure
Create a directory in which you will do the configuration:
[root@server]# mkdir ~/SmartCard/Navigate to the directory:
[root@server]# cd ~/SmartCard/Obtain the relevant CA certificates stored in files in PEM format. If your CA certificate is stored in a file of a different format, such as DER, convert it to PEM format. The IdM Certificate Authority certificate is in PEM format and is located in the
/etc/ipa/ca.crtfile.Convert a DER file to a PEM file:
# openssl x509 -in <filename>.der -inform DER -out <filename>.pem -outform PEM
For convenience, copy the certificates to the directory in which you want to do the configuration:
[root@server SmartCard]# cp /tmp/rootca.pem ~/SmartCard/
[root@server SmartCard]# cp /tmp/subca.pem ~/SmartCard/
[root@server SmartCard]# cp /tmp/issuingca.pem ~/SmartCard/
Optionally, if you use certificates of external certificate authorities, use the
openssl x509utility to view the contents of the files in thePEMformat to check that theIssuerandSubjectvalues are correct:[root@server SmartCard]# openssl x509 -noout -text -in rootca.pem | moreGenerate a configuration script with the in-built
ipa-adviseutility, using the administrator’s privileges:[root@server SmartCard]# kinit admin [root@server SmartCard]# ipa-advise config-server-for-smart-card-auth > config-server-for-smart-card-auth.sh
The
config-server-for-smart-card-auth.shscript performs the following actions:- It configures the IdM Apache HTTP Server.
- It enables Public Key Cryptography for Initial Authentication in Kerberos (PKINIT) on the Key Distribution Center (KDC).
- It configures the IdM Web UI to accept smart card authorization requests.
Execute the script, adding the PEM files containing the root CA and sub CA certificates as arguments:
[root@server SmartCard]# chmod +x config-server-for-smart-card-auth.sh
[root@server SmartCard]# ./config-server-for-smart-card-auth.sh rootca.pem subca.pem issuingca.pem
Ticket cache:KEYRING:persistent:0:0
Default principal: admin@IDM.EXAMPLE.COM
[...]
Systemwide CA database updated.
The ipa-certupdate command was successful
NoteEnsure that you add the root CA’s certificate as an argument before any sub CA certificates and that the CA or sub CA certificates have not expired.
Optionally, if the certificate authority that issued the user certificate does not provide any Online Certificate Status Protocol (OCSP) responder, you may need to disable OCSP check for authentication to the IdM Web UI:
Set the
SSLOCSPEnableparameter tooffin the/etc/httpd/conf.d/ssl.conffile:SSLOCSPEnable offRestart the Apache daemon (httpd) for the changes to take effect immediately:
[root@server SmartCard]# systemctl restart httpd
WarningDo not disable the OCSP check if you only use user certificates issued by the IdM CA. OCSP responders are part of IdM.
For instructions on how to keep the OCSP check enabled, and yet prevent a user certificate from being rejected by the IdM server if it does not contain the information about the location at which the CA that issued the user certificate listens for OCSP service requests, see the
SSLOCSPDefaultResponderdirective in Apache mod_ssl configuration options.
The server is now configured for smart card authentication.
To enable smart card authentication in the whole topology, run the procedure on each IdM server.
2.2. Using Ansible to configure the IdM server for smart card authentication
You can use Ansible to enable smart card authentication for users whose certificates have been issued by the certificate authority (CA) of the <EXAMPLE.ORG> domain that your Identity Management (IdM) CA trusts. To do that, you must obtain the following certificates so that you can use them when running an Ansible playbook with the ipasmartcard_server ansible-freeipa role script:
- The certificate of the root CA that has either issued the certificate for the <EXAMPLE.ORG> CA directly, or through one or more of its sub-CAs. You can download the certificate chain from a web page whose certificate has been issued by the authority. For details, see Step 4 in Configuring a browser to enable certificate authentication.
-
The IdM CA certificate. You can obtain the CA certificate from the
/etc/ipa/ca.crtfile on any IdM CA server. - The certificates of all of the CAs that are intermediate between the <EXAMPLE.ORG> CA and the IdM CA.
Prerequisites
-
You have
rootaccess to the IdM server. -
You know the IdM
adminpassword. - You have the root CA certificate, the IdM CA certificate, and all the intermediate CA certificates.
You have configured your Ansible control node to meet the following requirements:
- You are using Ansible version 2.14 or later.
-
You have installed the
ansible-freeipapackage on the Ansible controller. - The example assumes that in the ~/MyPlaybooks/ directory, you have created an Ansible inventory file with the fully-qualified domain name (FQDN) of the IdM server.
-
The example assumes that the secret.yml Ansible vault stores your
ipaadmin_password.
-
The target node, that is the node on which the
ansible-freeipamodule is executed, is part of the IdM domain as an IdM client, server or replica.
Procedure
If your CA certificates are stored in files of a different format, such as
DER, convert them toPEMformat:# openssl x509 -in <filename>.der -inform DER -out <filename>.pem -outform PEMThe IdM Certificate Authority certificate is in
PEMformat and is located in the/etc/ipa/ca.crtfile.Optionally, use the
openssl x509utility to view the contents of the files in thePEMformat to check that theIssuerandSubjectvalues are correct:# openssl x509 -noout -text -in root-ca.pem | moreNavigate to your ~/MyPlaybooks/ directory:
$ cd ~/MyPlaybooks/Create a subdirectory dedicated to the CA certificates:
$ mkdir SmartCard/For convenience, copy all the required certificates to the ~/MyPlaybooks/SmartCard/ directory:
# cp /tmp/root-ca.pem ~/MyPlaybooks/SmartCard/
# cp /tmp/intermediate-ca.pem ~/MyPlaybooks/SmartCard/
# cp /etc/ipa/ca.crt ~/MyPlaybooks/SmartCard/ipa-ca.crt
In your Ansible inventory file, specify the following:
- The IdM servers that you want to configure for smart card authentication.
- The IdM administrator password.
The paths to the certificates of the CAs in the following order:
- The root CA certificate file
- The intermediate CA certificates files
- The IdM CA certificate file
The file can look as follows:
[ipaserver]
ipaserver.idm.example.com

[ipareplicas]
ipareplica1.idm.example.com
ipareplica2.idm.example.com

[ipacluster:children]
ipaserver
ipareplicas

[ipacluster:vars]
ipaadmin_password= "{{ ipaadmin_password }}"
ipasmartcard_server_ca_certs=/home/<user_name>/MyPlaybooks/SmartCard/root-ca.pem,/home/<user_name>/MyPlaybooks/SmartCard/intermediate-ca.pem,/home/<user_name>/MyPlaybooks/SmartCard/ipa-ca.crt
Create an
install-smartcard-server.ymlplaybook with the following content:--- - name: Playbook to set up smart card authentication for an IdM server hosts: ipaserver become: true roles: - role: ipasmartcard_server state: present
- Save the file.
Run the Ansible playbook. Specify the playbook file, the file storing the password protecting the secret.yml file, and the inventory file:
$ ansible-playbook --vault-password-file=password_file -v -i inventory install-smartcard-server.ymlThe
ipasmartcard_serverAnsible role performs the following actions:- It configures the IdM Apache HTTP Server.
- It enables Public Key Cryptography for Initial Authentication in Kerberos (PKINIT) on the Key Distribution Center (KDC).
- It configures the IdM Web UI to accept smart card authorization requests.
Optionally, if the certificate authority that issued the user certificate does not provide any Online Certificate Status Protocol (OCSP) responder, you may need to disable OCSP check for authentication to the IdM Web UI:
Connect to the IdM server as
root:ssh root@ipaserver.idm.example.comSet the
SSLOCSPEnableparameter tooffin the/etc/httpd/conf.d/ssl.conffile:SSLOCSPEnable offRestart the Apache daemon (httpd) for the changes to take effect immediately:
# systemctl restart httpd
WarningDo not disable the OCSP check if you only use user certificates issued by the IdM CA. OCSP responders are part of IdM.
For instructions on how to keep the OCSP check enabled, and yet prevent a user certificate from being rejected by the IdM server if it does not contain the information about the location at which the CA that issued the user certificate listens for OCSP service requests, see the
SSLOCSPDefaultResponderdirective in Apache mod_ssl configuration options.
The server listed in the inventory file is now configured for smart card authentication.
To enable smart card authentication in the whole topology, set the hosts variable in the Ansible playbook to ipacluster:
---
- name: Playbook to setup smartcard for IPA server and replicas
  hosts: ipacluster
[...]
Additional resources
-
Sample playbooks using the
ipasmartcard_serverrole in the/usr/share/doc/ansible-freeipa/playbooks/directory
2.3. Configuring the IdM client for smart card authentication
Follow this procedure to configure IdM clients for smart card authentication. The procedure needs to be run on each IdM system, a client or a server, to which you want to connect while using a smart card for authentication. For example, to enable an ssh connection from host A to host B, the script needs to be run on host B.
As an administrator, run this procedure to enable smart card authentication using
The
sshprotocolFor details see Configuring SSH access using smart card authentication.
- The console login
- The GNOME Display Manager (GDM)
-
The
sucommand
This procedure is not required for authenticating to the IdM Web UI. Authenticating to the IdM Web UI involves two hosts, neither of which needs to be an IdM client:
- The machine on which the browser is running. The machine can be outside of the IdM domain.
-
The IdM server on which
httpdis running.
The following procedure assumes that you are configuring smart card authentication on an IdM client, not an IdM server. For this reason you need two computers: an IdM server to generate the configuration script, and the IdM client on which to run the script.
Prerequisites
- Your IdM server has been configured for smart card authentication, as described in Configuring the IdM server for smart card authentication.
- You have root access to the IdM server and the IdM client.
- You have the root CA certificate and all the intermediate CA certificates.
-
You installed the IdM client with the
--mkhomediroption to ensure remote users can log in successfully. If you do not create a home directory, the default login location is the root of the directory structure,/.
Procedure
On an IdM server, generate a configuration script with
ipa-adviseusing the administrator’s privileges:[root@server SmartCard]# kinit admin [root@server SmartCard]# ipa-advise config-client-for-smart-card-auth > config-client-for-smart-card-auth.sh
The
config-client-for-smart-card-auth.shscript performs the following actions:- It configures the smart card daemon.
- It sets the system-wide truststore.
- It configures the System Security Services Daemon (SSSD) to allow users to authenticate with either their user name and password or with their smart card. For more details on SSSD profile options for smart card authentication, see Smart card authentication options in RHEL.
From the IdM server, copy the script to a directory of your choice on the IdM client machine:
[root@server SmartCard]# scp config-client-for-smart-card-auth.sh root@client.idm.example.com:/root/SmartCard/
Password:
config-client-for-smart-card-auth.sh        100%   2419       3.5MB/s   00:00
From the IdM server, copy the CA certificate files in PEM format for convenience to the same directory on the IdM client machine as used in the previous step:
[root@server SmartCard]# scp {rootca.pem,subca.pem,issuingca.pem} root@client.idm.example.com:/root/SmartCard/
Password:
rootca.pem                          100%   1237     9.6KB/s   00:00
subca.pem                           100%   2514    19.6KB/s   00:00
issuingca.pem                       100%   2514    19.6KB/s   00:00
On the client machine, execute the script, adding the PEM files containing the CA certificates as arguments:
[root@client SmartCard]# kinit admin
[root@client SmartCard]# chmod +x config-client-for-smart-card-auth.sh
[root@client SmartCard]# ./config-client-for-smart-card-auth.sh rootca.pem subca.pem issuingca.pem
Ticket cache:KEYRING:persistent:0:0
Default principal: admin@IDM.EXAMPLE.COM
[...]
Systemwide CA database updated.
The ipa-certupdate command was successful
NoteEnsure that you add the root CA’s certificate as an argument before any sub CA certificates and that the CA or sub CA certificates have not expired.
The client is now configured for smart card authentication.
2.4. Using Ansible to configure IdM clients for smart card authentication
Follow this procedure to use the ansible-freeipa ipasmartcard_client module to configure specific Identity Management (IdM) clients to permit IdM users to authenticate with a smart card. Run this procedure to enable smart card authentication for IdM users that use any of the following to access IdM:
The
sshprotocolFor details see Configuring SSH access using smart card authentication.
- The console login
- The GNOME Display Manager (GDM)
-
The
sucommand
This procedure is not required for authenticating to the IdM Web UI. Authenticating to the IdM Web UI involves two hosts, neither of which needs to be an IdM client:
- The machine on which the browser is running. The machine can be outside of the IdM domain.
-
The IdM server on which
httpdis running.
Prerequisites
- Your IdM server has been configured for smart card authentication, as described in Using Ansible to configure the IdM server for smart card authentication.
- You have root access to the IdM server and the IdM client.
- You have the root CA certificate, the IdM CA certificate, and all the intermediate CA certificates.
You have configured your Ansible control node to meet the following requirements:
- You are using Ansible version 2.14 or later.
-
You have installed the
ansible-freeipapackage on the Ansible controller. - The example assumes that in the ~/MyPlaybooks/ directory, you have created an Ansible inventory file with the fully-qualified domain name (FQDN) of the IdM server.
-
The example assumes that the secret.yml Ansible vault stores your
ipaadmin_password.
-
The target node, that is the node on which the
ansible-freeipamodule is executed, is part of the IdM domain as an IdM client, server or replica.
Procedure
If your CA certificates are stored in files of a different format, such as
DER, convert them toPEMformat:# openssl x509 -in <filename>.der -inform DER -out <filename>.pem -outform PEMThe IdM CA certificate is in
PEMformat and is located in the/etc/ipa/ca.crtfile.Optionally, use the
openssl x509utility to view the contents of the files in thePEMformat to check that theIssuerandSubjectvalues are correct:# openssl x509 -noout -text -in root-ca.pem | moreOn your Ansible control node, navigate to your ~/MyPlaybooks/ directory:
$ cd ~/MyPlaybooks/Create a subdirectory dedicated to the CA certificates:
$ mkdir SmartCard/For convenience, copy all the required certificates to the ~/MyPlaybooks/SmartCard/ directory, for example:
# cp /tmp/root-ca.pem ~/MyPlaybooks/SmartCard/
# cp /tmp/intermediate-ca.pem ~/MyPlaybooks/SmartCard/
# cp /etc/ipa/ca.crt ~/MyPlaybooks/SmartCard/ipa-ca.crt
In your Ansible inventory file, specify the following:
- The IdM clients that you want to configure for smart card authentication.
- The IdM administrator password.
The paths to the certificates of the CAs in the following order:
- The root CA certificate file
- The intermediate CA certificates files
- The IdM CA certificate file
The file can look as follows:
[ipaclients]
ipaclient1.example.com
ipaclient2.example.com

[ipaclients:vars]
ipaadmin_password=SomeADMINpassword
ipasmartcard_client_ca_certs=/home/<user_name>/MyPlaybooks/SmartCard/root-ca.pem,/home/<user_name>/MyPlaybooks/SmartCard/intermediate-ca.pem,/home/<user_name>/MyPlaybooks/SmartCard/ipa-ca.crt
Create an
install-smartcard-clients.ymlplaybook with the following content:--- - name: Playbook to set up smart card authentication for an IdM client hosts: ipaclients become: true roles: - role: ipasmartcard_client state: present
- Save the file.
Run the Ansible playbook. Specify the playbook and inventory files:
$ ansible-playbook --vault-password-file=password_file -v -i inventory install-smartcard-clients.ymlThe
ipasmartcard_clientAnsible role performs the following actions:- It configures the smart card daemon.
- It sets the system-wide truststore.
- It configures the System Security Services Daemon (SSSD) to allow users to authenticate with either their user name and password or their smart card. For more details on SSSD profile options for smart card authentication, see Smart card authentication options in RHEL.
The clients listed in the ipaclients section of the inventory file are now configured for smart card authentication.
If you have installed the IdM clients with the --mkhomedir option, remote users will be able to log in to their home directories. Otherwise, the default login location is the root of the directory structure, /.
Additional resources
-
Sample playbooks using the
ipasmartcard_serverrole in the/usr/share/doc/ansible-freeipa/playbooks/directory
2.5. Adding a certificate to a user entry in the IdM Web UI
Follow this procedure to add an external certificate to a user entry in IdM Web UI.
Instead of uploading the whole certificate, it is also possible to upload certificate mapping data to a user entry in IdM. User entries containing either full certificates or certificate mapping data can be used in conjunction with corresponding certificate mapping rules to facilitate the configuration of smart card authentication for system administrators. For details, see Certificate mapping rules for configuring authentication.
If the user’s certificate has been issued by the IdM Certificate Authority, the certificate is already stored in the user entry, and you do not need to follow this procedure.
Prerequisites
- You have the certificate that you want to add to the user entry at your disposal.
Procedure
- Log into the IdM Web UI as an administrator if you want to add a certificate to another user. For adding a certificate to your own profile, you do not need the administrator’s credentials.
-
Navigate to
Users→Active users→sc_user. -
Find the
Certificateoption and clickAdd. In the command-line interface, display the certificate in the
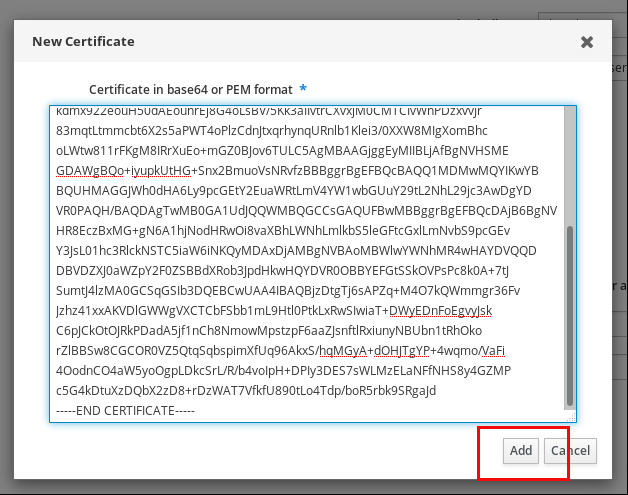
PEMformat using thecatutility or a text editor:[user@client SmartCard]$ cat testuser.crt- Copy and paste the certificate from the CLI into the window that has opened in the Web UI.
Click
Add.Figure 2.1. Adding a new certificate in the IdM Web UI
The sc_user entry now contains an external certificate.
2.6. Adding a certificate to a user entry in the IdM CLI
Follow this procedure to add an external certificate to a user entry in IdM CLI.
Instead of uploading the whole certificate, it is also possible to upload certificate mapping data to a user entry in IdM. User entries containing either full certificates or certificate mapping data can be used in conjunction with corresponding certificate mapping rules to facilitate the configuration of smart card authentication for system administrators. For details, see Certificate mapping rules for configuring authentication.
If the user’s certificate has been issued by the IdM Certificate Authority, the certificate is already stored in the user entry, and you do not need to follow this procedure.
Prerequisites
- You have the certificate that you want to add to the user entry at your disposal.
Procedure
Log into the IdM CLI as an administrator if you want to add a certificate to another user:
[user@client SmartCard]$ kinit adminFor adding a certificate to your own profile, you do not need the administrator’s credentials:
[user@client SmartCard]$ kinit sc_userCreate an environment variable containing the certificate with the header and footer removed and concatenated into a single line, which is the format expected by the
ipa user-add-certcommand:[user@client SmartCard]$ export CERT=`openssl x509 -outform der -in testuser.crt | base64 -w0 -`Note that certificate in the
testuser.crtfile must be in thePEMformat.Add the certificate to the profile of sc_user using the
ipa user-add-certcommand:[user@client SmartCard]$ ipa user-add-cert sc_user --certificate=$CERT
The sc_user entry now contains an external certificate.
2.7. Installing tools for managing and using smart cards
Prerequisites
-
The
gnutls-utilspackage is installed. -
The
openscpackage is installed. -
The
pcscdservice is running.
Before you can configure your smart card, you must install the corresponding tools, which can generate certificates and start the pscd service.
Procedure
Install the
openscandgnutls-utilspackages:# {PackageManagerCommand} -y install opensc gnutls-utilsStart the
pcscdservice.# systemctl start pcscd
Verification steps
Verify that the
pcscdservice is up and running# systemctl status pcscd
2.8. Preparing your smart card and uploading your certificates and keys to your smart card
Follow this procedure to configure your smart card with the pkcs15-init tool, which helps you to configure:
- Erasing your smart card
- Setting new PINs and optional PIN Unblocking Keys (PUKs)
- Creating a new slot on the smart card
- Storing the certificate, private key, and public key in the slot
- If required, locking the smart card settings as certain smart cards require this type of finalization
The pkcs15-init tool may not work with all smart cards. You must use the tools that work with the smart card you are using.
Prerequisites
The
openscpackage, which includes thepkcs15-inittool, is installed.For more details, see Installing tools for managing and using smart cards.
- The card is inserted in the reader and connected to the computer.
-
You have a private key, a public key, and a certificate to store on the smart card. In this procedure,
testuser.key,testuserpublic.key, andtestuser.crtare the names used for the private key, public key, and the certificate. - You have your current smart card user PIN and Security Officer PIN (SO-PIN).
Procedure
Erase your smart card and authenticate yourself with your PIN:
$ pkcs15-init --erase-card --use-default-transport-keys
Using reader with a card: Reader name
PIN [Security Officer PIN] required.
Please enter PIN [Security Officer PIN]:
The card has been erased.
Initialize your smart card, set your user PIN and PUK, and your Security Officer PIN and PUK:
$ pkcs15-init --create-pkcs15 --use-default-transport-keys \ --pin 963214 --puk 321478 --so-pin 65498714 --so-puk 784123
Using reader with a card: Reader name
The
pcks15-inittool creates a new slot on the smart card.Set a label and the authentication ID for the slot:
$ pkcs15-init --store-pin --label testuser \ --auth-id 01 --so-pin 65498714 --pin 963214 --puk 321478
Using reader with a card: Reader name
The label is set to a human-readable value, in this case,
testuser. Theauth-idmust be two hexadecimal values, in this case it is set to01.Store and label the private key in the new slot on the smart card:
$ pkcs15-init --store-private-key testuser.key --label testuser_key \ --auth-id 01 --id 01 --pin 963214
Using reader with a card: Reader name
NoteThe value you specify for
--idmust be the same when storing your private key and storing your certificate in the next step. Specifying your own value for--idis recommended as otherwise a more complicated value is calculated by the tool.Store and label the certificate in the new slot on the smart card:
$ pkcs15-init --store-certificate testuser.crt --label testuser_crt \ --auth-id 01 --id 01 --format pem --pin 963214
Using reader with a card: Reader name
Optional: Store and label the public key in the new slot on the smart card:
$ pkcs15-init --store-public-key testuserpublic.key --label testuserpublic_key --auth-id 01 --id 01 --pin 963214
Using reader with a card: Reader name
NoteIf the public key corresponds to a private key or certificate, specify the same ID as the ID of the private key or certificate.
Optional: Certain smart cards require you to finalize the card by locking the settings:
$ pkcs15-init -FAt this stage, your smart card includes the certificate, private key, and public key in the newly created slot. You have also created your user PIN and PUK and the Security Officer PIN and PUK.
2.9. Logging in to IdM with smart cards
Follow this procedure to use smart cards for logging in to the IdM Web UI.
Prerequisites
- The web browser is configured for using smart card authentication.
- The IdM server is configured for smart card authentication.
- The certificate installed on your smart card is either issued by the IdM server or has been added to the user entry in IdM.
- You know the PIN required to unlock the smart card.
- The smart card has been inserted into the reader.
Procedure
- Open the IdM Web UI in the browser.
Click Log In Using Certificate.

If the Password Required dialog box opens, add the PIN to unlock the smart card and click the OK button.
The User Identification Request dialog box opens.
If the smart card contains more than one certificate, select the certificate you want to use for authentication in the drop down list below Choose a certificate to present as identification.
- Click the OK button.
Now you are successfully logged in to the IdM Web UI.

2.10. Logging in to GDM using smart card authentication on an IdM client
The GNOME Desktop Manager (GDM) requires authentication. You can use your password; however, you can also use a smart card for authentication.
Follow this procedure to use smart card authentication to access GDM.
Prerequisites
- The system has been configured for smart card authentication. For details, see Configuring the IdM client for smart card authentication.
- The smart card contains your certificate and private key.
- The user account is a member of the IdM domain.
The certificate on the smart card maps to the user entry through:
- Assigning the certificate to a particular user entry. For details, see, Adding a certificate to a user entry in the IdM Web UI or Adding a certificate to a user entry in the IdM CLI.
- The certificate mapping data being applied to the account. For details, see Certificate mapping rules for configuring authentication on smart cards.
Procedure
- Insert the smart card in the reader.
- Enter the smart card PIN.
- Click Sign In.
You are successfully logged in to the RHEL system and you have a TGT provided by the IdM server.
Verification steps
In the Terminal window, enter
klistand check the result:$ klist Ticket cache: KEYRING:persistent:1358900015:krb_cache_TObtNMd Default principal: example.user@REDHAT.COM Valid starting Expires Service principal 04/20/2020 13:58:24 04/20/2020 23:58:24 krbtgt/EXAMPLE.COM@EXAMPLE.COM renew until 04/27/2020 08:58:15
2.11. Using smart card authentication with the su command
Changing to a different user requires authentication. You can use a password or a certificate. Follow this procedure to use your smart card with the su command. It means that after entering the su command, you are prompted for the smart card PIN.
Prerequisites
Your IdM server and client have been configured for smart card authentication.
- The smart card contains your certificate and private key. See Storing a certificate on a smart card
- The card is inserted in the reader and connected to the computer.
Procedure
In a terminal window, change to a different user with the
sucommand:$ su - example.user PIN for smart_card
If the configuration is correct, you are prompted to enter the smart card PIN.