
Chapter 7. Logging in to the Identity Management Web UI using one time passwords
Access to IdM Web UI can be secured using several methods. The basic one is password authentication.
To increase the security of password authentication, you can add a second step and require automatically generated one-time passwords (OTPs). The most common usage is to combine password connected with the user account and a time limited one time password generated by a hardware or software token.
The following sections help you to:
- Understand how the OTP authentication works in IdM.
- Configure OTP authentication on the IdM server.
- Configure a RADIUS server for OTP validation in IdM.
- Create OTP tokens and synchronize them with the FreeOTP app in your phone.
- Authenticate to the IdM Web UI with the combination of user password and one time password.
- Re-synchronize tokens in the Web UI.
7.1. Prerequisites
7.2. One time password (OTP) authentication in Identity Management
One-time passwords bring an additional step to your authentication security. The authentication uses your password + an automatically generated one time password.
To generate one time passwords, you can use a hardware or software token. IdM supports both software and hardware tokens.
Identity Management supports the following two standard OTP mechanisms:
- The HMAC-Based One-Time Password (HOTP) algorithm is based on a counter. HMAC stands for Hashed Message Authentication Code.
- The Time-Based One-Time Password (TOTP) algorithm is an extension of HOTP to support time-based moving factor.
IdM does not support OTP logins for Active Directory trust users.
7.3. Enabling the one-time password in the Web UI
Identity Management (IdM) administrators can enable two-factor authentication (2FA) for IdM users either globally or individually. The user enters the one-time password (OTP) after their regular password on the command line or in the dedicated field in the Web UI login dialog, with no space between these passwords.
Enabling 2FA is not the same as enforcing it. If you use logins based on LDAP-binds, IdM users can still authenticate by entering a password only. However, if you use krb5-based logins, the 2FA is enforced. In a future release, Red Hat plans to provide a configuration option for administrators to select one of the following:
-
Allow users to set their own tokens. In this case, LDAP-binds are still not going to enforce 2FA though
krb5-based logins are. -
Not allow users to set their own tokens. In this case, 2FA is going to be enforced in both LDAP-binds and
krb5-based logins.
Complete this procedure to use the IdM Web UI to enable 2FA for the individual example.user IdM user.
Prerequisites
- Administration privileges
Procedure
-
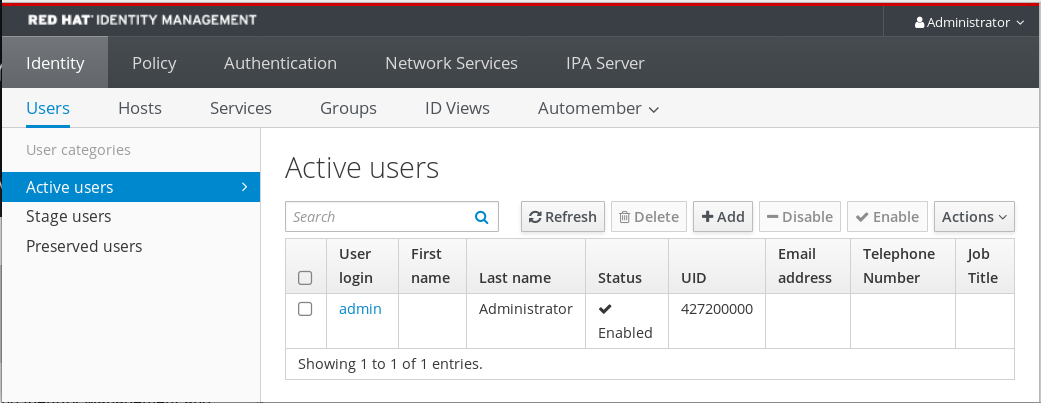
Log in to the IdM Web UI with IdM
adminprivileges. Open the Identity → Users → Active users tab.
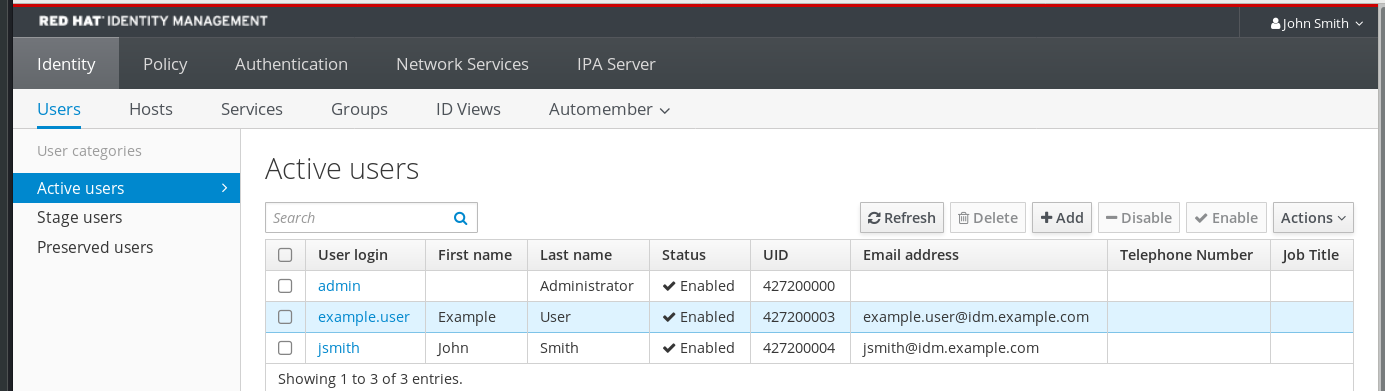
- Select example.user to open the user settings.
- In the User authentication types, select Two factor authentication (password + OTP).
- Click Save.
At this point, the OTP authentication is enabled for the IdM user.
Now you or example.user must assign a new token ID to the example.user account.
7.4. Configuring a RADIUS server for OTP validation in IdM
To enable the migration of a large deployment from a proprietary one-time password (OTP) solution to the Identity Management (IdM)-native OTP solution, IdM offers a way to offload OTP validation to a third-party RADIUS server for a subset of users. The administrator creates a set of RADIUS proxies where each proxy can only reference a single RADIUS server. If more than one server needs to be addressed, it is recommended to create a virtual IP solution that points to multiple RADIUS servers.
Such a solution must be built outside of RHEL IdM with the help of the keepalived daemon, for example. The administrator then assigns one of these proxy sets to a user. As long as the user has a RADIUS proxy set assigned, IdM bypasses all other authentication mechanisms.
IdM does not provide any token management or synchronization support for tokens in the third-party system.
Complete the procedure to configure a RADIUS server for OTP validation and to add a user to the proxy server:
Prerequisites
- The radius user authentication method is enabled. See Enabling the one-time password in the Web UI for details.
Procedure
Add a RADIUS proxy:
$ ipa radiusproxy-add proxy_name --secret secretThe command prompts you for inserting the required information.
The configuration of the RADIUS proxy requires the use of a common secret between the client and the server to wrap credentials. Specify this secret in the
--secretparameter.Assign a user to the added proxy:
ipa user-mod radiususer --radius=proxy_nameIf required, configure the user name to be sent to RADIUS:
ipa user-mod radiususer --radius-username=radius_user
As a result, the RADIUS proxy server starts to process the user OTP authentication.
When the user is ready to be migrated to the IdM native OTP system, you can simply remove the RADIUS proxy assignment for the user.
7.4.1. Changing the timeout value of a KDC when running a RADIUS server in a slow network
In certain situations, such as running a RADIUS proxy in a slow network, the Identity Management (IdM) Kerberos Distribution Center (KDC) closes the connection before the RADIUS server responds because the connection timed out while waiting for the user to enter the token.
To change the timeout settings of the KDC:
Change the value of the
timeoutparameter in the[otp]section in the/var/kerberos/krb5kdc/kdc.conffile. For example, to set the timeout to120seconds:[otp] DEFAULT = { timeout = 120 ... }Restart the
krb5kdcservice:# systemctl restart krb5kdc
Additional resources
- The How to configure FreeRADIUS authentication in FIPS mode Knowledgebase article
7.5. Adding OTP tokens in the Web UI
The following section helps you to add token to the IdM Web UI and to your software token generator.
Prerequisites
- Active user account on the IdM server.
- Administrator has enabled OTP for the particular user account in the IdM Web UI.
- A software device generating OTP tokens, for example FreeOTP.
Procedure
- Log in to the IdM Web UI with your user name and password.
- To create the token in your mobile phone, open the Authentication → OTP Tokens tab.
Click Add.
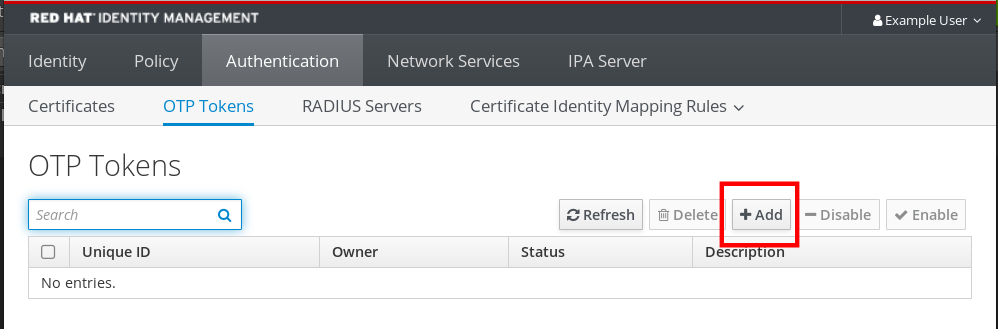
In the Add OTP token dialog box, leave everything unfilled and click Add.
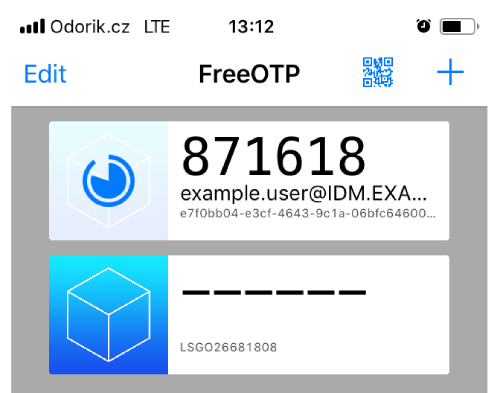
At this stage, the IdM server creates a token with default parameters at the server and opens a page with a QR code.
- Copy the QR code into your mobile phone.
- Click OK to close the QR code.
Now you can generate one time passwords and log in with them to the IdM Web UI.
7.6. Logging into the Web UI with a one time password
Follow this procedure to login for the first time into the IdM Web UI using a one time password (OTP).
Prerequisites
OTP configuration enabled on the Identity Management server for the user account you are using for the OTP authentication. Administrators as well as users themselves can enable OTP.
To enable the OTP configuration, see Enabling the one time password in the Web UI.
- A hardware or software device generating OTP tokens configured.
Procedure
- In the Identity Management login screen, enter your user name or a user name of the IdM server administrator account.
- Add the password for the user name entered above.
- Generate a one time password on your device.
- Enter the one time password right after the password (without space).
Click Log in.
If the authentication fails, synchronize OTP tokens.
If your CA uses a self-signed certificate, the browser issues a warning. Check the certificate and accept the security exception to proceed with the login.
If the IdM Web UI does not open, verify the DNS configuration of your Identity Management server.
After successful login, the IdM Web UI appears.
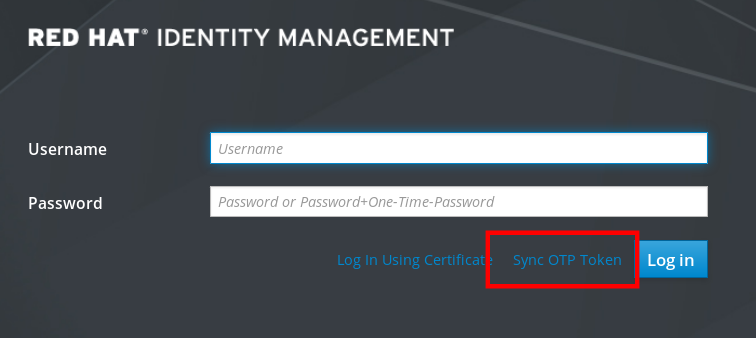
7.7. Synchronizing OTP tokens using the Web UI
If the login with OTP (One Time Password) fails, OTP tokens are not synchronized correctly.
The following text describes token re-synchronization.
Prerequisites
- A login screen opened.
- A device generating OTP tokens configured.
Procedure
On the IdM Web UI login screen, click Sync OTP Token.
- In the login screen, enter your username and the Identity Management password.
- Generate one time password and enter it in the First OTP field.
- Generate another one time password and enter it in the Second OTP field.
Optionally, enter the token ID.

- Click Sync OTP Token.
After the successful synchronization, you can log in to the IdM server.
7.8. Changing expired passwords
Administrators of Identity Management can enforce you having to change your password at the next login. It means that you cannot successfully log in to the IdM Web UI until you change the password.
Password expiration can happen during your first login to the Web UI.
If the expiration password dialog appears, follow the instructions in the procedure.
Prerequisites
- A login screen opened.
- Active account to the IdM server.
Procedure
- In the password expiration login screen, enter the user name.
- Add the password for the user name entered above.
In the OTP field, generate a one time password, if you use the one time password authentication.
If you do not have enabled the OTP authentication, leave the field empty.
- Enter the new password twice for verification.
Click Reset Password.

After the successful password change, the usual login dialog displays. Log in with the new password.