
Chapter 22. Managing user groups in IdM Web UI
This chapter introduces user groups management using the IdM web UI.
A user group is a set of users with common privileges, password policies, and other characteristics.
A user group in Identity Management (IdM) can include:
- IdM users
- other IdM user groups
- external users, which are users that exist outside of IdM
22.1. The different group types in IdM
IdM supports the following types of groups:
- POSIX groups (the default)
POSIX groups support Linux POSIX attributes for their members. Note that groups that interact with Active Directory cannot use POSIX attributes.
POSIX attributes identify users as separate entities. Examples of POSIX attributes relevant to users include
uidNumber, a user number (UID), andgidNumber, a group number (GID).- Non-POSIX groups
Non-POSIX groups do not support POSIX attributes. For example, these groups do not have a GID defined.
All members of this type of group must belong to the IdM domain.
- External groups
Use external groups to add group members that exist in an identity store outside of the IdM domain, such as:
- A local system
- An Active Directory domain
- A directory service
External groups do not support POSIX attributes. For example, these groups do not have a GID defined.
Table 22.1. User groups created by default
| Group name | Default group members |
|---|---|
|
| All IdM users |
|
|
Users with administrative privileges, including the default |
|
| This is a legacy group that no longer has any special privileges |
|
| Users with privileges to manage the Active Directory trusts |
When you add a user to a user group, the user gains the privileges and policies associated with the group. For example, to grant administrative privileges to a user, add the user to the admins group.
Do not delete the admins group. As admins is a pre-defined group required by IdM, this operation causes problems with certain commands.
In addition, IdM creates user private groups by default whenever a new user is created in IdM. For more information about private groups, see Adding users without a private group.
22.2. Direct and indirect group members
User group attributes in IdM apply to both direct and indirect members: when group B is a member of group A, all users in group B are considered indirect members of group A.
For example, in the following diagram:
- User 1 and User 2 are direct members of group A.
- User 3, User 4, and User 5 are indirect members of group A.
Figure 22.1. Direct and Indirect Group Membership
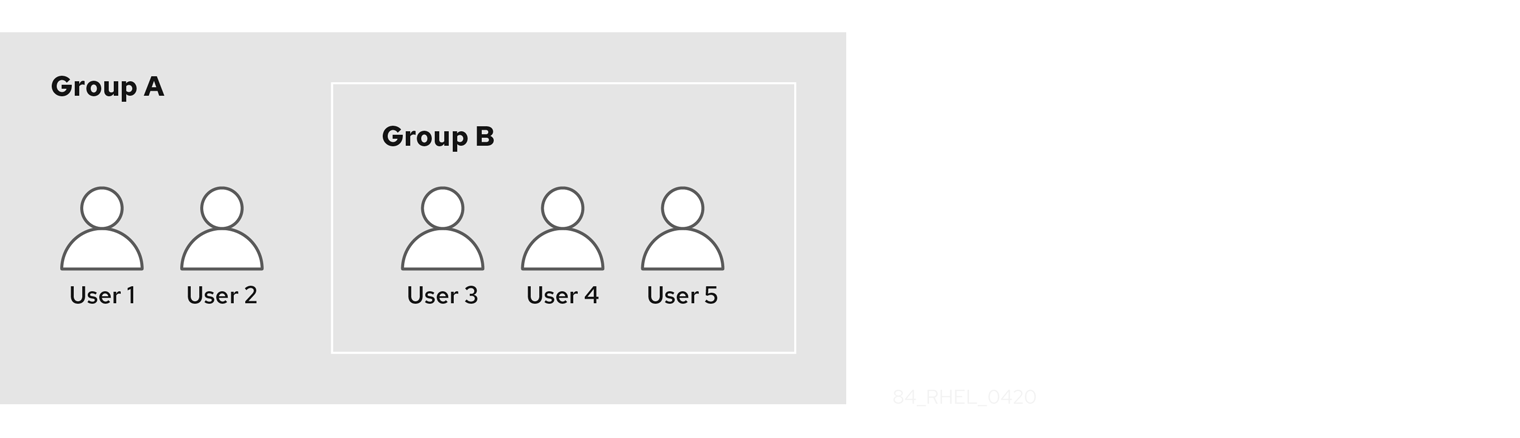
If you set a password policy for user group A, the policy also applies to all users in user group B.
22.3. Adding a user group using IdM Web UI
Follow this procedure to add a user group using the IdM Web UI.
Prerequisites
- You are logged in to the IdM Web UI.
Procedure
- Click Identity → Groups, and select User Groups in the left sidebar.
- Click Add to start adding the group.
Fill out the information about the group. For more information about user group types, see The different group types in IdM.
You can specify a custom GID for the group. If you do this, be careful to avoid ID conflicts. If you do not specify a custom GID, IdM automatically assigns a GID from the available ID range.

- Click Add to confirm.
22.4. Deleting a user group using IdM Web UI
Follow this procedure to delete a user group using the IdM Web UI. Note that deleting a group does not delete the group members from IdM.
Prerequisites
- You are logged in to the IdM Web UI.
Procedure
- Click Identity → Groups and select User Groups.
- Select the group to delete.
- Click Delete.
- Click Delete to confirm.
22.5. Adding a member to a user group using IdM Web UI
You can add both users and user groups as members of a user group. For more information, see The different group types in IdM and Direct and indirect group members.
Prerequisites
- You are logged in to the IdM Web UI.
Procedure
- Click Identity → Groups and select User Groups in the left sidebar.
- Click the name of the group.
Select the type of group member you want to add: Users, User Groups, or External.
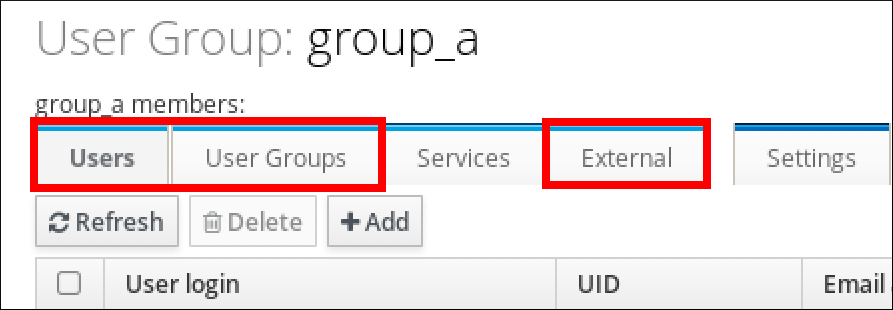
- Click Add.
- Select the check box next to one or more members you want to add.
Click the rightward arrow to move the selected members to the group.
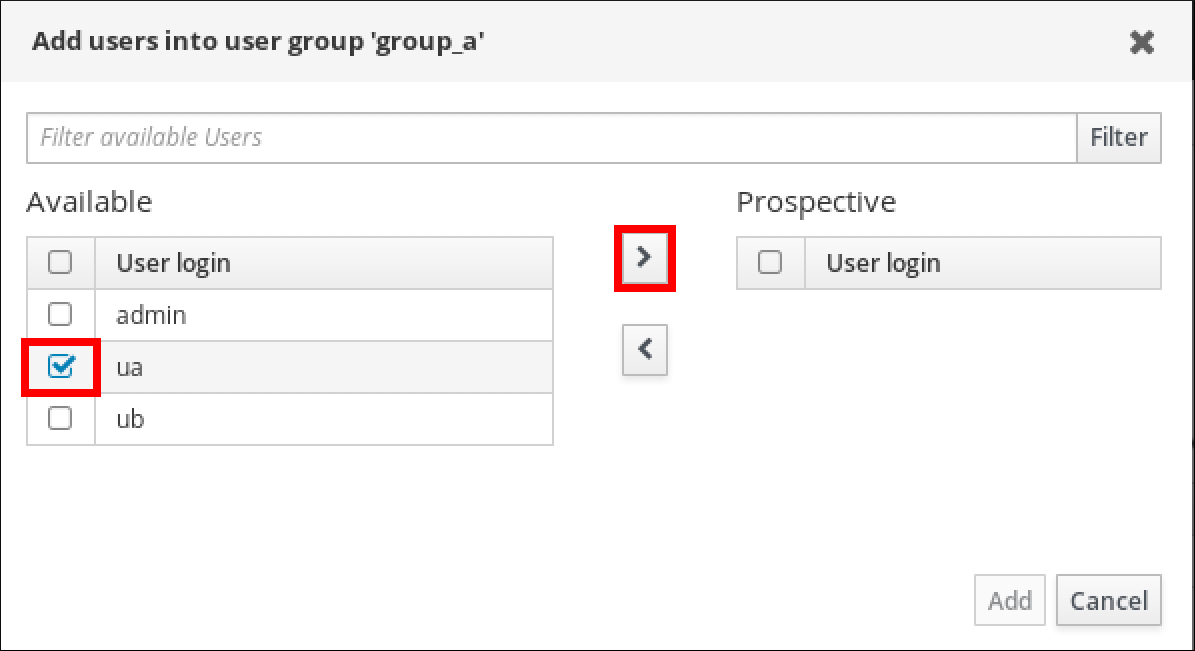
- Click Add to confirm.
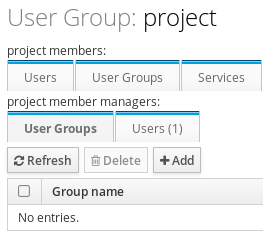
22.6. Adding users or groups as member managers to an IdM user group using the Web UI
Follow this procedure to add users or groups as member managers to an IdM user group using the Web UI. Member managers can add users or groups to IdM user groups but cannot change the attributes of a group.
Prerequisites
- You are logged in to the IdM Web UI.
- You must have the name of the user or group you are adding as member managers and the name of the group you want them to manage.
Procedure
- Click Identity → Groups and select User Groups in the left sidebar.
- Click the name of the group.
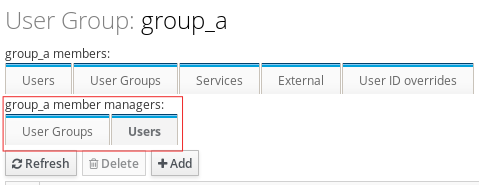
Select the type of group member manager you want to add: Users or User Groups.
- Click Add.
- Select the check box next to one or more members you want to add.
Click the rightward arrow to move the selected members to the group.

- Click Add to confirm.
After you add a member manager to a user group, the update may take some time to spread to all clients in your Identity Management environment.
Verification steps
Verify the newly added user or user group has been added to the member manager list of users or user groups:

Additional resources
-
See
ipa group-add-member-manager --helpfor more information.
22.7. Viewing group members using IdM Web UI
Follow this procedure to view members of a group using the IdM Web UI. You can view both direct and indirect group members. For more information, see Direct and indirect group members.
Prerequisites
- You are logged in to the IdM Web UI.
Procedure
- Select Identity → Groups.
- Select User Groups in the left sidebar.
- Click the name of the group you want to view.
Switch between Direct Membership and Indirect Membership.

22.8. Removing a member from a user group using IdM Web UI
Follow this procedure to remove a member from a user group using the IdM Web UI.
Prerequisites
- You are logged in to the IdM Web UI.
Procedure
- Click Identity → Groups and select User Groups in the left sidebar.
- Click the name of the group.
Select the type of group member you want to remove: Users, User Groups, or External.
- Select the check box next to the member you want to remove.
- Click Delete.
- Click Delete to confirm.
22.9. Removing users or groups as member managers from an IdM user group using the Web UI
Follow this procedure to remove users or groups as member managers from an IdM user group using the Web UI. Member managers can remove users or groups from IdM user groups but cannot change the attributes of a group.
Prerequisites
- You are logged in to the IdM Web UI.
- You must have the name of the existing member manager user or group you are removing and the name of the group they are managing.
Procedure
- Click Identity → Groups and select User Groups in the left sidebar.
- Click the name of the group.
Select the type of member manager you want to remove: Users or User Groups.
- Select the check box next to the member manager you want to remove.
- Click Delete.
- Click Delete to confirm.
After you remove a member manager from a user group, the update may take some time to spread to all clients in your Identity Management environment.
Verification steps
Verify the user or user group has been removed from the member manager list of users or user groups:
Additional resources
-
See
ipa group-add-member-manager --helpfor more details.