
Red Hat Training
A Red Hat training course is available for RHEL 8
Installing Identity Management
Methods of installing IdM servers and clients
Abstract
Making open source more inclusive
Red Hat is committed to replacing problematic language in our code, documentation, and web properties. We are beginning with these four terms: master, slave, blacklist, and whitelist. Because of the enormity of this endeavor, these changes will be implemented gradually over several upcoming releases. For more details, see our CTO Chris Wright’s message.
In Identity Management, planned terminology replacements include:
- block list replaces blacklist
- allow list replaces whitelist
- secondary replaces slave
The word master is being replaced with more precise language, depending on the context:
- IdM server replaces IdM master
- CA renewal server replaces CA renewal master
- CRL publisher server replaces CRL master
- multi-supplier replaces multi-master
Providing feedback on Red Hat documentation
We appreciate your feedback on our documentation. Let us know how we can improve it.
Submitting feedback through Jira (account required)
- Log in to the Jira website.
- Click Create in the top navigation bar.
- Enter a descriptive title in the Summary field.
- Enter your suggestion for improvement in the Description field. Include links to the relevant parts of the documentation.
- Click Create at the bottom of the dialogue.
Chapter 1. How to use this guide
An Identity Management (IdM) domain includes IdM servers, also called replicas, and IdM clients. While installing an IdM deployment always starts with installing the primary IdM server, the order of the next installation steps depends on the targeted topology. For example, you can install an IdM replica before or after installing an IdM client. Additionally, certain IdM deployments require a trust with Active Directory, while others do not.
Additional resources
Part I. Installing Identity Management
Chapter 2. Preparing the system for IdM server installation
The following sections list the requirements to install an Identity Management (IdM) server. Before the installation, verify your system meets these requirements.
2.1. Prerequisites
-
You need
rootprivileges to install an Identity Management (IdM) server on your host.
2.2. Hardware recommendations
RAM is the most important hardware feature to size properly. Make sure your system has enough RAM available. Typical RAM requirements are:
- For 10,000 users and 100 groups: at least 4 GB of RAM and 4 GB swap space
- For 100,000 users and 50,000 groups: at least 16 GB of RAM and 4 GB of swap space
For larger deployments, it is more effective to increase the RAM than to increase disk space because much of the data is stored in cache. In general, adding more RAM leads to better performance for larger deployments due to caching.
A basic user entry or a simple host entry with a certificate is approximately 5—10 kB in size.
2.3. Custom configuration requirements for IdM
Install an Identity Management (IdM) server on a clean system without any custom configuration for services such as DNS, Kerberos, Apache, or Directory Server.
The IdM server installation overwrites system files to set up the IdM domain. IdM backs up the original system files to /var/lib/ipa/sysrestore/. When an IdM server is uninstalled at the end of the lifecycle, these files are restored.
IPv6 requirements in IdM
The IdM system must have the IPv6 protocol enabled in the kernel and localhost (::1) is able to use it. If IPv6 is disabled, then the CLDAP plug-in used by the IdM services fails to initialize.
IPv6 does not have to be enabled on the network. It is possible to enable IPv6 stack without enabling IPv6 addresses if required.
Support for encryption types in IdM
Red Hat Enterprise Linux (RHEL) uses Version 5 of the Kerberos protocol, which supports encryption types such as Advanced Encryption Standard (AES), Camellia, and Data Encryption Standard (DES).
List of supported encryption types
While the Kerberos libraries on IdM servers and clients might support more encryption types, the IdM Kerberos Distribution Center (KDC) only supports the following encryption types:
-
aes256-cts:normal -
aes256-cts:special(default) -
aes128-cts:normal -
aes128-cts:special(default) -
aes128-sha2:normal -
aes128-sha2:special -
aes256-sha2:normal -
aes256-sha2:special -
camellia128-cts-cmac:normal -
camellia128-cts-cmac:special -
camellia256-cts-cmac:normal -
camellia256-cts-cmac:special
RC4 encryption types are disabled by default
The following RC4 encryption types have been deprecated and disabled by default in RHEL 8, as they are considered less secure than the newer AES-128 and AES-256 encryption types:
-
arcfour-hmac:normal -
arcfour-hmac:special
For more information about manually enabling RC4 support for compatibility with legacy Active Directory environments, see Ensuring support for common encryption types in AD and RHEL.
Support for DES and 3DES encryption has been removed
Due to security reasons, support for the DES algorithm was deprecated in RHEL 7. The recent rebase of Kerberos packages in RHEL 8.3.0 removes support for single-DES (DES) and triple-DES (3DES) encryption types from RHEL 8.
Standard RHEL 8 IdM installations do not use DES or 3DES encryption types by default and are unaffected by the Kerberos upgrade.
If you manually configured any services or users to only use DES or 3DES encryption (for example, for legacy clients), you might experience service interruptions after updating to the latest Kerberos packages, such as:
- Kerberos authentication errors
-
unknown enctypeencryption errors -
KDCs with DES-encrypted Database Master Keys (
K/M) fail to start
Red Hat recommends you do not use DES or 3DES encryption in your environment.
You only need to disable DES and 3DES encryption types if you configured your environment to use them.
Support for system-wide cryptographic policies in IdM
IdM uses the DEFAULT system-wide cryptographic policy. This policy offers secure settings for current threat models. It allows the TLS 1.2 and 1.3 protocols, as well as the IKEv2 and SSH2 protocols. The RSA keys and Diffie-Hellman parameters are accepted if they are at least 2048 bits long. This policy does not allow DES, 3DES, RC4, DSA, TLS v1.0, and other weaker algorithms.
You cannot install an IdM server while using the FUTURE system-wide cryptographic policy. When installing an IdM server, ensure you are using the DEFAULT system-wide cryptographic policy.
Additional Resources
- System-wide cryptographic policies
- man IPV6(7)
2.4. FIPS compliance
With RHEL 8.3.0 or later, you can install a new IdM server or replica on a system with the Federal Information Processing Standard (FIPS) 140 mode enabled.
To install IdM in FIPS mode, first enable FIPS mode on the host, then install IdM. The IdM installation script detects if FIPS is enabled and configures IdM to only use encryption types that are compliant with the FIPS 140 standard:
-
aes256-cts:normal -
aes256-cts:special -
aes128-cts:normal -
aes128-cts:special -
aes128-sha2:normal -
aes128-sha2:special -
aes256-sha2:normal -
aes256-sha2:special
For an IdM environment to be FIPS-compliant, all IdM replicas must have FIPS mode enabled.
Red Hat recommends that you enable FIPS mode in IdM clients as well, especially if you might promote those clients to IdM replicas. Ultimately, it is up to administrators to determine how they meet FIPS requirements; Red Hat does not enforce FIPS criteria.
Migration to FIPS-compliant IdM
You cannot migrate an existing IdM installation from a non-FIPS environment to a FIPS-compliant installation. This is not a technical problem but a legal and regulatory restriction.
To operate a FIPS-compliant system, all cryptographic key material must be created in FIPS mode. Furthermore, the cryptographic key material must never leave the FIPS environment unless it is securely wrapped and never unwrapped in non-FIPS environments.
If your scenario requires a migration of a non-FIPS IdM realm to a FIPS-compliant one, you must:
- create a new IdM realm in FIPS mode
- perform data migration from the non-FIPS realm to the new FIPS-mode realm with a filter that blocks all key material
The migration filter must block:
- KDC master key, keytabs, and all related Kerberos key material
- User passwords
- All certificates including CA, service, and user certificates
- OTP tokens
- SSH keys and fingerprints
- DNSSEC KSK and ZSK
- All vault entries
- AD trust-related key material
Effectively, the new FIPS installation is a different installation. Even with rigorous filtering, such a migration may not pass a FIPS 140 certification. Your FIPS auditor may flag this migration.
Additional Resources
- For more information about the FIPS 140 implementation in the RHEL operating system, see Federal Information Processing Standards 140 and FIPS mode in the RHEL Security Hardening document.
2.5. Support for cross-forest trust with FIPS mode enabled
To establish a cross-forest trust with an Active Directory (AD) domain while FIPS mode is enabled, you must meet the following requirements:
- IdM servers are on RHEL 8.4.0 or later.
- You must authenticate with an AD administrative account when setting up a trust. You cannot establish a trust using a shared secret while FIPS mode is enabled.
RADIUS authentication is not FIPS-compliant as the RADIUS protocol uses the MD5 hash function to encrypt passwords between client and server and, in FIPS mode, OpenSSL disables the use of the MD5 digest algorithm. However, if the RADIUS server is running on the same host as the IdM server, you can work around the problem and enable MD5 by performing the steps described in How to configure FreeRADIUS authentication in FIPS mode.
Additional Resources
- For more information about FIPS mode in the RHEL operating system, see Installing the system in FIPS mode in the Security Hardening document.
- For more details about the FIPS 140-2 standard, see the Security Requirements for Cryptographic Modules on the National Institute of Standards and Technology (NIST) web site.
2.6. Time service requirements for IdM
The following sections discuss using chronyd to keep your IdM hosts in sync with a central time source:
2.6.1. How IdM uses chronyd for synchronization
You can use chronyd to keep your IdM hosts in sync with a central time source as described here.
Kerberos, the underlying authentication mechanism in IdM, uses time stamps as part of its protocol. Kerberos authentication fails if the system time of an IdM client differs by more than five minutes from the system time of the Key Distribution Center (KDC).
To ensure that IdM servers and clients stay in sync with a central time source, IdM installation scripts automatically configure chronyd Network Time Protocol (NTP) client software.
If you do not pass any NTP options to the IdM installation command, the installer searches for _ntp._udp DNS service (SRV) records that point to the NTP server in your network and configures chrony with that IP address. If you do not have any _ntp._udp SRV records, chronyd uses the configuration shipped with the chrony package.
Because ntpd has been deprecated in favor of chronyd in RHEL 8, IdM servers are no longer configured as Network Time Protocol (NTP) servers and are only configured as NTP clients. The RHEL 7 NTP Server IdM server role has also been deprecated in RHEL 8.
Additional resources
2.6.2. List of NTP configuration options for IdM installation commands
You can use chronyd to keep your IdM hosts in sync with a central time source.
You can specify the following options with any of the IdM installation commands (ipa-server-install, ipa-replica-install, ipa-client-install) to configure chronyd client software during setup.
Table 2.1. List of NTP configuration options for IdM installation commands
| Option | Behavior |
|---|---|
|
| Use it to specify one NTP server. You can use it multiple times to specify multiple servers. |
|
| Use it to specify a pool of multiple NTP servers resolved as one hostname. |
|
|
Do not configure, start, or enable |
Additional resources
2.6.3. Ensuring IdM can reference your NTP time server
This procedure verifies you have the necessary configurations in place for IdM to be able to synchronize with your Network Time Protocol (NTP) time server.
Prerequisites
-
You have configured an NTP time server in your environment. In this example, the hostname of the previously configured time server is
ntpserver.example.com.
Procedure
Perform a DNS service (SRV) record search for NTP servers in your environment.
[user@server ~]$ dig +short -t SRV _ntp._udp.example.com
0 100 123 ntpserver.example.com.
-
If the previous
digsearch does not return your time server, add a_ntp._udpSRV record that points to your time server on port123. This process depends on your DNS solution.
Verification steps
Verify that DNS returns an entry for your time server on port
123when you perform a search for_ntp._udpSRV records.[user@server ~]$ dig +short -t SRV _ntp._udp.example.com 0 100 123 ntpserver.example.com.
Additional resources
2.6.4. Additional resources
2.7. Host name and DNS requirements for IdM
The host name and DNS requirements for server and replica systems are outlined below and also how to verify that the systems meet the requirements.
These requirements apply to all Identity Management (IdM) servers, those with integrated DNS and those without integrated DNS.
DNS records are vital for nearly all IdM domain functions, including running LDAP directory services, Kerberos, and Active Directory integration. Be extremely cautious and ensure that:
- You have a tested and functional DNS service available
- The service is properly configured
This requirement applies to IdM servers with and without integrated DNS.
- Verify the server host name
The host name must be a fully qualified domain name, such as
server.idm.example.com.ImportantDo not use single-label domain names, for example
.company: the IdM domain must be composed of one or more subdomains and a top level domain, for exampleexample.comorcompany.example.com.The fully qualified domain name must meet the following conditions:
- It is a valid DNS name, which means only numbers, alphabetic characters, and hyphens (-) are allowed. Other characters, such as underscores (_), in the host name cause DNS failures.
- It is all lower-case. No capital letters are allowed.
-
It does not resolve to the loopback address. It must resolve to the system’s public IP address, not to
127.0.0.1.
To verify the host name, use the
hostnameutility on the system where you want to install:# hostname server.idm.example.comThe output of
hostnamemust not belocalhostorlocalhost6.- Verify the forward and reverse DNS configuration
Obtain the IP address of the server.
The
ip addr showcommand displays both the IPv4 and IPv6 addresses. In the following example, the relevant IPv6 address is2001:DB8::1111because its scope is global:[root@server ~]# ip addr show ... 2: eth0: <BROADCAST,MULTICAST,UP,LOWER_UP> mtu 1500 qdisc pfifo_fast state UP group default qlen 1000 link/ether 00:1a:4a:10:4e:33 brd ff:ff:ff:ff:ff:ff inet 192.0.2.1/24 brd 192.0.2.255 scope global dynamic eth0 valid_lft 106694sec preferred_lft 106694sec inet6 2001:DB8::1111/32 scope global dynamic valid_lft 2591521sec preferred_lft 604321sec inet6 fe80::56ee:75ff:fe2b:def6/64 scope link valid_lft forever preferred_lft forever ...
Verify the forward DNS configuration using the
digutility.Run the command
dig +short server.idm.example.com A. The returned IPv4 address must match the IP address returned byip addr show:[root@server ~]# dig +short server.idm.example.com A 192.0.2.1Run the command
dig +short server.idm.example.com AAAA. If it returns an address, it must match the IPv6 address returned byip addr show:[root@server ~]# dig +short server.idm.example.com AAAA 2001:DB8::1111NoteIf
digdoes not return any output for the AAAA record, it does not indicate incorrect configuration. No output only means that no IPv6 address is configured in DNS for the system. If you do not intend to use the IPv6 protocol in your network, you can proceed with the installation in this situation.
Verify the reverse DNS configuration (PTR records). Use the
digutility and add the IP address.If the commands below display a different host name or no host name, the reverse DNS configuration is incorrect.
Run the command
dig +short -x IPv4_address. The output must display the server host name. For example:[root@server ~]# dig +short -x 192.0.2.1 server.idm.example.comIf the command
dig +short -x server.idm.example.com AAAAin the previous step returned an IPv6 address, usedigto query the IPv6 address too. The output must display the server host name. For example:[root@server ~]# dig +short -x 2001:DB8::1111 server.idm.example.comNoteIf
dig +short server.idm.example.com AAAAin the previous step did not display any IPv6 address, querying the AAAA record does not output anything. In this case, this is normal behavior and does not indicate incorrect configuration.WarningIf a reverse DNS (PTR record) search returns multiple host names,
httpdand other software associated with IdM may show unpredictable behavior. Red Hat strongly recommends configuring only one PTR record per IP.
- Verify the standards-compliance of DNS forwarders (required for integrated DNS only)
Ensure that all DNS forwarders you want to use with the IdM DNS server comply with the Extension Mechanisms for DNS (EDNS0) and DNS Security Extensions (DNSSEC) standards. To do this, inspect the output of the following command for each forwarder separately:
$ dig +dnssec @IP_address_of_the_DNS_forwarder . SOAThe expected output displayed by the command contains the following information:
-
Status:
NOERROR -
Flags:
ra -
EDNS flags:
do -
The
RRSIGrecord must be present in theANSWERsection
If any of these items is missing from the output, inspect the documentation for your DNS forwarder and verify that EDNS0 and DNSSEC are supported and enabled. In the latest versions of the BIND server, the
dnssec-enable yes;option must be set in the/etc/named.conffile.Example of the expected output produced by
dig:;; ->>HEADER<<- opcode: QUERY, status: NOERROR, id: 48655 ;; flags: qr rd ra ad; QUERY: 1, ANSWER: 2, AUTHORITY: 0, ADDITIONAL: 1 ;; OPT PSEUDOSECTION: ; EDNS: version: 0, flags: do; udp: 4096 ;; ANSWER SECTION: . 31679 IN SOA a.root-servers.net. nstld.verisign-grs.com. 2015100701 1800 900 604800 86400 . 31679 IN RRSIG SOA 8 0 86400 20151017170000 20151007160000 62530 . GNVz7SQs [...]
-
Status:
- Verify the
/etc/hostsfile Verify that the
/etc/hostsfile fulfills one of the following conditions:- The file does not contain an entry for the host. It only lists the IPv4 and IPv6 localhost entries for the host.
The file contains an entry for the host and the file fulfills all the following conditions:
- The first two entries are the IPv4 and IPv6 localhost entries.
- The next entry specifies the IdM server IPv4 address and host name.
-
The
FQDNof the IdM server comes before the short name of the IdM server. - The IdM server host name is not part of the localhost entry.
The following is an example of a correctly configured
/etc/hostsfile:
127.0.0.1   localhost localhost.localdomain \
localhost4 localhost4.localdomain4
::1         localhost localhost.localdomain \
localhost6 localhost6.localdomain6
192.0.2.1	server.idm.example.com	server
2001:DB8::1111	server.idm.example.com	server
2.8. Port requirements for IdM
Identity Management (IdM) uses several ports to communicate with its services. These ports must be open and available for incoming connections to the IdM server for IdM to work. They must not be currently used by another service or blocked by a firewall.
Table 2.2. IdM ports
| Service | Ports | Protocol |
|---|---|---|
| HTTP/HTTPS | 80, 443 | TCP |
| LDAP/LDAPS | 389, 636 | TCP |
| Kerberos | 88, 464 | TCP and UDP |
| DNS | 53 | TCP and UDP (optional) |
IdM uses ports 80 and 389. This is a secure practice because of the following safeguards:
- IdM normally redirects requests that arrive on port 80 to port 443. Port 80 (HTTP) is only used to provide Online Certificate Status Protocol (OCSP) responses and Certificate Revocation Lists (CRL). Both are digitally signed and therefore secured against man-in-the-middle attacks.
- Port 389 (LDAP) uses STARTTLS and Generic Security Services API (GSSAPI) for encryption.
In addition, ports 8080, 8443, and 749 must be free as they are used internally. Do not open these ports and instead leave them blocked by a firewall.
Table 2.3. firewalld services
| Service name | For details, see: |
|---|---|
|
|
|
|
|
|
|
|
|
2.9. Opening the ports required by IdM
Procedure
Verify that the
firewalldservice is running.To find out if
firewalldis currently running:# systemctl status firewalld.service
To start
firewalldand configure it to start automatically when the system boots:# systemctl start firewalld.service # systemctl enable firewalld.service
Open the required ports using the
firewall-cmdutility. Choose one of the following options:Add the individual ports to the firewall by using the
firewall-cmd --add-portcommand. For example, to open the ports in the default zone:# firewall-cmd --permanent --add-port={80/tcp,443/tcp,389/tcp,636/tcp,88/tcp,88/udp,464/tcp,464/udp,53/tcp,53/udp}Add the
firewalldservices to the firewall by using thefirewall-cmd --add-servicecommand. For example, to open the ports in the default zone:# firewall-cmd --permanent --add-service={freeipa-4,dns}For details on using
firewall-cmdto open ports on a system, see the firewall-cmd(1) man page.
Reload the
firewall-cmdconfiguration to ensure that the change takes place immediately:# firewall-cmd --reload
Note that reloading
firewalldon a system in production can cause DNS connection time outs. If required, to avoid the risk of time outs and to make the changes persistent on the running system, use the--runtime-to-permanentoption of thefirewall-cmdcommand, for example:# firewall-cmd --runtime-to-permanent
-
Optional. To verify that the ports are available now, use the
nc,telnet, ornmaputilities to connect to a port or run a port scan.
Note that you also have to open network-based firewalls for both incoming and outgoing traffic.
2.10. Installing packages required for an IdM server
In RHEL8, the packages necessary for installing an Identity Management (IdM) server are shipped as a module. The IdM server module stream is called the DL1 stream, and you need to enable this stream before downloading packages from this stream. The following procedure shows how to download the packages necessary for setting up the IdM environment of your choice.
Prerequisites
- You have a newly installed RHEL system.
You have made the required repositories available:
If your RHEL system is not running in the cloud, you have registered your system with the Red Hat Subscription Manager (RHSM). For details, see Registration, attaching, and removing subscriptions in the Subscription Manager command line. You have also enabled the
BaseOSandAppStreamrepositories that IdM uses:# subscription-manager repos --enable=rhel-8-for-x86_64-baseos-rpms # subscription-manager repos --enable=rhel-8-for-x86_64-appstream-rpms
For details on how to enable and disable specific repositories using RHSM, see Configuring options in Red Hat Subscription Manager.
- If your RHEL system is running in the cloud, skip the registration. The required repositories are already available via the Red Hat Update Infrastructure (RHUI).
- You have not previously enabled an IdM module stream.
Procedure
Enable the
idm:DL1stream:# yum module enable idm:DL1Switch to the RPMs delivered through the
idm:DL1stream:# yum distro-syncChoose one of the following options, depending on your IdM requirements:
To download the packages necessary for installing an IdM server without an integrated DNS:
# yum module install idm:DL1/serverTo download the packages necessary for installing an IdM server with an integrated DNS:
# yum module install idm:DL1/dnsTo download the packages necessary for installing an IdM server that has a trust agreement with Active Directory:
# yum module install idm:DL1/adtrustTo download the packages from multiple profiles, for example the
adtrustanddnsprofiles:# yum module install idm:DL1/{dns,adtrust}To download the packages necessary for installing an IdM client:
# yum module install idm:DL1/client
When switching to a new module stream once you have already enabled a different stream and downloaded packages from it, you need to first explicitly remove all the relevant installed content and disable the current module stream before enabling the new module stream. Trying to enable a new stream without disabling the current one results in an error. For details on how to proceed, see Switching to a later stream.
While it is possible to install packages from modules individually, be aware that if you install any package from a module that is not listed as "API" for that module, it is only going to be supported by Red Hat in the context of that module. For example, if you install bind-dyndb-ldap directly from the repository to use with your custom 389 Directory Server setup, any problems that you have will be ignored unless they occur for IdM, too.
2.11. Setting the correct file mode creation mask for IdM installation
The Identity Management (IdM) installation process requires that the file mode creation mask (umask) is set to 0022 for the root account. This allows users other than root to read files created during the installation. If a different umask is set, the installation of an IdM server will display a warning. If you continue with the installation, some functions of the server will not perform properly. For example, you will be unable to install an IdM replica from this server. After the installation, you can set the umask back to its original value.
Prerequisites
-
You have
rootprivileges.
Procedure
(Optional) Display the current
umask:# umask 0027
Set the
umaskto0022:# umask 0022
(Optional) After the IdM installation is complete, set the
umaskback to its original value:# umask 0027
2.12. Ensuring that fapolicyd rules do not block IdM installation and operation
If you are using the fapolicyd software framework on your RHEL host to control the execution of applications based on a user-defined policy, the installation of the Identity Management (IdM) server can fail. As the installation and operation requires the Java program to complete successfully, ensure that Java and Java classes are not blocked by any fapolicyd rules.
For more information, see the fapolicy restrictions causing IdM installation failures KCS solution.
2.13. Options for the IdM installation commands
Commands such as ipa-server-install, ipa-replica-install, ipa-dns-install and ipa-ca-install have numerous options you can use to supply additional information for an interactive installation. You can also use these options to script an unattended installation.
The following tables display some of the most common options for different components. Options for a specific component are shared across multiple commands. For example, you can use the --ca-subject option with both the ipa-ca-install and ipa-server-install commands.
For an exhaustive list of options, see the ipa-server-install(1), ipa-replica-install(1), ipa-dns-install(1) and ipa-ca-install(1) man pages.
Table 2.4. General options: available for ipa-server-install and ipa-replica-install
| Argument | Description |
|---|---|
|
| Enables debug logging for more verbose output. |
|
| Enables an unattended installation session that does not prompt for user input. |
|
| The fully-qualified domain name of the IdM server machine. Only numbers, lowercase alphabetic characters, and hyphens (-) are allowed. |
|
| Specifies the IP address of the server. This option only accepts IP addresses associated with the local interface. |
|
| The path to an LDIF file used to modify the configuration of the directory server instance. |
|
| The name of the LDAP server domain to use for the IdM domain. This is usually based on the IdM server’s hostname. |
|
|
The password of the superuser, |
|
|
The password for the |
|
|
The name of the Kerberos realm to create for the IdM domain in uppercase, such as |
|
| Tells the installation script to set up a DNS service within the IdM domain. |
|
|
Install and configure a CA on this replica. If a CA is not configured, certificate operations are forwarded to another replica with a CA installed. For |
Table 2.5. CA options: available for ipa-ca-install and ipa-server-install
| Argument | Description |
|---|---|
|
| Specifies the CA certificate subject Distinguished Name (default: CN=Certificate Authority,O=REALM.NAME). Relative Distinguished Names (RDN) are in LDAP order, with the most specific RDN first. |
|
| Specifies the subject base for certificates issued by IdM (default O=REALM.NAME). Relative Distinguished Names (RDN) are in LDAP order, with the most specific RDN first. |
|
| Generates a certificate signing request to be signed by an external CA. |
|
|
Specifies the signing algorithm of the IdM CA certificate. Possible values are SHA1withRSA, SHA256withRSA, SHA512withRSA . The default is SHA256withRSA. Use this option with |
Table 2.6. DNS options: available for ipa-dns-install, or for ipa-server-install and ipa-replica-install when using --setup-dns
| Argument | Description |
|---|---|
|
| Specifies a DNS forwarder to use with the DNS service. To specify more than one forwarder, use this option multiple times. |
|
| Uses root servers with the DNS service instead of forwarders. |
|
| Does not create a reverse DNS zone when the DNS domain is set up. If a reverse DNS zone is already configured, then that existing reverse DNS zone is used.
If this option is not used, then the default value is |
Additional resources
-
ipa-server-install(1)man page -
ipa-replica-install(1)man page -
ipa-dns-install(1)man page -
ipa-ca-install(1)man page
Chapter 3. Installing an IdM server: With integrated DNS, with an integrated CA as the root CA
Installing a new Identity Management (IdM) server with integrated DNS has the following advantages:
- You can automate much of the maintenance and DNS record management using native IdM tools. For example, DNS SRV records are automatically created during the setup, and later on are automatically updated.
- You can configure global forwarders during the installation of the IdM server for a stable external internet connection. Global forwarders are also useful for trusts with Active Directory.
- You can set up a DNS reverse zone to prevent emails from your domain to be considered spam by email servers outside of the IdM domain.
Installing IdM with integrated DNS has certain limitations:
- IdM DNS is not meant to be used as a general-purpose DNS server. Some of the advanced DNS functions are not supported. For more information, see DNS services available in an IdM server.
This chapter describes how you can install a new IdM server with an integrated certificate authority (CA) as the root CA.
The default configuration for the ipa-server-install command is an integrated CA as the root CA. If no CA option, for example --external-ca or --ca-less is specified, the IdM server is installed with an integrated CA.
3.1. Interactive installation
During the interactive installation using the ipa-server-install utility, you are asked to supply basic configuration of the system, for example the realm, the administrator’s password and the Directory Manager’s password.
The ipa-server-install installation script creates a log file at /var/log/ipaserver-install.log. If the installation fails, the log can help you identify the problem.
Procedure
Run the ipa-server-install utility.
# ipa-server-installThe script prompts to configure an integrated DNS service. Enter
yes.Do you want to configure integrated DNS (BIND)? [no]:
yesThe script prompts for several required settings and offers recommended default values in brackets.
- To accept a default value, press Enter.
To provide a custom value, enter the required value.
Server host name [server.idm.example.com]:
Please confirm the domain name [idm.example.com]:
Please provide a realm name [IDM.EXAMPLE.COM]:
WarningPlan these names carefully. You will not be able to change them after the installation is complete.
Enter the passwords for the Directory Server superuser (
cn=Directory Manager) and for the Identity Management (IdM) administration system user account (admin).Directory Manager password: IPA admin password:
The script prompts for per-server DNS forwarders.
Do you want to configure DNS forwarders? [yes]:
To configure per-server DNS forwarders, enter
yes, and then follow the instructions on the command line. The installation process will add the forwarder IP addresses to the IdM LDAP.-
For the forwarding policy default settings, see the
--forward-policydescription in the ipa-dns-install(1) man page.
-
For the forwarding policy default settings, see the
If you do not want to use DNS forwarding, enter
no.With no DNS forwarders, hosts in your IdM domain will not be able to resolve names from other, internal, DNS domains in your infrastructure. The hosts will only be left with public DNS servers to resolve their DNS queries.
The script prompts to check if any DNS reverse (PTR) records for the IP addresses associated with the server need to be configured.
Do you want to search for missing reverse zones? [yes]:
If you run the search and missing reverse zones are discovered, the script asks you whether to create the reverse zones along with the PTR records.
Do you want to create reverse zone for IP 192.0.2.1 [yes]:
Please specify the reverse zone name [2.0.192.in-addr.arpa.]:
Using reverse zone(s) 2.0.192.in-addr.arpa.
NoteUsing IdM to manage reverse zones is optional. You can use an external DNS service for this purpose instead.
Enter
yesto confirm the server configuration.Continue to configure the system with these values? [no]:
yes- The installation script now configures the server. Wait for the operation to complete.
After the installation script completes, update your DNS records in the following way:
Add DNS delegation from the parent domain to the IdM DNS domain. For example, if the IdM DNS domain is
idm.example.com, add a name server (NS) record to theexample.comparent domain.ImportantRepeat this step each time after an IdM DNS server is installed.
-
Add an
_ntp._udpservice (SRV) record for your time server to your IdM DNS. The presence of the SRV record for the time server of the newly-installed IdM server in IdM DNS ensures that future replica and client installations are automatically configured to synchronize with the time server used by this primary IdM server.
3.2. Non-interactive installation
The ipa-server-install installation script creates a log file at /var/log/ipaserver-install.log. If the installation fails, the log can help you identify the problem.
Procedure
Run the ipa-server-install utility with the options to supply all the required information. The minimum required options for non-interactive installation are:
-
--realmto provide the Kerberos realm name -
--ds-passwordto provide the password for the Directory Manager (DM), the Directory Server super user -
--admin-passwordto provide the password foradmin, the Identity Management (IdM) administrator -
--unattendedto let the installation process select default options for the host name and domain name
To install a server with integrated DNS, add also these options:
-
--setup-dnsto configure integrated DNS -
--forwarderor--no-forwarders, depending on whether you want to configure DNS forwarders or not -
--auto-reverseor--no-reverse, depending on whether you want to configure automatic detection of the reverse DNS zones that must be created in the IdM DNS or no reverse zone auto-detection
For example:
# ipa-server-install --realm IDM.EXAMPLE.COM --ds-password DM_password --admin-password admin_password --unattended --setup-dns --forwarder 192.0.2.1 --no-reverse-
After the installation script completes, update your DNS records in the following way:
Add DNS delegation from the parent domain to the IdM DNS domain. For example, if the IdM DNS domain is
idm.example.com, add a name server (NS) record to theexample.comparent domain.ImportantRepeat this step each time after an IdM DNS server is installed.
-
Add an
_ntp._udpservice (SRV) record for your time server to your IdM DNS. The presence of the SRV record for the time server of the newly-installed IdM server in IdM DNS ensures that future replica and client installations are automatically configured to synchronize with the time server used by this primary IdM server.
Additional resources
-
For a complete list of options accepted by ipa-server-install, run the
ipa-server-install --helpcommand.
Chapter 4. Installing an IdM server: With integrated DNS, with an external CA as the root CA
Installing a new Identity Management (IdM) server with integrated DNS has the following advantages:
- You can automate much of the maintenance and DNS record management using native IdM tools. For example, DNS SRV records are automatically created during the setup, and later on are automatically updated.
- You can configure global forwarders during the installation of the IdM server for a stable external internet connection. Global forwarders are also useful for trusts with Active Directory.
- You can set up a DNS reverse zone to prevent emails from your domain to be considered spam by email servers outside of the IdM domain.
Installing IdM with integrated DNS has certain limitations:
- IdM DNS is not meant to be used as a general-purpose DNS server. Some of the advanced DNS functions are not supported. For more information, see DNS services available in an IdM server.
This chapter describes how you can install a new IdM server with an external certificate authority (CA) as the root CA.
4.1. Interactive installation
During the interactive installation using the ipa-server-install utility, you are asked to supply basic configuration of the system, for example the realm, the administrator’s password and the Directory Manager’s password.
The ipa-server-install installation script creates a log file at /var/log/ipaserver-install.log. If the installation fails, the log can help you identify the problem.
Follow this procedure to install a server:
- With integrated DNS
- With an external certificate authority (CA) as the root CA
Prerequisites
-
You have determined the type of the external CA to specify with the
--external-ca-typeoption. See theipa-server-install(1) man page for details. If you are using a Microsoft Certificate Services certificate authority (MS CS CA) as your external CA: you have determined the certificate profile or template to specify with the
--external-ca-profileoption. By default, theSubCAtemplate is used.For more information about the
--external-ca-typeand--external-ca-profileoptions, see Options used when installing an IdM CA with an external CA as the root CA.
Procedure
Run the ipa-server-install utility with the
--external-caoption.# ipa-server-install --external-caIf you are using the Microsoft Certificate Services (MS CS) CA, also use the
--external-ca-typeoption and, optionally, the--external-ca-profileoption:[root@server ~]# ipa-server-install --external-ca --external-ca-type=ms-cs --external-ca-profile=<oid>/<name>/defaultIf you are not using MS CS to generate the signing certificate for your IdM CA, no other option may be necessary:
# ipa-server-install --external-ca
The script prompts to configure an integrated DNS service. Enter
yesorno. In this procedure, we are installing a server with integrated DNS.Do you want to configure integrated DNS (BIND)? [no]:
yesNoteIf you want to install a server without integrated DNS, the installation script will not prompt you for DNS configuration as described in the steps below. See Chapter 6, Installing an IdM server: Without integrated DNS, with an integrated CA as the root CA for details on the steps for installing a server without DNS.
The script prompts for several required settings and offers recommended default values in brackets.
- To accept a default value, press Enter.
To provide a custom value, enter the required value.
Server host name [
server.idm.example.com]: Please confirm the domain name [idm.example.com]: Please provide a realm name [IDM.EXAMPLE.COM]:WarningPlan these names carefully. You will not be able to change them after the installation is complete.
Enter the passwords for the Directory Server superuser (
cn=Directory Manager) and for the Identity Management (IdM) administration system user account (admin).Directory Manager password: IPA admin password:
The script prompts for per-server DNS forwarders.
Do you want to configure DNS forwarders? [yes]:
To configure per-server DNS forwarders, enter
yes, and then follow the instructions on the command line. The installation process will add the forwarder IP addresses to the IdM LDAP.-
For the forwarding policy default settings, see the
--forward-policydescription in the ipa-dns-install(1) man page.
-
For the forwarding policy default settings, see the
If you do not want to use DNS forwarding, enter
no.With no DNS forwarders, hosts in your IdM domain will not be able to resolve names from other, internal, DNS domains in your infrastructure. The hosts will only be left with public DNS servers to resolve their DNS queries.
The script prompts to check if any DNS reverse (PTR) records for the IP addresses associated with the server need to be configured.
Do you want to search for missing reverse zones? [yes]:
If you run the search and missing reverse zones are discovered, the script asks you whether to create the reverse zones along with the PTR records.
Do you want to create reverse zone for IP 192.0.2.1 [yes]: Please specify the reverse zone name [2.0.192.in-addr.arpa.]: Using reverse zone(s) 2.0.192.in-addr.arpa.
NoteUsing IdM to manage reverse zones is optional. You can use an external DNS service for this purpose instead.
Enter
yesto confirm the server configuration.Continue to configure the system with these values? [no]:
yesDuring the configuration of the Certificate System instance, the utility prints the location of the certificate signing request (CSR):
/root/ipa.csr:... Configuring certificate server (pki-tomcatd): Estimated time 3 minutes 30 seconds [1/8]: creating certificate server user [2/8]: configuring certificate server instance The next step is to get /root/ipa.csr signed by your CA and re-run /sbin/ipa-server-install as: /sbin/ipa-server-install --external-cert-file=/path/to/signed_certificate --external-cert-file=/path/to/external_ca_certificate
When this happens:
-
Submit the CSR located in
/root/ipa.csrto the external CA. The process differs depending on the service to be used as the external CA. Retrieve the issued certificate and the CA certificate chain for the issuing CA in a base 64-encoded blob (either a PEM file or a Base_64 certificate from a Windows CA). Again, the process differs for every certificate service. Usually, a download link on a web page or in the notification email allows the administrator to download all the required certificates.
ImportantBe sure to get the full certificate chain for the CA, not just the CA certificate.
Run
ipa-server-installagain, this time specifying the locations and names of the newly-issued CA certificate and the CA chain files. For example:# ipa-server-install --external-cert-file=/tmp/servercert20170601.pem --external-cert-file=/tmp/cacert.pem
-
Submit the CSR located in
- The installation script now configures the server. Wait for the operation to complete.
After the installation script completes, update your DNS records in the following way:
Add DNS delegation from the parent domain to the IdM DNS domain. For example, if the IdM DNS domain is
idm.example.com, add a name server (NS) record to theexample.comparent domain.ImportantRepeat this step each time after an IdM DNS server is installed.
-
Add an
_ntp._udpservice (SRV) record for your time server to your IdM DNS. The presence of the SRV record for the time server of the newly-installed IdM server in IdM DNS ensures that future replica and client installations are automatically configured to synchronize with the time server used by this primary IdM server.
The ipa-server-install --external-ca command can sometimes fail with the following error:
ipa : CRITICAL failed to configure ca instance Command '/usr/sbin/pkispawn -s CA -f /tmp/configuration_file' returned non-zero exit status 1
Configuration of CA failed
This failure occurs when the *_proxy environmental variables are set. For a solution of the problem, see Troubleshooting: External CA installation fails.
4.2. Troubleshooting: External CA installation fails
The ipa-server-install --external-ca command fails with the following error:
ipa : CRITICAL failed to configure ca instance Command '/usr/sbin/pkispawn -s CA -f /tmp/configuration_file' returned non-zero exit status 1
Configuration of CA failed
The env|grep proxy command displays variables such as the following:
# env|grep proxy
http_proxy=http://example.com:8080
ftp_proxy=http://example.com:8080
https_proxy=http://example.com:8080What this means:
The *_proxy environmental variables are preventing the server from being installed.
To fix the problem:
Use the following shell script to unset the
*_proxyenvironmental variables:# for i in ftp http https; do unset ${i}_proxy; doneRun the
pkidestroyutility to remove the unsuccessful certificate authority (CA) subsystem installation:# pkidestroy -s CA -i pki-tomcat; rm -rf /var/log/pki/pki-tomcat /etc/sysconfig/pki-tomcat /etc/sysconfig/pki/tomcat/pki-tomcat /var/lib/pki/pki-tomcat /etc/pki/pki-tomcat /root/ipa.csrRemove the failed Identity Management (IdM) server installation:
# ipa-server-install --uninstall-
Retry running
ipa-server-install --external-ca.
Chapter 5. Installing an IdM server: With integrated DNS, without a CA
Installing a new Identity Management (IdM) server with integrated DNS has the following advantages:
- You can automate much of the maintenance and DNS record management using native IdM tools. For example, DNS SRV records are automatically created during the setup, and later on are automatically updated.
- You can configure global forwarders during the installation of the IdM server for a stable external internet connection. Global forwarders are also useful for trusts with Active Directory.
- You can set up a DNS reverse zone to prevent emails from your domain to be considered spam by email servers outside of the IdM domain.
Installing IdM with integrated DNS has certain limitations:
- IdM DNS is not meant to be used as a general-purpose DNS server. Some of the advanced DNS functions are not supported. For more information, see DNS services available in an IdM server.
This chapter describes how you can install a new IdM server without a certificate authority (CA).
5.1. Certificates required to install an IdM server without a CA
You need to provide the certificates required to install an Identity Management (IdM) server without a certificate authority (CA). By using the command-line options described, you can provide these certificates to the ipa-server-install utility.
You cannot install a server or replica using self-signed third-party server certificates because the imported certificate files must contain the full CA certificate chain of the CA that issued the LDAP and Apache server certificates.
- The LDAP server certificate and private key
-
--dirsrv-cert-filefor the certificate and private key files for the LDAP server certificate -
--dirsrv-pinfor the password to access the private key in the files specified in--dirsrv-cert-file
-
- The Apache server certificate and private key
-
--http-cert-filefor the certificate and private key files for the Apache server certificate -
--http-pinfor the password to access the private key in the files specified in--http-cert-file
-
- The full CA certificate chain of the CA that issued the LDAP and Apache server certificates
-
--dirsrv-cert-fileand--http-cert-filefor the certificate files with the full CA certificate chain or a part of it
-
You can provide the files specified in the --dirsrv-cert-file and --http-cert-file options in the following formats:
- Privacy-Enhanced Mail (PEM) encoded certificate (RFC 7468). Note that the Identity Management installer accepts concatenated PEM-encoded objects.
- Distinguished Encoding Rules (DER)
- PKCS #7 certificate chain objects
- PKCS #8 private key objects
- PKCS #12 archives
You can specify the --dirsrv-cert-file and --http-cert-file options multiple times to specify multiple files.
- The certificate files to complete the full CA certificate chain (not needed in some environments)
-
--ca-cert-filefor the file or files containing the CA certificate of the CA that issued the LDAP, Apache Server, and Kerberos KDC certificates. Use this option if the CA certificate is not present in the certificate files provided by the other options.
-
The files provided using --dirsrv-cert-file and --http-cert-file combined with the file provided using --ca-cert-file must contain the full CA certificate chain of the CA that issued the LDAP and Apache server certificates.
- The Kerberos key distribution center (KDC) PKINIT certificate and private key
If you have a PKINIT certificate, use the following 2 options:
-
--pkinit-cert-filefor the Kerberos KDC SSL certificate and private key -
--pkinit-pinfor the password to access the Kerberos KDC private key in the files specified in--pkinit-cert-file
-
If you do not have a PKINIT certificate and want to configure the IdM server with a local KDC with a self-signed certificate, use the following option:
-
--no-pkinitfor disabling pkinit setup steps
-
Additional resources
-
For details on what the certificate file formats these options accept, see the
ipa-server-install(1) man page. - For details on PKINIT extensions required to create a RHEL IdM PKINIT certificate, see RHEL IdM PKINIT KDC certificate and extensions.
5.2. Interactive installation
During the interactive installation using the ipa-server-install utility, you are asked to supply basic configuration of the system, for example the realm, the administrator’s password and the Directory Manager’s password.
The ipa-server-install installation script creates a log file at /var/log/ipaserver-install.log. If the installation fails, the log can help you identify the problem.
Procedure
Run the
ipa-server-installutility and provide all the required certificates. For example:[root@server ~]# ipa-server-install \ --http-cert-file /tmp/server.crt \ --http-cert-file /tmp/server.key \ --http-pin secret \ --dirsrv-cert-file /tmp/server.crt \ --dirsrv-cert-file /tmp/server.key \ --dirsrv-pin secret \ --ca-cert-file ca.crt
See Certificates required to install an IdM server without a CA for details on the provided certificates.
The script prompts to configure an integrated DNS service. Enter
yesorno. In this procedure, we are installing a server with integrated DNS.Do you want to configure integrated DNS (BIND)? [no]:
yesNoteIf you want to install a server without integrated DNS, the installation script will not prompt you for DNS configuration as described in the steps below. See Installing an IdM server: Without integrated DNS, with an integrated CA as the root CA for details on the steps for installing a server without DNS.
The script prompts for several required settings and offers recommended default values in brackets.
- To accept a default value, press Enter.
To provide a custom value, enter the required value.
Server host name [server.idm.example.com]:
Please confirm the domain name [idm.example.com]:
Please provide a realm name [IDM.EXAMPLE.COM]:
WarningPlan these names carefully. You will not be able to change them after the installation is complete.
Enter the passwords for the Directory Server superuser (
cn=Directory Manager) and for the Identity Management (IdM) administration system user account (admin).Directory Manager password: IPA admin password:
The script prompts for per-server DNS forwarders.
Do you want to configure DNS forwarders? [yes]:
To configure per-server DNS forwarders, enter
yes, and then follow the instructions on the command line. The installation process will add the forwarder IP addresses to the IdM LDAP.-
For the forwarding policy default settings, see the
--forward-policydescription in the ipa-dns-install(1) man page.
-
For the forwarding policy default settings, see the
If you do not want to use DNS forwarding, enter
no.With no DNS forwarders, hosts in your IdM domain will not be able to resolve names from other, internal, DNS domains in your infrastructure. The hosts will only be left with public DNS servers to resolve their DNS queries.
The script prompts to check if any DNS reverse (PTR) records for the IP addresses associated with the server need to be configured.
Do you want to search for missing reverse zones? [yes]:
If you run the search and missing reverse zones are discovered, the script asks you whether to create the reverse zones along with the PTR records.
Do you want to create reverse zone for IP 192.0.2.1 [yes]:
Please specify the reverse zone name [2.0.192.in-addr.arpa.]:
Using reverse zone(s) 2.0.192.in-addr.arpa.
NoteUsing IdM to manage reverse zones is optional. You can use an external DNS service for this purpose instead.
Enter
yesto confirm the server configuration.Continue to configure the system with these values? [no]:
yes- The installation script now configures the server. Wait for the operation to complete.
After the installation script completes, update your DNS records in the following way:
Add DNS delegation from the parent domain to the IdM DNS domain. For example, if the IdM DNS domain is
idm.example.com, add a name server (NS) record to theexample.comparent domain.ImportantRepeat this step each time after an IdM DNS server is installed.
-
Add an
_ntp._udpservice (SRV) record for your time server to your IdM DNS. The presence of the SRV record for the time server of the newly-installed IdM server in IdM DNS ensures that future replica and client installations are automatically configured to synchronize with the time server used by this primary IdM server.
Chapter 6. Installing an IdM server: Without integrated DNS, with an integrated CA as the root CA
This chapter describes how you can install a new Identity Management (IdM) server without integrated DNS.
Red Hat strongly recommends installing IdM-integrated DNS for basic usage within the IdM deployment: When the IdM server also manages DNS, there is tight integration between DNS and native IdM tools which enables automating some of the DNS record management.
For more details, see Planning your DNS services and host names.
6.1. Interactive installation
During the interactive installation using the ipa-server-install utility, you are asked to supply basic configuration of the system, for example the realm, the administrator’s password and the Directory Manager’s password.
The ipa-server-install installation script creates a log file at /var/log/ipaserver-install.log. If the installation fails, the log can help you identify the problem.
This procedure installs a server:
- Without integrated DNS
- With integrated Identity Management (IdM) certificate authority (CA) as the root CA, which is the default CA configuration
Procedure
Run the
ipa-server-installutility.# ipa-server-install
The script prompts to configure an integrated DNS service. Press Enter to select the default
nooption.Do you want to configure integrated DNS (BIND)? [no]:
The script prompts for several required settings and offers recommended default values in brackets.
- To accept a default value, press Enter.
To provide a custom value, enter the required value.
Server host name [server.idm.example.com]:
Please confirm the domain name [idm.example.com]:
Please provide a realm name [IDM.EXAMPLE.COM]:
WarningPlan these names carefully. You will not be able to change them after the installation is complete.
Enter the passwords for the Directory Server superuser (
cn=Directory Manager) and for the IdM administration system user account (admin).Directory Manager password: IPA admin password:
The script prompts for several required settings and offers recommended default values in brackets.
- To accept a default value, press Enter.
To provide a custom value, enter the required value.
NetBIOS domain name [EXAMPLE]: Do you want to configure chrony with NTP server or pool address? [no]:
Enter
yesto confirm the server configuration.Continue to configure the system with these values? [no]:
yes- The installation script now configures the server. Wait for the operation to complete.
The installation script produces a file with DNS resource records:
the /tmp/ipa.system.records.UFRPto.dbfile in the example output below. Add these records to the existing external DNS servers. The process of updating the DNS records varies depending on the particular DNS solution.... Restarting the KDC Please add records in this file to your DNS system: /tmp/ipa.system.records.UFRBto.db Restarting the web server ...
ImportantThe server installation is not complete until you add the DNS records to the existing DNS servers.
Additional resources
- For more information about the DNS resource records you must add to your DNS system, see IdM DNS records for external DNS systems.
6.2. Non-interactive installation
This procedure installs a server without integrated DNS or with integrated Identity Management (IdM) certificate authority (CA) as the root CA, which is the default CA configuration.
The ipa-server-install installation script creates a log file at /var/log/ipaserver-install.log. If the installation fails, the log can help you identify the problem.
Procedure
Run the
ipa-server-installutility with the options to supply all the required information. The minimum required options for non-interactive installation are:-
--realmto provide the Kerberos realm name -
--ds-passwordto provide the password for the Directory Manager (DM), the Directory Server super user -
--admin-passwordto provide the password foradmin, the IdM administrator -
--unattendedto let the installation process select default options for the host name and domain name
For example:
# ipa-server-install --realm IDM.EXAMPLE.COM --ds-password DM_password --admin-password admin_password --unattended-
The installation script produces a file with DNS resource records:
the /tmp/ipa.system.records.UFRPto.dbfile in the example output below. Add these records to the existing external DNS servers. The process of updating the DNS records varies depending on the particular DNS solution.... Restarting the KDC Please add records in this file to your DNS system: /tmp/ipa.system.records.UFRBto.db Restarting the web server ...
ImportantThe server installation is not complete until you add the DNS records to the existing DNS servers.
Additional resources
- For more information about the DNS resource records you must add to your DNS system, see IdM DNS records for external DNS systems.
-
For a complete list of options accepted by ipa-server-install, run the
ipa-server-install --helpcommand.
6.3. IdM DNS records for external DNS systems
After installing an IdM server without integrated DNS, you must add LDAP and Kerberos DNS resource records for the IdM server to your external DNS system.
The ipa-server-install installation script generates a file containing the list of DNS resource records with a file name in the format /tmp/ipa.system.records.<random_characters>.db and prints instructions to add those records:
Please add records in this file to your DNS system: /tmp/ipa.system.records.6zdjqxh3.dbThis is an example of the contents of the file:
_kerberos-master._tcp.example.com. 86400 IN SRV 0 100 88 server.example.com. _kerberos-master._udp.example.com. 86400 IN SRV 0 100 88 server.example.com. _kerberos._tcp.example.com. 86400 IN SRV 0 100 88 server.example.com. _kerberos._udp.example.com. 86400 IN SRV 0 100 88 server.example.com. _kerberos.example.com. 86400 IN TXT "EXAMPLE.COM" _kpasswd._tcp.example.com. 86400 IN SRV 0 100 464 server.example.com. _kpasswd._udp.example.com. 86400 IN SRV 0 100 464 server.example.com. _ldap._tcp.example.com. 86400 IN SRV 0 100 389 server.example.com.
After adding the LDAP and Kerberos DNS resource records for the IdM server to your DNS system, ensure that the DNS management tools have not added PTR records for ipa-ca. The presence of PTR records for ipa-ca in your DNS could cause subsequent IdM replica installations to fail.
Chapter 7. Installing an IdM server: Without integrated DNS, with an external CA as the root CA
This chapter describes how you can install a new Identity Management (IdM) server, without integrated DNS, that uses an external certificate authority (CA) as the root CA.
Red Hat strongly recommends installing IdM-integrated DNS for basic usage within the IdM deployment: When the IdM server also manages DNS, there is tight integration between DNS and native IdM tools which enables automating some of the DNS record management.
For more details, see Planning your DNS services and host names.
7.1. Options used when installing an IdM CA with an external CA as the root CA
You may want to install an Identity Management IdM certificate authority (CA) with an external CA as the root CA if one of the following conditions applies:
-
You are installing a new IdM server or replica by using the
ipa-server-installcommand. -
You are installing the CA component into an existing IdM server by using the
ipa-ca-installcommand.
You can use following options for both commands that you can use for creating a certificate signing request (CSR) during the installation of an IdM CA with an external CA as the root CA.
- --external-ca-type=TYPE
-
Type of the external CA. Possible values are
genericandms-cs. The default value isgeneric. Usems-csto include a template name required by Microsoft Certificate Services (MS CS) in the generated CSR. To use a non-default profile, use the--external-ca-profileoption in conjunction with--external-ca-type=ms-cs. - --external-ca-profile=PROFILE_SPEC
Specify the certificate profile or template that you want the MS CS to apply when issuing the certificate for your IdM CA.
Note that the
--external-ca-profileoption can only be used if--external-ca-typeis ms-cs.You can identify the MS CS template in one of the following ways:
-
<oid>:<majorVersion>[:<minorVersion>]. You can specify a certificate template by its object identifier (OID) and major version. You can optionally also specify the minor version. -
<name>. You can specify a certificate template by its name. The name cannot contain any : characters and cannot be an OID, otherwise the OID-based template specifier syntax takes precedence. -
default. If you use this specifier, the template nameSubCAis used.
-
In certain scenarios, the Active Directory (AD) administrator can use the Subordinate Certification Authority (SCA) template, which is a built-in template in AD CS, to create a unique template to better suit the needs of the organization. The new template can, for example, have a customized validity period and customized extensions. The associated Object Identifier (OID) can be found in the AD Certificates Template console.
If the AD administrator has disabled the original, built-in template, you must specify the OID or name of the new template when requesting a certificate for your IdM CA. Ask your AD administrator to provide you with the name or OID of the new template.
If the original SCA AD CS template is still enabled, you can use it by specifying --external-ca-type=ms-cs without additionally using the --external-ca-profile option. In this case, the subCA external CA profile is used, which is the default IdM template corresponding to the SCA AD CS template.
7.2. Interactive installation
During the interactive installation using the ipa-server-install utility, you are asked to supply basic configuration of the system, for example the realm, the administrator’s password and the Directory Manager’s password.
The ipa-server-install installation script creates a log file at /var/log/ipaserver-install.log. If the installation fails, the log can help you identify the problem.
Follow this procedure to install a server:
- Without integrated DNS
- With an external certificate authority (CA) as the root CA
Prerequisites
-
You have determined the type of the external CA to specify with the
--external-ca-typeoption. See theipa-server-install(1) man page for details. If you are using a Microsoft Certificate Services certificate authority (MS CS CA) as your external CA: you have determined the certificate profile or template to specify with the
--external-ca-profileoption. By default, theSubCAtemplate is used.For more information about the
--external-ca-typeand--external-ca-profileoptions, see Options used when installing an IdM CA with an external CA as the root CA.
Procedure
Run the ipa-server-install utility with the
--external-caoption.If you are using the Microsoft Certificate Services (MS CS) CA, also use the
--external-ca-typeoption and, optionally, the--external-ca-profileoption:[root@server ~]# ipa-server-install --external-ca --external-ca-type=ms-cs --external-ca-profile=<oid>/<name>/defaultIf you are not using MS CS to generate the signing certificate for your IdM CA, no other option may be necessary:
# ipa-server-install --external-ca
The script prompts to configure an integrated DNS service. Press Enter to select the default
nooption.Do you want to configure integrated DNS (BIND)? [no]:
The script prompts for several required settings and offers recommended default values in brackets.
- To accept a default value, press Enter.
To provide a custom value, enter the required value.
Server host name [
server.idm.example.com]: Please confirm the domain name [idm.example.com]: Please provide a realm name [IDM.EXAMPLE.COM]:WarningPlan these names carefully. You will not be able to change them after the installation is complete.
Enter the passwords for the Directory Server superuser (
cn=Directory Manager) and for the IdM administration system user account (admin).Directory Manager password: IPA admin password:
Enter
yesto confirm the server configuration.Continue to configure the system with these values? [no]:
yesDuring the configuration of the Certificate System instance, the utility prints the location of the certificate signing request (CSR):
/root/ipa.csr:... Configuring certificate server (pki-tomcatd): Estimated time 3 minutes 30 seconds [1/8]: creating certificate server user [2/8]: configuring certificate server instance The next step is to get /root/ipa.csr signed by your CA and re-run /sbin/ipa-server-install as: /sbin/ipa-server-install --external-cert-file=/path/to/signed_certificate --external-cert-file=/path/to/external_ca_certificate
When this happens:
-
Submit the CSR located in
/root/ipa.csrto the external CA. The process differs depending on the service to be used as the external CA. Retrieve the issued certificate and the CA certificate chain for the issuing CA in a base 64-encoded blob (either a PEM file or a Base_64 certificate from a Windows CA). Again, the process differs for every certificate service. Usually, a download link on a web page or in the notification email allows the administrator to download all the required certificates.
ImportantBe sure to get the full certificate chain for the CA, not just the CA certificate.
Run
ipa-server-installagain, this time specifying the locations and names of the newly-issued CA certificate and the CA chain files. For example:# ipa-server-install --external-cert-file=/tmp/servercert20170601.pem --external-cert-file=/tmp/cacert.pem
-
Submit the CSR located in
- The installation script now configures the server. Wait for the operation to complete.
The installation script produces a file with DNS resource records:
the /tmp/ipa.system.records.UFRPto.dbfile in the example output below. Add these records to the existing external DNS servers. The process of updating the DNS records varies depending on the particular DNS solution.... Restarting the KDC Please add records in this file to your DNS system: /tmp/ipa.system.records.UFRBto.db Restarting the web server ...
ImportantThe server installation is not complete until you add the DNS records to the existing DNS servers.
Additional resources
- For more information about the DNS resource records you must add to your DNS system, see IdM DNS records for external DNS systems.
The
ipa-server-install --external-cacommand can sometimes fail with the following error:ipa : CRITICAL failed to configure ca instance Command '/usr/sbin/pkispawn -s CA -f /tmp/pass:quotes[configuration_file]' returned non-zero exit status 1 Configuration of CA failedThis failure occurs when the
*_proxyenvironmental variables are set. For a solution of the problem, see Troubleshooting: External CA installation fails.
7.3. Non-interactive installation
This procedure installs a server:
- Without integrated DNS
- With an external certificate authority (CA) as the root CA
The ipa-server-install installation script creates a log file at /var/log/ipaserver-install.log. If the installation fails, the log can help you identify the problem.
Prerequisites
-
You have determined the type of the external CA to specify with the
--external-ca-typeoption. See theipa-server-install(1) man page for details. If you are using a Microsoft Certificate Services certificate authority (MS CS CA) as your external CA: you have determined the certificate profile or template to specify with the
--external-ca-profileoption. By default, theSubCAtemplate is used.For more information about the
--external-ca-typeand--external-ca-profileoptions, see Options used when installing an IdM CA with an external CA as the root CA.
Procedure
Run the
ipa-server-installutility with the options to supply all the required information. The minimum required options for non-interactive installation of an IdM server with an external CA as the root CA are:-
--external-cato specify an external CA is the root CA -
--realmto provide the Kerberos realm name -
--ds-passwordto provide the password for the Directory Manager (DM), the Directory Server super user -
--admin-passwordto provide the password foradmin, the IdM administrator --unattendedto let the installation process select default options for the host name and domain nameFor example:
# ipa-server-install --external-ca --realm IDM.EXAMPLE.COM --ds-password DM_password --admin-password admin_password --unattended
If you are using a Microsoft Certificate Services (MS CS) CA, also use the
--external-ca-typeoption and, optionally, the--external-ca-profileoption. For more information, see Options used when installing an IdM CA with an external CA as the root CA.-
During the configuration of the Certificate System instance, the utility prints the location of the certificate signing request (CSR):
/root/ipa.csr:... Configuring certificate server (pki-tomcatd). Estimated time: 3 minutes [1/11]: configuring certificate server instance The next step is to get /root/ipa.csr signed by your CA and re-run /usr/sbin/ipa-server-install as: /usr/sbin/ipa-server-install --external-cert-file=/path/to/signed_certificate --external-cert-file=/path/to/external_ca_certificate The ipa-server-install command was successful
When this happens:
-
Submit the CSR located in
/root/ipa.csrto the external CA. The process differs depending on the service to be used as the external CA. Retrieve the issued certificate and the CA certificate chain for the issuing CA in a base 64-encoded blob (either a PEM file or a Base_64 certificate from a Windows CA). Again, the process differs for every certificate service. Usually, a download link on a web page or in the notification email allows the administrator to download all the required certificates.
ImportantBe sure to get the full certificate chain for the CA, not just the CA certificate.
Run
ipa-server-installagain, this time specifying the locations and names of the newly-issued CA certificate and the CA chain files. For example:# ipa-server-install --external-cert-file=/tmp/servercert20170601.pem --external-cert-file=/tmp/cacert.pem --realm IDM.EXAMPLE.COM --ds-password DM_password --admin-password admin_password --unattended
-
Submit the CSR located in
- The installation script now configures the server. Wait for the operation to complete.
The installation script produces a file with DNS resource records: the
/tmp/ipa.system.records.UFRPto.dbfile in the example output below. Add these records to the existing external DNS servers. The process of updating the DNS records varies depending on the particular DNS solution.... Restarting the KDC Please add records in this file to your DNS system: /tmp/ipa.system.records.UFRBto.db Restarting the web server ...
The server installation is not complete until you add the DNS records to the existing DNS servers.
Additional resources
- For more information about the DNS resource records you must add to your DNS system, see IdM DNS records for external DNS systems.
7.4. IdM DNS records for external DNS systems
After installing an IdM server without integrated DNS, you must add LDAP and Kerberos DNS resource records for the IdM server to your external DNS system.
The ipa-server-install installation script generates a file containing the list of DNS resource records with a file name in the format /tmp/ipa.system.records.<random_characters>.db and prints instructions to add those records:
Please add records in this file to your DNS system: /tmp/ipa.system.records.6zdjqxh3.dbThis is an example of the contents of the file:
_kerberos-master._tcp.example.com. 86400 IN SRV 0 100 88 server.example.com. _kerberos-master._udp.example.com. 86400 IN SRV 0 100 88 server.example.com. _kerberos._tcp.example.com. 86400 IN SRV 0 100 88 server.example.com. _kerberos._udp.example.com. 86400 IN SRV 0 100 88 server.example.com. _kerberos.example.com. 86400 IN TXT "EXAMPLE.COM" _kpasswd._tcp.example.com. 86400 IN SRV 0 100 464 server.example.com. _kpasswd._udp.example.com. 86400 IN SRV 0 100 464 server.example.com. _ldap._tcp.example.com. 86400 IN SRV 0 100 389 server.example.com.
After adding the LDAP and Kerberos DNS resource records for the IdM server to your DNS system, ensure that the DNS management tools have not added PTR records for ipa-ca. The presence of PTR records for ipa-ca in your DNS could cause subsequent IdM replica installations to fail.
Chapter 8. Installing an IdM server or replica with custom database settings from an LDIF file
You can install an IdM server and IdM replicas with custom settings for the Directory Server database. The following procedure shows you how to create an LDAP Data Interchange Format (LDIF) file with database settings, and how to pass those settings to the IdM server and replica installation commands.
Prerequisites
- You have determined custom Directory Server settings that improve the performance of your IdM environment. See Adjusting IdM Directory Server performance.
Procedure
Create a text file in LDIF format with your custom database settings. Separate LDAP attribute modifications with a dash (-). This example sets non-default values for the idle timeout and maximum file descriptors.
dn: cn=config changetype: modify replace: nsslapd-idletimeout nsslapd-idletimeout=1800 - replace: nsslapd-maxdescriptors nsslapd-maxdescriptors=8192
Use the
--dirsrv-config-fileparameter to pass the LDIF file to the installation script.To install an IdM server:
# ipa-server-install --dirsrv-config-file filename.ldifTo install an IdM replica:
# ipa-replica-install --dirsrv-config-file filename.ldif
Additional resources
Chapter 9. Troubleshooting IdM server installation
The following sections describe how to gather information about a failing IdM server installation, and how to resolve common installation issues.
9.1. Reviewing IdM server installation error logs
When you install an Identity Management (IdM) server, debugging information is appended to the following log files:
-
/var/log/ipaserver-install.log -
/var/log/httpd/error_log -
/var/log/dirsrv/slapd-INSTANCE-NAME/access -
/var/log/dirsrv/slapd-INSTANCE-NAME/errors
The last lines of the log files report success or failure, and the ERROR and DEBUG entries provide additional context.
To troubleshoot a failing IdM server installation, review the errors at the end of the log files and use this information to resolve any corresponding issues.
Prerequisites
-
You must have
rootprivileges to display the contents of IdM log files.
Procedure
Use the
tailcommand to display the last lines of a log file. The following example displays the last 10 lines of/var/log/ipaserver-install.log.[user@server ~]$ sudo tail -n 10 /var/log/ipaserver-install.log [sudo] password for user: value = gen.send(prev_value) File "/usr/lib/python3.6/site-packages/ipapython/install/common.py", line 65, in _install for unused in self._installer(self.parent): File "/usr/lib/python3.6/site-packages/ipaserver/install/server/init.py", line 564, in main master_install(self) File "/usr/lib/python3.6/site-packages/ipaserver/install/server/install.py", line 291, in decorated raise ScriptError() 2020-05-27T22:59:41Z DEBUG The ipa-server-install command failed, exception: ScriptError: 2020-05-27T22:59:41Z ERROR The ipa-server-install command failed. See /var/log/ipaserver-install.log for more information
To review a log file interactively, open the end of the log file using the
lessutility and use the ↑ and ↓ arrow keys to navigate. The following example opens the/var/log/ipaserver-install.logfile interactively.[user@server ~]$ sudo less -N +G /var/log/ipaserver-install.logGather additional troubleshooting information by repeating this review process with the remaining log files.
[user@server ~]$ sudo less -N +G /var/log/httpd/error_log [user@server ~]$ sudo less -N +G /var/log/dirsrv/slapd-INSTANCE-NAME/access [user@server ~]$ sudo less -N +G /var/log/dirsrv/slapd-INSTANCE-NAME/errors
Additional resources
-
If you are unable to resolve a failing IdM server installation, and you have a Red Hat Technical Support subscription, open a Technical Support case at the Red Hat Customer Portal and provide an
sosreportof the server. -
The
sosreportutility collects configuration details, logs and system information from a RHEL system. For more information about thesosreportutility, see What is an sosreport and how to create one in Red Hat Enterprise Linux?.
9.2. Reviewing IdM CA installation errors
When you install the Certificate Authority (CA) service on an Identity Management (IdM) server, debugging information is appended to the following locations (in order of recommended priority):
| Location | Description |
|---|---|
|
|
High-level issues and Python traces for the |
|
|
Errors from the |
|
| Large JAVA stacktraces of activity in the core of the Public Key Infrastructure (PKI) product |
|
| Audit log of the PKI product |
| Low-level debug data of certificate operations for service principals, hosts, and other entities that use certificates |
If a full IdM server installation fails while installing the optional CA component, no details about the CA are logged; a message is logged in the /var/log/ipaserver-install.log file indicating that the overall installation process failed. Red Hat recommends reviewing the log files listed above for details specific to the CA installation failure.
The only exception to this behavior is when you are installing the CA service and the root CA is an external CA. If there is an issue with the certificate from the external CA, errors are logged in /var/log/ipaserver-install.log.
To troubleshoot a failing IdM CA installation, review the errors at the end of these log files and use this information to resolve any corresponding issues.
Prerequisites
-
You must have
rootprivileges to display the contents of IdM log files.
Procedure
To review a log file interactively, open the end of the log file using the
lessutility and use the ↑ and ↓ arrow keys to navigate, while searching forScriptErrorentries. The following example opens/var/log/pki/pki-ca-spawn.$TIME_OF_INSTALLATION.log.[user@server ~]$ sudo less -N +G /var/log/pki/pki-ca-spawn.20200527185902.log- Gather additional troubleshooting information by repeating this review process with all the log files listed above.
Additional resources
-
If you are unable to resolve a failing IdM server installation, and you have a Red Hat Technical Support subscription, open a Technical Support case at the Red Hat Customer Portal and provide an
sosreportof the server. -
The
sosreportutility collects configuration details, logs and system information from a RHEL system. For more information about thesosreportutility, see What is an sosreport and how to create one in Red Hat Enterprise Linux?.
9.3. Removing a partial IdM server installation
If an IdM server installation fails, some configuration files can be left behind. Additional attempts to install the IdM server fail and the installation script reports that IPA is already configured.
Example system with existing partial IdM configuration
[root@server ~]# ipa-server-install The log file for this installation can be found in /var/log/ipaserver-install.log IPA server is already configured on this system. If you want to reinstall the IPA server, please uninstall it first using 'ipa-server-install --uninstall'. The ipa-server-install command failed. See /var/log/ipaserver-install.log for more information
To resolve this issue, uninstall the partial IdM server configuration and retry the installation process.
Prerequisites
-
You must have
rootprivileges.
Procedure
Uninstall the IdM server software from the host you are trying to configure as an IdM server.
[root@server ~]# ipa-server-install --uninstallIf you continue to experience difficulty installing an IdM server because of repeated failed installations, reinstall the operating system.
One of the requirements for installing an IdM server is a clean system without any customization. Failed installations may have compromised the integrity of the host by unexpectedly modifying system files.
Additional resources
- For additional details on uninstalling an IdM server, see Uninstalling an IdM server.
-
If installation attempts fail after repeated uninstallation attempts, and you have a Red Hat Technical Support subscription, open a Technical Support case at the Red Hat Customer Portal and provide an
sosreportof the server. -
The
sosreportutility collects configuration details, logs and system information from a RHEL system. For more information about thesosreportutility, see What is an sosreport and how to create one in Red Hat Enterprise Linux?.
9.4. Additional resources
Chapter 10. Uninstalling an IdM server
Follow this procedure to uninstall an Identity Management (IdM) server named server123.idm.example.com (server123). In the procedure, you first ensure that other servers are running critical services and that the topology will continue to be redundant before performing the uninstallation.
Prerequisites
-
You have
rootaccess to server123. - You have an IdM administrator’s credentials.
Procedure
If your IdM environment uses integrated DNS, ensure that server123 is not the only
enabledDNS server:[root@server123 ~]# ipa server-role-find --role 'DNS server' ---------------------- 2 server roles matched ---------------------- Server name: server456.idm.example.com Role name: DNS server Role status: enabled [...] ---------------------------- Number of entries returned 2 ----------------------------
If server123 is the only remaining DNS server in the topology, add the DNS server role to another IdM server. For more information, see the
ipa-dns-install(1)man page.If your IdM environment uses an integrated certificate authority (CA):
Ensure that server123 is not the only
enabledCA server:[root@server123 ~]# ipa server-role-find --role 'CA server' ---------------------- 2 server roles matched ---------------------- Server name: server123.idm.example.com Role name: CA server Role status: enabled Server name: r8server.idm.example.com Role name: CA server Role status: enabled ---------------------------- Number of entries returned 2 ----------------------------
If server123 is the only remaining CA server in the topology, add the CA server role to another IdM server. For more information, see the
ipa-ca-install(1)man page.If you have enabled vaults in your IdM environment, ensure that server123.idm.example.com is not the only
enabledKey Recovery Authority (KRA) server:[root@server123 ~]# ipa server-role-find --role 'KRA server' ---------------------- 2 server roles matched ---------------------- Server name: server123.idm.example.com Role name: KRA server Role status: enabled Server name: r8server.idm.example.com Role name: KRA server Role status: enabled ---------------------------- Number of entries returned 2 ----------------------------
If server123 is the only remaining KRA server in the topology, add the KRA server role to another IdM server. For more information, see
man ipa-kra-install(1).Ensure that server123.idm.example.com is not the CA renewal server:
[root@server123 ~]# ipa config-show | grep 'CA renewal' IPA CA renewal master: r8server.idm.example.com
If server123 is the CA renewal server, see Changing and resetting IdM CA renewal server for more information about how to move the CA renewal server role to another server.
Ensure that server123.idm.example.com is not the current certificate revocation list (CRL) publisher:
[root@server123 ~]# ipa-crlgen-manage status CRL generation: disabled
If the output shows that CRL generation is enabled on server123, see Generating CRL on an IdM CA server for more information about how to move the CRL publisher role to another server.
Connect to another IdM server in the topology:
$ ssh idm_user@server456On the server, obtain the IdM administrator’s credentials:
[idm_user@server456 ~]$ kinit adminView the DNA ID ranges assigned to the servers in the topology:
[idm_user@server456 ~]$ ipa-replica-manage dnarange-show server123.idm.example.com: 1001-1500 server456.idm.example.com: 1501-2000 [...]The output shows that a DNA ID range is assigned to both server123 and server456.
If server123 is the only IdM server in the topology with a DNA ID range assigned, create a test IdM user on server456 to ensure that the server has a DNA ID range assigned:
[idm_user@server456 ~]$ ipa user-add test_idm_userDelete server123.idm.example.com from the topology:
[idm_user@server456 ~]$ ipa server-del server123.idm.example.comImportantIf deleting server123 would lead to a disconnected topology, the script warns you about it. For information about how to create a replication agreement between the remaining replicas so that the deletion can proceed, see Setting up replication between two servers using the CLI.
NoteRunning the
ipa server-delcommand removes all replication data and agreements related to server123 for both thedomainandcasuffixes. This is in contrast to Domain Level 0 IdM topologies, where you initially had to remove these data by using theipa-replica-manage del server123command. Domain Level 0 IdM topologies are those running on RHEL 7.2 and earlier. Use theipa domainlevel-getcommand to view the current domain level.Return to server123.idm.example.com and uninstall the existing IdM installation:
[root@server123 ~]# ipa-server-install --uninstall ... Are you sure you want to continue with the uninstall procedure? [no]: yes- Ensure that all name server (NS) DNS records pointing to server123.idm.example.com are deleted from your DNS zones. This applies regardless of whether you use integrated DNS managed by IdM or external DNS. For more information about how to delete DNS records from IdM, see Deleting DNS records in the IdM CLI.
Additional resources
Chapter 11. Renaming an IdM server
You cannot change the host name of an existing Identity Management (IdM) server. However, you can replace the server with a replica of a different name.
Procedure
Install a new replica that will replace the existing server, ensuring the replica has the required host name and IP address. For details, see Installing an IdM replica.
ImportantIf the server you are uninstalling is the certificate revocation list (CRL) publisher server, make another server the CRL publisher server before proceeding.
For details on how this is done in the context of a migration procedure, see the following sections:
Stop the existing IdM server instance.
[root@old_server ~]# ipactl stop- Uninstall the existing server as described in Uninstalling an IdM server.
Chapter 12. Updating and downgrading IdM
12.1. Updating IdM packages
You can use the yum utility to update the Identity Management (IdM) packages on the system.
Prerequisites
- Ensure you have applied all previously released errata relevant to the RHEL system. For more information, see the How do I apply package updates to my RHEL system? KCS article.
Procedure
Select one of the following options:
To update all IdM packages that are relevant for your profile and that have updates available:
# yum upgrade ipa-*To install or update packages to match the latest version available for your profile from any enabled repository:
# yum distro-sync ipa-*
After you update the IdM packages on at least one server, all other servers in the topology receive the updated schema, even if you do not update their packages. This ensures that any new entries which use the new schema can be replicated among the other servers.
When updating multiple IdM servers, wait at least 10 minutes after updating one server before updating another server. However, the actual time required for a server’s successful update depends on the topology deployed, the latency of the connections, and the number of changes generated by the update.
When two or more servers are updated simultaneously or with only short intervals between the upgrades, there is not enough time to replicate the post-upgrade data changes throughout the topology, which can result in conflicting replication events.
Red Hat recommends upgrading to the next version only. For example, if you want to upgrade to IdM for RHEL 8.8, we recommend upgrading from IdM for RHEL 8.7. Upgrading from earlier versions can cause problems.
12.2. Downgrading IdM packages
Red Hat does not support downgrading Identity Management.
12.3. Additional resources
-
yum(8)man page
Chapter 13. Preparing the system for IdM client installation
This chapter describes the conditions your system must meet to install an Identity Management (IdM) client.
13.1. Supported versions of RHEL for installing IdM clients
An Identity Management deployment in which IdM servers are running on the latest minor version of Red Hat Enterprise Linux 8 supports clients that are running on the latest minor versions of:
- RHEL 7
- RHEL 8
- RHEL 9
- NOTE
- While other client systems, for example Ubuntu, can work with IdM 8 servers, Red Hat does not provide support for these clients.
- IMPORTANT
- If you are planning to make your IdM deployment FIPS-compliant, Red Hat strongly recommends migrating your environment to RHEL 9. RHEL 9 is the first major RHEL version that is planned to be compliant with FIPS 140-3.
13.2. DNS requirements for IdM clients
Client installer by default tries to search for _ldap._tcp.DOMAIN DNS SRV records for all domains that are parent to its hostname. For example, if a client machine has a hostname client1.idm.example.com, the installer will try to retrieve an IdM server hostname from _ldap._tcp.idm.example.com, _ldap._tcp.example.com and _ldap._tcp.com DNS SRV records, respectively. The discovered domain is then used to configure client components (for example, SSSD and Kerberos 5 configuration) on the machine.
However, the hostnames of IdM clients are not required to be part of the primary DNS domain. If the client machine hostname is not in a subdomain of an IdM server, pass the IdM domain as the --domain option of the ipa-client-install command. In that case, after the installation of the client, both SSSD and Kerberos components will have the domain set in their configuration files and will use it to autodiscover IdM servers.
Additional resources
- For details on DNS requirements in IdM, see Host name and DNS requirements for IdM.
13.3. Port requirements for IdM clients
Identity Management (IdM) clients connect to a number of ports on IdM servers to communicate with their services.
On IdM client, these ports must be open in the outgoing direction. If you are using a firewall that does not filter outgoing packets, such as firewalld, the ports are already available in the outgoing direction.
Additional resources
- For information about which specific ports are used, see Port requirements for IdM.
13.4. IPv6 requirements for IdM clients
Identity Management (IdM) does not require the IPv6 protocol to be enabled in the kernel of the host that you want to enroll into IdM. For example, if your internal network only uses the IPv4 protocol, you can configure the System Security Services Daemon (SSSD) to only use IPv4 to communicate with the IdM server. You can do this by inserting the following line into the [domain/NAME] section of the /etc/sssd/sssd.conf file:
lookup_family_order = ipv4_onlyAdditional resources
-
For more information about the
lookup_family_orderoption, see thesssd.conf(5)man page.
13.5. Installing IdM client packages from the idm:client stream
In RHEL8, the packages necessary for installing an Identity Management (IdM) client are shipped as a module.
The idm:client stream is the default stream of the idm module. Use this stream to download the IdM client packages if you do not need to install server components on your machine. Using the idm:client stream is especially recommended if you need to consistently use IdM client software that is supported long-term, provided you do not need server components, too.
Do not use the idm:client stream if you are planning to install an IdM replica on the host. In that case, use the idm:DL1 stream instead.
Prerequisites
When switching to the
idm:clientstream after you previously enabled theidm:DL1stream and downloaded packages from it, you need to first explicitly remove all the relevant installed content and disable theidm:DL1stream before enabling theidm:clientstream.For details on how to proceed, see Switching to a later stream.
ImportantTrying to enable a new stream without disabling the current one results in an error.
Procedure
To download the packages necessary for installing an IdM client:
# yum module install idm
13.6. Installing IdM client packages from the idm:DL1 stream
In RHEL8, the packages necessary for installing an Identity Management (IdM) client are shipped as a module.
The idm:DL1 stream needs to be enabled before you can download packages from it. Use this stream to download the IdM client packages if you need to install IdM server components on your machine.
Prerequisites
When switching to the
idm:DL1stream after you previously enabled theidm:clientstream and downloaded packages from it, you need to first explicitly remove all the relevant installed content and disable theidm:clientstream before enabling theidm:DL1stream.For details on how to proceed, see Switching to a later stream.
ImportantTrying to enable a new stream without disabling the current one results in an error.
Procedure
To switch to the RPMs delivered through the
idm:DL1stream:# yum module enable idm:DL1 # yum distro-sync
To download the packages necessary for installing an IdM client:
# yum module install idm:DL1/client
Chapter 14. Installing an IdM client
The following sections describe how to configure a system as an Identity Management (IdM) client by using the ipa-client-install utility. Configuring a system as an IdM client enrolls it into an IdM domain and enables the system to use IdM services on IdM servers in the domain.
To install an Identity Management (IdM) client successfully, you must provide credentials that can be used to enroll the client.
14.1. Prerequisites
- You have prepared the system for IdM client installation. For details, see Preparing the system for IdM client installation.
14.2. Installing a client by using user credentials: Interactive installation
Follow this procedure to install an Identity Management (IdM) client interactively by using the credentials of an authorized user to enroll the system into the domain.
Prerequisites
-
Ensure you have the credentials of a user authorized to enroll clients into the IdM domain. This could be, for example, a
hostadminuser with the Enrollment Administrator role.
Procedure
Run the
ipa-client-installutility on the system that you want to configure as an IdM client.# ipa-client-install --mkhomedirAdd the
--enable-dns-updatesoption to update the DNS records with the IP address of the client system if either of the following conditions applies:- The IdM server the client will be enrolled with was installed with integrated DNS
- The DNS server on the network accepts DNS entry updates with the GSS-TSIG protocol
# ipa-client-install --enable-dns-updates --mkhomedirEnabling DNS updates is useful if your client:
- has a dynamic IP address issued using the Dynamic Host Configuration Protocol
- has a static IP address but it has just been allocated and the IdM server does not know about it
The installation script attempts to obtain all the required settings, such as DNS records, automatically.
If the SRV records are set properly in the IdM DNS zone, the script automatically discovers all the other required values and displays them. Enter
yesto confirm.Client hostname: client.example.com Realm: EXAMPLE.COM DNS Domain: example.com IPA Server: server.example.com BaseDN: dc=example,dc=com Continue to configure the system with these values? [no]: yesTo install the system with different values, enter
no. Then runipa-client-installagain, and specify the required values by adding command-line options toipa-client-install, for example:-
--hostname -
--realm -
--domain -
--server -
--mkhomedir
ImportantThe fully qualified domain name must be a valid DNS name:
-
Only numbers, alphabetic characters, and hyphens (
-) are allowed. For example, underscores are not allowed and can cause DNS failures. - The host name must be all lower-case. No capital letters are allowed.
-
- If the script fails to obtain some settings automatically, it prompts you for the values.
The script prompts for a user whose identity will be used to enroll the client. This could be, for example, a
hostadminuser with the Enrollment Administrator role:User authorized to enroll computers:
hostadminPassword forhostadmin@EXAMPLE.COM:The installation script now configures the client. Wait for the operation to complete.
Client configuration complete.
Additional resources
-
For details on how the client installation script searches for the DNS records, see the
DNS Autodiscoverysection in theipa-client-install(1) man page.
14.3. Installing a client by using a one-time password: Interactive installation
Follow this procedure to install an Identity Management (IdM) client interactively by using a one-time password to enroll the system into the domain.
Prerequisites
On a server in the domain, add the future client system as an IdM host. Use the
--randomoption with theipa host-addcommand to generate a one-time random password for the enrollment.NoteThe
ipa host-add <client_fqdn>command requires that the client FQDN is resolvable through DNS. If it is not resolvable, provide the IdM client system’s IP address using the--ip addressoption or alternatively, use the--forceoption.$ ipa host-add client.example.com --random -------------------------------------------------- Added host "client.example.com" -------------------------------------------------- Host name: client.example.com Random password: W5YpARl=7M.n Password: True Keytab: False Managed by: server.example.com
NoteThe generated password will become invalid after you use it to enroll the machine into the IdM domain. It will be replaced with a proper host keytab after the enrollment is finished.
Procedure
Run the
ipa-client-installutility on the system that you want to configure as an IdM client.Use the
--passwordoption to provide the one-time random password. Because the password often contains special characters, enclose it in single quotes (').# ipa-client-install --mkhomedir --password=passwordAdd the
--enable-dns-updatesoption to update the DNS records with the IP address of the client system if either of the following conditions applies:- The IdM server the client will be enrolled with was installed with integrated DNS
- The DNS server on the network accepts DNS entry updates with the GSS-TSIG protocol
# ipa-client-install --password 'W5YpARl=7M.n' --enable-dns-updates --mkhomedirEnabling DNS updates is useful if your client:
- has a dynamic IP address issued using the Dynamic Host Configuration Protocol
- has a static IP address but it has just been allocated and the IdM server does not know about it
The installation script attempts to obtain all the required settings, such as DNS records, automatically.
If the SRV records are set properly in the IdM DNS zone, the script automatically discovers all the other required values and displays them. Enter
yesto confirm.Client hostname: client.example.com Realm: EXAMPLE.COM DNS Domain: example.com IPA Server: server.example.com BaseDN: dc=example,dc=com Continue to configure the system with these values? [no]: yesTo install the system with different values, enter
no. Then runipa-client-installagain, and specify the required values by adding command-line options toipa-client-install, for example:-
--hostname -
--realm -
--domain -
--server -
--mkhomedir
ImportantThe fully qualified domain name must be a valid DNS name:
-
Only numbers, alphabetic characters, and hyphens (
-) are allowed. For example, underscores are not allowed and can cause DNS failures. - The host name must be all lower-case. No capital letters are allowed.
-
- If the script fails to obtain some settings automatically, it prompts you for the values.
The installation script now configures the client. Wait for the operation to complete.
Client configuration complete.
Additional resources
-
For details on how the client installation script searches for the DNS records, see the
DNS Autodiscoverysection in theipa-client-install(1) man page.
14.4. Installing a client: Non-interactive installation
For a non-interactive installation, you must provide all required information to the ipa-client-install utility using command-line options. The following sections describe the minimum required options for a non-interactive installation.
- Options for the intended authentication method for client enrollment
The available options are:
-
--principaland--passwordto specify the credentials of a user authorized to enroll clients -
--randomto specify a one-time random password generated for the client -
--keytabto specify the keytab from a previous enrollment
-
- The option for unattended installation
The
--unattendedoption lets the installation run without requiring user confirmation.If the SRV records are set properly in the IdM DNS zone, the script automatically discovers all the other required values. If the script cannot discover the values automatically, provide them using command-line options, such as:
--hostnameto specify a static fully qualified domain name (FQDN) for the client machine.ImportantThe FQDN must be a valid DNS name:
- Only numbers, alphabetic characters, and hyphens (-) are allowed. For example, underscores are not allowed and can cause DNS failures.
- The host name must be all lower-case. No capital letters are allowed.
-
--domainto specify the primary DNS domain of an existing IdM deployment, such asexample.com. The name is a lowercase version of the IdM Kerberos realm name. -
--serverto specify the FQDN of the IdM server to connect to. When this option is used, DNS autodiscovery for Kerberos is disabled and a fixed list of KDC and Admin servers is configured. Under normal circumstances, this option is not needed as the list of servers is retrieved from the primary IdM DNS domain. -
--realmto specify the Kerberos realm of an existing IdM deployment. Usually it is an uppercase version of the primary DNS domain used by the IdM installation. Under normal circumstances, this option is not needed as the realm name is retrieved from the IdM server.
An example of a basic ipa-client-install command for non-interactive installation:
# ipa-client-install --password 'W5YpARl=7M.n' --mkhomedir --unattended
An example of an ipa-client-install command for non-interactive installation with more options specified:
# ipa-client-install --password 'W5YpARl=7M.n' --domain idm.example.com --server server.idm.example.com --realm IDM.EXAMPLE.COM --mkhomedir --unattendedAdditional resources
-
For a complete list of options accepted by
ipa-client-install, see the ipa-client-install(1) man page.
14.5. Removing pre-IdM configuration after installing a client
The ipa-client-install script does not remove any previous LDAP and System Security Services Daemon (SSSD) configuration from the /etc/openldap/ldap.conf and /etc/sssd/sssd.conf files. If you modified the configuration in these files before installing the client, the script adds the new client values, but comments them out. For example:
BASE dc=example,dc=com URI ldap://ldap.example.com #URI ldaps://server.example.com # modified by IPA #BASE dc=ipa,dc=example,dc=com # modified by IPA
To apply the new Identity Management (IdM)} configuration values:
-
Open
/etc/openldap/ldap.confand/etc/sssd/sssd.conf. - Delete the previous configuration.
- Uncomment the new IdM configuration.
-
Server processes that rely on system-wide LDAP configuration might require a restart to apply the changes. Applications that use
openldaplibraries typically import the configuration when started.
14.6. Testing an IdM client
The command-line interface informs you that the ipa-client-install was successful, but you can also do your own test.
To test that the Identity Management (IdM) client can obtain information about users defined on the server, check that you are able to resolve a user defined on the server. For example, to check the default admin user:
[user@client ~]$ id admin
uid=1254400000(admin) gid=1254400000(admins) groups=1254400000(admins)
To test that authentication works correctly, su to a root user from a non-root user:
[user@client ~]$ su -
Last login: Thu Oct 18 18:39:11 CEST 2018 from 192.168.122.1 on pts/0
[root@client ~]#14.7. Connections performed during an IdM client installation
Requests performed during an IdM client installation lists the operations performed by ipa-client-install, the Identity Management (IdM) client installation tool.
Table 14.1. Requests performed during an IdM client installation
| Operation | Protocol used | Purpose |
|---|---|---|
| DNS resolution against the DNS resolvers configured on the client system | DNS | To discover the IP addresses of IdM servers; (optionally) to add A/AAAA and SSHFP records |
| Requests to ports 88 (TCP/TCP6 and UDP/UDP6) on an IdM replica | Kerberos | To obtain a Kerberos ticket |
| JSON-RPC calls to the IdM Apache-based web-service on discovered or configured IdM servers | HTTPS | IdM client enrollment; retrieval of CA certificate chain if LDAP method fails; request for a certificate issuance if required |
| Requests over TCP/TCP6 to ports 389 on IdM servers, using SASL GSSAPI authentication, plain LDAP, or both | LDAP | IdM client enrollment; identity retrieval by SSSD processes; Kerberos key retrieval for the host principal |
| Network time protocol (NTP) discovery and resolution (optionally) | NTP | To synchronize time between the client system and an NTP server |
14.8. IdM client’s communications with the server during post-installation deployment
The client side of Identity Management (IdM) framework is implemented with two different applications:
-
The
ipacommand-line interface (CLI) - (optional) the browser-based Web UI
CLI post-installation operations shows the operations performed by the CLI during an IdM client post-installation deployment. Web UI post-installation operations shows the operations performed by the Web UI during an IdM client post-installation deployment.
Table 14.2. CLI post-installation operations
| Operation | Protocol used | Purpose |
|---|---|---|
| DNS resolution against the DNS resolvers configured on the client system | DNS | To discover the IP addresses of IdM servers |
| Requests to ports 88 (TCP/TCP6 and UDP/UDP6) and 464 (TCP/TCP6 and UDP/UDP6) on an IdM replica | Kerberos | To obtain a Kerberos ticket; change a Kerberos password; authenticate to the IdM Web UI |
| JSON-RPC calls to the IdM Apache-based web-service on discovered or configured IdM servers | HTTPS |
any |
Table 14.3. Web UI post-installation operations
| Operation | Protocol used | Purpose |
|---|---|---|
| JSON-RPC calls to the IdM Apache-based web-service on discovered or configured IdM servers | HTTPS | To retrieve the IdM Web UI pages |
Additional resources
-
SSSD communication patterns for more information about how the
SSSDdaemon communicates with the services available on the IdM and Active Directory servers. -
Certmonger communication patterns for more information about how the
certmongerdaemon communicates with the services available on the IdM and Active Directory servers.
14.9. SSSD communication patterns
The System Security Services Daemon (SSSD) is a system service to access remote directories and authentication mechanisms. If configured on an Identity Management IdM client, it connects to the IdM server, which provides authentication, authorization and other identity and policy information. If the IdM server is in a trust relationships with Active Directory (AD), SSSD also connects to AD to perform authentication for AD users using the Kerberos protocol. By default, SSSD uses Kerberos to authenticate any non-local user. In special situations, SSSD might be configured to use the LDAP protocol instead.
The SSSD can be configured to communicate with multiple servers. The tables below show common communication patterns for SSSD in IdM.
Table 14.4. Communication patterns of SSSD on IdM clients when talking to IdM servers
| Operation | Protocol used | Purpose |
|---|---|---|
| DNS resolution against the DNS resolvers configured on the client system | DNS | To discover the IP addresses of IdM servers |
| Requests to ports 88 (TCP/TCP6 and UDP/UDP6), 464 (TCP/TCP6 and UDP/UDP6), and 749 (TCP/TCP6) on an Identity Management replica and Active Directory domain controllers | Kerberos | To obtain a Kerberos ticket; to change a Kerberos password |
| Requests over TCP/TCP6 to ports 389 on IdM servers, using SASL GSSAPI authentication, plain LDAP, or both | LDAP | To obtain information about IdM users and hosts, download HBAC and sudo rules, automount maps, the SELinux user context, public SSH keys, and other information stored in IdM LDAP |
| (optionally) In case of smart-card authentication, requests to the Online Certificate Status Protocol (OCSP) responder, if it is configured. This often is done via port 80, but it depends on the actual value of the OCSP responder URL in a client certificate. | HTTP | To obtain information about the status of the certificate installed in the smart card |
Table 14.5. Communication patterns of SSSD on IdM servers acting as trust agents when talking to Active Directory Domain Controllers
| Operation | Protocol used | Purpose |
|---|---|---|
| DNS resolution against the DNS resolvers configured on the client system | DNS | To discover the IP addresses of IdM servers |
| Requests to ports 88 (TCP/TCP6 and UDP/UDP6), 464 (TCP/TCP6 and UDP/UDP6), and 749 (TCP/TCP6) on an Identity Management replica and Active Directory domain controllers | Kerberos | To obtain a Kerberos ticket; change a Kerberos password; administer Kerberos remotely |
| Requests to ports 389 (TCP/TCP6 and UDP/UDP6) and 3268 (TCP/TCP6) | LDAP | To query Active Directory user and group information; to discover Active Directory domain controllers |
| (optionally) In case of smart-card authentication, requests to the Online Certificate Status Protocol (OCSP) responder, if it is configured. This often is done via port 80, but it depends on the actual value of the OCSP responder URL in a client certificate. | HTTP | To obtain information about the status of the certificate installed in the smart card |
Additional resources
14.10. Certmonger communication patterns
Certmonger is a daemon running on Identity Management (IdM) servers and IdM clients to allow a timely renewal of SSL certificates associated with the services on the host. The Table 14.6, “Certmonger communication patterns” shows the operations performed by the certmonger utility on IdM servers.
Table 14.6. Certmonger communication patterns
| Operation | Protocol used | Purpose |
|---|---|---|
| DNS resolution against the DNS resolvers configured on the client system | DNS | To discover the IP addresses of IdM servers |
| Requests to ports 88 (TCP/TCP6 and UDP/UDP6) and 464 (TCP/TCP6 and UDP/UDP6) on an IdM replica | Kerberos | To obtain a Kerberos ticket |
| JSON-RPC calls to the IdM Apache-based web-service on discovered or configured IdM servers | HTTPS | To request new certificates |
| Access over port 8080 (TCP/TCP6) on the IdM server | HTTP | To obtain an Online Certificate Status Protocol (OCSP) responder and certificate status |
| (on the first installed server or on the server where certificate tracking has been transferred) Access over port 8443 (TCP/TCP6) on the IdM server | HTTPS |
To administer the Certificate Authority on the IdM server (only during IdM server and replica installation). |
Additional resources
Chapter 15. Installing an IdM client with Kickstart
A Kickstart enrollment automatically adds a new system to the Identity Management (IdM) domain at the time Red Hat Enterprise Linux is installed.
15.1. Installing a client with Kickstart
Follow this procedure to use a Kickstart file to install an Identity Management (IdM) client.
Prerequisites
-
Do not start the
sshdservice prior to the kickstart enrollment. Startingsshdbefore enrolling the client generates the SSH keys automatically, but the Kickstart file in Section 15.2, “Kickstart file for client installation” uses a script for the same purpose, which is the preferred solution.
Procedure
Pre-create the host entry on the IdM server, and set a temporary password for the entry:
$ ipa host-add client.example.com --password=secretThe password is used by Kickstart to authenticate during the client installation and expires after the first authentication attempt. After the client is successfully installed, it authenticates using its keytab.
-
Create a Kickstart file with the contents described in Section 15.2, “Kickstart file for client installation”. Make sure that network is configured properly in the Kickstart file using the
networkcommand. - Use the Kickstart file to install the IdM client.
15.2. Kickstart file for client installation
You can use a Kickstart file to install an Identity Management (IdM) client. The contents of the Kickstart file must meet certain requirements as outlined here.
- The
ipa-clientpackage in the list of packages to install Add the
ipa-clientpackage to the %packages section of the Kickstart file. For example:%packages ...
ipa-client...- Post-installation instructions for the IdM client
The post-installation instructions must include:
- An instruction for ensuring SSH keys are generated before enrollment
An instruction to run the
ipa-client-installutility, while specifying:- All the required information to access and configure the IdM domain services
- The password which you set when pre-creating the client host on the IdM server. in Section 15.1, “Installing a client with Kickstart”.
For example, the post-installation instructions for a Kickstart installation that uses a one-time password and retrieves the required options from the command line rather than via DNS can look like this:
%post --log=/root/ks-post.log # Generate SSH keys; ipa-client-install uploads them to the IdM server by default /usr/libexec/openssh/sshd-keygen rsa # Run the client install script /usr/sbin/ipa-client-install --hostname=client.example.com --domain=EXAMPLE.COM --enable-dns-updates --mkhomedir -w secret --realm=EXAMPLE.COM --server=server.example.com
Optionally, you can also include other options in the Kickstart file, such as:
-
For a non-interactive installation, add the
--unattendedoption toipa-client-install. To let the client installation script request a certificate for the machine:
-
Add the
--request-certoption toipa-client-install. Set the system bus address to
/dev/nullfor both thegetcertandipa-client-installutility in the Kickstartchrootenvironment. To do this, add these lines to the post-installation instructions in the Kickstart file before theipa-client-installinstruction:# env DBUS_SYSTEM_BUS_ADDRESS=unix:path=/dev/null getcert list # env DBUS_SYSTEM_BUS_ADDRESS=unix:path=/dev/null ipa-client-install
-
Add the
15.3. Testing an IdM client
The command-line interface informs you that the ipa-client-install was successful, but you can also do your own test.
To test that the Identity Management (IdM) client can obtain information about users defined on the server, check that you are able to resolve a user defined on the server. For example, to check the default admin user:
[user@client ~]$ id admin
uid=1254400000(admin) gid=1254400000(admins) groups=1254400000(admins)
To test that authentication works correctly, su to a root user from a non-root user:
[user@client ~]$ su -
Last login: Thu Oct 18 18:39:11 CEST 2018 from 192.168.122.1 on pts/0
[root@client ~]#Chapter 16. Troubleshooting IdM client installation
The following sections describe how to gather information about a failing IdM client installation, and how to resolve common installation issues.
16.1. Reviewing IdM client installation errors
When you install an Identity Management (IdM) client, debugging information is appended to /var/log/ipaclient-install.log. If a client installation fails, the installer logs the failure and rolls back changes to undo any modifications to the host. The reason for the installation failure may not be at the end of the log file, as the installer also logs the roll back procedure.
To troubleshoot a failing IdM client installation, review lines labeled ScriptError in the /var/log/ipaclient-install.log file and use this information to resolve any corresponding issues.
Prerequisites
-
You must have
rootprivileges to display the contents of IdM log files.
Procedure
Use the
greputility to retrieve any occurrences of the keywordScriptErrorfrom the/var/log/ipaserver-install.logfile.[user@server ~]$ sudo grep ScriptError /var/log/ipaclient-install.log [sudo] password for user: 2020-05-28T18:24:50Z DEBUG The ipa-client-install command failed, exception: ScriptError: One of password / principal / keytab is required.
To review a log file interactively, open the end of the log file using the
lessutility and use the ↑ and ↓ arrow keys to navigate.[user@server ~]$ sudo less -N +G /var/log/ipaclient-install.log
Additional resources
-
If you are unable to resolve a failing IdM client installation, and you have a Red Hat Technical Support subscription, open a Technical Support case at the Red Hat Customer Portal and provide an
sosreportof the client. -
The
sosreportutility collects configuration details, logs and system information from a RHEL system. For more information about thesosreportutility, see What is an sosreport and how to create one in Red Hat Enterprise Linux?.
16.2. Resolving issues if the client installation fails to update DNS records
The IdM client installer issues nsupdate commands to create PTR, SSHFP, and additional DNS records. However, the installation process fails if the client is unable to update DNS records after installing and configuring the client software.
To fix this problem, verify the configuration and review DNS errors in /var/log/client-install.log.
Prerequisites
- You are using IdM DNS as the DNS solution for your IdM environment
Procedure
Ensure that dynamic updates for the DNS zone the client is in are enabled:
[user@server ~]$ ipa dnszone-mod idm.example.com. --dynamic-update=TRUEEnsure that the IdM server running the DNS service has port 53 opened for both TCP and UDP protocols.
[user@server ~]$ sudo firewall-cmd --permanent --add-port=53/tcp --add-port=53/udp [sudo] password for user: success [user@server ~]$ firewall-cmd --runtime-to-permanent success
Use the
greputility to retrieve the contents ofnsupdatecommands from/var/log/client-install.logto see which DNS record updates are failing.[user@server ~]$ sudo grep nsupdate /var/log/ipaclient-install.log
Additional resources
-
If you are unable to resolve a failing installation, and you have a Red Hat Technical Support subscription, open a Technical Support case at the Red Hat Customer Portal and provide an
sosreportof the client. -
The
sosreportutility collects configuration details, logs and system information from a RHEL system. For more information about thesosreportutility, see What is an sosreport and how to create one in Red Hat Enterprise Linux?.
16.3. Resolving issues if the client installation fails to join the IdM Kerberos realm
The IdM client installation process fails if the client is unable to join the IdM Kerberos realm.
Joining realm failed: Failed to add key to the keytab child exited with 11 Installation failed. Rolling back changes.
This failure can be caused by an empty Kerberos keytab.
Prerequisites
-
Removing system files requires
rootprivileges.
Procedure
Remove
/etc/krb5.keytab.[user@client ~]$ sudo rm /etc/krb5.keytab [sudo] password for user: [user@client ~]$ ls /etc/krb5.keytab ls: cannot access '/etc/krb5.keytab': No such file or directory- Retry the IdM client installation.
Additional resources
-
If you are unable to resolve a failing installation, and you have a Red Hat Technical Support subscription, open a Technical Support case at the Red Hat Customer Portal and provide an
sosreportof the client. -
The
sosreportutility collects configuration details, logs and system information from a RHEL system. For more information about thesosreportutility, see What is an sosreport and how to create one in Red Hat Enterprise Linux?.
16.4. Additional resources
- To troubleshoot installing the first IdM server, see Troubleshooting IdM server installation.
- To troubleshoot installing an IdM replica, see Troubleshooting IdM replica installation.
Chapter 17. Re-enrolling an IdM client
If a client machine has been destroyed and lost connection with the IdM servers, for example due to the client’s hardware failure, and you still have its keytab, you can re-enroll the client. In this scenario, you want to get the client back in the IdM environment with the same hostname.
17.1. Client re-enrollment in IdM
If a client machine has been destroyed and lost connection with the IdM servers, for example due to the client’s hardware failure, and you still have its keytab, you can re-enroll the client. In this scenario, you want to get the client back in the IdM environment with the same hostname.
During the re-enrollment, the client generates a new Kerberos key and SSH keys, but the identity of the client in the LDAP database remains unchanged. After the re-enrollment, the host has its keys and other information in the same LDAP object with the same FQDN as previously, before the machine’s loss of connection with the IdM servers.
You can only re-enroll clients whose domain entry is still active. If you uninstalled a client (using ipa-client-install --uninstall) or disabled its host entry (using ipa host-disable), you cannot re-enroll it.
You cannot re-enroll a client after you have renamed it. This is because in IdM, the key attribute of the client’s entry in LDAP is the client’s hostname, its FQDN. As opposed to re-enrolling a client, during which the client’s LDAP object remains unchanged, the outcome of renaming a client is that the client has its keys and other information in a different LDAP object with a new FQDN. Therefore, the only way to rename a client is to uninstall the host from IdM, change the host’s hostname, and install it as an IdM client with a new name. For details on how to rename a client, see Renaming IdM client systems.
What happens during client re-enrollment
During re-enrollment, IdM:
- Revokes the original host certificate
- Creates new SSH keys
- Generates a new keytab
17.2. Re-enrolling a client by using user credentials: Interactive re-enrollment
Follow this procedure to re-enroll an Identity Management (IdM) client interactively by using the credentials of an authorized user.
- Re-create the client machine with the same host name.
Run the
ipa-client-install --force-joincommand on the client machine:# ipa-client-install --force-joinThe script prompts for a user whose identity will be used to re-enroll the client. This could be, for example, a
hostadminuser with the Enrollment Administrator role:User authorized to enroll computers:
hostadminPassword forhostadmin@EXAMPLE.COM:
Additional resources
- For a more detailed procedure on enrolling clients by using an authorized user’s credentials, see Installing a client by using user credentials: Interactive installation.
17.3. Re-enrolling a client by using the client keytab: Non-interactive re-enrollment
Prerequisites
-
Back up the original client keytab file, for example in the
/tmpor/rootdirectory.
Procedure
Follow this procedure to re-enroll an Identity Management (IdM) client non-interactively by using the keytab of the client system. For example, re-enrollment using the client keytab is appropriate for an automated installation.
- Re-create the client machine with the same host name.
-
Copy the keytab file from the backup location to the
/etc/directory on the re-created client machine. Use the
ipa-client-installutility to re-enroll the client, and specify the keytab location with the--keytaboption:# ipa-client-install --keytab /etc/krb5.keytabNoteThe keytab specified in the
--keytaboption is only used when authenticating to initiate the enrollment. During the re-enrollment, IdM generates a new keytab for the client.
17.4. Testing an IdM client
The command-line interface informs you that the ipa-client-install was successful, but you can also do your own test.
To test that the Identity Management (IdM) client can obtain information about users defined on the server, check that you are able to resolve a user defined on the server. For example, to check the default admin user:
[user@client ~]$ id admin
uid=1254400000(admin) gid=1254400000(admins) groups=1254400000(admins)
To test that authentication works correctly, su to a root user from a non-root user:
[user@client ~]$ su -
Last login: Thu Oct 18 18:39:11 CEST 2018 from 192.168.122.1 on pts/0
[root@client ~]#Chapter 18. Uninstalling an IdM client
As an administrator, you can remove an Identity Management (IdM) client from the environment.
18.1. Uninstalling an IdM client
Uninstalling a client removes the client from the Identity Management (IdM) domain, along with all of the specific IdM configuration of system services, such as System Security Services Daemon (SSSD). This restores the previous configuration of the client system.
Procedure
Enter the
ipa-client-install --uninstallcommand:[root@client ~]# ipa-client-install --uninstallOptional: Check that you cannot obtain a Kerberos ticket-granting ticket (TGT) for an IdM user:
[root@client ~]# kinit admin kinit: Client 'admin@EXAMPLE.COM' not found in Kerberos database while getting initial credentials [root@client ~]#If a Kerberos TGT ticket has been returned successfully, follow the additional uninstallation steps in Uninstalling an IdM client: additional steps after multiple past installations.
On the client, remove old Kerberos principals from each identified keytab other than
/etc/krb5.keytab:[root@client ~]# ipa-rmkeytab -k /path/to/keytab -r EXAMPLE.COMOn an IdM server, remove all DNS entries for the client host from IdM:
[root@server ~]# ipa dnsrecord-del Record name: old-client-name Zone name: idm.example.com No option to delete specific record provided. Delete all? Yes/No (default No): yes ------------------------ Deleted record "old-client-name"On the IdM server, remove the client host entry from the IdM LDAP server. This removes all services and revokes all certificates issued for that host:
[root@server ~]# ipa host-del client.idm.example.comImportantRemoving the client host entry from the IdM LDAP server is crucial if you think you might re-enroll the client in the future, with a different IP address or a different hostname.
18.2. Uninstalling an IdM client: additional steps after multiple past installations
If you install and uninstall a host as an Identity Management (IdM) client multiple times, the uninstallation procedure might not restore the pre-IdM Kerberos configuration.
In this situation, you must manually remove the IdM Kerberos configuration. In extreme cases, you must reinstall the operating system.
Prerequisites
-
You have used the
ipa-client-install --uninstallcommand to uninstall the IdM client configuration from the host. However, you can still obtain a Kerberos ticket-granting ticket (TGT) for an IdM user from the IdM server. -
You have checked that the
/var/lib/ipa-client/sysrestoredirectory is empty and hence you cannot restore the prior-to-IdM-client configuration of the system using the files in the directory.
Procedure
Check the
/etc/krb5.conf.ipafile:If the contents of the
/etc/krb5.conf.ipafile are the same as the contents of thekrb5.conffile prior to the installation of the IdM client, you can:Remove the
/etc/krb5.conffile:# rm /etc/krb5.confRename the
/etc/krb5.conf.ipafile into/etc/krb5.conf:# mv /etc/krb5.conf.ipa /etc/krb5.conf
-
If the contents of the
/etc/krb5.conf.ipafile are not the same as the contents of thekrb5.conffile prior to the installation of the IdM client, you can at least restore the Kerberos configuration to the state directly after the installation of the operating system:
Re-install the
krb5-libspackage:# yum reinstall krb5-libsAs a dependency, this command will also re-install the
krb5-workstationpackage and the original version of the/etc/krb5.conffile.
-
Remove the
var/log/ipaclient-install.logfile if present.
Verification steps
Try to obtain IdM user credentials. This should fail:
[root@r8server ~]# kinit admin kinit: Client 'admin@EXAMPLE.COM' not found in Kerberos database while getting initial credentials [root@r8server ~]#
The /etc/krb5.conf file is now restored to its factory state. As a result, you cannot obtain a Kerberos TGT for an IdM user on the host.
Chapter 19. Renaming IdM client systems
The following sections describe how to change the host name of an Identity Management (IdM) client system.
Renaming a client is a manual procedure. Do not perform it unless changing the host name is absolutely required.
Renaming an IdM client involves:
- Preparing the host. For details, see Preparing an IdM client for its renaming.
- Uninstalling the IdM client from the host. For details, see Uninstalling a client.
- Renaming the host. For details, see Renaming a client.
- Installing the IdM client on the host with the new name. For details, see Reinstalling a client.
- Configuring the host after the IdM client installation. For details, see Re-adding services, re-generating certificates, and re-adding host groups.
19.1. Preparing an IdM client for its renaming
Before uninstalling the current client, make note of certain settings for the client. You will apply this configuration after re-enrolling the machine with a new host name.
Identify which services are running on the machine:
Use the
ipa service-findcommand, and identify services with certificates in the output:$ ipa service-find old-client-name.example.com-
In addition, each host has a default host service which does not appear in the
ipa service-findoutput. The service principal for the host service, also called a host principal, ishost/old-client-name.example.com.
For all service principals displayed by
ipa service-find old-client-name.example.com, determine the location of the corresponding keytabs on theold-client-name.example.comsystem:# find / -name "*.keytab"Each service on the client system has a Kerberos principal in the form service_name/host_name@REALM, such as
ldap/old-client-name.example.com@EXAMPLE.COM.Identify all host groups to which the machine belongs.
# ipa hostgroup-find old-client-name.example.com
19.2. Uninstalling an IdM client
Uninstalling a client removes the client from the Identity Management (IdM) domain, along with all of the specific IdM configuration of system services, such as System Security Services Daemon (SSSD). This restores the previous configuration of the client system.
Procedure
Enter the
ipa-client-install --uninstallcommand:[root@client ~]# ipa-client-install --uninstallOptional: Check that you cannot obtain a Kerberos ticket-granting ticket (TGT) for an IdM user:
[root@client ~]# kinit admin kinit: Client 'admin@EXAMPLE.COM' not found in Kerberos database while getting initial credentials [root@client ~]#If a Kerberos TGT ticket has been returned successfully, follow the additional uninstallation steps in Uninstalling an IdM client: additional steps after multiple past installations.
On the client, remove old Kerberos principals from each identified keytab other than
/etc/krb5.keytab:[root@client ~]# ipa-rmkeytab -k /path/to/keytab -r EXAMPLE.COMOn an IdM server, remove all DNS entries for the client host from IdM:
[root@server ~]# ipa dnsrecord-del Record name: old-client-name Zone name: idm.example.com No option to delete specific record provided. Delete all? Yes/No (default No): yes ------------------------ Deleted record "old-client-name"On the IdM server, remove the client host entry from the IdM LDAP server. This removes all services and revokes all certificates issued for that host:
[root@server ~]# ipa host-del client.idm.example.comImportantRemoving the client host entry from the IdM LDAP server is crucial if you think you might re-enroll the client in the future, with a different IP address or a different hostname.
19.3. Uninstalling an IdM client: additional steps after multiple past installations
If you install and uninstall a host as an Identity Management (IdM) client multiple times, the uninstallation procedure might not restore the pre-IdM Kerberos configuration.
In this situation, you must manually remove the IdM Kerberos configuration. In extreme cases, you must reinstall the operating system.
Prerequisites
-
You have used the
ipa-client-install --uninstallcommand to uninstall the IdM client configuration from the host. However, you can still obtain a Kerberos ticket-granting ticket (TGT) for an IdM user from the IdM server. -
You have checked that the
/var/lib/ipa-client/sysrestoredirectory is empty and hence you cannot restore the prior-to-IdM-client configuration of the system using the files in the directory.
Procedure
Check the
/etc/krb5.conf.ipafile:If the contents of the
/etc/krb5.conf.ipafile are the same as the contents of thekrb5.conffile prior to the installation of the IdM client, you can:Remove the
/etc/krb5.conffile:# rm /etc/krb5.confRename the
/etc/krb5.conf.ipafile into/etc/krb5.conf:# mv /etc/krb5.conf.ipa /etc/krb5.conf
-
If the contents of the
/etc/krb5.conf.ipafile are not the same as the contents of thekrb5.conffile prior to the installation of the IdM client, you can at least restore the Kerberos configuration to the state directly after the installation of the operating system:
Re-install the
krb5-libspackage:# yum reinstall krb5-libsAs a dependency, this command will also re-install the
krb5-workstationpackage and the original version of the/etc/krb5.conffile.
-
Remove the
var/log/ipaclient-install.logfile if present.
Verification steps
Try to obtain IdM user credentials. This should fail:
[root@r8server ~]# kinit admin kinit: Client 'admin@EXAMPLE.COM' not found in Kerberos database while getting initial credentials [root@r8server ~]#
The /etc/krb5.conf file is now restored to its factory state. As a result, you cannot obtain a Kerberos TGT for an IdM user on the host.
19.4. Renaming the host system
Rename the machine as required. For example:
# hostnamectl set-hostname new-client-name.example.comYou can now re-install the Identity Management (IdM) client to the IdM domain with the new host name.
19.5. Re-installing an IdM client
Install an client on your renamed host following the procedure described in Installing a client.
19.6. Re-adding services, re-generating certificates, and re-adding host groups
Procedure
On the Identity Management (IdM) server, add a new keytab for every service identified in the Preparing an IdM client for its renaming.
[root@server ~]# ipa service-add service_name/new-client-nameGenerate certificates for services that had a certificate assigned in the Preparing an IdM client for its renaming. You can do this:
- Using the IdM administration tools
-
Using the
certmongerutility
- Re-add the client to the host groups identified in the Preparing an IdM client for its renaming.
Chapter 20. Preparing the system for IdM replica installation
The following links list the requirements to install an Identity Management (IdM) replica. Before the installation, verify your system meets these requirements.
- Ensure the target system meets the general requirements for IdM server installation.
- Ensure the target system meets the additional, version requirements for IdM replica installation.
Authorize the target system for enrollment into the IdM domain. For more information, see one of the following sections that best fits your needs:
Additional resources
20.1. Replica version requirements
Red Hat Enterprise Linux (RHEL) 8 replicas only work with Identity Management (IdM) servers running on RHEL 7.4 and later. Before introducing IdM replicas running on RHEL 8 into an existing deployment, upgrade all IdM servers to RHEL 7.4 or later, and change the domain level to 1.
In addition, the replica must be running the same or later version of IdM. For example:
- You have an IdM server installed on Red Hat Enterprise Linux 8 and it uses IdM 4.x packages.
- You must install the replica also on Red Hat Enterprise Linux 8 or later and use IdM version 4.x or later.
This ensures that configuration can be properly copied from the server to the replica.
For details on how to display the IdM software version, see Methods for displaying IdM software version.
20.2. Methods for displaying IdM software version
You can display the IdM version number with:
- The IdM WebUI
-
ipacommands -
rpmcommands
- Displaying version through the WebUI
In the IdM WebUI, the software version can be displayed by choosing
Aboutfrom the username menu at the upper-right.
- Displaying version with
ipacommands From the command line, use the
ipa --versioncommand.[root@server ~]# ipa --version VERSION: 4.8.0, API_VERSION: 2.233
- Displaying version with
rpmcommands If IdM services are not operating properly, you can use the
rpmutility to determine the version number of theipa-serverpackage that is currently installed.[root@server ~]# rpm -q ipa-server ipa-server-4.8.0-11.module+el8.1.0+4247+9f3fd721.x86_64
20.3. Authorizing the installation of a replica on an IdM client
When installing a replica on an existing Identity Management (IdM) client by running the ipa-replica-install utility, choose Method 1 or Method 2 below to authorize the replica installation. Choose Method 1 if one of the following applies:
- You want a senior system administrator to perform the initial part of the procedure and a junior administrator to perform the rest.
- You want to automate your replica installation.
- Method 1: the
ipaservershost group Log in to any IdM host as IdM admin:
$ kinit adminAdd the client machine to the
ipaservershost group:$ ipa hostgroup-add-member ipaservers --hosts client.idm.example.com Host-group: ipaservers Description: IPA server hosts Member hosts: server.idm.example.com, client.idm.example.com ------------------------- Number of members added 1 -------------------------
NoteMembership in the
ipaserversgroup grants the machine elevated privileges similar to the administrator’s credentials. Therefore, in the next step, theipa-replica-installutility can be run on the host successfully by a junior system administrator.- Method 2: a privileged user’s credentials
Choose one of the following methods to authorize the replica installation by providing a privileged user’s credentials:
-
Let Identity Management (IdM) prompt you for the credentials interactively after you start the
ipa-replica-installutility. This is the default behavior. Log in to the client as a privileged user immediately before running the
ipa-replica-installutility. The default privileged user isadmin:$ kinit admin
-
Let Identity Management (IdM) prompt you for the credentials interactively after you start the
Additional resources
- To start the installation procedure, see Installing an IdM replica.
- You can use an Ansible playbook to install IdM replicas. For more information, see Installing an Identity Management replica using an Ansible playbook.
20.4. Authorizing the installation of a replica on a system that is not enrolled into IdM
When installing a replica on a system that is not enrolled in the Identity Management (IdM) domain, the ipa-replica-install utility first enrolls the system as a client and then installs the replica components. For this scenario, choose Method 1 or Method 2 below to authorize the replica installation. Choose Method 1 if one of the following applies:
- You want a senior system administrator to perform the initial part of the procedure and a junior administrator to perform the rest.
- You want to automate your replica installation.
- Method 1: a random password generated on an IdM server
Enter the following commands on any server in the domain:
Log in as the administrator.
$ kinit adminAdd the external system as an IdM host. Use the
--randomoption with theipa host-addcommand to generate a random one-time password to be used for the subsequent replica installation.$ ipa host-add replica.example.com --random -------------------------------------------------- Added host "replica.example.com" -------------------------------------------------- Host name: replica.example.com Random password: W5YpARl=7M.n Password: True Keytab: False Managed by: server.example.comThe generated password will become invalid after you use it to enroll the machine into the IdM domain. It will be replaced with a proper host keytab after the enrollment is finished.
Add the system to the
ipaservershost group.$ ipa hostgroup-add-member ipaservers --hosts replica.example.com Host-group: ipaservers Description: IPA server hosts Member hosts: server.example.com, replica.example.com ------------------------- Number of members added 1 -------------------------
NoteMembership in the
ipaserversgroup grants the machine elevated privileges similar to the administrator’s credentials. Therefore, in the next step, theipa-replica-installutility can be run on the host successfully by a junior system administrator that provides the generated random password.- Method 2: a privileged user’s credentials
Using this method, you authorize the replica installation by providing a privileged user’s credentials. The default privileged user is
admin.No action is required prior to running the IdM replica installation utility. Add the principal name and password options (
--principal admin --admin-password password) to theipa-replica-installcommand directly during the installation.
Additional resources
- To start the installation procedure, see Installing an IdM replica.
- You can use an Ansible playbook to install IdM replicas. For more information, see Installing an Identity Management replica using an Ansible playbook.
Chapter 21. Installing an IdM replica
The following sections describe how to install an Identity Management (IdM) replica interactively, by using the command-line interface (CLI). The replica installation process copies the configuration of the existing server and installs the replica based on that configuration.
Red Hat recommends using Ansible roles to install replicas. By using Ansible roles, you can consistently install and customize multiple replicas.
Interactive and non-interactive methods that do not use Ansible are useful in topologies where, for example, the replica preparation is delegated to a user or a third party. You can also use these methods in geographically distributed topologies where you do not have access from the Ansible controller node.
Prerequisites
- You are installing one IdM replica at a time. The installation of multiple replicas at the same time is not supported.
Ensure your system is prepared for IdM replica installation.
ImportantIf this preparation is not performed, installing an IdM replica will fail.
For the individual types of replica installation procedures, see:
- Section 21.1, “Installing an IdM replica with integrated DNS and a CA”
- Section 21.2, “Installing an IdM replica with integrated DNS and no CA”
- Section 21.3, “Installing an IdM replica without integrated DNS and with a CA”
- Section 21.4, “Installing an IdM replica without integrated DNS and without a CA”
- Section 21.5, “Installing an IdM hidden replica”
To troubleshoot the replica installation procedure, see:
After the installation, see:
21.1. Installing an IdM replica with integrated DNS and a CA
Follow this procedure to install an Identity Management (IdM) replica:
- With integrated DNS
- With a certificate authority (CA)
You can do this to, for example, replicate the CA service for resiliency after installing an IdM server with an integrated CA.
When configuring a replica with a CA, the CA configuration of the replica must mirror the CA configuration of the other server.
For example, if the server includes an integrated IdM CA as the root CA, the new replica must also be installed with an integrated CA as the root CA. No other CA configuration is available in this case.
Including the --setup-ca option in the ipa-replica-install command copies the CA configuration of the initial server.
Prerequisites
- Ensure your system is prepared for an IdM replica installation.
Procedure
Enter
ipa-replica-installwith these options:-
--setup-dnsto configure the replica as a DNS server --forwarderto specify a per-server forwarder, or--no-forwarderif you do not want to use any per-server forwarders. To specify multiple per-server forwarders for failover reasons, use--forwardermultiple times.NoteThe
ipa-replica-installutility accepts a number of other options related to DNS settings, such as--no-reverseor--no-host-dns. For more information about them, see theipa-replica-install(1) man page.-
--setup-cato include a CA on the replica
For example, to set up a replica with an integrated DNS server and a CA that forwards all DNS requests not managed by the IdM servers to the DNS server running on IP 192.0.2.1:
# ipa-replica-install --setup-dns --forwarder 192.0.2.1 --setup-ca-
After the installation completes, add a DNS delegation from the parent domain to the IdM DNS domain. For example, if the IdM DNS domain is
idm.example.com, add a name server (NS) record to theexample.comparent domain.ImportantRepeat this step each time after you install an IdM DNS server.
21.2. Installing an IdM replica with integrated DNS and no CA
Follow this procedure to install an Identity Management (IdM) replica:
- With integrated DNS
- Without a certificate authority (CA) in an IdM environment in which a CA is already installed. The replica will forward all certificate operations to the IdM server with a CA installed.
Prerequisites
- Ensure your system is prepared for an IdM replica installation.
Procedure
Enter
ipa-replica-installwith these options:-
--setup-dnsto configure the replica as a DNS server -
--forwarderto specify a per-server forwarder, or--no-forwarderif you do not want to use any per-server forwarders. To specify multiple per-server forwarders for failover reasons, use--forwardermultiple times.
For example, to set up a replica with an integrated DNS server that forwards all DNS requests not managed by the IdM servers to the DNS server running on IP 192.0.2.1:
# ipa-replica-install --setup-dns --forwarder 192.0.2.1NoteThe
ipa-replica-installutility accepts a number of other options related to DNS settings, such as--no-reverseor--no-host-dns. For more information about them, see theipa-replica-install(1) man page.-
After the installation completes, add a DNS delegation from the parent domain to the IdM DNS domain. For example, if the IdM DNS domain is
idm.example.com, add a name server (NS) record to theexample.comparent domain.ImportantRepeat this step each time after you install an IdM DNS server.
21.3. Installing an IdM replica without integrated DNS and with a CA
Follow this procedure to install an Identity Management (IdM) replica:
- Without integrated DNS
- With a certificate authority (CA)
When configuring a replica with a CA, the CA configuration of the replica must mirror the CA configuration of the other server.
For example, if the server includes an integrated IdM CA as the root CA, the new replica must also be installed with an integrated CA as the root CA. No other CA configuration is available in this case.
Including the --setup-ca option in the ipa-replica-install command copies the CA configuration of the initial server.
Prerequisites
- Ensure your system is prepared for an IdM replica installation.
Procedure
Enter
ipa-replica-installwith the--setup-caoption.# ipa-replica-install --setup-ca
Add the newly created IdM DNS service records to your DNS server:
Export the IdM DNS service records into a file in the
nsupdateformat:$ ipa dns-update-system-records --dry-run --out dns_records_file.nsupdate
-
Submit a DNS update request to your DNS server using the
nsupdateutility and the dns_records_file.nsupdate file. For more information, see Updating External DNS Records Using nsupdate in RHEL 7 documentation. Alternatively, refer to your DNS server documentation for adding DNS records.
21.4. Installing an IdM replica without integrated DNS and without a CA
Follow this procedure to install an Identity Management (IdM) replica:
- Without integrated DNS
- Without a certificate authority (CA) by providing the required certificates manually. The assumption here is that the first server was installed without a CA.
You cannot install a server or replica using self-signed third-party server certificates because the imported certificate files must contain the full CA certificate chain of the CA that issued the LDAP and Apache server certificates.
Prerequisites
- Ensure your system is prepared for an IdM replica installation.
Procedure
Enter
ipa-replica-install, and provide the required certificate files by adding these options:-
--dirsrv-cert-file -
--dirsrv-pin -
--http-cert-file -
--http-pin
For details about the files that are provided using these options, see Section 5.1, “Certificates required to install an IdM server without a CA”.
For example:
# ipa-replica-install \ --dirsrv-cert-file /tmp/server.crt \ --dirsrv-cert-file /tmp/server.key \ --dirsrv-pin secret \ --http-cert-file /tmp/server.crt \ --http-cert-file /tmp/server.key \ --http-pin secret
NoteDo not add the
--ca-cert-fileoption. Theipa-replica-installutility takes this part of the certificate information automatically from the first server you installed.-
21.6. Testing an IdM replica
After creating a replica, check if the replica replicates data as expected. You can use the following procedure.
Procedure
Create a user on the new replica:
[admin@new_replica ~]$ ipa user-add test_userMake sure the user is visible on another replica:
[admin@another_replica ~]$ ipa user-show test_user
21.7. Connections performed during an IdM replica installation
Requests performed during an IdM replica installation lists the operations performed by ipa-replica-install, the Identity Management (IdM) replica installation tool.
Table 21.1. Requests performed during an IdM replica installation
| Operation | Protocol used | Purpose |
|---|---|---|
| DNS resolution against the DNS resolvers configured on the client system | DNS | To discover the IP addresses of IdM servers |
| Requests to ports 88 (TCP/TCP6 and UDP/UDP6) on the discovered IdM servers | Kerberos | To obtain a Kerberos ticket |
| JSON-RPC calls to the IdM Apache-based web-service on the discovered or configured IdM servers | HTTPS | IdM client enrollment; replica keys retrieval and certificate issuance if required |
| Requests over TCP/TCP6 to port 389 on the IdM server, using SASL GSSAPI authentication, plain LDAP, or both | LDAP | IdM client enrollment; CA certificate chain retrieval; LDAP data replication |
| Requests over TCP/TCP6 to port 22 on IdM server | SSH | To check if the connection is working |
| (optionally) Access over port 8443 (TCP/TCP6) on the IdM servers | HTTPS | To administer the Certificate Authority on the IdM server (only during IdM server and replica installation) |
Chapter 22. Troubleshooting IdM replica installation
The following sections describe the process for gathering information about a failing IdM replica installation, and how to resolve some common installation issues.
22.1. IdM replica installation error log files
When you install an Identity Management (IdM) replica, debugging information is appended to the following log files on the replica:
-
/var/log/ipareplica-install.log -
/var/log/ipareplica-conncheck.log -
/var/log/ipaclient-install.log -
/var/log/httpd/error_log -
/var/log/dirsrv/slapd-INSTANCE-NAME/access -
/var/log/dirsrv/slapd-INSTANCE-NAME/errors -
/var/log/ipaserver-install.log
The replica installation process also appends debugging information to the following log files on the IdM server the replica is contacting:
-
/var/log/httpd/error_log -
/var/log/dirsrv/slapd-INSTANCE-NAME/access -
/var/log/dirsrv/slapd-INSTANCE-NAME/errors
The last line of each log file reports success or failure, and ERROR and DEBUG entries provide additional context.
Additional resources
22.2. Reviewing IdM replica installation errors
To troubleshoot a failing IdM replica installation, review the errors at the end of the installation error log files on the new replica and the server, and use this information to resolve any corresponding issues.
Prerequisites
-
You must have
rootprivileges to display the contents of IdM log files.
Procedure
Use the
tailcommand to display the latest errors from the primary log file/var/log/ipareplica-install.log. The following example displays the last 10 lines.[user@replica ~]$ sudo tail -n 10 /var/log/ipareplica-install.log [sudo] password for user: func(installer) File "/usr/lib/python3.6/site-packages/ipaserver/install/server/replicainstall.py", line 424, in decorated func(installer) File "/usr/lib/python3.6/site-packages/ipaserver/install/server/replicainstall.py", line 785, in promote_check ensure_enrolled(installer) File "/usr/lib/python3.6/site-packages/ipaserver/install/server/replicainstall.py", line 740, in ensure_enrolled raise ScriptError("Configuration of client side components failed!") 2020-05-28T18:24:51Z DEBUG The ipa-replica-install command failed, exception: ScriptError: Configuration of client side components failed! 2020-05-28T18:24:51Z ERROR Configuration of client side components failed! 2020-05-28T18:24:51Z ERROR The ipa-replica-install command failed. See /var/log/ipareplica-install.log for more information
To review the log file interactively, open the end of the log file using the
lessutility and use the ↑ and ↓ arrow keys to navigate.[user@replica ~]$ sudo less -N +G /var/log/ipareplica-install.log(Optional) While
/var/log/ipareplica-install.logis the primary log file for a replica installation, you can gather additional troubleshooting information by repeating this review process with additional files on the replica and the server.On the replica:
[user@replica ~]$ sudo less -N +G /var/log/ipareplica-conncheck.log [user@replica ~]$ sudo less -N +G /var/log/ipaclient-install.log [user@replica ~]$ sudo less -N +G /var/log/httpd/error_log [user@replica ~]$ sudo less -N +G /var/log/dirsrv/slapd-INSTANCE-NAME/access [user@replica ~]$ sudo less -N +G /var/log/dirsrv/slapd-INSTANCE-NAME/errors [user@replica ~]$ sudo less -N +G /var/log/ipaserver-install.log
On the server:
[user@server ~]$ sudo less -N +G /var/log/httpd/error_log [user@server ~]$ sudo less -N +G /var/log/dirsrv/slapd-INSTANCE-NAME/access [user@server ~]$ sudo less -N +G /var/log/dirsrv/slapd-INSTANCE-NAME/errors
Additional resources
- IdM replica installation error log files
-
If you are unable to resolve a failing replica installation, and you have a Red Hat Technical Support subscription, open a Technical Support case at the Red Hat Customer Portal and provide an
sosreportof the replica and ansosreportof the server. -
The
sosreportutility collects configuration details, logs and system information from a RHEL system. For more information about thesosreportutility, see What is an sosreport and how to create one in Red Hat Enterprise Linux?.
22.3. IdM CA installation error log files
Installing the Certificate Authority (CA) service on an Identity Management (IdM) replica appends debugging information to several locations on the replica and the IdM server the replica communicates with.
Table 22.1. On the replica (in order of recommended priority):
| Location | Description |
|---|---|
|
|
High-level issues and Python traces for the |
|
|
Errors from the |
|
| Large JAVA stacktraces of activity in the core of the Public Key Infrastructure (PKI) product |
|
| Audit log of the PKI product |
| Low-level debug data of certificate operations for service principals, hosts, and other entities that use certificates |
On the server contacted by the replica:
-
/var/log/httpd/error_loglog file
Installing the CA service on an existing IdM replica also writes debugging information to the following log file:
-
/var/log/ipareplica-ca-install.loglog file
If a full IdM replica installation fails while installing the optional CA component, no details about the CA are logged; a message is logged in the /var/log/ipareplica-install.log file indicating that the overall installation process failed. Red Hat recommends reviewing the log files listed above for details specific to the CA installation failure.
The only exception to this behavior is when you are installing the CA service and the root CA is an external CA. If there is an issue with the certificate from the external CA, errors are logged in /var/log/ipareplica-install.log.
Additional resources
22.4. Reviewing IdM CA installation errors
To troubleshoot a failing IdM CA installation, review the errors at the end of the CA installation error log files and use this information to resolve any corresponding issues.
Prerequisites
-
You must have
rootprivileges to display the contents of IdM log files.
Procedure
To review a log file interactively, open the end of the log file using the
lessutility and use the ↑ and ↓ arrow keys to navigate, while searching forScriptErrorentries. The following example opens/var/log/pki/pki-ca-spawn.$TIME_OF_INSTALLATION.log.[user@server ~]$ sudo less -N +G /var/log/pki/pki-ca-spawn.20200527185902.log- Gather additional troubleshooting information by repeating this review process with all the CA installation error log files.
Additional resources
- IdM CA installation error log files
-
If you are unable to resolve a failing IdM server installation, and you have a Red Hat Technical Support subscription, open a Technical Support case at the Red Hat Customer Portal and provide an
sosreportof the server. -
The
sosreportutility collects configuration details, logs and system information from a RHEL system. For more information about thesosreportutility, see What is an sosreport and how to create one in Red Hat Enterprise Linux?.
22.5. Removing a partial IdM replica installation
If an IdM replica installation fails, some configuration files may be left behind. Additional attempts to install the IdM replica can fail and the installation script reports that IPA is already configured:
Example system with existing partial IdM configuration
[root@server ~]# ipa-replica-install
Your system may be partly configured.
Run /usr/sbin/ipa-server-install --uninstall to clean up.
IPA server is already configured on this system.
If you want to reinstall the IPA server, please uninstall it first using 'ipa-server-install --uninstall'.
The ipa-replica-install command failed. See /var/log/ipareplica-install.log for more information
To resolve this issue, uninstall IdM software from the replica, remove the replica from the IdM topology, and retry the installation process.
Prerequisites
-
You must have
rootprivileges.
Procedure
Uninstall the IdM server software on the host you are trying to configure as an IdM replica.
[root@replica ~]# ipa-server-install --uninstallOn all other servers in the topology, use the
ipa server-delcommand to delete any references to the replica that did not install properly.[root@other-replica ~]# ipa server-del replica.idm.example.com- Attempt installing the replica.
If you continue to experience difficulty installing an IdM replica because of repeated failed installations, reinstall the operating system.
One of the requirements for installing an IdM replica is a clean system without any customization. Failed installations may have compromised the integrity of the host by unexpectedly modifying system files.
Additional resources
- For additional details on uninstalling an IdM replica, see Uninstalling an IdM replica.
-
If installation attempts fail after repeated uninstallation attempts, and you have a Red Hat Technical Support subscription, open a Technical Support case at the Red Hat Customer Portal and provide an
sosreportof the replica and ansosreportof the server. -
The
sosreportutility collects configuration details, logs and system information from a RHEL system. For more information about thesosreportutility, see What is an sosreport and how to create one in Red Hat Enterprise Linux?.
22.6. Resolving invalid credential errors
If an IdM replica installation fails with an Invalid credentials error, the system clocks on the hosts may be out of sync with each other:
[27/40]: setting up initial replication
Starting replication, please wait until this has completed.
Update in progress, 15 seconds elapsed
[ldap://server.example.com:389] reports: Update failed! Status: [49 - LDAP error: Invalid credentials]
[error] RuntimeError: Failed to start replication
Your system may be partly configured.
Run /usr/sbin/ipa-server-install --uninstall to clean up.
ipa.ipapython.install.cli.install_tool(CompatServerReplicaInstall): ERROR Failed to start replication
ipa.ipapython.install.cli.install_tool(CompatServerReplicaInstall): ERROR The ipa-replica-install command failed. See /var/log/ipareplica-install.log for more information
If you use the --no-ntp or -N options to attempt the replica installation while clocks are out of sync, the installation fails because services are unable to authenticate with Kerberos.
To resolve this issue, synchronize the clocks on both hosts and retry the installation process.
Prerequisites
-
You must have
rootprivileges to change system time.
Procedure
Synchronize the system clocks manually or with
chronyd.- Synchronizing manually
Display the system time on the server and set the replica’s time to match.
[user@server ~]$ date Thu May 28 21:03:57 EDT 2020 [user@replica ~]$ sudo timedatectl set-time '2020-05-28 21:04:00'
Synchronizing with
chronyd:See Using the Chrony suite to configure NTP to configure and set system time with
chronytools.
- Attempt the IdM replica installation again.
Additional resources
-
If you are unable to resolve a failing replica installation, and you have a Red Hat Technical Support subscription, open a Technical Support case at the Red Hat Customer Portal and provide an
sosreportof the replica and ansosreportof the server. -
The
sosreportutility collects configuration details, logs and system information from a RHEL system. For more information about thesosreportutility, see What is an sosreport and how to create one in Red Hat Enterprise Linux?.
22.7. Additional resources
Chapter 23. Uninstalling an IdM replica
As an IdM administrator, you can remove an Identity Management (IdM) replica from the topology. For more information, see Uninstalling an IdM server.
Chapter 24. Installing DNS on an existing IdM server
Follow this procedure to install the DNS service on an Identity Management (IdM) server that was originally installed without it.
Prerequisites
- You understand the advantages and limitations of using IdM with integrated DNS as described in Installing an IdM server: With integrated DNS, with an integrated CA as the root CA.
-
You have
rootaccess to the IdM server.
Procedure
[Optional] Verify that DNS is not already installed on the IdM server.
[root@r8server ~]# ipa server-role-show r8server.idm.example.com Role name: DNS server Server name: r8server.idm.example.com Role name: DNS server Role status: absent
The output confirms that IdM DNS is not available on the server.
Enable the
idm:DL1stream:[root@r8server ~]# yum module enable idm:DL1Download the
ipa-dns-serverpackage and its dependencies:[root@r8server ~]# yum module install idm:DL1/dnsStart the script to install DNS on the server:
[root@r8server ~]# ipa-dns-installThe script prompts for per-server DNS forwarders.
Do you want to configure DNS forwarders? [yes]:
To configure per-server DNS forwarders, enter
yes, and then follow the instructions on the command line. The installation process will add the forwarder IP addresses to the IdM LDAP.-
For the forwarding policy default settings, see the
--forward-policydescription in the ipa-dns-install(1) man page.
-
For the forwarding policy default settings, see the
If you do not want to use DNS forwarding, enter
no.With no DNS forwarders, hosts in your IdM domain will not be able to resolve names from other, internal, DNS domains in your infrastructure. The hosts will only be left with public DNS servers to resolve their DNS queries.
The script prompts to check if any DNS reverse (PTR) records for the IP addresses associated with the server need to be configured.
Do you want to search for missing reverse zones? [yes]:
If you run the search and missing reverse zones are discovered, the script asks you whether to create the reverse zones along with the PTR records.
Do you want to create reverse zone for IP 192.0.2.1 [yes]:
Please specify the reverse zone name [2.0.192.in-addr.arpa.]:
Using reverse zone(s) 2.0.192.in-addr.arpa.
NoteUsing IdM to manage reverse zones is optional. You can use an external DNS service for this purpose instead.
Additional resources
-
man ipa-dns-install(1)
Chapter 25. Uninstalling the integrated IdM DNS service from an IdM server
If you have more than one server with integrated DNS in an Identity Management (IdM) deployment, you might decide to remove the integrated DNS service from one of the servers. To do this, you must first decommission the IdM server completely before re-installing IdM on it, this time without the integrated DNS.
While you can add the DNS role to an IdM server, IdM does not provide a method to remove only the DNS role from an IdM server: the ipa-dns-install command does not have an --uninstall option.
Prerequisites
- You have integrated DNS installed on an IdM server.
- This is not the last integrated DNS service in your IdM topology.
Procedure
- Identify the redundant DNS service and follow the procedure in Uninstalling an IdM server on the IdM replica that hosts this service.
- On the same host, follow the procedure in either Without integrated DNS, with an integrated CA as the root CA or Without integrated DNS, with an external CA as the root CA, depending on your use case.
Chapter 26. Adding the IdM CA service to an IdM server in a deployment without a CA
If you previously installed an Identity Management (IdM) domain without the certificate authority (CA) component, you can add the IdM CA service to the domain by using the ipa-ca-install command. Depending on your requirements, you can select one of the following options:
For details on the supported CA configurations, see Planning your CA services.
26.1. Installing the first IdM CA as the root CA into an existing IdM domain
If you previously installed Identity Management (IdM) without the certificate authority (CA) component, you can install the CA on an IdM server subsequently. Follow this procedure to install, on the idmserver server, an IdM CA that is not subordinate to any external root CA.
Prerequisites
-
You have
rootpermissions on idmserver. - The IdM server is installed on idmserver.
- Your IdM deployment has no CA installed.
-
You know the IdM
Directory Managerpassword.
Procedure
On idmserver, install the IdM Certificate Server CA:
[root@idmserver ~] ipa-ca-installOn each IdM host in the topology, run the
ipa-certupdateutility to update the host with the information about the new certificate from the IdM LDAP.ImportantIf you do not run
ipa-certupdateafter generating the IdM CA certificate, the certificate will not be distributed to the other IdM machines.
26.2. Installing the first IdM CA with an external CA as the root CA into an existing IdM domain
If you previously installed Identity Management (IdM) without the certificate authority (CA) component, you can install the CA on an IdM server subsequently. Follow this procedure to install, on the idmserver server, an IdM CA that is subordinate to an external root CA, with zero or several intermediate CAs in between.
Prerequisites
-
You have
rootpermissions on idmserver. - The IdM server is installed on idmserver.
- Your IdM deployment has no CA installed.
-
You know the IdM
Directory Managerpassword.
Procedure
Start the installation:
[root@idmserver ~] ipa-ca-install --external-ca- Wait till the command-line interface informs you that a certificate signing request (CSR) has been saved.
- Submit the CSR to the external CA.
- Copy the issued certificate to the IdM server.
Continue the installation by adding the certificates and full path to the external CA files to
ipa-ca-install:[root@idmserver ~]# ipa-ca-install --external-cert-file=/root/master.crt --external-cert-file=/root/ca.crtOn each IdM host in the topology, run the
ipa-certupdateutility to update the host with the information about the new certificate from the IdM LDAP.ImportantFailing to run
ipa-certupdateafter generating the IdM CA certificate means that the certificate will not be distributed to the other IdM machines.
Chapter 27. Adding the IdM CA service to an IdM server in a deployment with a CA
If your Identity Management (IdM) environment already has the IdM certificate authority (CA) service installed but a particular IdM server, idmserver, was installed as an IdM replica without a CA, you can add the CA service to idmserver by using the ipa-ca-install command.
This procedure is identical for both the following scenarios:
- The IdM CA is a root CA.
- The IdM CA is subordinate to an external, root CA.
Prerequisites
-
You have
rootpermissions on idmserver. - The IdM server is installed on idmserver.
- Your IdM deployment has a CA installed on another IdM server.
-
You know the IdM
Directory Managerpassword.
Procedure
On idmserver, install the IdM Certificate Server CA:
[root@idmserver ~] ipa-ca-install
Chapter 28. Uninstalling the IdM CA service from an IdM server
If you have more than four Identity Management (IdM) replicas with the CA Role in your topology and you run into performance problems due to redundant certificate replication, (RH) recommends that you remove redundant CA service instances from IdM replicas. To do this, you must first decommission the affected IdM replicas completely before re-installing IdM on them, this time without the CA service.
While you can add the CA role to an IdM replica, IdM does not provide a method to remove only the CA role from an IdM replica: the ipa-ca-install command does not have an --uninstall option.
Prerequisites
- You have the IdM CA service installed on more than four IdM servers in your topology.
Procedure
- Identify the redundant CA service and follow the procedure in Uninstalling an IdM server on the IdM replica that hosts this service.
- On the same host, follow the procedure in Installing an IdM server: With integrated DNS, without a CA.
Chapter 29. Managing replication topology
This chapter describes how to manage replication between servers in an Identity Management (IdM) domain.
Additional resources
29.1. Explaining replication agreements, topology suffixes and topology segments
When you create a replica, Identity Management (IdM) creates a replication agreement between the initial server and the replica. The data that is replicated is then stored in topology suffixes and when two replicas have a replication agreement between their suffixes, the suffixes form a topology segment. These concepts are explained in more detail in the following sections:
29.1.1. Replication agreements between IdM replicas
When an administrator creates a replica based on an existing server, Identity Management (IdM) creates a replication agreement between the initial server and the replica. The replication agreement ensures that the data and configuration is continuously replicated between the two servers.
IdM uses multiple read/write replica replication. In this configuration, all replicas joined in a replication agreement receive and provide updates, and are therefore considered suppliers and consumers. Replication agreements are always bilateral.
Figure 29.1. Server and replica agreements

IdM uses two types of replication agreements:
- Domain replication agreements
- These agreements replicate the identity information.
- Certificate replication agreements
- These agreements replicate the certificate information.
Both replication channels are independent. Two servers can have one or both types of replication agreements configured between them. For example, when server A and server B have only domain replication agreement configured, only identity information is replicated between them, not the certificate information.
29.1.2. Topology suffixes
Topology suffixes store the data that is replicated. IdM supports two types of topology suffixes: domain and ca. Each suffix represents a separate server, a separate replication topology.
When a replication agreement is configured, it joins two topology suffixes of the same type on two different servers.
- The
domainsuffix: dc=example,dc=com The
domainsuffix contains all domain-related data.When two replicas have a replication agreement between their
domainsuffixes, they share directory data, such as users, groups, and policies.- The
casuffix: o=ipaca The
casuffix contains data for the Certificate System component. It is only present on servers with a certificate authority (CA) installed.When two replicas have a replication agreement between their
casuffixes, they share certificate data.
Figure 29.2. Topology suffixes

An initial topology replication agreement is set up between two servers by the ipa-replica-install script when installing a new replica.
Example 29.1. Viewing topology suffixes
The ipa topologysuffix-find command displays a list of topology suffixes:
$ ipa topologysuffix-find
---------------------------
2 topology suffixes matched
---------------------------
  Suffix name: ca
  Managed LDAP suffix DN: o=ipaca

  Suffix name: domain
  Managed LDAP suffix DN: dc=example,dc=com
----------------------------
Number of entries returned 2
----------------------------
29.1.3. Topology segments
When two replicas have a replication agreement between their suffixes, the suffixes form a topology segment. Each topology segment consists of a left node and a right node. The nodes represent the servers joined in the replication agreement.
Topology segments in IdM are always bidirectional. Each segment represents two replication agreements: from server A to server B, and from server B to server A. The data is therefore replicated in both directions.
Figure 29.3. Topology segments
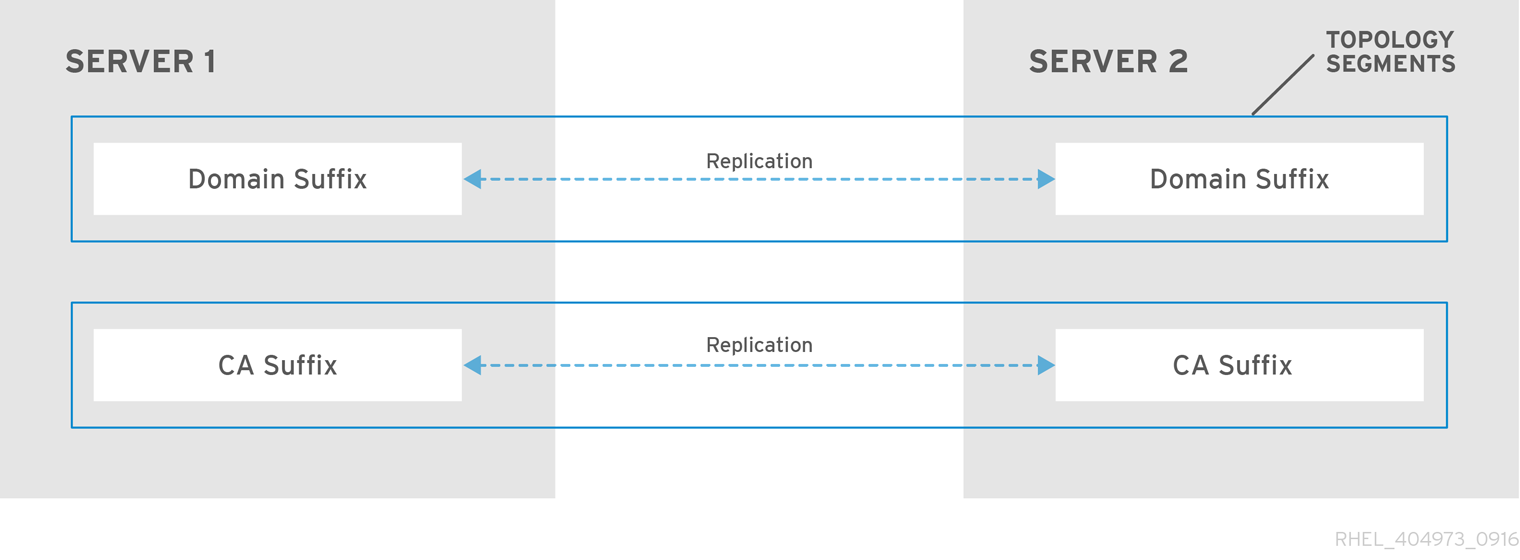
Example 29.2. Viewing topology segments
The ipa topologysegment-find command shows the current topology segments configured for the domain or CA suffixes. For example, for the domain suffix:
$ ipa topologysegment-find
Suffix name: domain
-----------------
1 segment matched
-----------------
  Segment name: server1.example.com-to-server2.example.com
  Left node: server1.example.com
  Right node: server2.example.com
  Connectivity: both
----------------------------
Number of entries returned 1
----------------------------
In this example, domain-related data is only replicated between two servers: server1.example.com and server2.example.com.
To display details for a particular segment only, use the ipa topologysegment-show command:
$ ipa topologysegment-show
Suffix name: domain
Segment name: server1.example.com-to-server2.example.com
  Segment name: server1.example.com-to-server2.example.com
  Left node: server1.example.com
  Right node: server2.example.com
  Connectivity: both
29.2. Using the topology graph to manage replication topology
The topology graph in the web UI shows the relationships between the servers in the domain. Using the Web UI, you can manipulate and transform the representation of the topology.
Accessing the topology graph
To access the topology graph:
- Select → → .
- If you make any changes to the topology that are not immediately reflected in the graph, click .
Interpreting the topology graph
Servers joined in a domain replication agreement are connected by an orange arrow. Servers joined in a CA replication agreement are connected by a blue arrow.
- Topology graph example: recommended topology
The recommended topology example below shows one of the possible recommended topologies for four servers: each server is connected to at least two other servers, and more than one server is a CA server.
Figure 29.4. Recommended topology example

- Topology graph example: discouraged topology
In the discouraged topology example below,
server1is a single point of failure. All the other servers have replication agreements with this server, but not with any of the other servers. Therefore, ifserver1fails, all the other servers will become isolated.Avoid creating topologies like this.
Figure 29.5. Discouraged topology example: Single Point of Failure

Customizing the topology view
You can move individual topology nodes by dragging the mouse:
Figure 29.6. Moving topology graph nodes

You can zoom in and zoom out the topology graph using the mouse wheel:
Figure 29.7. Zooming the topology graph
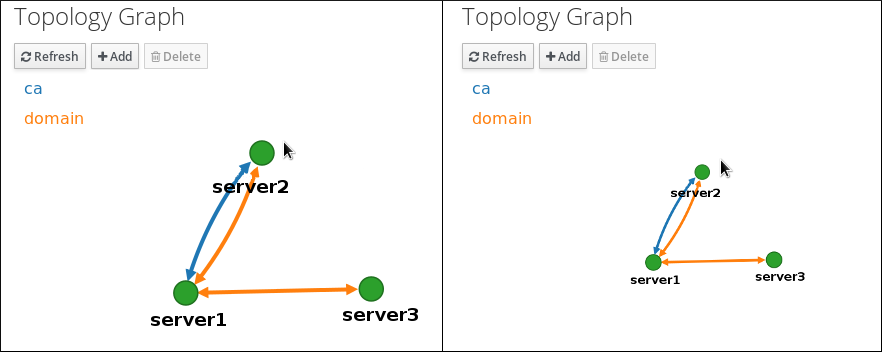
You can move the canvas of the topology graph by holding the left mouse button:
Figure 29.8. Moving the topology graph canvas
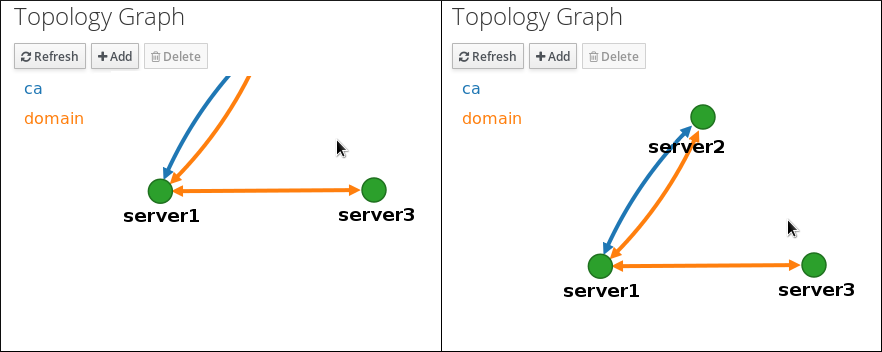
29.3. Setting up replication between two servers using the Web UI
Using the Web interface of Identity Management (IdM) you can choose two servers and create new replication agreement between them.
Prerequisites
- You have the IdM administrator credentials.
Procedure
In the topology graph, hover your mouse over one of the server nodes.
Figure 29.9. Domain or CA options
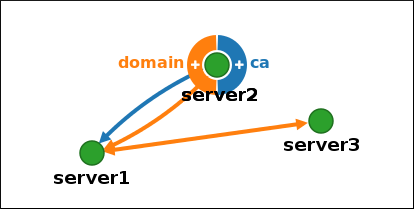
-
Click on the
domainor thecapart of the circle depending on what type of topology segment you want to create. A new arrow representing the new replication agreement appears under your mouse pointer. Move your mouse to the other server node, and click on it.
Figure 29.10. Creating a new segment
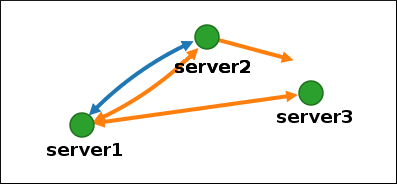
-
In the
Add topology segmentwindow, click to confirm the properties of the new segment.
The new topology segment between the two servers joins them in a replication agreement. The topology graph now shows the updated replication topology:
Figure 29.11. New segment created
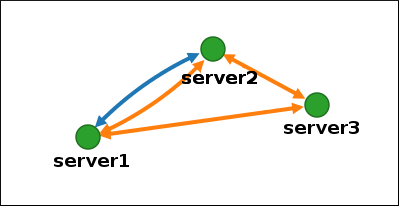
29.4. Stopping replication between two servers using the Web UI
Using the web interface of Identity Management (IdM) you can remove a replication agreement from servers.
Prerequisites
- You have the IdM administrator credentials.
Procedure
Click on an arrow representing the replication agreement you want to remove. This highlights the arrow.
Figure 29.12. Topology segment highlighted
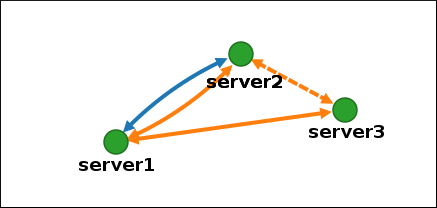
- Click .
-
In the
Confirmationwindow, click .
IdM removes the topology segment between the two servers, which deletes their replication agreement. The topology graph now shows the updated replication topology:
Figure 29.13. Topology segment deleted
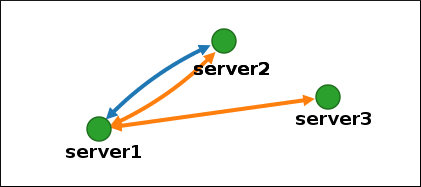
29.5. Setting up replication between two servers using the CLI
You can configure replication agreements between two servers using the ipa topologysegment-add command.
Prerequisites
- You have the IdM administrator credentials.
Procedure
Use the
ipa topologysegment-addcommand to create a topology segment for the two servers. When prompted, provide:-
the required topology suffix:
domainorca - the left node and the right node, representing the two servers
optionally, a custom name for the segment
For example:
$ ipa topologysegment-add
Suffix name: domain
Left node: server1.example.com
Right node: server2.example.com
Segment name [server1.example.com-to-server2.example.com]: new_segment
---------------------------
Added segment "new_segment"
---------------------------
  Segment name: new_segment
  Left node: server1.example.com
  Right node: server2.example.com
  Connectivity: both
Adding the new segment joins the servers in a replication agreement.
-
the required topology suffix:
Optional. Use the
ipa topologysegment-showcommand to verify that the new segment is configured.$ ipa topologysegment-show Suffix name: domain Segment name: new_segment Segment name: new_segment Left node: server1.example.com Right node: server2.example.com Connectivity: both
29.6. Stopping replication between two servers using the CLI
You can terminate replication agreements from command line using the ipa topology segment-del command.
Prerequisites
- You have the IdM administrator credentials.
Procedure
To stop replication, you must delete the corresponding replication segment between the servers. To do that, you need to know the segment name.
If you do not know the name, use the
ipa topologysegment-findcommand to display all segments, and locate the required segment in the output. When prompted, provide the required topology suffix:domainorca. For example:$ ipa topologysegment-find Suffix name: domain ------------------ 8 segments matched ------------------ Segment name: new_segment Left node: server1.example.com Right node: server2.example.com Connectivity: both ... ---------------------------- Number of entries returned 8 ----------------------------
Use the
ipa topologysegment-delcommand to remove the topology segment joining the two servers.$ ipa topologysegment-del Suffix name: domain Segment name: new_segment ----------------------------- Deleted segment "new_segment" -----------------------------
Deleting the segment removes the replication agreement.
Optional. Use the
ipa topologysegment-findcommand to verify that the segment is no longer listed.$ ipa topologysegment-find Suffix name: domain ------------------ 7 segments matched ------------------ Segment name: server2.example.com-to-server3.example.com Left node: server2.example.com Right node: server3.example.com Connectivity: both ... ---------------------------- Number of entries returned 7 ----------------------------
29.7. Removing server from topology using the Web UI
You can use Identity Management (IdM) web interface to remove a server from the topology.
Prerequisites
- You have the IdM administrator credentials.
- The server you want to remove is not the only server connecting other servers with the rest of the topology; this would cause the other servers to become isolated, which is not allowed.
- The server you want to remove is not your last CA or DNS server.
Removing a server is an irreversible action. If you remove a server, the only way to introduce it back into the topology is to install a new replica on the machine.
Procedure
To remove a server from the topology without uninstalling the server components from the machine:
- Select → → .
Click on the name of the server you want to delete.
Figure 29.14. Selecting a server
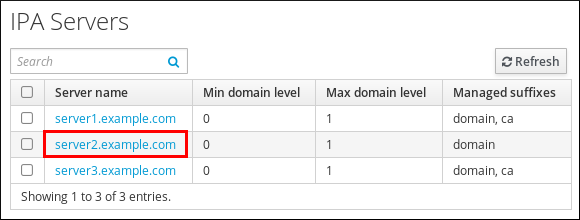
- Click .
29.8. Removing server from topology using the CLI
You can use the command line interface to remove a server from the topology.
Prerequisites
- You have the IdM administrator credentials.
- The server you want to remove is not the only server connecting other servers with the rest of the topology; this would cause the other servers to become isolated, which is not allowed
- The server you want to remove is not your last CA or DNS server.
Removing a server is an irreversible action. If you remove a server, the only way to introduce it back into the topology is to install a new replica on the machine.
Procedure
To remove server1.example.com:
On another server, run the
ipa server-delcommand to removeserver1.example.com. The command removes all topology segments pointing to the server:[user@server2 ~]$ ipa server-del Server name: server1.example.com Removing server1.example.com from replication topology, please wait... ---------------------------------------------------------- Deleted IPA server "server1.example.com" ----------------------------------------------------------
Optional: on
server1.example.com, run theipa server-install --uninstallcommand to uninstall the server components from the machine.[root@server1 ~]# ipa server-install --uninstall
29.9. Viewing server roles on an IdM server using the Web UI
Based on the services installed on an IdM server, it can perform various server roles. For example:
- CA server
- DNS server
- Key recovery authority (KRA) server.
For a complete list of the supported server roles, see → → .
-
Role status
absentmeans that no server in the topology is performing the role. -
Role status
enabledmeans that one or more servers in the topology are performing the role.
Figure 29.15. Server roles in the web UI
29.10. Viewing server roles on an IdM server using the CLI
Based on the services installed on an IdM server, it can perform various server roles. For example:
- CA server
- DNS server
- Key recovery authority (KRA) server.
You can view which servers perform which roles in the topology using the following commands.
-
The
ipa config-showcommand displays all CA servers and the current CA renewal server:
$ ipa config-show
  ...
  IPA masters: server1.example.com, server2.example.com, server3.example.com
  IPA CA servers: server1.example.com, server2.example.com
  IPA CA renewal master: server1.example.com
-
The
ipa server-showcommand displays a list of roles enabled on a particular server. For example, for a list of roles enabled on server.example.com:
$ ipa server-show
Server name: server.example.com
  ...
  Enabled server roles: CA server, DNS server, KRA server
-
The
ipa server-find --servrolesearches for all servers with a particular server role enabled. For example, to search for all CA servers:
$ ipa server-find --servrole "CA server"
---------------------
2 IPA servers matched
---------------------
  Server name: server1.example.com
  ...

  Server name: server2.example.com
  ...
----------------------------
Number of entries returned 2
----------------------------
29.11. Promoting a replica to a CA renewal server and CRL publisher server
If your IdM deployment uses an embedded certificate authority (CA), one of the IdM CA servers acts as the CA renewal server, a server that manages the renewal of CA subsystem certificates. One of the IdM CA servers also acts as the IdM CRL publisher server, a server that generates certificate revocation lists. By default, the CA renewal server and CRL publisher server roles are installed on the first server on which the system administrator installed the CA role using the ipa-server-install or ipa-ca-install command.
Prerequisites
- You have the IdM administrator credentials.
Chapter 30. Installing and running the IdM Healthcheck tool
Learn more about the IdM Healthcheck tool and how to install and run it.
- The Healthcheck tool is only available on RHEL 8.1 or later.
30.1. Healthcheck in IdM
The Healthcheck tool in Identity Management (IdM) helps find issues that may impact the health of your IdM environment.
The Healthcheck tool is a command line tool that can be used without Kerberos authentication.
Modules are Independent
Healthcheck consists of independent modules which test for:
- Replication issues
- Certificate validity
- Certificate Authority infrastructure issues
- IdM and Active Directory trust issues
- Correct file permissions and ownership settings
Two output formats
Healthcheck generates the following outputs, which you can set using the output-type option:
-
json: Machine-readable output in JSON format (default) -
human: Human-readable output
You can specify a different file destination with the --output-file option.
Results
Each Healthcheck module returns one of the following results:
- SUCCESS
- configured as expected
- WARNING
- not an error, but worth keeping an eye on or evaluating
- ERROR
- not configured as expected
- CRITICAL
- not configured as expected, with a high possibility for impact
30.2. Installing IdM Healthcheck
Follow this procedure to install the IdM Healthcheck tool.
Procedure
Install the
ipa-healthcheckpackage:[root@server ~]# yum install ipa-healthcheckNoteOn RHEL 8.1 and 8.2 systems, use the yum install /usr/bin/ipa-healthcheck command instead.
Verification steps
Use the
--failures-onlyoption to haveipa-healthcheckonly report errors. A fully-functioning IdM installation returns an empty result of[].[root@server ~]# ipa-healthcheck --failures-only []
Additional resources
-
Use
ipa-healthcheck --helpto see all supported arguments.
30.3. Running IdM Healthcheck
Healthcheck can be run manually or automatically using log rotation.
Prerequisites
- The Healthcheck tool must be installed. See Installing IdM Healthcheck.
Procedure
To run healthcheck manually, enter the
ipa-healthcheckcommand.[root@server ~]# ipa-healthcheck
Additional resources
For all options, see the man page: man ipa-healthcheck.
30.4. Additional resources
See the following sections of the Configuring and managing Identity Management guide for examples of using IdM Healthcheck.
- You can also see those chapters organized into a single guide: Using IdM Healthcheck to monitor your IdM environment
Chapter 31. Installing an Identity Management server using an Ansible playbook
Learn more about how to configure a system as an IdM server by using Ansible. Configuring a system as an IdM server establishes an IdM domain and enables the system to offer IdM services to IdM clients. You can manage the deployment by using the ipaserver Ansible role.
Prerequisites
You understand Ansible and IdM concepts:
- Ansible roles
- Ansible nodes
- Ansible inventory
- Ansible tasks
- Ansible modules
- Ansible plays and playbooks
31.1. Ansible and its advantages for installing IdM
Ansible is an automation tool used to configure systems, deploy software, and perform rolling updates. Ansible includes support for Identity Management (IdM), and you can use Ansible modules to automate installation tasks such as the setup of an IdM server, replica, client, or an entire IdM topology.
Advantages of using Ansible to install IdM
The following list presents advantages of installing Identity Management using Ansible in contrast to manual installation.
- You do not need to log into the managed node.
- You do not need to configure settings on each host to be deployed individually. Instead, you can have one inventory file to deploy a complete cluster.
- You can reuse an inventory file later for management tasks, for example to add users and hosts. You can reuse an inventory file even for such tasks as are not related to IdM.
31.2. Installing the ansible-freeipa package
Follow this procedure to install the ansible-freeipa package that provides Ansible roles and modules for installing and managing Identity Management (IdM) .
Prerequisites
On the managed node:
- Ensure that the managed node is a Red Hat Enterprise Linux 8 system with a static IP address and a working package manager.
On the controller:
- Ensure that the controller is a Red Hat Enterprise Linux system with a valid subscription. If this is not the case, see the official Ansible documentation Installation guide for alternative installation instructions.
-
Ensure that you can reach the managed node over the
SSHprotocol from the controller. Check that the managed node is listed in the/root/.ssh/known_hostsfile of the controller.
Procedure
Use the following procedure on the Ansible controller.
If your system is running on RHEL 8.5 and earlier, enable the required repository:
# subscription-manager repos --enable ansible-2.8-for-rhel-8-x86_64-rpmsIf your system is running on RHEL 8.5 and earlier, install the
ansiblepackage:# yum install ansibleInstall the
ansible-freeipapackage:# yum install ansible-freeipaThe roles and modules are installed into the
/usr/share/ansible/roles/and/usr/share/ansible/plugins/modulesdirectories.
31.3. Ansible roles location in the file system
By default, the ansible-freeipa roles are installed to the /usr/share/ansible/roles/ directory. The structure of the ansible-freeipa package is as follows:
The
/usr/share/ansible/roles/directory stores theipaserver,ipareplica, andipaclientroles on the Ansible controller. Each role directory stores examples, a basic overview, the license and documentation about the role in aREADME.mdMarkdown file.[root@server]# ls -1 /usr/share/ansible/roles/ ipaclient ipareplica ipaserverThe
/usr/share/doc/ansible-freeipa/directory stores the documentation about individual roles and the topology inREADME.mdMarkdown files. It also stores theplaybooks/subdirectory.[root@server]# ls -1 /usr/share/doc/ansible-freeipa/ playbooks README-client.md README.md README-replica.md README-server.md README-topology.mdThe
/usr/share/doc/ansible-freeipa/playbooks/directory stores the example playbooks:[root@server]# ls -1 /usr/share/doc/ansible-freeipa/playbooks/ install-client.yml install-cluster.yml install-replica.yml install-server.yml uninstall-client.yml uninstall-cluster.yml uninstall-replica.yml uninstall-server.yml
31.4. Setting the parameters for a deployment with an integrated DNS and an integrated CA as the root CA
Complete this procedure to configure the inventory file for installing an IdM server with an integrated CA as the root CA in an environment that uses the IdM integrated DNS solution.
The inventory in this procedure uses the INI format. You can, alternatively, use the YAML or JSON formats.
Procedure
Create a
~/MyPlaybooks/directory:$ mkdir MyPlaybooks
-
Create a
~/MyPlaybooks/inventoryfile. Open the inventory file for editing. Specify the fully-qualified domain names (
FQDN) of the host you want to use as an IdM server. Ensure that theFQDNmeets the following criteria:- Only alphanumeric characters and hyphens (-) are allowed. For example, underscores are not allowed and can cause DNS failures.
- The host name must be all lower-case.
- Specify the IdM domain and realm information.
Specify that you want to use integrated DNS by adding the following option:
ipaserver_setup_dns=yesSpecify the DNS forwarding settings. Choose one of the following options:
-
Use the
ipaserver_auto_forwarders=yesoption if you want the installer to use forwarders from the/etc/resolv.conffile. Do not use this option if the nameserver specified in the/etc/resolv.conffile is the localhost 127.0.0.1 address or if you are on a virtual private network and the DNS servers you are using are normally unreachable from the public internet. -
Use the
ipaserver_forwardersoption to specify your forwarders manually. The installation process adds the forwarder IP addresses to the/etc/named.conffile on the installed IdM server. Use the
ipaserver_no_forwarders=yesoption to configure root DNS servers to be used instead.NoteWith no DNS forwarders, your environment is isolated, and names from other DNS domains in your infrastructure are not resolved.
-
Use the
Specify the DNS reverse record and zone settings. Choose from the following options:
-
Use the
ipaserver_allow_zone_overlap=yesoption to allow the creation of a (reverse) zone even if the zone is already resolvable. -
Use the
ipaserver_reverse_zonesoption to specify your reverse zones manually. Use the
ipaserver_no_reverse=yesoption if you do not want the installer to create a reverse DNS zone.NoteUsing IdM to manage reverse zones is optional. You can use an external DNS service for this purpose instead.
-
Use the
-
Specify the passwords for
adminand for theDirectory Manager. Use the Ansible Vault to store the password, and reference the Vault file from the playbook file. Alternatively and less securely, specify the passwords directly in the inventory file. (Optional) Specify a custom
firewalldzone to be used by the IdM server. If you do not set a custom zone, IdM will add its services to the defaultfirewalldzone. The predefined default zone ispublic.ImportantThe specified
firewalldzone must exist and be permanent.Example of an inventory file with the required server information (excluding the passwords)
[ipaserver]
server.idm.example.com

[ipaserver:vars]
ipaserver_domain=idm.example.com
ipaserver_realm=IDM.EXAMPLE.COM
ipaserver_setup_dns=yes
ipaserver_auto_forwarders=yes
[...]
Example of an inventory file with the required server information (including the passwords)
[ipaserver]
server.idm.example.com

[ipaserver:vars]
ipaserver_domain=idm.example.com
ipaserver_realm=IDM.EXAMPLE.COM
ipaserver_setup_dns=yes
ipaserver_auto_forwarders=yes
ipaadmin_password=MySecretPassword123
ipadm_password=MySecretPassword234

[...]
Example of an inventory file with a custom
firewalldzone[ipaserver] server.idm.example.com [ipaserver:vars] ipaserver_domain=idm.example.com ipaserver_realm=IDM.EXAMPLE.COM ipaserver_setup_dns=yes ipaserver_auto_forwarders=yes ipaadmin_password=MySecretPassword123 ipadm_password=MySecretPassword234 ipaserver_firewalld_zone=custom zoneExample playbook to set up an IdM server using admin and Directory Manager passwords stored in an Ansible Vault file
---
- name: Playbook to configure IPA server
  hosts: ipaserver
  become: true
  vars_files:
  - playbook_sensitive_data.yml

  roles:
  - role: ipaserver
    state: present
Example playbook to set up an IdM server using admin and Directory Manager passwords from an inventory file
---
- name: Playbook to configure IPA server
  hosts: ipaserver
  become: true

  roles:
  - role: ipaserver
    state: present
Additional resources
-
For the forwarding policy default settings, see the
--forward-policydescription in theipa-dns-install(1)man page. -
For more information about DNS variables used by the
ipaserverrole, see the DNS Variables section in theREADME-server.mdfile in the/usr/share/doc/ansible-freeipadirectory. - For more information on inventory files, see How to build your inventory.
31.5. Setting the parameters for a deployment with external DNS and an integrated CA as the root CA
Complete this procedure to configure the inventory file for installing an IdM server with an integrated CA as the root CA in an environment that uses an external DNS solution.
The inventory file in this procedure uses the INI format. You can, alternatively, use the YAML or JSON formats.
Procedure
Create a
~/MyPlaybooks/directory:$ mkdir MyPlaybooks
-
Create a
~/MyPlaybooks/inventoryfile. Open the inventory file for editing. Specify the fully-qualified domain names (
FQDN) of the host you want to use as an IdM server. Ensure that theFQDNmeets the following criteria:- Only alphanumeric characters and hyphens (-) are allowed. For example, underscores are not allowed and can cause DNS failures.
- The host name must be all lower-case.
- Specify the IdM domain and realm information.
-
Make sure that the
ipaserver_setup_dnsoption is set tonoor that it is absent. -
Specify the passwords for
adminand for theDirectory Manager. Use the Ansible Vault to store the password, and reference the Vault file from the playbook file. Alternatively and less securely, specify the passwords directly in the inventory file. (Optional) Specify a custom
firewalldzone to be used by the IdM server. If you do not set a custom zone, IdM will add its services to the defaultfirewalldzone. The predefined default zone ispublic.ImportantThe specified
firewalldzone must exist and be permanent.Example of an inventory file with the required server information (excluding the passwords)
[ipaserver]
server.idm.example.com

[ipaserver:vars]
ipaserver_domain=idm.example.com
ipaserver_realm=IDM.EXAMPLE.COM
ipaserver_setup_dns=no
[...]
Example of an inventory file with the required server information (including the passwords)
[ipaserver]
server.idm.example.com

[ipaserver:vars]
ipaserver_domain=idm.example.com
ipaserver_realm=IDM.EXAMPLE.COM
ipaserver_setup_dns=no
ipaadmin_password=MySecretPassword123
ipadm_password=MySecretPassword234

[...]
Example of an inventory file with a custom
firewalldzone[ipaserver] server.idm.example.com [ipaserver:vars] ipaserver_domain=idm.example.com ipaserver_realm=IDM.EXAMPLE.COM ipaserver_setup_dns=no ipaadmin_password=MySecretPassword123 ipadm_password=MySecretPassword234 ipaserver_firewalld_zone=custom zoneExample playbook to set up an IdM server using admin and Directory Manager passwords stored in an Ansible Vault file
---
- name: Playbook to configure IPA server
  hosts: ipaserver
  become: true
  vars_files:
  - playbook_sensitive_data.yml

  roles:
  - role: ipaserver
    state: present
Example playbook to set up an IdM server using admin and Directory Manager passwords from an inventory file
---
- name: Playbook to configure IPA server
  hosts: ipaserver
  become: true

  roles:
  - role: ipaserver
    state: present
Additional resources
- For more information on inventory files, see How to build your inventory.
31.6. Deploying an IdM server with an integrated CA as the root CA using an Ansible playbook
Complete this procedure to deploy an IdM server with an integrated certificate authority (CA) as the root CA using an Ansible playbook.
The inventory in this procedure uses the INI format. You can, alternatively, use the YAML or JSON formats.
Prerequisites
You have set the parameters that correspond to your scenario by choosing one of the following procedures:
-
You have read and understood the variables you can use with the
ipaserverrole as described in the/usr/share/doc/ansible-freeipa/README-server.mdfile.
Procedure
Run the
ansible-playbookcommand with the name of the playbook file, for exampleinstall-server.yml. Specify the inventory file with the-ioption:$ ansible-playbook --vault-password-file=password_file -v -i ~/MyPlaybooks/inventory ~/MyPlaybooks/install-server.ymlSpecify the level of verbosity by using the
-v,-vv, or-vvvoption.You can view the output of the Ansible playbook script on the command-line interface (CLI). The following output shows that the script has run successfully as 0 tasks have failed:
PLAY RECAP
server.idm.example.com : ok=18   changed=10   unreachable=0    failed=0    skipped=21   rescued=0    ignored=0
Choose one of the following options:
If your IdM deployment uses external DNS: add the DNS resource records contained in the
/tmp/ipa.system.records.UFRPto.dbfile to the existing external DNS servers. The process of updating the DNS records varies depending on the particular DNS solution.... Restarting the KDC Please add records in this file to your DNS system: /tmp/ipa.system.records.UFRBto.db Restarting the web server ...
ImportantThe server installation is not complete until you add the DNS records to the existing DNS servers.
If your IdM deployment uses integrated DNS:
Add DNS delegation from the parent domain to the IdM DNS domain. For example, if the IdM DNS domain is
idm.example.com, add a name server (NS) record to theexample.comparent domain.ImportantRepeat this step each time after an IdM DNS server is installed.
-
Add an
_ntp._udpservice (SRV) record for your time server to your IdM DNS. The presence of the SRV record for the time server of the newly-installed IdM server in IdM DNS ensures that future replica and client installations are automatically configured to synchronize with the time server used by this primary IdM server.
Additional resources
- For instruction on how to deploy an IdM server with an external CA as the root CA, see Deploying an IdM server with an external CA as the root CA using an Ansible playbook
31.7. Setting the parameters for a deployment with an integrated DNS and an external CA as the root CA
Complete this procedure to configure the inventory file for installing an IdM server with an external CA as the root CA in an environment that uses the IdM integrated DNS solution.
The inventory file in this procedure uses the INI format. You can, alternatively, use the YAML or JSON formats.
Procedure
Create a
~/MyPlaybooks/directory:$ mkdir MyPlaybooks
-
Create a
~/MyPlaybooks/inventoryfile. Open the inventory file for editing. Specify the fully-qualified domain names (
FQDN) of the host you want to use as an IdM server. Ensure that theFQDNmeets the following criteria:- Only alphanumeric characters and hyphens (-) are allowed. For example, underscores are not allowed and can cause DNS failures.
- The host name must be all lower-case.
- Specify the IdM domain and realm information.
Specify that you want to use integrated DNS by adding the following option:
ipaserver_setup_dns=yesSpecify the DNS forwarding settings. Choose one of the following options:
-
Use the
ipaserver_auto_forwarders=yesoption if you want the installation process to use forwarders from the/etc/resolv.conffile. This option is not recommended if the nameserver specified in the/etc/resolv.conffile is the localhost 127.0.0.1 address or if you are on a virtual private network and the DNS servers you are using are normally unreachable from the public internet. -
Use the
ipaserver_forwardersoption to specify your forwarders manually. The installation process adds the forwarder IP addresses to the/etc/named.conffile on the installed IdM server. Use the
ipaserver_no_forwarders=yesoption to configure root DNS servers to be used instead.NoteWith no DNS forwarders, your environment is isolated, and names from other DNS domains in your infrastructure are not resolved.
-
Use the
Specify the DNS reverse record and zone settings. Choose from the following options:
-
Use the
ipaserver_allow_zone_overlap=yesoption to allow the creation of a (reverse) zone even if the zone is already resolvable. -
Use the
ipaserver_reverse_zonesoption to specify your reverse zones manually. Use the
ipaserver_no_reverse=yesoption if you do not want the installation process to create a reverse DNS zone.NoteUsing IdM to manage reverse zones is optional. You can use an external DNS service for this purpose instead.
-
Use the
-
Specify the passwords for
adminand for theDirectory Manager. Use the Ansible Vault to store the password, and reference the Vault file from the playbook file. Alternatively and less securely, specify the passwords directly in the inventory file. (Optional) Specify a custom
firewalldzone to be used by the IdM server. If you do not set a custom zone, IdM adds its services to the defaultfirewalldzone. The predefined default zone ispublic.ImportantThe specified
firewalldzone must exist and be permanent.Example of an inventory file with the required server information (excluding the passwords)
[ipaserver]
server.idm.example.com

[ipaserver:vars]
ipaserver_domain=idm.example.com
ipaserver_realm=IDM.EXAMPLE.COM
ipaserver_setup_dns=yes
ipaserver_auto_forwarders=yes
[...]
Example of an inventory file with the required server information (including the passwords)
[ipaserver]
server.idm.example.com

[ipaserver:vars]
ipaserver_domain=idm.example.com
ipaserver_realm=IDM.EXAMPLE.COM
ipaserver_setup_dns=yes
ipaserver_auto_forwarders=yes
ipaadmin_password=MySecretPassword123
ipadm_password=MySecretPassword234

[...]
Example of an inventory file with a custom
firewalldzone[ipaserver] server.idm.example.com [ipaserver:vars] ipaserver_domain=idm.example.com ipaserver_realm=IDM.EXAMPLE.COM ipaserver_setup_dns=yes ipaserver_auto_forwarders=yes ipaadmin_password=MySecretPassword123 ipadm_password=MySecretPassword234 ipaserver_firewalld_zone=custom zone [...]Create a playbook for the first step of the installation. Enter instructions for generating the certificate signing request (CSR) and copying it from the controller to the managed node.
---
- name: Playbook to configure IPA server Step 1
  hosts: ipaserver
  become: true
  vars_files:
  - playbook_sensitive_data.yml
  vars:
    ipaserver_external_ca: yes

  roles:
  - role: ipaserver
    state: present

  post_tasks:
  - name: Copy CSR /root/ipa.csr from node to "{{ groups.ipaserver[0] + '-ipa.csr' }}"
    fetch:
      src: /root/ipa.csr
      dest: "{{ groups.ipaserver[0] + '-ipa.csr' }}"
      flat: yes
Create another playbook for the final step of the installation.
---
- name: Playbook to configure IPA server Step 2
  hosts: ipaserver
  become: true
  vars_files:
  - playbook_sensitive_data.yml
  vars:
    ipaserver_external_cert_files: "/root/chain.crt"

  pre_tasks:
  - name: Copy "{{ groups.ipaserver[0] + '-chain.crt' }}" to /root/chain.crt on node
    copy:
      src: "{{ groups.ipaserver[0] + '-chain.crt' }}"
      dest: "/root/chain.crt"
      force: yes

  roles:
  - role: ipaserver
    state: present
Additional resources
-
For the forwarding policy default settings, see the
--forward-policydescription in theipa-dns-install(1)man page. -
For more information about DNS variables used by the
ipaserverrole, see the DNS Variables section in theREADME-server.mdfile in the/usr/share/doc/ansible-freeipadirectory. - For more information on inventory files, see How to build your inventory.
31.8. Setting the parameters for a deployment with external DNS and an external CA as the root CA
Complete this procedure to configure the inventory file for installing an IdM server with an external CA as the root CA in an environment that uses an external DNS solution.
The inventory file in this procedure uses the INI format. You can, alternatively, use the YAML or JSON formats.
Procedure
Create a
~/MyPlaybooks/directory:$ mkdir MyPlaybooks
-
Create a
~/MyPlaybooks/inventoryfile. Open the inventory file for editing. Specify the fully-qualified domain names (
FQDN) of the host you want to use as an IdM server. Ensure that theFQDNmeets the following criteria:- Only alphanumeric characters and hyphens (-) are allowed. For example, underscores are not allowed and can cause DNS failures.
- The host name must be all lower-case.
- Specify the IdM domain and realm information.
-
Make sure that the
ipaserver_setup_dnsoption is set tonoor that it is absent. -
Specify the passwords for
adminand for theDirectory Manager. Use the Ansible Vault to store the password, and reference the Vault file from the playbook file. Alternatively and less securely, specify the passwords directly in the inventory file. (Optional) Specify a custom
firewalldzone to be used by the IdM server. If you do not set a custom zone, IdM will add its services to the defaultfirewalldzone. The predefined default zone ispublic.ImportantThe specified
firewalldzone must exist and be permanent.Example of an inventory file with the required server information (excluding the passwords)
[ipaserver]
server.idm.example.com

[ipaserver:vars]
ipaserver_domain=idm.example.com
ipaserver_realm=IDM.EXAMPLE.COM
ipaserver_setup_dns=no
[...]
Example of an inventory file with the required server information (including the passwords)
[ipaserver]
server.idm.example.com

[ipaserver:vars]
ipaserver_domain=idm.example.com
ipaserver_realm=IDM.EXAMPLE.COM
ipaserver_setup_dns=no
ipaadmin_password=MySecretPassword123
ipadm_password=MySecretPassword234

[...]
Example of an inventory file with a custom
firewalldzone[ipaserver] server.idm.example.com [ipaserver:vars] ipaserver_domain=idm.example.com ipaserver_realm=IDM.EXAMPLE.COM ipaserver_setup_dns=no ipaadmin_password=MySecretPassword123 ipadm_password=MySecretPassword234 ipaserver_firewalld_zone=custom zone [...]Create a playbook for the first step of the installation. Enter instructions for generating the certificate signing request (CSR) and copying it from the controller to the managed node.
---
- name: Playbook to configure IPA server Step 1
  hosts: ipaserver
  become: true
  vars_files:
  - playbook_sensitive_data.yml
  vars:
    ipaserver_external_ca: yes

  roles:
  - role: ipaserver
    state: present

  post_tasks:
  - name: Copy CSR /root/ipa.csr from node to "{{ groups.ipaserver[0] + '-ipa.csr' }}"
    fetch:
      src: /root/ipa.csr
      dest: "{{ groups.ipaserver[0] + '-ipa.csr' }}"
      flat: yes
Create another playbook for the final step of the installation.
---
- name: Playbook to configure IPA server Step 2
  hosts: ipaserver
  become: true
  vars_files:
  - playbook_sensitive_data.yml
  vars:
    ipaserver_external_cert_files: "/root/chain.crt"

  pre_tasks:
  - name: Copy "{{ groups.ipaserver[0] + '-chain.crt' }}" to /root/chain.crt on node
    copy:
      src: "{{ groups.ipaserver[0] + '-chain.crt' }}"
      dest: "/root/chain.crt"
      force: yes

  roles:
  - role: ipaserver
    state: present
Additional resources
- For details on the options available to you when installing an IdM server with external DNS and an externally signed CA, see Installing an IdM server: Without integrated DNS, with an external CA as the root CA.
- For more information on inventory files, see How to build your inventory.
31.9. Deploying an IdM server with an external CA as the root CA using an Ansible playbook
Complete this procedure to deploy an IdM server with an external certificate authority (CA) as the root CA using an Ansible playbook.
The inventory file in this procedure uses the INI format. You can, alternatively, use the YAML or JSON formats.
Prerequisites
You have set the parameters that correspond to your scenario by choosing one of the following procedures:
-
You have read and understood the variables you can use with the
ipaserverrole as described in the/usr/share/doc/ansible-freeipa/README-server.mdfile.
Procedure
Run the
ansible-playbookcommand with the name of the playbook file that contains instructions for the first step of the installation, for exampleinstall-server-step1.yml. Specify the inventory file with the-ioption:$ ansible-playbook --vault-password-file=password_file -v -i ~/MyPlaybooks/inventory ~/MyPlaybooks/install-server-step1.ymlSpecify the level of verbosity by using the
-v,-vvor-vvvoption.You can view the output of the Ansible playbook script on the command-line interface (CLI). The following output shows that the script has run successfully as 0 tasks have failed:
PLAY RECAP server.idm.example.com : ok=18 changed=10 unreachable=0 failed=0 skipped=21 rescued=0 ignored=0-
Locate the
ipa.csrcertificate signing request file on the controller and submit it to the external CA. - Place the IdM CA certificate signed by the external CA in the controller file system so that the playbook in the next step can find it.
Run the
ansible-playbookcommand with the name of the playbook file that contains instructions for the final step of the installation, for exampleinstall-server-step2.yml. Specify the inventory file with the-ioption:$ ansible-playbook -v -i ~/MyPlaybooks/inventory ~/MyPlaybooks/install-server-step2.ymlChoose one of the following options:
If your IdM deployment uses external DNS: add the DNS resource records contained in the
/tmp/ipa.system.records.UFRPto.dbfile to the existing external DNS servers. The process of updating the DNS records varies depending on the particular DNS solution.... Restarting the KDC Please add records in this file to your DNS system: /tmp/ipa.system.records.UFRBto.db Restarting the web server ...
ImportantThe server installation is not complete until you add the DNS records to the existing DNS servers.
If your IdM deployment uses integrated DNS:
Add DNS delegation from the parent domain to the IdM DNS domain. For example, if the IdM DNS domain is
idm.example.com, add a name server (NS) record to theexample.comparent domain.ImportantRepeat this step each time after an IdM DNS server is installed.
-
Add an
_ntp._udpservice (SRV) record for your time server to your IdM DNS. The presence of the SRV record for the time server of the newly-installed IdM server in IdM DNS ensures that future replica and client installations are automatically configured to synchronize with the time server used by this primary IdM server.
Additional resources
For instruction on how to deploy an IdM server with an integrated CA as the root CA, see Deploying an IdM server with an integrated CA as the root CA using an Ansible playbook
31.10. Uninstalling an IdM server using an Ansible playbook
In an existing Identity Management (IdM) deployment, replica and server are interchangeable terms.
Complete this procedure to uninstall an IdM replica using an Ansible playbook. In this example:
- IdM configuration is uninstalled from server123.idm.example.com.
- server123.idm.example.com and the associated host entry are removed from the IdM topology.
Prerequisites
On the control node:
- You are using Ansible version 2.14 or later.
-
You have installed the
ansible-freeipapackage. - You have created an Ansible inventory file with the fully-qualified domain name (FQDN) of the IdM server in the ~/MyPlaybooks/ directory. In this example, the FQDN is server123.idm.example.com.
-
You have stored your
ipaadmin_passwordin the secret.yml Ansible vault. -
For the
ipaserver_remove_from_topologyoption to work, the system must be running on RHEL 8.9 or later.
On the managed node:
- The system is running on RHEL 7.6 or later.
Procedure
Create your Ansible playbook file uninstall-server.yml with the following content:
---
- name: Playbook to uninstall an IdM replica
  hosts: ipaserver
  become: true

  roles:
  - role: ipaserver
    ipaserver_remove_from_domain: true
    state: absent
The
ipaserver_remove_from_domainoption unenrolls the host from the IdM topology.NoteIf the removal of server123.idm.example.com should lead to a disconnected topology, the removal will be aborted. For more information, see Using an Ansible playbook to uninstall an IdM server even if this leads to a disconnected topology.
Uninstall the replica:
$ ansible-playbook --vault-password-file=password_file -v -i <path_to_inventory_directory>/hosts <path_to_playbooks_directory>/uninstall-server.yml- Ensure that all name server (NS) DNS records pointing to server123.idm.example.com are deleted from your DNS zones. This applies regardless of whether you use integrated DNS managed by IdM or external DNS. For more information on how to delete DNS records from IdM, see Deleting DNS records in the IdM CLI.
31.11. Using an Ansible playbook to uninstall an IdM server even if this leads to a disconnected topology
In an existing Identity Management (IdM) deployment, replica and server are interchangeable terms.
Complete this procedure to uninstall an IdM replica using an Ansible playbook even if this results in a disconnected IdM topology. In the example, server456.idm.example.com is used to remove the replica and the associated host entry with the FQDN of server123.idm.example.com from the topology, leaving certain replicas disconnected from server456.idm.example.com and the rest of the topology.
If removing a replica from the topology using only the remove_server_from_domain does not result in a disconnected topology, no other options are required. If the result is a disconnected topology, you must specify which part of the domain you want to preserve. In that case, you must do the following:
-
Specify the
ipaserver_remove_on_servervalue. -
Set
ipaserver_ignore_topology_disconnectto True.
Prerequisites
On the control node:
- You are using Ansible version 2.14 or later.
- The system is running on RHEL 8.9 or later.
-
You have installed the
ansible-freeipapackage. - You have created an Ansible inventory file with the fully-qualified domain name (FQDN) of the IdM server in the ~/MyPlaybooks/ directory. In this example, the FQDN is server123.idm.example.com.
-
You have stored your
ipaadmin_passwordin the secret.yml Ansible vault.
On the managed node:
- The system is running on RHEL 7.6 or later.
Procedure
Create your Ansible playbook file uninstall-server.yml with the following content:
--- - name: Playbook to uninstall an IdM replica hosts: ipaserver become: true roles: - role: ipaserver ipaserver_remove_from_domain: true ipaserver_remove_on_server: server456.idm.example.com ipaserver_ignore_topology_disconnect: true state: absentNoteUnder normal circumstances, if the removal of server123 does not result in a disconnected topology: if the value for
ipaserver_remove_on_serveris not set, the replica on which server123 is removed is automatically determined using the replication agreements of server123.Uninstall the replica:
$ ansible-playbook --vault-password-file=password_file -v -i <path_to_inventory_directory>/hosts <path_to_playbooks_directory>/uninstall-server.yml- Ensure that all name server (NS) DNS records pointing to server123.idm.example.com are deleted from your DNS zones. This applies regardless of whether you use integrated DNS managed by IdM or external DNS. For more information on how to delete DNS records from IdM, see Deleting DNS records in the IdM CLI.
31.12. Additional resources
- Planning the replica topology
- Backing up and restoring IdM servers using Ansible playbooks
- Inventory basics: formats, hosts, and groups
-
You can see sample Ansible playbooks for installing an IdM server and a list of possible variables in the
ansible-freeipaupstream documentation.
Chapter 32. Installing an Identity Management replica using an Ansible playbook
Configuring a system as an IdM replica by using Ansible enrolls it into an IdM domain and enables the system to use IdM services on IdM servers in the domain.
The deployment is managed by the ipareplica Ansible role. The role can use the autodiscovery mode for identifying the IdM servers, domain and other settings. However, if you deploy multiple replicas in a tier-like model, with different groups of replicas being deployed at different times, you must defined specific servers or replicas for each group.
Prerequisites
- You have installed the ansible-freeipa package on the Ansible control node.
You understand Ansible and IdM concepts:
- Ansible roles
- Ansible nodes
- Ansible inventory
- Ansible tasks
- Ansible modules
- Ansible plays and playbooks
Additional resources
32.1. Specifying the base, server and client variables for installing the IdM replica
Complete this procedure to configure the inventory file for installing an IdM replica.
Prerequisites
You have configured your Ansible control node to meet the following requirements:
- You are using Ansible version 2.14 or later.
-
You have installed the
ansible-freeipapackage on the Ansible controller. - The example assumes that in the ~/MyPlaybooks/ directory, you have created an Ansible inventory file with the fully-qualified domain name (FQDN) of the IdM server.
-
The example assumes that the secret.yml Ansible vault stores your
ipaadmin_password.
-
The target node, that is the node on which the
ansible-freeipamodule is executed, is part of the IdM domain as an IdM client, server or replica.
Procedure
Open the inventory file for editing. Specify the fully-qualified domain names (FQDN) of the hosts to become IdM replicas. The FQDNs must be valid DNS names:
-
Only numbers, alphabetic characters, and hyphens (
-) are allowed. For example, underscores are not allowed and can cause DNS failures. The host name must be all lower-case.
Example of a simple inventory hosts file with only the replicas' FQDN defined
[ipareplicas]
replica1.idm.example.com
replica2.idm.example.com
replica3.idm.example.com
[...]
If the IdM server is already deployed and the SRV records are set properly in the IdM DNS zone, the script automatically discovers all the other required values.
-
Only numbers, alphabetic characters, and hyphens (
[Optional] Provide additional information in the inventory file based on how you have designed your topology:
- Scenario 1
If you want to avoid autodiscovery and have all replicas listed in the
[ipareplicas]section use a specific IdM server, set the server in the[ipaservers]section of the inventory file.Example inventory hosts file with the FQDN of the IdM server and replicas defined
[ipaservers]
server.idm.example.com

[ipareplicas]
replica1.idm.example.com
replica2.idm.example.com
replica3.idm.example.com
[...]
- Scenario 2
Alternatively, if you want to avoid autodiscovery but want to deploy specific replicas with specific servers, set the servers for specific replicas individually in the
[ipareplicas]section in the inventory file.Example inventory file with a specific IdM server defined for a specific replica
[ipaservers]
server.idm.example.com
replica1.idm.example.com

[ipareplicas]
replica2.idm.example.com
replica3.idm.example.com ipareplica_servers=replica1.idm.example.com
In the example above,
replica3.idm.example.comuses the already deployedreplica1.idm.example.comas its replication source.- Scenario 3
If you are deploying several replicas in one batch and time is a concern to you, multitier replica deployment can be useful for you. Define specific groups of replicas in the inventory file, for example
[ipareplicas_tier1]and[ipareplicas_tier2], and design separate plays for each group in theinstall-replica.ymlplaybook.Example inventory file with replica tiers defined
[ipaservers]
server.idm.example.com

[ipareplicas_tier1]
replica1.idm.example.com

[ipareplicas_tier2]
replica2.idm.example.com \ ipareplica_servers=replica1.idm.example.com,server.idm.example.com
The first entry in
ipareplica_serverswill be used. The second entry will be used as a fallback option. When using multiple tiers for deploying IdM replicas, you must have separate tasks in the playbook to first deploy replicas from tier1 and then replicas from tier2:Example of a playbook file with different plays for different replica groups
---
- name: Playbook to configure IPA replicas (tier1)
  hosts: ipareplicas_tier1
  become: true

  roles:
  - role: ipareplica
    state: present

- name: Playbook to configure IPA replicas (tier2)
  hosts: ipareplicas_tier2
  become: true

  roles:
  - role: ipareplica
    state: present
[Optional] Provide additional information regarding
firewalldand DNS:- Scenario 1
If you want the replica to use a specified
firewalldzone instead of the default one, you can specify it in the inventory file. This can be useful, for example, when you want to use an internalfirewalldzone for your IdM installation instead of a public zone that is set as default.If you do not set a custom zone, IdM will add its services to the default
firewalldzone. The predefined default zone ispublic.ImportantThe specified
firewalldzone must exist and be permanent.Example of a simple inventory hosts file with a custom
firewalldzone[ipaservers] server.idm.example.com [ipareplicas] replica1.idm.example.com replica2.idm.example.com replica3.idm.example.com [...] [ipareplicas:vars] ipareplica_firewalld_zone=custom zone- Scenario 2
If you want the replica to host the IdM DNS service, add the ipareplica_setup_dns=yes line to the
[ipareplicas:vars]section. Additionally, specify if you want to use per-server DNS forwarders:-
To configure per-server forwarders, add the
ipareplica_forwardersvariable and a list of strings to the[ipareplicas:vars]section, for example: ipareplica_forwarders=192.0.2.1,192.0.2.2 -
To configure no per-server forwarders, add the following line to the
[ipareplicas:vars]section: ipareplica_no_forwarders=yes. -
To configure per-server forwarders based on the forwarders listed in the
/etc/resolv.conffile of the replica, add theipareplica_auto_forwardersvariable to the[ipareplicas:vars]section.
Example inventory file with instructions to set up DNS and per-server forwarders on the replicas
[ipaservers]
server.idm.example.com

[ipareplicas]
replica1.idm.example.com
replica2.idm.example.com
replica3.idm.example.com
[...]

[ipareplicas:vars]
ipareplica_setup_dns=yes
ipareplica_forwarders=192.0.2.1,192.0.2.2
-
To configure per-server forwarders, add the
- Scenario 3
Specify the DNS resolver using the
ipaclient_configure_dns_resolveandipaclient_dns_serversoptions (if available) to simplify cluster deployments. This is especially useful if your IdM deployment is using integrated DNS:An inventory file snippet specifying a DNS resolver:
[...]
[ipaclient:vars]
ipaclient_configure_dns_resolver=true
ipaclient_dns_servers=192.168.100.1
NoteThe
ipaclient_dns_serverslist must contain only IP addresses. Host names are not allowed.
Additional resources
-
For more information about the
ipareplicavariables, see the/usr/share/ansible/roles/ipareplica/README.mdMarkdown file.
32.2. Specifying the credentials for installing the IdM replica using an Ansible playbook
Complete this procedure to configure the authorization for installing the IdM replica.
Prerequisites
You have configured your Ansible control node to meet the following requirements:
- You are using Ansible version 2.14 or later.
-
You have installed the
ansible-freeipapackage on the Ansible controller. - The example assumes that in the ~/MyPlaybooks/ directory, you have created an Ansible inventory file with the fully-qualified domain name (FQDN) of the IdM server.
-
The example assumes that the secret.yml Ansible vault stores your
ipaadmin_password.
-
The target node, that is the node on which the
ansible-freeipamodule is executed, is part of the IdM domain as an IdM client, server or replica.
Procedure
Specify the password of a user authorized to deploy replicas, for example the IdM
admin.Red Hat recommends using the Ansible Vault to store the password, and referencing the Vault file from the playbook file, for example
install-replica.yml:Example playbook file using principal from inventory file and password from an Ansible Vault file
- name: Playbook to configure IPA replicas hosts: ipareplicas become: true vars_files: -
playbook_sensitive_data.ymlroles: - role: ipareplica state: presentFor details how to use Ansible Vault, see the official Ansible Vault documentation.
Less securely, provide the credentials of
admindirectly in the inventory file. Use theipaadmin_passwordoption in the[ipareplicas:vars]section of the inventory file. The inventory file and theinstall-replica.ymlplaybook file can then look as follows:Example inventory hosts.replica file
[...]
[ipareplicas:vars]
ipaadmin_password=Secret123
Example playbook using principal and password from inventory file
- name: Playbook to configure IPA replicas
  hosts: ipareplicas
  become: true

  roles:
  - role: ipareplica
    state: present
Alternatively but also less securely, provide the credentials of another user authorized to deploy a replica directly in the inventory file. To specify a different authorized user, use the
ipaadmin_principaloption for the user name, and theipaadmin_passwordoption for the password. The inventory file and theinstall-replica.ymlplaybook file can then look as follows:Example inventory hosts.replica file
[...]
[ipareplicas:vars]
ipaadmin_principal=my_admin
ipaadmin_password=my_admin_secret123
Example playbook using principal and password from inventory file
- name: Playbook to configure IPA replicas
  hosts: ipareplicas
  become: true

  roles:
  - role: ipareplica
    state: present
Additional resources
-
For details on the options accepted by the
ipareplicaAnsible role, see the/usr/share/ansible/roles/ipareplica/README.mdMarkdown file.
32.3. Deploying an IdM replica using an Ansible playbook
Complete this procedure to use an Ansible playbook to deploy an IdM replica.
Prerequisites
- You have configured the inventory file for installing an IdM replica.
- You have configured the authorization for installing the IdM replica.
Procedure
To install an IdM replica using an Ansible playbook, use the
ansible-playbookcommand with the name of the playbook file, for exampleinstall-replica.yml. Specify the inventory file with the-ioption:$ ansible-playbook --vault-password-file=password_file -v -i <path_to_inventory_directory>/hosts.replica <path_to_playbooks_directory>/install-replica.ymlSpecify the level of verbosity by using the
-v,-vvor-vvvoption.Ansible informs you about the execution of the Ansible playbook script. The following output shows that the script has run successfully as 0 tasks have failed:
PLAY RECAP
replica.idm.example.com : ok=18   changed=10   unreachable=0    failed=0    skipped=21   rescued=0    ignored=0
You have now installed an IdM replica.
32.4. Uninstalling an IdM replica using an Ansible playbook
In an existing Identity Management (IdM) deployment, replica and server are interchangeable terms. For information on how to uninstall an IdM server, see Uninstalling an IdM server using an Ansible playbook or Using an Ansible playbook to uninstall an IdM server even if this leads to a disconnected topology.
Additional resources
Chapter 33. Installing an Identity Management client using an Ansible playbook
Learn more about how to configure a system as an Identity Management (IdM) client by using Ansible. Configuring a system as an IdM client enrolls it into an IdM domain and enables the system to use IdM services on IdM servers in the domain.
The deployment is managed by the ipaclient Ansible role. By default, the role uses the autodiscovery mode for identifying the IdM servers, domain and other settings. The role can be modified to have the Ansible playbook use the settings specified, for example in the inventory file.
Prerequisites
- You have installed the ansible-freeipa package on the Ansible control node.
You understand Ansible and IdM concepts:
- Ansible roles
- Ansible nodes
- Ansible inventory
- Ansible tasks
- Ansible modules
- Ansible plays and playbooks
33.1. Setting the parameters of the inventory file for the autodiscovery client installation mode
To install an Identity Management client using an Ansible playbook, configure the target host parameters in an inventory file, for example inventory/hosts:
- The information about the host
- The authorization for the task
The inventory file can be in one of many formats, depending on the inventory plugins you have. The INI-like format is one of Ansible’s defaults and is used in the examples below.
To use smart cards with the graphical user interface in RHEL, ensure that you include the ipaclient_mkhomedir variable in your Ansible playbook.
Prerequisites
- You have checked the deployment instructions on the control node, see Checking the parameters in the install-client.yml file.
Procedure
Specify the fully-qualified hostname (FQDN) of the host to become an IdM client. The fully qualified domain name must be a valid DNS name:
-
Only numbers, alphabetic characters, and hyphens (
-) are allowed. For example, underscores are not allowed and can cause DNS failures. - The host name must be all lower-case. No capital letters are allowed.
If the SRV records are set properly in the IdM DNS zone, the script automatically discovers all the other required values.
Example of a simple inventory hosts file with only the client FQDN defined
[ipaclients]
client.idm.example.com
[...]
-
Only numbers, alphabetic characters, and hyphens (
Specify the credentials for enrolling the client. The following authentication methods are available:
The password of a user authorized to enroll clients. This is the default option.
Red Hat recommends using the Ansible Vault to store the password, and referencing the Vault file from the playbook file, for example
install-client.yml, directly:Example playbook file using principal from inventory file and password from an Ansible Vault file
- name: Playbook to configure IPA clients with username/password
  hosts: ipaclients
  become: true
  vars_files:
  - playbook_sensitive_data.yml

  roles:
  - role: ipaclient
    state: present
Less securely, provide the credentials of
adminusing theipaadmin_passwordoption in the[ipaclients:vars]section of theinventory/hostsfile. Alternatively, to specify a different authorized user, use theipaadmin_principaloption for the user name, and theipaadmin_passwordoption for the password. Theinventory/hostsinventory file and theinstall-client.ymlplaybook file can then look as follows:Example inventory hosts file
[...]
[ipaclients:vars]
ipaadmin_principal=my_admin
ipaadmin_password=Secret123
Example Playbook using principal and password from inventory file
- name: Playbook to unconfigure IPA clients
  hosts: ipaclients
  become: true

  roles:
  - role: ipaclient
    state: true
The client keytab from the previous enrollment if it is still available.
This option is available if the system was previously enrolled as an Identity Management client. To use this authentication method, uncomment the
#ipaclient_keytaboption, specifying the path to the file storing the keytab, for example in the[ipaclient:vars]section ofinventory/hosts.A random, one-time password (OTP) to be generated during the enrollment. To use this authentication method, use the
ipaclient_use_otp=yesoption in your inventory file. For example, you can uncomment theipaclient_use_otp=yesoption in the[ipaclients:vars]section of theinventory/hostsfile. Note that with OTP you must also specify one of the following options:-
The password of a user authorized to enroll clients, for example by providing a value for
ipaadmin_passwordin the[ipaclients:vars]section of theinventory/hostsfile. -
The admin keytab, for example by providing a value for
ipaadmin_keytabin the[ipaclients:vars]section ofinventory/hosts.
-
The password of a user authorized to enroll clients, for example by providing a value for
[Optional] Specify the DNS resolver using the
ipaclient_configure_dns_resolveandipaclient_dns_serversoptions (if available) to simplify cluster deployments. This is especially useful if your IdM deployment is using integrated DNS:An inventory file snippet specifying a DNS resolver:
[...] [ipaclients:vars] ipaadmin_password: "{{ ipaadmin_password }}" ipaclient_domain=idm.example.com ipaclient_configure_dns_resolver=true ipaclient_dns_servers=192.168.100.1NoteThe
ipaclient_dns_serverslist must contain only IP addresses. Host names are not allowed.-
Starting with RHEL 8.9, you can also specify the
ipaclient_subid: trueoption to have subid ranges configured for IdM users on the IdM level.
Additional resources
-
/usr/share/ansible/roles/ipaclient/README.md - Managing subID ranges manually
33.2. Setting the parameters of the inventory file when autodiscovery is not possible during client installation
To install an Identity Management client using an Ansible playbook, configure the target host parameters in an inventory file, for example inventory/hosts:
- The information about the host, the IdM server and the IdM domain or the IdM realm
- The authorization for the task
The inventory file can be in one of many formats, depending on the inventory plugins you have. The INI-like format is one of Ansible’s defaults and is used in the examples below.
To use smart cards with the graphical user interface in RHEL, ensure that you include the ipaclient_mkhomedir variable in your Ansible playbook.
Prerequisites
- You have checked the deployment instructions on the control node, see Checking the parameters in the install-client.yml file.
Procedure
Specify the fully-qualified hostname (FQDN) of the host to become an IdM client. The fully qualified domain name must be a valid DNS name:
-
Only numbers, alphabetic characters, and hyphens (
-) are allowed. For example, underscores are not allowed and can cause DNS failures. - The host name must be all lower-case. No capital letters are allowed.
-
Only numbers, alphabetic characters, and hyphens (
Specify other options in the relevant sections of the
inventory/hostsfile:-
The FQDN of the servers in the
[ipaservers]section to indicate which IdM server the client will be enrolled with One of the two following options:
-
The
ipaclient_domainoption in the[ipaclients:vars]section to indicate the DNS domain name of the IdM server the client will be enrolled with The
ipaclient_realmoption in the[ipaclients:vars]section to indicate the name of the Kerberos realm controlled by the IdM serverExample of an inventory hosts file with the client FQDN, the server FQDN and the domain defined
[ipaclients]
client.idm.example.com

[ipaservers]
server.idm.example.com

[ipaclients:vars]
ipaclient_domain=idm.example.com
[...]
-
The
-
The FQDN of the servers in the
Specify the credentials for enrolling the client. The following authentication methods are available:
The password of a user authorized to enroll clients. This is the default option.
Red Hat recommends using the Ansible Vault to store the password, and referencing the Vault file from the playbook file, for example
install-client.yml, directly:Example playbook file using principal from inventory file and password from an Ansible Vault file
- name: Playbook to configure IPA clients with username/password
  hosts: ipaclients
  become: true
  vars_files:
  - playbook_sensitive_data.yml

  roles:
  - role: ipaclient
    state: present
Less securely, the credentials of
adminto be provided using theipaadmin_passwordoption in the[ipaclients:vars]section of theinventory/hostsfile. Alternatively, to specify a different authorized user, use theipaadmin_principaloption for the user name, and theipaadmin_passwordoption for the password. Theinstall-client.ymlplaybook file can then look as follows:Example inventory hosts file
[...]
[ipaclients:vars]
ipaadmin_principal=my_admin
ipaadmin_password=Secret123
Example Playbook using principal and password from inventory file
- name: Playbook to unconfigure IPA clients
  hosts: ipaclients
  become: true

  roles:
  - role: ipaclient
    state: true
The client keytab from the previous enrollment if it is still available:
This option is available if the system was previously enrolled as an Identity Management client. To use this authentication method, uncomment the
ipaclient_keytaboption, specifying the path to the file storing the keytab, for example in the[ipaclient:vars]section ofinventory/hosts.A random, one-time password (OTP) to be generated during the enrollment. To use this authentication method, use the
ipaclient_use_otp=yesoption in your inventory file. For example, you can uncomment the#ipaclient_use_otp=yesoption in the[ipaclients:vars]section of theinventory/hostsfile. Note that with OTP you must also specify one of the following options:-
The password of a user authorized to enroll clients, for example by providing a value for
ipaadmin_passwordin the[ipaclients:vars]section of theinventory/hostsfile. -
The admin keytab, for example by providing a value for
ipaadmin_keytabin the[ipaclients:vars]section ofinventory/hosts.
-
The password of a user authorized to enroll clients, for example by providing a value for
-
Starting with RHEL 8.9, you can also specify the
ipaclient_subid: trueoption to have subid ranges configured for IdM users on the IdM level.
Additional resources
-
For details on the options accepted by the
ipaclientAnsible role, see the/usr/share/ansible/roles/ipaclient/README.mdfile. - Managing subID ranges manually
33.3. Checking the parameters in the install-client.yml file
The install-client.yml playbook file contains instructions for the IdM client deployment.
Procedure
Open the file and check if the instructions in the playbook correspond to what you are planning for your deployment. The contents typically look like this:
---
- name: Playbook to configure IPA clients with username/password
  hosts: ipaclients
  become: true

  roles:
  - role: ipaclient
    state: present
This is what the individual entries mean:
-
The hosts entry specifies the section of the
inventory/hostsfile where the ansible script searches theFQDNsof the hosts on which theipa-client-installscript shall be run. -
The
become: trueentry specifies that root’s credentials will be invoked during the execution of theipa-client-installscript. -
The
role: ipacliententry specifies the role that will be installed on the host: in this case, it is the ipa client role. -
The
state: presententry specifies that the client should be installed rather than uninstalled (absent).
-
The hosts entry specifies the section of the
33.4. Authorization options for IdM client enrollment using an Ansible playbook
The individual authorization options for IdM client enrollment with examples of inventory and playbook files are as follows:
Table 33.1. Authorization options for IdM client enrollment using Ansible
| Authorization option | Note | Example inventory file | Example install-client.yml playbook file |
|---|---|---|---|
| Password of a user authorized to enroll a client: Option 1 | Password stored in Ansible vault |
[ipaclients:vars] [...] |
- name: Playbook to configure IPA clients with username/password
  hosts: ipaclients
  become: true
  vars_files:
  - playbook_sensitive_data.yml

  roles:
  - role: ipaclient
    state: present
|
| Password of a user authorized to enroll a client: Option 2 | Password stored in inventory file |
[ipaclients:vars] ipaadmin_password=Secret123 |
- name: Playbook to configure IPA clients
  hosts: ipaclients
  become: true

  roles:
  - role: ipaclient
    state: true
|
| A random, one-time password (OTP): Option 1 | OTP + administrator password |
[ipaclients:vars] ipaadmin_password=Secret123 ipaclient_use_otp=true |
- name: Playbook to configure IPA clients
  hosts: ipaclients
  become: true

  roles:
  - role: ipaclient
    state: true
|
| A random, one-time password (OTP): Option 2 | OTP + an admin keytab |
[ipaclients:vars] ipaadmin_keytab=/root/admin.keytab ipaclient_use_otp=true |
- name: Playbook to configure IPA clients
  hosts: ipaclients
  become: true

  roles:
  - role: ipaclient
    state: true
|
| The client keytab from the previous enrollment |
[ipaclients:vars] ipaclient_keytab=/root/krb5.keytab |
- name: Playbook to configure IPA clients
  hosts: ipaclients
  become: true

  roles:
  - role: ipaclient
    state: true
|
As of RHEL 8.8, in the two OTP authorization scenarios described above, the requesting of the administrator’s TGT by using the kinit command occurs on the first specified or discovered IdM server. Therefore, no additional modification of the Ansible control node is required. Prior to RHEL 8.8, the krb5-workstation package was required on the control node.
33.5. Deploying an IdM client using an Ansible playbook
Complete this procedure to use an Ansible playbook to deploy an IdM client in your IdM environment.
Prerequisites
You have set the parameters of the IdM client deployment to correspond to your deployment scenario:
- You have checked the parameters in install-client.yml.
Procedure
To install an IdM client using an Ansible playbook, use the
ansible-playbookcommand with the name of the playbook file, for exampleinstall-client.yml. Specify the inventory file with the-ioption:$ ansible-playbook --vault-password-file=password_file -v -i inventory/hosts install-client.ymlSpecify the level of verbosity by using the
-v,-vvor-vvvoption.Ansible informs you about the execution of the Ansible playbook script. The following output shows that the script has run successfully as no tasks have failed:
PLAY RECAP client1.idm.example.com : ok=18 changed=10 unreachable=0 failed=0 skipped=21 rescued=0 ignored=0NoteAnsible uses different colors to provide different types of information about the running process. You can modify the default colors in the
[colors]section of the/etc/ansible/ansible.cfgfile:[colors] [...] #error = red #debug = dark gray #deprecate = purple #skip = cyan #unreachable = red #ok = green #changed = yellow [...]
You have now installed an IdM client on your host using an Ansible playbook.
33.6. Testing an Identity Management client after Ansible installation
The command-line interface (CLI) informs you that the ansible-playbook command was successful, but you can also do your own test.
To test that the Identity Management client can obtain information about users defined on the server, check that you are able to resolve a user defined on the server. For example, to check the default admin user:
[user@client1 ~]$ id admin
uid=1254400000(admin) gid=1254400000(admins) groups=1254400000(admins)
To test that authentication works correctly, su - as another already existing IdM user:
[user@client1 ~]$ su - idm_user
Last login: Thu Oct 18 18:39:11 CEST 2018 from 192.168.122.1 on pts/0
[idm_user@client1 ~]$
33.7. Uninstalling an IdM client using an Ansible playbook
Complete this procedure to use an Ansible playbook to uninstall your host as an IdM client.
Prerequisites
- IdM administrator credentials.
Procedure
To uninstall the IdM client, use the
ansible-playbookcommand with the name of the playbook file, for exampleuninstall-client.yml. Specify the inventory file with the-ioption and, optionally, specify the level of verbosity by using the-v,-vvor-vvvoptions:$ ansible-playbook --vault-password-file=password_file -v -i inventory/hosts uninstall-client.yml
The uninstallation of the client only removes the basic IdM configuration from the host but leaves the configuration files on the host in case you decide to re-install the client. In addition, the uninstallation has the following limitations:
- It does not remove the client host entry from the IdM LDAP server. The uninstallation only unenrolls the host.
- It does not remove any services residing on the client from IdM.
- It does not remove the DNS entries for the client from the IdM server.
-
It does not remove the old principals for keytabs other than
/etc/krb5.keytab.
Note that the uninstallation does remove all certificates that were issued for the host by the IdM CA.
Additional resources
Part II. Integrating IdM and AD
Chapter 34. Installing trust between IdM and AD
Learn more about how to create a trust between the Identity Management IdM server and Active Directory (AD), where both servers are located in the same forest.
- NOTE
- In RHEL 7, synchronization and trust were two possible approaches to indirect integration of RHEL systems to Active Directory (AD). In RHEL 8, synchronization is deprecated. To integrate IdM and AD, use the trust approach instead. To migrate from synchronization to trust, see Migrating an existing environment from synchronization to trust in the context of integrating a Linux domain with an Active Directory domain.
Prerequisites
- First, read the Planning a cross-forest trust between Identity Management and Active Directory document.
- AD is installed with a domain controller on it.
The IdM server is installed and running.
- For details, see Installing Identity Management.
- Both the AD server and the IdM server must have their clocks in sync because Kerberos requires max 5 mins delay in communication.
Unique NetBIOS names for each of the servers placed in the trust because the NetBIOS names are critical for identifying the Active Directory domain.
-
The NetBIOS name of an Active Directory or IdM domain is usually the first part of the corresponding DNS domain. If the DNS domain is
ad.example.com, the NetBIOS name is typicallyAD. However, it is not required. Important is that the NetBIOS name is just one word without periods. The maximum length of a NetBIOS name is 15 characters.
-
The NetBIOS name of an Active Directory or IdM domain is usually the first part of the corresponding DNS domain. If the DNS domain is
The IdM system must have the IPv6 protocol enabled in the kernel.
- If IPv6 is disabled, then the CLDAP plug-in used by the IdM services fails to initialize.
34.1. Supported versions of Windows Server
You can establish a trust relationship with Active Directory (AD) forests that use the following forest and domain functional levels:
- Forest functional level range: Windows Server 2012 — Windows Server 2016
- Domain functional level range: Windows Server 2012 — Windows Server 2016
Identity Management (IdM) supports establishing a trust with Active Directory domain controllers running the following operating systems:
- Windows Server 2022 (RHEL 8.7 and later)
- Windows Server 2019
- Windows Server 2016
- Windows Server 2012 R2
- Windows Server 2012
In RHEL 8.4, Identity Management (IdM) does not support establishing trust to Active Directory with Active Directory domain controllers running Windows Server 2008 R2 or earlier versions. RHEL IdM now requires SMB encryption when establishing the trust relationship, which is only supported in Windows Server 2012 or later.
34.2. How the trust works
The trust between Identity Management IdM and Active Directory (AD) is established on the Cross-realm Kerberos trust. This solution uses the Kerberos capability to establish trusts between different identity sources. Therefore, all AD users can:
- Log in to access Linux systems and resources.
- Use single sign-on (SSO).
All IdM objects are managed in IdM in the trust.
All AD objects are managed in AD in the trust.
In complex environments, a single IdM forest can be connected to multiple AD forests. This setup enables better separation of duties for different functions in the organization. AD administrators can focus on users and policies related to users while Linux administrators have full control over the Linux infrastructure. In such a case, the Linux realm controlled by IdM is analogous to an AD resource domain or realm but with Linux systems in it.
From the perspective of AD, Identity Management represents a separate AD forest with a single AD domain. When cross-forest trust between an AD forest root domain and an IdM domain is established, users from the AD forest domains can interact with Linux machines and services from the IdM domain.
In trust environments, IdM enables you to use ID views to configure POSIX attributes for AD users on the IdM server.
34.3. AD administration rights
When you want to build a trust between AD (Active Directory) and IdM (Identity Management), you will need to use an AD administrator account with appropriate AD privileges.
Such an AD administrator must be a member of one of the following groups:
- Enterprise Admin group in the AD forest
- Domain Admins group in the forest root domain for your AD forest
Additional resources
- For details about Enterprise Admins, see Enterprise Admins.
- For details about Domain Admins, see Domain Admins.
- For details about AD trust, see How Domain and Forest Trusts Work.
34.4. Ensuring support for common encryption types in AD and RHEL
By default, Identity Management establishes a cross-realm trust with support for RC4, AES-128, and AES-256 Kerberos encryption types. Additionally, by default SSSD and Samba Winbind support RC4, AES-128, and AES-256 Kerberos encryption types.
RC4 encryption has been deprecated and disabled by default, as it is considered less secure than the newer AES-128 and AES-256 encryption types. In contrast, Active Directory (AD) user credentials and trusts between AD domains support RC4 encryption and they might not support all AES encryption types.
Without any common encryption types, communication between RHEL hosts and AD domains might not work, or some AD accounts might not be able to authenticate. To address this situation, perform one of the configurations outlined in the following sections.
If IdM is in FIPS mode, the IdM-AD integration does not work due to AD only supporting the use of RC4 or AES HMAC-SHA1 encryptions, while RHEL 9 in FIPS mode allows only AES HMAC-SHA2 by default. To enable the use of AES HMAC-SHA1 in RHEL 9, enter # update-crypto-policies --set FIPS:AD-SUPPORT.
IdM does not support the more restrictive FIPS:OSPP crypto policy, which should only be used on Common Criteria evaluated systems.
34.4.1. Enabling AES encryption in AD (recommended)
To ensure trusts between Active Directory (AD) domains in an AD forest support strong AES encryption types, see the following Microsoft article: AD DS: Security: Kerberos "Unsupported etype" error when accessing a resource in a trusted domain
34.4.2. Enabling the AES encryption type in Active Directory using a GPO
This section describes how to enable the AES encryption type in Active Directory (AD) using a group policy object (GPO). Certain features on RHEL, such as running a Samba server on an IdM client, require this encryption type.
Note that RHEL no longer supports the weak DES and RC4 encryption types.
Prerequisites
- You are logged into AD as a user who can edit group policies.
-
The
Group Policy Management Consoleis installed on the computer.
Procedure
-
Open the
Group Policy Management Console. -
Right-click
Default Domain Policy, and selectEdit. TheGroup Policy Management Editoropens. -
Navigate to
Computer Configuration→Policies→Windows Settings→Security Settings→Local Policies→Security Options. -
Double-click the
Network security: Configure encryption types allowed for Kerberospolicy. -
Select
AES256_HMAC_SHA1and, optionally,Future encryption types. - Click .
-
Close the
Group Policy Management Editor. -
Repeat the steps for the
Default Domain Controller Policy. Wait until the Windows domain controllers (DC) applied the group policy automatically. Alternatively, to apply the GPO manually on a DC, enter the following command using an account that has administrator permissions:
C:\> gpupdate /force /target:computer
34.4.3. Enabling RC4 support in RHEL
On every RHEL host where authentication against AD Domain Controllers takes place, complete the steps outlined below.
Procedure
Use the
update-crypto-policiescommand to enable theAD-SUPPORTcryptographic subpolicy in addition to theDEFAULTcryptographic policy.[root@host ~]# update-crypto-policies --set DEFAULT:AD-SUPPORT Setting system policy to DEFAULT:AD-SUPPORT Note: System-wide crypto policies are applied on application start-up. It is recommended to restart the system for the change of policies to fully take place.- Restart the host.
The AD-SUPPORT cryptographic subpolicy is only available on RHEL 8.3 and newer.
-
To enable support for RC4 in RHEL 8.2, create and enable a custom cryptographic module policy with
cipher = RC4-128+. For more details, see Customizing system-wide cryptographic policies with subpolicies. To enable support for RC4 in RHEL 8.0 and RHEL 8.1, add
+rc4to thepermitted_enctypesoption in the/etc/crypto-policies/back-ends/krb5.configfile:[libdefaults] permitted_enctypes = aes256-cts-hmac-sha1-96 aes256-cts-hmac-sha384-192 camellia256-cts-cmac aes128-cts-hmac-sha1-96 aes128-cts-hmac-sha256-128 camellia128-cts-cmac +rc4
34.4.4. Additional resources
34.5. Ports required for communication between IdM and AD
To enable communication between your Active Directory (AD) and Identity Management (IdM) environments, open the following ports on the firewalls of your AD Domain Controllers and IdM servers.
Table 34.1. Ports required for an AD trust
| Service | Port | Protocol |
|---|---|---|
| Endpoint resolution portmapper | 135 | TCP |
| NetBIOS-DGM | 138 | TCP and UDP |
| NetBIOS-SSN | 139 | TCP and UDP |
| Microsoft-DS | 445 | TCP and UDP |
| Dynamic RPC | 49152-65535 | TCP |
| AD Global Catalog | 3268 | TCP |
| LDAP | 389 | TCP and UDP |
The TCP port 389 is not required to be open on IdM servers for trust, but it is necessary for clients communicating with the IdM server.
The TCP port 135 is required for the DCE RPC end-point mapper to work and is used during the IdM-AD trust creation.
To open ports, you can use the following methods:
firewalldservice — you can enable the particular ports or enable the following services which includes the ports:- FreeIPA trust setup
- FreeIPA with LDAP
- Kerberos
- DNS
For details, see the
firewall-cmdman page.
If you are using RHEL 8.2 and earlier, the freeipa-trust firewalld service includes an RPC port range of 1024-1300, which is incorrect. On RHEL 8.2 and earlier, you must manually open the TCP port range 49152-65535 in addition to enabling the freeipa-trust firewalld service.
This issue has been fixed for RHEL 8.3 and later in Bug 1850418 - update freeipa-trust.xml definition to include correct dynamic RPC range.
The RHEL web console, which is a UI with firewall settings based on the
firewalldservice.
For details about firewall configuration through the web console, see Enabling services on the firewall using the web console
NoteIf you are using RHEL 8.2 and earlier, the
FreeIPA Trust Setupservice includes an RPC port range of1024-1300, which is incorrect. On RHEL 8.2 and earlier, you must manually open the TCP port range49152-65535in addition to enabling theFreeIPA Trust Setupservice in the RHEL web console.This issue has been fixed for RHEL 8.3 and later in Bug 1850418 - update freeipa-trust.xml definition to include correct dynamic RPC range.
Table 34.2. Ports required by IdM servers in a trust
| Service | Port | Protocol |
|---|---|---|
| Kerberos | 88, 464 | TCP and UDP |
| LDAP | 389 | TCP |
| DNS | 53 | TCP and UDP |
Table 34.3. Ports required by IdM clients in an AD trust
| Service | Port | Protocol |
|---|---|---|
| Kerberos | 88 | UDP and TCP |
The libkrb5 library uses UDP and falls back to the TCP protocol if the data sent from the Key Distribution Center (KDC) is too large. Active Directory attaches a Privilege Attribute Certificate (PAC) to the Kerberos ticket, which increases the size and requires to use the TCP protocol. To avoid the fall-back and resending the request, by default, SSSD in Red Hat Enterprise Linux 7.4 and later uses TCP for user authentication. If you want to configure the size before libkrb5 uses TCP, set the udp_preference_limit in the /etc/krb5.conf file. For details, see the krb5.conf(5) man page.
The following diagram shows communication sent by IdM clients, and received and responded to by IdM servers and AD Domain Controllers. To set the incoming and outgoing ports and protocols on your firewall, Red Hat recommends using the firewalld service, which already has definitions for FreeIPA services.
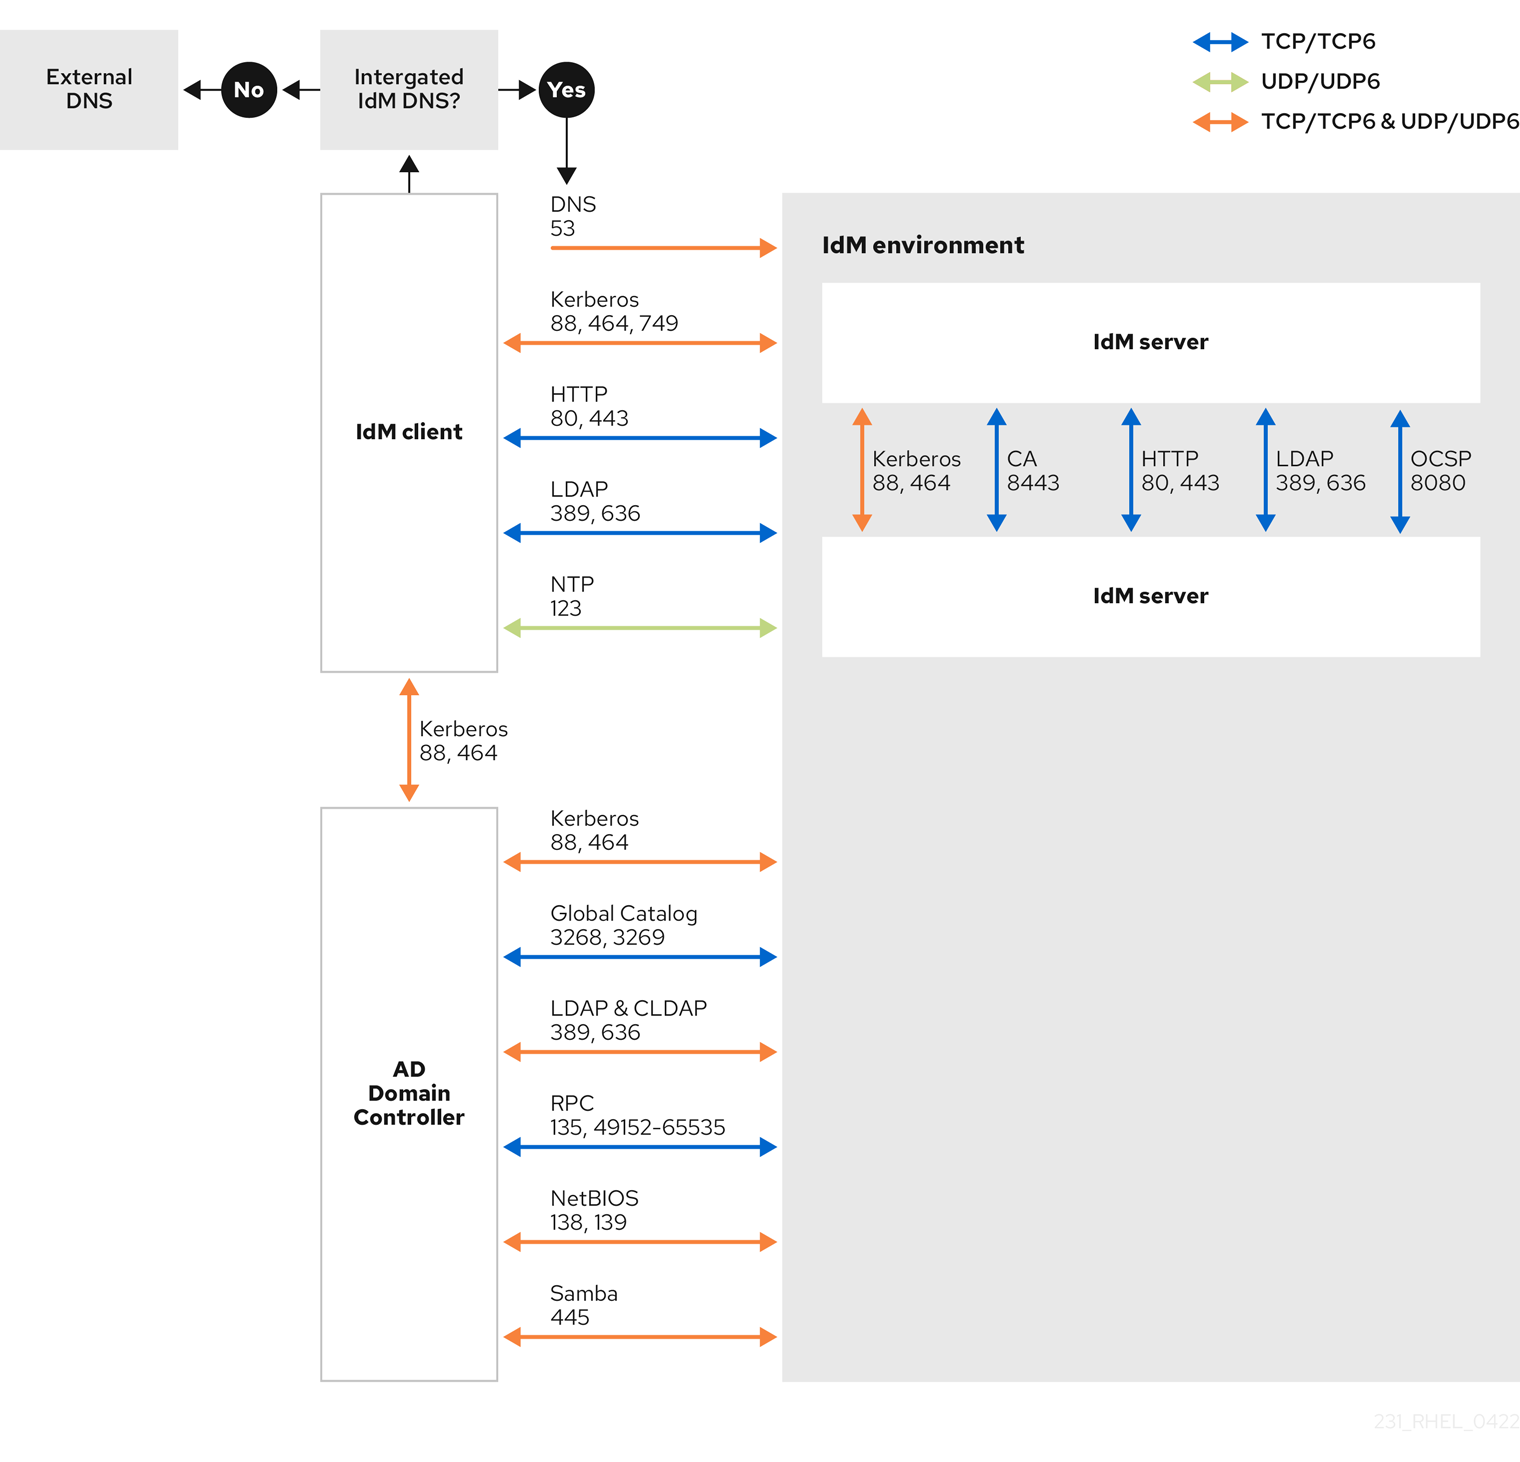
Additional resources
- For more information about the Dynamic RPC port range in Windows Server 2008 and later, see The default dynamic port range for TCP/IP has changed since Windows Vista and in Windows Server 2008.
34.6. Configuring DNS and realm settings for a trust
Before you connect Identity Management (IdM) and Active Directory (AD) in a trust, you need to ensure that servers see each other and resolve domain names correctly. To configure DNS to allow using domain names between:
- One primary IdM server using integrated DNS server and Certification Authority.
- One AD Domain Controller.
DNS settings require:
- Configuring DNS zones in the IdM server
- Configuring conditional DNS forwarding in AD
- Verifying correctness of the DNS configuration
34.6.1. Unique primary DNS domains
In Windows, every domain is a Kerberos realm and a DNS domain at the same time. Every domain managed by the domain controller needs to have its own dedicated DNS zone. The same applies when Identity Management (IdM) is trusted by Active Directory (AD) as a forest. AD expects IdM to have its own DNS domain. For the trust setup to work, the DNS domain needs to be dedicated to the Linux environment.
Each system must have its own unique primary DNS domain configured. For example:
-
ad.example.comfor AD andidm.example.comfor IdM -
example.comfor AD andidm.example.comfor IdM -
ad.example.comfor AD andexample.comfor IdM
The most convenient management solution is an environment where each DNS domain is managed by integrated DNS servers, but it is possible to use any other standard-compliant DNS server as well.
- Kerberos realm names as upper-case versions of primary DNS domain names
-
Kerberos realm names must be the same as the primary DNS domain names, with all letters uppercase. For example, if the domain names are
ad.example.comfor AD andidm.example.comfor IdM, the Kerberos realm names are required to beAD.EXAMPLE.COMandIDM.EXAMPLE.COM. - DNS records resolvable from all DNS domains in the trust
- All machines must be able to resolve DNS records from all DNS domains involved in the trust relationship.
- IdM and AD DNS Domains
- Systems joined to IdM can be distributed over multiple DNS domains. Red Hat recommends that you deploy IdM clients in a DNS zone different to the ones owned by Active Directory. The primary IdM DNS domain must have proper SRV records to support AD trusts.
In some environments with trusts between IdM and Active Directory, you can install an IdM client on a host that is part of the Active Directory DNS domain. The host can then benefit from the Linux-focused features of IdM. This is not a recommended configuration and has some limitations. See Configuring IdM clients in an Active Directory DNS domain for more details.
You can acquire a list of the required SRV records specific to your system setup by running the following command:
$ ipa dns-update-system-records --dry-run
The generated list can look for example like this:
IPA DNS records:
  _kerberos-master._tcp.idm.example.com. 86400 IN SRV 0 100 88 server.idm.example.com.
  _kerberos-master._udp.idm.example.com. 86400 IN SRV 0 100 88 server.idm.example.com.
  _kerberos._tcp.idm.example.com. 86400 IN SRV 0 100 88 server.idm.example.com.
  _kerberos._tcp.idm.example.com. 86400 IN SRV 0 100 88 server.idm.example.com.
  _kerberos.idm.example.com. 86400 IN TXT "IDM.EXAMPLE.COM"
  _kpasswd._tcp.idm.example.com. 86400 IN SRV 0 100 464 server.idm.example.com.
  _kpasswd._udp.idm.example.com. 86400 IN SRV 0 100 464 server.idm.example.com.
  _ldap._tcp.idm.example.com. 86400 IN SRV 0 100 389 server.idm.example.com.
  _ipa-ca.idm.example.com. 86400 IN A 192.168.122.2
For other DNS domains that are part of the same IdM realm, it is not required for the SRV records to be configured when the trust to AD is configured. The reason is that AD domain controllers do not use SRV records to discover KDCs but rather base the KDC discovery on name suffix routing information for the trust.
34.6.2. Configuring a DNS forward zone in the IdM Web UI
Follow this procedure to add a DNS forward zone to the Identity Management (IdM) server by using the IdM Web UI.
With DNS forward zones, you can forward DNS queries for a specific zone to a different DNS server. For example, you can forward DNS queries for the Active Directory (AD) domain to an AD DNS server.
Prerequisites
- Access to the IdM Web UI with a user account that has administrator rights.
- Correctly configured DNS server.
Procedure
- Log in to the IdM Web UI with administrator privileges. For details, see Accessing the IdM Web UI in a web browser.
- Click on the Network Services tab.
- Click on the DNS tab.
In the drop down menu, click on the DNS Forward Zones item.
- Click on the Add button.
- In the Add DNS forward zone dialog box, add a zone name.
- In the Zone forwarders item, click on the Add button.
- In the Zone forwarders field, add the IP address of the server for which you want to create the forward zone.
Click on the Add button.
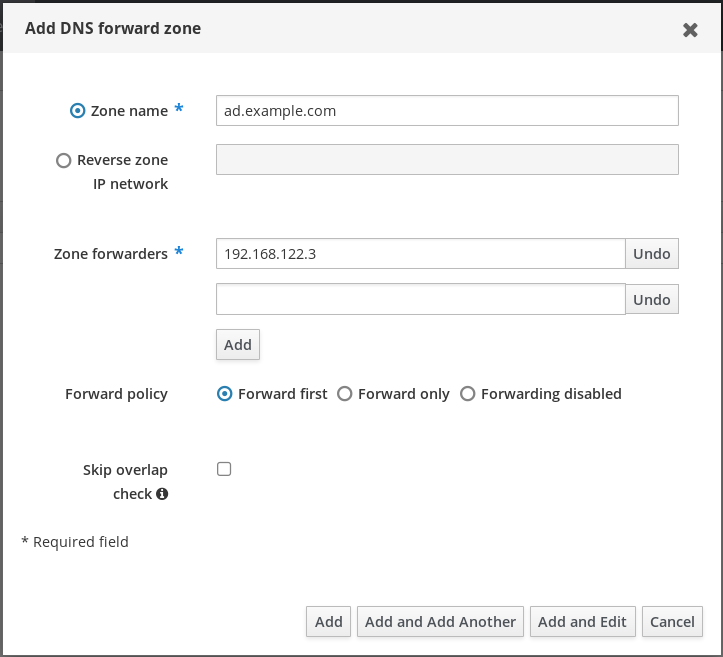
The forwarded zone has been added to the DNS settings and you can verify it in the DNS Forward Zones settings. The Web UI informs you about success with the following pop-up message: DNS Forward Zone successfully added.
The Web UI might display a warning about a DNSSEC validation failure after adding a forward zone to the configuration.
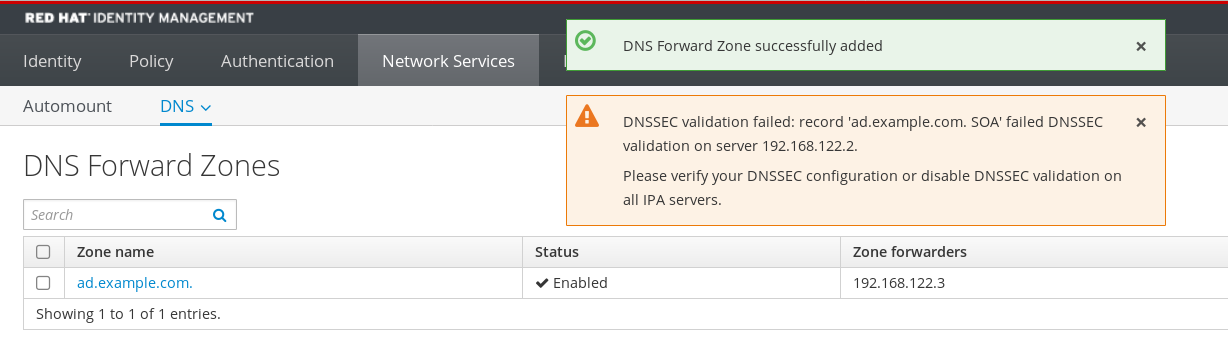
DNSSEC (Domain Name System Security Extensions) secures DNS data with a digital signature to protect DNS from attacks. This service is enabled by default in the IdM server. The warning appears because the remote DNS server does not use DNSSEC. Red Hat recommends that you enable DNSSEC on the remote DNS server.
If you cannot enable DNSSEC validation on the remote server, you can disable DNSSEC in the IdM server:
Choose the appropriate configuration file to edit:
-
If your IdM server is using RHEL 8.0 or RHEL 8.1, open the
/etc/named.conffile. -
If your IdM server is using RHEL 8.2 or later, open the
/etc/named/ipa-options-ext.conffile.
-
If your IdM server is using RHEL 8.0 or RHEL 8.1, open the
Add the following DNSSEC parameters:
dnssec-enable no;
dnssec-validation no;
- Save and close the configuration file.
Restart the DNS service:
# systemctl restart named-pkcs11
Verification steps
Use the
nslookupcommand with the name of the remote DNS server:$ nslookup ad.example.com Server: 192.168.122.2 Address: 192.168.122.2#53 No-authoritative answer: Name: ad.example.com Address: 192.168.122.3
If you configured the domain forwarding correctly, the IP address of the remote DNS server is displayed.
34.6.3. Configuring a DNS forward zone in the CLI
Follow this procedure to add a new DNS forward zone to the Identity Management (IdM) server using the command line interface (CLI).
With DNS forward zones, you can forward DNS queries for a specific zone to a different DNS server. For example, you can forward DNS queries for the Active Directory (AD) domain to an AD DNS server.
Prerequisites
- Access to the CLI with a user account that has administrator rights.
- Correctly configured DNS server.
Procedure
Create a DNS forward zone for the AD domain, and specify the IP address of the remote DNS server with the
--forwarderoption:# ipa dnsforwardzone-add ad.example.com --forwarder=192.168.122.3 --forward-policy=first
You might see a warning about a DNSSEC validation failure in the /var/log/messages system logs after adding a new forward zone to the configuration:
named-pkcs11[2572]: no valid DS resolving 'host.ad.example.com/A/IN': 192.168.100.25#53
DNSSEC (Domain Name System Security Extensions) secures DNS data with a digital signature to protect DNS from attacks. This service is enabled by default in the IdM server. The warning appears because the remote DNS server does not use DNSSEC. Red Hat recommends that you enable DNSSEC on the remote DNS server.
If you cannot enable DNSSEC validation on the remote server, you can disable DNSSEC in the IdM server:
Choose the appropriate configuration file to edit:
-
If your IdM server is using RHEL 8.0 or RHEL 8.1, open the
/etc/named.conffile. -
If your IdM server is using RHEL 8.2 or later, open the
/etc/named/ipa-options-ext.conffile.
-
If your IdM server is using RHEL 8.0 or RHEL 8.1, open the
Add the following DNSSEC parameters:
dnssec-enable no;
dnssec-validation no;
- Save and close the configuration file.
Restart the DNS service:
# systemctl restart named-pkcs11
Verification steps
Use the
nslookupcommand with the name of the remote DNS server:$ nslookup ad.example.com Server: 192.168.122.2 Address: 192.168.122.2#53 No-authoritative answer: Name: ad.example.com Address: 192.168.122.3
If the domain forwarding is configured correctly, the
nslookuprequest displays an IP address of the remote DNS server.
34.6.4. Configuring DNS forwarding in AD
Follow this procedure to set up a DNS forwarding in Active Directory (AD) for the Identity Management (IdM) server.
Prerequisites
- Windows Server with AD installed.
- DNS port open on both servers.
Procedure
- Log in to the Windows Server.
- Open Server Manager.
- Open DNS Manager.
In Conditional Forwarders, add a new conditional forwarder with:
- The IdM server IP address
-
A fully qualified domain name, for example,
server.idm.example.com
- Save the settings.
34.6.5. Verifying the DNS configuration
Before configuring trust, verify that the Identity Management (IdM) and Active Directory (AD) servers can resolve themselves and each other.
Prerequisites
- You need to be logged in with sudo permissions.
Procedure
Run a DNS query for the Kerberos over UDP and LDAP over TCP service records.
[admin@server ~]# dig +short -t SRV _kerberos._udp.idm.example.com.
0 100 88 server.idm.example.com.

[admin@server ~]# dig +short -t SRV _ldap._tcp.idm.example.com.
0 100 389 server.idm.example.com.
The commands are expected to list all IdM servers.
Run a DNS query for the TXT record with the IdM Kerberos realm name. The obtained value is expected to match the Kerberos realm you specified when installing IdM.
[admin@server ~]# dig +short -t TXT _kerberos.idm.example.com.
"IDM.EXAMPLE.COM"
If the previous steps did not return all the expected records, update the DNS configuration with the missing records:
If your IdM environment uses an integrated DNS server, enter the
ipa dns-update-system-recordscommand without any options to update your system records:[admin@server ~]$ ipa dns-update-system-records
If your IdM environment does not use an integrated DNS server:
On the IdM server, export the IdM DNS records into a file:
[admin@server ~]$ ipa dns-update-system-records --dry-run --out dns_records_file.nsupdate
The command creates a file named dns_records_file.nsupdate with the relevant IdM DNS records.
-
Submit a DNS update request to your DNS server using the
nsupdateutility and the dns_records_file.nsupdate file. For more information, see Updating External DNS Records Using nsupdate in RHEL 7 documentation. Alternatively, refer to your DNS server documentation for adding DNS records.
Verify that IdM is able to resolve service records for AD with a command that runs a DNS query for Kerberos and LDAP over TCP service records:
[admin@server ~]# dig +short -t SRV _kerberos._tcp.dc._msdcs.ad.example.com.
0 100 88 addc1.ad.example.com.

[admin@server ~]# dig +short -t SRV _ldap._tcp.dc._msdcs.ad.example.com.
0 100 389 addc1.ad.example.com.
34.7. Configuring IdM clients in an Active Directory DNS domain
If you have client systems in a DNS domain controlled by Active Directory and you require those clients to be able to join the IdM Server to benefit from its RHEL features, you can configure users to access a client using a host name from the Active Directory DNS domain.
This is not a recommended configuration and has some limitations. Red Hat recommends to always deploy IdM clients in a DNS zone different from the ones owned by Active Directory and access IdM clients through their IdM host names.
Your IdM client configuration depends on whether you require single sign-on with Kerberos.
34.7.1. Configuring an IdM client without Kerberos single sign-on
Password authentication is the only authentication method that is available for users to access resources on IdM clients if the IdM clients are in an Active Directory DNS domain. Follow this procedure to configure your client without Kerberos single sign-on.
Procedure
Install the IdM client with the
--domain=IPA_DNS_Domainoption to ensure the System Security Services Daemon (SSSD) can communicate with the IdM servers:[root@idm-client.ad.example.com ~]# ipa-client-install --domain=idm.example.com
This option disables the SRV record auto-detection for the Active Directory DNS domain.
Open the
/etc/krb5.confconfiguration file and locate the existing mapping for the Active Directory domain in the[domain_realm]section..ad.example.com = IDM.EXAMPLE.COM ad.example.com = IDM.EXAMPLE.COM
Replace both lines with an entry mapping the fully qualified domain name (FQDN) of the Linux clients in the Active Directory DNS zone to the IdM realm:
idm-client.ad.example.com = IDM.EXAMPLE.COM
By replacing the default mapping, you prevent Kerberos from sending its requests for the Active Directory domain to the IdM Kerberos Distribution Center (KDC). Instead Kerberos uses auto-discovery through SRV DNS records to locate the KDC.
34.7.2. Requesting SSL certificates without single sign-on
SSL-based services require a certificate with dNSName extension records that cover all system host names, because both original (A/AAAA) and CNAME records must be in the certificate. Currently, IdM only issues certificates to host objects in the IdM database.
In the described setup without single sign-on available, IdM already has a host object for the FQDN in the database, and certmonger can request a certificate using this name.
Prerequisites
- Installed and configured the IdM client by following the procedure in Configuring an IdM client without Kerberos single sign-on.
Procedure
Use
certmongerto request a certificate using the FQDN:[root@idm-client.ad.example.com ~]# ipa-getcert request -r \ -f /etc/httpd/alias/server.crt \ -k /etc/httpd/alias/server.key \ -N CN=ipa-client.ad.example.com \ -D ipa-client.ad.example.com \ -K host/idm-client.ad.example.com@IDM.EXAMPLE.COM \ -U id-kp-serverAuth
The certmonger service uses the default host key stored in the /etc/krb5.keytab file to authenticate to the IdM Certificate Authority (CA).
34.7.3. Configuring an IdM client with Kerberos single sign-on
If you require Kerberos single sign-on to access resources on the IdM client, the client must be within the IdM DNS domain, for example idm-client.idm.example.com. You must create a CNAME record idm-client.ad.example.com in the Active Directory DNS domain pointing to the A/AAAA record of the IdM client.
For Kerberos-based application servers, MIT Kerberos supports a method to allow the acceptance of any host-based principal available in the application’s keytab.
Procedure
On the IdM client, disable the strict checks on what Kerberos principal is used to target the Kerberos server by setting the following option in the
[libdefaults]section of the/etc/krb5.confconfiguration file:ignore_acceptor_hostname = true
34.7.4. Requesting SSL certificates with single sign-on
SSL-based services require a certificate with dNSName extension records that cover all system host names, because both original (A/AAAA) and CNAME records must be in the certificate. Currently, IdM only issues certificates to host objects in the IdM database.
Follow this procedure to create a host object for ipa-client.example.com in IdM and make sure the real IdM machine’s host object is able to manage this host.
Prerequisites
- You have disabled the strict checks on what Kerberos principal is used to target the Kerberos server as outlined in Configuring an IdM client with Kerberos single sign-on.
Procedure
Create a new host object on the IdM server:
[root@idm-server.idm.example.com ~]# ipa host-add idm-client.ad.example.com --force
Use the
--forceoption, because the host name is a CNAME and not an A/AAAA record.On the IdM server, allow the IdM DNS host name to manage the Active Directory host entry in the IdM database:
[root@idm-server.idm.example.com ~]# ipa host-add-managedby idm-client.ad.example.com \
      --hosts=idm-client.idm.example.com
Your can now request an SSL certificate for your IdM client with the
dNSNameextension record for its host name within the Active Directory DNS domain:[root@idm-client.idm.example.com ~]# ipa-getcert request -r \ -f /etc/httpd/alias/server.crt \ -k /etc/httpd/alias/server.key \ -N CN=`hostname --fqdn` \ -D `hostname --fqdn` \ -D idm-client.ad.example.com \ -K host/idm-client.idm.example.com@IDM.EXAMPLE.COM \ -U id-kp-serverAuth
34.8. Setting up a trust
This section describes how to configure the Identity Management (IdM)/Active Directory (AD) trust on the IdM side using the command line.
Prerequisites
- DNS is correctly configured. Both IdM and AD servers must be able to resolve each other names. For details, see Configuring DNS and realm settings for a trust.
- Supported versions of AD and IdM are deployed. For details, see Supported versions of Windows Server.
- You have obtained a Kerberos ticket. For details, see Using kinit to log in to IdM manually.
34.8.1. Preparing the IdM server for the trust
Before you can establish a trust with AD, you must prepare the IdM domain using the ipa-adtrust-install utility on an IdM server.
Any system where you run the ipa-adtrust-install command automatically becomes an AD trust controller. However, you must run ipa-adtrust-install only once on an IdM server.
Prerequisites
- IdM server is installed.
- You need root privileges to install packages and restart IdM services.
Procedure
Install the required packages:
[root@ipaserver ~]# yum install ipa-server-trust-ad samba-clientAuthenticate as the IdM administrative user:
[root@ipaserver ~]# kinit adminRun the
ipa-adtrust-installutility:[root@ipaserver ~]# ipa-adtrust-installThe DNS service records are created automatically if IdM was installed with an integrated DNS server.
If you installed IdM without an integrated DNS server,
ipa-adtrust-installprints a list of service records that you must manually add to DNS before you can continue.The script prompts you that the
/etc/samba/smb.confalready exists and will be rewritten:WARNING: The smb.conf already exists. Running ipa-adtrust-install will break your existing Samba configuration. Do you wish to continue? [no]:
yesThe script prompts you to configure the
slapi-nisplug-in, a compatibility plug-in that allows older Linux clients to work with trusted users:Do you want to enable support for trusted domains in Schema Compatibility plugin? This will allow clients older than SSSD 1.9 and non-Linux clients to work with trusted users. Enable trusted domains support in slapi-nis? [no]:
yesWhen prompted, enter the NetBIOS name for the IdM domain or press Enter to accept the name suggested:
Trust is configured but no NetBIOS domain name found, setting it now.
Enter the NetBIOS name for the IPA domain.
Only up to 15 uppercase ASCII letters, digits and dashes are allowed.
Example: EXAMPLE.

NetBIOS domain name [IDM]:
You are prompted to run the SID generation task to create a SID for any existing users:
Do you want to run the ipa-sidgen task? [no]:
yesThis is a resource-intensive task, so if you have a high number of users, you can run this at another time.
(Optional) By default, the Dynamic RPC port range is defined as
49152-65535for Windows Server 2008 and later. If you need to define a different Dynamic RPC port range for your environment, configure Samba to use different ports and open those ports in your firewall settings. The following example sets the port range to55000-65000.[root@ipaserver ~]# net conf setparm global 'rpc server dynamic port range' 55000-65000 [root@ipaserver ~]# firewall-cmd --add-port=55000-65000/tcp [root@ipaserver ~]# firewall-cmd --runtime-to-permanent
Make sure that DNS is properly configured, as described in Verifying the DNS configuration for a trust.
ImportantRed Hat strongly recommends you verify the DNS configuration as described in Verifying the DNS configuration for a trust every time after running
ipa-adtrust-install, especially if IdM or AD do not use integrated DNS servers.Restart the
ipaservice:[root@ipaserver ~]# ipactl restartUse the
smbclientutility to verify that Samba responds to Kerberos authentication from the IdM side:[root@ipaserver ~]#
smbclient -L server.idm.example.com -U user_name --use-kerberos=requiredlp_load_ex: changing to config backend registry Sharename Type Comment --------- ---- ------- IPC$ IPC IPC Service (Samba 4.15.2) ...
34.8.2. Setting up a trust agreement using the command line
Follow this procedure to set up the trust agreement using the command line. The Identity Management (IdM) server allows you to configure three types of trust agreements:
- One-way trust — default option. One-way trust enables Active Directory (AD) users and groups to access resources in IdM, but not the other way around. The IdM domain trusts the AD forest, but the AD forest does not trust the IdM domain.
Two-way trust — Two-way trust enables AD users and groups to access resources in IdM.
You must configure a two-way trust for solutions such as Microsoft SQL Server that expect the
S4U2SelfandS4U2ProxyMicrosoft extensions to the Kerberos protocol to work over a trust boundary. An application on a RHEL IdM host might requestS4U2SelforS4U2Proxyinformation from an Active Directory domain controller about an AD user, and a two-way trust provides this feature.Note that this two-way trust functionality does not allow IdM users to login to Windows systems, and the two-way trust in IdM does not give the users any additional rights compared to the one-way trust solution in AD.
-
To create the two-way trust, add the following option to the command:
--two-way=true
-
To create the two-way trust, add the following option to the command:
External trust — a trust relationship between IdM and an AD domain in different forests. While a forest trust always requires establishing a trust between IdM and the root domain of an Active Directory forest, an external trust can be established from IdM to a domain within a forest. This is only recommended if it is not possible to establish a forest trust between forest root domains due to administrative or organizational reasons.
-
To create the external trust, add the following option to the command:
--external=true
-
To create the external trust, add the following option to the command:
The steps below show you how to create a one-way trust agreement.
Prerequisites
- User name and password of a Windows administrator.
- You have prepared the IdM server for the trust.
Procedure
Create a trust agreement for the AD domain and the IdM domain by using the
ipa trust-addcommand:To have SSSD automatically generate UIDs and GIDs for AD users based on their SID, create a trust agreement with the
Active Directory domainID range type. This is the most common configuration.[root@server ~]# ipa trust-add --type=ad ad.example.com --admin <ad_admin_username> --password --range-type=ipa-ad-trust
If you have configured POSIX attributes for your users in Active Directory (such as
uidNumberandgidNumber) and you want SSSD to process this information, create a trust agreement with theActive Directory domain with POSIX attributesID range type:[root@server ~]# ipa trust-add --type=ad ad.example.com --admin <ad_admin_username> --password --range-type=ipa-ad-trust-posix
If you do not specify an ID Range type when creating a trust, IdM attempts to automatically select the appropriate range type by requesting details from AD domain controllers in the forest root domain. If IdM does not detect any POSIX attributes, the trust installation script selects the Active Directory domain ID range.
If IdM detects any POSIX attributes in the forest root domain, the trust installation script selects the Active Directory domain with POSIX attributes ID range and assumes that UIDs and GIDs are correctly defined in AD. If POSIX attributes are not correctly set in AD, you will not be able to resolve AD users.
For example, if the users and groups that need access to IdM systems are not part of the forest root domain, but instead are located in a child domain of the forest domain, the installation script may not detect the POSIX attributes defined in the child AD domain. In this case, Red Hat recommends that you explicitly choose the POSIX ID range type when establishing the trust.
34.8.3. Setting up a trust agreement in the IdM Web UI
Follow this procedure to configure the Identity Management (IdM)/Active Directory (AD) trust agreement on the IdM side using the IdM Web UI.
Prerequisites
- DNS is correctly configured. Both IdM and AD servers must be able to resolve each other names.
- Supported versions of AD and IdM are deployed.
- You have obtained a Kerberos ticket.
- Before creating a trust in the Web UI, prepare the IdM server for the trust as described in: Preparing the IdM server for the trust.
- You need to be logged in as an IdM administrator.
Procedure
- Log in to the IdM Web UI with administrator privileges. For details, see Accessing the IdM Web UI in a web browser.
- In the IdM Web UI, click the IPA Server tab.
- In the IPA Server tab, click the Trusts tab.
In the drop down menu, select the Trusts option.

- Click the Add button.
- In the Add Trust dialog box, enter the name of the Active Directory domain.
In the Account and Password fields, add the administrator credentials of the Active Directory administrator.
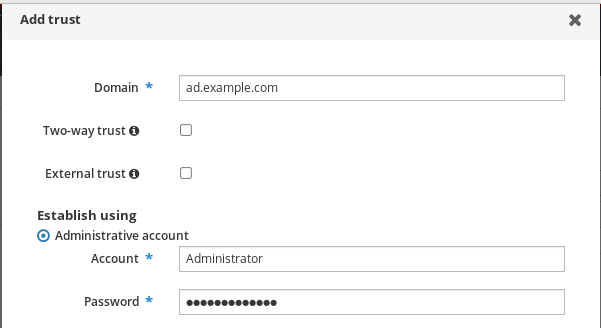
- (Optional) Select Two-way trust, if you want to enable AD users and groups to access resources in IdM. However, the two-way trust in IdM does not give the users any additional rights compared to the one-way trust solution in AD. Both solutions are considered equally secure because of default cross-forest trust SID filtering settings.
- (Optional) Select External trust if you are configuring a trust with an AD domain that is not the root domain of an AD forest. While a forest trust always requires establishing a trust between IdM and the root domain of an Active Directory forest, you can establish an external trust from IdM to any domain within an AD forest.
(Optional) By default, the trust installation script tries to detect the appropriate ID range type. You can also explicitly set the ID range type by choosing one of the following options:
-
To have SSSD automatically generate UIDs and GIDs for AD users based on their SID, select the
Active Directory domainID range type. This is the most common configuration. If you have configured POSIX attributes for your users in Active Directory (such as
uidNumberandgidNumber) and you want SSSD to process this information, select theActive Directory domain with POSIX attributesID range type. Warning
If you leave the Range type setting on the default
Detectoption, IdM attempts to automatically select the appropriate range type by requesting details from AD domain controllers in the forest root domain. If IdM does not detect any POSIX attributes, the trust installation script selects theActive Directory domainID range.If IdM detects any POSIX attributes in the forest root domain, the trust installation script selects the
Active Directory domain with POSIX attributesID range and assumes that UIDs and GIDs are correctly defined in AD. If POSIX attributes are not correctly set in AD, you will not be able to resolve AD users.For example, if the users and groups that need access to IdM systems are not part of the forest root domain, but instead are located in a child domain of the forest domain, the installation script may not detect the POSIX attributes defined in the child AD domain. In this case, Red Hat recommends that you explicitly choose the POSIX ID range type when establishing the trust.
-
To have SSSD automatically generate UIDs and GIDs for AD users based on their SID, select the
- Click Add.
Verification steps
If the trust has been successfully added to the IdM server, you can see the green pop-up window in the IdM Web UI. It means that the:
- Domain name exists
User name and password of the Windows Server has been added correctly.
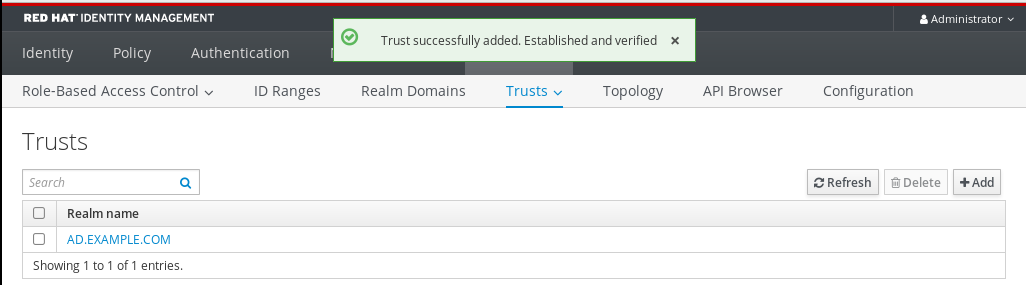
Now you can continue to test the trust connection and Kerberos authentication.
34.8.4. Setting up a trust agreement using Ansible
Follow this procedure to set up a one-way trust agreement between Identity Management (IdM) and Active Directory (AD) by using an Ansible playbook. You can configure three types of trust agreements:
- One-way trust — default option. One-way trust enables Active Directory (AD) users and groups to access resources in IdM, but not the other way around. The IdM domain trusts the AD forest, but the AD forest does not trust the IdM domain.
Two-way trust — Two-way trust enables AD users and groups to access resources in IdM.
You must configure a two-way trust for solutions such as Microsoft SQL Server that expect the
S4U2SelfandS4U2ProxyMicrosoft extensions to the Kerberos protocol to work over a trust boundary. An application on a RHEL IdM host might requestS4U2SelforS4U2Proxyinformation from an Active Directory domain controller about an AD user, and a two-way trust provides this feature.Note that this two-way trust functionality does not allow IdM users to login to Windows systems, and the two-way trust in IdM does not give the users any additional rights compared to the one-way trust solution in AD.
-
To create the two-way trust, add the following variable to the playbook task below:
two_way: true
-
To create the two-way trust, add the following variable to the playbook task below:
External trust — a trust relationship between IdM and an AD domain in different forests. While a forest trust always requires establishing a trust between IdM and the root domain of an Active Directory forest, an external trust can be established from IdM to a domain within a forest. This is only recommended if it is not possible to establish a forest trust between forest root domains due to administrative or organizational reasons.
-
To create the external trust, add the following variable to the playbook task below:
external: true
-
To create the external trust, add the following variable to the playbook task below:
Prerequisites
- User name and password of a Windows administrator.
-
The IdM
adminpassword. - You have prepared the IdM server for the trust.
-
You are using the 4.8.7 version of IdM or later. To view the version of IdM you have installed on your server, run
ipa --version. You have configured your Ansible control node to meet the following requirements:
- You are using Ansible version 2.14 or later.
-
You have installed the
ansible-freeipapackage on the Ansible controller. - The example assumes that in the ~/MyPlaybooks/ directory, you have created an Ansible inventory file with the fully-qualified domain name (FQDN) of the IdM server.
-
The example assumes that the secret.yml Ansible vault stores your
ipaadmin_password.
-
The target node, that is the node on which the
ansible-freeipamodule is executed, is part of the IdM domain as an IdM client, server or replica.
Procedure
Navigate to your ~/MyPlaybooks/ directory:
$ cd ~/MyPlaybooks/Select one of the following scenarios based on your use case:
To create an ID mapping trust agreement, in which SSSD automatically generates UIDs and GIDs for AD users and groups based on their SIDs, create an
add-trust.ymlplaybook with the following content:--- - name: Playbook to create a trust hosts: ipaserver vars_files: - /home/user_name/MyPlaybooks/secret.yml tasks: - name: ensure the trust is present ipatrust: ipaadmin_password: "{{ ipaadmin_password }}" realm: ad.example.com admin: Administrator password: secret_password range_type: ipa-ad-trust state: presentIn the example:
-
realmdefines the AD realm name string. -
admindefines the AD domain administrator string. -
passworddefines the AD domain administrator’s password string.
-
To create a POSIX trust agreement, in which SSSD processes POSIX attributes stored in AD, such as
uidNumberandgidNumber, create anadd-trust.ymlplaybook with the following content:--- - name: Playbook to create a trust hosts: ipaserver vars_files: - /home/user_name/MyPlaybooks/secret.yml tasks: - name: ensure the trust is present ipatrust: ipaadmin_password: "{{ ipaadmin_password }}" realm: ad.example.com admin: Administrator password: secret_password range_type: ipa-ad-trust-posix state: presentTo create a trust agreement in which IdM attempts to automatically select the appropriate range type,
ipa-ad-trustoripa-ad-trust-posix, by requesting details from AD domain controllers in the forest root domain, create anadd-trust.ymlplaybook with the following content:--- - name: Playbook to create a trust hosts: ipaserver vars_files: - /home/user_name/MyPlaybooks/secret.yml tasks: - name: ensure the trust is present ipatrust: ipaadmin_password: "{{ ipaadmin_password }}" realm: ad.example.com admin: Administrator password: secret_password state: present
WarningIf you do not specify an ID range type when creating a trust, and if IdM does not detect any POSIX attributes in the AD forest root domain, the trust installation script selects the
Active Directory domainID range.If IdM detects any POSIX attributes in the forest root domain, the trust installation script selects the
Active Directory domain with POSIX attributesID range and assumes that UIDs and GIDs are correctly defined in AD.However, if POSIX attributes are not correctly set in AD, you will not be able to resolve AD users. For example, if the users and groups that need access to IdM systems are not part of the forest root domain, but instead are located in a child domain of the forest domain, the installation script may not detect the POSIX attributes defined in the child AD domain. In this case, Red Hat recommends that you explicitly choose the POSIX ID range type when establishing the trust.
- Save the file.
Run the Ansible playbook. Specify the playbook file, the file storing the password protecting the secret.yml file, and the inventory file:
$ ansible-playbook --vault-password-file=password_file -v -i inventory add-trust.yml
Additional resources
- /usr/share/doc/ansible-freeipa/README-trust.md
- /usr/share/doc/ansible-freeipa/playbooks/trust
34.8.5. Verifying the Kerberos configuration
To verify the Kerberos configuration, test if it is possible to obtain a ticket for an Identity Management (IdM) user and if the IdM user can request service tickets.
Procedure
Request a ticket for an Active Directory (AD) user:
[root@ipaserver ~]# kinit user@AD.EXAMPLE.COM
Request service tickets for a service within the IdM domain:
[root@server ~]# kvno -S host server.idm.example.com
If the AD service ticket is successfully granted, there is a cross-realm ticket-granting ticket (TGT) listed with all of the other requested tickets. The TGT is named krbtgt/IPA.DOMAIN@AD.DOMAIN.
[root@server ]# klist
Ticket cache: KEYRING:persistent:0:krb_ccache_hRtox00
Default principal: user@AD.EXAMPLE.COM

Valid starting       Expires              Service principal
03.05.2016 18:31:06  04.05.2016 04:31:01  host/server.idm.example.com@IDM.EXAMPLE.COM
	renew until 04.05.2016 18:31:00
03.05.2016 18:31:06 04.05.2016 04:31:01 krbtgt/IDM.EXAMPLE.COM@AD.EXAMPLE.COM
	renew until 04.05.2016 18:31:00
03.05.2016 18:31:01  04.05.2016 04:31:01  krbtgt/AD.EXAMPLE.COM@AD.EXAMPLE.COM
	renew until 04.05.2016 18:31:00
The localauth plug-in maps Kerberos principals to local System Security Services Daemon (SSSD) user names. This allows AD users to use Kerberos authentication and access Linux services, which support GSSAPI authentication directly.
34.8.6. Verifying the trust configuration on IdM
Before configuring trust, verify that the Identity Management (IdM) and Active Directory (AD) servers can resolve themselves and each other.
Prerequisites
- You need to be logged in with administrator privileges.
Procedure
Run a DNS query for the MS DC Kerberos over UDP and LDAP over TCP service records.
[root@server ~]# dig +short -t SRV _kerberos._udp.dc._msdcs.idm.example.com.
0 100 88 server.idm.example.com.

[root@server ~]# dig +short -t SRV _ldap._tcp.dc._msdcs.idm.example.com.
0 100 389 server.idm.example.com.
These commands list all IdM servers on which
ipa-adtrust-installhas been executed. The output is empty ifipa-adtrust-installhas not been executed on any IdM server, which is typically before establishing the first trust relationship.Run a DNS query for the Kerberos and LDAP over TCP service records to verify that IdM is able to resolve service records for AD:
[root@server ~]# dig +short -t SRV _kerberos._tcp.dc._msdcs.ad.example.com.
0 100 88 addc1.ad.example.com.

[root@ipaserver ~]# dig +short -t SRV _ldap._tcp.dc._msdcs.ad.example.com.
0 100 389 addc1.ad.example.com.
.
34.8.7. Verifying the trust configuration on AD
After configuring the trust, verify that:
- The Identity Management (IdM)-hosted services are resolvable from the Active Directory (AD) server.
- AD services are resolvable from the AD server.
Prerequisites
- You need to be logged in with administrator privileges.
Procedure
On the AD server, set the
nslookup.exeutility to look up service records.C:\>nslookup.exe > set type=SRV
Enter the domain name for the Kerberos over UDP and LDAP over TCP service records.
> _kerberos._udp.idm.example.com. _kerberos._udp.idm.example.com. SRV service location: priority = 0 weight = 100 port = 88 svr hostname = server.idm.example.com > _ldap._tcp.idm.example.com _ldap._tcp.idm.example.com SRV service location: priority = 0 weight = 100 port = 389 svr hostname = server.idm.example.comChange the service type to TXT and run a DNS query for the TXT record with the IdM Kerberos realm name.
C:\>nslookup.exe > set type=TXT > _kerberos.idm.example.com. _kerberos.idm.example.com. text = "IDM.EXAMPLE.COM"Run a DNS query for the MS DC Kerberos over UDP and LDAP over TCP service records.
C:\>nslookup.exe > set type=SRV > _kerberos._udp.dc._msdcs.idm.example.com. _kerberos._udp.dc._msdcs.idm.example.com. SRV service location: priority = 0 weight = 100 port = 88 svr hostname = server.idm.example.com > _ldap._tcp.dc._msdcs.idm.example.com. _ldap._tcp.dc._msdcs.idm.example.com. SRV service location: priority = 0 weight = 100 port = 389 svr hostname = server.idm.example.comActive Directory only expects to discover domain controllers that can respond to AD-specific protocol requests, such as other AD domain controllers and IdM trust controllers. Use the
ipa-adtrust-installtool to promote an IdM server to a trust controller, and you can verify which servers are trust controllers with theipa server-role-find --role 'AD trust controller'command.Verify that AD services are resolvable from the AD server.
C:\>nslookup.exe > set type=SRV
Enter the domain name for the Kerberos over UDP and LDAP over TCP service records.
> _kerberos._udp.dc._msdcs.ad.example.com. _kerberos._udp.dc._msdcs.ad.example.com. SRV service location: priority = 0 weight = 100 port = 88 svr hostname = addc1.ad.example.com > _ldap._tcp.dc._msdcs.ad.example.com. _ldap._tcp.dc._msdcs.ad.example.com. SRV service location: priority = 0 weight = 100 port = 389 svr hostname = addc1.ad.example.com
34.8.8. Creating a trust agent
A trust agent is an IdM server that can perform identity lookups against AD domain controllers.
For example, if you are creating a replica of an IdM server that has a trust with Active Directory, you can set up the replica as a trust agent. A replica does not automatically have the AD trust agent role installed.
Prerequisites
- IdM is installed with an Active Directory trust.
-
The
sssd-toolspackage is installed.
Procedure
On an existing trust controller, run the
ipa-adtrust-install --add-agentscommand:[root@existing_trust_controller]# ipa-adtrust-install --add-agents
The command starts an interactive configuration session and prompts you for the information required to set up the agent.
Restart the IdM service on the trust agent.
[root@new_trust_agent]# ipactl restart
Remove all entries from the SSSD cache on the trust agent:
[root@new_trust_agent]# sssctl cache-remove
Verify that the replica has the AD trust agent role installed:.
[root@existing_trust_controller]# ipa server-show new_replica.idm.example.com ... Enabled server roles: CA server, NTP server, AD trust agent
Additional resources
-
For further information about the
--add-agentsoption, see theipa-adtrust-install(1)man page. - For more information about trust agents, see Trust controllers and trust agents in the Planning Identity Management guide.
34.8.9. Enabling automatic private group mapping for a POSIX ID range on the CLI
By default, SSSD does not map private groups for Active Directory (AD) users if you have established a POSIX trust that relies on POSIX data stored in AD. If any AD users do not have primary groups configured, IdM is not be able to resolve them.
This procedure explains how to enable automatic private group mapping for an ID range by setting the hybrid option for the auto_private_groups SSSD parameter on the command line. As a result, IdM is able to resolve AD users that do not have primary groups configured in AD.
Prerequisites
- You have successfully established a POSIX cross-forest trust between your IdM and AD environments.
Procedure
Display all ID ranges and make note of the AD ID range you want to modify.
[root@server ~]# ipa idrange-find ---------------- 2 ranges matched ---------------- Range name: IDM.EXAMPLE.COM_id_range First Posix ID of the range: 882200000 Number of IDs in the range: 200000 Range type: local domain range Range name: AD.EXAMPLE.COM_id_range First Posix ID of the range: 1337000000 Number of IDs in the range: 200000 Domain SID of the trusted domain: S-1-5-21-4123312420-990666102-3578675309 Range type: Active Directory trust range with POSIX attributes ---------------------------- Number of entries returned 2 ----------------------------
Adjust the automatic private group behavior for the AD ID range with the
ipa idrange-modcommand.[root@server ~]# ipa idrange-mod --auto-private-groups=hybrid AD.EXAMPLE.COM_id_rangeReset the SSSD cache to enable the new setting.
[root@server ~]# sss_cache -E
Additional resources
34.8.10. Enabling automatic private group mapping for a POSIX ID range in the IdM WebUI
By default, SSSD does not map private groups for Active Directory (AD) users if you have established a POSIX trust that relies on POSIX data stored in AD. If any AD users do not have primary groups configured, IdM is not be able to resolve them.
This procedure explains how to enable automatic private group mapping for an ID range by setting the hybrid option for the auto_private_groups SSSD parameter in the Identity Management (IdM) WebUI. As a result, IdM is able to resolve AD users that do not have primary groups configured in AD.
Prerequisites
- You have successfully established a POSIX cross-forest trust between your IdM and AD environments.
Procedure
- Log into the IdM Web UI with your user name and password.
- Open the IPA Server → ID Ranges tab.
-
Select the ID range you want to modify, such as
AD.EXAMPLE.COM_id_range. From the Auto private groups drop down menu, select the
hybridoption.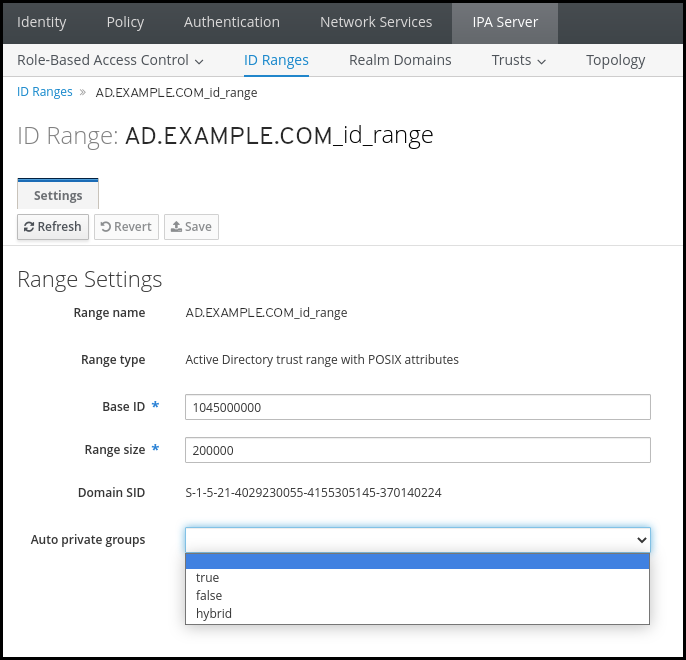
- Click the Save button to save your changes.
Additional resources
34.9. Troubleshooting setting up a cross-forest trust
Learn more about troubleshooting the process of configuring a cross-forest trust between your Identity Management (IdM) environment and an Active Directory (AD) forest.
34.9.1. Sequence of events when establishing a cross-forest trust with AD
When you use the ipa trust-add command to establish a cross-forest trust with an Active Directory (AD) Domain Controller (DC), the command operates on behalf of the user who ran the command and performs the following actions on the IdM server. If you have trouble establishing a cross-forest trust, you can use this list to help narrow down and troubleshoot your issue.
Part 1: The command verifies settings and inputs
- Verify that the IdM server has the Trust Controller role.
-
Validate the options passed to the
ipa trust-addcommand. -
Validate the ID range associated with a trusted forest root domain. If you did not specify the ID range type and properties as options to the
ipa trust-addcommand, they are discovered from Active Directory.
Part 2: The command attempts to establish a trust to an Active Directory domain
- Create a separate trust object for each trust direction. Each of the objects get created on both sides (IdM and AD). If you are establishing a one-way trust, only one object is created on each side.
The IdM server uses the Samba suite to handle domain controller capabilities for Active Directory and creates a trust object on the target AD PDC:
-
The IdM server establishes a secure connection to the
IPC$share on the target DC. Since RHEL 8.4, the connection requires at least the SMB3 protocol with Windows Server 2012 and above to ensure the connection is sufficiently secure with AES-based encryption used for the session. -
The IdM server queries for the presence of the trusted domain object (TDO) using an
LSA QueryTrustedDomainInfoByNamecall. If the TDO is already present, remove it with an
LSA DeleteTrustedDomaincall.NoteThis call fails if the AD user account used to establish the trust does not have full Enterprise Admin (EA) or Domain Admin (DA) privileges for the forest root, such as members of the Incoming Forest Trust Builders group. If the old TDO is not automatically removed, an AD Administrator must manually remove it from AD.
-
The IdM server creates a new TDO with an
LSA CreateTrustedDomainEx2call. The TDO credentials are randomly generated using a Samba-provided password generator with 128 random characters. The new TDO is then modified with an
LSA SetInformationTrustedDomaincall to make sure encryption types supported by the trust are set properly:-
The
RC4_HMAC_MD5encryption type is enabled, even if there are no RC4 keys in use, due to how Active Directory is designed. -
AES128_CTS_HMAC_SHA1_96andAES256_CTS_HMAC_SHA1_96encryption types are enabled.
-
The
-
The IdM server establishes a secure connection to the
-
For a forest trust, verify that in-forest domains can be reached transitively with an
LSA SetInformationTrustedDomaincall. Add trust topology information about the other forest (IdM in the case of communicating with AD, AD in the case of communicating with IdM) using an
LSA RSetForestTrustInformationcall.NoteThis step might cause a conflict for one of three reasons:
-
A SID namespace conflict, reported as an
LSA_SID_DISABLED_CONFLICTerror. This conflict cannot be resolved. -
A NetBIOS namespace conflict, reported as an
LSA_NB_DISABLED_CONFLICTerror. This conflict cannot be resolved. -
A DNS namespace conflict with a top level name (TLN), reported as an
LSA_TLN_DISABLED_CONFLICTerror. The IdM server can automatically resolve a TLN conflict if it is caused by another forest.
To resolve a TLN conflict, the IdM server performs the following steps:
- Retrieve forest trust information for the conflicting forest.
- Add an exclusion entry for the IdM DNS namespace to the AD forest.
- Set forest trust information for the forest we conflict on.
- Re-try establishing the trust to the original forest.
The IdM server can only resolve these conflicts if you authenticated the
ipa trust-addcommand with the privileges of an AD administrator that can change forest trusts. If you do not have access to those privileges, the administrator of the original forest must manually perform the steps above in the Active Directory Domains and Trusts section of the Windows UI.-
A SID namespace conflict, reported as an
- If it does not exist, create the ID range for the trusted domain.
- For a forest trust, query Active Directory domain controllers from the forest root for details about the forest topology. The IdM server uses this information to create additional ID ranges for any additional domains from the trusted forest.
Additional resources
- Trust controllers and trust agents
- Overview Documents (Microsoft)
- Technical Documents (Microsoft)
- Privileged Accounts and Groups in Active Directory (Microsoft)
34.9.2. Checklist of prerequisites for establishing an AD trust
You can use the following checklist to review the prerequisites for creating a trust with an AD domain.
Table 34.4. Table
| Component | Configuration | Additional details |
|---|---|---|
| Product versions | Your Active Directory domain is using a supported version of Windows Server. | |
| AD Administrator privileges | The Active Directory administration account must be a member of one of the following groups:
| |
| Networking | IPv6 support is enabled in the Linux kernel for all IdM servers. | |
| Date and time | Verify the date and time settings on both servers match. | |
| Encryption types | The following AD accounts have AES encryption keys:
If you have recently enabled AES encryption in AD, generate new AES keys with the following steps:
| |
| Firewall | You have opened all necessary ports on IdM servers and AD Domain Controllers for bidirectional communication. | |
| DNS |
| |
| Topology | Ensure you are attempting to establish a trust with an IdM server you have configured as a trust controller. |
34.9.3. Gathering debug logs of an attempt to establish an AD trust
If you are experiencing issues with establishing a trust between an IdM environment and AD domain, use the following steps to enable detailed error logging so you can gather logs of an attempt to establish a trust. You can review these logs to help with your troubleshooting efforts, or you can provide them in a Red Hat Technical Support case.
Prerequisites
- You need root permissions to restart IdM services.
Procedure
To enable debugging for the IdM server, create the file
/etc/ipa/server.confwith the following contents.[global] debug=True
Restart the
httpdservice to load the debugging configuration.[root@trust_controller ~]# systemctl restart httpd
Stop the
smbandwinbindservices.[root@trust_controller ~]# systemctl stop smb winbind
Set the debugging log level for the
smbandwinbindservices.[root@trust_controller ~]# net conf setparm global 'log level' 100
To enable debug logging for Samba client code used by the IdM framework, edit the
/usr/share/ipa/smb.conf.emptyconfiguration file to have the following contents.[global] log level = 100Remove previous Samba logs.
[root@trust_controller ~]# rm /var/log/samba/log.*
Start the
smbandwinbindservices.[root@trust_controller ~]# systemctl start smb winbind
Print a timestamp as you attempt to establish a trust with verbose mode enabled.
[root@trust_controller ~]# date; ipa -vvv trust-add --type=ad ad.example.com
Review the following error log files for information about the failed request:
-
/var/log/httpd/error_log -
/var/log/samba/log.*
-
Disable debugging.
[root@trust_controller ~]# mv /etc/ipa/server.conf /etc/ipa/server.conf.backup [root@trust_controller ~]# systemctl restart httpd [root@trust_controller ~]# systemctl stop smb winbind [root@trust_controller ~]# net conf setparm global 'log level' 0 [root@trust_controller ~]# mv /usr/share/ipa/smb.conf.empty /usr/share/ipa/smb.conf.empty.backup [root@trust_controller ~]# systemctl start smb winbind
(Optional) If you are unable to determine the cause of the authentication issue:
Collect and archive the log files you recently generated.
[root@trust_controller ~]# tar -cvf debugging-trust.tar /var/log/httpd/error_log /var/log/samba/log.*
- Open a Red Hat Technical Support case and provide the timestamp and debug logs from the attempt.
Additional resources
34.10. Troubleshooting client access to services in the other forest
After configuring a trust between your Identity Management (IdM) and Active Directory (AD) environments, you might experience issues where a client in one domain is not able to access a service in the other domain. Use the following diagrams to troubleshoot the issue.
34.10.1. Flow of information when a host in the AD forest root domain requests services from an IdM server
The following diagram explains the flow of information when an Active Directory (AD) client requests a service in the Identity Management (IdM) domain.
If you have trouble accessing IdM services from AD clients, you can use this information to narrow your troubleshooting efforts and identify the source of the issue.

- The AD client contacts the AD Kerberos Distribution Center (KDC) to perform a TGS Request for the service in the IdM domain.
- The AD KDC recognizes that the service belongs to the trusted IdM domain.
- The AD KDC sends the client a cross-realm ticket-granting ticket (TGT), along with a referral to the trusted IdM KDC.
- The AD client uses the cross-realm TGT to request a ticket to the IdM KDC.
- The IdM KDC validates the Privileged Attribute Certificate (MS-PAC) that is transmitted with the cross-realm TGT.
- The IPA-KDB plugin might check the LDAP directory to see if foreign principals are allowed to get tickets for the requested service.
- The IPA-KDB plugin decodes the MS-PAC, verifies, and filters the data. It performs lookups in the LDAP server to check if it needs to augment the MS-PAC with additional information, such as local groups.
- The IPA-KDB plugin then encodes the PAC, signs it, attaches it to the service ticket, and sends it to the AD client.
- The AD client can now contact the IdM service using the service ticket issued by IdM KDC.
34.10.2. Flow of information when a host in an AD child domain requests services from an IdM server
The following diagram explains the flow of information when an Active Directory (AD) host in a child domain requests a service in the Identity Management (IdM) domain. In this scenario, the AD client contacts the Kerberos Distribution Center (KDC) in the child domain, then contacts the KDC in the AD forest root, and finally contacts the IdM KDC to request access to the IdM service.
If you have trouble accessing IdM services from AD clients, and your AD client belongs to a domain that is a child domain of an AD forest root, you can use this information to narrow your troubleshooting efforts and identify the source of the issue.

- The AD client contacts the AD Kerberos Distribution Center (KDC) in its own domain to perform a TGS Request for the service in the IdM domain.
-
The AD KDC in
child.ad.example.com, the child domain, recognizes that the service belongs to the trusted IdM domain. -
The AD KDC in the child domain sends the client a referral ticket for the AD forest root domain
ad.example.com. - The AD client contacts the KDC in the AD forest root domain for the service in the IdM domain.
- The KDC in the forest root domain recognizes that the service belongs to the trusted IdM domain.
- The AD KDC sends the client a cross-realm ticket-granting ticket (TGT), along with a referral to the trusted IdM KDC.
- The AD client uses the cross-realm TGT to request a ticket to the IdM KDC.
- The IdM KDC validates the Privileged Attribute Certificate (MS-PAC) that is transmitted with the cross-realm TGT.
- The IPA-KDB plugin might check the LDAP directory to see if foreign principals are allowed to get tickets for the requested service.
- The IPA-KDB plugin decodes the MS-PAC, verifies, and filters the data. It performs lookups in the LDAP server to check if it needs to augment the MS-PAC with additional information, such as local groups.
- The IPA-KDB plugin then encodes the PAC, signs it, attaches it to the service ticket, and sends it to the AD client.
- The AD client can now contact the IdM service using the service ticket issued by IdM KDC.
34.10.3. Flow of information when an IdM client requests services from an AD server
The following diagram explains the flow of information when an Identity Management (IdM) client requests a service in the Active Directory (AD) domain when you have configured a two-way trust between IdM and AD.
If you have trouble accessing AD services from IdM clients, you can use this information to narrow your troubleshooting efforts and identify the source of the issue.
By default, IdM establishes a one-way trust to AD, which means it is not possible to issue cross-realm ticket-granting ticket (TGT) for resources in an AD forest. To be able to request tickets to services from trusted AD domains, configure a two-way trust.
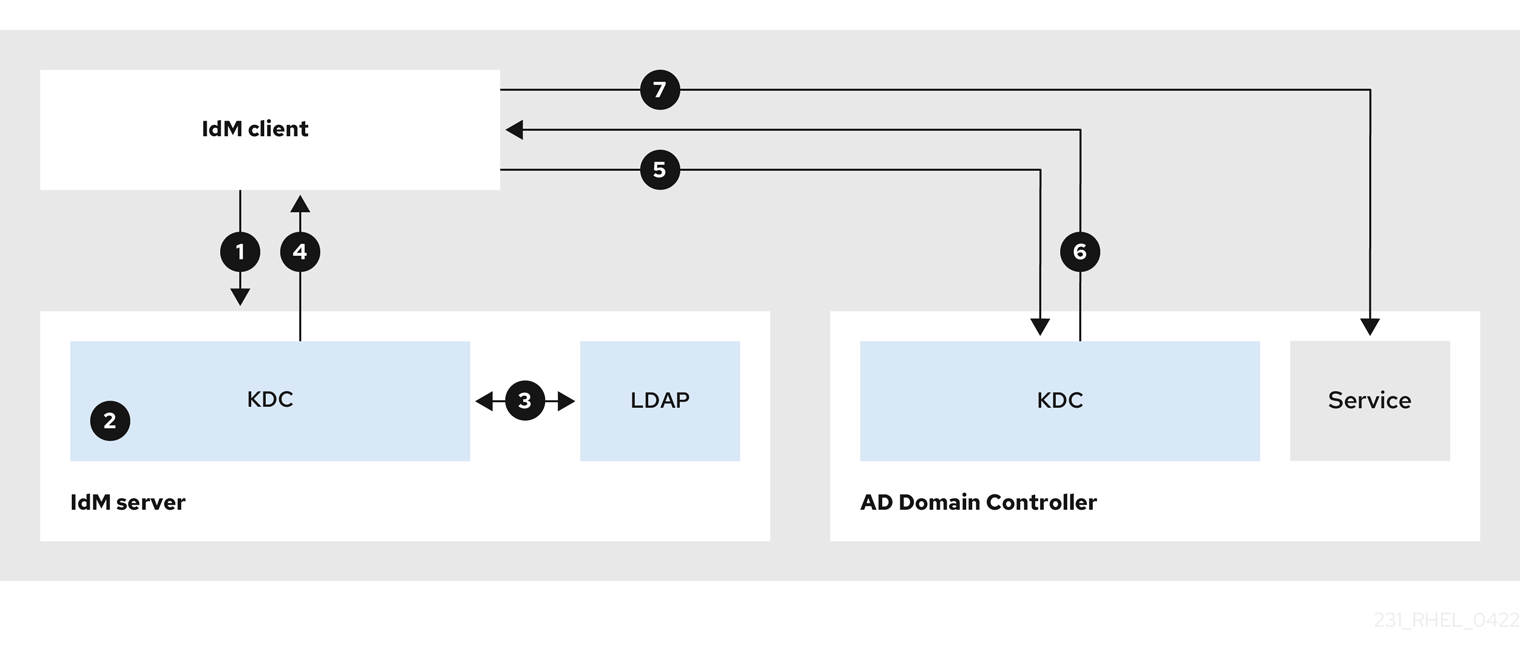
- The IdM client requests a ticket-granting ticket (TGT) from the IdM Kerberos Distribution Center (KDC) for the AD service it wants to contact.
- The IdM KDC recognizes that the service belongs to the AD realm, verifies that the realm is known and trusted, and that the client is allowed to request services from that realm.
- Using information from the IdM Directory Server about the user principal, the IdM KDC creates a cross-realm TGT with a Privileged Attribute Certificate (MS-PAC) record about the user principal.
- The IdM KDC sends back a cross-realm TGT to the IdM client.
- The IdM client contacts the AD KDC to request a ticket for the AD service, presenting the cross-realm TGT that contains the MS-PAC provided by the IdM KDC.
- The AD server validates and filters the PAC, and returns a ticket for the AD service.
- The IPA client can now contact the AD service.
Additional resources
34.11. Removing the trust using the command line
Follow this procedure to remove the Identity Management (IdM)/Active Directory (AD) trust on the IdM side using the command line interface.
Prerequisites
- You have obtained a Kerberos ticket as an IdM administrator. For details, see Logging in to IdM in the Web UI: Using a Kerberos ticket.
Procedure
Use the
ipa trust-delcommand to remove the trust configuration from IdM.[root@server ~]# ipa trust-del ad_domain_name ------------------------------ Deleted trust "ad_domain_name" ------------------------------
- Remove the trust object from your Active Directory configuration.
Removing the trust configuration does not automatically remove the ID range IdM has created for AD users. This way, if you add the trust again, the existing ID range is re-used. Also, if AD users have created files on an IdM client, their POSIX IDs are preserved in the file metadata.
To remove all information related to an AD trust, remove the AD user ID range after removing the trust configuration and trust object:
# ipa idrange-del AD.EXAMPLE.COM_id_range
# systemctl restart sssdVerification steps
Use the
ipa trust-showcommand to confirm that the trust has been removed.[root@server ~]# ipa trust-show ad.example.com ipa: ERROR: ad.example.com: trust not found
Additional resources
34.12. Removing the trust using the IdM Web UI
Follow this procedure to remove the Identity Management (IdM)/Active Directory (AD) trust using the IdM Web UI.
Prerequisites
- You have obtained a Kerberos ticket. For details, see Logging in to IdM in the Web UI: Using a Kerberos ticket.
Procedure
- Log in to the IdM Web UI with administrator privileges. For details, see Accessing the IdM Web UI in a web browser.
- In the IdM Web UI, click the IPA Server tab.
- In the IPA Server tab, click the Trusts tab.
Select the trust you want to remove.
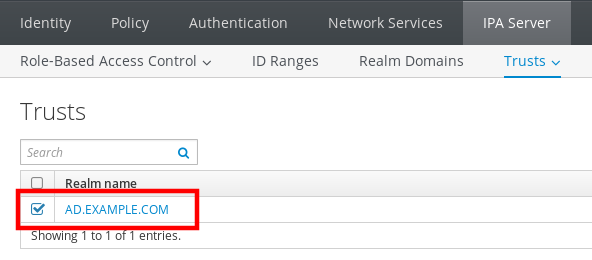
- Click the Delete button.
In the Remove trusts dialog box, click Delete.

- Remove the trust object from your Active Directory configuration.
Removing the trust configuration does not automatically remove the ID range IdM has created for AD users. This way, if you add the trust again, the existing ID range is re-used. Also, if AD users have created files on an IdM client, their POSIX IDs are preserved in the file metadata.
To remove all information related to an AD trust, remove the AD user ID range in the ID Ranges tab after removing the trust configuration and trust object.
Verification steps
If the trust has been successfully deleted, the Web UI displays a green pop-up with the text:
Additional resources
34.13. Removing the trust using Ansible
Follow this procedure to remove the Identity Management (IdM)/Active Directory (AD) trust on the IdM side by using an Ansible playbook.
Prerequisites
- You have obtained a Kerberos ticket as an IdM administrator. For details, see Logging in to IdM in the Web UI: Using a Kerberos ticket.
You have configured your Ansible control node to meet the following requirements:
- You are using Ansible version 2.14 or later.
-
You have installed the
ansible-freeipapackage on the Ansible controller. - The example assumes that in the ~/MyPlaybooks/ directory, you have created an Ansible inventory file with the fully-qualified domain name (FQDN) of the IdM server.
-
The example assumes that the secret.yml Ansible vault stores your
ipaadmin_password.
-
The target node, that is the node on which the
ansible-freeipamodule is executed, is part of the IdM domain as an IdM client, server or replica.
Procedure
Navigate to your ~/MyPlaybooks/ directory:
$ cd ~/MyPlaybooks/Create an
del-trust.ymlplaybook with the following content:--- - name: Playbook to delete trust hosts: ipaserver vars_files: - /home/user_name/MyPlaybooks/secret.yml tasks: - name: ensure the trust is absent ipatrust: ipaadmin_password: "{{ ipaadmin_password }}" realm: ad.example.com state: absentIn the example,
realmdefines the AD realm name string.- Save the file.
Run the Ansible playbook. Specify the playbook file, the file storing the password protecting the secret.yml file, and the inventory file:
$ ansible-playbook --vault-password-file=password_file -v -i inventory del-trust.yml
Removing the trust configuration does not automatically remove the ID range IdM has created for AD users. This way, if you add the trust again, the existing ID range is re-used. Also, if AD users have created files on an IdM client, their POSIX IDs are preserved in the file metadata.
To remove all information related to an AD trust, remove the AD user ID range after removing the trust configuration and trust object:
# ipa idrange-del AD.EXAMPLE.COM_id_range
# systemctl restart sssdVerification steps
Use the
ipa trust-showcommand to confirm that the trust has been removed.[root@server ~]# ipa trust-show ad.example.com ipa: ERROR: ad.example.com: trust not found
Additional resources
- /usr/share/doc/ansible-freeipa/README-trust.md
- /usr/share/doc/ansible-freeipa/playbooks/trust
- Removing an ID range after removing a trust to AD
34.14. Removing an ID range after removing a trust to AD
If you have removed a trust between your IdM and Active Directory (AD) environments, you might want to remove the ID range associated with it.
IDs allocated to ID ranges associated with trusted domains might still be used for ownership of files and directories on systems enrolled into IdM.
If you remove the ID range that corresponds to an AD trust that you have removed, you will not be able to resolve the ownership of any files and directories owned by AD users.
Prerequisites
- You have removed a trust to an AD environment.
Procedure
Display all the ID ranges that are currently in use:
[root@server ~]# ipa idrange-find-
Identify the name of the ID range associated with the trust you have removed. The first part of the name of the ID range is the name of the trust, for example
AD.EXAMPLE.COM_id_range. Remove the range:
[root@server ~]# ipa idrange-del AD.EXAMPLE.COM_id_rangeRestart the SSSD service to remove references to the ID range you have removed.
[root@server ~]# systemctl restart sssd
Additional resources