
Red Hat Training
A Red Hat training course is available for RHEL 8
Composing a customized RHEL system image
Creating customized system images with RHEL image builder on Red Hat Enterprise Linux 8
Abstract
Making open source more inclusive
Red Hat is committed to replacing problematic language in our code, documentation, and web properties. We are beginning with these four terms: master, slave, blacklist, and whitelist. Because of the enormity of this endeavor, these changes will be implemented gradually over several upcoming releases. For more details, see our CTO Chris Wright’s message.
Providing feedback on Red Hat documentation
We appreciate your feedback on our documentation. Let us know how we can improve it.
Submitting feedback through Jira (account required)
- Log in to the Jira website.
- Click Create in the top navigation bar.
- Enter a descriptive title in the Summary field.
- Enter your suggestion for improvement in the Description field. Include links to the relevant parts of the documentation.
- Click Create at the bottom of the dialogue.
Chapter 1. RHEL image builder description
To deploy a system, create a system image. To create RHEL system images, use the RHEL image builder tool. You can use RHEL image builder to create customized system images of RHEL, including system images prepared for deployment on cloud platforms. RHEL image builder automatically handles the setup details for each output type and is therefore easier to use and faster to work with than manual methods of image creation. You can access the RHEL image builder functionalities by using the command-line interface in the composer-cli tool, or the graphical user interface in the RHEL web console.
From RHEL 8.3 onward, the osbuild-composer back end replaces lorax-composer. The new service provides REST APIs for image building.
1.1. RHEL image builder terminology
RHEL image builder uses the following concepts:
- Blueprint
A blueprint is a description of a customized system image. It lists the packages and customizations that will be part of the system. You can edit blueprints with customizations and save them as a particular version. When you create a system image from a blueprint, the image is associated with the blueprint in the RHEL image builder interface.
Create blueprints in the TOML format.
- Compose
- Composes are individual builds of a system image, based on a specific version of a particular blueprint. Compose as a term refers to the system image, the logs from its creation, inputs, metadata, and the process itself.
- Customizations
- Customizations are specifications for the image that are not packages. This includes users, groups, and SSH keys.
1.2. RHEL image builder output formats
RHEL image builder can create images in multiple output formats shown in the following table.
Table 1.1. RHEL image builder output formats
| Description | CLI name | File extension |
|---|---|---|
| QEMU Image |
|
|
| Disk Archive |
|
|
| Amazon Web Services |
|
|
| Microsoft Azure |
|
|
| Google Cloud Platform |
|
|
| VMware vSphere |
|
|
| VMware vSphere |
|
|
| Openstack |
|
|
| RHEL for Edge Commit |
|
|
| RHEL for Edge Container |
|
|
| RHEL for Edge Installer |
|
|
| RHEL for Edge Raw Image |
|
|
| RHEL for Edge Simplified Installer |
|
|
| RHEL for Edge AMI |
|
|
| RHEL for Edge VMDK |
|
|
| RHEL Installer |
|
|
| Oracle Cloud Infrastructure |
|
|
To check the supported types, run the command:
# composer-cli compose types
Chapter 2. Installing RHEL image builder
Before using RHEL image builder, you must install it.
2.1. RHEL image builder system requirements
The host that runs RHEL image builder must meet the following requirements:
Table 2.1. RHEL image builder system requirements
| Parameter | Minimal Required Value |
|---|---|
| System type | A dedicated host or virtual machine. Note that RHEL image builder is not supported in containers, including Red Hat Universal Base Images (UBI). |
| Processor | 2 cores |
| Memory | 4 GiB |
| Disk space | 20 GiB of free space in the ` /var/cache/` filesystem |
| Access privileges | root |
| Network | Internet connectivity to the Red Hat Content Delivery Network (CDN). |
If you do not have internet connectivity, use RHEL image builder in isolated networks. For that, you must override the default repositories to point to your local repositories to not connect to Red Hat Content Delivery Network (CDN). Ensure that you have your content mirrored internally or use Red Hat Satellite.
2.2. Installing RHEL image builder
Install RHEL image builder to have access to all the osbuild-composer package functionalities.
Prerequisites
- You are logged in to the RHEL host on which you want to install RHEL image builder.
- The host is subscribed to Red Hat Subscription Manager (RHSM) or Red Hat Satellite.
-
You have enabled the
BaseOSandAppStreamrepositories to be able to install the RHEL image builder packages.
Procedure
Install RHEL image builder and other necessary packages:
# yum install osbuild-composer composer-cli cockpit-composer
-
osbuild-composer- A service to build customized RHEL operating system images. -
composer-cli- This package enables access to the CLI interface. -
cockpit-composer- This package enables access to the Web UI interface. The web console is installed as a dependency of thecockpit-composerpackage.
-
Enable and start RHEL image builder socket:
# systemctl enable --now osbuild-composer.socket
If you want to use RHEL image builder in the web console, enable and start it.
# systemctl enable --now cockpit.socket
The
osbuild-composerandcockpitservices start automatically on first access.Load the shell configuration script so that the autocomplete feature for the
composer-clicommand starts working immediately without logging out and in:$ source /etc/bash_completion.d/composer-cli
Restart the running
osbuild-composerservice on your RHEL host.# systemctl restart osbuild-composer
The osbuild-composer package is the new backend engine that will be the preferred default and focus of all new functionality beginning with Red Hat Enterprise Linux 8.3 and later. The previous backend lorax-composer package is considered deprecated, will only receive select fixes for the remainder of the Red Hat Enterprise Linux 8 life cycle and will be omitted from future major releases. It is recommended to uninstall lorax-composer in favor of osbuild-composer.
Verification
Verify that the installation works by running
composer-cli:# composer-cli status show
Troubleshooting
You can use a system journal to track RHEL image builder activities. Additionally, you can find the log messages in the file.
To find the journal output for traceback, run the following commands:
$ journalctl | grep osbuild
To show both remote or local workers:
$ journalctl -u osbuild-worker*
To show the running services:
$ journalctl -u osbuild-composer.service
2.3. Reverting to lorax-composer RHEL image builder backend
The osbuild-composer backend, though much more extensible, does not currently achieve feature parity with the previous lorax-composer backend.
To revert to the previous backend, follow the steps:
Prerequisites
-
You have installed the
osbuild-composerpackage
Procedure
Remove the osbuild-composer backend.
# yum remove osbuild-composer
# yum remove weldr-client
In the
/etc/yum.conf file, add an exclude entry forosbuild-composerpackage.# cat /etc/yum.conf [main] gpgcheck=1 installonly_limit=3 clean_requirements_on_remove=True best=True skip_if_unavailable=False exclude=osbuild-composer weldr-client
Install the
lorax-composerpackage.# yum install lorax-composer composer-cli
Enable and start the
lorax-composerservice to start after each reboot.# systemctl enable --now lorax-composer.socket # systemctl start lorax-composer
Additional resources
Chapter 3. Configuring RHEL image builder repositories
To use RHEL image builder, you must ensure that the repositories are configured. You can use the following types of repositories in RHEL image builder:
- Official repository overrides
- Use these if you want to download base system RPMs from elsewhere than the Red Hat Content Delivery Network (CDN) official repositories, for example, a custom mirror in your network. Using official repository overrides disables the default repositories, and your custom mirror must contain all the necessary packages.
- Custom third-party repositories
- Use these to include packages that are not available in the official RHEL repositories.
3.1. Adding custom third-party repositories to RHEL image builder
You can add custom third-party sources to your repositories and manage these repositories by using the composer-cli.
Prerequisites
- You have the URL of the custom third-party repository.
Procedure
Create a repository source file, such as
/root/repo.toml. For example:id = "k8s" name = "Kubernetes" type = "yum-baseurl" url = "https://server.example.com/repos/company_internal_packages/" check_gpg = false check_ssl = false system = false
The
typefield accepts the following valid values:yum-baseurl,yum-mirrorlist, andyum-metalink.- Save the file in the TOML format.
Add the new third-party source to RHEL image builder:
$ composer-cli sources add <file-name>.toml
Verification
Check if the new source was successfully added:
$ composer-cli sources listCheck the new source content:
$ composer-cli sources info <source_id>
3.2. Adding third-party repositories with specific distributions to RHEL image builder
You can specify a list of distributions in the custom third-party source file by using the optional field distro. The repository file uses the distribution string list while resolving dependencies during the image building.
Any request that specifies rhel-8 uses this source. For example, if you list packages and specify rhel-8, it includes this source. However, listing packages for the host distribution do not include this source.
Prerequisites
- You have the URL of the custom third-party repository.
- You have the list of distributions that you want to specify.
Procedure
Create a repository source file, such as
/root/repo.toml. For example, to specify the distribution:check_gpg = true check_ssl = true distros = ["rhel-8"] id = "rh9-local" name = "packages for RHEL" system = false type = "yum-baseurl" url = "https://local/repos/rhel8/projectrepo/"- Save the file in the TOML format.
Add the new third-party source to RHEL image builder:
$ composer-cli sources add <file-name>.toml
Verification
Check if the new source was successfully added:
$ composer-cli sources listCheck the new source content:
$ composer-cli sources info <source_id>
3.3. Checking repositories metadata with GPG
To detect and avoid corrupted packages, you can use the DNF package manager to check the GNU Privacy Guard (GPG) signature on RPM packages, and also to check if the repository metadata has been signed with a GPG key.
You can either enter the gpgkey that you want to do the check over https by setting the gpgkeys field with the key URL. Alternatively, to improve security, you can also embed the whole key into the gpgkeys field, to import it directly instead of fetching the key from the URL.
Prerequisites
- The directory that you want to use as a repository exists and contains packages.
Procedure
Access the folder where you want to create a repository:
$ cd repo/Run the
createrepo_cto create a repository from RPM packages:$ createrepo_c .Access the directory where the repodata is:
$ cd repodata/Sign your
repomd.xmlfile:$ gpg -u <_gpg-key-email_> --yes --detach-sign --armor /srv/repo/example/repomd.xmlTo enable GPG signature checks in the repository:
-
Set
check_repogpg = truein the repository source. Enter the
gpgkeythat you want to do the check. If your key is available overhttps, set thegpgkeysfield with the key URL for the key. You can add as many URL keys as you need.The following is an example:
check_gpg = true
check_ssl = true
id = "signed local packages"
name = "repository_name"
type = "yum-baseurl"
url = "https://local/repos/projectrepo/"
check_repogpg = true
gpgkeys=["https://local/keys/repokey.pub"]
As an alternative, add the GPG key directly in the
gpgkeysfield, for example:check_gpg = true check_ssl = true check_repogpg id = "custom-local" name = "signed local packages" type = "yum-baseurl" url = "https://local/repos/projectrepo/" gpgkeys=["https://remote/keys/other-repokey.pub", '''-----BEGIN PGP PUBLIC KEY BLOCK----- … -----END PGP PUBLIC KEY BLOCK-----''']
If the test does not find the signature, the GPG tool shows an error similar to the following one:
$ GPG verification is enabled, but GPG signature is not available.
This may be an error or the repository does not support GPG verification:
Status code: 404 for http://repo-server/rhel/repodata/repomd.xml.asc (IP: 192.168.1.3)
If the signature is invalid, the GPG tool shows an error similar to the following one:
repomd.xml GPG signature verification error: Bad GPG signature
-
Set
Verification
Test the signature of the repository manually:
$ gpg --verify /srv/repo/example/repomd.xml.asc
3.4. RHEL image builder official repository overrides
RHEL image builder osbuild-composer back end does not inherit the system repositories located in the /etc/yum.repos.d/ directory. Instead, it has its own set of official repositories defined in the /usr/share/osbuild-composer/repositories directory. This includes the Red Hat official repository, which contains the base system RPMs to install additional software or update already installed programs to newer versions. If you want to override the official repositories, you must define overrides in /etc/osbuild-composer/repositories/. This directory is for user defined overrides and the files located there take precedence over those in the /usr/share/osbuild-composer/repositories/ directory.
The configuration files are not in the usual YUM repository format known from the files in /etc/yum.repos.d/. Instead, they are JSON files.
3.5. Overriding a system repository
You can configure your own repository override for RHEL image builder in the /etc/osbuild-composer/repositories directory.
Prior to RHEL 8.5 release, the name of the repository overrides is rhel-8.json. Starting from RHEL 8.5, the names also respect the minor version: rhel-84.json, rhel-85.json, and so on.
Prerequisites
- You have a custom repository that is accessible from your host system.
Procedure
Create the
/etc/osbuild-composer/repositories/directory to store your repository overrides:$ sudo mkdir -p /etc/osbuild-composer/repositories
Create a JSON file, using a name corresponding to your RHEL version. Alternatively, you can copy the file for your distribution from
/usr/share/osbuild-composer/and modify its content.For RHEL 8.9, use
/etc/osbuild-composer/repositories/rhel-89.json.Add the following structure to your JSON file. Specify only one of the following attributes, in the string format:
-
baseurl- The base URL of the repository. -
metalink- The URL of a metalink file that contains a list of valid mirror repositories. mirrorlist- The URL of a mirrorlist file that contains a list of valid mirror repositories. The remaining fields, such asgpgkey, andmetadata_expire, are optional.For example:
{ "x86_64": [ { "name": "baseos", "baseurl": "http://mirror.example.com/composes/released/RHEL-8/8.0/BaseOS/x86_64/os/", "gpgkey": "-----BEGIN PGP PUBLIC KEY BLOCK-----\n\n (…)", "check_gpg": true } ] }Alternatively, you can copy the JSON file for your distribution, by replacing
rhel-version.jsonwith your RHEL version, for example: rhel-8.json.$ cp /usr/share/osbuild-composer/repositories/rhel-version.json /etc/osbuild-composer/repositories/
-
Optional: Verify the JSON file:
$ json_verify /etc/osbuild-composer/repositories/<file>.json
Edit the
baseurlpaths in therhel-8.jsonfile and save it. For example:$ /etc/osbuild-composer/repositories/rhel-version.jsonRestart the
osbuild-composer.service:$ sudo systemctl restart osbuild-composer.service
Verification
Check if the repository points to the correct URLs:
$ cat /etc/yum.repos.d/redhat.repo
You can see that the repository points to the correct URLs which are copied from the
/etc/yum.repos.d/redhat.repofile.
Additional resources
3.6. Overriding a system repository that requires subscriptions
You can set up the osbuild-composer service to use system subscriptions that are defined in the /etc/yum.repos.d/redhat.repo file. To use a system subscription in osbuild-composer, define a repository override that has the following details:
-
The same
baseurlas the repository defined in/etc/yum.repos.d/redhat.repo. The value of
”rhsm”: truedefined in the JSON object.Noteosbuild-composerdoes not automatically use repositories defined in/etc/yum.repos.d/. You need to manually specify them either as a system repository override or as an additionalsourceby usingcomposer-cli. The “BaseOS” and “AppStream” repositories usually use system repository overrides, whereas all the other repositories usecomposer-clisources.
Prerequisites
-
Your system has a subscription defined in
/etc/yum.repos.d/redhat.repo - You have created a repository override. See Overriding a system repository.
Procedure
Get the
baseurlfrom the/etc/yum.repos.d/redhat.repofile:# cat /etc/yum.repos.d/redhat.repo [AppStream] name = AppStream mirror example baseurl = https://mirror.example.com/RHEL-8/8.0/AppStream/x86_64/os/ enabled = 1 gpgcheck = 0 sslverify = 1 sslcacert = /etc/pki/ca1/ca.crt sslclientkey = /etc/pki/ca1/client.key sslclientcert = /etc/pki/ca1/client.crt metadata_expire = 86400 enabled_metadata = 0Configure the repository override to use the same
baseurland setrhsmto true:{ "x86_64": [ { "name": "AppStream mirror example", "baseurl": "https://mirror.example.com/RHEL-8/8.0/AppStream/x86_64/os/", "gpgkey": "-----BEGIN PGP PUBLIC KEY BLOCK-----\n\n (…)", "check_gpg": true, "rhsm": true } ] }Restart the
osbuild-composer.service:$ sudo systemctl restart osbuild-composer.service
Additional resources
Chapter 4. Creating system images by using RHEL image builder CLI
RHEL image builder is a tool for creating custom system images. To control RHEL image builder and create your custom system images, you can use the command-line interface (CLI) or the web console interface.
4.1. Introducing the RHEL image builder command-line interface
You can use the RHEL image builder command-line interface (CLI) to create blueprints, by running the composer-cli command with the suitable options and subcommands.
The workflow for the command-line interface can be summarized as follows:
- Create a blueprint or export (save) an existing blueprint definition to a plain text file
- Edit this file in a text editor
- Import the blueprint text file back into image builder
- Run a compose to build an image from the blueprint
- Export the image file to download it
Apart from the basic subcommands to create a blueprint, the composer-cli command offers many subcommands to examine the state of configured blueprints and composes.
4.2. Using RHEL image builder as a non-root user
To run the composer-cli commands as non-root, the user must be in the weldr group.
Prerequisites
- You have created a user
Procedure
To add a user to the
weldrorrootgroups, run the following commands:$ sudo usermod -a -G weldr user $ newgrp weldr
4.3. Creating a blueprint by using the command-line interface
You can create a new RHEL image builder blueprint using the command-line interface (CLI). The blueprint describes the final image and its customizations, such as packages, and kernel customizations.
Prerequisite
- You are logged in as the root user or a user who is a member of the welder group
Procedure
Create a plain text file with the following contents:
name = "BLUEPRINT-NAME"
description = "LONG FORM DESCRIPTION TEXT"
version = "0.0.1"
modules = []
groups = []
Replace BLUEPRINT-NAME and LONG FORM DESCRIPTION TEXT with a name and description for your blueprint.
Replace 0.0.1 with a version number according to the Semantic Versioning scheme.
For every package that you want to be included in the blueprint, add the following lines to the file:
[[packages]]
name = "package-name"
version = "package-version"
Replace package-name with the name of the package, such as httpd, gdb-doc, or coreutils.
Optionally, replace package-version with the version to use. This field supports
dnfversion specifications:- For a specific version, use the exact version number such as 8.7.0.
- For the latest available version, use the asterisk *.
- For the latest minor version, use formats such as 8.*.
Customize your blueprints to suit your needs. For example, disable Simultaneous Multi Threading (SMT), add the following lines to the blueprint file:
[customizations.kernel]
append = "nosmt=force"
For additional customizations available, see Supported Image Customizations.
- Save the file, for example, as BLUEPRINT-NAME.toml and close the text editor.
Push the blueprint:
# composer-cli blueprints push BLUEPRINT-NAME.tomlReplace BLUEPRINT-NAME with the value you used in previous steps.
NoteTo create images using
composer-clias non-root, add your user to theweldrorrootgroups.# usermod -a -G weldr user $ newgrp weldr
Verification
List the existing blueprints to verify that the blueprint has been pushed and exists:
# composer-cli blueprints list
Display the blueprint configuration you have just added:
# composer-cli blueprints show BLUEPRINT-NAMECheck whether the components and versions listed in the blueprint and their dependencies are valid:
# composer-cli blueprints depsolve BLUEPRINT-NAMEIf RHEL image builder is unable to solve the dependencies of a package from your custom repositories, remove the
osbuild-composercache:$ sudo rm -rf /var/cache/osbuild-composer/* $ sudo systemctl restart osbuild-composer
4.4. Editing a blueprint with command-line interface
You can edit an existing blueprint in the command-line (CLI) interface to, for example, add a new package, or define a new group, and to create your customized images. For that, follow the steps:
Prerequisites
- You have created a blueprint
Procedure
List the existing blueprints:
# composer-cli blueprints list
Save the blueprint to a local text file:
# composer-cli blueprints save BLUEPRINT-NAME- Edit the BLUEPRINT-NAME.toml file with a text editor and make your changes.
Before finishing the edits, verify that the file is a valid blueprint:
Remove the following line from the blueprint, if present:
packages = []
- Increase the version number, for example, from 0.0.1 to 0.1.0. Remember that RHEL image builder blueprint versions must use the Semantic Versioning scheme. Note also that if you do not change the version, the patch version component increases automatically.
- Save the file and close the text editor.
Push the blueprint back into RHEL image builder:
# composer-cli blueprints push BLUEPRINT-NAME.tomlNoteTo import the blueprint back into RHEL image builder, supply the file name including the
.tomlextension, while in other commands use only the blueprint name.
Verification
To verify that the contents uploaded to RHEL image builder match your edits, list the contents of blueprint:
# composer-cli blueprints show BLUEPRINT-NAMECheck whether the components and versions listed in the blueprint and their dependencies are valid:
# composer-cli blueprints depsolve BLUEPRINT-NAME
Additional resources
4.5. Creating a system image with RHEL image builder in the command-line interface
You can build a customized RHEL image by using the RHEL image builder command-line interface. For that, you must specify a blueprint and an image type. Optionally, you can also specify a distribution. If you do not specify a distribution, it will use the same distribution and version as the host system. The architecture is also the same as the one on the host.
Prerequisites
- You have a blueprint prepared for the image. See Creating a RHEL image builder blueprint using the command-line interface.
Procedure
Optional: List the image formats you can create:
# composer-cli compose types
Start the compose:
# composer-cli compose start BLUEPRINT-NAME IMAGE-TYPE
Replace BLUEPRINT-NAME with the name of the blueprint, and IMAGE-TYPE with the type of the image. For the available values, see the output of the
composer-cli compose typescommand.The compose process starts in the background and shows the composer Universally Unique Identifier (UUID).
The image creation can take up to ten minutes to complete.
To check the status of the compose:
# composer-cli compose status
A finished compose shows the FINISHED status value. To identify your compose in the list, use its UUID.
After the compose process is finished, download the resulting image file:
# composer-cli compose image UUIDReplace UUID with the UUID value shown in the previous steps.
Verification
After you create your image, you can check the image creation progress using the following commands:
Download the metadata of the image to get a
.tarfile of the metadata for the compose:$ sudo composer-cli compose metadata UUIDDownload the logs of the image:
$ sudo composer-cli compose logs UUIDThe command creates a
.tarfile that contains the logs for the image creation. If the logs are empty, you can check the journal.Check the journal:
$ journalctl | grep osbuild
Check the manifest of the image:
$ sudo cat /var/lib/osbuild-composer/jobs/job_UUID.jsonYou can find the job_UUID.json in the journal.
Additional resources
4.6. Basic RHEL image builder command-line commands
The RHEL image builder command-line interface offers the following subcommands.
Blueprint manipulation
- List all available blueprints
# composer-cli blueprints list
- Show a blueprint contents in the TOML format
# composer-cli blueprints show <BLUEPRINT-NAME>- Save (export) blueprint contents in the TOML format into a file
BLUEPRINT-NAME.toml # composer-cli blueprints save <BLUEPRINT-NAME>- Remove a blueprint
# composer-cli blueprints delete <BLUEPRINT-NAME>- Push (import) a blueprint file in the TOML format into RHEL image builder
# composer-cli blueprints push <BLUEPRINT-NAME>
Composing images from blueprints
- List the available image types
# composer-cli compose types
- Start a compose
# composer-cli compose start <BLUEPRINT> <COMPOSE-TYPE>
- List all composes
# composer-cli compose list
- List all composes and their status
# composer-cli compose status
- Cancel a running compose
# composer-cli compose cancel <COMPOSE-UUID>- Delete a finished compose
# composer-cli compose delete <COMPOSE-UUID>- Show detailed information about a compose
# composer-cli compose info <COMPOSE-UUID>- Download image file of a compose
# composer-cli compose image <COMPOSE-UUID>- See more subcommands and options
# composer-cli help
Additional resources
- composer-cli(1) man page
4.7. RHEL image builder blueprint format
RHEL image builder blueprints are presented to the user as plain text in the TOML format.
The elements of a typical blueprint file include the following:
- The blueprint metadata
name = "<BLUEPRINT-NAME>"
description = "<LONG FORM DESCRIPTION TEXT>"
version = "<VERSION>"
The BLUEPRINT-NAME and LONG FORM DESCRIPTION TEXT field are a name and description for your blueprint.
The VERSION is a version number according to the Semantic Versioning scheme, and is present only once for the entire blueprint file.
- Groups to include in the image
[[groups]]
name = "group-name"
The group entry describes a group of packages to be installed into the image. Groups use the following package categories:
- Mandatory
- Default
Optional
The group-name is the name of the group, for example, anaconda-tools, widget, wheel or users. Blueprints install the mandatory and default packages. There is no mechanism for selecting optional packages.
- Packages to include in the image
[[packages]]
name = "<package-name>"
version = "<package-version>"
package-name is the name of the package, such as httpd, gdb-doc, or coreutils.
package-version is a version to use. This field supports
dnfversion specifications:- For a specific version, use the exact version number such as 8.7.0.
- For latest available version, use the asterisk *.
- For a latest minor version, use a format such as 8.*.
Repeat this block for every package to include.
There are no differences between packages and modules in the RHEL image builder tool. Both are treated as RPM package dependencies.
4.8. Supported image customizations
You can customize your image by adding customizations to your blueprint, such as:
- Adding an additional RPM package
- Enabling a service
- Customizing a kernel command line parameter.
Between others. You can use several image customizations within blueprints. By using the customizations, you can add packages and groups to the image that are not available in the default packages. To use these options, configure the customizations in the blueprint and import (push) it to RHEL image builder.
Additional resources
4.8.1. Selecting a distribution
You can use the distro field to select the distribution to use when composing your images, or depsolving the blueprint. If distro is left blank it will use the host distribution. If you do not specify a distribution, the blueprint uses the host distribution. In case you upgrade the host operating system, the blueprints with no distribution set build images using the new operating system version. You cannot build an operating system image that differs from the RHEL image builder host.
Procedure
Customize the blueprint with the distro to always build the specified RHEL image:
name = "blueprint_name"
description = "blueprint_version"
version = "0.1"
distro = "different_minor_version"
Replace "different_minor_version" to build a different minor version, for example, if you want to build a RHEL 8.8 image, use distro = "rhel-88". On RHEL 8.9 image, you can build minor versions such as RHEL 8.8 and earlier releases.
4.8.2. Selecting a package group
Customize the blueprint with packages and modules. The name attribute is a required string. The version attribute is an optional string that, if not provided, uses the latest version in the repositories.
Currently, there are no differences between packages and modules in osbuild-composer. Both are treated as an RPM package dependency.
Procedure
Customize your blueprint with a package:
[[packages]]
name = "package_group_name"
Replace "package_group_name" with the name of the group. For example, "tmux".
[[packages]]
name = "tmux"
version = "2.9a"
4.8.3. Setting the image hostname
The customizations.hostname is an optional string that you can use to configure the final image hostname. This customization is optional, and if you do not set it, the blueprint uses the default hostname.
Procedure
Customize the blueprint to configure the hostname:
[customizations]
hostname = "baseimage"
4.8.4. Specifying additional users
Add a user to the image, and optionally, set their SSH key. All fields for this section are optional except for the name.
Procedure
Customize the blueprint to add a user to the image:
[[customizations.user]]
name = "USER-NAME"
description = "USER-DESCRIPTION"
password = "PASSWORD-HASH"
key = "PUBLIC-SSH-KEY"
home = "/home/USER-NAME/"
shell = "/usr/bin/bash"
groups = ["users", "wheel"]
uid = NUMBER
gid = NUMBER
The GID is optional and must already exist in the image. Optionally, a package creates it, or the blueprint creates the GID by using the
[[customizations.group]]entry.Replace PASSWORD-HASH with the actual
password hash. To generate thepassword hash, use a command such as:$ python3 -c 'import crypt,getpass;pw=getpass.getpass();print(crypt.crypt(pw) if (pw==getpass.getpass("Confirm: ")) else exit())'Replace the other placeholders with suitable values.
Enter the
namevalue and omit any lines you do not need.Repeat this block for every user to include.
4.8.5. Specifying additional groups
Specify a group for the resulting system image. Both the name and the gid attributes are mandatory.
Procedure
Customize the blueprint with a group:
[[customizations.group]]
name = "GROUP-NAME"
gid = NUMBER
Repeat this block for every group to include.
4.8.6. Setting SSH key for existing users
You can use customizations.sshkey to set an SSH key for the existing users in the final image. Both user and key attributes are mandatory.
Procedure
- Customize the blueprint by setting an SSH key for existing users:
[[customizations.sshkey]]
user = "root"
key = "PUBLIC-SSH-KEY"
You can only configure the customizations.sshkey customization for existing users. To create a user and set an SSH key, see the User specifications for the resulting system image customization.
4.8.7. Appending a kernel argument
You can append arguments to the boot loader kernel command line. By default, RHEL image builder builds a default kernel into the image. However, you can customize the kernel by configuring it in the blueprint.
Procedure
Append a kernel boot parameter option to the defaults:
[customizations.kernel]
append = "KERNEL-OPTION"
Define a kernel name to use in an image
[customizations.kernel]
name = "KERNEL-rt"
4.8.8. Setting time zone and NTP
You can customize your blueprint to configure the time zone and the Network Time Protocol (NTP). Both timezone and ntpservers attributes are optional strings. If you do not customize the time zone, the system uses Universal Time, Coordinated (UTC). If you do not set NTP servers, the system uses the default distribution.
Procedure
Customize the blueprint with the
timezoneand thentpserversyou want:[customizations.timezone] timezone = "TIMEZONE" ntpservers = "NTP_SERVER"
For example:
[customizations.timezone]
timezone = "US/Eastern"
ntpservers = ["0.north-america.pool.ntp.org", "1.north-america.pool.ntp.org"]
NoteSome image types, such as Google Cloud, already have NTP servers set up. You cannot override it because the image requires the NTP servers to boot in the selected environment. However, you can customize the time zone in the blueprint.
4.8.9. Customizing the locale settings
You can customize the locale settings for your resulting system image. Both language and the keyboard attributes are mandatory. You can add many other languages. The first language you add is the primary language and the other languages are secondary.
Procedure
- Set the locale settings:
[customizations.locale]
languages = ["LANGUAGE"]
keyboard = "KEYBOARD"
For example:
[customizations.locale]
languages = ["en_US.UTF-8"]
keyboard = "us"
To list the values supported by the languages, run the following command:
$ localectl list-locales
To list the values supported by the keyboard, run the following command:
$ localectl list-keymaps
4.8.10. Customizing firewall
Set the firewall for the resulting system image. By default, the firewall blocks incoming connections, except for services that enable their ports explicitly, such as sshd.
If you do not want to use the [customizations.firewall] or the [customizations.firewall.services], either remove the attributes, or set them to an empty list []. If you only want to use the default firewall setup, you can omit the customization from the blueprint.
The Google and OpenStack templates explicitly disable the firewall for their environment. You cannot override this behavior by setting the blueprint.
Procedure
Customize the blueprint with the following settings to open other ports and services:
[customizations.firewall]
ports = ["PORTS"]
Where
portsis an optional list of strings that contain ports or a range of ports and protocols to open. You can configure the ports by using the following format:port:protocolformat. You can configure the port ranges by using theportA-portB:protocolformat. For example:[customizations.firewall] ports = ["22:tcp", "80:tcp", "imap:tcp", "53:tcp", "53:udp", "30000-32767:tcp", "30000-32767:udp"]
You can use numeric ports, or their names from the
/etc/servicesto enable or disable port lists.Specify which firewall services to enable or disable in the
customizations.firewall.servicesection:[customizations.firewall.services] enabled = ["SERVICES"] disabled = ["SERVICES"]
You can check the available firewall services:
$ firewall-cmd --get-services
For example:
[customizations.firewall.services]
enabled = ["ftp", "ntp", "dhcp"]
disabled = ["telnet"]
NoteThe services listed in
firewall.servicesare different from theservice-namesavailable in the/etc/servicesfile.
4.8.11. Enabling or disabling services
You can control which services to enable during the boot time. Some image types already have services enabled or disabled to ensure that the image works correctly and you cannot override this setup. The [customizations.services] settings in the blueprint do not replace these services, but add the services to the list of services already present in the image templates.
Procedure
Customize which services to enable during the boot time:
[customizations.services]
enabled = ["SERVICES"]
disabled = ["SERVICES"]
For example:
[customizations.services]
enabled = ["sshd", "cockpit.socket", "httpd"]
disabled = ["postfix", "telnetd"]
4.8.12. Specifying a custom filesystem configuration
You can specify a custom filesystem configuration in your blueprints and therefore create images with a specific disk layout, instead of the default layout configuration. By using the non-default layout configuration in your blueprints, you can benefit from:
- Security benchmark compliance
- Protection against out-of-disk errors
- Improved performance
- Consistency with existing setups
The filesystem customization is not supported for OSTree systems, because OSTree images have their own mount rule, such as read-only.
The blueprint supports the following mountpoints and their sub-directories:
-
/- the root mount point -
/var -
/home -
/opt -
/srv -
/usr -
/app -
/data -
/boot- The blueprint supports the/bootcustomization from RHEL 8.7 and RHEL 9.1 onward.
Customizing mount points is only supported from RHEL 8.5 distributions onward, by using the CLI. In earlier distributions, you can only specify the root partition as a mount point and specify the size argument as an alias for the image size. Beginning with RHEL 8.6, for the osbuild-composer-46.1-1.el8 RPM and later version, the physical partitions are no longer available and filesystem customizations create logical volumes.
If you have more than one partition in the customized image, you can create images with a customized file system partition on LVM and resize those partitions at runtime. To do this, you can specify a customized filesystem configuration in your blueprint and therefore create images with the required disk layout. The default filesystem layout remains unchanged - if you use plain images without file system customization, and cloud-init resizes the root partition.
The blueprint automatically converts the file system customization to an LVM partition.
You can use the custom file blueprint customization to create new files or to replace existing files. The parent directory of the file you specify must exist, otherwise, the image build fails. Ensure that the parent directory exists by specifying it in the [[customizations.directories]] customization.
If you combine the files customizations with other blueprint customizations, it might affect the functioning of the other customizations, or it might override the current files customizations.
With the [[customizations.files]] blueprint customization you can:
- Create new text files.
- Modifying existing files. WARNING: this can override the existing content.
- Set user and group ownership for the file you are creating.
- Set the mode permission in the octal format.
You cannot create or replace the following files:
-
/etc/fstab -
/etc/shadow -
/etc/passwd -
/etc/group
You can create customized files and directories in your image, by using the [[customizations.files]] and the [[customizations.directories]] blueprint customizations. You can use these customizations only in the /etc directory.
These blueprint customizations are supported by all image types, except the image types that deploy OSTree commits, such as edge-raw-image, edge-installer, and edge-simplified-installer.
If you use the customizations.directories with a directory path which already exists in the image with mode, user or group already set, the image build fails to prevent changing the ownership or permissions of the existing directory.
With the [[customizations.directories]] blueprint customization you can:
- Create new directories.
- Set user and group ownership for the directory you are creating.
- Set the directory mode permission in the octal format.
- Ensure that parent directories are created as needed.
With the [[customizations.files]] blueprint customization you can:
- Create new text files.
- Modifying existing files. WARNING: this can override the existing content.
- Set user and group ownership for the file you are creating.
- Set the mode permission in the octal format.
You cannot create or replace the following files:
-
/etc/fstab -
/etc/shadow -
/etc/passwd -
/etc/group
Procedure
Customize the filesystem configuration in your blueprint:
[[customizations.filesystem]]
mountpoint = "MOUNTPOINT"
size = MINIMUM-PARTITION-SIZE
The
MINIMUM-PARTITION-SIZEvalue has no default size format. The blueprint customization supports the following values and units: kB to TB and KiB to TiB. For example, you can define the mount point size in bytes:[[customizations.filesystem]] mountpoint = "/var" size = 1073741824
Define the mount point size by using units. For example:
[[customizations.filesystem]]
mountpoint = "/opt"
size = "20 GiB"
[[customizations.filesystem]]
mountpoint = "/boot"
size = "1 GiB"
Create customized directories under the
/etcdirectory for your image by using[[customizations.directories]]:[[customizations.directories]] path = "/etc/directory_name" mode = "octal_access_permission" user = "user_string_or_integer" group = "group_string_or_integer" ensure_parents = boolean
The blueprint entries are described as following:
-
path- Mandatory - enter the path to the directory that you want to create. It must be an absolute path under the/etcdirectory. -
mode- Optional - set the access permission on the directory, in the octal format. If you do not specify a permission, it defaults to 0755. The leading zero is optional. -
user- Optional - set a user as the owner of the directory. If you do not specify a user, it defaults toroot. You can specify the user as a string or as an integer. -
group- Optional - set a group as the owner of the directory. If you do not specify a group, it defaults toroot. You can specify the group as a string or as an integer. -
ensure_parents- Optional - Specify whether you want to create parent directories as needed. If you do not specify a value, it defaults tofalse. Create customized file under the
/etcdirectory for your image by using[[customizations.directories]]:[[customizations.files]] path = "/etc/directory_name" mode = "octal_access_permission" user = "user_string_or_integer" group = "group_string_or_integer" data = "Hello world!"
The blueprint entries are described as following:
-
path- Mandatory - enter the path to the file that you want to create. It must be an absolute path under the/etcdirectory. -
modeOptional - set the access permission on the file, in the octal format. If you do not specify a permission, it defaults to 0644. The leading zero is optional. -
user- Optional - set a user as the owner of the file. If you do not specify a user, it defaults toroot. You can specify the user as a string or as an integer. -
group- Optional - set a group as the owner of the file. If you do not specify a group, it defaults toroot. You can specify the group as a string or as an integer. -
data- Optional - Specify the content of a plain text file. If you do not specify a content, it creates an empty file.
4.9. Packages installed by RHEL image builder
When you create a system image using RHEL image builder, the system installs a set of base package groups.
When you add additional components to your blueprint, ensure that the packages in the components you added do not conflict with any other package components. Otherwise, the system fails to solve dependencies and creating your customized image fails. You can check if there is no conflict between the packages by running the command:
# composer-cli blueprints depsolve BLUEPRINT-NAME
By default, RHEL image builder uses the Core group as the base list of packages.
Table 4.1. Default packages to support image type creation
| Image type | Default Packages |
|---|---|
|
|
|
|
|
|
|
|
|
|
|
|
|
|
|
|
|
|
|
|
|
|
|
|
|
|
|
|
|
|
|
|
|
|
|
|
|
|
|
Additional resources
4.10. Enabled services on custom images
When you use image builder to configure a custom image, the default services that the image uses are determined by the following:
-
The RHEL release on which you use the
osbuild-composerutility - The image type
For example, the ami image type enables the sshd, chronyd, and cloud-init services by default. If these services are not enabled, the custom image does not boot.
Table 4.2. Enabled services to support image type creation
| Image type | Default enabled Services |
|---|---|
|
| sshd, cloud-init, cloud-init-local, cloud-config, cloud-final |
|
| sshd, cloud-init, cloud-init-local, cloud-config, cloud-final |
|
| cloud-init |
|
| No extra service enables by default |
|
| No extra service enables by default |
|
| sshd, chronyd, waagent, cloud-init, cloud-init-local, cloud-config, cloud-final |
|
| sshd, chronyd, vmtoolsd, cloud-init |
Note: You can customize which services to enable during the system boot. However, the customization does not override services enabled by default for the mentioned image types.
Additional resources
Chapter 5. Creating system images by using RHEL image builder web console interface
RHEL image builder is a tool for creating custom system images. To control RHEL image builder and create your custom system images, you can use the web console interface. Note that the command-line interface is the currently preferred alternative, because it offers more features.
5.1. Accessing the RHEL image builder dashboard in the RHEL web console
With the cockpit-composer plugin for the RHEL web console, you can manage image builder blueprints and composes using a graphical interface.
Prerequisites
- You must have root access to the system.
- You installed RHEL image builder.
-
You installed the
cockpit-composerpackage.
Procedure
-
On the host, open
https://<_localhost_>:9090/in a web browser. - Log in to the web console as the root user.
To display the RHEL image builder controls, click the button, in the upper-left corner of the window.
The RHEL image builder dashboard opens, listing existing blueprints, if any.
Additional resources
5.2. Creating a blueprint in the web console interface
Creating a blueprint is a necessary step before creating the customized RHEL system image. All the customizations are optional.
These blueprint customizations are available for Red Hat Enterprise Linux 9.2 or later versions and Red Hat Enterprise Linux 8.8 or later versions.
Prerequisites
- You have opened the RHEL image builder app from the web console in a browser. See Accessing RHEL image builder GUI in the RHEL web console.
Procedure
Click in the upper-right corner.
A dialog wizard with fields for the blueprint name and description opens.
On the
Detailspage:- Enter the name of the blueprint and, optionally, its description.
- Click .
Optional: In the
Packagespage:-
On the
Available packagessearch, enter the package name - Click the button to move it to the Chosen packages field.
- Repeat the previous steps to search and include as many packages as you want.
Click .
NoteThese customizations are all optional unless otherwise specified.
-
On the
-
On the
Kernelpage, enter a kernel name and the command-line arguments. On the
File systempage, you can selectUse automatic partitioningorManually configure partitionsfor your image file system. For manually configuring the partitions, complete the following steps:Click the button.
The
Configure partitionssection opens, showing the configuration based on Red Hat standards and security guides.From the dropdown menu, provide details to configure the partitions:
For the
Mount pointfield, select one of the following mount point type options:-
/- the root mount point -
/var -
/home -
/opt -
/srv -
/usr -
/app -
/data -
/tmp /usr/localYou can also add an additional path to the
Mount point, such as/tmp. For example:/varas a prefix and/tmpas an additional path results in/var/tmp.NoteDepending on the Mount point type you choose, the file system type changes to
xfs.
-
For the
Minimum size partitionfield of the file system, enter the needed minimum partition size. In the Minimum size dropdown menu, you can use common size units such asGiB,MiB, orKiB. The default unit isGiB.NoteMinimum sizemeans that RHEL image builder can still increase the partition sizes, in case they are too small to create a working image.
To add more partitions, click the button. If you see the following error message:
Duplicate partitions: Only one partition at each mount point can be created., you can:- Click the button to remove the duplicated partition.
- Choose a new mount point for the partition you want to create.
- After you finish the partitioning configuration, click .
On the
Servicespage, you can enable or disable services:- Enter the service names you want to enable or disable, separating them by a comma, by space, or by pressing the key. Click .
On the
Firewallpage, set up your firewall setting:-
Enter the
Ports, and the firewall services you want to enable or disable. - Click the button to manage your firewall rules for each zone independently. Click .
-
Enter the
On the
Userspage, add a users by following the steps:- Click .
-
Enter a
Username, apassword, and aSSH key. You can also mark the user as a privileged user, by clicking theServer administratorcheckbox. Click .
On the
Groupspage, add groups by completing the following steps:Click the button:
-
Enter a
Group nameand aGroup ID. You can add more groups. Click .
-
Enter a
On the
SSH keyspage, add a key:Click the button.
- Enter the SSH key.
-
Enter a
User. Click .
On the
Timezonepage, set your time zone settings:On the
Timezonefield, enter the time zone you want to add to your system image. For example, add the following time zone format: "US/Eastern".If you do not set a time zone, the system uses Universal Time, Coordinated (UTC) as default.
-
Enter the
NTPservers. Click .
On the
Localepage, complete the following steps:-
On the
Keyboardsearch field, enter the package name you want to add to your system image. For example: ["en_US.UTF-8"]. -
On the
Languagessearch field, enter the package name you want to add to your system image. For example: "us". Click .
-
On the
On the
Otherspage, complete the following steps:-
On the
Hostnamefield, enter the hostname you want to add to your system image. If you do not add a hostname, the operating system determines the hostname. -
Mandatory only for the Simplifier Installer image: On the
Installation Devicesfield, enter a valid node for your system image. For example:dev/sda1. Click .
-
On the
Mandatory only when building FIDO images: On the
FIDO device onboardingpage, complete the following steps:On the
Manufacturing server URLfield, enter the following information:-
On the
DIUN public key insecurefield, enter the insecure public key. -
On the
DIUN public key hashfield, enter the public key hash. -
On the
DIUN public key root certsfield, enter the public key root certs. Click .
-
On the
On the
OpenSCAPpage, complete the following steps:-
On the
Datastreamfield, enter thedatastreamremediation instructions you want to add to your system image. -
On the
Profile IDfield, enter theprofile_idsecurity profile you want to add to your system image. Click .
-
On the
Mandatory only when building Ignition images: On the
Ignitionpage, complete the following steps:-
On the
Firstboot URLfield, enter the package name you want to add to your system image. -
On the
Embedded Datafield, drag or upload your file. Click .
-
On the
-
. On the
Reviewpage, review the details about the blueprint. Click .
The RHEL image builder view opens, listing existing blueprints.
5.3. Importing a blueprint in the RHEL image builder web console interface
You can import and use an already existing blueprint. The system automatically resolves all the dependencies.
Prerequisites
- You have opened the RHEL image builder app from the web console in a browser.
- You have a blueprint that you want to import to use in the RHEL image builder web console interface.
Procedure
-
On the RHEL image builder dashboard, click . The
Import blueprintwizard opens. -
From the
Uploadfield, either drag or upload an existing blueprint. This blueprint can be in eitherTOMLorJSONformat. - Click . The dashboard lists the blueprint you imported.
Verification
When you click the blueprint you imported, you have access to a dashboard with all the customizations for the blueprint that you imported.
To verify the packages that have been selected for the imported blueprint, navigate to the
Packagestab.- To list all the package dependencies, click . The list is searchable and can be ordered.
Next steps
Optional: To modify any customization:
-
From the
Customizationsdashboard, click the customization you want to make a change. Optionally, you can click to navigate to all the available customization options.
-
From the
Additional resources
5.4. Exporting a blueprint from the RHEL image builder web console interface
You can export a blueprint to use the customizations in another system. You can export the blueprint in the TOML or in the JSON format. Both formats work on the CLI and also in the API interface.
Prerequisites
- You have opened the RHEL image builder app from the web console in a browser.
- You have a blueprint that you want to export.
Procedure
- On the image builder dashboard, select the blueprint you want to export.
-
Click
Export blueprint. TheExport blueprintwizard opens. Click the button to download the blueprint as a file or click the button to copy the blueprint to the clipboard.
- Optionally, click the button to copy the blueprint.
Verification
- Open the exported blueprint in a text editor to inspect and review it.
5.5. Creating a system image by using RHEL image builder in the web console interface
You can create a customized RHEL system image from a blueprint by completing the following steps.
Prerequisites
- You opened the RHEL image builder app from the web console in a browser.
- You created a blueprint.
Procedure
- In the RHEL image builder dashboard, click the blueprint tab.
- On the blueprint table, find the blueprint you want to build an image.
- On the right side of the chosen blueprint, click . The Create image dialog wizard opens.
On the Image output page, complete the following steps:
- From the Select a blueprint list, select the image type you want.
From the Image output type list, select the image output type you want.
Depending on the image type you select, you need to add further details.
- Click .
On the Review page, review the details about the image creation and click .
The image build starts and takes up to 20 minutes to complete.
Verification
After the image finishes building, you can:
Download the image.
- On the RHEL image builder dashboard, click the Node options (⫶) menu and select Download image.
Download the logs of the image to inspect the elements and verify if any issue is found.
- On the RHEL image builder dashboard, click the Node options (⫶) menu and select Download logs.
Chapter 6. Using RHEL image builder to create system images from different releases
You can use RHEL image builder to create images of multiple RHEL minor releases that are different from the host, such as RHEL 8.8 and RHEL 8.7. For that, you can add source system repositories with the release distribution fields set and also, you can create blueprints with the correct release distribution fields set.
Additionally, if you have existing blueprint or source system repositories in an old format, you can create new blueprints with the correct release distribution fields set.
To list the supported release distribution, you can run the following command:
$ composer-cli distros list
The output shows you a list with supported release distribution names:
rhel-8
rhel-84
rhel-85
rhel-86
rhel-87
rhel-88
rhel-89
NoteCross-distribution image building, such as building a CentOS image on RHEL is not supported.
6.1. Creating an image with a different distribution in the CLI
To select the distribution you want to use when composing an image in the RHEL image builder CLI, you must set the distro field in the blueprint. For that, follow the steps:
Procedure
- If you are creating a new blueprint
- Create a blueprint. For example:
name = "<blueprint_name>"
description = "<image-description>"
version = "0.0.1"
modules = []
groups = []
distro = "<distro-version>"
By setting the
distrofield to “rhel-88”, you ensure that it always builds a RHEL 8.8 image, no matter which version is running on the host.NoteIf the
distrofield is blank, it uses the same distribution of the host.- If you are updating an existing blueprint
- Save (export) the existing blueprint to a local text file:
# composer-cli blueprints save EXISTING-BLUEPRINTEdit the existing blueprint file with a text editor of your choice, setting the
distrofield with the distribution of your choice, for example:name = "blueprint_84" description = "A 8.8 base image" version = "0.0.1" modules = [] groups = [] distro = "rhel-88"
- Save the file and close the editor.
Push (import) the blueprint back into RHEL image builder:
# composer-cli blueprints push EXISTING-BLUEPRINT.tomlStart the image creation:
# composer-cli compose start BLUEPRINT-NAME IMAGE-TYPE
Wait until the compose is finished.
Check the status of the compose:
# composer-cli compose status
After the compose finishes, it shows a FINISHED status value. Identify the compose in the list by its UUID.
Download the resulting image file:
# composer-cli compose image UUIDReplace UUID with the UUID value shown in the previous steps.
6.2. Using system repositories with specific distributions
You can specify a list of distribution strings that the system repository source uses when resolving dependencies and building images. For that, follow the step:
Procedure
Create a TOML file with the following structure, for example:
check_gpg = true
check_ssl = true
distros = ["<distro-version>"]
id = "<image-id>"
name = "<image-name>_"
system = false
type = "<image-type>"
url = "\http://local/repos/rhel-<distro-version>_/<project-repo>/"
For example:
check_gpg = true
check_ssl = true
distros = ["rhel-84"]
id = "rhel-84-local"
name = "local packages for rhel-84"
system = false
type = "yum-baseurl"
url = "\http://local/repos/rhel-84/projectrepo/"
Additional resources
Chapter 7. Creating a boot ISO installer image with RHEL image builder
You can use RHEL image builder to create bootable ISO Installer images. These images consist of a .tar file that has a root file system. You can use the bootable ISO image to install the file system to a bare metal server.
RHEL image builder builds a manifest that creates a boot ISO that contains a root file system. To create the ISO image, select the image type image-installer. RHEL image builder builds a .tar file with the following content:
- a standard Anaconda installer ISO
- an embedded RHEL system tar file
- a default Kickstart file that installs the commit with minimal default requirements
The created installer ISO image includes a pre-configured system image that you can install directly to a bare metal server.
7.1. Creating a boot ISO installer image using the RHEL image builder CLI
You can create a customized boot ISO installer image by using the RHEL image builder command-line interface. As a result, image builder builds an .iso file that contains a .tar file, which you can install for the Operating system. The .iso file is set up to boot Anaconda and install the .tar file to set up the system. You can use the created ISO image file on a hard disk or to boot in a virtual machine, for example, in an HTTP Boot or a USB installation.
The Installer (.iso) image type does not accept partitions customization. If you try to manually configure the filesystem customization, it is not applied to any system built by the Installer image. Mounting an ISO image built with RHEL image builder file system customizations causes an error in the Kickstart, and the installation does not reboot automatically. For more information, see Automate a RHEL ISO installation generated by image builder and Automate a RHEL ISO installation generated by image builder.
Prerequisites
- You have created a blueprint for the image and customized it with a user included and pushed it back into RHEL image builder. See Blueprint customizations.
Procedure
Create the ISO image:
# composer-cli compose start BLUEPRINT-NAME image-installer
- BLUEPRINT-NAME with name of the blueprint you created
image-installer is the image type
The compose process starts in the background and the UUID of the compose is shown. Wait until the compose is finished. This might take several minutes.
Check the status of the compose:
# composer-cli compose status
A finished compose shows a status value of FINISHED.
Identify the compose in the list by its UUID.
# composer-cli compose list
After the compose is finished, download the created image file to the current directory:
# composer-cli compose image UUIDReplace UUID with the UUID value obtained in the previous steps.
RHEL image builder builds a
.isofile that contains a.tarfile. The.tarfile is the image that will be installed for the Operating system. The. isois set up to boot Anaconda and install the.tarfile to set up the system.
Next steps
In the directory where you downloaded the image file.
-
Locate the
.isoimage you downloaded. Mount the ISO.
$ mount -o ro path_to_ISO /mntYou can find the
.tarfile at the/mnt/liveimg.tar.gzdirectory.List the
.tarfile content:$ tar ztvf /mnt/liveimg.tar.gz
7.2. Creating a boot ISO installer image by using RHEL image builder in the GUI
You can build a customized boot ISO installer image by using the RHEL image builder GUI. You can use the resulting ISO image file on a hard disk or boot it in a virtual machine. For example, in an HTTP Boot or a USB installation.
The Installer (.iso) image type does not accept partitions customization. If you try to manually configure the filesystem customization, it is not applied to any system built by the Installer image. Mounting an ISO image built with RHEL image builder file system customizations causes an error in the Kickstart, and the installation does not reboot automatically. For more information, see Automate a RHEL ISO installation generated by image builder and Automate a RHEL ISO installation generated by image builder.
Prerequisites
- You have opened the RHEL image builder app from the web console in a browser.
- You have created a blueprint for your image. See Creating a RHEL image builder blueprint in the web console interface.
Procedure
- On the RHEL image builder dashboard, locate the blueprint that you want to use to build your image. Optionally, enter the blueprint name or a part of it into the search box at upper left, and click .
On the right side of the blueprint, click the corresponding button.
The Create image dialog wizard opens.
On the Create image dialog wizard:
-
In the Image Type list, select
"RHEL Installer (.iso)". - Click .
On the Review tab, click .
RHEL image builder adds the compose of a RHEL ISO image to the queue.
After the process is complete, you can see the image build complete status. RHEL image builder creates the ISO image.
-
In the Image Type list, select
Verification
After the image is successfully created, you can download it.
-
Click Download to save the
"RHEL Installer (.iso)"image to your system. -
Navigate to the folder where you downloaded the
"RHEL Installer (.iso)"image. - Locate the .tar image you downloaded.
Extract the
"RHEL Installer (.iso)"image content.$ tar -xf content.tar
7.3. Installing a bootable ISO to a media and booting it
Install the bootable ISO image you created by using RHEL image builder to a bare metal system.
Prerequisites
- You created the bootable ISO image by using RHEL image builder. See Creating a boot ISO installer image using the RHEL image builder in the command-line interface.
- You have downloaded the bootable ISO image.
-
You installed the
ddtool. - You have a USB flash drive with enough capacity for the ISO image. The required size varies depending on the packages you selected in your blueprint, but the recommended minimum size is 8 GB.
Procedure
Write the bootable ISO image directly to the USB drive using the
ddtool. For example:dd if=installer.iso of=/dev/sdX
Where
installer.isois the ISO image file name and/dev/sdXis your USB flash drive device path.- Insert the flash drive into a USB port of the computer you want to boot.
Boot the ISO image from the USB flash drive.
When the installation environment starts, you might need to complete the installation manually, similarly to the default Red Hat Enterprise Linux installation.
Additional resources
Chapter 8. Creating pre-hardened images with RHEL image builder OpenSCAP integration
RHEL image builder on-premise supports the OpenSCAP integration. This integration enables the production of pre-hardened RHEL images. By setting up a blueprint, you can perform the following actions:
- Customize it with a set of predefined security profiles
- Add a set of packages or add-on files
- Build a customized RHEL image ready to deploy on your chosen platform that is more suitable to your environment
Red Hat provides regularly updated versions of the security hardening profiles that you can choose when you build your systems so that you can meet your current deployment guidelines.
RHEL image builder does not include support for FIPS boot mode. Consequently, OpenSCAP profiles that require the FIPS mode to be enabled, such as DISA STIG, are not supported.
8.1. Differences between Kickstart and pre-hardened images
For the traditional image creation using a Kickstart file, you have to choose which packages you must install and ensure that the system is not affected by a vulnerability. With the RHEL image builder OpenSCAP integration, you can build security hardened images. During the image build process an OSBuild oscap remediation stage runs the OpenSCAP tool in the chroot, on the filesystem tree. The OpenSCAP tool runs the standard evaluation for the profile you choose and applies the remediations to the image. With this, you can build a more completely hardened image, if you compare it to running the remediation on a live system.
8.2. Installing OpenSCAP
Install the OpenSCAP tool to have access to SCAP tools to help you to create standard security checklists for your systems.
Procedure
Install OpenSCAP on your system:
# *yum install openscap-scanner*
Install
scap-security-guidepackage:# *yum install scap-security-guide*
After the installation is completed you can start using the
oscapcommand line tool. The SCAP content will be installed in the/usr/share/xml/scap/ssg/content/directory.
8.3. The OpenSCAP blueprint customization
With the OpenSCAP support for blueprint customization, you can create blueprints and then use them to build your own pre-hardened images. To create a pre-hardened image you can customize the mount points and configure the file system layout according to the selected security profile. After you select the OpenSCAP profile, the OpenSCAP blueprint customization configures the image to trigger the remediation during the image build with the selected profile. During the image build, OpenSCAP applies a first-boot remediation.
To use the OpenSCAP blueprint customization in your image blueprints, you need to provide the following information:
-
The datastream path to the
datastreamremediation instructions. The datastream path is located in the/usr/share/xml/scap/ssg/content/directory. The
profile_idof the required security profile. The value of theprofile_idfield accepts both the long and short forms, for example, the following are acceptable:cisorxccdf_org.ssgproject.content_profile_cis. See SCAP Security Guide profiles supported in RHEL 8 for more details.The following is a blueprint with OpenSCAP customization example:
[customizations]
datastream = "/usr/share/xml/scap/ssg/content/ssg-rhel8-ds.xml"
profile_id = "xccdf_org.ssgproject.content_profile_cis"
The most common SCAP file type is an SCAP source datastream. You can find more details about the SCAP source datastream from the
scap-security-guidepackage, enter the command:$ oscap info /usr/share/xml/scap/ssg/content/ssg-rhel8-ds.xml
The oscap tool runs on the image tree to perform an offline scan of a file system that is mounted at an arbitrary path. You can use it for scanning of custom objects that are not supported by oscap-docker or oscap-vm, such as containers in formats other than Docker. oscap-chroot mimics the usage and options of the oscap tool.
RHEL image builder generates the necessary configurations for the osbuild stage based on your blueprint customization. Additionally, RHEL image builder adds two packages to the image:
-
openscap-scanner- theOpenSCAPtool. scap-security-guide- package which contains the remediation instructions.NoteThe remediation stage uses the
scap-security-guidepackage for the datastream because this package is installed on the image by default. If you want to use a different datastream, add the necessary package to the blueprint, and specify the path to the datastream in theoscapconfiguration.
Additional resources
8.4. Creating a pre-hardened image with RHEL image builder
With the OpenSCAP and RHEL image builder integration, you can create pre-hardened images that you can deploy in a VM.
Prerequisite
-
You are logged in as the root user or a user who is a member of the
weldergroup.
Procedure
Create a blueprint in the TOML format, with the following content:
name = "blueprint_name"
description = "blueprint_description"
version = "0.0.1"
modules = []
groups = []
distro = ""

[customizations]
[[customizations.user]]
name = "scap-security-guide"
description = "Admin account"
password = secure_password_hash
key = ssh-key
home = "/home/scap-security-guide"
group = ["wheel"]

[[customizations.filesystem]]
mountpoint = "/tmp"
size = "20 GiB"

[customizations.openscap]
datastream = "/usr/share/xml/scap/ssg/content/ssg-rhel8-ds.xml "
profile_id = "cis"
Start the build of a OpenSCAP image:
# composer-cli compose start blueprint_name qcow2Where blueprint_name is the blueprint name.
After the image build is ready, you can use your pre-hardened image on your deployments. See Creating a virtual machine.
Verification
After you deploy your pre-hardened image in a VM, you can perform a configuration compliance scan to verify that the image is aligned to the selected security profile.
Performing a configuration compliance scanning does not guarantee the system is compliant. For more information, see Configuration compliance scanning.
- Connect to the image using SSH.
Run the
oscapscanner.# scap-workbenchOn the SCAP Workbench:
- Select the version of the system you want to scan. Click .
- Select the profile you want to scan and click . OpenSCAP checks all the requirements for the system.
- Click to scan your system with the selected profile.
- After the scan finishes, click .
Chapter 9. Preparing and deploying a KVM Guest Image by using RHEL image builder
Use RHEL image builder to create a .qcow2 purpose-built that you can deploy on a Kernel-based Virtual Machine (KVM) based hypervisor.
Creating a customized KVM guest image involves the following high-level steps:
-
Create a blueprint for the
.qcow2image. -
Create a
.qcow2image by using RHEL image builder. - Create a virtual machine from the KVM guest image.
9.1. Creating customized KVM guest images by using RHEL image builder
You can create a customized .qcow2 KVM guest image by using RHEL image builder. The following procedure shows the steps on the GUI, but you can also use the CLI.
Prerequisites
-
You must be in the
rootorweldrgroup to access the system. -
The
cockpit-composerpackage is installed. - On a RHEL system, you have opened the RHEL image builder dashboard of the web console.
- You have created a blueprint. See Creating a blueprint in the web console interface.
Procedure
- Click the blueprint name you created.
- Select the tab Images.
- Click Create Image to create your customized image. The Create Image window opens.
-
From the Type drop-down menu list, select
QEMU Image(.qcow2). - Set the size that you want the image to be when instantiated and click Create.
- A small pop-up on the upper right side of the window informs you that the image creation has been added to the queue. After the image creation process is complete, you can see the Image build complete status.
Verification
-
Click the breadcrumbs icon and select the Download option. RHEL image builder downloads the KVM guest image
.qcow2file at your default download location.
Additional resources
9.2. Creating a virtual machine from a KVM guest image
With RHEL image builder, you can build a .qcow2 image, and use a KVM guest image to create a VM. The KVM guest images created using RHEL image builder already have cloud-init installed and enabled.
Prerequisites
-
You created a
.qcow2image by using RHEL image builder. See Creating a blueprint in the web console interface. -
You have the
qemu-kvmpackage installed on your system. You can check if the/dev/kvmdevice is available on your system, and virtualization features are enabled in the BIOS. -
You have the
libvirtandvirt-installpackages installed on your system. -
You have the
genisoimageutility, that is provided by thexorrisopackage, installed on your system.
Procedure
-
Move the
.qcow2image that you created by using RHEL image builder to the/var/lib/libvirt/images/directory. Create a directory, for example,
cloudinitisoand navigate to this newly created directory:$ mkdir cloudinitiso $ cd cloudinitiso
Create a file named
meta-data. Add the following information to this file:instance-id: citest local-hostname: vmname
Create a file named
user-data. Add the following information to the file:#cloud-config user: admin password: password chpasswd: {expire: False} ssh_pwauth: True ssh_authorized_keys: - ssh-rsa AAA...fhHQ== your.email@example.comssh_authorized_keysis your SSH public key. You can find your SSH public key in~/.ssh/<id_rsa.pub>\.Use the
genisoimageutility to create an ISO image that includes theuser-dataandmeta-datafiles.# genisoimage -output cloud-init.iso -volid cidata -joliet -rock user-data meta-data I: -input-charset not specified, using utf-8 (detected in locale settings) Total translation table size: 0 Total rockridge attributes bytes: 331 Total directory bytes: 0 Path table size(bytes): 10 Max brk space used 0 183 extents written (0 MB)
Create a new VM from the KVM Guest Image using the
virt-installcommand. Include the ISO image you created on step 4 as an attachment to the VM image.# virt-install \ --memory 4096 \ --vcpus 4 \ --name myvm \ --disk rhel-8-x86_64-kvm.qcow2,device=disk,bus=virtio,format=qcow2 \ --disk cloud-init.iso,device=cdrom \ --os-variant rhel 8 \ --virt-type kvm \ --graphics none \ --import- --graphics none - means it is a headless RHEL 8 VM.
- --vcpus 4 - means that it uses 4 virtual CPUs.
- --memory 4096 - means it uses 4096 MB RAM.
The VM installation starts:
Starting install...
Connected to domain mytestcivm
...
[  OK  ] Started Execute cloud user/final scripts.
[  OK  ] Reached target Cloud-init target.

Red Hat Enterprise Linux 8 (Ootpa)
Kernel 4.18.0-221.el8.x86_64 on an x86_64
Verification
After the boot is complete, the VM shows a text login interface. To log in to the local console of the VM, use user the details from the user-data file:
-
Enter
adminas a username and press . Enter
passwordas password and press .After the login authentication is complete, you have access to the VM using the CLI.
Chapter 10. Pushing a container to a registry and embedding it into an image
With RHEL image builder, you can build security hardened images using the OpenSCAP tool. You can take advantage of the support for container customization in the blueprints to create a container and embed it directly into the image you create.
10.1. Blueprint customization to embed a container into an image
To embed a container from registry.access.redhat.com registry, you must add a container customization to your blueprint. For example:
[[containers]]
source = "registry.access.redhat.com/ubi9/ubi:latest"
name =  "local-name"
tls-verify = true
-
source- Mandatory field. It is a reference to the container image at a registry. This example uses theregistry.access.redhat.comregistry. You can specify a tag version. The default tag version islatest. -
name- The name of the container in the local registry. tls-verify- Boolean field. Thetls-verifyboolean field controls the transport layer security. The default value istrue.RHEL image builder pulls the container during the image build and stores the container into the image. The default local container storage location depends on the image type, so that all support
container-tools, such as Podman, are able to work with it. The embedded containers are not started. To access protected container resources, you can use acontainers-auth.jsonfile.
10.2. The Container registry credentials
The osbuild-worker service is responsible for the communication with the container registry. To enable that, you can set up the /etc/osbuild-worker/osbuild-worker.toml configuration file.
After setting the /etc/osbuild-worker/osbuild-worker.toml configuration file, you must restart the osbuild-worker service, because it reads the /etc/osbuild-worker/osbuild-worker.toml configuration file only once, during the osbuild-worker service start.
The /etc/osbuild-worker/osbuild-worker.toml configuration file has a containers section with an auth_field_path entry that is a string referring to a path of a containers-auth.json file to be used for accessing protected resources. The container registry credentials are only used to pull a container image from a registry, when embedding the container into the image.
For example:
[containers]
auth_file_path = "/etc/osbuild-worker/containers-auth.json"
Additional resources
-
The
containers-auth.jsonman page
10.3. Pushing a container artifact directly to a container registry
You can push container artifacts, such as RHEL for Edge container images directly, directly to a container registry after you build it, by using the RHEL image builder CLI.
Prerequisites
-
Access to quay.io registry. This example uses the
quay.iocontainer registry as a target registry, but you can use a container registry of your choice.
Procedure
Set up a
registry-config.tomlfile to select the container provider. The credentials are optional.provider = "container_provider" [settings] tls_verify = false username = "admin" password = "your_password"
Create a blueprint in the
.tomlformat. This is a blueprint for the container in which you install annginxpackage into the blueprint.name = "simple-container" description = "Simple RHEL container" version = "0.0.1" [[packages]] name = "nginx" version = "*"
Push the blueprint:
# composer-cli blueprints push blueprint.toml
Build the container image, by passing the registry and the repository to the
composer-clitool as arguments.# composer-cli compose start simple-container container "quay.io:8080/osbuild/repository" registry-config.toml
- simple-container - is the blueprint name.
- container - is the image type.
"quay.io:8080/osbuild/repository" -
quay.iois the target registry,osbuildis the organization andrepositoryis the location to push the container when it finishes building. Optionally, you can set atag. If you do not set a value for:tag, it uses:latesttag by default.NoteBuilding the container image takes time because of resolving dependencies of the customized packages.
- After the image build finishes, the container you created is available in quay.io.
Verification
Open quay.io. and click
Repository Tags.You can see details about the container you created, such as: - last modified - image size - the `manifest ID`, that you can copy to the clipboard.
-
Copy the
manifest IDvalue to build the image in which you want to embed a container.
Additional resources
10.4. Building an image and pulling the container into the image
After you have created the container image, you can build your customized image and pull the container image into it. For that, you must specify a container customization in the blueprint, and the container name for the final image. During the build process, the container image is fetched and placed in the local Podman container storage.
Prerequisites
-
You created a container image and pushed it into your local
quay.iocontainer registry instance. See Pushing a container artifact directly to a container registry. - You have access to registry.access.redhat.com.
-
You have a container
manifest ID. -
You have the
qemu-kvmandqemu-imgpackages installed.
Procedure
Create a blueprint to build a
qcow2image. The blueprint must contain the customization.name = "image" description = "A qcow2 image with a container" version = "0.0.1" distro = "rhel-90" [[packages]] name = "podman" version = "*" [[containers]] source = "registry.access.redhat.com/ubi9:8080/osbuild/container/container-image@sha256:manifest-ID-from-Repository-tag: tag-version" name = "source-name" tls-verify = true
Push the blueprint:
# composer-cli blueprints push blueprint-image.tomlBuild the container image:
# composer-cli start compose image qcow2
- image is the blueprint name.
qcow2is the image type.NoteBuilding the image takes time because it checks the container on
quay.ioregistry.
To check the status of the compose:
# composer-cli compose status
A finished compose shows the FINISHED status value. To identify your compose in the list, use its UUID.
After the compose process is finished, download the resulting image file to your default download location:
# composer-cli compose image UUIDReplace UUID with the UUID value shown in the previous steps.
You can use the
qcow2image you created and downloaded to create a VM.
Verification
From the resulting qcow2 image that you downloaded, perform the following steps:
-
Start the
qcow2image in a VM. See Creating a virtual machine from a KVM guest image. The
qemuwizard opens. Login in to theqcow2image.-
Enter the username and password. These can be the username and password you set up in the
.qcow2blueprint in the "customizations.user" section, or created at boot time withcloud-init.
-
Enter the username and password. These can be the username and password you set up in the
Run the container image and open a shell prompt inside the container:
# podman run -it registry.access.redhat.com/ubi9:8080/osbuild/repository /bin/bash/registry.access.redhat.comis the target registry,osbuildis the organization andrepositoryis the location to push the container when it finishes building.Check that the packages you added to the blueprint are available:
# type -a nginx
The output shows you the
nginxpackage path.
Chapter 11. Preparing and uploading cloud images by using RHEL image builder
RHEL image builder can create custom system images ready for use on various cloud platforms. To use your customized RHEL system image in a cloud, create the system image with RHEL image builder using the chosen output type, configure your system for uploading the image, and upload the image to your cloud account. You can push customized image clouds through the Image Builder application in the RHEL web console, available for a subset of the service providers that we support, such as AWS and Microsoft Azure clouds. See Pushing images to AWS Cloud AMI and Pushing VHD images to Microsoft Azure cloud.
11.1. Preparing to upload AWS AMI images
Before uploading an AWS AMI image, you must configure a system for uploading the images.
Prerequisites
- You must have an Access Key ID configured in the AWS IAM account manager.
- You must have a writable S3 bucket prepared.
Procedure
Install Python 3 and the
piptool:# yum install python3 python3-pip
Install the AWS command-line tools with
pip:# pip3 install awscli
Set your profile. The terminal prompts you to provide your credentials, region and output format:
$ aws configure
AWS Access Key ID [None]:
AWS Secret Access Key [None]:
Default region name [None]:
Default output format [None]:
Define a name for your bucket and create a bucket:
$ BUCKET=bucketname
$ aws s3 mb s3://$BUCKET
Replace bucketname with the actual bucket name. It must be a globally unique name. As a result, your bucket is created.
To grant permission to access the S3 bucket, create a
vmimportS3 Role in the AWS Identity and Access Management (IAM), if you have not already done so in the past:Create a
trust-policy.jsonfile with the trust policy configuration, in the JSON format. For example:{ "Version": "2022-10-17", "Statement": [{ "Effect": "Allow", "Principal": { "Service": "vmie.amazonaws.com" }, "Action": "sts:AssumeRole", "Condition": { "StringEquals": { "sts:Externalid": "vmimport" } } }] }Create a
role-policy.jsonfile with the role policy configuration, in the JSON format. For example:{ "Version": "2012-10-17", "Statement": [{ "Effect": "Allow", "Action": ["s3:GetBucketLocation", "s3:GetObject", "s3:ListBucket"], "Resource": ["arn:aws:s3:::%s", "arn:aws:s3:::%s/"] }, { "Effect": "Allow", "Action": ["ec2:ModifySnapshotAttribute", "ec2:CopySnapshot", "ec2:RegisterImage", "ec2:Describe"], "Resource": "*" }] } $BUCKET $BUCKETCreate a role for your Amazon Web Services account, by using the
trust-policy.jsonfile:$ aws iam create-role --role-name vmimport --assume-role-policy-document file://trust-policy.json
Embed an inline policy document, by using the
role-policy.jsonfile:$ aws iam put-role-policy --role-name vmimport --policy-name vmimport --policy-document file://role-policy.json
Additional resources
11.2. Uploading an AMI image to AWS by using the CLI
You can use RHEL image builder to build ami images and push them directly to Amazon AWS Cloud service provider, by using the CLI.
Prerequisites
Procedure
Using the text editor, create a configuration file with the following content:
provider = "aws"

[settings]
accessKeyID = "AWS_ACCESS_KEY_ID"
secretAccessKey = "AWS_SECRET_ACCESS_KEY"
bucket = "AWS_BUCKET"
region = "AWS_REGION"
key = "IMAGE_KEY"
Replace values in the fields with your credentials for
accessKeyID,secretAccessKey,bucket, andregion. TheIMAGE_KEYvalue is the name of your VM Image to be uploaded to EC2.- Save the file as CONFIGURATION-FILE.toml and close the text editor.
Start the compose to upload it to AWS:
# composer-cli compose start blueprint-name image-type image-key configuration-file.toml
Replace:
- blueprint-name with the name of the blueprint you created
-
image-type with the
amiimage type. - image-key with the name of your VM Image to be uploaded to EC2.
configuration-file.toml with the name of the configuration file of the cloud provider.
NoteYou must have the correct AWS Identity and Access Management (IAM) settings for the bucket you are going to send your customized image to. You have to set up a policy to your bucket before you are able to upload images to it.
Check the status of the image build:
# composer-cli compose status
After the image upload process is complete, you can see the "FINISHED" status.
Verification
To confirm that the image upload was successful:
-
Access EC2 on the menu and select the correct region in the AWS console. The image must have the
availablestatus, to indicate that it was successfully uploaded. - On the dashboard, select your image and click .
Additional Resources
11.3. Pushing images to AWS Cloud AMI
You can create a (.raw) image by using RHEL image builder, and choose to check the Upload to AWS checkbox to push the output image that you create directly to the Amazon AWS Cloud AMI service provider.
Prerequisites
-
You must have
rootorwheelgroup user access to the system. - You have opened the RHEL image builder interface of the RHEL web console in a browser.
- You have created a blueprint. See Creating a blueprint in the web console interface.
- You must have an Access Key ID configured in the AWS IAM account manager.
- You must have a writable S3 bucket prepared.
Procedure
- In the RHEL image builder dashboard, click the blueprint name that you previously created.
- Select the tab .
Click to create your customized image.
The Create Image window opens.
-
From the Type drop-down menu list, select
Amazon Machine Image Disk (.raw). - Check the Upload to AWS checkbox to upload your image to the AWS Cloud and click .
To authenticate your access to AWS, type your
AWS access key IDandAWS secret access keyin the corresponding fields. Click .NoteYou can view your AWS secret access key only when you create a new Access Key ID. If you do not know your Secret Key, generate a new Access Key ID.
-
Type the name of the image in the
Image namefield, type the Amazon bucket name in theAmazon S3 bucket namefield and type theAWS regionfield for the bucket you are going to add your customized image to. Click . Review the information and click .
Optionally, click to modify any incorrect detail.
NoteYou must have the correct IAM settings for the bucket you are going to send your customized image. This procedure uses the IAM Import and Export, so you have to set up a policy to your bucket before you are able to upload images to it. For more information, see Required Permissions for IAM Users.
-
From the Type drop-down menu list, select
A pop-up on the upper right informs you of the saving progress. It also informs that the image creation has been initiated, the progress of this image creation and the subsequent upload to the AWS Cloud.
After the process is complete, you can see the Image build complete status.
In a browser, access Service→EC2.
-
On the AWS console dashboard menu, choose the correct region. The image must have the
Availablestatus, to indicate that it is uploaded. - On the AWS dashboard, select your image and click .
-
On the AWS console dashboard menu, choose the correct region. The image must have the
- A new window opens. Choose an instance type according to the resources you need to start your image. Click .
- Review your instance start details. You can edit each section if you need to make any changes. Click
Before you start the instance, select a public key to access it.
You can either use the key pair you already have or you can create a new key pair.
Follow the next steps to create a new key pair in EC2 and attach it to the new instance.
- From the drop-down menu list, select Create a new key pair.
- Enter the name to the new key pair. It generates a new key pair.
- Click Download Key Pair to save the new key pair on your local system.
Then, you can click to start your instance.
You can check the status of the instance, which displays as Initializing.
- After the instance status is running, the button becomes available.
Click . A window appears with instructions on how to connect by using SSH.
- Select A standalone SSH client as the preferred connection method to and open a terminal.
In the location you store your private key, ensure that your key is publicly viewable for SSH to work. To do so, run the command:
$ chmod 400 _your-instance-name.pem_>
Connect to your instance by using its Public DNS:
$ ssh -i <_your-instance-name.pem_> ec2-user@<_your-instance-IP-address_>
Type
yesto confirm that you want to continue connecting.As a result, you are connected to your instance over SSH.
Verification
- Check if you are able to perform any action while connected to your instance by using SSH.
11.4. Preparing to upload Microsoft Azure VHD images
You can use RHEL image builder to create a VHD image that can be uploaded to Microsoft Azure cloud.
Prerequisites
- You must have a Microsoft Azure resource group and storage account.
-
You have Python installed. The
AZ CLItool depends on python.
Procedure
Import the Microsoft repository key:
# rpm --import https://packages.microsoft.com/keys/microsoft.asc
Create a local
azure-cli.reporepository with the following information. Save theazure-cli.reporepository under/etc/yum.repos.d/:[azure-cli] name=Azure CLI baseurl=https://packages.microsoft.com/yumrepos/vscode enabled=1 gpgcheck=1 gpgkey=https://packages.microsoft.com/keys/microsoft.asc
Install the Microsoft Azure CLI:
# yumdownloader azure-cli
# rpm -ivh --nodeps azure-cli-2.0.64-1.el7.x86_64.rpm
NoteThe downloaded version of the Microsoft Azure CLI package can vary depending on the current available version.
Run the Microsoft Azure CLI:
$ az login
The terminal shows the following message
Note, we have launched a browser for you to login. For old experience with device code, use "az login --use-device-code. Then, the terminal opens a browser with a link to https://microsoft.com/devicelogin from where you can login.NoteIf you are running a remote (SSH) session, the login page link will not open in the browser. In this case, you can copy the link to a browser and login to authenticate your remote session. To sign in, use a web browser to open the page https://microsoft.com/devicelogin and enter the device code to authenticate.
List the keys for the storage account in Microsoft Azure:
$ az storage account keys list --resource-group <resource_group_name> --account-name <storage_account_name>
Replace resource-group-name with name of your Microsoft Azure resource group and storage-account-name with name of your Microsoft Azure storage account.
NoteYou can list the available resources using the following command:
$ az resource list
Make note of value key1 in the output of the previous command.
Create a storage container:
$ az storage container create --account-name <storage_account_name>\
--account-key <key1_value> --name <storage_account_name>
Replace storage-account-name with name of the storage account.
Additional resources
11.5. Uploading VHD images to Microsoft Azure cloud
After you have created your customized VHD image, you can upload it to the Microsoft Azure cloud.
Prerequisites
- Your system must be set up for uploading Microsoft Azure VHD images. See Preparing to upload Microsoft Azure VHD images.
You must have a Microsoft Azure VHD image created by RHEL image builder.
-
In the CLI, use the
vhdoutput type. -
In the GUI, use the
Azure Disk Image (.vhd)image type.
-
In the CLI, use the
Procedure
Push the image to Microsoft Azure and create an instance from it:
$ az storage blob upload --account-name <account_name> --container-name <container_name> --file <_image_-disk.vhd> --name <_image_-disk.vhd> --type page
...
After the upload to the Microsoft Azure Blob storage completes, create a Microsoft Azure image from it:
$ az image create --resource-group < _resource_group_name_> --name <_image_-disk.vhd>  --os-type linux --location eastus --source https://$ACCOUNT.blob.core.windows.net/<_container_name_> <_image_-disk.vhd>
 - Running ...
Verification
Create an instance either with the Microsoft Azure portal, or a command similar to the following:
$ az vm create --resource-group <_resource_group_name_> --location eastus --name <_image_-disk.vhd> --image <_image_-disk.vhd> --admin-username azure-user --generate-ssh-keys
 - Running ...
-
Use your private key via SSH to access the resulting instance. Log in as
azure-user. This username was set on the previous step.
Additional Resources
11.6. Pushing VHD images to Microsoft Azure cloud
You can create .vhd images by using RHEL image builder. Then, you can push the output .vhd images to a Blob Storage of the Microsoft Azure Cloud service provider.
Prerequisites
- You have root access to the system.
- You have access to the RHEL image builder interface of the RHEL web console.
- You created a blueprint. See Creating a RHEL image builder blueprint in the web console interface.
- You have a Microsoft Storage Account created.
- You have a writable Blob Storage prepared.
Procedure
- In the RHEL image builder dashboard, select the blueprint you want to use.
- Click the tab.
Click to create your customized
.vhdimage.The Create image wizard opens.
-
Select
Microsoft Azure (.vhd)from the Type drop-down menu list. - Check the Upload to Azure checkbox to upload your image to the Microsoft Azure Cloud.
- Enter the Image Size and click .
-
Select
On the Upload to Azure page, enter the following information:
On the Authentication page, enter:
- Your Storage account name. You can find it on the Storage account page, in the Microsoft Azure portal.
- Your Storage access key: You can find it on the Access Key Storage page.
- Click .
On the Authentication page, enter:
- The image name.
- The Storage container. It is the blob container to which you will upload the image. Find it under the Blob service section, in the Microsoft Azure portal.
- Click .
On the Review page, click . The RHEL image builder and upload processes start.
Access the image you pushed into Microsoft Azure Cloud.
- Access the Microsoft Azure portal.
- In the search bar, type "storage account" and click Storage accounts from the list.
- On the search bar, type "Images" and select the first entry under Services. You are redirected to the Image dashboard.
- On the navigation panel, click Containers.
-
Find the container you created. Inside the container is the
.vhdfile you created and pushed by using RHEL image builder.
Verification
Verify that you can create a VM image and launch it.
- In the search bar, type images account and click Images from the list.
- Click .
- From the dropdown list, choose the resource group you used earlier.
- Enter a name for the image.
- For the OS type, select Linux.
- For the VM generation, select Gen 2.
- Under Storage Blob, click and click through the storage accounts and container until you reach your VHD file.
- Click Select at the end of the page.
- Choose an Account Type, for example, Standard SSD.
- Click and then . Wait a few moments for the image creation.
To launch the VM, follow the steps:
- Click .
- Click from the menu bar on the header.
- Enter a name for your virtual machine.
- Complete the Size and Administrator account sections.
Click and then . You can see the deployment progress.
After the deployment finishes, click the virtual machine name to retrieve the public IP address of the instance to connect by using SSH.
- Open a terminal to create an SSH connection to connect to the VM.
11.7. Uploading VMDK images and creating a RHEL virtual machine in vSphere
With RHEL image builder, you can create customized VMware vSphere system images, either in the Open virtualization format (.ova) or in the Virtual disk (.vmdk) format. You can upload these images to the VMware vSphere client. You can upload the .vmdk or .ova image to VMware vSphere using the govc import.vmdk CLI tool. The vmdk you create contains the cloud-init package installed and you can use it to provision users by using user data, for example.
Uploading vmdk images by using the VMware vSphere GUI is not supported.
Prerequisites
- You created a blueprint with username and password customizations.
-
You created a VMware vSphere image either in the
.ovaor.vmdkformat by using RHEL image builder and downloaded it to your host system. -
You installed and configured the
govcCLI tool, to be able use theimport.vmdkcommand.
Procedure
Configure the following values in the user environment with the GOVC environment variables:
GOVC_URL
GOVC_DATACENTER
GOVC_FOLDER
GOVC_DATASTORE
GOVC_RESOURCE_POOL
GOVC_NETWORK
- Navigate to the directory where you downloaded your VMware vSphere image.
Launch the VMware vSphere image on vSphere by following the steps:
Import the VMware vSphere image in to vSphere:
$ govc import.vmdk ./composer-api.vmdk foldernameFor the
.ovaformat:$ govc import.ova ./composer-api.ova foldernameCreate the VM in vSphere without powering it on:
govc vm.create \
-net.adapter=vmxnet3 \
-m=4096 -c=2 -g=rhel8_64Guest \
-firmware=efi -disk=”foldername/composer-api.vmdk” \
-disk.controller=scsi -on=false \
 vmname
For the
.ovaformat, replace the line-firmware=efi -disk=”foldername/composer-api.vmdk” \with `-firmware=efi -disk=”foldername/composer-api.ova” \Power-on the VM:
govc vm.power -on vmnameRetrieve the VM IP address:
govc vm.ip vmnameUse SSH to log in to the VM, using the username and password you specified in your blueprint:
$ ssh admin@<_ip_address_of_the_vm_>
NoteIf you copied the
.vmdkimage from your local host to the destination using thegovc datastore.uploadcommand, using the resulting image is not supported. There is no option to use theimport.vmdkcommand in the vSphere GUI and as a result, the vSphere GUI does not support the direct upload. As a consequence, the.vmdkimage is not usable from the vSphere GUI.
11.8. Uploading images to GCP with RHEL image builder
With RHEL image builder, you can build a gce image, provide credentials for your user or GCP service account, and then upload the gce image directly to the GCP environment.
11.8.1. Uploading a gce image to GCP by using the CLI
Follow the procedure to set up a configuration file with credentials to upload your gce image to GCP.
You cannot manually import gce image to GCP, because the image will not boot. You must use either gcloud or RHEL image builder to upload it.
Prerequisites
You have a valid Google account and credentials to upload your image to GCP. The credentials can be from a user account or a service account. The account associated with the credentials must have at least the following IAM roles assigned:
-
roles/storage.admin- to create and delete storage objects -
roles/compute.storageAdmin- to import a VM image to Compute Engine.
-
- You have an existing GCP bucket.
Procedure
By using a text editor, create a
gcp-config.tomlconfiguration file with the following content:provider = "gcp" [settings] bucket = "GCP_BUCKET" region = "GCP_STORAGE_REGION" object = "OBJECT_KEY" credentials = "GCP_CREDENTIALS"
-
GCP_BUCKETpoints to an existing bucket. It is used to store the intermediate storage object of the image which is being uploaded. -
GCP_STORAGE_REGIONis both a regular Google storage region and, a dual or multi region. -
OBJECT_KEYis the name of an intermediate storage object. It must not exist before the upload, and it is deleted when the upload process is done. If the object name does not end with.tar.gz, the extension is automatically added to the object name. GCP_CREDENTIALSis a Base64-encoded scheme of the credentials JSON file downloaded from GCP. The credentials determine which project the GCP uploads the image to.NoteSpecifying
GCP_CREDENTIALSin thegcp-config.tomlfile is optional if you use a different mechanism to authenticate with GCP. For other authentication methods, see Authenticating with GCP.
-
Retrieve the
GCP_CREDENTIALSfrom the JSON file downloaded from GCP.$ sudo base64 -w 0 cee-gcp-nasa-476a1fa485b7.json
Create a compose with an additional image name and cloud provider profile:
$ sudo composer-cli compose start BLUEPRINT-NAME gce IMAGE_KEY gcp-config.toml
The image build, upload, and cloud registration processes can take up to ten minutes to complete.
Verification
Verify that the image status is FINISHED:
$ sudo composer-cli compose status
Additional resources
11.8.2. How RHEL image builder sorts the authentication order of different GCP credentials
You can use several different types of credentials with RHEL image builder to authenticate with GCP. If RHEL image builder configuration is set to authenticate with GCP using multiple sets of credentials, it uses the credentials in the following order of preference:
-
Credentials specified with the
composer-clicommand in the configuration file. -
Credentials configured in the
osbuild-composerworker configuration. Application Default Credentialsfrom theGoogle GCP SDKlibrary, which tries to automatically find a way to authenticate by using the following options:- If the GOOGLE_APPLICATION_CREDENTIALS environment variable is set, Application Default Credentials tries to load and use credentials from the file pointed to by the variable.
Application Default Credentials tries to authenticate by using the service account attached to the resource that is running the code. For example, Google Compute Engine VM.
NoteYou must use the GCP credentials to determine which GCP project to upload the image to. Therefore, unless you want to upload all of your images to the same GCP project, you always must specify the credentials in the
gcp-config.tomlconfiguration file with thecomposer-clicommand.
11.8.2.1. Specifying GCP credentials with the composer-cli command
You can specify GCP authentication credentials in the upload target configuration gcp-config.toml file. Use a Base64-encoded scheme of the Google account credentials JSON file to save time.
Procedure
Get the encoded content of the Google account credentials file with the path stored in
GOOGLE_APPLICATION_CREDENTIALSenvironment variable, by running the following command:$ base64 -w 0 "${GOOGLE_APPLICATION_CREDENTIALS}"In the upload target configuration
gcp-config.tomlfile, set the credentials:provider = "gcp" [settings] provider = "gcp" [settings] ... credentials = "GCP_CREDENTIALS"
11.8.2.2. Specifying credentials in the osbuild-composer worker configuration
You can configure GCP authentication credentials to be used for GCP globally for all image builds. This way, if you want to import images to the same GCP project, you can use the same credentials for all image uploads to GCP.
Procedure
In the
/etc/osbuild-worker/osbuild-worker.tomlworker configuration, set the following credential value:[gcp] credentials = "PATH_TO_GCP_ACCOUNT_CREDENTIALS"
11.9. Pushing VMDK images to vSphere using the RHEL image builder GUI tool
You can build VMware images by using the RHEL image builder GUI tool and push the images directly to your vSphere instance, to avoid having to download the image file and push it manually. The vmdk you create contains the cloud-init package installed and you can use it to provision users by using user data, for example. To build .vmdk images by using RHEL image builder and push them directly to vSphere instances service provider, follow the steps:
Prerequisites
-
You are a member of the
rootor theweldrgroup. - You have opened link:https://localhost:9090/RHEL image builder in a browser.
- You have created a blueprint. See Creating a RHEL image builder blueprint in the web console interface.
- You have a vSphere Account.
Procedure
- For the blueprint you created, click the tab .
Click to create your customized image.
The Image type window opens.
In the Image type window:
- From the dropdown menu, select the Type: VMware vSphere (.vmdk).
- Check the Upload to VMware checkbox to upload your image to the vSphere.
- Optional: Set the size of the image you want to instantiate. The minimal default size is 2 GB.
- Click .
In the Upload to VMware window, under Authentication, enter the following details:
- Username: username of the vSphere account.
- Password: password of the vSphere account.
In the Upload to VMware window, under Destination, enter the following details about the image upload destination:
- Image name: a name for the image.
- Host: The URL of your VMware vSphere.
- Cluster: The name of the cluster.
- Data center: The name of the data center.
- Data store:The name of the Data store.
- Click Next.
In the Review window, review the details of the image creation and click .
You can click to modify any incorrect detail.
RHEL image builder adds the compose of a RHEL vSphere image to the queue, and creates and uploads the image to the Cluster on the vSphere instance you specified.
NoteThe image build and upload processes take a few minutes to complete.
After the process is complete, you can see the Image build complete status.
Verification
After the image status upload is completed successfully, you can create a Virtual Machine (VM) from the image you uploaded and login into it. To do so:
- Access VMware vSphere Client.
- Search for the image in the Cluster on the vSphere instance you specified.
- Select the image you uploaded.
- Right-click the selected image.
Click
New Virtual Machine.A New Virtual Machine window opens.
In the New Virtual Machine window, provide the following details:
-
Select
New Virtual Machine. - Select a name and a folder for your VM.
- Select a computer resource: choose a destination computer resource for this operation.
- Select storage: For example, select NFS-Node1
- Select compatibility: The image should be BIOS only.
- Select a guest operating system: For example, select Linux and Red Hat Fedora (64-bit).
- Customize hardware: When creating a VM, on the Device Configuration button on the upper right, delete the default New Hard Disk and use the drop-down to select an Existing Hard Disk disk image:
- Ready to complete: Review the details and click Finish to create the image.
-
Select
Navigate to the VMs tab.
- From the list, select the VM you created.
- Click the Start button from the panel. A new window appears, showing the VM image loading.
- Log in with the credentials you created for the blueprint.
You can verify if the packages you added to the blueprint are installed. For example:
$ rpm -qa | grep firefox
Additional resources
11.10. Pushing customized images to OCI
With RHEL image builder, you can build customized images and push them directly to your Oracle Cloud Infrastructure (OCI) instance. Then, you can start an image instance from the OCI dashboard.
Prerequisites
-
You have
rootorweldrgroup user access to the system. - You have an Oracle Cloud account.
- You must be granted security access in an OCI policy by your administrator.
-
You have created an OCI Bucket in the
OCI_REGIONof your choice.
Procedure
- Open the RHEL image builder interface of the web console in a browser.
- Click . The Create blueprint wizard opens.
- On the Details page, enter a name for the blueprint, and optionally, a description. Click .
- On the Packages page, select the components and packages that you want to include in the image. Click .
- On the Customizations page, configure the customizations that you want for your blueprint. Click .
- On the Review page, click .
- To create an image, click . The Create image wizard opens.
On the Image output page, complete the following steps:
- From the "Select a blueprint" drop-down menu, select the blueprint you want.
-
From the "Image output type" drop-down menu, select
Oracle Cloud Infrastructure (.qcow2). - Check the "Upload OCI checkbox to upload your image to the OCI.
- Enter the "image size". Click .
On the Upload to OCI - Authentication page, enter the following mandatory details:
- User OCID: you can find it in the Console on the page showing the user’s details.
- Private key
On the Upload to OCI - Destination page, enter the following mandatory details and click .
- Image name: a name for the image to be uploaded.
- OCI bucket
- Bucket namespace
- Bucket region
- Bucket compartment
- Bucket tenancy
- Review the details in the wizard and click .
RHEL image builder adds the compose of a RHEL .qcow2 image to the queue.
Verification
- Access the OCI dashboard → Custom Images.
- Select the Compartment you specified for the image and locate the image in the Import image table.
- Click the image name and verify the image information.
Additional resources
11.11. Uploading QCOW2 images to OpenStack
With the RHEL image builder tool, you can create customized .qcow2 images that are suitable for uploading to OpenStack cloud deployments, and starting instances there. RHEL image builder creates images in the QCOW2 format, but with further changes specific to OpenStack.
Do not mistake the generic QCOW2 image type output format you create by using RHEL image builder with the OpenStack image type, which is also in the QCOW2 format, but contains further changes specific to OpenStack.
Prerequisites
- You have created a blueprint.
Procedure
Start the compose of a
QCOW2image.# composer-cli compose start blueprint_name openstackCheck the status of the building.
# composer-cli compose status
After the image build finishes, you can download the image.
Download the
QCOW2image:# composer-cli compose image UUID- Access the OpenStack dashboard and click .
-
On the left menu, select the
Admintab. From the
System Panel, clickImage.The
Create An Imagewizard opens.In the
Create An Imagewizard:- Enter a name for the image
-
Click
Browseto upload theQCOW2image. -
From the
Formatdropdown list, select theQCOW2 - QEMU Emulator. Click .
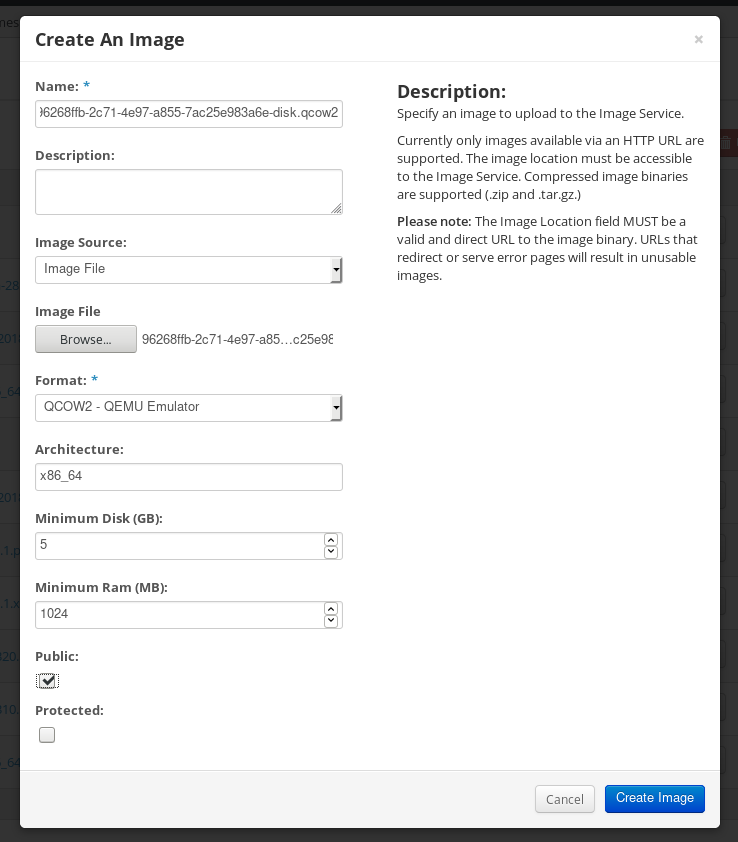
On the left menu, select the
Projecttab.-
From the
Computemenu, selectInstances. Click the button.
The
Launch Instancewizard opens.-
On the
Detailspage, enter a name for the instance. Click . -
On the
Sourcepage, select the name of the image you uploaded. Click . On the
Flavorpage, select the machine resources that best fit your needs. Click .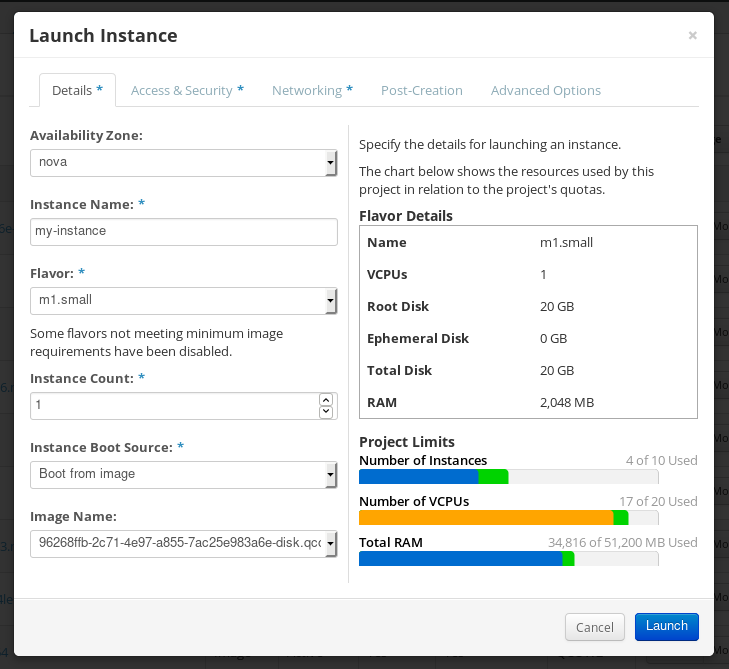
-
From the
-
You can run the image instance using any mechanism (CLI or OpenStack web UI) from the image. Use your private key via SSH to access the resulting instance. Log in as
cloud-user.
11.12. Preparing to upload customized RHEL images to Alibaba Cloud
To deploy a customized RHEL image to the Alibaba Cloud, first you need to verify the customized image. The image needs a specific configuration to boot successfully, because Alibaba Cloud requests the custom images to meet certain requirements before you use it.
RHEL image builder generates images that conform to Alibaba’s requirements. However, Red Hat recommends also using the Alibaba image_check tool to verify the format compliance of your image.
Prerequisites
- You must have created an Alibaba image by using RHEL image builder.
Procedure
- Connect to the system containing the image that you want to check by using the Alibaba image_check tool.
Download the image_check tool:
$ curl -O https://docs-aliyun.cn-hangzhou.oss.aliyun-inc.com/assets/attach/73848/cn_zh/1557459863884/image_check
Change the file permission of the image compliance tool:
# chmod +x image_check
Run the command to start the image compliance tool checkup:
# ./image_check
The tool verifies the system configuration and generates a report that is displayed on your screen. The image_check tool saves this report in the same folder where the image compliance tool is running.
Troubleshooting
If any of the Detection Items fail, follow the instructions in the terminal to correct it.
Additional resources
11.13. Uploading customized RHEL images to Alibaba
You can upload a customized AMI image you created by using RHEL image builder to the Object Storage Service (OSS).
Prerequisites
- Your system is set up for uploading Alibaba images. See Preparing for uploading images to Alibaba.
-
You have created an
amiimage by using RHEL image builder. - You have a bucket. See Creating a bucket.
- You have an active Alibaba Account.
- You activated OSS.
Procedure
- Log in to the OSS console.
- In the Bucket menu on the left, select the bucket to which you want to upload an image.
- In the upper right menu, click the Files tab.
Click . A dialog window opens on the right side. Configure the following:
- Upload To: Choose to upload the file to the Current directory or to a Specified directory.
- File ACL: Choose the type of permission of the uploaded file.
- Click .
- Select the image you want to upload to the OSS Console..
- Click .
Additional resources
11.14. Importing images to Alibaba Cloud
To import a customized Alibaba RHEL image that you created by using RHEL image builder to the Elastic Compute Service (ECS), follow the steps:
Prerequisites
- Your system is set up for uploading Alibaba images. See Preparing for uploading images to Alibaba.
-
You have created an
amiimage by using RHEL image builder. - You have a bucket. See Creating a bucket.
- You have an active Alibaba Account.
- You activated OSS.
- You have uploaded the image to Object Storage Service (OSS). See Uploading images to Alibaba.
Procedure
Log in to the ECS console.
- On the left-side menu, click .
- On the upper right side, click . A dialog window opens.
Confirm that you have set up the correct region where the image is located. Enter the following information:
-
OSS Object Address: See how to obtain OSS Object Address. -
Image Name -
Operating System -
System Disk Size -
System Architecture -
Platform: Red Hat
-
Optionally, provide the following details:
-
Image Format:qcow2orami, depending on the uploaded image format. -
Image Description Add Images of Data DisksThe address can be determined in the OSS management console. After selecting the required bucket in the left menu:
-
-
Select
Filessection. Click the Details link on the right for the appropriate image.
A window appears on the right side of the screen, showing image details. The
OSSobject address is in theURLbox.Click .
NoteThe importing process time can vary depending on the image size.
The customized image is imported to the ECS Console.
Additional resources
11.15. Creating an instance of a customized RHEL image using Alibaba Cloud
You can create instances of a customized RHEL image by using the Alibaba ECS Console.
Prerequisites
- You have activated OSS and uploaded your custom image.
- You have successfully imported your image to ECS Console. See Importing images to Alibaba.
Procedure
- Log in to the ECS console.
- On the left-side menu, select Instances.
- In the upper-right corner, click Create Instance. You are redirected to a new window.
- Complete all the required information. See Creating an instance by using the wizard for more details.
Click Create Instance and confirm the order.
NoteYou can see the option Create Order instead of Create Instance, depending on your subscription.
As a result, you have an active instance ready for deployment from the Alibaba ECS Console.
Additional resources