
Red Hat Training
A Red Hat training course is available for Red Hat Enterprise Linux
SELinux User's and Administrator's Guide
Basic and advanced configuration of Security-Enhanced Linux (SELinux)
Abstract
Part I. SELinux
Chapter 1. Introduction
Note
_t. For example, the type name for the web server is httpd_t. The type context for files and directories normally found in /var/www/html/ is httpd_sys_content_t. The type contexts for files and directories normally found in /tmp and /var/tmp/ is tmp_t. The type context for web server ports is http_port_t.
httpd_t) to access files and directories with a context normally found in /var/www/html/ and other web server directories (httpd_sys_content_t). There is no allow rule in the policy for files normally found in /tmp and /var/tmp/, so access is not permitted. With SELinux, even if Apache is compromised, and a malicious script gains access, it is still not able to access the /tmp directory.
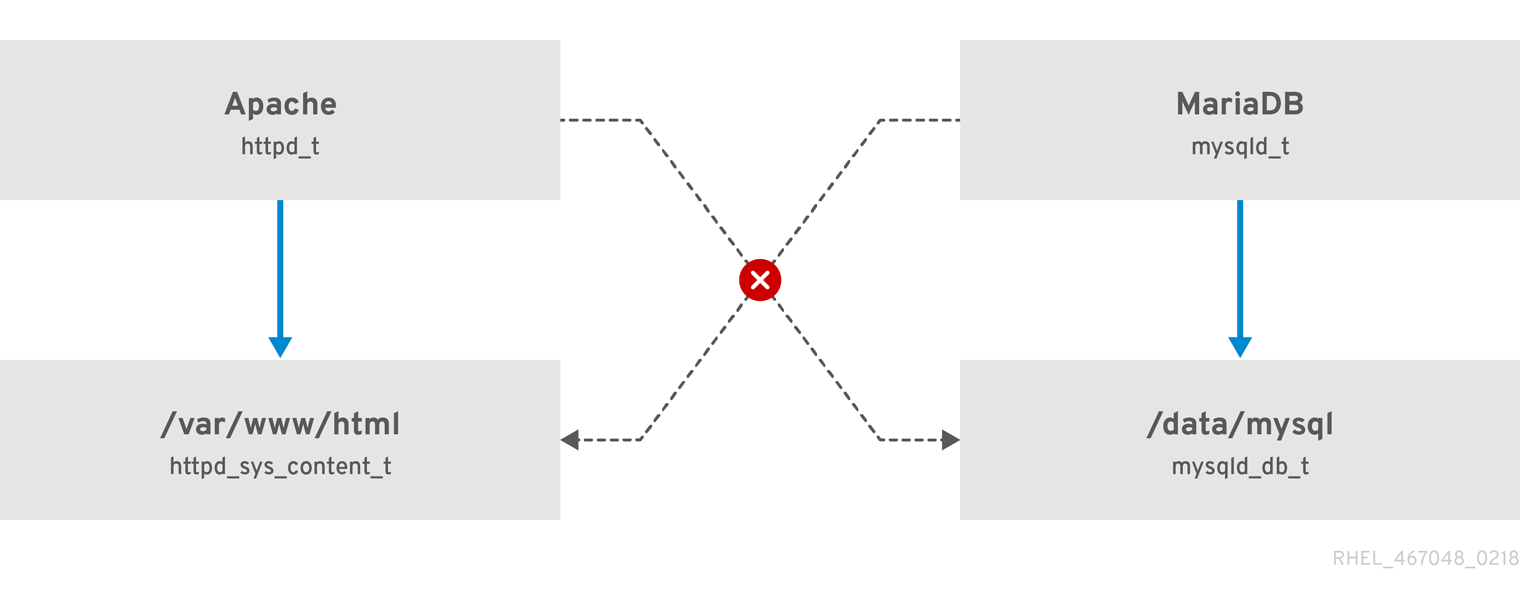
Figure 1.1. SELinux allows the Apache process running as httpd_t to access the /var/www/html/ directory and it denies the same process to access the /data/mysql/ directory because there is no allow rule for the httpd_t and mysqld_db_t type contexts). On the other hand, the MariaDB process running as mysqld_t is able to access the /data/mysql/ directory and SELinux also correctly denies the process with the mysqld_t type to access the /var/www/html/ directory labeled as httpd_sys_content_t.
Additional Resources
- The
selinux(8)man page and man pages listed by theapropos selinuxcommand. - Man pages listed by the
man -k _selinuxcommand when the selinux-policy-doc package is installed. See Section 11.3.3, “Manual Pages for Services” for more information.
1.1. Benefits of running SELinux
- All processes and files are labeled. SELinux policy rules define how processes interact with files, as well as how processes interact with each other. Access is only allowed if an SELinux policy rule exists that specifically allows it.
- Fine-grained access control. Stepping beyond traditional UNIX permissions that are controlled at user discretion and based on Linux user and group IDs, SELinux access decisions are based on all available information, such as an SELinux user, role, type, and, optionally, a security level.
- SELinux policy is administratively-defined and enforced system-wide.
- Improved mitigation for privilege escalation attacks. Processes run in domains, and are therefore separated from each other. SELinux policy rules define how processes access files and other processes. If a process is compromised, the attacker only has access to the normal functions of that process, and to files the process has been configured to have access to. For example, if the Apache HTTP Server is compromised, an attacker cannot use that process to read files in user home directories, unless a specific SELinux policy rule was added or configured to allow such access.
- SELinux can be used to enforce data confidentiality and integrity, as well as protecting processes from untrusted inputs.
- antivirus software,
- replacement for passwords, firewalls, and other security systems,
- all-in-one security solution.
1.2. Examples
- The default action is deny. If an SELinux policy rule does not exist to allow access, such as for a process opening a file, access is denied.
- SELinux can confine Linux users. A number of confined SELinux users exist in the SELinux policy. Linux users can be mapped to confined SELinux users to take advantage of the security rules and mechanisms applied to them. For example, mapping a Linux user to the SELinux
user_uuser, results in a Linux user that is not able to run (unless configured otherwise) set user ID (setuid) applications, such assudoandsu. See Section 3.3, “Confined and Unconfined Users” for more information. - Increased process and data separation. Processes run in their own domains, preventing processes from accessing files used by other processes, as well as preventing processes from accessing other processes. For example, when running SELinux, unless otherwise configured, an attacker cannot compromise a Samba server, and then use that Samba server as an attack vector to read and write to files used by other processes, such as MariaDB databases.
- SELinux helps mitigate the damage made by configuration mistakes. Domain Name System (DNS) servers often replicate information between each other in what is known as a zone transfer. Attackers can use zone transfers to update DNS servers with false information. When running the Berkeley Internet Name Domain (BIND) as a DNS server in Red Hat Enterprise Linux, even if an administrator forgets to limit which servers can perform a zone transfer, the default SELinux policy prevents zone files [1] from being updated using zone transfers, by the BIND
nameddaemon itself, and by other processes. - See the NetworkWorld.com article, A seatbelt for server software: SELinux blocks real-world exploits[2], for background information about SELinux, and information about various exploits that SELinux has prevented.
1.3. SELinux Architecture
1.4. SELinux States and Modes
setenforce utility to change between enforcing and permissive mode. Changes made with setenforce do not persist across reboots. To change to enforcing mode, enter the setenforce 1 command as the Linux root user. To change to permissive mode, enter the setenforce 0 command. Use the getenforce utility to view the current SELinux mode:
~]# getenforce
Enforcing~]#setenforce 0~]#getenforcePermissive
~]#setenforce 1~]#getenforceEnforcing
httpd_t domain permissive:
~]# semanage permissive -a httpd_tNote
1.5. Additional Resources
Chapter 2. SELinux Contexts
~]$ls -Z file1-rwxrw-r-- user1 group1 unconfined_u:object_r:user_home_t:s0 file1
- SELinux user
- The SELinux user identity is an identity known to the policy that is authorized for a specific set of roles, and for a specific MLS/MCS range. Each Linux user is mapped to an SELinux user using SELinux policy. This allows Linux users to inherit the restrictions placed on SELinux users. The mapped SELinux user identity is used in the SELinux context for processes in that session, in order to define what roles and levels they can enter. Enter the following command as root to view a list of mappings between SELinux and Linux user accounts (you need to have the policycoreutils-python package installed):
~]#semanage login -lLogin Name SELinux User MLS/MCS Range Service __default__ unconfined_u s0-s0:c0.c1023 * root unconfined_u s0-s0:c0.c1023 * system_u system_u s0-s0:c0.c1023 *Output may differ slightly from system to system:- The
Login Namecolumn lists Linux users. - The
SELinux Usercolumn lists which SELinux user the Linux user is mapped to. For processes, the SELinux user limits which roles and levels are accessible. - The
MLS/MCS Rangecolumn, is the level used by Multi-Level Security (MLS) and Multi-Category Security (MCS). - The
Servicecolumn determines the correct SELinux context, in which the Linux user is supposed to be logged in to the system. By default, the asterisk (*) character is used, which stands for any service.
- role
- Part of SELinux is the Role-Based Access Control (RBAC) security model. The role is an attribute of RBAC. SELinux users are authorized for roles, and roles are authorized for domains. The role serves as an intermediary between domains and SELinux users. The roles that can be entered determine which domains can be entered; ultimately, this controls which object types can be accessed. This helps reduce vulnerability to privilege escalation attacks.
- type
- The type is an attribute of Type Enforcement. The type defines a domain for processes, and a type for files. SELinux policy rules define how types can access each other, whether it be a domain accessing a type, or a domain accessing another domain. Access is only allowed if a specific SELinux policy rule exists that allows it.
- level
- The level is an attribute of MLS and MCS. An MLS range is a pair of levels, written as lowlevel-highlevel if the levels differ, or lowlevel if the levels are identical (
s0-s0is the same ass0). Each level is a sensitivity-category pair, with categories being optional. If there are categories, the level is written as sensitivity:category-set. If there are no categories, it is written as sensitivity.If the category set is a contiguous series, it can be abbreviated. For example,c0.c3is the same asc0,c1,c2,c3. The/etc/selinux/targeted/setrans.conffile maps levels (s0:c0) to human-readable form (that isCompanyConfidential). In Red Hat Enterprise Linux, targeted policy enforces MCS, and in MCS, there is just one sensitivity,s0. MCS in Red Hat Enterprise Linux supports 1024 different categories:c0through toc1023.s0-s0:c0.c1023is sensitivitys0and authorized for all categories.MLS enforces the Bell-La Padula Mandatory Access Model, and is used in Labeled Security Protection Profile (LSPP) environments. To use MLS restrictions, install the selinux-policy-mls package, and configure MLS to be the default SELinux policy. The MLS policy shipped with Red Hat Enterprise Linux omits many program domains that were not part of the evaluated configuration, and therefore, MLS on a desktop workstation is unusable (no support for the X Window System); however, an MLS policy from the upstream SELinux Reference Policy can be built that includes all program domains. For more information on MLS configuration, see Section 4.13, “Multi-Level Security (MLS)”.
2.1. Domain Transitions
entrypoint type for the new domain. The entrypoint permission is used in SELinux policy and controls which applications can be used to enter a domain. The following example demonstrates a domain transition:
Procedure 2.1. An Example of a Domain Transition
- A user wants to change their password. To do this, they run the
passwdutility. The/usr/bin/passwdexecutable is labeled with thepasswd_exec_ttype:~]$ls -Z /usr/bin/passwd-rwsr-xr-x root root system_u:object_r:passwd_exec_t:s0 /usr/bin/passwdThepasswdutility accesses/etc/shadow, which is labeled with theshadow_ttype:~]$ls -Z /etc/shadow-r--------. root root system_u:object_r:shadow_t:s0 /etc/shadow - An SELinux policy rule states that processes running in the
passwd_tdomain are allowed to read and write to files labeled with theshadow_ttype. Theshadow_ttype is only applied to files that are required for a password change. This includes/etc/gshadow,/etc/shadow, and their backup files. - An SELinux policy rule states that the
passwd_tdomain has itsentrypointpermission set to thepasswd_exec_ttype. - When a user runs the
passwdutility, the user's shell process transitions to thepasswd_tdomain. With SELinux, since the default action is to deny, and a rule exists that allows (among other things) applications running in thepasswd_tdomain to access files labeled with theshadow_ttype, thepasswdapplication is allowed to access/etc/shadow, and update the user's password.
passwd_t domain to access objects labeled with the shadow_t file type, other SELinux policy rules must be met before the subject can transition to a new domain. In this example, Type Enforcement ensures:
- The
passwd_tdomain can only be entered by executing an application labeled with thepasswd_exec_ttype; can only execute from authorized shared libraries, such as thelib_ttype; and cannot execute any other applications. - Only authorized domains, such as
passwd_t, can write to files labeled with theshadow_ttype. Even if other processes are running with superuser privileges, those processes cannot write to files labeled with theshadow_ttype, as they are not running in thepasswd_tdomain. - Only authorized domains can transition to the
passwd_tdomain. For example, thesendmailprocess running in thesendmail_tdomain does not have a legitimate reason to executepasswd; therefore, it can never transition to thepasswd_tdomain. - Processes running in the
passwd_tdomain can only read and write to authorized types, such as files labeled with theetc_torshadow_ttypes. This prevents thepasswdapplication from being tricked into reading or writing arbitrary files.
2.2. SELinux Contexts for Processes
ps -eZ command to view the SELinux context for processes. For example:
Procedure 2.2. View the SELinux Context for the passwd Utility
- Open a terminal, such as → → .
- Run the
passwdutility. Do not enter a new password:~]$passwdChanging password for user user_name. Changing password for user_name. (current) UNIX password: - Open a new tab, or another terminal, and enter the following command. The output is similar to the following:
~]$ps -eZ | grep passwdunconfined_u:unconfined_r:passwd_t:s0-s0:c0.c1023 13212 pts/1 00:00:00 passwd - In the first tab/terminal, press
Ctrl+Cto cancel thepasswdutility.
passwd utility (labeled with the passwd_exec_t type) is executed, the user's shell process transitions to the passwd_t domain. Remember that the type defines a domain for processes, and a type for files.
ps utility again. Note that below is a truncated example of the output, and may differ on your system:
]$ps -eZsystem_u:system_r:dhcpc_t:s0 1869 ? 00:00:00 dhclient system_u:system_r:sshd_t:s0-s0:c0.c1023 1882 ? 00:00:00 sshd system_u:system_r:gpm_t:s0 1964 ? 00:00:00 gpm system_u:system_r:crond_t:s0-s0:c0.c1023 1973 ? 00:00:00 crond system_u:system_r:kerneloops_t:s0 1983 ? 00:00:05 kerneloops system_u:system_r:crond_t:s0-s0:c0.c1023 1991 ? 00:00:00 atd
system_r role is used for system processes, such as daemons. Type Enforcement then separates each domain.
2.3. SELinux Contexts for Users
~]$id -Zunconfined_u:unconfined_r:unconfined_t:s0-s0:c0.c1023
unconfined_u user, running as the unconfined_r role, and is running in the unconfined_t domain. s0-s0 is an MLS range, which in this case, is the same as just s0. The categories the user has access to is defined by c0.c1023, which is all categories (c0 through to c1023).
Chapter 3. Targeted Policy
unconfined_t domain, and system processes started by init run in the unconfined_service_t domain; both of these domains are unconfined.
3.1. Confined Processes
sshd or httpd, is confined in Red Hat Enterprise Linux. Also, most processes that run as the root user and perform tasks for users, such as the passwd utility, are confined. When a process is confined, it runs in its own domain, such as the httpd process running in the httpd_t domain. If a confined process is compromised by an attacker, depending on SELinux policy configuration, an attacker's access to resources and the possible damage they can do is limited.
Procedure 3.1. How to Verify SELinux Status
- Confirm that SELinux is enabled, is running in enforcing mode, and that targeted policy is being used. The correct output should look similar to the output below:
~]$sestatusSELinux status: enabled SELinuxfs mount: /sys/fs/selinux SELinux root directory: /etc/selinux Loaded policy name: targeted Current mode: enforcing Mode from config file: enforcing Policy MLS status: enabled Policy deny_unknown status: allowed Max kernel policy version: 30See Section 4.4, “Permanent Changes in SELinux States and Modes” for detailed information about changing SELinux modes. - As root, create a file in the
/var/www/html/directory:~]#touch /var/www/html/testfile - Enter the following command to view the SELinux context of the newly created file:
~]$ls -Z /var/www/html/testfile-rw-r--r-- root root unconfined_u:object_r:httpd_sys_content_t:s0 /var/www/html/testfileBy default, Linux users run unconfined in Red Hat Enterprise Linux, which is why thetestfilefile is labeled with the SELinuxunconfined_uuser. RBAC is used for processes, not files. Roles do not have a meaning for files; theobject_rrole is a generic role used for files (on persistent storage and network file systems). Under the/procdirectory, files related to processes may use thesystem_rrole. Thehttpd_sys_content_ttype allows thehttpdprocess to access this file.
httpd) from reading files that are not correctly labeled, such as files intended for use by Samba. This is an example, and should not be used in production. It assumes that the httpd and wget packages are installed, the SELinux targeted policy is used, and that SELinux is running in enforcing mode.
Procedure 3.2. An Example of Confined Process
- As root, start the
httpddaemon:~]#systemctl start httpd.serviceConfirm that the service is running. The output should include the information below (only the time stamp will differ):~]$systemctl status httpd.servicehttpd.service - The Apache HTTP Server Loaded: loaded (/usr/lib/systemd/system/httpd.service; disabled) Active: active (running) since Mon 2013-08-05 14:00:55 CEST; 8s ago - Change into a directory where your Linux user has write access to, and enter the following command. Unless there are changes to the default configuration, this command succeeds:
~]$wget http://localhost/testfile--2009-11-06 17:43:01-- http://localhost/testfile Resolving localhost... 127.0.0.1 Connecting to localhost|127.0.0.1|:80... connected. HTTP request sent, awaiting response... 200 OK Length: 0 [text/plain] Saving to: `testfile' [ <=> ] 0 --.-K/s in 0s 2009-11-06 17:43:01 (0.00 B/s) - `testfile' saved [0/0] - The
chconcommand relabels files; however, such label changes do not survive when the file system is relabeled. For permanent changes that survive a file system relabel, use thesemanageutility, which is discussed later. As root, enter the following command to change the type to a type used by Samba:~]#chcon -t samba_share_t /var/www/html/testfileEnter the following command to view the changes:~]$ls -Z /var/www/html/testfile-rw-r--r-- root root unconfined_u:object_r:samba_share_t:s0 /var/www/html/testfile - Note that the current DAC permissions allow the
httpdprocess access totestfile. Change into a directory where your user has write access to, and enter the following command. Unless there are changes to the default configuration, this command fails:~]$wget http://localhost/testfile--2009-11-06 14:11:23-- http://localhost/testfile Resolving localhost... 127.0.0.1 Connecting to localhost|127.0.0.1|:80... connected. HTTP request sent, awaiting response... 403 Forbidden 2009-11-06 14:11:23 ERROR 403: Forbidden. - As root, remove
testfile:~]#rm -i /var/www/html/testfile - If you do not require
httpdto be running, as root, enter the following command to stop it:~]#systemctl stop httpd.service
httpd process access to testfile in step 2, because the file was labeled with a type that the httpd process does not have access to, SELinux denied access.
auditd daemon is running, an error similar to the following is logged to /var/log/audit/audit.log:
type=AVC msg=audit(1220706212.937:70): avc:  denied  { getattr } for  pid=1904 comm="httpd" path="/var/www/html/testfile" dev=sda5 ino=247576 scontext=unconfined_u:system_r:httpd_t:s0 tcontext=unconfined_u:object_r:samba_share_t:s0  tclass=file

type=SYSCALL msg=audit(1220706212.937:70): arch=40000003 syscall=196 success=no exit=-13 a0=b9e21da0 a1=bf9581dc a2=555ff4 a3=2008171 items=0 ppid=1902 pid=1904 auid=500 uid=48 gid=48 euid=48 suid=48 fsuid=48 egid=48 sgid=48 fsgid=48 tty=(none) ses=1 comm="httpd" exe="/usr/sbin/httpd" subj=unconfined_u:system_r:httpd_t:s0 key=(null)
/var/log/httpd/error_log:
[Wed May 06 23:00:54 2009] [error] [client 127.0.0.1] (13)Permission denied: access to /testfile denied
3.2. Unconfined Processes
init end up running in the unconfined_service_t domain, unconfined services executed by kernel end up running in the kernel_t domain, and unconfined services executed by unconfined Linux users end up running in the unconfined_t domain. For unconfined processes, SELinux policy rules are applied, but policy rules exist that allow processes running in unconfined domains almost all access. Processes running in unconfined domains fall back to using DAC rules exclusively. If an unconfined process is compromised, SELinux does not prevent an attacker from gaining access to system resources and data, but of course, DAC rules are still used. SELinux is a security enhancement on top of DAC rules – it does not replace them.
httpd) can access data intended for use by Samba, when running unconfined. Note that in Red Hat Enterprise Linux, the httpd process runs in the confined httpd_t domain by default. This is an example, and should not be used in production. It assumes that the httpd, wget, dbus and audit packages are installed, that the SELinux targeted policy is used, and that SELinux is running in enforcing mode.
Procedure 3.3. An Example of Unconfined Process
- The
chconcommand relabels files; however, such label changes do not survive when the file system is relabeled. For permanent changes that survive a file system relabel, use thesemanageutility, which is discussed later. As the root user, enter the following command to change the type to a type used by Samba:~]#chcon -t samba_share_t /var/www/html/testfileView the changes:~]$ls -Z /var/www/html/testfile-rw-r--r-- root root unconfined_u:object_r:samba_share_t:s0 /var/www/html/testfile - Enter the following command to confirm that the
httpdprocess is not running:~]$systemctl status httpd.servicehttpd.service - The Apache HTTP Server Loaded: loaded (/usr/lib/systemd/system/httpd.service; disabled) Active: inactive (dead)If the output differs, enter the following command as root to stop thehttpdprocess:~]#systemctl stop httpd.service - To make the
httpdprocess run unconfined, enter the following command as root to change the type of the/usr/sbin/httpdfile, to a type that does not transition to a confined domain:~]#chcon -t bin_t /usr/sbin/httpd - Confirm that
/usr/sbin/httpdis labeled with thebin_ttype:~]$ls -Z /usr/sbin/httpd-rwxr-xr-x. root root system_u:object_r:bin_t:s0 /usr/sbin/httpd - As root, start the
httpdprocess and confirm, that it started successfully:~]#systemctl start httpd.service~]#systemctl status httpd.servicehttpd.service - The Apache HTTP Server Loaded: loaded (/usr/lib/systemd/system/httpd.service; disabled) Active: active (running) since Thu 2013-08-15 11:17:01 CEST; 5s ago - Enter the following command to view
httpdrunning in theunconfined_service_tdomain:~]$ps -eZ | grep httpdsystem_u:system_r:unconfined_service_t:s0 11884 ? 00:00:00 httpd system_u:system_r:unconfined_service_t:s0 11885 ? 00:00:00 httpd system_u:system_r:unconfined_service_t:s0 11886 ? 00:00:00 httpd system_u:system_r:unconfined_service_t:s0 11887 ? 00:00:00 httpd system_u:system_r:unconfined_service_t:s0 11888 ? 00:00:00 httpd system_u:system_r:unconfined_service_t:s0 11889 ? 00:00:00 httpd - Change into a directory where your Linux user has write access to, and enter the following command. Unless there are changes to the default configuration, this command succeeds:
~]$wget http://localhost/testfile--2009-05-07 01:41:10-- http://localhost/testfile Resolving localhost... 127.0.0.1 Connecting to localhost|127.0.0.1|:80... connected. HTTP request sent, awaiting response... 200 OK Length: 0 [text/plain] Saving to: `testfile' [ <=> ]--.-K/s in 0s 2009-05-07 01:41:10 (0.00 B/s) - `testfile' saved [0/0]Although thehttpdprocess does not have access to files labeled with thesamba_share_ttype,httpdis running in the unconfinedunconfined_service_tdomain, and falls back to using DAC rules, and as such, thewgetcommand succeeds. Hadhttpdbeen running in the confinedhttpd_tdomain, thewgetcommand would have failed. - The
restoreconutility restores the default SELinux context for files. As root, enter the following command to restore the default SELinux context for/usr/sbin/httpd:~]#restorecon -v /usr/sbin/httpdrestorecon reset /usr/sbin/httpd context system_u:object_r:unconfined_exec_t:s0->system_u:object_r:httpd_exec_t:s0Confirm that/usr/sbin/httpdis labeled with thehttpd_exec_ttype:~]$ls -Z /usr/sbin/httpd-rwxr-xr-x root root system_u:object_r:httpd_exec_t:s0 /usr/sbin/httpd - As root, enter the following command to restart
httpd. After restarting, confirm thathttpdis running in the confinedhttpd_tdomain:~]#systemctl restart httpd.service~]$ps -eZ | grep httpdsystem_u:system_r:httpd_t:s0 8883 ? 00:00:00 httpd system_u:system_r:httpd_t:s0 8884 ? 00:00:00 httpd system_u:system_r:httpd_t:s0 8885 ? 00:00:00 httpd system_u:system_r:httpd_t:s0 8886 ? 00:00:00 httpd system_u:system_r:httpd_t:s0 8887 ? 00:00:00 httpd system_u:system_r:httpd_t:s0 8888 ? 00:00:00 httpd system_u:system_r:httpd_t:s0 8889 ? 00:00:00 httpd - As root, remove
testfile:~]#rm -i /var/www/html/testfilerm: remove regular empty file `/var/www/html/testfile'? y - If you do not require
httpdto be running, as root, enter the following command to stophttpd:~]#systemctl stop httpd.service
3.3. Confined and Unconfined Users
semanage login -l command as root:
~]#semanage login -lLogin Name SELinux User MLS/MCS Range Service __default__ unconfined_u s0-s0:c0.c1023 * root unconfined_u s0-s0:c0.c1023 * system_u system_u s0-s0:c0.c1023 *
__default__ login by default, which is mapped to the SELinux unconfined_u user. The following line defines the default mapping:
__default__ unconfined_u s0-s0:c0.c1023
unconfined_u user. It assumes that the root user is running unconfined, as it does by default in Red Hat Enterprise Linux:
Procedure 3.4. Mapping a New Linux User to the SELinux unconfined_u User
- As root, enter the following command to create a new Linux user named
newuser:~]#useradd newuser - To assign a password to the Linux
newuseruser. Enter the following command as root:~]#passwd newuserChanging password for user newuser. New UNIX password: Enter a password Retype new UNIX password: Enter the same password again passwd: all authentication tokens updated successfully. - Log out of your current session, and log in as the Linux
newuseruser. When you log in, the pam_selinux PAM module automatically maps the Linux user to an SELinux user (in this case,unconfined_u), and sets up the resulting SELinux context. The Linux user's shell is then launched with this context. Enter the following command to view the context of a Linux user:[newuser@localhost ~]$id -Zunconfined_u:unconfined_r:unconfined_t:s0-s0:c0.c1023Note
If you no longer need thenewuseruser on your system, log out of the Linuxnewuser's session, log in with your account, and run theuserdel -r newusercommand as root. It will removenewuseralong with their home directory.
~]$seinfo -uUsers: 8 sysadm_u system_u xguest_u root guest_u staff_u user_u unconfined_u
seinfo command is provided by the setools-console package, which is not installed by default.
unconfined_t domain to its own confined domain, the unconfined Linux user is still subject to the restrictions of that confined domain. The security benefit of this is that, even though a Linux user is running unconfined, the application remains confined. Therefore, the exploitation of a flaw in the application can be limited by the policy.
Table 3.1. SELinux User Capabilities
| User | Role | Domain | X Window System | su or sudo | Execute in home directory and /tmp (default) | Networking |
|---|---|---|---|---|---|---|
| sysadm_u | sysadm_r | sysadm_t | yes | su and sudo | yes | yes |
| staff_u | staff_r | staff_t | yes | only sudo | yes | yes |
| user_u | user_r | user_t | yes | no | yes | yes |
| guest_u | guest_r | guest_t | no | no | yes | no |
| xguest_u | xguest_r | xguest_t | yes | no | yes | Firefox only |
- Linux users in the
user_t,guest_t, andxguest_tdomains can only run set user ID (setuid) applications if SELinux policy permits it (for example,passwd). These users cannot run thesuandsudosetuid applications, and therefore cannot use these applications to become root. - Linux users in the
sysadm_t,staff_t,user_t, andxguest_tdomains can log in using the X Window System and a terminal. - By default, Linux users in the
staff_t,user_t,guest_t, andxguest_tdomains can execute applications in their home directories and/tmp. To prevent them from executing applications, which inherit users' permissions, in directories they have write access to, set theguest_exec_contentandxguest_exec_contentbooleans tooff. This helps prevent flawed or malicious applications from modifying users' files.See Section 6.6, “Booleans for Users Executing Applications” for information about allowing and preventing users from executing applications in their home directories and/tmp. - The only network access Linux users in the
xguest_tdomain have is Firefox connecting to web pages.
system_u is a special user identity for system processes and objects. It must never be associated to a Linux user. Also, unconfined_u and root are unconfined users. For these reasons, they are not included in the aforementioned table of SELinux user capabilities.
webadm_rcan only administrate SELinux types related to the Apache HTTP Server. See Section 13.2, “Types” for further information.dbadm_rcan only administrate SELinux types related to the MariaDB database and the PostgreSQL database management system. See Section 20.2, “Types” and Section 21.2, “Types” for further information.logadm_rcan only administrate SELinux types related to thesyslogandauditlogprocesses.secadm_rcan only administrate SELinux.auditadm_rcan only administrate processes related to theauditsubsystem.
~]$seinfo -r
seinfo command is provided by the setools-console package, which is not installed by default.
3.3.1. The sudo Transition and SELinux Roles
sudo command. The sudo command is used to give trusted users administrative access. When users precede an administrative command with sudo, they are prompted for their own password. Then, when they have been authenticated and assuming that the command is permitted, the administrative command is executed as if they were the root user.
staff_u and sysadm_u SELinux confined users are permitted to use sudo by default. When such users execute a command with sudo, their role can be changed based on the rules specified in the /etc/sudoers configuration file or in a respective file in the /etc/sudoers.d/ directory if such a file exists.
sudo, see the Gaining Privileges section in the Red Hat Enterprise Linux 7 System Administrator's Guide.
Procedure 3.5. Configuring the sudo Transition
sudo to transition a newly-created SELinux_user_u confined user from a default_role_r to an administrator_r administrator role.
Note
- Create a new SELinux user and specify the default SELinux role and a supplementary confined administrator role for this user:
~]#semanage user -a -r s0-s0:c0.c1023 -R "default_role_r administrator_r" SELinux_user_u - Set up the default SElinux policy context file. For example, to have the same SELinux rules as the
staff_uSELinux user, copy thestaff_ucontext file:~]#cp /etc/selinux/targeted/contexts/users/staff_u /etc/selinux/targeted/contexts/users/SELinux_user_u - Map the newly-created SELinux user to an existing Linux user:
semanage login -a -s SELinux_user_u -rs0:c0.c1023 linux_user - Create a new configuration file with the same name as your Linux user in the
/etc/sudoers.d/directory and add the following string to it:~]#echo "linux_user ALL=(ALL) TYPE=administrator_t ROLE=administrator_r /bin/bash " > /etc/sudoers.d/linux_user - Use the
restoreconutility to relabel the linux_user home directory:~]#restorecon -FR -v /home/linux_user - Log in to the system as the newly-created Linux user and check that the user is labeled with the default SELinux role:
~]$id -ZSELinux_user_u:default_role_r:SELinux_user_t:s0:c0.c1023 - Run
sudoto change the user's SELinux context to the supplementary SELinux role as specified in/etc/sudoers.d/linux_user. The-ioption used withsudocauses that an interactive shell is executed:~]$sudo -i~]#id -ZSELinux_user_u:administrator_r:administrator_t:s0:c0.c1023
Example 3.1. Configuring the sudo Transition
confined_u with default assigned role staff_r and with sudo configured to change the role of confined_u from staff_r to webadm_r.
- Enter all the following commands as the root user in the
sysadm_rorunconfined_rrole.~]#semanage user -a -r s0-s0:c0.c1023 -R "staff_r webadm_r" confined_u~]#cp /etc/selinux/targeted/contexts/users/staff_u /etc/selinux/targeted/contexts/users/confined_u~]#semanage login -a -s confined_u -rs0:c0.c1023 linux_user~]#restorecon -FR -v /home/linux_user~]#echo "linux_user ALL=(ALL) ROLE=webadm_r TYPE=webadm_t /bin/bash " > /etc/sudoers.d/linux_user - Log in to the system as the newly-created Linux user and check that the user is labeled with the default SELinux role:
~]$id -Zconfined_u:staff_r:staff_t:s0:c0.c1023~]$sudo -i~]#id -Zconfined_u:webadm_r:webadm_t:s0:c0.c1023
Chapter 4. Working with SELinux
mount command; mounting NFS volumes; and how to preserve SELinux contexts when copying and archiving files and directories.
4.1. SELinux Packages
- policycoreutils provides utilities such as
restorecon,secon,setfiles,semodule,load_policy, andsetsebool, for operating and managing SELinux. - selinux-policy provides a basic directory structure, the
selinux-policy.conffile, and RPM macros. - selinux-policy-targeted provides the SELinux targeted policy.
- libselinux – provides an API for SELinux applications.
- libselinux-utils provides the
avcstat,getenforce,getsebool,matchpathcon,selinuxconlist,selinuxdefcon,selinuxenabled, andsetenforceutilities. - libselinux-python provides Python bindings for developing SELinux applications.
yum install <package-name> command:
- selinux-policy-devel provides utilities for creating a custom SELinux policy and policy modules.
- selinux-policy-doc provides manual pages that describe how to configure SELinux altogether with various services.
- selinux-policy-mls provides the MLS (Multi-Level Security) SELinux policy.
- setroubleshoot-server translates denial messages, produced when access is denied by SELinux, into detailed descriptions that can be viewed with the
sealertutility, also provided in this package. - setools-console provides the Tresys Technology SETools distribution, a number of utilities and libraries for analyzing and querying policy, audit log monitoring and reporting, and file context management. The setools package is a meta-package for SETools. The setools-gui package provides the
apolandseauditutilities. The setools-console package provides thesechecker,sediff,seinfo,sesearch, andfindconcommand-line utilities. See the Tresys Technology SETools page for information about these utilities. Note that setools and setools-gui packages are available only when the Red Hat Network Optional channel is enabled. For further information, see Scope of Coverage Details. - mcstrans translates levels, such as
s0-s0:c0.c1023, to a form that is easier to read, such asSystemLow-SystemHigh. - policycoreutils-python provides utilities such as
semanage,audit2allow,audit2why, andchcat, for operating and managing SELinux. - policycoreutils-gui provides
system-config-selinux, a graphical utility for managing SELinux.
4.2. Which Log File is Used
yum install setroubleshoot-server command).
auditd daemon is running, an SELinux denial message, such as the following, is written to /var/log/audit/audit.log by default:
type=AVC msg=audit(1223024155.684:49): avc: denied { getattr } for pid=2000 comm="httpd" path="/var/www/html/file1" dev=dm-0 ino=399185 scontext=unconfined_u:system_r:httpd_t:s0 tcontext=system_u:object_r:samba_share_t:s0 tclass=file
/var/log/message file:
May 7 18:55:56 localhost setroubleshoot: SELinux is preventing httpd (httpd_t) "getattr" to /var/www/html/file1 (samba_share_t). For complete SELinux messages. run sealert -l de7e30d6-5488-466d-a606-92c9f40d316d
setroubleshootd no longer constantly runs as a service. However, it is still used to analyze the AVC messages. Two new programs act as a method to start setroubleshoot when needed:
- The
sedispatchutility runs as a part of theauditsubsystem. When an AVC denial message is returned,sedispatchsends a message usingdbus. These messages go straight tosetroubleshootdif it is already running. If it is not running,sedispatchstarts it automatically. - The
seappletutility runs in the system toolbar, waiting for dbus messages insetroubleshootd. It launches the notification bubble, allowing the user to review AVC messages.
Procedure 4.1. Starting Daemons Automatically
- To configure the
auditdandrsyslogdaemons to automatically start at boot, enter the following commands as the root user:~]#systemctl enable auditd.service~]#systemctl enable rsyslog.service - To ensure that the daemons are enabled, type the following commands at the shell prompt:
~]$systemctl is-enabled auditdenabled~]$systemctl is-enabled rsyslogenabledAlternatively, use thesystemctl status service-name.servicecommand and search for the keywordenabledin the command output, for example:~]$systemctl status auditd.service | grep enabledauditd.service - Security Auditing Service Loaded: loaded (/usr/lib/systemd/system/auditd.service; enabled)
systemd daemon manages system services, see the Managing System Services chapter in the System Administrator's Guide.
4.3. Main Configuration File
/etc/selinux/config file is the main SELinux configuration file. It controls whether SELinux is enabled or disabled and which SELinux mode and SELinux policy is used:
# This file controls the state of SELinux on the system.
# SELINUX= can take one of these three values:
#       enforcing - SELinux security policy is enforced.
#       permissive - SELinux prints warnings instead of enforcing.
#       disabled - No SELinux policy is loaded.
SELINUX=enforcing
# SELINUXTYPE= can take one of these two values:
#       targeted - Targeted processes are protected,
#       mls - Multi Level Security protection.
SELINUXTYPE=targeted
SELINUX=- The
SELINUXoption sets whether SELinux is disabled or enabled and in which mode - enforcing or permissive - it is running:- When using
SELINUX=enforcing, SELinux policy is enforced, and SELinux denies access based on SELinux policy rules. Denial messages are logged. - When using
SELINUX=permissive, SELinux policy is not enforced. SELinux does not deny access, but denials are logged for actions that would have been denied if running SELinux in enforcing mode. - When using
SELINUX=disabled, SELinux is disabled, the SELinux module is not registered with the Linux kernel, and only DAC rules are used.
SELINUXTYPE=- The
SELINUXTYPEoption sets the SELinux policy to use. Targeted policy is the default policy. Only change this option if you want to use the MLS policy. For information on how to enable the MLS policy, see Section 4.13.2, “Enabling MLS in SELinux”.
4.4. Permanent Changes in SELinux States and Modes
getenforce or sestatus commands to check in which mode SELinux is running. The getenforce command returns Enforcing, Permissive, or Disabled.
sestatus command returns the SELinux status and the SELinux policy being used:
~]$sestatusSELinux status: enabled SELinuxfs mount: /sys/fs/selinux SELinux root directory: /etc/selinux Loaded policy name: targeted Current mode: enforcing Mode from config file: enforcing Policy MLS status: enabled Policy deny_unknown status: allowed Max kernel policy version: 30
Note
4.4.1. Enabling SELinux
- Enable SELinux in permissive mode. For more information, see Section 4.4.1.1, “Permissive Mode”.
- Reboot your system.
- Check for SELinux denial messages. For more information, see Section 11.3.5, “Searching For and Viewing Denials”.
- If there are no denials, switch to enforcing mode. For more information, see Section 4.4.1.2, “Enforcing Mode”.
- Run your application in the
unconfined_service_tdomain. See Section 3.2, “Unconfined Processes” for more information. - Write a new policy for your application. See the Writing Custom SELinux Policy Knowledgebase article for more information.
4.4.1.1. Permissive Mode
Procedure 4.2. Changing to Permissive Mode
- Edit the
/etc/selinux/configfile as follows:# This file controls the state of SELinux on the system. # SELINUX= can take one of these three values: # enforcing - SELinux security policy is enforced. # permissive - SELinux prints warnings instead of enforcing. # disabled - No SELinux policy is loaded. SELINUX=permissive # SELINUXTYPE= can take one of these two values: # targeted - Targeted processes are protected, # mls - Multi Level Security protection. SELINUXTYPE=targeted - Reboot the system:
~]#
reboot
4.4.1.2. Enforcing Mode
Procedure 4.3. Changing to Enforcing Mode
rpm -q package_name- Edit the
/etc/selinux/configfile as follows:# This file controls the state of SELinux on the system. # SELINUX= can take one of these three values: # enforcing - SELinux security policy is enforced. # permissive - SELinux prints warnings instead of enforcing. # disabled - No SELinux policy is loaded. SELINUX=enforcing # SELINUXTYPE= can take one of these two values: # targeted - Targeted processes are protected, # mls - Multi Level Security protection. SELINUXTYPE=targeted - Reboot the system:
~]#
rebootOn the next boot, SELinux relabels all the files and directories within the system and adds SELinux context for files and directories that were created when SELinux was disabled.
Note
~]# ausearch -m AVC,USER_AVC,SELINUX_ERR -ts today~]# grep "SELinux is preventing" /var/log/messages4.4.2. Disabling SELinux
Important
Procedure 4.4. Disabling SELinux
- Configure
SELINUX=disabledin the/etc/selinux/configfile:# This file controls the state of SELinux on the system. # SELINUX= can take one of these three values: # enforcing - SELinux security policy is enforced. # permissive - SELinux prints warnings instead of enforcing. # disabled - No SELinux policy is loaded. SELINUX=disabled # SELINUXTYPE= can take one of these two values: # targeted - Targeted processes are protected, # mls - Multi Level Security protection. SELINUXTYPE=targeted - Reboot your system. After reboot, confirm that the
getenforcecommand returnsDisabled:~]$getenforceDisabled
4.5. Changing SELinux Modes at Boot Time
- enforcing=0
- Setting this parameter causes the system to start in permissive mode, which is useful when troubleshooting issues. Using permissive mode might be the only option to detect a problem if your file system is too corrupted. Moreover, in permissive mode, the system continues to create the labels correctly. The AVC messages that are created in this mode can be different than in enforcing mode.In permissive mode, only the first denial from a series of the same denials is reported. However, in enforcing mode, you might get a denial related to reading a directory, and an application stops. In permissive mode, you get the same AVC message, but the application continues reading files in the directory and you get an AVC for each denial in addition.
- selinux=0
- This parameter causes the kernel to not load any part of the SELinux infrastructure. The init scripts notice that the system booted with the
selinux=0parameter and touch the/.autorelabelfile. This causes the system to automatically relabel the next time you boot with SELinux enabled.Important
Red Hat does not recommend using theselinux=0parameter. To debug your system, prefer using permissive mode. - autorelabel=1
- This parameter forces the system to relabel similarly to the following commands:
~]#
If the system labeling contains a large amount of errors, you might need to boot in permissive mode in order that the autorelabel succeeds.touch /.autorelabel~]#reboot
checkreqprot, see the /usr/share/doc/kernel-doc-<KERNEL_VER>/Documentation/kernel-parameters.txt file. This documentation is installed with the kernel-doc package. Replace the <KERNEL_VER> string with the version number of the installed kernel, for example:
~]#yum install kernel-doc~]$less /usr/share/doc/kernel-doc-3.10.0/Documentation/kernel-parameters.txt
4.6. Booleans
4.6.1. Listing Booleans
semanage boolean -l command as the Linux root user. The following example does not list all Booleans and the output is shortened for brevity:
~]#semanage boolean -lSELinux boolean State Default Description smartmon_3ware (off , off) Determine whether smartmon can... mpd_enable_homedirs (off , off) Determine whether mpd can traverse...
Note
SELinux boolean column lists Boolean names. The Description column lists whether the Booleans are on or off, and what they do.
getsebool -a command lists Booleans, whether they are on or off, but does not give a description of each one. The following example does not list all Booleans:
~]$getsebool -acvs_read_shadow --> off daemons_dump_core --> on
getsebool boolean-name command to only list the status of the boolean-name Boolean:
~]$getsebool cvs_read_shadowcvs_read_shadow --> off
~]$getsebool cvs_read_shadow daemons_dump_corecvs_read_shadow --> off daemons_dump_core --> on
4.6.2. Configuring Booleans
setsebool utility in the setsebool boolean_name on/off form to enable or disable Booleans.
httpd_can_network_connect_db Boolean:
Procedure 4.5. Configuring Booleans
- By default, the
httpd_can_network_connect_dbBoolean is off, preventing Apache HTTP Server scripts and modules from connecting to database servers:~]$getsebool httpd_can_network_connect_dbhttpd_can_network_connect_db --> off - To temporarily enable Apache HTTP Server scripts and modules to connect to database servers, enter the following command as root:
~]#setsebool httpd_can_network_connect_db on - Use the
getseboolutility to verify the Boolean has been enabled:~]$getsebool httpd_can_network_connect_dbhttpd_can_network_connect_db --> onThis allows Apache HTTP Server scripts and modules to connect to database servers. - This change is not persistent across reboots. To make changes persistent across reboots, run the
setsebool -P boolean-name oncommand as root:[3]~]#setsebool -P httpd_can_network_connect_db on
4.6.3. Shell Auto-Completion
getsebool, setsebool, and semanage utilities. Use the auto-completion with getsebool and setsebool to complete both command-line parameters and Booleans. To list only the command-line parameters, add the hyphen character ("-") after the command name and hit the Tab key:
~]# setsebool -[Tab]
-P
~]$ getsebool samba_[Tab]
samba_create_home_dirs   samba_export_all_ro      samba_run_unconfined
samba_domain_controller  samba_export_all_rw      samba_share_fusefs
samba_enable_home_dirs   samba_portmapper         samba_share_nfs
~]# setsebool -P virt_use_[Tab]
virt_use_comm     virt_use_nfs      virt_use_sanlock
virt_use_execmem  virt_use_rawip    virt_use_usb
virt_use_fusefs   virt_use_samba    virt_use_xserver
semanage utility is used with several command-line arguments that are completed one by one. The first argument of a semanage command is an option, which specifies what part of SELinux policy is managed:
~]# semanage [Tab]
boolean     export      import      login       node        port
dontaudit   fcontext    interface   module      permissive  user
~]# semanage fcontext -[Tab]
-a           -D           --equal      --help       -m           -o
--add        --delete     -f           -l           --modify     -S
-C           --deleteall  --ftype      --list       -n           -t
-d           -e           -h           --locallist  --noheading  --type
~]#semanage fcontext -a -t samba<tab> samba_etc_t samba_secrets_t sambagui_exec_t samba_share_t samba_initrc_exec_t samba_unconfined_script_exec_t samba_log_t samba_unit_file_t samba_net_exec_t
~]# semanage port -a -t http_port_t -p tcp 814.7. SELinux Contexts – Labeling Files
ls -Z command:
~]$ls -Z file1-rw-rw-r-- user1 group1 unconfined_u:object_r:user_home_t:s0 file1
unconfined_u), a role (object_r), a type (user_home_t), and a level (s0). This information is used to make access control decisions. On DAC systems, access is controlled based on Linux user and group IDs. SELinux policy rules are checked after DAC rules. SELinux policy rules are not used if DAC rules deny access first.
Note
/etc directory that is labeled with the etc_t type, the new file inherits the same type:
~]$ ls -dZ - /etc
drwxr-xr-x. root root system_u:object_r:etc_t:s0       /etc
~]# touch /etc/file1
~]# ls -lZ /etc/file1
-rw-r--r--. root root unconfined_u:object_r:etc_t:s0   /etc/file1
chcon, semanage fcontext, restorecon, and matchpathcon.
4.7.1. Temporary Changes: chcon
chcon command changes the SELinux context for files. However, changes made with the chcon command are not persistent across file-system relabels, or the execution of the restorecon command. SELinux policy controls whether users are able to modify the SELinux context for any given file. When using chcon, users provide all or part of the SELinux context to change. An incorrect file type is a common cause of SELinux denying access.
Quick Reference
- Run the
chcon -t type file-namecommand to change the file type, where type is an SELinux type, such ashttpd_sys_content_t, and file-name is a file or directory name:~]$chcon -t httpd_sys_content_t file-name - Run the
chcon -R -t type directory-namecommand to change the type of the directory and its contents, where type is an SELinux type, such ashttpd_sys_content_t, and directory-name is a directory name:~]$chcon -R -t httpd_sys_content_t directory-name
Procedure 4.6. Changing a File's or Directory's Type
file1 was a directory.
- Change into your home directory.
- Create a new file and view its SELinux context:
~]$touch file1~]$ls -Z file1-rw-rw-r-- user1 group1 unconfined_u:object_r:user_home_t:s0 file1In this example, the SELinux context forfile1includes the SELinuxunconfined_uuser,object_rrole,user_home_ttype, and thes0level. For a description of each part of the SELinux context, see Chapter 2, SELinux Contexts. - Enter the following command to change the type to
samba_share_t. The-toption only changes the type. Then view the change:~]$chcon -t samba_share_t file1~]$ls -Z file1-rw-rw-r-- user1 group1 unconfined_u:object_r:samba_share_t:s0 file1 - Use the following command to restore the SELinux context for the
file1file. Use the-voption to view what changes:~]$restorecon -v file1restorecon reset file1 context unconfined_u:object_r:samba_share_t:s0->system_u:object_r:user_home_t:s0In this example, the previous type,samba_share_t, is restored to the correct,user_home_ttype. When using targeted policy (the default SELinux policy in Red Hat Enterprise Linux), therestoreconcommand reads the files in the/etc/selinux/targeted/contexts/files/directory, to see which SELinux context files should have.
Procedure 4.7. Changing a Directory and its Contents Types
/var/www/html/):
- As the root user, create a new
web/directory and then 3 empty files (file1,file2, andfile3) within this directory. Theweb/directory and files in it are labeled with thedefault_ttype:~]#mkdir /web~]#touch /web/file{1,2,3}~]#ls -dZ /webdrwxr-xr-x root root unconfined_u:object_r:default_t:s0 /web~]#ls -lZ /web-rw-r--r-- root root unconfined_u:object_r:default_t:s0 file1 -rw-r--r-- root root unconfined_u:object_r:default_t:s0 file2 -rw-r--r-- root root unconfined_u:object_r:default_t:s0 file3 - As root, enter the following command to change the type of the
web/directory (and its contents) tohttpd_sys_content_t:~]#chcon -R -t httpd_sys_content_t /web/~]#ls -dZ /web/drwxr-xr-x root root unconfined_u:object_r:httpd_sys_content_t:s0 /web/~]#ls -lZ /web/-rw-r--r-- root root unconfined_u:object_r:httpd_sys_content_t:s0 file1 -rw-r--r-- root root unconfined_u:object_r:httpd_sys_content_t:s0 file2 -rw-r--r-- root root unconfined_u:object_r:httpd_sys_content_t:s0 file3 - To restore the default SELinux contexts, use the
restoreconutility as root:~]#restorecon -R -v /web/restorecon reset /web context unconfined_u:object_r:httpd_sys_content_t:s0->system_u:object_r:default_t:s0 restorecon reset /web/file2 context unconfined_u:object_r:httpd_sys_content_t:s0->system_u:object_r:default_t:s0 restorecon reset /web/file3 context unconfined_u:object_r:httpd_sys_content_t:s0->system_u:object_r:default_t:s0 restorecon reset /web/file1 context unconfined_u:object_r:httpd_sys_content_t:s0->system_u:object_r:default_t:s0
chcon.
Note
4.7.2. Persistent Changes: semanage fcontext
semanage fcontext command is used to change the SELinux context of files. To show contexts to newly created files and directories, enter the following command as root:
~]# semanage fcontext -C -lsemanage fcontext are used by the following utilities. The setfiles utility is used when a file system is relabeled and the restorecon utility restores the default SELinux contexts. This means that changes made by semanage fcontext are persistent, even if the file system is relabeled. SELinux policy controls whether users are able to modify the SELinux context for any given file.
Quick Reference
- Enter the following command, remembering to use the full path to the file or directory:
~]#semanage fcontext -a options file-name|directory-name - Use the
restoreconutility to apply the context changes:~]#restorecon -v file-name|directory-name
Use of regular expressions with semanage fcontext
semanage fcontext command to work correctly, you can use either a fully qualified path or Perl-compatible regular expressions (PCRE). The only PCRE flag in use is PCRE2_DOTALL, which causes the . wildcard to match anything, including a new line. Strings representing paths are processed as bytes, meaning that non-ASCII characters are not matched by a single wildcard.
semanage fcontext are evaluated in reverse order to how they were defined: the latest entry is evaluated first regardless of the stem length. Local file context modifications stored in file_contexts.local have a higher priority than those specified in policy modules. This means that whenever a match for a given file path is found in file_contexts.local, no other file-context definitions are considered.
Important
semanage fcontext command effectively override all other file-context definitions. All regular expressions should therefore be as specific as possible to avoid unintentionally impacting other parts of the file system.
semanage-fcontext(8) man page.
Procedure 4.8. Changing a File's or Directory 's Type
file1 was a directory.
- As the root user, create a new file in the
/etcdirectory. By default, newly-created files in/etcare labeled with theetc_ttype:~]#touch /etc/file1~]$ls -Z /etc/file1-rw-r--r-- root root unconfined_u:object_r:etc_t:s0 /etc/file1To list information about a directory, use the following command:~]$ls -dZ directory_name - As root, enter the following command to change the
file1type tosamba_share_t. The-aoption adds a new record, and the-toption defines a type (samba_share_t). Note that running this command does not directly change the type;file1is still labeled with theetc_ttype:~]#semanage fcontext -a -t samba_share_t /etc/file1~]#ls -Z /etc/file1-rw-r--r-- root root unconfined_u:object_r:etc_t:s0 /etc/file1~]$
semanage fcontext -C -l/etc/file1 unconfined_u:object_r:samba_share_t:s0 - As root, use the
restoreconutility to change the type. Becausesemanageadded an entry tofile_contexts.localfor/etc/file1,restoreconchanges the type tosamba_share_t:~]#restorecon -v /etc/file1restorecon reset /etc/file1 context unconfined_u:object_r:etc_t:s0->system_u:object_r:samba_share_t:s0
Procedure 4.9. Changing a Directory and its Contents Types
/var/www/html/:
- As the root user, create a new
web/directory and then 3 empty files (file1,file2, andfile3) within this directory. Theweb/directory and files in it are labeled with thedefault_ttype:~]#mkdir /web~]#touch /web/file{1,2,3}~]#ls -dZ /webdrwxr-xr-x root root unconfined_u:object_r:default_t:s0 /web~]#ls -lZ /web-rw-r--r-- root root unconfined_u:object_r:default_t:s0 file1 -rw-r--r-- root root unconfined_u:object_r:default_t:s0 file2 -rw-r--r-- root root unconfined_u:object_r:default_t:s0 file3 - As root, enter the following command to change the type of the
web/directory and the files in it, tohttpd_sys_content_t. The-aoption adds a new record, and the-toption defines a type (httpd_sys_content_t). The"/web(/.*)?"regular expression causessemanageto apply changes toweb/, as well as the files in it. Note that running this command does not directly change the type;web/and files in it are still labeled with thedefault_ttype:~]#semanage fcontext -a -t httpd_sys_content_t "/web(/.*)?"~]$ls -dZ /webdrwxr-xr-x root root unconfined_u:object_r:default_t:s0 /web~]$ls -lZ /web-rw-r--r-- root root unconfined_u:object_r:default_t:s0 file1 -rw-r--r-- root root unconfined_u:object_r:default_t:s0 file2 -rw-r--r-- root root unconfined_u:object_r:default_t:s0 file3Thesemanage fcontext -a -t httpd_sys_content_t "/web(/.*)?"command adds the following entry to/etc/selinux/targeted/contexts/files/file_contexts.local:/web(/.*)? system_u:object_r:httpd_sys_content_t:s0
- As root, use the
restoreconutility to change the type ofweb/, as well as all files in it. The-Ris for recursive, which means all files and directories underweb/are labeled with thehttpd_sys_content_ttype. Sincesemanageadded an entry tofile.contexts.localfor/web(/.*)?,restoreconchanges the types tohttpd_sys_content_t:~]#restorecon -R -v /webrestorecon reset /web context unconfined_u:object_r:default_t:s0->system_u:object_r:httpd_sys_content_t:s0 restorecon reset /web/file2 context unconfined_u:object_r:default_t:s0->system_u:object_r:httpd_sys_content_t:s0 restorecon reset /web/file3 context unconfined_u:object_r:default_t:s0->system_u:object_r:httpd_sys_content_t:s0 restorecon reset /web/file1 context unconfined_u:object_r:default_t:s0->system_u:object_r:httpd_sys_content_t:s0Note that by default, newly-created files and directories inherit the SELinux type of their parent directories.
Procedure 4.10. Deleting an added Context
/web(/.*)?, use quotation marks around the regular expression:
~]#semanage fcontext -d "/web(/.*)?"
- To remove the context, as root, enter the following command, where file-name|directory-name is the first part in
file_contexts.local:~]#semanage fcontext -d file-name|directory-nameThe following is an example of a context infile_contexts.local:/test system_u:object_r:httpd_sys_content_t:s0
With the first part beingtest. To prevent thetest/directory from being labeled with thehttpd_sys_content_tafter runningrestorecon, or after a file system relabel, enter the following command as root to delete the context fromfile_contexts.local:~]#semanage fcontext -d /test - As root, use the
restoreconutility to restore the default SELinux context.
semanage, see the semanage(8) and semanage-fcontext(8) manual pages.
Important
semanage fcontext -a, use the full path to the file or directory to avoid files being mislabeled after a file system relabel, or after the restorecon command is run.
4.7.3. How File Context is Determined
.fc files). Based on the system policy, semanage generates file_contexts.homedirs and file_contexts files.
semanage fcontext command. Such customizations are stored in the file_contexts.local file.
matchpathcon or restorecon, is determining the proper label for a given path, it searches for local changes first (file_contexts.local). If the utility does not find a matching pattern, it searches the file_contexts.homedirs file and finally the file_contexts file. However, whenever a match for a given file path is found, the search ends, the utility does look for any additional file-context definitions. This means that home directory-related file contexts have higher priority than the rest, and local customizations override the system policy.
system policy (contents of file_contexts.homedirs and file_contexts files) are sorted by the length of the stem (prefix of the path before any wildcard) before evaluation. This means that the most specific path is chosen. However, file-context definitions specified using semanage fcontext are evaluated in reverse order to how they were defined: the latest entry is evaluated first regardless of the stem length.
- changing the context of a file by using
chcon, see Section 4.7.1, “Temporary Changes: chcon”. - changing and adding a file-context definition by using
semanage fcontext, see Section 4.7.2, “Persistent Changes: semanage fcontext”. - changing and adding a file-context definition through a system-policy operation, see Section 4.10, “Maintaining SELinux Labels” or Section 4.12, “Prioritizing and Disabling SELinux Policy Modules”.
4.8. The file_t and default_t Types
file_t type is the default type of a file that has not yet been assigned EA value. This type is only used for this purpose and does not exist on correctly-labeled file systems, because all files on a system running SELinux should have a proper SELinux context, and the file_t type is never used in file-context configuration[4].
default_t type is used on files that do not match any pattern in file-context configuration, so that such files can be distinguished from files that do not have a context on disk, and generally are kept inaccessible to confined domains. For example, if you create a new top-level directory, such as mydirectory/, this directory may be labeled with the default_t type. If services need access to this directory, you need to update the file-contexts configuration for this location. See Section 4.7.2, “Persistent Changes: semanage fcontext” for details on adding a context to the file-context configuration.
4.9. Mounting File Systems
mount -o context command to override existing extended attributes, or to specify a different, default context for file systems that do not support extended attributes. This is useful if you do not trust a file system to supply the correct attributes, for example, removable media used in multiple systems. The mount -o context command can also be used to support labeling for file systems that do not support extended attributes, such as File Allocation Table (FAT) or NFS volumes. The context specified with the context option is not written to disk: the original contexts are preserved, and are seen when mounting without context if the file system had extended attributes in the first place.
4.9.1. Context Mounts
mount -o context=SELinux_user:role:type:level command when mounting the required file system. Context changes are not written to disk. By default, NFS mounts on the client side are labeled with a default context defined by policy for NFS volumes. In common policies, this default context uses the nfs_t type. Without additional mount options, this may prevent sharing NFS volumes using other services, such as the Apache HTTP Server. The following example mounts an NFS volume so that it can be shared using the Apache HTTP Server:
~]#mount server:/export /local/mount/point -o \ context="system_u:object_r:httpd_sys_content_t:s0"
-o context. However, since these changes are not written to disk, the context specified with this option does not persist between mounts. Therefore, this option must be used with the same context specified during every mount to retain the required context. For information about making context mount persistent, see Section 4.9.5, “Making Context Mounts Persistent”.
-o context, use the SELinux system_u user and object_r role, and concentrate on the type. If you are not using the MLS policy or multi-category security, use the s0 level.
Note
context option, context changes by users and processes are prohibited. For example, running the chcon command on a file system mounted with a context option results in a Operation not supported error.
4.9.2. Changing the Default Context
file_t type. If it is desirable to use a different default context, mount the file system with the defcontext option.
/dev/sda2 to the newly-created test/ directory. It assumes that there are no rules in /etc/selinux/targeted/contexts/files/ that define a context for the test/ directory:
~]#mount /dev/sda2 /test/ -o defcontext="system_u:object_r:samba_share_t:s0"
- the
defcontextoption defines thatsystem_u:object_r:samba_share_t:s0is "the default security context for unlabeled files"[5]. - when mounted, the root directory (
test/) of the file system is treated as if it is labeled with the context specified bydefcontext(this label is not stored on disk). This affects the labeling for files created undertest/: new files inherit thesamba_share_ttype, and these labels are stored on disk. - files created under
test/while the file system was mounted with adefcontextoption retain their labels.
4.9.3. Mounting an NFS Volume
nfs_t type. Depending on policy configuration, services, such as Apache HTTP Server and MariaDB, may not be able to read files labeled with the nfs_t type. This may prevent file systems labeled with this type from being mounted and then read or exported by other services.
context option when mounting to override the nfs_t type. Use the following context option to mount NFS volumes so that they can be shared using the Apache HTTP Server:
~]#mount server:/export /local/mount/point -o context="system_u:object_r:httpd_sys_content_t:s0"
context options, Booleans can be enabled to allow services access to file systems labeled with the nfs_t type. See Part II, “Managing Confined Services” for instructions on configuring Booleans to allow services access to the nfs_t type.
4.9.4. Multiple NFS Mounts
export/, which has two subdirectories, web/ and database/. The following commands attempt two mounts from a single NFS export, and try to override the context for each one:
~]#mount server:/export/web /local/web -o context="system_u:object_r:httpd_sys_content_t:s0"
~]#mount server:/export/database /local/database -o context="system_u:object_r:mysqld_db_t:s0"
/var/log/messages:
kernel: SELinux: mount invalid. Same superblock, different security settings for (dev 0:15, type nfs)
-o nosharecache,context options. The following example mounts multiple mounts from a single NFS export, with a different context for each mount (allowing a single service access to each one):
~]#mount server:/export/web /local/web -o nosharecache,context="system_u:object_r:httpd_sys_content_t:s0"
~]#mount server:/export/database /local/database -o \ nosharecache,context="system_u:object_r:mysqld_db_t:s0"
server:/export/web is mounted locally to the /local/web/ directory, with all files being labeled with the httpd_sys_content_t type, allowing Apache HTTP Server access. server:/export/database is mounted locally to /local/database/, with all files being labeled with the mysqld_db_t type, allowing MariaDB access. These type changes are not written to disk.
Important
nosharecache options allows you to mount the same subdirectory of an export multiple times with different contexts, for example, mounting /export/web/ multiple times. Do not mount the same subdirectory from an export multiple times with different contexts, as this creates an overlapping mount, where files are accessible under two different contexts.
4.9.5. Making Context Mounts Persistent
/etc/fstab file or an automounter map, and use the required context as a mount option. The following example adds an entry to /etc/fstab for an NFS context mount:
server:/export /local/mount/ nfs context="system_u:object_r:httpd_sys_content_t:s0" 0 0
4.10. Maintaining SELinux Labels
4.10.1. Copying Files and Directories
user_home_t type:
~]$touch file1
~]$ls -Z file1-rw-rw-r-- user1 group1 unconfined_u:object_r:user_home_t:s0 file1
/etc, the new file is created in accordance to default-labeling rules for /etc. Copying a file without additional options may not preserve the original context:
~]$ls -Z file1-rw-rw-r-- user1 group1 unconfined_u:object_r:user_home_t:s0 file1
~]#cp file1 /etc/
~]$ls -Z /etc/file1-rw-r--r-- root root unconfined_u:object_r:etc_t:s0 /etc/file1
file1 is copied to /etc, if /etc/file1 does not exist, /etc/file1 is created as a new file. As shown in the example above, /etc/file1 is labeled with the etc_t type, in accordance to default-labeling rules.
cp options to preserve the context of the original file, such as --preserve=context. SELinux policy may prevent contexts from being preserved during copies.
Procedure 4.11. Copying Without Preserving SELinux Contexts
cp command, if no options are given, the type is inherited from the targeted, parent directory.
- Create a file in a user's home directory. The file is labeled with the
user_home_ttype:~]$touch file1~]$ls -Z file1-rw-rw-r-- user1 group1 unconfined_u:object_r:user_home_t:s0 file1 - The
/var/www/html/directory is labeled with thehttpd_sys_content_ttype, as shown with the following command:~]$ls -dZ /var/www/html/drwxr-xr-x root root system_u:object_r:httpd_sys_content_t:s0 /var/www/html/ - When
file1is copied to/var/www/html/, it inherits thehttpd_sys_content_ttype:~]#cp file1 /var/www/html/~]$ls -Z /var/www/html/file1-rw-r--r-- root root unconfined_u:object_r:httpd_sys_content_t:s0 /var/www/html/file1
Procedure 4.12. Preserving SELinux Contexts When Copying
--preserve=context option to preserve contexts when copying.
- Create a file in a user's home directory. The file is labeled with the
user_home_ttype:~]$touch file1~]$ls -Z file1-rw-rw-r-- user1 group1 unconfined_u:object_r:user_home_t:s0 file1 - The
/var/www/html/directory is labeled with thehttpd_sys_content_ttype, as shown with the following command:~]$ls -dZ /var/www/html/drwxr-xr-x root root system_u:object_r:httpd_sys_content_t:s0 /var/www/html/ - Using the
--preserve=contextoption preserves SELinux contexts during copy operations. As shown below, theuser_home_ttype offile1was preserved when the file was copied to/var/www/html/:~]#cp --preserve=context file1 /var/www/html/~]$ls -Z /var/www/html/file1-rw-r--r-- root root unconfined_u:object_r:user_home_t:s0 /var/www/html/file1
Procedure 4.13. Copying and Changing the Context
--context option to change the destination copy's context. The following example is performed in the user's home directory:
- Create a file in a user's home directory. The file is labeled with the
user_home_ttype:~]$touch file1~]$ls -Z file1-rw-rw-r-- user1 group1 unconfined_u:object_r:user_home_t:s0 file1 - Use the
--contextoption to define the SELinux context:~]$cp --context=system_u:object_r:samba_share_t:s0 file1 file2 - Without
--context,file2would be labeled with theunconfined_u:object_r:user_home_tcontext:~]$ls -Z file1 file2-rw-rw-r-- user1 group1 unconfined_u:object_r:user_home_t:s0 file1 -rw-rw-r-- user1 group1 system_u:object_r:samba_share_t:s0 file2
Procedure 4.14. Copying a File Over an Existing File
- As root, create a new file,
file1in the/etcdirectory. As shown below, the file is labeled with theetc_ttype:~]#touch /etc/file1~]$ls -Z /etc/file1-rw-r--r-- root root unconfined_u:object_r:etc_t:s0 /etc/file1 - Create another file,
file2, in the/tmpdirectory. As shown below, the file is labeled with theuser_tmp_ttype:~]$touch /tmp/file2~$ls -Z /tmp/file2-rw-r--r-- root root unconfined_u:object_r:user_tmp_t:s0 /tmp/file2 - Overwrite
file1withfile2:~]#cp /tmp/file2 /etc/file1 - After copying, the following command shows
file1labeled with theetc_ttype, not theuser_tmp_ttype from/tmp/file2that replaced/etc/file1:~]$ls -Z /etc/file1-rw-r--r-- root root unconfined_u:object_r:etc_t:s0 /etc/file1
Important
4.10.2. Moving Files and Directories
/var/www/html/ directory, which is used by the Apache HTTP Server. Since the file is moved, it does not inherit the correct SELinux context:
Procedure 4.15. Moving Files and Directories
- Change into your home directory and create file in it. The file is labeled with the
user_home_ttype:~]$touch file1~]$ls -Z file1-rw-rw-r-- user1 group1 unconfined_u:object_r:user_home_t:s0 file1 - Enter the following command to view the SELinux context of the
/var/www/html/directory:~]$ls -dZ /var/www/html/drwxr-xr-x root root system_u:object_r:httpd_sys_content_t:s0 /var/www/html/By default,/var/www/html/is labeled with thehttpd_sys_content_ttype. Files and directories created under/var/www/html/inherit this type, and as such, they are labeled with this type. - As root, move
file1to/var/www/html/. Since this file is moved, it keeps its currentuser_home_ttype:~]#mv file1 /var/www/html/~]#ls -Z /var/www/html/file1-rw-rw-r-- user1 group1 unconfined_u:object_r:user_home_t:s0 /var/www/html/file1
user_home_t type. If all files comprising a web page are labeled with the user_home_t type, or another type that the Apache HTTP Server cannot read, permission is denied when attempting to access them using web browsers, such as Mozilla Firefox.
Important
mv command may result in the incorrect SELinux context, preventing processes, such as the Apache HTTP Server and Samba, from accessing such files and directories.
4.10.3. Checking the Default SELinux Context
matchpathcon utility to check if files and directories have the correct SELinux context. This utility queries the system policy and then provides the default security context associated with the file path.[6] The following example demonstrates using matchpathcon to verify that files in /var/www/html/ directory are labeled correctly:
Procedure 4.16. Checking the Default SELinux Conxtext with matchpathcon
- As the root user, create three files (
file1,file2, andfile3) in the/var/www/html/directory. These files inherit thehttpd_sys_content_ttype from/var/www/html/:~]#touch /var/www/html/file{1,2,3}~]#ls -Z /var/www/html/-rw-r--r-- root root unconfined_u:object_r:httpd_sys_content_t:s0 file1 -rw-r--r-- root root unconfined_u:object_r:httpd_sys_content_t:s0 file2 -rw-r--r-- root root unconfined_u:object_r:httpd_sys_content_t:s0 file3 - As root, change the
file1type tosamba_share_t. Note that the Apache HTTP Server cannot read files or directories labeled with thesamba_share_ttype.~]#chcon -t samba_share_t /var/www/html/file1 - The
matchpathcon-Voption compares the current SELinux context to the correct, default context in SELinux policy. Enter the following command to check all files in the/var/www/html/directory:~]$matchpathcon -V /var/www/html/*/var/www/html/file1 has context unconfined_u:object_r:samba_share_t:s0, should be system_u:object_r:httpd_sys_content_t:s0 /var/www/html/file2 verified. /var/www/html/file3 verified.
matchpathcon command explains that file1 is labeled with the samba_share_t type, but should be labeled with the httpd_sys_content_t type:
/var/www/html/file1 has context unconfined_u:object_r:samba_share_t:s0, should be system_u:object_r:httpd_sys_content_t:s0
file1, as root, use the restorecon utility:
~]#restorecon -v /var/www/html/file1restorecon reset /var/www/html/file1 context unconfined_u:object_r:samba_share_t:s0->system_u:object_r:httpd_sys_content_t:s0
4.10.4. Archiving Files with tar
tar utility does not retain extended attributes by default. Since SELinux contexts are stored in extended attributes, contexts can be lost when archiving files. Use the tar --selinux command to create archives that retain contexts and to restore files from the archives. If a tar archive contains files without extended attributes, or if you want the extended attributes to match the system defaults, use the restorecon utility:
~]$tar -xvf archive.tar | restorecon -f -
restorecon.
tar archive that retains SELinux contexts:
Procedure 4.17. Creating a tar Archive
- Change to the
/var/www/html/directory and view its SELinux context:~]$cd /var/www/html/html]$ls -dZ /var/www/html/drwxr-xr-x. root root system_u:object_r:httpd_sys_content_t:s0 . - As root, create three files (
file1,file2, andfile3) in/var/www/html/. These files inherit thehttpd_sys_content_ttype from/var/www/html/:html]#touch file{1,2,3}html]$ls -Z /var/www/html/-rw-r--r-- root root unconfined_u:object_r:httpd_sys_content_t:s0 file1 -rw-r--r-- root root unconfined_u:object_r:httpd_sys_content_t:s0 file2 -rw-r--r-- root root unconfined_u:object_r:httpd_sys_content_t:s0 file3 - As root, enter the following command to create a
tararchive namedtest.tar. Use the--selinuxto retain the SELinux context:html]#tar --selinux -cf test.tar file{1,2,3} - As root, create a new directory named
test/, and then allow all users full access to it:~]#mkdir /test~]#chmod 777 /test/ - Copy the
test.tarfile intotest/:~]$cp /var/www/html/test.tar /test/ - Change into
test/directory. Once in this directory, enter the following command to extract thetararchive. Specify the--selinuxoption again otherwise the SELinux context will be changed todefault_t:~]$cd /test/test]$tar --selinux -xvf test.tar - View the SELinux contexts. The
httpd_sys_content_ttype has been retained, rather than being changed todefault_t, which would have happened had the--selinuxnot been used:test]$ls -lZ /test/-rw-r--r-- user1 group1 unconfined_u:object_r:httpd_sys_content_t:s0 file1 -rw-r--r-- user1 group1 unconfined_u:object_r:httpd_sys_content_t:s0 file2 -rw-r--r-- user1 group1 unconfined_u:object_r:httpd_sys_content_t:s0 file3 -rw-r--r-- user1 group1 unconfined_u:object_r:default_t:s0 test.tar - If the
test/directory is no longer required, as root, enter the following command to remove it, as well as all files in it:~]#rm -ri /test/
tar, such as the --xattrs option that retains all extended attributes.
4.10.5. Archiving Files with star
star utility does not retain extended attributes by default. Since SELinux contexts are stored in extended attributes, contexts can be lost when archiving files. Use the star -xattr -H=exustar command to create archives that retain contexts. The star package is not installed by default. To install star, run the yum install star command as the root user.
star archive that retains SELinux contexts:
Procedure 4.18. Creating a star Archive
- As root, create three files (
file1,file2, andfile3) in the/var/www/html/. These files inherit thehttpd_sys_content_ttype from/var/www/html/:~]#touch /var/www/html/file{1,2,3}~]#ls -Z /var/www/html/-rw-r--r-- root root unconfined_u:object_r:httpd_sys_content_t:s0 file1 -rw-r--r-- root root unconfined_u:object_r:httpd_sys_content_t:s0 file2 -rw-r--r-- root root unconfined_u:object_r:httpd_sys_content_t:s0 file3 - Change into
/var/www/html/directory. Once in this directory, as root, enter the following command to create astararchive namedtest.star:~]$cd /var/www/htmlhtml]#star -xattr -H=exustar -c -f=test.star file{1,2,3}star: 1 blocks + 0 bytes (total of 10240 bytes = 10.00k). - As root, create a new directory named
test/, and then allow all users full access to it:~]#mkdir /test~]#chmod 777 /test/ - Enter the following command to copy the
test.starfile intotest/:~]$cp /var/www/html/test.star /test/ - Change into
test/. Once in this directory, enter the following command to extract thestararchive:~]$cd /test/test]$star -x -f=test.starstar: 1 blocks + 0 bytes (total of 10240 bytes = 10.00k). - View the SELinux contexts. The
httpd_sys_content_ttype has been retained, rather than being changed todefault_t, which would have happened had the-xattr -H=exustaroption not been used:~]$ls -lZ /test/-rw-r--r-- user1 group1 unconfined_u:object_r:httpd_sys_content_t:s0 file1 -rw-r--r-- user1 group1 unconfined_u:object_r:httpd_sys_content_t:s0 file2 -rw-r--r-- user1 group1 unconfined_u:object_r:httpd_sys_content_t:s0 file3 -rw-r--r-- user1 group1 unconfined_u:object_r:default_t:s0 test.star - If the
test/directory is no longer required, as root, enter the following command to remove it, as well as all files in it:~]#rm -ri /test/ - If
staris no longer required, as root, remove the package:~]#yum remove star
star.
4.11. Information Gathering Tools
avcstat
/sys/fs/selinux/avc/cache_stats, and you can specify a different cache file with the -f /path/to/file option.
~]#avcstatlookups hits misses allocs reclaims frees 47517410 47504630 12780 12780 12176 12275
seinfo
seinfo is a command-line utility that uses a policy.conf file, a binary policy file, a modular list of policy packages, or a policy list file as input. You must have the setools-console package installed to use the seinfo utility.
seinfo will vary between binary and source files. For example, the policy source file uses the { } brackets to group multiple rule elements onto a single line. A similar effect happens with attributes, where a single attribute expands into one or many types. Because these are expanded and no longer relevant in the binary policy file, they have a return value of zero in the search results. However, the number of rules greatly increases as each formerly one line rule using brackets is now a number of individual lines.
~]#seinfoStatistics for policy file: /sys/fs/selinux/policy Policy Version & Type: v.28 (binary, mls) Classes: 77 Permissions: 229 Sensitivities: 1 Categories: 1024 Types: 3001 Attributes: 244 Users: 9 Roles: 13 Booleans: 158 Cond. Expr.: 193 Allow: 262796 Neverallow: 0 Auditallow: 44 Dontaudit: 156710 Type_trans: 10760 Type_change: 38 Type_member: 44 Role allow: 20 Role_trans: 237 Range_trans: 2546 Constraints: 62 Validatetrans: 0 Initial SIDs: 27 Fs_use: 22 Genfscon: 82 Portcon: 373 Netifcon: 0 Nodecon: 0 Permissives: 22 Polcap: 2
seinfo utility can also list the number of types with the domain attribute, giving an estimate of the number of different confined processes:
~]#seinfo -adomain -x | wc -l550
unconfined_domain attribute:
~]#seinfo -aunconfined_domain_type -x | wc -l52
--permissive option:
~]#seinfo --permissive -x | wc -l31
| wc -l command in the above commands to see the full lists.
sesearch
sesearch utility to search for a particular rule in the policy. It is possible to search either policy source files or the binary file. For example:
~]$sesearch --role_allow -t httpd_sys_content_tFound 20 role allow rules: allow system_r sysadm_r; allow sysadm_r system_r; allow sysadm_r staff_r; allow sysadm_r user_r; allow system_r git_shell_r; allow system_r guest_r; allow logadm_r system_r; allow system_r logadm_r; allow system_r nx_server_r; allow system_r staff_r; allow staff_r logadm_r; allow staff_r sysadm_r; allow staff_r unconfined_r; allow staff_r webadm_r; allow unconfined_r system_r; allow system_r unconfined_r; allow system_r user_r; allow webadm_r system_r; allow system_r webadm_r; allow system_r xguest_r;
sesearch utility can provide the number of allow rules:
~]#sesearch --allow | wc -l262798
~]#sesearch --dontaudit | wc -l156712
4.12. Prioritizing and Disabling SELinux Policy Modules
/etc/selinux/ allows using a priority on SELinux modules. Enter the following command as root to show two module directories with a different priority:
~]#ls /etc/selinux/targeted/active/modules100 400 disabled
semodule utility is 400, the priority used in selinux-policy packages is 100, so you can find most of the SELinux modules installed with the priority 100.
Example 4.1. Using SELinux Policy Modules Priority
semodule -i command and set the priority of the module to 400. We use sandbox.pp in the following example.
~]#semodule -X 400 -i sandbox.pp~]#semodule --list-modules=full | grep sandbox400 sandbox pp 100 sandbox pp
semodule -r command as root:
~]#semodule -X 400 -r sandboxlibsemanage.semanage_direct_remove_key: sandbox module at priority 100 is now active.
Disabling a System Policy Module
system policy module, enter the following command as root:
semodule -d MODULE_NAMEWarning
system policy module using the semodule -r command, it is deleted on your system's storage and you cannot load it again. To avoid unnecessary reinstallations of the selinux-policy-targeted package for restoring all system policy modules, use the semodule -d command instead.
4.13. Multi-Level Security (MLS)
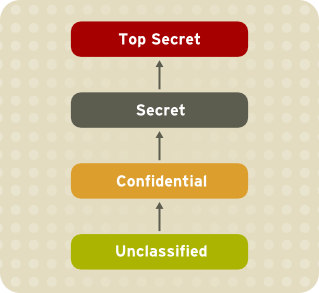
Figure 4.1. Levels of clearance

Figure 4.2. Allowed data flows using MLS
4.13.1. MLS and System Privileges
4.13.2. Enabling MLS in SELinux
Note
Procedure 4.19. Enabling SELinux MLS Policy
- Install the selinux-policy-mls package:
~]#yum install selinux-policy-mls - Before the MLS policy is enabled, each file on the file system must be relabeled with an MLS label. When the file system is relabeled, confined domains may be denied access, which may prevent your system from booting correctly. To prevent this from happening, configure
SELINUX=permissivein the/etc/selinux/configfile. Also, enable the MLS policy by configuringSELINUXTYPE=mls. Your configuration file should look like this:# This file controls the state of SELinux on the system. # SELINUX= can take one of these three values: # enforcing - SELinux security policy is enforced. # permissive - SELinux prints warnings instead of enforcing. # disabled - No SELinux policy is loaded. SELINUX=permissive # SELINUXTYPE= can take one of these two values: # targeted - Targeted processes are protected, # mls - Multi Level Security protection. SELINUXTYPE=mls
- Make sure SELinux is running in permissive mode:
~]#setenforce 0~]$getenforcePermissive - Use the
fixfilesscript to create the/.autorelabelfile containing the-Foption to ensure that files are relabeled upon next reboot:~]#fixfiles -F onboot - Reboot your system. During the next boot, all file systems will be relabeled according to the MLS policy. The label process labels all files with an appropriate SELinux context:
*** Warning -- SELinux mls policy relabel is required.
*** Relabeling could take a very long time, depending on file
*** system size and speed of hard drives.
***********
Each*(asterisk) character on the bottom line represents 1000 files that have been labeled. In the above example, eleven*characters represent 11000 files which have been labeled. The time it takes to label all files depends upon the number of files on the system, and the speed of the hard disk drives. On modern systems, this process can take as little as 10 minutes. Once the labeling process finishes, the system will automatically reboot. - In permissive mode, SELinux policy is not enforced, but denials are still logged for actions that would have been denied if running in enforcing mode. Before changing to enforcing mode, as root, enter the following command to confirm that SELinux did not deny actions during the last boot. If SELinux did not deny actions during the last boot, this command does not return any output. See Chapter 11, Troubleshooting for troubleshooting information if SELinux denied access during boot.
~]#grep "SELinux is preventing" /var/log/messages - If there were no denial messages in the
/var/log/messagesfile, or you have resolved all existing denials, configureSELINUX=enforcingin the/etc/selinux/configfile:# This file controls the state of SELinux on the system. # SELINUX= can take one of these three values: # enforcing - SELinux security policy is enforced. # permissive - SELinux prints warnings instead of enforcing. # disabled - No SELinux policy is loaded. SELINUX=enforcing # SELINUXTYPE= can take one of these two values: # targeted - Targeted processes are protected, # mls - Multi Level Security protection. SELINUXTYPE=mls
- Reboot your system and make sure SELinux is running in enforcing mode:
~]$getenforceEnforcingand the MLS policy is enabled:~]#sestatus |grep mlsPolicy from config file: mls
4.13.3. Creating a User With a Specific MLS Range
Procedure 4.20. Creating a User With a Specific MLS Range
- Add a new Linux user using the
useraddcommand and map the new Linux user to an existing SELinux user (in this case,staff_u):~]#useradd -Z staff_u john - Assign the newly-created Linux user a password:
prompt~]#
passwd john - Enter the following command as root to view the mapping between SELinux and Linux users. The output should be as follows:
~]#semanage login -lLogin Name SELinux User MLS/MCS Range Service __default__ user_u s0-s0 * john staff_u s0-s15:c0.c1023 * root root s0-s15:c0.c1023 * staff staff_u s0-s15:c0.c1023 * sysadm staff_u s0-s15:c0.c1023 * system_u system_u s0-s15:c0.c1023 * - Define a specific range for user
john:~]#semanage login --modify --range s2:c100 john - View the mapping between SELinux and Linux users again. Note that the user
johnnow has a specific MLS range defined:~]#semanage login -lLogin Name SELinux User MLS/MCS Range Service __default__ user_u s0-s0 * john staff_u s2:c100 * root root s0-s15:c0.c1023 * staff staff_u s0-s15:c0.c1023 * sysadm staff_u s0-s15:c0.c1023 * system_u system_u s0-s15:c0.c1023 * - To correct the label on john's home directory if needed, enter the following command:
~]#chcon -R -l s2:c100 /home/john
4.13.4. Setting Up Polyinstantiated Directories
/tmp and /var/tmp/ directories are normally used for temporary storage by all programs, services, and users. Such setup, however, makes these directories vulnerable to race condition attacks, or an information leak based on file names. SELinux offers a solution in the form of polyinstantiated directories. This effectively means that both /tmp and /var/tmp/ are instantiated, making them appear private for each user. When instantiation of directories is enabled, each user's /tmp and /var/tmp/ directory is automatically mounted under /tmp-inst and /var/tmp/tmp-inst.
Procedure 4.21. Enabling Polyinstantiation Directories
- Uncomment the last three lines in the
/etc/security/namespace.conffile to enable instantiation of the/tmp,/var/tmp/, and users' home directories:~]$tail -n 3 /etc/security/namespace.conf/tmp /tmp-inst/ level root,adm /var/tmp /var/tmp/tmp-inst/ level root,adm $HOME $HOME/$USER.inst/ level - Ensure that in the
/etc/pam.d/loginfile, thepam_namespace.somodule is configured for session:~]$grep namespace /etc/pam.d/loginsession required pam_namespace.so - Reboot your system.
4.14. File Name Transition
A_t creates a specified object class in a directory labeled B_t and the specified object class is named objectname, it gets the label C_t. This mechanism provides more fine-grained control over processes on the system.
- By default, objects inherit labels from parent directories. For example, if the user creates a file in a directory labeled
etc_t, then the file is labeled alsoetc_t. However, this method is useless when it is desirable to have multiple files within a directory with different labels. - Policy writers can write a rule in policy that states: If a process with type
A_tcreates a specified object class in a directory labeledB_t, the object gets the newC_tlabel. This practice is problematic if a single program creates multiple objects in the same directory where each object requires a separate label. Moreover, these rules provide only partial control, because names of the created objects are not specified. - Certain applications have SELinux awareness that allow such an application to ask the system what the label of a certain path should be. These applications then request the kernel to create the object with the required label. Examples of applications with SELinux awareness are the rpm package manager, the restorecon utility, or the udev device manager. However, it is not possible to instruct every application that creates files or directories with SELinux awareness. It is often necessary to relabel objects with the correct label after creating. Otherwise, when a confined domain attempts to use the object, AVC messages are returned.
strcmp() function. Use of regular expressions or wildcard characters is not considered.
Note
Example 4.2. Examples of Policy Rules Written with File Name Transition
filetrans_pattern(unconfined_t, admin_home_t, ssh_home_t, dir, ".ssh")
unconfined_t type creates the ~/.ssh/ directory in a directory labeled admin_home_t, the ~/.ssh/ directory gets the label ssh_home_t.
filetrans_pattern(staff_t, user_home_dir_t, httpd_user_content_t, dir, "public_html")
filetrans_pattern(thumb_t, user_home_dir_t, thumb_home_t, file, "missfont.log")
filetrans_pattern(kernel_t, device_t, xserver_misc_device_t, chr_file, "nvidia0")
filetrans_pattern(puppet_t, etc_t, krb5_conf_t, file, "krb5.conf")
Note
4.15. Disabling ptrace()
ptrace() system call allows one process to observe and control the execution of another process and change its memory and registers. This call is used primarily by developers during debugging, for example when using the strace utility. When ptrace() is not needed, it can be disabled to improve system security. This can be done by enabling the deny_ptrace Boolean, which denies all processes, even those that are running in unconfined_t domains, from being able to use ptrace() on other processes.
deny_ptrace Boolean is disabled by default. To enable it, run the setsebool -P deny_ptrace on command as the root user:
~]#setsebool -P deny_ptrace on
~]$getsebool deny_ptracedeny_ptrace --> on
setsebool -P deny_ptrace off command as root:
~]#setsebool -P deny_ptrace off
Note
setsebool -P command makes persistent changes. Do not use the -P option if you do not want changes to persist across reboots.
ptrace() system call. To list all domains that are allowed to use ptrace(), enter the following command. Note that the setools-console package provides the sesearch utility and that the package is not installed by default.
~]#sesearch -A -p ptrace,sys_ptrace -C | grep -v deny_ptrace | cut -d ' ' -f 5
4.16. Thumbnail Protection
- /usr/bin/evince-thumbnailer
- /usr/bin/ffmpegthumbnailer
- /usr/bin/gnome-exe-thumbnailer.sh
- /usr/bin/gnome-nds-thumbnailer
- /usr/bin/gnome-xcf-thumbnailer
- /usr/bin/gsf-office-thumbnailer
- /usr/bin/raw-thumbnailer
- /usr/bin/shotwell-video-thumbnailer
- /usr/bin/totem-video-thumbnailer
- /usr/bin/whaaw-thumbnailer
- /usr/lib/tumbler-1/tumblerd
- /usr/lib64/tumbler-1/tumblerd
setsebool httpd_can_network_connect_db off command. For changes that persist across reboots, run the setsebool -P httpd_can_network_connect_db off command.
/etc/selinux/targeted/contexts/files/ directory define contexts for files and directories. Files in this directory are read by the restorecon and setfiles utilities to restore files and directories to their default contexts.
Chapter 5. The sepolicy Suite
sepolicy utility provides a suite of features to query the installed SELinux policy. These features are either new or were previously provided by separate utilities, such as sepolgen or setrans. The suite allows you to generate transition reports, man pages, or even new policy modules, thus giving users easier access and better understanding of the SELinux policy.
sepolicy. Enter the following command as the root user to install sepolicy:
~]#yum install policycoreutils-devel
sepolicy suite provides the following features that are invoked as command-line parameters:
Table 5.1. The sepolicy Features
| Feature | Description |
|---|---|
| booleans | Query the SELinux Policy to see description of Booleans |
| communicate | Query the SELinux policy to see if domains can communicate with each other |
| generate | Generate an SELinux policy module template |
| gui | Graphical User Interface for SELinux Policy |
| interface | List SELinux Policy interfaces |
| manpage | Generate SELinux man pages |
| network | Query SELinux policy network information |
| transition | Query SELinux policy and generate a process transition report |
5.1. The sepolicy Python Bindings
sesearch and seinfo utilities. The sesearch utility is used for searching rules in a SELinux policy while the seinfo utility allows you to query various other components in the policy.
sesearch and seinfo have been added so that you can use the functionality of these utilities through the sepolicy suite. See the example below:
> python
>>> import sepolicy
>>> sepolicy.info(sepolicy.ATTRIBUTE)
Returns a dictionary of all information about SELinux Attributes
>>>sepolicy.search([sepolicy.ALLOW])
Returns a dictionary of all allow rules in the policy.
5.2. Generating SELinux Policy Modules: sepolicy generate
sepolgen or selinux-polgengui utilities were used for generating a SELinux policy. These tools have been merged to the sepolicy suite. In Red Hat Enterprise Linux 7, the sepolicy generate command is used to generate an initial SELinux policy module template.
sepolgen, it is not necessary to run sepolicy generate as the root user. This utility also creates an RPM spec file, which can be used to build an RPM package that installs the policy package file (NAME.pp) and the interface file (NAME.if) to the correct location, provides installation of the SELinux policy into the kernel, and fixes the labeling. The setup script continues to install SELinux policy and sets up the labeling. In addition, a manual page based on the installed policy is generated using the sepolicy manpage command. [7] Finally, sepolicy generate builds and compiles the SELinux policy and the manual page into an RPM package, ready to be installed on other systems.
sepolicy generate is executed, the following files are produced:
NAME.te– type enforcing file- This file defines all the types and rules for a particular domain.
NAME.if– interface file- This file defines the default file context for the system. It takes the file types created in the
NAME.tefile and associates file paths to the types. Utilities, such asrestoreconandrpm, use these paths to write labels. NAME_selinux.spec– RPM spec file- This file is an RPM spec file that installs SELinux policy and sets up the labeling. This file also installs the interface file and a man page describing the policy. You can use the
sepolicy manpage -d NAMEcommand to generate the man page. NAME.sh– helper shell script- This script helps to compile, install, and fix the labeling on the system. It also generates a man page based on the installed policy, compiles, and builds an RPM package suitable to be installed on other systems.
sepolicy generate prints out all generated paths from the source domain to the target domain. See the sepolicy-generate(8) manual page for further information about sepolicy generate.
5.3. Understanding Domain Transitions: sepolicy transition
setrans utility was used to examine if transition between two domain or process types is possible and printed out all intermediary types that are used to transition between these domains or processes. In Red Hat Enterprise Linux 7, setrans is provided as part of the sepolicy suite and the sepolicy transition command is now used instead.
sepolicy transition command queries a SELinux policy and creates a process transition report. The sepolicy transition command requires two command-line arguments – a source domain (specified by the -s option) and a target domain (specified by the -t option). If only the source domain is entered, sepolicy transition lists all possible domains that the source domain can transition to. The following output does not contain all entries. The “@” character means “execute”:
~]$sepolicy transition -s httpd_thttpd_t @ httpd_suexec_exec_t --> httpd_suexec_t httpd_t @ mailman_cgi_exec_t --> mailman_cgi_t httpd_t @ abrt_retrace_worker_exec_t --> abrt_retrace_worker_t httpd_t @ dirsrvadmin_unconfined_script_exec_t --> dirsrvadmin_unconfined_script_t httpd_t @ httpd_unconfined_script_exec_t --> httpd_unconfined_script_t
sepolicy transition examines SELinux policy for all transition paths from the source domain to the target domain and lists these paths. The output below is not complete:
~]$sepolicy transition -s httpd_t -t system_mail_thttpd_t @ exim_exec_t --> system_mail_t httpd_t @ courier_exec_t --> system_mail_t httpd_t @ sendmail_exec_t --> system_mail_t httpd_t ... httpd_suexec_t @ sendmail_exec_t --> system_mail_t httpd_t ... httpd_suexec_t @ exim_exec_t --> system_mail_t httpd_t ... httpd_suexec_t @ courier_exec_t --> system_mail_t httpd_t ... httpd_suexec_t ... httpd_mojomojo_script_t @ sendmail_exec_t --> system_mail_t
sepolicy transition.
5.4. Generating Manual Pages: sepolicy manpage
sepolicy manpage command generates manual pages based on the SELinux policy that document process domains. As a result, such documentation is always up-to-date. Each name of automatically generated manual pages consists of the process domain name and the _selinux suffix, for example httpd_selinux.
- The
Entrypointssection contains all executable files that need to be executed during a domain transition. - The
Process Typessection lists all process types that begin with the same prefix as the target domain. - The
Booleanssection lists Booleans associated with the domain. - The
Port Typessection contains the port types matching the same prefix as the domain and describes the default port numbers assigned to these port types. - The
Managed Filessection describes the types that the domain is allowed to write to and the default paths associated with these types. - The
File Contextssection contains all file types associated with the domain and describes how to use these file types along with the default path labeling on a system. - The
Sharing Filessection explains how to use the domain sharing types, such aspublic_content_t.
sepolicy manpage.
sepolicy manpage” for more information about sepolicy manpage.
Chapter 6. Confining Users
unconfined_u user by default. All processes run by unconfined_u are in the unconfined_t domain. This means that users can access across the system within the limits of the standard Linux DAC policy. However, a number of confined SELinux users are available in Red Hat Enterprise Linux. This means that users can be restricted to limited set of capabilities. Each Linux user is mapped to an SELinux user using SELinux policy, allowing Linux users to inherit the restrictions placed on SELinux users, for example (depending on the user), not being able to:
- run the X Window System
- use networking
- run setuid applications (unless SELinux policy permits it)
- or run the
suandsudocommands.
user_u user are in the user_t domain. Such processes can connect to network, but cannot run the su or sudo commands. This helps protect the system from the user. See Section 3.3, “Confined and Unconfined Users”, Table 3.1, “SELinux User Capabilities” for further information about confined users and their capabilities.
6.1. Linux and SELinux User Mappings
~]#semanage login -lLogin Name SELinux User MLS/MCS Range Service __default__ unconfined_u s0-s0:c0.c1023 * root unconfined_u s0-s0:c0.c1023 * system_u system_u s0-s0:c0.c1023 *
__default__ login by default (which is in turn mapped to the SELinux unconfined_u user). When a Linux user is created with the useradd command, if no options are specified, they are mapped to the SELinux unconfined_u user. The following defines the default-mapping:
__default__ unconfined_u s0-s0:c0.c1023 *
6.2. Confining New Linux Users: useradd
unconfined_u user run in the unconfined_t domain. This is seen by running the id -Z command while logged-in as a Linux user mapped to unconfined_u:
~]$id -Zunconfined_u:unconfined_r:unconfined_t:s0-s0:c0.c1023
unconfined_t domain, SELinux policy rules are applied, but policy rules exist that allow Linux users running in the unconfined_t domain almost all access. If unconfined Linux users execute an application that SELinux policy defines can transition from the unconfined_t domain to its own confined domain, unconfined Linux users are still subject to the restrictions of that confined domain. The security benefit of this is that, even though a Linux user is running unconfined, the application remains confined, and therefore, the exploitation of a flaw in the application can be limited by policy.
Note
useradd command, use the -Z option to specify which SELinux user they are mapped to. The following example creates a new Linux user, useruuser, and maps that user to the SELinux user_u user. Linux users mapped to the SELinux user_u user run in the user_t domain. In this domain, Linux users are unable to run setuid applications unless SELinux policy permits it (such as passwd), and cannot run the su or sudo command, preventing them from becoming the root user with these commands.
Procedure 6.1. Confining a New Linux User to user_u SELinux User
- As root, create a new Linux user (
useruuser) that is mapped to the SELinuxuser_uuser.~]#useradd -Z user_u useruuser - To view the mapping between
useruuseranduser_u, enter the following command as root:~]#semanage login -lLogin Name SELinux User MLS/MCS Range Service __default__ unconfined_u s0-s0:c0.c1023 * root unconfined_u s0-s0:c0.c1023 * system_u system_u s0-s0:c0.c1023 * useruuser user_u s0 * - As root, assign a password to the Linux
useruuseruser:~]#passwd useruuserChanging password for user useruuser. New password: Enter a password Retype new password: Enter the same password again passwd: all authentication tokens updated successfully. - Log out of your current session, and log in as the Linux
useruuseruser. When you log in, thepam_selinuxmodule maps the Linux user to an SELinux user (in this case,user_u), and sets up the resulting SELinux context. The Linux user's shell is then launched with this context. Enter the following command to view the context of a Linux user:~]$id -Zuser_u:user_r:user_t:s0 - Log out of the Linux
useruuser's session, and log back in with your account. If you do not want the Linuxuseruuseruser, enter the following command as root to remove it, along with its home directory:~]#userdel -Z -r useruuser
6.3. Confining Existing Linux Users: semanage login
unconfined_u user (the default behavior), and you would like to change which SELinux user they are mapped to, use the semanage login command. The following example creates a new Linux user named newuser, then maps that Linux user to the SELinux user_u user:
Procedure 6.2. Mapping Linux Users to the SELinux Users
- As root, create a new Linux user (
newuser). Since this user uses the default mapping, it does not appear in thesemanage login -loutput:~]#useradd newuser~]#semanage login -lLogin Name SELinux User MLS/MCS Range Service __default__ unconfined_u s0-s0:c0.c1023 * root unconfined_u s0-s0:c0.c1023 * system_u system_u s0-s0:c0.c1023 * - To map the Linux
newuseruser to the SELinuxuser_uuser, enter the following command as root:~]#semanage login -a -s user_u newuserThe-aoption adds a new record, and the-soption specifies the SELinux user to map a Linux user to. The last argument,newuser, is the Linux user you want mapped to the specified SELinux user. - To view the mapping between the Linux
newuseruser anduser_u, use thesemanageutility again:~]#semanage login -lLogin Name SELinux User MLS/MCS Range Service __default__ unconfined_u s0-s0:c0.c1023 * newuser user_u s0 * root unconfined_u s0-s0:c0.c1023 * system_u system_u s0-s0:c0.c1023 * - As root, assign a password to the Linux
newuseruser:~]#passwd newuserChanging password for user newuser. New password: Enter a password Retype new password: Enter the same password again passwd: all authentication tokens updated successfully. - Log out of your current session, and log in as the Linux
newuseruser. Enter the following command to view thenewuser's SELinux context:~]$id -Zuser_u:user_r:user_t:s0 - Log out of the Linux
newuser's session, and log back in with your account. If you do not want the Linuxnewuseruser, enter the following command as root to remove it, along with its home directory:~]#userdel -r newuserAs root, remove the mapping between the Linuxnewuseruser anduser_u:~]#semanage login -d newuser~]#semanage login -lLogin Name SELinux User MLS/MCS Range Service __default__ unconfined_u s0-s0:c0.c1023 * root unconfined_u s0-s0:c0.c1023 * system_u system_u s0-s0:c0.c1023 *
6.4. Changing the Default Mapping
__default__ login by default (which is in turn mapped to the SELinux unconfined_u user). If you would like new Linux users, and Linux users not specifically mapped to an SELinux user to be confined by default, change the default mapping with the semanage login command.
unconfined_u to user_u:
~]#semanage login -m -S targeted -s "user_u" -r s0 __default__
__default__ login is mapped to user_u:
~]#semanage login -lLogin Name SELinux User MLS/MCS Range Service __default__ user_u s0-s0:c0.c1023 * root unconfined_u s0-s0:c0.c1023 * system_u system_u s0-s0:c0.c1023 *
semanage login -l output, they are mapped to user_u, as per the __default__ login.
__default__ login to the SELinux unconfined_u user:
~]#semanage login -m -S targeted -s "unconfined_u" -r s0-s0:c0.c1023 __default__
6.5. xguest: Kiosk Mode
xguest_u, see Table 3.1, “SELinux User Capabilities”. Any changes made while logged in with this account, such as creating files or changing settings, are lost when you log out.
- As root, install the xguest package. Install dependencies as required:
~]#yum install xguest - In order to allow the kiosk account to be used by a variety of people, the account is not password-protected, and as such, the account can only be protected if SELinux is running in enforcing mode. Before logging in with this account, use the
getenforceutility to confirm that SELinux is running in enforcing mode:~]$getenforceEnforcingIf this is not the case, see Section 4.4, “Permanent Changes in SELinux States and Modes” for information about changing to enforcing mode. It is not possible to log in with this account if SELinux is in permissive mode or disabled. - You can only log in to this account using the GNOME Display Manager (GDM). Once the xguest package is installed, a
Guestaccount is added to the GDM login screen.
6.6. Booleans for Users Executing Applications
/tmp directory, which they have write access to, helps prevent flawed or malicious applications from modifying files that users own.
setsebool utility, which must be run as root. The setsebool -P command makes persistent changes. Do not use the -P option if you do not want changes to persist across reboots:
guest_t
guest_t domain from executing applications in their home directories and /tmp:
~]#setsebool -P guest_exec_content off
xguest_t
xguest_t domain from executing applications in their home directories and /tmp:
~]#setsebool -P xguest_exec_content off
user_t
user_t domain from executing applications in their home directories and /tmp:
~]#setsebool -P user_exec_content off
staff_t
staff_t domain from executing applications in their home directories and /tmp:
~]#setsebool -P staff_exec_content off
staff_exec_content boolean on and to allow Linux users in the staff_t domain to execute applications in their home directories and /tmp:
~]#setsebool -P staff_exec_content on
Chapter 7. Securing Programs Using Sandbox
7.1. Running an Application Using Sandbox
~]# yum install policycoreutils-sandbox
~]$sandbox[options]application_under_test
-X option. For example:
~]$Thesandbox-Xevince
-X tells sandbox to set up a confined secondary X Server for the application (in this case, evince), before copying the needed resources and creating a closed virtual environment in the user’s home directory or in the /tmp directory.
~]$Note thatsandbox-Hsandbox/home-Tsandbox/tmp-Xfirefox
sandbox/home is used for /home and sandbox/tmp is used for /tmp. Different applications are placed in different restricted environments. The application runs in full-screen mode and this prevents access to other functions. As mentioned before, you cannot open or create files except those which are labeled as sandbox_x_file_t.
sandbox. To allow access, use the sandbox_web_t label. For example, to launch Firefox:
~]$sandbox‑X‑tsandbox_web_tfirefox
Warning
sandbox_net_t label allows unrestricted, bi-directional network access to all network ports. The sandbox_web_t allows connections to ports required for web browsing only.
sandbox_net_t should made with caution and only when required.
sandbox (8) manual page for information, and a full list of available options.
Chapter 8. sVirt
Non-Virtualized Environment

Virtualized Environment

8.1. Security and Virtualization

8.2. sVirt Labeling
~]#ps -eZ | grep qemusystem_u:system_r:svirt_t:s0:c87,c520 27950 ? 00:00:17 qemu-kvm system_u:system_r:svirt_t:s0:c639,c757 27989 ? 00:00:06 qemu-system-x86
~]#ls -lZ /var/lib/libvirt/images/*system_u:object_r:svirt_image_t:s0:c87,c520 image1
Table 8.1. sVirt Labels
| Type | SELinux Context | Description |
|---|---|---|
| Virtual Machine Processes | system_u:system_r:svirt_t:MCS1 | MCS1 is a randomly selected MCS field. Currently approximately 500,000 labels are supported. |
| Virtual Machine Image | system_u:object_r:svirt_image_t:MCS1 | Only processes labeled svirt_t with the same MCS fields are able to read/write these image files and devices. |
| Virtual Machine Shared Read/Write Content | system_u:object_r:svirt_image_t:s0 | All processes labeled svirt_t are allowed to write to the svirt_image_t:s0 files and devices. |
| Virtual Machine Image | system_u:object_r:virt_content_t:s0 | System default label used when an image exits. No svirt_t virtual processes are allowed to read files/devices with this label. |
Chapter 9. Secure Linux Containers
virsh command-line utility provided by the libvirt package.
Chapter 10. SELinux systemd Access Control
systemd daemon. In previous releases of Red Hat Enterprise Linux, daemons could be started in two ways:
- At boot time, the System V
initdaemon launched aninit.rcscript and then this script launched the required daemon. For example, the Apache server, which was started at boot, got the following SELinux label:system_u:system_r:httpd_t:s0
- An administrator launched the
init.rcscript manually, causing the daemon to run. For example, when theservice httpd restartcommand was invoked on the Apache server, the resulting SELinux label looked as follows:unconfined_u:system_r:httpd_t:s0
systemd daemon, the transitions are very different. As systemd handles all the calls to start and stop daemons on the system, using the init_t type, it can override the user part of the label when a daemon is restarted manually. As a result, the labels in both scenarios above are system_u:system_r:httpd_t:s0 as expected and the SELinux policy could be improved to govern which domains are able to control which units.
10.1. SELinux Access Permissions for Services
systemd starts and stops all services, and users and processes communicate with systemd using the systemctl utility. The systemd daemon has the ability to consult the SELinux policy and check the label of the calling process and the label of the unit file that the caller tries to manage, and then ask SELinux whether or not the caller is allowed the access. This approach strengthens access control to critical system capabilities, which include starting and stopping system services.
systemctl to send a D-Bus message to systemd, which would in turn start or stop whatever service NetworkManager requested. In fact, NetworkManager was allowed to do everything systemctl could do. It was also impossible to setup confined administrators so that they could start or stop just particular services.
systemd also works as an SELinux Access Manager. It can retrieve the label of the process running systemctl or the process that sent a D-Bus message to systemd. The daemon then looks up the label of the unit file that the process wanted to configure. Finally, systemd can retrieve information from the kernel if the SELinux policy allows the specific access between the process label and the unit file label. This means a compromised application that needs to interact with systemd for a specific service can now be confined by SELinux. Policy writers can also use these fine-grained controls to confine administrators. Policy changes involve a new class called service, with the following permissions:
class service
{
       start
       stop
       status
       reload
       kill
       load
       enable
       disable
}
systemd do not match in all cases. A mapping was defined to line up systemd method calls with SELinux access checks. Table 10.1, “Mapping of systemd unit file method calls on SELinux access checks” maps access checks on unit files while Table 10.2, “Mapping of systemd general system calls on SELinux access checks” covers access checks for the system in general. If no match is found in either table, then the undefined system check is called.
Table 10.1. Mapping of systemd unit file method calls on SELinux access checks
systemd unit file method | SELinux access check |
|---|---|
| DisableUnitFiles | disable |
| EnableUnitFiles | enable |
| GetUnit | status |
| GetUnitByPID | status |
| GetUnitFileState | status |
| Kill | stop |
| KillUnit | stop |
| LinkUnitFiles | enable |
| ListUnits | status |
| LoadUnit | status |
| MaskUnitFiles | disable |
| PresetUnitFiles | enable |
| ReenableUnitFiles | enable |
| Reexecute | start |
| Reload | reload |
| ReloadOrRestart | start |
| ReloadOrRestartUnit | start |
| ReloadOrTryRestart | start |
| ReloadOrTryRestartUnit | start |
| ReloadUnit | reload |
| ResetFailed | stop |
| ResetFailedUnit | stop |
| Restart | start |
| RestartUnit | start |
| Start | start |
| StartUnit | start |
| StartUnitReplace | start |
| Stop | stop |
| StopUnit | stop |
| TryRestart | start |
| TryRestartUnit | start |
| UnmaskUnitFiles | enable |
Table 10.2. Mapping of systemd general system calls on SELinux access checks
systemd general system call | SELinux access check |
|---|---|
| ClearJobs | reboot |
| FlushDevices | halt |
| Get | status |
| GetAll | status |
| GetJob | status |
| GetSeat | status |
| GetSession | status |
| GetSessionByPID | status |
| GetUser | status |
| Halt | halt |
| Introspect | status |
| KExec | reboot |
| KillSession | halt |
| KillUser | halt |
| ListJobs | status |
| ListSeats | status |
| ListSessions | status |
| ListUsers | status |
| LockSession | halt |
| PowerOff | halt |
| Reboot | reboot |
| SetUserLinger | halt |
| TerminateSeat | halt |
| TerminateSession | halt |
| TerminateUser | halt |
Example 10.1. SELinux Policy for a System Service
sesearch utility, you can list policy rules for a system service. For example, calling the sesearch -A -s NetworkManager_t -c service command returns:
allow NetworkManager_t dnsmasq_unit_file_t : service { start stop status reload kill load } ;
allow NetworkManager_t nscd_unit_file_t : service { start stop status reload kill load } ;
allow NetworkManager_t ntpd_unit_file_t : service { start stop status reload kill load } ;
allow NetworkManager_t pppd_unit_file_t : service { start stop status reload kill load } ;
allow NetworkManager_t polipo_unit_file_t : service { start stop status reload kill load } ;
10.2. SELinux and journald
systemd, the journald daemon (also known as systemd-journal) is the alternative for the syslog utility, which is a system service that collects and stores logging data. It creates and maintains structured and indexed journals based on logging information that is received from the kernel, from user processes using the libc syslog() function, from standard and error output of system services, or using its native API. It implicitly collects numerous metadata fields for each log message in a secure way.
systemd-journal service can be used with SELinux to increase security. SELinux controls processes by only allowing them to do what they were designed to do; sometimes even less, depending on the security goals of the policy writer. For example, SELinux prevents a compromised ntpd process from doing anything other than handle Network Time. However, the ntpd process sends syslog messages, so that SELinux would allow the compromised process to continue to send those messages. The compromised ntpd could format syslog messages to match other daemons and potentially mislead an administrator, or even worse, a utility that reads the syslog file into compromising the whole system.
systemd-journal daemon verifies all log messages and, among other things, adds SELinux labels to them. It is then easy to detect inconsistencies in log messages and prevent an attack of this type before it occurs. You can use the journalctl utility to query logs of systemd journals. If no command-line arguments are specified, running this utility lists the full content of the journal, starting from the oldest entries. To see all logs generated on the system, including logs for system components, execute journalctl as root. If you execute it as a non-root user, the output will be limited only to logs related to the currently logged-in user.
Example 10.2. Listing Logs with journalctl
journalctl for listing all logs related to a particular SELinux label. For example, the following command lists all logs logged under the system_u:system_r:policykit_t:s0 label:
~]# journalctl _SELINUX_CONTEXT=system_u:system_r:policykit_t:s0
Oct 21 10:22:42 localhost.localdomain polkitd[647]: Started polkitd version 0.112
Oct 21 10:22:44 localhost.localdomain polkitd[647]: Loading rules from directory /etc/polkit-1/rules.d
Oct 21 10:22:44 localhost.localdomain polkitd[647]: Loading rules from directory /usr/share/polkit-1/rules.d
Oct 21 10:22:44 localhost.localdomain polkitd[647]: Finished loading, compiling and executing 5 rules
Oct 21 10:22:44 localhost.localdomain polkitd[647]: Acquired the name org.freedesktop.PolicyKit1 on the system bus Oct 21 10:23:10 localhost polkitd[647]: Registered Authentication Agent for unix-session:c1 (system bus name :1.49, object path /org/freedesktop/PolicyKit1/AuthenticationAgent, locale en_US.UTF-8) (disconnected from bus)
Oct 21 10:23:35 localhost polkitd[647]: Unregistered Authentication Agent for unix-session:c1 (system bus name :1.80 [/usr/bin/gnome-shell --mode=classic], object path /org/freedesktop/PolicyKit1/AuthenticationAgent, locale en_US.utf8)
journalctl, see the journalctl(1) manual page.
Chapter 11. Troubleshooting
audit2allow.
11.1. What Happens when Access is Denied
| Daemon | Log Location |
|---|---|
| auditd on | /var/log/audit/audit.log |
| auditd off; rsyslogd on | /var/log/messages |
| setroubleshootd, rsyslogd, and auditd on | /var/log/audit/audit.log. Easier-to-read denial messages also sent to /var/log/messages |
setroubleshootd and auditd daemons are running, a warning is displayed when access is denied by SELinux:

Forbidden

You don't have permission to access file name on this server
/var/log/messages and /var/log/audit/audit.log for "SELinux is preventing" and "denied" errors respectively. This can be done by running the following commands as the root user:
~]#grep "SELinux is preventing" /var/log/messages
~]#grep "denied" /var/log/audit/audit.log
11.2. Top Three Causes of Problems
11.2.1. Labeling Problems
/var/www/html/ for a website, an administrator wants to use /srv/myweb/. On Red Hat Enterprise Linux, the /srv directory is labeled with the var_t type. Files and directories created in /srv inherit this type. Also, newly-created objects in top-level directories (such as /myserver) may be labeled with the default_t type. SELinux prevents the Apache HTTP Server (httpd) from accessing both of these types. To allow access, SELinux must know that the files in /srv/myweb/ are to be accessible to httpd:
~]#semanage fcontext -a -t httpd_sys_content_t "/srv/myweb(/.*)?"
semanage command adds the context for the /srv/myweb/ directory (and all files and directories under it) to the SELinux file-context configuration[8]. The semanage utility does not change the context. As root, run the restorecon utility to apply the changes:
~]#restorecon -R -v /srv/myweb
11.2.1.1. What is the Correct Context?
matchpathcon utility checks the context of a file path and compares it to the default label for that path. The following example demonstrates using matchpathcon on a directory that contains incorrectly labeled files:
~]$matchpathcon -V /var/www/html/*/var/www/html/index.html has context unconfined_u:object_r:user_home_t:s0, should be system_u:object_r:httpd_sys_content_t:s0 /var/www/html/page1.html has context unconfined_u:object_r:user_home_t:s0, should be system_u:object_r:httpd_sys_content_t:s0
index.html and page1.html files are labeled with the user_home_t type. This type is used for files in user home directories. Using the mv command to move files from your home directory may result in files being labeled with the user_home_t type. This type should not exist outside of home directories. Use the restorecon utility to restore such files to their correct type:
~]#restorecon -v /var/www/html/index.htmlrestorecon reset /var/www/html/index.html context unconfined_u:object_r:user_home_t:s0->system_u:object_r:httpd_sys_content_t:s0
-R option:
~]#restorecon -R -v /var/www/html/restorecon reset /var/www/html/page1.html context unconfined_u:object_r:samba_share_t:s0->system_u:object_r:httpd_sys_content_t:s0 restorecon reset /var/www/html/index.html context unconfined_u:object_r:samba_share_t:s0->system_u:object_r:httpd_sys_content_t:s0
matchpathcon.
11.2.2. How are Confined Services Running?
semanage command.
httpd_can_network_connect_db Boolean:
~]#setsebool -P httpd_can_network_connect_db on
getsebool and grep utilities to see if any Booleans are available to allow access. For example, use the getsebool -a | grep ftp command to search for FTP related Booleans:
~]$getsebool -a | grep ftpftpd_anon_write --> off ftpd_full_access --> off ftpd_use_cifs --> off ftpd_use_nfs --> off ftpd_connect_db --> off httpd_enable_ftp_server --> off tftp_anon_write --> off
getsebool -a command. For a list of Booleans, an explanation of what each one is, and whether they are on or off, run the semanage boolean -l command as root. See Section 4.6, “Booleans” for information about listing and configuring Booleans.
Port Numbers
semanage port -l | grep http command as root to list http related ports:
~]#semanage port -l | grep httphttp_cache_port_t tcp 3128, 8080, 8118 http_cache_port_t udp 3130 http_port_t tcp 80, 443, 488, 8008, 8009, 8443 pegasus_http_port_t tcp 5988 pegasus_https_port_t tcp 5989
http_port_t port type defines the ports Apache HTTP Server can listen on, which in this case, are TCP ports 80, 443, 488, 8008, 8009, and 8443. If an administrator configures httpd.conf so that httpd listens on port 9876 (Listen 9876), but policy is not updated to reflect this, the following command fails:
~]#systemctl start httpd.serviceJob for httpd.service failed. See 'systemctl status httpd.service' and 'journalctl -xn' for details.
~]#systemctl status httpd.servicehttpd.service - The Apache HTTP Server Loaded: loaded (/usr/lib/systemd/system/httpd.service; disabled) Active: failed (Result: exit-code) since Thu 2013-08-15 09:57:05 CEST; 59s ago Process: 16874 ExecStop=/usr/sbin/httpd $OPTIONS -k graceful-stop (code=exited, status=0/SUCCESS) Process: 16870 ExecStart=/usr/sbin/httpd $OPTIONS -DFOREGROUND (code=exited, status=1/FAILURE)
/var/log/audit/audit.log:
type=AVC msg=audit(1225948455.061:294): avc: denied { name_bind } for pid=4997 comm="httpd" src=9876 scontext=unconfined_u:system_r:httpd_t:s0 tcontext=system_u:object_r:port_t:s0 tclass=tcp_socket
httpd to listen on a port that is not listed for the http_port_t port type, enter the semanage port command to add a port to policy configuration[9]:
~]#semanage port -a -t http_port_t -p tcp 9876
-a option adds a new record; the -t option defines a type; and the -p option defines a protocol. The last argument is the port number to add.
11.2.3. Evolving Rules and Broken Applications
audit2allow utility to create a custom policy module to allow access. See Section 11.3.8, “Allowing Access: audit2allow” for information about using audit2allow.
11.3. Fixing Problems
audit2allow.
11.3.1. Linux Permissions
~]$ls -l /var/www/html/index.html-rw-r----- 1 root root 0 2009-05-07 11:06 index.html
index.html is owned by the root user and group. The root user has read and write permissions (-rw), and members of the root group have read permissions (-r-). Everyone else has no access (---). By default, such permissions do not allow httpd to read this file. To resolve this issue, use the chown command to change the owner and group. This command must be run as root:
~]#chown apache:apache /var/www/html/index.html
httpd runs as the Linux Apache user. If you run httpd with a different user, replace apache:apache with that user.
11.3.2. Possible Causes of Silent Denials
~]# semodule -DB-D option disables dontaudit rules; the -B option rebuilds policy. After running semodule -DB, try exercising the application that was encountering permission problems, and see if SELinux denials — relevant to the application — are now being logged. Take care in deciding which denials should be allowed, as some should be ignored and handled by dontaudit rules. If in doubt, or in search of guidance, contact other SELinux users and developers on an SELinux list, such as fedora-selinux-list.
dontaudit rules, enter the following command as root:
~]# semodule -Bsesearch --dontaudit command. Narrow down searches using the -s domain option and the grep command. For example:
~]$sesearch --dontaudit -s smbd_t | grep squiddontaudit smbd_t squid_port_t : tcp_socket name_bind ; dontaudit smbd_t squid_port_t : udp_socket name_bind ;
11.3.3. Manual Pages for Services
httpd accessing NFS volumes). This information may be in the standard manual page or in the manual page that can be automatically generated from the SELinux policy for every service domain using the sepolicy manpage utility. Such manual pages are named in the service-name_selinux format. Such manual pages are also shipped with the selinux-policy-doc package.
- Samba: the samba_selinux(8) manual page for example describes that enabling the
samba_enable_home_dirsBoolean allows Samba to share users home directories. - NFS: the nfsd_selinux(8) manual page describes SELinux nfsd policy that allows users to setup their nfsd processes in as secure a method as possible.
sepolicy manpage” for further information about sepolicy manpage.
11.3.4. Permissive Domains
- They can be used for making a single process (domain) run permissive to troubleshoot an issue without putting the entire system at risk by making it permissive.
- They allow an administrator to create policies for new applications. Previously, it was recommended that a minimal policy be created, and then the entire machine put into permissive mode, so that the application could run, but SELinux denials still logged. The
audit2allowcould then be used to help write the policy. This put the whole system at risk. With permissive domains, only the domain in the new policy can be marked permissive, without putting the whole system at risk.
11.3.4.1. Making a Domain Permissive
semanage permissive -a domain command, where domain is the domain you want to make permissive. For example, enter the following command as root to make the httpd_t domain (the domain the Apache HTTP Server runs in) permissive:
~]#semanage permissive -a httpd_t
semodule -l | grep permissive command as root. For example:
~]#semodule -l | grep permissivepermissive_httpd_t (null) permissivedomains (null)
semanage permissive -d domain command as root. For example:
~]#semanage permissive -d httpd_t
11.3.4.2. Disabling Permissive Domains
permissivedomains.pp module contains all of the permissive domain declarations that are presented on the system. To disable all permissive domains, enter the following command as root:
~]#semodule -d permissivedomains
Note
semodule -d command, it is no longer showed in the output of the semodule -l command. To see all policy modules including disabled, enter the following command as root:
~]#semodule --list-modules=full
11.3.4.3. Denials for Permissive Domains
SYSCALL message is different for permissive domains. The following is an example AVC denial (and the associated system call) from the Apache HTTP Server:
type=AVC msg=audit(1226882736.442:86): avc:  denied  { getattr } for  pid=2427 comm="httpd" path="/var/www/html/file1" dev=dm-0 ino=284133 scontext=unconfined_u:system_r:httpd_t:s0 tcontext=unconfined_u:object_r:samba_share_t:s0 tclass=file

type=SYSCALL msg=audit(1226882736.442:86): arch=40000003 syscall=196 success=no exit=-13 a0=b9a1e198 a1=bfc2921c a2=54dff4 a3=2008171 items=0 ppid=2425 pid=2427 auid=502 uid=48 gid=48 euid=48 suid=48 fsuid=48 egid=48 sgid=48 fsgid=48 tty=(none) ses=4 comm="httpd" exe="/usr/sbin/httpd" subj=unconfined_u:system_r:httpd_t:s0 key=(null)
httpd_t domain is not permissive, and as such, the action is denied, and the SYSCALL message contains success=no. The following is an example AVC denial for the same situation, except the semanage permissive -a httpd_t command has been run to make the httpd_t domain permissive:
type=AVC msg=audit(1226882925.714:136): avc:  denied  { read } for  pid=2512 comm="httpd" name="file1" dev=dm-0 ino=284133 scontext=unconfined_u:system_r:httpd_t:s0 tcontext=unconfined_u:object_r:samba_share_t:s0 tclass=file

type=SYSCALL msg=audit(1226882925.714:136): arch=40000003 syscall=5 success=yes exit=11 a0=b962a1e8 a1=8000 a2=0 a3=8000 items=0 ppid=2511 pid=2512 auid=502 uid=48 gid=48 euid=48 suid=48 fsuid=48 egid=48 sgid=48 fsgid=48 tty=(none) ses=4 comm="httpd" exe="/usr/sbin/httpd" subj=unconfined_u:system_r:httpd_t:s0 key=(null)
success=yes in the SYSCALL message.
11.3.5. Searching For and Viewing Denials
auditd, rsyslogd, and setroubleshootd daemons are running. See Section 4.2, “Which Log File is Used” for information about starting these daemons. A number of utilites are available for searching for and viewing SELinux AVC messages, such as ausearch, aureport, and sealert.
ausearch
ausearch utility that can query the audit daemon logs for events based on different search criteria.[10] The ausearch utility accesses /var/log/audit/audit.log, and as such, must be run as the root user:
| Searching For | Command |
|---|---|
| all denials | ausearch -m avc,user_avc,selinux_err,user_selinux_err |
| denials for that today | ausearch -m avc -ts today |
| denials from the last 10 minutes | ausearch -m avc -ts recent |
-c comm-name option, where comm-name is the executable’s name, for example, httpd for the Apache HTTP Server, and smbd for Samba:
~]#ausearch -m avc -c httpd
~]#ausearch -m avc -c smbd
ausearch command, it is advised to use either the --interpret (-i) option for easier readability, or the --raw (-r) option for script processing. See the ausearch(8) manual page for further ausearch options.
aureport
aureport utility, which produces summary reports of the audit system logs. [11] The aureport utility accesses /var/log/audit/audit.log, and as such, must be run as the root user. To view a list of SELinux denial messages and how often each one occurred, run the aureport -a command. The following is example output that includes two denials:
~]#aureport -aAVC Report ======================================================== # date time comm subj syscall class permission obj event ======================================================== 1. 05/01/2009 21:41:39 httpd unconfined_u:system_r:httpd_t:s0 195 file getattr system_u:object_r:samba_share_t:s0 denied 2 2. 05/03/2009 22:00:25 vsftpd unconfined_u:system_r:ftpd_t:s0 5 file read unconfined_u:object_r:cifs_t:s0 denied 4
sealert
sealert utility, which reads denial messages translated by setroubleshoot-server.[12] Denials are assigned IDs, as seen in /var/log/messages. The following is an example denial from messages:
setroubleshoot: SELinux is preventing /usr/sbin/httpd from name_bind access on the tcp_socket. For complete SELinux messages. run sealert -l 8c123656-5dda-4e5d-8791-9e3bd03786b7
8c123656-5dda-4e5d-8791-9e3bd03786b7. The -l option takes an ID as an argument. Running the sealert -l 8c123656-5dda-4e5d-8791-9e3bd03786b7 command presents a detailed analysis of why SELinux denied access, and a possible solution for allowing access.
setroubleshootd, dbus and auditd daemons are running, a warning is displayed when access is denied by SELinux:
Show launches the sealert GUI, which allows you to troubleshoot the problem:

sealert -b command to launch the sealert GUI. To view a detailed analysis of all denial messages, run the sealert -l \* command.
11.3.6. Raw Audit Messages
/var/log/audit/audit.log. The following is an example AVC denial message (and the associated system call) that occurred when the Apache HTTP Server (running in the httpd_t domain) attempted to access the /var/www/html/file1 file (labeled with the samba_share_t type):
type=AVC msg=audit(1226874073.147:96): avc:  denied  { getattr } for  pid=2465 comm="httpd" path="/var/www/html/file1" dev=dm-0 ino=284133 scontext=unconfined_u:system_r:httpd_t:s0 tcontext=unconfined_u:object_r:samba_share_t:s0 tclass=file

type=SYSCALL msg=audit(1226874073.147:96): arch=40000003 syscall=196 success=no exit=-13 a0=b98df198 a1=bfec85dc a2=54dff4 a3=2008171 items=0 ppid=2463 pid=2465 auid=502 uid=48 gid=48 euid=48 suid=48 fsuid=48 egid=48 sgid=48 fsgid=48 tty=(none) ses=6 comm="httpd" exe="/usr/sbin/httpd" subj=unconfined_u:system_r:httpd_t:s0 key=(null)
- { getattr }
- The item in the curly brackets indicates the permission that was denied. The
getattrentry indicates the source process was trying to read the target file's status information. This occurs before reading files. This action is denied due to the file being accessed having a wrong label. Commonly seen permissions includegetattr,read, andwrite. - comm="httpd"
- The executable that launched the process. The full path of the executable is found in the
exe=section of the system call (SYSCALL) message, which in this case, isexe="/usr/sbin/httpd". - path="/var/www/html/file1"
- The path to the object (target) the process attempted to access.
- scontext="unconfined_u:system_r:httpd_t:s0"
- The SELinux context of the process that attempted the denied action. In this case, it is the SELinux context of the Apache HTTP Server, which is running in the
httpd_tdomain. - tcontext="unconfined_u:object_r:samba_share_t:s0"
- The SELinux context of the object (target) the process attempted to access. In this case, it is the SELinux context of
file1. Note that thesamba_share_ttype is not accessible to processes running in thehttpd_tdomain.In certain situations, thetcontextmay match thescontext, for example, when a process attempts to execute a system service that will change characteristics of that running process, such as the user ID. Also, thetcontextmay match thescontextwhen a process tries to use more resources (such as memory) than normal limits allow, resulting in a security check to see if that process is allowed to break those limits.
SYSCALL) message, two items are of interest:
success=no: indicates whether the denial (AVC) was enforced or not.success=noindicates the system call was not successful (SELinux denied access).success=yesindicates the system call was successful. This can be seen for permissive domains or unconfined domains, such asunconfined_service_tandkernel_t.exe="/usr/sbin/httpd": the full path to the executable that launched the process, which in this case, isexe="/usr/sbin/httpd".
scontext) with the target context (tcontext). Should the process (scontext) be accessing such an object (tcontext)? For example, the Apache HTTP Server (httpd_t) should only be accessing types specified in the httpd_selinux(8) manual page, such as httpd_sys_content_t, public_content_t, and so on, unless configured otherwise.
11.3.7. sealert Messages
/var/log/messages. The following is an example AVC denial (logged to messages) that occurred when the Apache HTTP Server (running in the httpd_t domain) attempted to access the /var/www/html/file1 file (labeled with the samba_share_t type):
hostname setroubleshoot: SELinux is preventing httpd (httpd_t) "getattr" to /var/www/html/file1 (samba_share_t). For complete SELinux messages. run sealert -l 32eee32b-21ca-4846-a22f-0ba050206786
sealert -l 32eee32b-21ca-4846-a22f-0ba050206786 command to view the complete message. This command only works on the local machine, and presents the same information as the sealert GUI:
~]$sealert -l 32eee32b-21ca-4846-a22f-0ba050206786SELinux is preventing httpd from getattr access on the file /var/www/html/file1. ***** Plugin restorecon (92.2 confidence) suggests ************************ If you want to fix the label. /var/www/html/file1 default label should be httpd_sys_content_t. Then you can run restorecon. Do # /sbin/restorecon -v /var/www/html/file1 ***** Plugin public_content (7.83 confidence) suggests ******************** If you want to treat file1 as public content Then you need to change the label on file1 to public_content_t or public_content_rw_t. Do # semanage fcontext -a -t public_content_t '/var/www/html/file1' # restorecon -v '/var/www/html/file1' ***** Plugin catchall (1.41 confidence) suggests ************************** If you believe that httpd should be allowed getattr access on the file1 file by default. Then you should report this as a bug. You can generate a local policy module to allow this access. Do allow this access for now by executing: # ausearch -c 'httpd' --raw | audit2allow -M my-httpd # semodule -i my-httpd.pp Additional Information: Source Context system_u:system_r:httpd_t:s0 Target Context unconfined_u:object_r:samba_share_t:s0 Target Objects /var/www/html/file1 [ file ] Source httpd Source Path httpd Port <Unknown> Host hostname.redhat.com Source RPM Packages Target RPM Packages Policy RPM selinux-policy-3.13.1-166.el7.noarch Selinux Enabled True Policy Type targeted Enforcing Mode Enforcing Host Name hostname.redhat.com Platform Linux hostname.redhat.com 3.10.0-693.el7.x86_64 #1 SMP Thu Jul 6 19:56:57 EDT 2017 x86_64 x86_64 Alert Count 2 First Seen 2017-07-20 02:52:11 EDT Last Seen 2017-07-20 02:52:11 EDT Local ID 32eee32b-21ca-4846-a22f-0ba050206786 Raw Audit Messages type=AVC msg=audit(1500533531.140:295): avc: denied { getattr } for pid=24934 comm="httpd" path="/var/www/html/file1" dev="vda1" ino=31457414 scontext=system_u:system_r:httpd_t:s0 tcontext=unconfined_u:object_r:samba_share_t:s0 tclass=file Hash: httpd,httpd_t,samba_share_t,file,getattr
- Summary
- A brief summary of the denied action. This is the same as the denial in
/var/log/messages. In this example, thehttpdprocess was denied access to a file (file1), which is labeled with thesamba_share_ttype. - Detailed Description
- A more verbose description. In this example,
file1is labeled with thesamba_share_ttype. This type is used for files and directories that you want to export using Samba. The description suggests changing the type to a type that can be accessed by the Apache HTTP Server and Samba, if such access is required. - Allowing Access
- A suggestion for how to allow access. This may be relabeling files, enabling a Boolean, or making a local policy module. In this case, the suggestion is to label the file with a type accessible to both the Apache HTTP Server and Samba.
- Fix Command
- A suggested command to allow access and resolve the denial. In this example, it gives the command to change the
file1type topublic_content_t, which is accessible to the Apache HTTP Server and Samba. - Additional Information
- Information that is useful in bug reports, such as the policy package name and version (
selinux-policy-3.13.1-166.el7.noarch), but may not help towards solving why the denial occurred. - Raw Audit Messages
- The raw audit messages from
/var/log/audit/audit.logthat are associated with the denial. See Section 11.3.6, “Raw Audit Messages” for information about each item in the AVC denial.
11.3.8. Allowing Access: audit2allow
Warning
audit2allow utility.
audit2allow utility gathers information from logs of denied operations and then generates SELinux policy allow rules.[13] After analyzing denial messages as per Section 11.3.7, “sealert Messages”, and if no label changes or Booleans allowed access, use audit2allow to create a local policy module. When access is denied by SELinux, running audit2allow generates Type Enforcement rules that allow the previously denied access.
audit2allow to generate a local policy module as your first option when you see an SELinux denial. Troubleshooting should start with a check if there is a labeling problem. The second most often case is that you have changed a process configuration, and you forgot to tell SELinux about it. For more information, see the Four Key Causes of SELinux Errors white paper.
audit2allow to create a policy module:
- A denial message and the associated system call are logged to the
/var/log/audit/audit.logfile:type=AVC msg=audit(1226270358.848:238): avc: denied
{ write }for pid=13349comm="certwatch"name="cache" dev=dm-0 ino=218171 scontext=system_u:system_r:certwatch_t:s0tcontext=system_u:object_r:var_t:s0tclass=dir type=SYSCALL msg=audit(1226270358.848:238): arch=40000003 syscall=39 success=no exit=-13 a0=39a2bf a1=3ff a2=3a0354 a3=94703c8 items=0 ppid=13344 pid=13349 auid=4294967295 uid=0 gid=0 euid=0 suid=0 fsuid=0 egid=0 sgid=0 fsgid=0 tty=(none) ses=4294967295 comm="certwatch" exe="/usr/bin/certwatch" subj=system_u:system_r:certwatch_t:s0 key=(null)In this example, certwatch was denied the write access to a directory labeled with thevar_ttype. Analyze the denial message as per Section 11.3.7, “sealert Messages”. If no label changes or Booleans allowed access, useaudit2allowto create a local policy module. - Enter the following command to produce a human-readable description of why the access was denied. The
audit2allowutility reads/var/log/audit/audit.log, and as such, must be run as the root user:~]#audit2allow -w -atype=AVC msg=audit(1226270358.848:238): avc: denied { write } for pid=13349 comm="certwatch" name="cache" dev=dm-0 ino=218171 scontext=system_u:system_r:certwatch_t:s0 tcontext=system_u:object_r:var_t:s0 tclass=dir Was caused by: Missing type enforcement (TE) allow rule. You can use audit2allow to generate a loadable module to allow this access.The-acommand-line option causes all audit logs to be read. The-woption produces the human-readable description. As shown, access was denied due to a missing Type Enforcement rule. - Enter the following command to view the Type Enforcement rule that allows the denied access:
~]#audit2allow -a#============= certwatch_t ============== allow certwatch_t var_t:dir write;Important
Missing Type Enforcement rules are usually caused by bugs in the SELinux policy, and should be reported in Red Hat Bugzilla. For Red Hat Enterprise Linux, create bugs against theRed Hat Enterprise Linuxproduct, and select theselinux-policycomponent. Include the output of theaudit2allow -w -aandaudit2allow -acommands in such bug reports. - To use the rule displayed by
audit2allow -a, enter the following command as root to create a custom module. The-Moption creates a Type Enforcement file (.te) with the name specified with-M, in your current working directory:~]#audit2allow -a -M mycertwatch******************** IMPORTANT *********************** To make this policy package active, execute: semodule -i mycertwatch.pp - Also,
audit2allowcompiles the Type Enforcement rule into a policy package (.pp):~]#lsmycertwatch.pp mycertwatch.teTo install the module, enter the following command as the root:~]#semodule -i mycertwatch.ppImportant
Modules created withaudit2allowmay allow more access than required. It is recommended that policy created withaudit2allowbe posted to the upstream SELinux list for review. If you believe there is a bug in the policy, create a bug in Red Hat Bugzilla.
grep utility to narrow down the input for audit2allow. The following example demonstrates using grep to only send denial messages related to certwatch through audit2allow:
~]#grep certwatch /var/log/audit/audit.log | audit2allow -R -M mycertwatch2******************** IMPORTANT *********************** To make this policy package active, execute: semodule -i mycertwatch2.pp
/etc/selinux/targeted/contexts/files/ define contexts for files and directories. Files in this directory are read by the restorecon and setfiles utilities to restore files and directories to their default contexts.
semanage port -a command adds an entry to the /etc/selinux/targeted/modules/active/ports.local file. Note that by default, this file can only be viewed by root.
Chapter 12. Further Information
12.1. Contributors
- Dominick Grift – Technical Editor
- Murray McAllister – Red Hat Product Security
- James Morris – Technical Editor
- Eric Paris – Technical Editor
- Scott Radvan – Red Hat Customer Content Services
- Daniel Walsh – Red Hat Security Engineering
12.2. Other Resources
Fedora
- Main page: http://fedoraproject.org/wiki/SELinux.
- Troubleshooting: http://fedoraproject.org/wiki/SELinux/Troubleshooting.
- Fedora SELinux FAQ: https://fedoraproject.org/wiki/SELinux_FAQ.
The National Security Agency (NSA)
- Main SELinux website: https://www.nsa.gov/what-we-do/research/selinux/.
- SELinux Mailing List: https://www.nsa.gov/what-we-do/research/selinux/mailing-list.shtml.
- SELinux documentation: https://www.nsa.gov/what-we-do/research/selinux/documentation/index.shtml.
- SELinux background: https://www.nsa.gov/what-we-do/research/selinux/related-work/.
Tresys Technology
The SELinux GitHub repositories
- SELinux Project: https://github.com/SELinuxProject
- Tresys Technology: https://github.com/TresysTechnology/
SELinux Project Wiki
- Main page: http://selinuxproject.org/page/Main_Page.
- User resources, including links to documentation, mailing lists, websites, and tools: http://selinuxproject.org/page/User_Resources.
The SELinux Notebook - The Foundations - 4th Edition
DigitalOcean: An Introduction to SELinux on CentOS 7
IRC
- #selinux
- #fedora-selinux
Part II. Managing Confined Services
Chapter 13. The Apache HTTP Server
~]$ rpm -q httpd
package httpd is not installed
yum utility as the root user to install it:
~]# yum install httpd13.1. The Apache HTTP Server and SELinux
httpd) runs confined by default. Confined processes run in their own domains, and are separated from other confined processes. If a confined process is compromised by an attacker, depending on SELinux policy configuration, an attacker's access to resources and the possible damage they can do is limited. The following example demonstrates the httpd processes running in their own domain. This example assumes the httpd, setroubleshoot, setroubleshoot-server and policycoreutils-python packages are installed:
- Run the
getenforcecommand to confirm SELinux is running in enforcing mode:~]$
getenforceEnforcingThe command returnsEnforcingwhen SELinux is running in enforcing mode. - Enter the following command as root to start
httpd:~]#
systemctl start httpd.serviceConfirm that the service is running. The output should include the information below (only the time stamp will differ):~]#
systemctl status httpd.servicehttpd.service - The Apache HTTP Server Loaded: loaded (/usr/lib/systemd/system/httpd.service; disabled) Active: active (running) since Mon 2013-08-05 14:00:55 CEST; 8s ago - To view the
httpdprocesses, execute the following command:~]$
ps -eZ | grep httpdsystem_u:system_r:httpd_t:s0 19780 ? 00:00:00 httpd system_u:system_r:httpd_t:s0 19781 ? 00:00:00 httpd system_u:system_r:httpd_t:s0 19782 ? 00:00:00 httpd system_u:system_r:httpd_t:s0 19783 ? 00:00:00 httpd system_u:system_r:httpd_t:s0 19784 ? 00:00:00 httpd system_u:system_r:httpd_t:s0 19785 ? 00:00:00 httpdThe SELinux context associated with thehttpdprocesses issystem_u:system_r:httpd_t:s0. The second last part of the context,httpd_t, is the type. A type defines a domain for processes and a type for files. In this case, thehttpdprocesses are running in thehttpd_tdomain.
httpd_t) interact with files, other processes, and the system in general. Files must be labeled correctly to allow httpd access to them. For example, httpd can read files labeled with the httpd_sys_content_t type, but cannot write to them, even if Linux (DAC) permissions allow write access. Booleans must be enabled to allow certain behavior, such as allowing scripts network access, allowing httpd access to NFS and CIFS volumes, and httpd being allowed to execute Common Gateway Interface (CGI) scripts.
/etc/httpd/conf/httpd.conf file is configured so httpd listens on a port other than TCP ports 80, 443, 488, 8008, 8009, or 8443, the semanage port command must be used to add the new port number to SELinux policy configuration. The following example demonstrates configuring httpd to listen on a port that is not already defined in SELinux policy configuration for httpd, and, as a consequence, httpd failing to start. This example also demonstrates how to then configure the SELinux system to allow httpd to successfully listen on a non-standard port that is not already defined in the policy. This example assumes the httpd package is installed. Run each command in the example as the root user:
- Enter the following command to confirm
httpdis not running:~]#
systemctl status httpd.servicehttpd.service - The Apache HTTP Server Loaded: loaded (/usr/lib/systemd/system/httpd.service; disabled) Active: inactive (dead)If the output differs, stop the process:~]#
systemctl stop httpd.service - Use the
semanageutility to view the ports SELinux allowshttpdto listen on:~]#
semanage port -l | grep -w http_port_thttp_port_t tcp 80, 443, 488, 8008, 8009, 8443 - Edit the
/etc/httpd/conf/httpd.conffile as root. Configure theListenoption so it lists a port that is not configured in SELinux policy configuration forhttpd. In this example,httpdis configured to listen on port 12345:# Change this to Listen on specific IP addresses as shown below to # prevent Apache from glomming onto all bound IP addresses (0.0.0.0) # #Listen 12.34.56.78:80 Listen 127.0.0.1:12345
- Enter the following command to start
httpd:~]#
systemctl start httpd.serviceJob for httpd.service failed. See 'systemctl status httpd.service' and 'journalctl -xn' for details.An SELinux denial message similar to the following is logged:setroubleshoot: SELinux is preventing the httpd (httpd_t) from binding to port 12345. For complete SELinux messages. run sealert -l f18bca99-db64-4c16-9719-1db89f0d8c77
- For SELinux to allow
httpdto listen on port 12345, as used in this example, the following command is required:~]#
semanage port -a -t http_port_t -p tcp 12345 - Start
httpdagain and have it listen on the new port:~]#
systemctl start httpd.service - Now that SELinux has been configured to allow
httpdto listen on a non-standard port (TCP 12345 in this example),httpdstarts successfully on this port. - To prove that
httpdis listening and communicating on TCP port 12345, open a telnet connection to the specified port and issue a HTTP GET command, as follows:~]#
telnet localhost 12345Trying 127.0.0.1... Connected to localhost. Escape character is '^]'. GET / HTTP/1.0 HTTP/1.1 200 OK Date: Wed, 02 Dec 2009 14:36:34 GMT Server: Apache/2.2.13 (Red Hat) Accept-Ranges: bytes Content-Length: 3985 Content-Type: text/html; charset=UTF-8 [...continues...]
13.2. Types
/var/www/html/ directory, and shows the file inheriting the httpd_sys_content_t type from its parent directory (/var/www/html/):
- Enter the following command to view the SELinux context of
/var/www/html/:~]$
ls -dZ /var/www/htmldrwxr-xr-x root root system_u:object_r:httpd_sys_content_t:s0 /var/www/htmlThis shows/var/www/html/is labeled with thehttpd_sys_content_ttype. - Create a new file by using the
touchutility as root:~]#
touch /var/www/html/file1 - Enter the following command to view the SELinux context:
~]$
ls -Z /var/www/html/file1-rw-r--r-- root root unconfined_u:object_r:httpd_sys_content_t:s0 /var/www/html/file1
ls -Z command shows file1 labeled with the httpd_sys_content_t type. SELinux allows httpd to read files labeled with this type, but not write to them, even if Linux permissions allow write access. SELinux policy defines what types a process running in the httpd_t domain (where httpd runs) can read and write to. This helps prevent processes from accessing files intended for use by another process.
httpd can access files labeled with the httpd_sys_content_t type (intended for the Apache HTTP Server), but by default, cannot access files labeled with the samba_share_t type (intended for Samba). Also, files in user home directories are labeled with the user_home_t type: by default, this prevents httpd from reading or writing to files in user home directories.
httpd. Different types allow you to configure flexible access:
httpd_sys_content_t- Use this type for static web content, such as
.htmlfiles used by a static website. Files labeled with this type are accessible (read only) tohttpdand scripts executed byhttpd. By default, files and directories labeled with this type cannot be written to or modified byhttpdor other processes. Note that by default, files created in or copied into the/var/www/html/directory are labeled with thehttpd_sys_content_ttype. httpd_sys_script_exec_t- Use this type for scripts you want
httpdto execute. This type is commonly used for Common Gateway Interface (CGI) scripts in the/var/www/cgi-bin/directory. By default, SELinux policy preventshttpdfrom executing CGI scripts. To allow this, label the scripts with thehttpd_sys_script_exec_ttype and enable thehttpd_enable_cgiBoolean. Scripts labeled withhttpd_sys_script_exec_trun in thehttpd_sys_script_tdomain when executed byhttpd. Thehttpd_sys_script_tdomain has access to other system domains, such aspostgresql_tandmysqld_t. httpd_sys_rw_content_t- Files labeled with this type can be written to by scripts labeled with the
httpd_sys_script_exec_ttype, but cannot be modified by scripts labeled with any other type. You must use thehttpd_sys_rw_content_ttype to label files that will be read from and written to by scripts labeled with thehttpd_sys_script_exec_ttype. httpd_sys_ra_content_t- Files labeled with this type can be appended to by scripts labeled with the
httpd_sys_script_exec_ttype, but cannot be modified by scripts labeled with any other type. You must use thehttpd_sys_ra_content_ttype to label files that will be read from and appended to by scripts labeled with thehttpd_sys_script_exec_ttype. httpd_unconfined_script_exec_t- Scripts labeled with this type run without SELinux protection. Only use this type for complex scripts, after exhausting all other options. It is better to use this type instead of disabling SELinux protection for
httpd, or for the entire system.
Note
~]$ grep httpd /etc/selinux/targeted/contexts/files/file_contexts
Procedure 13.1. Changing the SELinux Context
chcon command. Changes made with chcon do not survive a file system relabel or the restorecon command. SELinux policy controls whether users are able to modify the SELinux context for any given file. The following example demonstrates creating a new directory and an index.html file for use by httpd, and labeling that file and directory to allow httpd access to them:
- Use the
mkdirutility as root to create a top-level directory structure to store files to be used byhttpd:~]#
mkdir -p /my/website - Files and directories that do not match a pattern in file-context configuration may be labeled with the
default_ttype. This type is inaccessible to confined services:~]$
ls -dZ /mydrwxr-xr-x root root unconfined_u:object_r:default_t:s0 /my - Enter the following command as root to change the type of the
my/directory and subdirectories, to a type accessible tohttpd. Now, files created under/my/website/inherit thehttpd_sys_content_ttype, rather than thedefault_ttype, and are therefore accessible to httpd:~]#
chcon -R -t httpd_sys_content_t /my/~]#touch /my/website/index.html~]#ls -Z /my/website/index.html-rw-r--r-- root root unconfined_u:object_r:httpd_sys_content_t:s0 /my/website/index.html
chcon.
semanage fcontext command (semanage is provided by the policycoreutils-python package) to make label changes that survive a relabel and the restorecon command. This command adds changes to file-context configuration. Then, run restorecon, which reads file-context configuration, to apply the label change. The following example demonstrates creating a new directory and an index.html file for use by httpd, and persistently changing the label of that directory and file to allow httpd access to them:
- Use the
mkdirutility as root to create a top-level directory structure to store files to be used byhttpd:~]#
mkdir -p /my/website - Enter the following command as root to add the label change to file-context configuration:
~]#
semanage fcontext -a -t httpd_sys_content_t "/my(/.*)?"The"/my(/.*)?"expression means the label change applies to themy/directory and all files and directories under it. - Use the
touchutility as root to create a new file:~]#
touch /my/website/index.html - Enter the following command as root to apply the label changes (
restoreconreads file-context configuration, which was modified by thesemanagecommand in step 2):~]#
restorecon -R -v /my/restorecon reset /my context unconfined_u:object_r:default_t:s0->system_u:object_r:httpd_sys_content_t:s0 restorecon reset /my/website context unconfined_u:object_r:default_t:s0->system_u:object_r:httpd_sys_content_t:s0 restorecon reset /my/website/index.html context unconfined_u:object_r:default_t:s0->system_u:object_r:httpd_sys_content_t:s0
13.3. Booleans
setsebool command. For example, to enable the httpd_anon_write Boolean, enter the following command as the root user:
~]# setsebool -P httpd_anon_write onon to off in the command, as shown below:
~]# setsebool -P httpd_anon_write offNote
-P option if you do not want setsebool changes to persist across reboots.
httpd is running:
httpd_anon_write- When disabled, this Boolean allows
httpdto only have read access to files labeled with thepublic_content_rw_ttype. Enabling this Boolean allowshttpdto write to files labeled with thepublic_content_rw_ttype, such as a public directory containing files for a public file transfer service. httpd_mod_auth_ntlm_winbind- Enabling this Boolean allows access to NTLM and Winbind authentication mechanisms using the
mod_auth_ntlm_winbindmodule inhttpd. httpd_mod_auth_pam- Enabling this Boolean allows access to PAM authentication mechanisms using the
mod_auth_pammodule inhttpd. httpd_sys_script_anon_write- This Boolean defines whether or not HTTP scripts are allowed write access to files labeled with the
public_content_rw_ttype, as used in a public file transfer service. httpd_builtin_scripting- This Boolean defines access to
httpdscripting. Having this Boolean enabled is often required for PHP content. httpd_can_network_connect- When disabled, this Boolean prevents HTTP scripts and modules from initiating a connection to a network or remote port. Enable this Boolean to allow this access.
httpd_can_network_connect_db- When disabled, this Boolean prevents HTTP scripts and modules from initiating a connection to database servers. Enable this Boolean to allow this access.
httpd_can_network_relay- Enable this Boolean when
httpdis being used as a forward or reverse proxy. httpd_can_sendmail- When disabled, this Boolean prevents HTTP modules from sending mail. This can prevent spam attacks should a vulnerability be found in
httpd. Enable this Boolean to allow HTTP modules to send mail. httpd_dbus_avahi- When disabled, this Boolean denies
httpdaccess to theavahiservice throughD-Bus. Enable this Boolean to allow this access. httpd_enable_cgi- When disabled, this Boolean prevents
httpdfrom executing CGI scripts. Enable this Boolean to allowhttpdto execute CGI scripts (CGI scripts must be labeled with thehttpd_sys_script_exec_ttype). httpd_enable_ftp_server- Enabling this Boolean allows
httpdto listen on the FTP port and act as an FTP server. httpd_enable_homedirs- When disabled, this Boolean prevents
httpdfrom accessing user home directories. Enable this Boolean to allowhttpdaccess to user home directories; for example, content in/home/*/. httpd_execmem- When enabled, this Boolean allows
httpdto execute programs that require memory addresses that are both executable and writable. Enabling this Boolean is not recommended from a security standpoint as it reduces protection against buffer overflows, however certain modules and applications (such as Java and Mono applications) require this privilege. httpd_ssi_exec- This Boolean defines whether or not server side include (SSI) elements in a web page can be executed.
httpd_tty_comm- This Boolean defines whether or not
httpdis allowed access to the controlling terminal. Usually this access is not required, however in cases such as configuring an SSL certificate file, terminal access is required to display and process a password prompt. httpd_unified- When enabled, this Boolean allows
httpd_tcomplete access to all of thehttpdtypes (that is to execute, read, or write sys_content_t). When disabled, there is separation in place between web content that is read-only, writable, or executable. Disabling this Boolean ensures an extra level of security but adds the administrative overhead of having to individually label scripts and other web content based on the file access that each should have. httpd_use_cifs- Enable this Boolean to allow
httpdaccess to files on CIFS volumes that are labeled with thecifs_ttype, such as file systems mounted using Samba. httpd_use_nfs- Enable this Boolean to allow
httpdaccess to files on NFS volumes that are labeled with thenfs_ttype, such as file systems mounted using NFS.
Note
~]$ getsebool -a | grep service_name
Enter the following command to view description of a particular Boolean:
~]$ sepolicy booleans -b boolean_name
Note that the additional policycoreutils-devel package providing the sepolicy utility is required for this command to work.
13.4. Configuration examples
13.4.1. Running a static site
.html files for that website with the httpd_sys_content_t type. By default, the Apache HTTP Server cannot write to files that are labeled with the httpd_sys_content_t type. The following example creates a new directory to store files for a read-only website:
- Use the
mkdirutility as root to create a top-level directory:~]#
mkdir /mywebsite - As root, create a
/mywebsite/index.htmlfile. Copy and paste the following content into/mywebsite/index.html:<html> <h2>index.html from /mywebsite/</h2> </html>
- To allow the Apache HTTP Server read only access to
/mywebsite/, as well as files and subdirectories under it, label the directory with thehttpd_sys_content_ttype. Enter the following command as root to add the label change to file-context configuration:~]#
semanage fcontext -a -t httpd_sys_content_t "/mywebsite(/.*)?" - Use the
restoreconutility as root to make the label changes:~]#
restorecon -R -v /mywebsiterestorecon reset /mywebsite context unconfined_u:object_r:default_t:s0->system_u:object_r:httpd_sys_content_t:s0 restorecon reset /mywebsite/index.html context unconfined_u:object_r:default_t:s0->system_u:object_r:httpd_sys_content_t:s0 - For this example, edit the
/etc/httpd/conf/httpd.conffile as root. Comment out the existingDocumentRootoption. Add aDocumentRoot "/mywebsite"option. After editing, these options should look as follows:#DocumentRoot "/var/www/html" DocumentRoot "/mywebsite"
- Enter the following command as root to see the status of the Apache HTTP Server. If the server is stopped, start it:
~]#
systemctl status httpd.servicehttpd.service - The Apache HTTP Server Loaded: loaded (/usr/lib/systemd/system/httpd.service; disabled) Active: inactive (dead)~]#
systemctl start httpd.serviceIf the server is running, restart the service by executing the following command as root (this also applies any changes made tohttpd.conf):~]#
systemctl status httpd.servicehttpd.service - The Apache HTTP Server Loaded: loaded (/usr/lib/systemd/system/httpd.service; disabled) Active: active (running) since Wed 2014-02-05 13:16:46 CET; 2s ago~]#
systemctl restart httpd.service - Use a web browser to navigate to
http://localhost/index.html. The following is displayed:index.html from /mywebsite/
13.4.2. Sharing NFS and CIFS volumes
nfs_t type. Also, by default, Samba shares mounted on the client side are labeled with a default context defined by policy. In common policies, this default context uses the cifs_t type.
nfs_t or cifs_t types. This may prevent file systems labeled with these types from being mounted and then read or exported by other services. Booleans can be enabled or disabled to control which services are allowed to access the nfs_t and cifs_t types.
httpd_use_nfs Boolean to allow httpd to access and share NFS volumes (labeled with the nfs_t type):
~]# setsebool -P httpd_use_nfs onhttpd_use_cifs Boolean to allow httpd to access and share CIFS volumes (labeled with the cifs_t type):
~]# setsebool -P httpd_use_cifs onNote
-P option if you do not want setsebool changes to persist across reboots.
13.4.3. Sharing files between services
httpd_sys_content_t type, which are intended for use by the Apache HTTP Server. Files can be shared between the Apache HTTP Server, FTP, rsync, and Samba, if the required files are labeled with the public_content_t or public_content_rw_t type.
- Use the
mkdirutility as root to create a new top-level directory to share files between multiple services:~]#
mkdir /shares - Files and directories that do not match a pattern in file-context configuration may be labeled with the
default_ttype. This type is inaccessible to confined services:~]$
ls -dZ /sharesdrwxr-xr-x root root unconfined_u:object_r:default_t:s0 /shares - As root, create a
/shares/index.htmlfile. Copy and paste the following content into/shares/index.html:<html> <body> <p>Hello</p> </body> </html>
- Labeling
/shares/with thepublic_content_ttype allows read-only access by the Apache HTTP Server, FTP, rsync, and Samba. Enter the following command as root to add the label change to file-context configuration:~]#
semanage fcontext -a -t public_content_t "/shares(/.*)?" - Use the
restoreconutility as root to apply the label changes:~]#
restorecon -R -v /shares/restorecon reset /shares context unconfined_u:object_r:default_t:s0->system_u:object_r:public_content_t:s0 restorecon reset /shares/index.html context unconfined_u:object_r:default_t:s0->system_u:object_r:public_content_t:s0
/shares/ through Samba:
- Confirm the samba, samba-common, and samba-client packages are installed (version numbers may differ):
~]$
rpm -q samba samba-common samba-clientsamba-3.4.0-0.41.el6.3.i686 samba-common-3.4.0-0.41.el6.3.i686 samba-client-3.4.0-0.41.el6.3.i686If any of these packages are not installed, install them by running the following command as root:~]#
yum install package-name - Edit the
/etc/samba/smb.conffile as root. Add the following entry to the bottom of this file to share the/shares/directory through Samba:[shares] comment = Documents for Apache HTTP Server, FTP, rsync, and Samba path = /shares public = yes writable = no
- A Samba account is required to mount a Samba file system. Enter the following command as root to create a Samba account, where username is an existing Linux user. For example,
smbpasswd -a testusercreates a Samba account for the Linuxtestuseruser:~]#
smbpasswd -a testuserNew SMB password: Enter a password Retype new SMB password: Enter the same password again Added user testuser.If you run the above command, specifying a user name of an account that does not exist on the system, it causes aCannot locate Unix account for 'username'!error. - Start the Samba service:
~]#
systemctl start smb.service - Enter the following command to list the available shares, where username is the Samba account added in step 3. When prompted for a password, enter the password assigned to the Samba account in step 3 (version numbers may differ):
~]$
smbclient -U username -L localhostEnter username's password: Domain=[HOSTNAME] OS=[Unix] Server=[Samba 3.4.0-0.41.el6] Sharename Type Comment --------- ---- ------- shares Disk Documents for Apache HTTP Server, FTP, rsync, and Samba IPC$ IPC IPC Service (Samba Server Version 3.4.0-0.41.el6) username Disk Home Directories Domain=[HOSTNAME] OS=[Unix] Server=[Samba 3.4.0-0.41.el6] Server Comment --------- ------- Workgroup Master --------- ------- - User the
mkdirutility to create a new directory. This directory will be used to mount thesharesSamba share:~]#
mkdir /test/ - Enter the following command as root to mount the
sharesSamba share to/test/, replacing username with the user name from step 3:~]#
mount //localhost/shares /test/ -o user=usernameEnter the password for username, which was configured in step 3. - View the content of the file, which is being shared through Samba:
~]$
cat /test/index.html<html> <body> <p>Hello</p> </body> </html>
/shares/ through the Apache HTTP Server:
- Confirm the httpd package is installed (version number may differ):
~]$
rpm -q httpdhttpd-2.2.11-6.i386If this package is not installed, use theyumutility as root to install it:~]#
yum install httpd - Change into the
/var/www/html/directory. Enter the following command as root to create a link (namedshares) to the/shares/directory:html]#
ln -s /shares/ shares - Start the Apache HTTP Server:
~]#
systemctl start httpd.service - Use a web browser to navigate to
http://localhost/shares. The/shares/index.htmlfile is displayed.
index.html file if it exists. If /shares/ did not have index.html, and instead had file1, file2, and file3, a directory listing would occur when accessing http://localhost/shares:
- Remove the
index.htmlfile:~]#
rm -i /shares/index.html - Use the
touchutility as root to create three files in/shares/:~]#
touch /shares/file{1,2,3}~]#ls -Z /shares/-rw-r--r-- root root system_u:object_r:public_content_t:s0 file1 -rw-r--r-- root root unconfined_u:object_r:public_content_t:s0 file2 -rw-r--r-- root root unconfined_u:object_r:public_content_t:s0 file3 - Enter the following command as root to see the status of the Apache HTTP Server:
~]#
systemctl status httpd.servicehttpd.service - The Apache HTTP Server Loaded: loaded (/usr/lib/systemd/system/httpd.service; disabled) Active: inactive (dead)If the server is stopped, start it:~]#
systemctl start httpd.service - Use a web browser to navigate to
http://localhost/shares. A directory listing is displayed:
13.4.4. Changing port numbers
semanage utility as the root user to list the ports SELinux allows httpd to listen on:
~]# semanage port -l | grep -w http_port_t
http_port_t                    tcp      80, 443, 488, 8008, 8009, 8443
httpd to listen on TCP ports 80, 443, 488, 8008, 8009, or 8443. If /etc/httpd/conf/httpd.conf is configured so that httpd listens on any port not listed for http_port_t, httpd fails to start.
httpd to run on a port other than TCP ports 80, 443, 488, 8008, 8009, or 8443:
- Edit the
/etc/httpd/conf/httpd.conffile as root so theListenoption lists a port that is not configured in SELinux policy forhttpd. The following example configureshttpdto listen on the 10.0.0.1 IP address, and on TCP port 12345:# Change this to Listen on specific IP addresses as shown below to # prevent Apache from glomming onto all bound IP addresses (0.0.0.0) # #Listen 12.34.56.78:80 Listen 10.0.0.1:12345
- Enter the following command as the root user to add the port to SELinux policy configuration:
~]#
semanage port -a -t http_port_t -p tcp 12345 - Confirm that the port is added:
~]#
semanage port -l | grep -w http_port_thttp_port_t tcp 12345, 80, 443, 488, 8008, 8009, 8443
httpd on port 12345, use the semanage utility as root to remove the port from policy configuration:
~]# semanage port -d -t http_port_t -p tcp 12345Chapter 14. Samba
~]$ rpm -q samba
package samba is not installed
yum utility as the root user to install it:
~]# yum install samba14.1. Samba and SELinux
smbd) runs confined by default. Confined services run in their own domains, and are separated from other confined services. The following example demonstrates the smbd process running in its own domain. This example assumes the samba package is installed:
- Run the
getenforcecommand to confirm SELinux is running in enforcing mode:~]$
getenforceEnforcingThe command returnsEnforcingwhen SELinux is running in enforcing mode. - Enter the following command as root to start
smbd:~]#
systemctl start smb.serviceConfirm that the service is running. The output should include the information below (only the time stamp will differ):~]#
systemctl status smb.servicesmb.service - Samba SMB Daemon Loaded: loaded (/usr/lib/systemd/system/smb.service; disabled) Active: active (running) since Mon 2013-08-05 12:17:26 CEST; 2h 22min ago - To view the
smbdprocesses, execute the following command:~]$
ps -eZ | grep smbsystem_u:system_r:smbd_t:s0 9653 ? 00:00:00 smbd system_u:system_r:smbd_t:s0 9654? 00:00:00 smbdThe SELinux context associated with thesmbdprocesses issystem_u:system_r:smbd_t:s0. The second last part of the context,smbd_t, is the type. A type defines a domain for processes and a type for files. In this case, thesmbdprocesses are running in thesmbd_tdomain.
smbd to access and share them. For example, smbd can read and write to files labeled with the samba_share_t type, but by default, cannot access files labeled with the httpd_sys_content_t type, which is intended for use by the Apache HTTP Server. Booleans must be enabled to allow certain behavior, such as allowing home directories and NFS volumes to be exported through Samba, as well as to allow Samba to act as a domain controller.
14.2. Types
samba_share_t type to allow Samba to share them. Only label files you have created, and do not relabel system files with the samba_share_t type: Booleans can be enabled to share such files and directories. SELinux allows Samba to write to files labeled with the samba_share_t type, as long as the /etc/samba/smb.conf file and Linux permissions are set accordingly.
samba_etc_t type is used on certain files in the /etc/samba/ directory, such as smb.conf. Do not manually label files with the samba_etc_t type. If files in this directory are not labeled correctly, enter the restorecon -R -v /etc/samba command as the root user to restore such files to their default contexts. If /etc/samba/smb.conf is not labeled with the samba_etc_t type, starting the Samba service may fail and an SELinux denial message may be logged. The following is an example denial message when /etc/samba/smb.conf was labeled with the httpd_sys_content_t type:
setroubleshoot: SELinux is preventing smbd (smbd_t) "read" to ./smb.conf (httpd_sys_content_t). For complete SELinux messages. run sealert -l deb33473-1069-482b-bb50-e4cd05ab18af
14.3. Booleans
smbd_anon_write- Having this Boolean enabled allows
smbdto write to a public directory, such as an area reserved for common files that otherwise has no special access restrictions. samba_create_home_dirs- Having this Boolean enabled allows Samba to create new home directories independently. This is often done by mechanisms such as PAM.
samba_domain_controller- When enabled, this Boolean allows Samba to act as a domain controller, as well as giving it permission to execute related commands such as
useradd,groupadd, andpasswd. samba_enable_home_dirs- Enabling this Boolean allows Samba to share users' home directories.
samba_export_all_ro- Export any file or directory, allowing read-only permissions. This allows files and directories that are not labeled with the
samba_share_ttype to be shared through Samba. When thesamba_export_all_roBoolean is enabled, but thesamba_export_all_rwBoolean is disabled, write access to Samba shares is denied, even if write access is configured in/etc/samba/smb.conf, as well as Linux permissions allowing write access. samba_export_all_rw- Export any file or directory, allowing read and write permissions. This allows files and directories that are not labeled with the
samba_share_ttype to be exported through Samba. Permissions in/etc/samba/smb.confand Linux permissions must be configured to allow write access. samba_run_unconfined- Having this Boolean enabled allows Samba to run unconfined scripts in the
/var/lib/samba/scripts/directory. samba_share_fusefs- This Boolean must be enabled for Samba to share fusefs file systems.
samba_share_nfs- Disabling this Boolean prevents
smbdfrom having full access to NFS shares through Samba. Enabling this Boolean will allow Samba to share NFS volumes. use_samba_home_dirs- Enable this Boolean to use a remote server for Samba home directories.
virt_use_samba- Allow virtual machine access to CIFS files.
Note
~]$ getsebool -a | grep service_name
Enter the following command to view description of a particular Boolean:
~]$ sepolicy booleans -b boolean_name
Note that the additional policycoreutils-devel package providing the sepolicy utility is required for this command to work.
14.4. Configuration examples
14.4.1. Sharing directories you create
- Confirm that the samba, samba-common, and samba-client packages are installed:
~]$
rpm -q samba samba-common samba-clientpackage samba is not installed package samba-common is not installed package samba-client is not installedIf any of these packages are not installed, install them by using theyumutility as root:~]#
yum install package-name - Use the
mkdirutility as root to create a new top-level directory to share files through Samba:~]#
mkdir /myshare - Use the
touchutility root to create an empty file. This file is used later to verify the Samba share mounted correctly:~]#
touch /myshare/file1 - SELinux allows Samba to read and write to files labeled with the
samba_share_ttype, as long as the/etc/samba/smb.conffile and Linux permissions are set accordingly. Enter the following command as root to add the label change to file-context configuration:~]#
semanage fcontext -a -t samba_share_t "/myshare(/.*)?" - Use the
restoreconutility as root to apply the label changes:~]#
restorecon -R -v /mysharerestorecon reset /myshare context unconfined_u:object_r:default_t:s0->system_u:object_r:samba_share_t:s0 restorecon reset /myshare/file1 context unconfined_u:object_r:default_t:s0->system_u:object_r:samba_share_t:s0 - Edit
/etc/samba/smb.confas root. Add the following to the bottom of this file to share the/myshare/directory through Samba:[myshare] comment = My share path = /myshare public = yes writable = no
- A Samba account is required to mount a Samba file system. Enter the following command as root to create a Samba account, where username is an existing Linux user. For example,
smbpasswd -a testusercreates a Samba account for the Linuxtestuseruser:~]#
smbpasswd -a testuserNew SMB password: Enter a password Retype new SMB password: Enter the same password again Added user testuser.If you enter the above command, specifying a user name of an account that does not exist on the system, it causes aCannot locate Unix account for 'username'!error. - Start the Samba service:
~]#
systemctl start smb.service - Enter the following command to list the available shares, where username is the Samba account added in step 7. When prompted for a password, enter the password assigned to the Samba account in step 7 (version numbers may differ):
~]$
smbclient -U username -L localhostEnter username's password: Domain=[HOSTNAME] OS=[Unix] Server=[Samba 3.4.0-0.41.el6] Sharename Type Comment --------- ---- ------- myshare Disk My share IPC$ IPC IPC Service (Samba Server Version 3.4.0-0.41.el6) username Disk Home Directories Domain=[HOSTNAME] OS=[Unix] Server=[Samba 3.4.0-0.41.el6] Server Comment --------- ------- Workgroup Master --------- ------- - Use the
mkdirutility as root to create a new directory. This directory will be used to mount themyshareSamba share:~]#
mkdir /test/ - Enter the following command as root to mount the
myshareSamba share to/test/, replacing username with the user name from step 7:~]#
mount //localhost/myshare /test/ -o user=usernameEnter the password for username, which was configured in step 7. - Enter the following command to view the
file1file created in step 3:~]$
ls /test/file1
14.4.2. Sharing a website
samba_share_t type, for example, when wanting to share a website in the /var/www/html/ directory. For these cases, use the samba_export_all_ro Boolean to share any file or directory (regardless of the current label), allowing read only permissions, or the samba_export_all_rw Boolean to share any file or directory (regardless of the current label), allowing read and write permissions.
/var/www/html/, and then shares that file through Samba, allowing read and write permissions. This example assumes the httpd, samba, samba-common, samba-client, and wget packages are installed:
- As the root user, create a
/var/www/html/file1.htmlfile. Copy and paste the following content into this file:<html> <h2>File being shared through the Apache HTTP Server and Samba.</h2> </html>
- Enter the following command to view the SELinux context of
file1.html:~]$
ls -Z /var/www/html/file1.html-rw-r--r--. root root unconfined_u:object_r:httpd_sys_content_t:s0 /var/www/html/file1.htmlThe file is labeled with thehttpd_sys_content_t. By default, the Apache HTTP Server can access this type, but Samba cannot. - Start the Apache HTTP Server:
~]#
systemctl start httpd.service - Change into a directory your user has write access to, and enter the following command. Unless there are changes to the default configuration, this command succeeds:
~]$
wget http://localhost/file1.htmlResolving localhost... 127.0.0.1 Connecting to localhost|127.0.0.1|:80... connected. HTTP request sent, awaiting response... 200 OK Length: 84 [text/html] Saving to: `file1.html.1' 100%[=======================>] 84 --.-K/s in 0s `file1.html.1' saved [84/84] - Edit
/etc/samba/smb.confas root. Add the following to the bottom of this file to share the/var/www/html/directory through Samba:[website] comment = Sharing a website path = /var/www/html/ public = no writable = no
- The
/var/www/html/directory is labeled with thehttpd_sys_content_ttype. By default, Samba cannot access files and directories labeled with the this type, even if Linux permissions allow it. To allow Samba access, enable thesamba_export_all_roBoolean:~]#
setsebool -P samba_export_all_ro onDo not use the-Poption if you do not want the change to persist across reboots. Note that enabling thesamba_export_all_roBoolean allows Samba to access any type. - Start the Samba service:
~]#
systemctl start smb.service
Chapter 15. File Transfer Protocol
vsftpd) is designed from the ground up to be fast, stable, and, most importantly, secure. Its ability to handle large numbers of connections efficiently and securely is why vsftpd is the only stand-alone FTP distributed with Red Hat Enterprise Linux.
~]$ rpm -q vsftpd
package vsftpd is not installed
yum utility as the root user to install it:
~]# yum install vsftpd15.1. Types
/var/ftp/ directory when they log in using FTP. This directory is labeled with the public_content_t type, allowing only read access, even if write access is configured in /etc/vsftpd/vsftpd.conf. The public_content_t type is accessible to other services, such as Apache HTTP Server, Samba, and NFS.
public_content_t- Label files and directories you have created with the
public_content_ttype to share them read-only throughvsftpd. Other services, such as Apache HTTP Server, Samba, and NFS, also have access to files labeled with this type. Files labeled with thepublic_content_ttype cannot be written to, even if Linux permissions allow write access. If you require write access, use thepublic_content_rw_ttype. public_content_rw_t- Label files and directories you have created with the
public_content_rw_ttype to share them with read and write permissions throughvsftpd. Other services, such as Apache HTTP Server, Samba, and NFS, also have access to files labeled with this type. Remember that Booleans for each service must be enabled before they can write to files labeled with this type.
15.2. Booleans
ftpd_anon_write- When disabled, this Boolean prevents
vsftpdfrom writing to files and directories labeled with thepublic_content_rw_ttype. Enable this Boolean to allow users to upload files using FTP. The directory where files are uploaded to must be labeled with thepublic_content_rw_ttype and Linux permissions must be set accordingly. ftpd_full_access- When this Boolean is enabled, only Linux (DAC) permissions are used to control access, and authenticated users can read and write to files that are not labeled with the
public_content_torpublic_content_rw_ttypes. ftpd_use_cifs- Having this Boolean enabled allows
vsftpdto access files and directories labeled with thecifs_ttype; therefore, having this Boolean enabled allows you to share file systems mounted using Samba throughvsftpd. ftpd_use_nfs- Having this Boolean enabled allows
vsftpdto access files and directories labeled with thenfs_ttype; therefore, this Boolean allows you to share file systems mounted using NFS throughvsftpd. ftpd_connect_db- Allow FTP daemons to initiate a connection to a database.
httpd_enable_ftp_server- Allow the
httpddaemon to listen on the FTP port and act as a FTP server. tftp_anon_write- Having this Boolean enabled allows TFTP access to a public directory, such as an area reserved for common files that otherwise has no special access restrictions.
Important
ftp_home_dir Boolean. See the Red Hat Enterprise Linux 7.3 Release Notes document for more information.
Note
~]$ getsebool -a | grep service_name
Enter the following command to view description of a particular Boolean:
~]$ sepolicy booleans -b boolean_name
Note that the additional policycoreutils-devel package providing the sepolicy utility is required for this command to work.
Chapter 16. Network File System
~]$ rpm -q nfs-utils
package nfs-utils is not installed
yum utility as root to install it:
~]# yum install nfs-utils16.1. NFS and SELinux
nfsd process, which is labeled with the unconfined kernel_t domain type. The SELinux policy allows NFS to share files by default. Also, passing SELinux labels between a client and the server is supported, which provides better security control of confined domains accessing NFS volumes. For example, when a home directory is set up on an NFS volume, it is possible to specify confined domains that are able to access only the home directory and not other directories on the volume. Similarly, applications, such as Secure Virtualization, can set the label of an image file on an NFS volume, thus increasing the level of separation of virtual machines.
16.2. Types
nfs_t type. The root user is able to override the default type using the mount -context option. The following types are used with NFS. Different types allow you to configure flexible access:
var_lib_nfs_t- This type is used for existing and new files copied to or created in the
/var/lib/nfs/directory. This type should not need to be changed in normal operation. To restore changes to the default settings, run therestorecon -R -v /var/lib/nfscommand as the root user. nfsd_exec_t- The
/usr/sbin/rpc.nfsdfile is labeled with thenfsd_exec_t, as are other system executables and libraries related to NFS. Users should not label any files with this type.nfsd_exec_twill transition tonfsd_t.
16.3. Booleans
ftpd_use_nfs- When enabled, this Boolean allows the
ftpddaemon to access NFS volumes. cobbler_use_nfs- When enabled, this Boolean allows the
cobblerddaemon to access NFS volumes. git_system_use_nfs- When enabled, this Boolean allows the Git system daemon to read system shared repositories on NFS volumes.
httpd_use_nfs- When enabled, this Boolean allows the
httpddaemon to access files stored on NFS volumes. samba_share_nfs- When enabled, this Boolean allows the
smbddaemon to share NFS volumes. When disabled, this Boolean preventssmbdfrom having full access to NFS shares using Samba. sanlock_use_nfs- When enabled, this Boolean allows the
sanlockdaemon to manage NFS volumes. sge_use_nfs- When enabled, this Boolean allows the
sgescheduler to access NFS volumes. use_nfs_home_dirs- When enabled, this Boolean adds support for NFS home directories.
virt_use_nfs- When enabled, this Boolean allows confident virtual guests to manage files on NFS volumes.
xen_use_nfs- When enabled, this Boolean allows
Xento manage files on NFS volumes. git_cgi_use_nfs- When enabled, this Boolean allows the Git Common Gateway Interface (CGI) to access NFS volumes.
Note
~]$ getsebool -a | grep service_name
Enter the following command to view description of a particular Boolean:
~]$ sepolicy booleans -b boolean_name
Note that the additional policycoreutils-devel package providing the sepolicy utility is required for this command to work.
16.4. Configuration Examples
16.4.1. Enabling SELinux Labeled NFS Support
Note
nfs-srv.
- If the NFS server is running, stop it:
[nfs-srv]#
systemctl stop nfsConfirm that the server is stopped:[nfs-srv]#
systemctl status nfsnfs-server.service - NFS Server Loaded: loaded (/usr/lib/systemd/system/nfs-server.service; disabled) Active: inactive (dead) - Edit the
/etc/sysconfig/nfsfile to set theRPCNFSDARGSflag to"-V 4.2":# Optional arguments passed to rpc.nfsd. See rpc.nfsd(8) RPCNFSDARGS="-V 4.2"
- Start the server again and confirm that it is running. The output will contain information below, only the time stamp will differ:
[nfs-srv]#
systemctl start nfs[nfs-srv]#
systemctl status nfsnfs-server.service - NFS Server Loaded: loaded (/usr/lib/systemd/system/nfs-server.service; disabled) Active: active (exited) since Wed 2013-08-28 14:07:11 CEST; 4s ago - On the client side, mount the NFS server:
[nfs-client]#
mount -o v4.2 server:mntpoint localmountpoint - All SELinux labels are now successfully passed from the server to the client:
[nfs-srv]$
ls -Z file-rw-rw-r--. user user unconfined_u:object_r:svirt_image_t:s0 file [nfs-client]$ls -Z file-rw-rw-r--. user user unconfined_u:object_r:svirt_image_t:s0 file
Note
Chapter 17. Berkeley Internet Name Domain
named daemon. BIND lets users locate computer resources and services by name instead of numerical addresses.
~]$ rpm -q bind
package bind is not installed
yum utility as the root user to install it:
~]# yum install bind17.1. BIND and SELinux
/var/named/slaves/, /var/named/dynamic/ and /var/named/data/ directories allow zone files to be updated using zone transfers and dynamic DNS updates. Files in /var/named/ are labeled with the named_zone_t type, which is used for master zone files.
/etc/named.conf file to place slave zones in /var/named/slaves/. The following is an example of a domain entry in /etc/named.conf for a slave DNS server that stores the zone file for testdomain.com in /var/named/slaves/:
zone "testdomain.com" {
type slave;
masters { IP-address; };
file "/var/named/slaves/db.testdomain.com";
};
named_zone_t, the named_write_master_zones Boolean must be enabled to allow zone transfers and dynamic DNS to update the zone file. Also, the mode of the parent directory has to be changed to allow the named user or group read, write and execute access.
/var/named/ are labeled with the named_cache_t type, a file system relabel or running restorecon -R /var/ will change their type to named_zone_t.
17.2. Types
named_zone_t- Used for master zone files. Other services cannot modify files of this type. The
nameddaemon can only modify files of this type if thenamed_write_master_zonesBoolean is enabled. named_cache_t- By default,
namedcan write to files labeled with this type, without additional Booleans being set. Files copied or created in the/var/named/slaves/,/var/named/dynamic/and/var/named/data/directories are automatically labeled with thenamed_cache_ttype. named_var_run_t- Files copied or created in the
/var/run/bind/,/var/run/named/, and/var/run/unbound/directories are automatically labeled with thenamed_var_run_ttype. named_conf_t- BIND-related configuration files, usually stored in the
/etcdirectory, are automatically labeled with thenamed_conf_ttype. named_exec_t- BIND-related executable files, usually stored in the
/usr/sbin/directory, are automatically labeled with thenamed_exec_ttype. named_log_t- BIND-related log files, usually stored in the
/var/log/directory, are automatically labeled with thenamed_log_ttype. named_unit_file_t- Executable BIND-related files in the
/usr/lib/systemd/system/directory are automatically labeled with thenamed_unit_file_ttype.
17.3. Booleans
named_write_master_zones- When disabled, this Boolean prevents
namedfrom writing to zone files or directories labeled with thenamed_zone_ttype. The daemon does not usually need to write to zone files; but in the case that it needs to, or if a secondary server needs to write to zone files, enable this Boolean to allow this action. named_tcp_bind_http_port- When enabled, this Boolean allows BIND to bind an Apache port.
Note
~]$ getsebool -a | grep service_name
Enter the following command to view description of a particular Boolean:
~]$ sepolicy booleans -b boolean_name
Note that the additional policycoreutils-devel package providing the sepolicy utility is required for this command to work.
17.4. Configuration Examples
17.4.1. Dynamic DNS
/var/named/dynamic/ directory for zone files you want updated by dynamic DNS. Files created in or copied into this directory inherit Linux permissions that allow named to write to them. As such files are labeled with the named_cache_t type, SELinux allows named to write to them.
/var/named/dynamic/ is labeled with the named_zone_t type, dynamic DNS updates may not be successful for a certain period of time as the update needs to be written to a journal first before being merged. If the zone file is labeled with the named_zone_t type when the journal attempts to be merged, an error such as the following is logged:
named[PID]: dumping master file: rename: /var/named/dynamic/zone-name: permission denied
setroubleshoot: SELinux is preventing named (named_t) "unlink" to zone-name (named_zone_t)
restorecon utility as root:
~]# restorecon -R -v /var/named/dynamicChapter 18. Concurrent Versioning System
~]$ rpm -q cvs
package cvs is not installed
yum utility as root to install it:
~]# yum install cvs18.1. CVS and SELinux
cvs daemon runs labeled with the cvs_t type. By default in Red Hat Enterprise Linux, CVS is only allowed to read and write certain directories. The label cvs_data_t defines which areas cvs has read and write access to. When using CVS with SELinux, assigning the correct label is essential for clients to have full access to the area reserved for CVS data.
18.2. Types
cvs_data_t- This type is used for data in a CVS repository. CVS can only gain full access to data if it has this type.
cvs_exec_t- This type is used for the
/usr/bin/cvsbinary.
18.3. Booleans
cvs_read_shadow- This Boolean allows the
cvsdaemon to access the/etc/shadowfile for user authentication.
Note
~]$ getsebool -a | grep service_name
Enter the following command to view description of a particular Boolean:
~]$ sepolicy booleans -b boolean_name
Note that the additional policycoreutils-devel package providing the sepolicy utility is required for this command to work.
18.4. Configuration Examples
18.4.1. Setting up CVS
cvs-srv with an IP address of 192.168.1.1 and a client with a host name of cvs-client and an IP address of 192.168.1.100. Both hosts are on the same subnet (192.168.1.0/24). This is an example only and assumes that the cvs and xinetd packages are installed, that the SELinux targeted policy is used, and that SELinux is running in enforced mode.
Note
cvs-srv.
- This example requires the cvs and xinetd packages. Confirm that the packages are installed:
[cvs-srv]$
rpm -q cvs xinetdpackage cvs is not installed package xinetd is not installedIf they are not installed, use theyumutility as root to install it:[cvs-srv]#
yum install cvs xinetd - Enter the following command as root to create a group named
CVS:[cvs-srv]#
groupadd CVSThis can by also done by using thesystem-config-usersutility. - Create a user with a user name of
cvsuserand make this user a member of the CVS group. This can be done usingsystem-config-users. - Edit the
/etc/servicesfile and make sure that the CVS server has uncommented entries looking similar to the following:cvspserver 2401/tcp # CVS client/server operations cvspserver 2401/udp # CVS client/server operations
- Create the CVS repository in the root area of the file system. When using SELinux, it is best to have the repository in the root file system so that recursive labels can be given to it without affecting any other subdirectories. For example, as root, create a
/cvs/directory to house the repository:[root@cvs-srv]#
mkdir /cvs - Give full permissions to the
/cvs/directory to all users:[root@cvs-srv]#
chmod -R 777 /cvsWarning
This is an example only and these permissions should not be used in a production system. - Edit the
/etc/xinetd.d/cvsfile and make sure that the CVS section is uncommented and configured to use the/cvs/directory. The file should look similar to:service cvspserver { disable = no port = 2401 socket_type = stream protocol = tcp wait = no user = root passenv = PATH server = /usr/bin/cvs env = HOME=/cvs server_args = -f --allow-root=/cvs pserver # bind = 127.0.0.1 - Start the
xinetddaemon:[cvs-srv]#
systemctl start xinetd.service - Add a rule which allows inbound connections through TCP on port 2401 by using the
system-config-firewallutility. - On the client side, enter the following command as the
cvsuseruser:[cvsuser@cvs-client]$
cvs -d /cvs init - At this point, CVS has been configured but SELinux will still deny logins and file access. To demonstrate this, set the
$CVSROOTvariable oncvs-clientand try to log in remotely. The following step is supposed to be performed oncvs-client:[cvsuser@cvs-client]$
export CVSROOT=:pserver:cvsuser@192.168.1.1:/cvs[cvsuser@cvs-client]$ [cvsuser@cvs-client]$cvs loginLogging in to :pserver:cvsuser@192.168.1.1:2401/cvs CVS password: ******** cvs [login aborted]: unrecognized auth response from 192.168.100.1: cvs pserver: cannot open /cvs/CVSROOT/config: Permission deniedSELinux has blocked access. In order to get SELinux to allow this access, the following step is supposed to be performed oncvs-srv: - Change the context of the
/cvs/directory as root in order to recursively label any existing and new data in the/cvs/directory, giving it thecvs_data_ttype:[root@cvs-srv]#
semanage fcontext -a -t cvs_data_t '/cvs(/.*)?'[root@cvs-srv]#restorecon -R -v /cvs - The client,
cvs-clientshould now be able to log in and access all CVS resources in this repository:[cvsuser@cvs-client]$
export CVSROOT=:pserver:cvsuser@192.168.1.1:/cvs[cvsuser@cvs-client]$ [cvsuser@cvs-client]$cvs loginLogging in to :pserver:cvsuser@192.168.1.1:2401/cvs CVS password: ******** [cvsuser@cvs-client]$
Chapter 19. Squid Caching Proxy
~]$ rpm -q squid
package squid is not installed
yum utility as root to install it:
~]# yum install squid19.1. Squid Caching Proxy and SELinux
- Run the
getenforcecommand to confirm SELinux is running in enforcing mode:~]$
getenforceEnforcingThe command returnsEnforcingwhen SELinux is running in enforcing mode. - Enter the following command as the root user to start the
squiddaemon:~]#
systemctl start squid.serviceConfirm that the service is running. The output should include the information below (only the time stamp will differ):~]#
systemctl status squid.servicesquid.service - Squid caching proxy Loaded: loaded (/usr/lib/systemd/system/squid.service; disabled) Active: active (running) since Mon 2013-08-05 14:45:53 CEST; 2s ago - Enter the following command to view the
squidprocesses:~]$
ps -eZ | grep squidsystem_u:system_r:squid_t:s0 27018 ? 00:00:00 squid system_u:system_r:squid_t:s0 27020 ? 00:00:00 log_file_daemonThe SELinux context associated with thesquidprocesses issystem_u:system_r:squid_t:s0. The second last part of the context,squid_t, is the type. A type defines a domain for processes and a type for files. In this case, the Squid processes are running in thesquid_tdomain.
squid_t, interact with files, other processes, and the system in general. Files must be labeled correctly to allow squid access to them.
/etc/squid/squid.conf file is configured so squid listens on a port other than the default TCP ports 3128, 3401 or 4827, the semanage port command must be used to add the required port number to the SELinux policy configuration. The following example demonstrates configuring squid to listen on a port that is not initially defined in SELinux policy configuration for it, and, as a consequence, the server failing to start. This example also demonstrates how to then configure the SELinux system to allow the daemon to successfully listen on a non-standard port that is not already defined in the policy. This example assumes the squid package is installed. Run each command in the example as the root user:
- Confirm the
squiddaemon is not running:~]#
systemctl status squid.servicesquid.service - Squid caching proxy Loaded: loaded (/usr/lib/systemd/system/squid.service; disabled) Active: inactive (dead)If the output differs, stop the process:~]#
systemctl stop squid.service - Enter the following command to view the ports SELinux allows
squidto listen on:~]#
semanage port -l | grep -w -i squid_port_tsquid_port_t tcp 3401, 4827 squid_port_t udp 3401, 4827 - Edit
/etc/squid/squid.confas root. Configure thehttp_portoption so it lists a port that is not configured in SELinux policy configuration forsquid. In this example, the daemon is configured to listen on port 10000:# Squid normally listens to port 3128 http_port 10000
- Run the
setseboolcommand to make sure thesquid_connect_anyBoolean is set to off. This ensuressquidis only permitted to operate on specific ports:~]#
setsebool -P squid_connect_any 0 - Start the
squiddaemon:~]#
systemctl start squid.serviceJob for squid.service failed. See 'systemctl status squid.service' and 'journalctl -xn' for details.An SELinux denial message similar to the following is logged:localhost setroubleshoot: SELinux is preventing the squid (squid_t) from binding to port 10000. For complete SELinux messages. run sealert -l 97136444-4497-4fff-a7a7-c4d8442db982
- For SELinux to allow
squidto listen on port 10000, as used in this example, the following command is required:~]#
semanage port -a -t squid_port_t -p tcp 10000 - Start
squidagain and have it listen on the new port:~]#
systemctl start squid.service - Now that SELinux has been configured to allow Squid to listen on a non-standard port (TCP 10000 in this example), it starts successfully on this port.
19.2. Types
httpd_squid_script_exec_t- This type is used for utilities such as
cachemgr.cgi, which provides a variety of statistics about Squid and its configuration. squid_cache_t- Use this type for data that is cached by Squid, as defined by the
cache_dirdirective in/etc/squid/squid.conf. By default, files created in or copied into the/var/cache/squid/and/var/spool/squid/directories are labeled with thesquid_cache_ttype. Files for the squidGuard URL redirector plug-in forsquidcreated in or copied to the/var/squidGuard/directory are also labeled with thesquid_cache_ttype. Squid is only able to use files and directories that are labeled with this type for its cached data. squid_conf_t- This type is used for the directories and files that Squid uses for its configuration. Existing files, or those created in or copied to the
/etc/squid/and/usr/share/squid/directories are labeled with this type, including error messages and icons. squid_exec_t- This type is used for the
squidbinary,/usr/sbin/squid. squid_log_t- This type is used for logs. Existing files, or those created in or copied to
/var/log/squid/or/var/log/squidGuard/must be labeled with this type. squid_initrc_exec_t- This type is used for the initialization file required to start
squidwhich is located at/etc/rc.d/init.d/squid. squid_var_run_t- This type is used by files in the
/var/run/directory, especially the process id (PID) named/var/run/squid.pidwhich is created by Squid when it runs.
19.3. Booleans
squid_connect_any- When enabled, this Boolean permits Squid to initiate a connection to a remote host on any port.
squid_use_tproxy- When enabled, this Boolean allows Squid to run as a transparent proxy.
Note
~]$ getsebool -a | grep service_name
Enter the following command to view description of a particular Boolean:
~]$ sepolicy booleans -b boolean_name
Note that the additional policycoreutils-devel package providing the sepolicy utility is required for this command to work.
19.4. Configuration Examples
19.4.1. Squid Connecting to Non-Standard Ports
- Confirm that the squid is installed:
~]$
rpm -q squidpackage squid is not installedIf the package is not installed, use theyumutility as root to install it:~]#
yum install squid - Edit the main configuration file,
/etc/squid/squid.conf, and confirm that thecache_dirdirective is uncommented and looks similar to the following:cache_dir ufs /var/spool/squid 100 16 256
This line specifies the default settings for thecache_dirdirective to be used in this example; it consists of the Squid storage format (ufs), the directory on the system where the cache resides (/var/spool/squid), the amount of disk space in megabytes to be used for the cache (100), and finally the number of first-level and second-level cache directories to be created (16and256respectively). - In the same configuration file, make sure the
http_access allow localnetdirective is uncommented. This allows traffic from thelocalnetACL which is automatically configured in a default installation of Squid on Red Hat Enterprise Linux. It will allow client machines on any existing RFC1918 network to have access through the proxy, which is sufficient for this simple example. - In the same configuration file, make sure the
visible_hostnamedirective is uncommented and is configured to the host name of the machine. The value should be the fully qualified domain name (FQDN) of the host:visible_hostname squid.example.com
- As root, enter the following command to start the
squiddaemon. As this is the first timesquidhas started, this command will initialise the cache directories as specified above in thecache_dirdirective and will then start the daemon:~]#
systemctl start squid.serviceEnsure thatsquidstarts successfully. The output will include the information below, only the time stamp will differ:~]#
systemctl status squid.servicesquid.service - Squid caching proxy Loaded: loaded (/usr/lib/systemd/system/squid.service; disabled) Active: active (running) since Thu 2014-02-06 15:00:24 CET; 6s ago - Confirm that the
squidprocess ID (PID) has started as a confined service, as seen here by thesquid_var_run_tvalue:~]#
ls -lZ /var/run/squid.pid-rw-r--r--. root squid unconfined_u:object_r:squid_var_run_t:s0 /var/run/squid.pid - At this point, a client machine connected to the
localnetACL configured earlier is successfully able to use the internal interface of this host as its proxy. This can be configured in the settings for all common web browsers, or system-wide. Squid is now listening on the default port of the target machine (TCP 3128), but the target machine will only allow outgoing connections to other services on the Internet through common ports. This is a policy defined by SELinux itself. SELinux will deny access to non-standard ports, as shown in the next step: - When a client makes a request using a non-standard port through the Squid proxy such as a website listening on TCP port 10000, a denial similar to the following is logged:
SELinux is preventing the squid daemon from connecting to network port 10000
- To allow this access, the
squid_connect_anyBoolean must be modified, as it is disabled by default:~]#
setsebool -P squid_connect_any onNote
Do not use the-Poption if you do not wantsetseboolchanges to persist across reboots. - The client will now be able to access non-standard ports on the Internet as Squid is now permitted to initiate connections to any port, on behalf of its clients.
Chapter 20. MariaDB (a replacement for MySQL)
mysqld) and many client programs and libraries.[18]
~]$ rpm -q mariadb-server
package mariadb-server is not installedyum utility as root to install it:
~]# yum install mariadb-server20.1. MariaDB and SELinux
- Run the
getenforcecommand to confirm SELinux is running in enforcing mode:~]$
getenforceEnforcingThe command returnsEnforcingwhen SELinux is running in enforcing mode. - Enter the following command as the root user to start
mariadb:~]#
systemctl start mariadb.serviceConfirm that the service is running. The output should include the information below (only the time stamp will differ):~]#
systemctl status mariadb.servicemariadb.service - MariaDB database server Loaded: loaded (/usr/lib/systemd/system/mariadb.service; disabled) Active: active (running) since Mon 2013-08-05 11:20:11 CEST; 3h 28min ago - Enter the following command to view the
mysqldprocesses:~]$
ps -eZ | grep mysqldsystem_u:system_r:mysqld_safe_t:s0 12831 ? 00:00:00 mysqld_safe system_u:system_r:mysqld_t:s0 13014 ? 00:00:00 mysqldThe SELinux context associated with themysqldprocesses issystem_u:system_r:mysqld_t:s0. The second last part of the context,mysqld_t, is the type. A type defines a domain for processes and a type for files. In this case, themysqldprocesses are running in themysqld_tdomain.
20.2. Types
mysqld. Different types allow you to configure flexible access:
mysqld_db_t- This type is used for the location of the MariaDB database. In Red Hat Enterprise Linux, the default location for the database is the
/var/lib/mysql/directory, however this can be changed. If the location for the MariaDB database is changed, the new location must be labeled with this type. See the example in Section 20.4.1, “MariaDB Changing Database Location” for instructions on how to change the default database location and how to label the new section appropriately. mysqld_etc_t- This type is used for the MariaDB main configuration file
/etc/my.cnfand any other configuration files in the/etc/mysql/directory. mysqld_exec_t- This type is used for the
mysqldbinary located at/usr/libexec/mysqld, which is the default location for the MariaDB binary on Red Hat Enterprise Linux. Other systems may locate this binary at/usr/sbin/mysqldwhich should also be labeled with this type. mysqld_unit_file_t- This type is used for executable MariaDB-related files located in the
/usr/lib/systemd/system/directory by default in Red Hat Enterprise Linux. mysqld_log_t- Logs for MariaDB need to be labeled with this type for proper operation. All log files in the
/var/log/directory matching themysql.*wildcard must be labeled with this type. mysqld_var_run_t- This type is used by files in the
/var/run/mariadb/directory, specifically the process id (PID) named/var/run/mariadb/mariadb.pid, which is created by themysqlddaemon when it runs. This type is also used for related socket files such as/var/lib/mysql/mysql.sock. Files such as these must be labeled correctly for proper operation as a confined service.
20.3. Booleans
selinuxuser_mysql_connect_enabled- When enabled, this Boolean allows users to connect to the local MariaDB server.
exim_can_connect_db- When enabled, this Boolean allows the
eximmailer to initiate connections to a database server. ftpd_connect_db- When enabled, this Boolean allows
ftpdaemons to initiate connections to a database server. httpd_can_network_connect_db- Enabling this Boolean is required for a web server to communicate with a database server.
Note
~]$ getsebool -a | grep service_name
Enter the following command to view description of a particular Boolean:
~]$ sepolicy booleans -b boolean_name
Note that the additional policycoreutils-devel package providing the sepolicy utility is required for this command to work.
20.4. Configuration Examples
20.4.1. MariaDB Changing Database Location
/var/lib/mysql/. This is where SELinux expects it to be by default, and hence this area is already labeled appropriately for you, using the mysqld_db_t type.
auditd service is running, and that there is a valid database in the default location of /var/lib/mysql/.
- View the SELinux context of the default database location for
mysql:~]#
ls -lZ /var/lib/mysqldrwx------. mysql mysql system_u:object_r:mysqld_db_t:s0 mysqlThis showsmysqld_db_twhich is the default context element for the location of database files. This context will have to be manually applied to the new database location that will be used in this example in order for it to function properly. - Enter the following command and enter the
mysqldroot password to show the available databases:~]#
mysqlshow -u root -pEnter password: ******* +--------------------+ | Databases | +--------------------+ | information_schema | | mysql | | test | | wikidb | +--------------------+ - Stop the
mariadb.serviceservice:~]#
systemctl stop mariadb.service - Create a new directory for the new location of the database(s). In this example,
/mysql/is used:~]#
mkdir -p /mysql - Copy the database files from the old location to the new location:
~]#
cp -R /var/lib/mysql/* /mysql/ - Change the ownership of this location to allow access by the mysql user and group. This sets the traditional Unix permissions which SELinux will still observe:
~]#
chown -R mysql:mysql /mysql - Enter the following command to see the initial context of the new directory:
~]#
ls -lZ /mysqldrwxr-xr-x. mysql mysql unconfined_u:object_r:usr_t:s0 mysqlThe contextusr_tof this newly created directory is not currently suitable to SELinux as a location for MariaDB database files. Once the context has been changed, MariaDB will be able to function properly in this area. - Open the main MariaDB configuration file
/etc/my.cnfwith a text editor and modify thedatadiroption so that it refers to the new location. In this example, the value that should be entered is/mysql:[mysqld] datadir=/mysql
Save this file and exit. - Start
mariadb.service. The service should fail to start, and a denial message will be logged to the/var/log/messagesfile:~]#
systemctl start mariadb.serviceJob for mariadb.service failed. See 'systemctl status mariadb.service' and 'journalctl -xn' for details.However, if theauditdaemon is running alongside thesetroubleshootservice, the denial will be logged to the/var/log/audit/audit.logfile instead:SELinux is preventing /usr/libexec/mysqld "write" access on /mysql. For complete SELinux messages. run sealert -l b3f01aff-7fa6-4ebe-ad46-abaef6f8ad71
The reason for this denial is that/mysql/is not labeled correctly for MariaDB data files. SELinux is stopping MariaDB from having access to the content labeled asusr_t. Perform the following steps to resolve this problem: - Enter the following command to add a context mapping for
/mysql/. Note that thesemanageutility is not installed by default. If it is missing on your system, install the policycoreutils-python package.~]#
semanage fcontext -a -t mysqld_db_t "/mysql(/.*)?" - This mapping is written to the
/etc/selinux/targeted/contexts/files/file_contexts.localfile:~]#
grep -i mysql /etc/selinux/targeted/contexts/files/file_contexts.local/mysql(/.*)? system_u:object_r:mysqld_db_t:s0 - Now use the
restoreconutility to apply this context mapping to the running system:~]#
restorecon -R -v /mysql - Now that the
/mysql/location has been labeled with the correct context for MariaDB,mysqldstarts:~]#
systemctl start mariadb.service - Confirm the context has changed for
/mysql/:~]$
ls -lZ /mysqldrwxr-xr-x. mysql mysql system_u:object_r:mysqld_db_t:s0 mysql - The location has been changed and labeled, and
mysqldhas started successfully. At this point all running services should be tested to confirm normal operation.
Chapter 21. PostgreSQL
~]# rpm -q postgresql-serveryum utility as root to install it:
~]# yum install postgresql-server21.1. PostgreSQL and SELinux
- Run the
getenforcecommand to confirm SELinux is running in enforcing mode:~]$
getenforceEnforcingThe command returnsEnforcingwhen SELinux is running in enforcing mode. - Enter the following command as the root user to start
postgresql:~]#
systemctl start postgresql.serviceConfirm that the service is running. The output should include the information below (only the time stamp will differ):~]#
systemctl start postgresql.servicepostgresql.service - PostgreSQL database server Loaded: loaded (/usr/lib/systemd/system/postgresql.service; disabled) Active: active (running) since Mon 2013-08-05 14:57:49 CEST; 12s - Enter the following command to view the
postgresqlprocesses:~]$
ps -eZ | grep postgressystem_u:system_r:postgresql_t:s0 395 ? 00:00:00 postmaster system_u:system_r:postgresql_t:s0 397 ? 00:00:00 postmaster system_u:system_r:postgresql_t:s0 399 ? 00:00:00 postmaster system_u:system_r:postgresql_t:s0 400 ? 00:00:00 postmaster system_u:system_r:postgresql_t:s0 401 ? 00:00:00 postmaster system_u:system_r:postgresql_t:s0 402 ? 00:00:00 postmasterThe SELinux context associated with thepostgresqlprocesses issystem_u:system_r:postgresql_t:s0. The second last part of the context,postgresql_t, is the type. A type defines a domain for processes and a type for files. In this case, thepostgresqlprocesses are running in thepostgresql_tdomain.
21.2. Types
postgresql. Different types allow you to configure flexible access. Note that in the list below are used several regular expression to match the whole possible locations:
postgresql_db_t- This type is used for several locations. The locations labeled with this type are used for data files for PostgreSQL:
/usr/lib/pgsql/test/regres/usr/share/jonas/pgsql/var/lib/pgsql/data/var/lib/postgres(ql)?
postgresql_etc_t- This type is used for configuration files in the
/etc/postgresql/directory. postgresql_exec_t- This type is used for several locations. The locations labeled with this type are used for binaries for PostgreSQL:
/usr/bin/initdb(.sepgsql)?/usr/bin/(se)?postgres/usr/lib(64)?/postgresql/bin/.*/usr/lib(64)?/pgsql/test/regress/pg_regress
systemd_unit_file_t- This type is used for the executable PostgreSQL-related files located in the
/usr/lib/systemd/system/directory. postgresql_log_t- This type is used for several locations. The locations labeled with this type are used for log files:
/var/lib/pgsql/logfile/var/lib/pgsql/pgstartup.log/var/lib/sepgsql/pgstartup.log/var/log/postgresql/var/log/postgres.log.*/var/log/rhdb/rhdb/var/log/sepostgresql.log.*
postgresql_var_run_t- This type is used for run-time files for PostgreSQL, such as the process id (PID) in the
/var/run/postgresql/directory.
21.3. Booleans
selinuxuser_postgresql_connect_enabled- Having this Boolean enabled allows any user domain (as defined by PostgreSQL) to make connections to the database server.
Note
~]$ getsebool -a | grep service_name
Enter the following command to view description of a particular Boolean:
~]$ sepolicy booleans -b boolean_name
Note that the additional policycoreutils-devel package providing the sepolicy utility is required for this command to work.
21.4. Configuration Examples
21.4.1. PostgreSQL Changing Database Location
/var/lib/pgsql/data/. This is where SELinux expects it to be by default, and hence this area is already labeled appropriately for you, using the postgresql_db_t type.
- View the SELinux context of the default database location for
postgresql:~]#
ls -lZ /var/lib/pgsqldrwx------. postgres postgres system_u:object_r:postgresql_db_t:s0 dataThis showspostgresql_db_twhich is the default context element for the location of database files. This context will have to be manually applied to the new database location that will be used in this example in order for it to function properly. - Create a new directory for the new location of the database(s). In this example,
/opt/postgresql/data/is used. If you use a different location, replace the text in the following steps with your location:~]#
mkdir -p /opt/postgresql/data - Perform a directory listing of the new location. Note that the initial context of the new directory is
usr_t. This context is not sufficient for SELinux to offer its protection mechanisms to PostgreSQL. Once the context has been changed, it will be able to function properly in the new area.~]#
ls -lZ /opt/postgresql/drwxr-xr-x. root root unconfined_u:object_r:usr_t:s0 data - Change the ownership of the new location to allow access by the postgres user and group. This sets the traditional Unix permissions which SELinux will still observe.
~]#
chown -R postgres:postgres /opt/postgresql - Open the
/etc/systemd/system/postgresql.servicefile with a text editor and modify thePGDATAandPGLOGvariables to point to the new location:~]#
vi /etc/systemd/system/postgresql.servicePGDATA=/opt/postgresql/data PGLOG=/opt/postgresql/data/pgstartup.logSave this file and exit the text editor.If the/etc/systemd/system/postgresql.servicefile does not exist, create it and insert the following content:.include /lib/systemd/system/postgresql.service [Service] # Location of database directory Environment=PGDATA=/opt/postgresql/data Environment=PGLOG=/opt/postgresql/data/pgstartup.log
- Initialize the database in the new location:
~]$
su - postgres -c "initdb -D /opt/postgresql/data" - Having changed the database location, starting the service will fail at this point:
~]#
systemctl start postgresql.serviceJob for postgresql.service failed. See 'systemctl status postgresql.service' and 'journalctl -xn' for details.SELinux has caused the service to not start. This is because the new location is not properly labeled. The following steps explain how to label the new location (/opt/postgresql/) and start the postgresql service properly: - Use the
semanageutility to add a context mapping for/opt/postgresql/and any other directories/files within it:~]#
semanage fcontext -a -t postgresql_db_t "/opt/postgresql(/.*)?" - This mapping is written to the
/etc/selinux/targeted/contexts/files/file_contexts.localfile:~]#
grep -i postgresql /etc/selinux/targeted/contexts/files/file_contexts.local/opt/postgresql(/.*)? system_u:object_r:postgresql_db_t:s0 - Now use the
restoreconutility to apply this context mapping to the running system:~]#
restorecon -R -v /opt/postgresql - Now that the
/opt/postgresql/location has been labeled with the correct context for PostgreSQL, thepostgresqlservice will start successfully:~]#
systemctl start postgresql.service - Confirm the context is correct for
/opt/postgresql/:~]$
ls -lZ /optdrwxr-xr-x. root root system_u:object_r:postgresql_db_t:s0 postgresql - Check with the
pscommand that thepostgresqlprocess displays the new location:~]#
ps aux | grep -i postmasterpostgres 21564 0.3 0.3 42308 4032 ? S 10:13 0:00 /usr/bin/postmaster -p 5432 -D /opt/postgresql/data/ - The location has been changed and labeled, and
postgresqlhas started successfully. At this point all running services should be tested to confirm normal operation.
Chapter 22. rsync
rsync utility performs fast file transfer and it is used for synchronizing data between systems. [20]
~]$ rpm -q rsync
package rsync is not installed
yum utility as root to install it:
~]# yum install rsync22.1. rsync and SELinux
rsync daemon, you must label the files and directories with the public_content_t type. Like most services, correct labeling is required for SELinux to perform its protection mechanisms over rsync.[21]
22.2. Types
rsync. Different types all you to configure flexible access:
public_content_t- This is a generic type used for the location of files (and the actual files) to be shared using
rsync. If a special directory is created to house files to be shared withrsync, the directory and its contents need to have this label applied to them. rsync_exec_t- This type is used for the
/usr/bin/rsyncsystem binary. rsync_log_t- This type is used for the
rsynclog file, located at/var/log/rsync.logby default. To change the location of the file rsync logs to, use the--log-file=FILEoption to thersynccommand at run-time. rsync_var_run_t- This type is used for the
rsyncdlock file, located at/var/run/rsyncd.lock. This lock file is used by thersyncserver to manage connection limits. rsync_data_t- This type is used for files and directories which you want to use as rsync domains and isolate them from the access scope of other services. Also, the
public_content_tis a general SELinux context type, which can be used when a file or a directory interacts with multiple services (for example, FTP and NFS directory as an rsync domain). rsync_etc_t- This type is used for rsync-related files in the
/etcdirectory.
22.3. Booleans
rsync_anon_write- Having this Boolean enabled allows
rsyncin thersync_tdomain to manage files, links and directories that have a type ofpublic_content_rw_t. Often these are public files used for public file transfer services. Files and directories must be labeled this type. rsync_client- Having this Boolean enabled allows
rsyncto initiate connections to ports defined asrsync_port_t, as well as allowing the daemon to manage files, links, and directories that have a type ofrsync_data_t. Note thatrsyncmust be in thersync_tdomain in order for SELinux to enact its control over it. The configuration example in this chapter demonstratesrsyncrunning in thersync_tdomain. rsync_export_all_ro- Having this Boolean enabled allows
rsyncin thersync_tdomain to export NFS and CIFS volumes with read-only access to clients.
Note
~]$ getsebool -a | grep service_name
Enter the following command to view description of a particular Boolean:
~]$ sepolicy booleans -b boolean_name
Note that the additional policycoreutils-devel package providing the sepolicy utility is required for this command to work.
22.4. Configuration Examples
22.4.1. Rsync as a daemon
rsync daemon to run normally on a non-standard port.
Procedure 22.1. Getting rsync to launch as rsync_t
- Run the
getenforcecommand to confirm SELinux is running in enforcing mode:~]$
getenforceEnforcingThe command returnsEnforcingwhen SELinux is running in enforcing mode. - Run the
whichcommand to confirm that the rsync binary is in the system path:~]$
which rsync/usr/bin/rsync - When running rsync as a daemon, a configuration file should be used and saved as
/etc/rsyncd.conf. Note that the following configuration file used in this example is very simple and is not indicative of all the possible options that are available, rather it is just enough to demonstrate thersyncdaemon:log file = /var/log/rsync.log pid file = /var/run/rsyncd.pid lock file = /var/run/rsync.lock [files] path = /srv/rsync comment = file area read only = false timeout = 300 - Now that a simple configuration file exists for rsync to operate in daemon mode, you can start it by running the following command:
~]#
systemctl start rsyncd.serviceEnsure thatrsyncdwas successfully started (the output is supposed to look similar to the one below, only the time stamp will differ):~]#
systemctl status rsyncd.servicersyncd.service - fast remote file copy program daemon Loaded: loaded (/usr/lib/systemd/system/rsyncd.service; disabled) Active: active (running) since Thu 2014-02-27 09:46:24 CET; 2s ago Main PID: 3220 (rsync) CGroup: /system.slice/rsyncd.service └─3220 /usr/bin/rsync --daemon --no-detachSELinux can now enforce its protection mechanisms over thersyncdaemon as it is now running in thersync_tdomain:~]$
ps -eZ | grep rsyncsystem_u:system_r:rsync_t:s0 3220 ? 00:00:00 rsync
rsyncd running in the rsync_t domain. Rsync can also be run as a socket-activated service. In that case, the rsyncd is not executed until a client tries to connect to the service. To enable rsyncd to run as a socket-activated service, follow the steps above. To start rsyncd as a socket-activated service, enter the following command as root:
~]# systemctl start rsyncd.socketProcedure 22.2. Running the rsync daemon on a non-default port
- Modify the
/etc/rsyncd.conffile and add theport = 10000line at the top of the file in the global configuration area (that is, before any file areas are defined). The new configuration file will look like:log file = /var/log/rsyncd.log pid file = /var/run/rsyncd.pid lock file = /var/run/rsync.lock port = 10000 [files] path = /srv/rsync comment = file area read only = false timeout = 300 - After launching the
rsyncdaemon with this new setting, a denial message similar to the following is logged by SELinux:Jul 22 10:46:59 localhost setroubleshoot: SELinux is preventing the rsync (rsync_t) from binding to port 10000. For complete SELinux messages, run sealert -l c371ab34-639e-45ae-9e42-18855b5c2de8
- Use the
semanageutility to add TCP port 10000 to the SELinux policy inrsync_port_t:~]#
semanage port -a -t rsync_port_t -p tcp 10000 - Now that TCP port 10000 has been added to the SELinux policy for
rsync_port_t,rsyncdwill start and operate normally on this port:~]#
systemctl start rsyncd.service~]#
netstat -lnp | grep 10000tcp 0 0 0.0.0.0:10000 0.0.0.0:* LISTEN 9910/rsync
rsyncd to operate on TCP port 10000.
Chapter 23. Postfix
~]$ rpm -q postfix
package postfix is not installed
yum utility root to install it:
~]# yum install postfix23.1. Postfix and SELinux
- Run the
getenforcecommand to confirm SELinux is running in enforcing mode:~]$
getenforceEnforcingThe command returnsEnforcingwhen SELinux is running in enforcing mode. - Enter the following command as the root user to start
postfix:~]#
systemctl start postfix.serviceConfirm that the service is running. The output should include the information below (only the time stamp will differ):~]#
systemctl status postfix.servicepostfix.service - Postfix Mail Transport Agent Loaded: loaded (/usr/lib/systemd/system/postfix.service; disabled) Active: active (running) since Mon 2013-08-05 11:38:48 CEST; 3h 25min ago - Run following command to view the
postfixprocesses:~]$
ps -eZ | grep postfixsystem_u:system_r:postfix_master_t:s0 1651 ? 00:00:00 master system_u:system_r:postfix_pickup_t:s0 1662 ? 00:00:00 pickup system_u:system_r:postfix_qmgr_t:s0 1663 ? 00:00:00 qmgrIn the output above, the SELinux context associated with the Postfixmasterprocess issystem_u:system_r:postfix_master_t:s0. The second last part of the context,postfix_master_t, is the type for this process. A type defines a domain for processes and a type for files. In this case, themasterprocess is running in thepostfix_master_tdomain.
23.2. Types
postfix_etc_t- This type is used for configuration files for Postfix in the
/etc/postfix/directory. postfix_data_t- This type is used for Postfix data files in the
/var/lib/postfix/directory. postfix_var_run_t- This type is used for Postfix files stored in the
/run/directory. postfix_initrc_exec_t- The Postfix executable files are labeled with the
postfix_initrc_exec_ttype. When executed, they transition to thepostfix_initrc_tdomain. postfix_spool_t- This type is used for Postfix files stored in the
/var/spool/directory.
Note
~]$ grep postfix /etc/selinux/targeted/contexts/files/file_contexts23.3. Booleans
postfix_local_write_mail_spool- Having this Boolean enabled allows Postfix to write to the local mail spool on the system. Postfix requires this Boolean to be enabled for normal operation when local spools are used.
Note
~]$ getsebool -a | grep service_name
Enter the following command to view description of a particular Boolean:
~]$ sepolicy booleans -b boolean_name
Note that the additional policycoreutils-devel package providing the sepolicy utility is required for this command to work.
23.4. Configuration Examples
23.4.1. SpamAssassin and Postfix
~]$ rpm -q spamassassin
package spamassassin is not installed
yum utility as root to install it:
~]# yum install spamassassinProcedure 23.1. Running SpamAssassin on a non-default port
- Use the
semanageutility as root to show the port that SELinux allows thespamddaemon to listen on by default:~]#
semanage port -l | grep spamdspamd_port_t tcp 783This output shows that TCP/783 is defined inspamd_port_tas the port for SpamAssassin to operate on. - Edit the
/etc/sysconfig/spamassassinconfiguration file and modify it so that it will start SpamAssassin on the example port TCP/10000:# Options to spamd SPAMDOPTIONS="-d -p 10000 -c m5 -H"
This line now specifies that SpamAssassin will operate on port 10000. The rest of this example will show how to modify the SELinux policy to allow this socket to be opened. - Start SpamAssassin and an error message similar to the following will appear:
~]#
systemctl start spamassassin.serviceJob for spamassassin.service failed. See 'systemctl status spamassassin.service' and 'journalctl -xn' for details.This output means that SELinux has blocked access to this port. - A denial message similar to the following will be logged by SELinux:
SELinux is preventing the spamd (spamd_t) from binding to port 10000.
- As root, run
semanageto modify the SELinux policy in order to allow SpamAssassin to operate on the example port (TCP/10000):~]#
semanage port -a -t spamd_port_t -p tcp 10000 - Confirm that SpamAssassin will now start and is operating on TCP port 10000:
~]#
systemctl start spamassassin.service~]#netstat -lnp | grep 10000tcp 0 0 127.0.0.1:10000 0.0.0.0:* LISTEN 2224/spamd.pid - At this point,
spamdis properly operating on TCP port 10000 as it has been allowed access to that port by the SELinux policy.
Chapter 24. DHCP
dhcpd daemon is used in Red Hat Enterprise Linux to dynamically deliver and configure Layer 3 TCP/IP details for clients.
dhcpd daemon. Enter the following command to see if the dhcp package is installed:
~]# rpm -q dhcp
package dhcp is not installed
yum utility as root to install it:
~]# yum install dhcp24.1. DHCP and SELinux
dhcpd is enabled, it runs confined by default. Confined processes run in their own domains, and are separated from other confined processes. If a confined process is compromised by an attacker, depending on SELinux policy configuration, an attacker's access to resources and the possible damage they can do is limited. The following example demonstrates dhcpd and related processes running in their own domain. This example assumes the dhcp package is installed and that the dhcpd service has been started:
- Run the
getenforcecommand to confirm SELinux is running in enforcing mode:~]$
getenforceEnforcingThe command returnsEnforcingwhen SELinux is running in enforcing mode. - Enter the following command as the root user to start
dhcpd:~]#
systemctl start dhcpd.serviceConfirm that the service is running. The output should include the information below (only the time stamp will differ):~]#
systemctl status dhcpd.servicedhcpd.service - DHCPv4 Server Daemon Loaded: loaded (/usr/lib/systemd/system/dhcpd.service; disabled) Active: active (running) since Mon 2013-08-05 11:49:07 CEST; 3h 20min ago - Run following command to view the
dhcpdprocesses:~]$
ps -eZ | grep dhcpdsystem_u:system_r:dhcpd_t:s0 5483 ? 00:00:00 dhcpdThe SELinux context associated with the dhcpd process issystem_u:system_r:dhcpd_t:s0.
24.2. Types
dhcp_etc_t- This type is mainly used for files in the
/etcdirectory, including configuration files. dhcpd_var_run_t- This type is used for the PID file for
dhcpd, in the/var/run/directory. dhcpd_exec_t- This type is used for transition of DHCP executable files to the
dhcpd_tdomain. dhcpd_initrc_exec_t- This type is used for transition of DHCP executable files to the
dhcpd_initrc_tdomain.
Note
dhcpd, enter the following command:
~]$ grep dhcp /etc/selinux/targeted/contexts/files/file_contextsChapter 25. OpenShift by Red Hat
~]$rpm -q openshift-clientspackage openshift-clients is not installed
Important
25.1. OpenShift and SELinux
25.2. Types
Process types
openshift_t- The OpenShift process is associated with the
openshift_tSELinux type.
Types on executables
openshift_cgroup_read_exec_t- SELinux allows files with this type to transition an executable to the
openshift_cgroup_read_tdomain. openshift_cron_exec_t- SELinux allows files with this type to transition an executable to the
openshift_cron_tdomain. openshift_initrc_exec_t- SELinux allows files with this type to transition an executable to the
openshift_initrc_tdomain.
Writable types
openshift_cgroup_read_tmp_t- This type allows OpenShift control groups (cgroup) read and access temporary files in the
/tmpdirectory. openshift_cron_tmp_t- This type allows storing temporary files of the OpenShift cron jobs in
/tmp. openshift_initrc_tmp_t- This type allows storing the OpenShift
initrctemporary files in/tmp. openshift_log_t- Files with this type are treated as OpenShift log data, usually stored under the
/var/log/directory. openshift_rw_file_t- OpenShift have permission to read and to write to files labeled with this type.
openshift_tmp_t- This type is used for storing the OpenShift temporary files in
/tmp. openshift_tmpfs_t- This type allows storing the OpenShift data on a tmpfs file system.
openshift_var_lib_t- This type allows storing the OpenShift files in the
/var/lib/directory. openshift_var_run_t- This type allows storing the OpenShift files in the
/run/or/var/run/directory.
25.3. Booleans
openshift_use_nfs- Having this Boolean enabled allows installing OpenShift on an NFS share.
Note
~]$ getsebool -a | grep service_name
Enter the following command to view description of a particular Boolean:
~]$ sepolicy booleans -b boolean_name
Note that the additional policycoreutils-devel package providing the sepolicy utility is required for this command to work.
25.4. Configuration Examples
25.4.1. Changing the Default OpenShift Directory
/var/lib/openshift/ directory, which is labeled with the openshift_var_lib_t SELinux type. To allow OpenShift to store data in a different directory, label the new directory with the proper SELinux context.
/srv/openshift/:
Procedure 25.1. Changing the Default OpenShift Directory for Storing Data
- As root, create a new
openshift/directory within the/srvdirectory. The new directory is labeled with thevar_ttype:~]#mkdir /srv/openshift~]$ls -Zd /srv/openshiftdrwxr-xr-x. root root unconfined_u:object_r:var_t:s0 openshift/ - As root, use the
semanageutility to map/srv/openshift/to the proper SELinux context:~]#semanage fcontext -a -e /var/lib/openshift /srv/openshift - Then, use the
restoreconutility as root to apply the changes:~]#restorecon -R -v /srv/openshift - The
/srv/openshift/directory is now labeled with the correctopenshift_var_lib_ttype:~]$ls -Zd /srv/openshiftdrwxr-xr-x. root root unconfined_u:object_r:openshift_var_lib_t:s0 openshift/
Chapter 26. Identity Management
~]$ rpm -q ipa-server
package ipa-server is not installed
If it is not installed, enter the following command as the root user to install it:
~]# yum install ipa-server
26.1. Identity Management and SELinux
SSSD) queries the access rights defined for a particular IdM user. Then the pam_selinux module sends a request to the kernel to launch the user process with the proper SELinux context according to the IdM access rights, for example guest_u:guest_r:guest_t:s0.
26.1.1. Trust to Active Directory Domains
WinSync utility to allow users from Active Directory (AD) domains to access data stored on IdM domains. To do that, WinSync had to replicate the user and group data from the AD server to the local server and kept the data synchronized.
SSSD daemon has been enhanced to work with AD and users are able to create a trusted relationship between IdM and AD domains. The user and group data are read directly from the AD server. Additionally, Kerberos cross-realm trust allowing single sign-on (SSO) authentication between the AD and IdM domains is provided. If SSO is set, users from the AD domains can access data protected by Kerberos that is stored on the IdM domains without requiring a password.
26.2. Configuration Examples
26.2.1. Mapping SELinux users to IdM users
Procedure 26.1. How to Add a User to an SELinux Mapping
- To create a new SELinux mapping, enter the following command where
SELinux_mappingis the name of the new SELinux mapping and the--selinuxuseroption specifies a particular SELinux user:~]$
ipa selinuxusermap-add SELinux_mapping --selinuxuser=staff_u:s0-s0:c0.c1023 - Enter the following command to add an IdM user with the
tuseruser name to the SELinux mapping:~]$
ipa selinuxusermap-add-user --users=tuser SELinux_mapping - To add a new host named
ipaclient.example.comto the SELinux mapping, enter the following command:~]$
ipa selinuxusermap-add-host --hosts=ipaclient.example.com SELinux_mapping - The
tuseruser gets thestaff_u:s0-s0:c0.c1023label when logged in to the ipaclient.example.com host:[tuser@ipa-client]$
id -Zstaff_u:staff_r:staff_t:s0-s0:c0.c1023
Chapter 27. Red Hat Gluster Storage
27.1. Red Hat Gluster Storage and SELinux
glusterd (GlusterFS Management Service) and glusterfsd (NFS server) processes as a part of Red Hat Gluster Storage. These processes have advanced process isolation unbounded with the glusterd_t SELinux type.
27.2. Types
Process types
glusterd_t- The Gluster processes are associated with the
glusterd_tSELinux type.
Types on executables
glusterd_initrc_exec_t- The SELinux-specific script type context for the Gluster init script files.
glusterd_exec_t- The SELinux-specific executable type context for the Gluster executable files.
Port Types
gluster_port_t- This type is defined for
glusterd. By default,glusterduses 204007-24027, and 38465-38469 TCP ports.
File Contexts
glusterd_brick_t- This type is used for files threated as
glusterdbrick data. glusterd_conf_t- This type is associated with the
glusterdconfiguration data, usually stored in the/etcdirectory. glusterd_log_t- Files with this type are treated as
glusterdlog data, usually stored under the/var/log/directory. glusterd_tmp_t- This type is used for storing the
glusterdtemporary files in the/tmpdirectory. glusterd_var_lib_t- This type allows storing the
glusterdfiles in the/var/lib/directory. glusterd_var_run_t- This type allows storing the
glusterdfiles in the/run/or/var/run/directory.
27.3. Booleans
gluster_export_all_ro- Having this Boolean enabled allows
glusterfsdto share files and directory as read-only. This Boolean is disabled by default. gluster_export_all_rw- Having this Boolean enabled allows
glusterfsdto share files and directories with read and write access. This Boolean is enabled by default. gluster_anon_write- Having this Boolean enabled allows
glusterfsdto modify public files labeled with thepublic_content_rw_tSELinux type.
Note
~]$ getsebool -a | grep service_name
Enter the following command to view description of a particular Boolean:
~]$ sepolicy booleans -b boolean_name
Note that the additional policycoreutils-devel package providing the sepolicy utility is required for this command to work.
27.4. Configuration Examples
27.4.1. Labeling Gluster Bricks
glusterd_brick_t, SELinux denies certain file access operations and generates various AVC messages.
/dev/rhgs/gluster, to be used as the Gluster brick.
Procedure 27.1. How to Label a Gluster Brick
- Create a directory to mount the previously formatted logical volume. For example:
~]#
mkdir /mnt/brick1 - Mount the logical volume, in this case
/dev/vg-group/gluster, to the/mnt/brick1/directory created in the previous step.~]#
mount /dev/vg-group/gluster /mnt/brick1/Note that themountcommand mounts devices only temporarily. To mount the device permanently, add an entry similar as the following one to the/etc/fstabfile:/dev/vg-group/gluster /mnt/brick1 xfs rw,inode64,noatime,nouuid 1 2
For more information, see the fstab(5) manual page. - Check the SELinux context of
/mnt/brick1/:~]$
ls -lZd /mnt/brick1/drwxr-xr-x. root root system_u:object_r:unlabeled_t:s0 /mnt/brick1/The directory is labeled with theunlabeled_tSELinux type. - Change the SELinux type of
/mnt/brick1/to theglusterd_brick_tSELinux type:~]#
semanage fcontext -a -t glusterd_brick_t "/mnt/brick1(/.*)?" - Use the
restoreconutility to apply the changes:~]#
restorecon -Rv /mnt/brick1 - Finally, verify that the context has been successfully changed:
~]$
ls -lZd /mnt/brick1drwxr-xr-x. root root system_u:object_r:glusterd_brick_t:s0 /mnt/brick1/
Chapter 28. References
Books
- SELinux by Example
- Mayer, MacMillan, and CaplanPrentice Hall, 2007
- SELinux: NSA's Open Source Security Enhanced Linux
- Bill McCartyO'Reilly Media Inc., 2004
Tutorials and Help
- Tutorials and talks from Russell Coker
- Dan Walsh's Journal
- Red Hat Knowledgebase
General Information
- NSA SELinux main website
- NSA SELinux FAQ
Mailing Lists
- NSA SELinux mailing list
- Fedora SELinux mailing list
Community
- SELinux Project Wiki
- SELinux community page
- IRC
- irc.freenode.net, #selinux
Appendix A. Revision History
| Revision History | |||
|---|---|---|---|
| Revision 0.3-06 | Fri Aug 9 2019 | ||
| |||
| Revision 0.3-05 | Sat Oct 20 2018 | ||
| |||
| Revision 0.3-03 | Tue Apr 3 2018 | ||
| |||
| Revision 0.3-01 | Thu Jul 13 2017 | ||
| |||
| Revision 0.2-18 | Wed Nov 2 2016 | ||
| |||
| Revision 0.2-11 | Sun Jun 26 2016 | ||
| |||
| Revision 0.2-10 | Sun Feb 14 2016 | ||
| |||
| Revision 0.2-9 | Thu Dec 10 2015 | ||
| |||
| Revision 0.2-8 | Thu Nov 11 2015 | ||
| |||
| Revision 0.2-7 | Thu Aug 13 2015 | ||
| |||
| Revision 0.2-6 | Wed Feb 18 2015 | ||
| |||
| Revision 0.2-5 | Fri Dec 05 2014 | ||
| |||
| Revision 0.2-4 | Thu Dec 04 2014 | ||
| |||
| Revision 0.1-41 | Tue May 20 2014 | ||
| |||
| Revision 0.1-1 | Tue Jan 17 2013 | ||
| |||