
Red Hat Training
A Red Hat training course is available for Red Hat Enterprise Linux
3.2. Installing the para-virtualized drivers
virsh or virt-manager.
- hosting the files on a network accessible to the guest, or
- by creating a virtualized CD-ROM device on the guest of the installation disk .iso file.
yum. The package names in the list below are to assist you with choosing the right package for your guest.
Para-virtualized drivers package names
xenpv-win-32bit- The driver package for the 32 bit versions of Windows.
xenpv-win-32bit-debug- The package for debugging the drivers for the 32 bit versions of Windows.
xenpv-win-64bit- The driver package for the 64 bit versions of Windows.
xenpv-win-64bit-debug- The package for debugging the drivers for the 64 bit versions of Windows.
xenpv-win-64bit-debug) are used for debugging the para-virtualized driver inside of the windows guests. These drivers provide users with more verbose reporting and additional tools for debugging and data logging.
.iso file containing the drivers, use yum on a host with the Virtualization channel in RHN enabled.
# yum install xenpv-win-32bitFor the 64 bit package execute the follow command:
# yum install xenpv-win-64bitThis extracts the packaged files to the
/usr/share/xenpv-win directory. The Bash output below shows the contents of a /usr/share/xenpv-win directory with both 32 bit and 64 bit drivers and the debugging packages installed. Note the symbolic links (denoted by the -> symbol) linking to the newest version of the para-virtualized drivers.
$ ls -al /usr/share/xenpv-win
total 13472
drwxr-xr-x   2 root root    4096 Jul 14 17:29 .
drwxr-xr-x 214 root root    4096 Jul 14 17:29 ..
-rw-r--r--   1 root root 3325952 Jul 11 14:58 xenpv-win-32bit-0.97.1.iso
-rw-r--r--   1 root root 3422208 Jul 11 14:58 xenpv-win-32bit-debug-0.97.1.iso
lrwxrwxrwx   1 root root      32 Jul 14 17:29 xenpv-win-32bit-debug.iso -> xenpv-win-32bit-debug-0.97.1.iso
lrwxrwxrwx   1 root root      26 Jul 14 17:29 xenpv-win-32bit.iso -> xenpv-win-32bit-0.97.1.iso
-rw-r--r--   1 root root 3454976 Jul 11 14:58 xenpv-win-64bit-0.97.1.iso
-rw-r--r--   1 root root 3522560 Jul 11 14:58 xenpv-win-64bit-debug-0.97.1.iso
lrwxrwxrwx   1 root root      32 Jul 14 17:29 xenpv-win-64bit-debug.iso -> xenpv-win-64bit-debug-0.97.1.iso
lrwxrwxrwx   1 root root      26 Jul 14 17:29 xenpv-win-64bit.iso -> xenpv-win-64bit-0.97.1.iso
The .iso files in the
/usr/share/xenpv-win directory are mounted as virtual CD-ROM devices for the Windows guests in order to install the drivers.
virt-manager (graphical) or virsh (command line).
Follow Procedure 3.1, “Using virt-manager to mount a CD-ROM image for a Windows guest” to add a CD-ROM image with virt-manager.
Procedure 3.1. Using virt-manager to mount a CD-ROM image for a Windows guest
- Open
virt-manager, select your virtualized guest from the list of virtual machines and press the button. - Click the button in the Details panel.
- This opens a wizard for adding the new device. Select Storage device from the drop down menu, then click .

- Choose the Simple File option and set the file location of the para-virtualized drivers .iso file. The location of the .iso files is
/usr/share/xenpv-winif you usedyumto install the para-virtualized driver packages.If the drivers are stored physical CD, use the Normal Disk Partition option.Set the Device type to IDE cdrom and click to proceed.
- The disk has been assigned and is available for the guest once the guest is started. Click to close the wizard or back if you made a mistake.

To mount .iso images with virsh guests must be either active (on) or inactive (off) state. For inactive guests refer to Appendix A, Using virsh to mount a CD-ROM image on an inactive domain. For mounting the CD-ROM image on an active guest with virsh, follow Procedure 3.2, “Mounting the driver installation CD-ROM image with virsh on an active guest”.
Procedure 3.2. Mounting the driver installation CD-ROM image with virsh on an active guest
- Determine the required parameters, including:
- An active domain. In the example the domain is called
w2k3_32. - An unallocated block device label. The example in the next step uses
hdc, ifhdcis already allocated choose the next unallocated letter for examplehdd. You can verify which drive labels are in use by reading the configuration file generated with thevirsh dumpxml w2k3_32 w2k3_32guest.xml. This command generates a configuration file calledw2k3_32guest.xmlin the current directory. - The correct driver for your windows guest. In the example the
xenpv-win-32bit.isofrom thexenpv-win-32bitpackage.
- Use the
virshcommand with the parameters modified for your guest.# virsh attach-disk
w2k3_32/usr/share/xenpv-win/xenpv-win-32bit.isohdc--driver file --type cdrom --mode readonly
Warning
| Executable file name | Description |
|---|---|
xenpv-win-32bit.exe | The para-virtualized driver package for 32 bit Microsoft Windows installations. This covers most installations. |
xenpv-win-32bit-debug.exe | The para-virtualized driver debugging package for 32 bit Microsoft Windows installations. |
xenpv-win-64bit.exe | The para-virtualized driver package for 64 bit Microsoft Windows installations. This covers Windows XP Professional® x64 (Service Pack 1 and Service Pack 2), Windows Vista® 64 bit (release and Service Pack 1), Windows Server® 2003 (64 bit) Service Pack 2 and Windows Server® 2003 R2 (64 bit) Service Pack 2. |
xenpv-win-64bit-debug.exe | The para-virtualized driver debugging package for Microsoft Windows 64 bit installations. |
Important
Procedure 3.3. Installing the para-virtualized drivers on the Windows® guest
- The installer may start automatically if you added the virtualized CD-ROM to an active guest. If this occurs skip this step and continue from step 2.Start the installer by double clicking the CD drive (
Ein the example below).If Autorun is disabled, start the installer by double clicking the.exefile on the CD.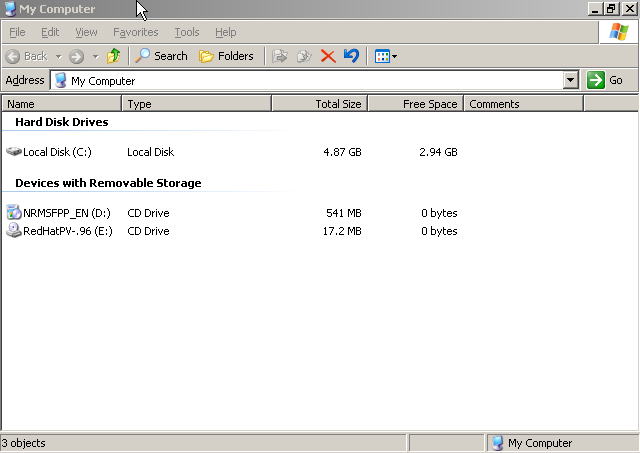
- Once the file is open, the Welcome screen appears. Select to proceed.

- You are now prompted to select the type of install you want.The
Completeoption installs the network driver, disk driver and source code.TheCustomoption opens another dialog box from which you can choose individual components to install.Once you have made your selection, click to continue.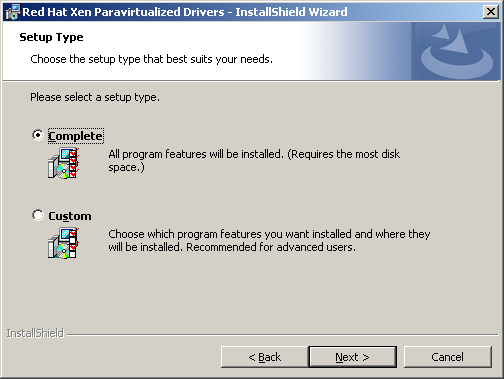
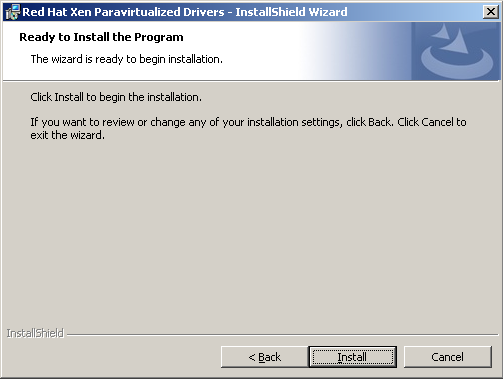
- Select to complete the installation.
- The unsigned driver warning (Network and Disk driver has not been digitally signed) dialog box pops up. Select to install drivers. This dialog box will appear four times, twice for each driver,
rhelscsiand thenrhelnet.
Note
Future releases of Red Hat Para-virtualized Driver for Microsoft Windows will be digitally signed by Windows Hardware Quality Labs (WHQL). Once certified the warning will not appear. - Select Show the README file to view the release notes for the drivers.Click to complete the installation.

- Reboot the guest.