
Chapter 6. Filtering assets by tags
You can apply tags in the metadata of each asset and then group assets by tags in the Project Explorer. This feature helps you quickly search through assets of a specific category.
Procedure
- In Business Central, go to Menu → Design → Projects and click the project name.
- Select the asset from the list to open the asset editor.
- In the asset editor window, go to Overview → Metadata.
In the Tags field, enter the name of your new tag and click Add new tag(s). You can assign multiple tags to an asset by separating tag names with a space.
Figure 6.1. Creating tags

The assigned tags are displayed as buttons next to the Tags field.
Figure 6.2. Tags in metadata view

To delete a tag, click the tag button with the trash icon.
Figure 6.3. Deleting tags in metadata view

- Click Save to save your metadata changes.
-
Expand the Project Explorer by clicking
 on the upper-left corner.
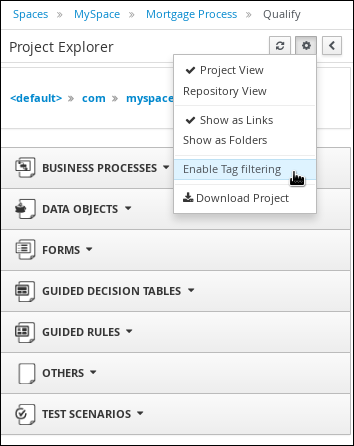
Click the gear icon
 in the Project Explorer toolbar and select Enable Tag filtering.
Figure 6.4. Enable tag filtering
This displays a Filter by Tag drop-down menu in the Project Explorer.
Figure 6.5. Filter by tag
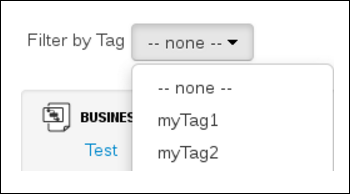
You can sort your assets through this filter to display all assets and service tasks that include the selected metadata tag.