
Chapter 45. Configuring IBM WebSphere Application Server for KIE Server
Before you deploy KIE Server with IBM WebSphere Application Server, you must configure system properties, security settings, JMS requirements, and other properties on IBM WebSphere. These configurations promote an optimal integration with KIE Server.
Prerequisites
- IBM WebSphere Application Server is installed and running.
- You are logged in to the WebSphere Integrated Solutions Console.
45.1. Enabling administrative security
You must enable administrative security in the WebSphere Integrated Solutions Console so that you have the required permissions to create users and groups.
Procedure
- In the WebSphere Integrated Solutions Console, click Security → Global Security and ensure that the option Enable Application Security is selected. This may already be selected and overridden at the server level.
- Click Security Configuration Wizard and click Next.
- Select the repository that contains the user information. For example, select Federated repositories for local configurations.
- Click Next
- Enter the Primary administrative user name and Password.
- Click Next and then click Finish.
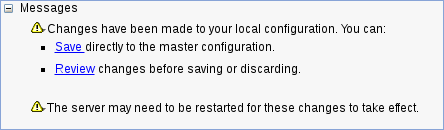
Click Save in the Messages window to save your changes to the primary configuration.
Figure 45.1. Save security changes
In your command terminal, navigate to the IBM WebSphere Application Server
/bindirectory location that you specified during installation, and run the following commands to stop and restart IBM WebSphere to apply the security changes:sudo ./stopServer.sh <SERVER_NAME>
sudo ./startServer.sh <SERVER_NAME>
Replace
<SERVER_NAME>with the IBM WebSphere Application Server name defined in Servers → Server Types → IBM WebSphere Application Servers of the WebSphere Integrated Solutions Console.
45.2. Configuring Java Message Service (JMS)
The Java Message Service (JMS) is a Java API that KIE Server uses to exchange messages with other application servers such as Oracle WebLogic Server and IBM WebSphere Application Server. You must configure your application server to send and receive JMS messages through KIE Server to ensure collaboration between the two servers.
45.2.1. Create a service bus and add IBM WebSphere Application Server
You must create a service bus and add the IBM WebSphere Application Server as a member in order to use JMS.
Procedure
- In the WebSphere Integrated Solutions Console, navigate to Service Integration → Buses → New.
- Enter a new bus name and clear the Bus Security option.
- Click Next and then Finish to create the service bus.
- Select the service bus that you created.
- Under Topology, select Bus Members → Add.
- In the Add a New Bus Member wizard, choose the IBM WebSphere Application Server and the type of message store for persistence. You can also specify the properties of the message store.
- Click Finish to add the new bus member.
45.2.2. Create JMS connection factories
To enable messaging with KIE Server, you must create certain JMS connection factories for sending and receiving messages.
Prerequisites
- You have created a service bus for IBM WebSphere Application Server.
Procedure
- In the WebSphere Integrated Solutions Console, navigate to Resources → JMS → Connection Factories.
- Select the correct scope and click New.
- Select the Default Messaging Provider option and click OK.
-
For each of the following required connection factories, enter the name of the connection factory (for example,
KIE.SERVER.REQUEST) and the JNDI name (for example,jms/cf/KIE.SERVER.REQUEST), and then select the service bus from the Bus Name drop-down list. Leave the default values for the remaining options. - Click Apply and then click Save to save the changes to the primary configuration, and repeat for each required factory.
45.2.2.1. JMS connection factories for KIE Server
The following table lists the required Java Message Service (JMS) connection factories that enable JMS messaging with KIE Server:
Table 45.1. Required JMS connection factories for KIE Server
| Name | Default value | Used for |
|---|---|---|
|
|
| Sending all requests to KIE Server |
|
|
| Receiving all responses produced by KIE Server |
45.2.3. Create JMS queues
JMS queues are the destination end points for point-to-point messaging. You must create certain JMS queues to enable JMS messaging with KIE Server.
Prerequisites
- You have created a service bus for IBM WebSphere Application Server.
Procedure
- In the WebSphere Integrated Solutions Console, navigate to Resources → JMS → Queues.
- Select the correct scope and click New.
- Select the Default Messaging Provider option and click OK.
-
For each of the following required queues, enter the name of the queue (for example,
KIE.SERVER.REQUEST) and the JNDI name (for example,jms/KIE.SERVER.REQUEST), and then select the service bus from the Bus Name drop-down list. - From the Queue Name drop-down list, select the Create Service Integration Bus Destination, enter a unique identifier, and select the bus member that you created previously.
- Click Apply and then click Save to save the changes to the primary configuration, and repeat for each required queue.
45.2.3.1. JMS queues for KIE Server
The following table lists the required Java Message Service (JMS) queues that enable JMS messaging with KIE Server:
Table 45.2. Required JMS queues for KIE Server
| Name | Default value | Used for |
|---|---|---|
|
|
| Sending all requests to KIE Server |
|
|
| Receiving all responses produced by KIE Server |
45.2.4. Create JMS activation specifications
A JMS activation specification is required in order to bridge the queue and the message-driven bean that enables JMS.
Prerequisites
- You have created a service bus for IBM WebSphere Application Server.
- You have created JMS queues.
Procedure
- In the WebSphere Integrated Solutions Console, navigate to Resources → JMS → Activation Specifications.
- Select the correct scope and click New.
- Select the Default Messaging Provider option and click OK.
-
For each of the following required activation specifications, enter the name of the activation specification (for example,
KIE.SERVER.REQUEST) and the JNDI name (for example,jms/activation/KIE.SERVER.REQUEST), and then select the service bus from the Bus Name drop-down list. -
From the Destination Type drop-down list, select Queue and enter the name of the corresponding queue as a Destination lookup (for example,
jms/KIE.SERVER.REQUEST). - Click Apply and then click Save to save the changes to the primary configuration, and repeat for each required activation specification.
45.2.4.1. JMS activation specifications for KIE Server
The following table lists the required Java Message Service (JMS) activation specifications that enable JMS messaging with KIE Server:
Table 45.3. Required JMS activation specifications for KIE Server
| Name | Default value | Used for |
|---|---|---|
|
|
| Sending all requests to KIE Server |
|
|
| Receiving all responses produced by KIE Server |
45.3. Setting system properties in IBM WebSphere Application Server
Set the system properties listed in this section on your IBM WebSphere Application Server before you deploy KIE Server.
Procedure
- In the WebSphere Integrated Solutions Console, navigate to Servers → Server Types → IBM WebSphere Application Servers.
- In the list of application servers, choose the server on which you are going to deploy KIE Server.
Under the Server Infrastructure, click Java and Process Management → Process Definition.
Figure 45.2. WebSphere configuration page
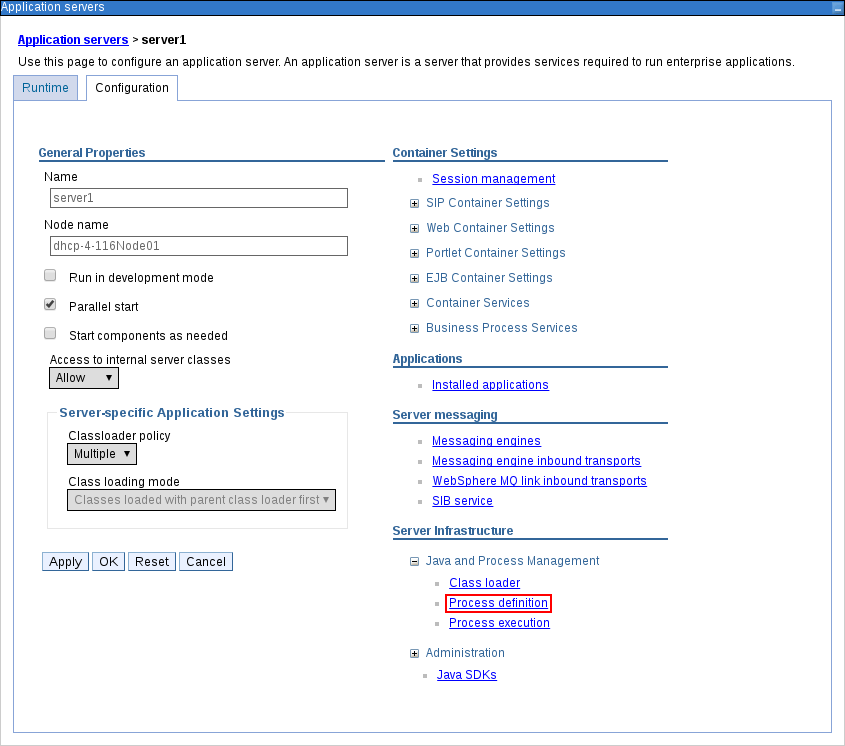
Under Additional Properties, click Java Virtual Machine.
Figure 45.3. Process definition configuration page
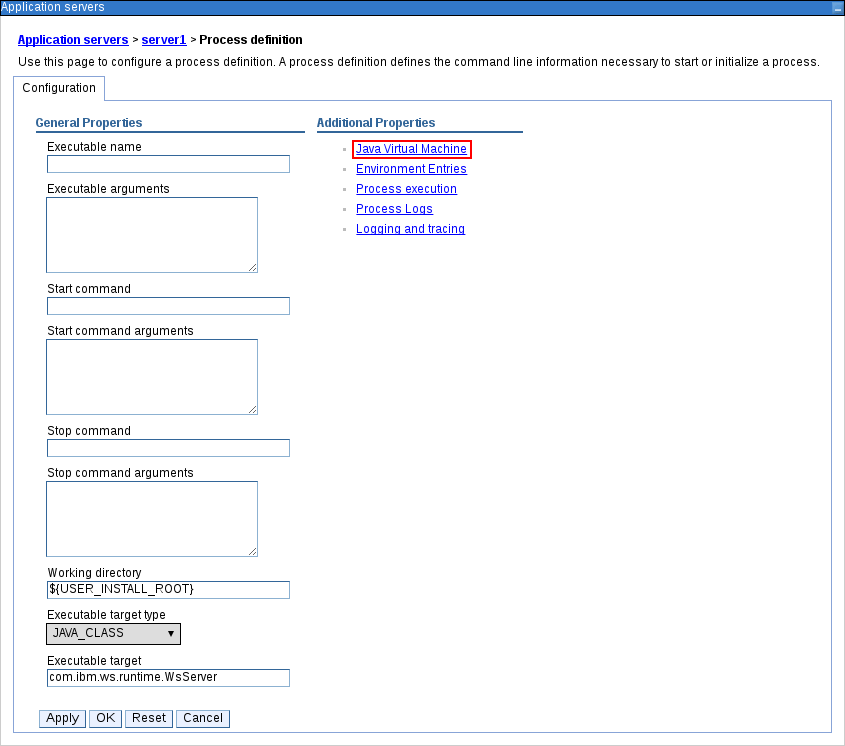
This opens the configuration properties for the JVM that is used to start IBM WebSphere.
-
Set both the Initial heap size and Maximum heap size to
2048and click Apply to increase the Java Virtual Machine (JVM) memory size. KIE Server has been tested with these values. If you do not increase the JVM memory size, IBM WebSphere Application Server freezes or causes deployment errors when deploying KIE Server. - Under Additional Properties, click Custom Properties.
Click New → Custom JVM Properties and add the following properties to IBM WebSphere:
Table 45.4. System properties for KIE Server
Name Value Description kie.server.jms.queues.responsejms/KIE.SERVER.RESPONSEThe JNDI name of JMS queue for responses used by KIE Server.
org.kie.server.domainWSLoginJAAS
LoginContextdomain used to authenticate users when using JMS.org.jbpm.server.ext.disabledtrueDisables Business Central features, which are not supported in RHDM. If not set, KIE Server will work, but will show error messages during start up.
org.jbpm.ui.server.ext.disabledtrueDisables Business Central features, which are not supported in RHDM. If not set, KIE Server will work, but will show error messages during start up.
org.jbpm.case.server.ext.disabledtrueDisables Business Central features, which are not supported in RHDM. If not set, KIE Server will work, but will show error messages during start up.
org.jboss.logging.providerjdkThis property is only required where a
CA SiteMinder TAI (SMTAI)is installed in the environment. Using this property forces Hibernate to useJDKinstead oflog4jfor logging within Dashbuilder.CA SiteMinder TAI (SMTAI)contains an old version oflog4j, which causes conflicts.- Click Save to save the changes to the primary configuration.
45.4. Stopping and restarting IBM WebSphere Application Server
After you have configured all required system properties in IBM WebSphere Application Server, stop and restart the IBM server to ensure that the configurations are applied.
Procedure
In your command terminal, navigate to the IBM WebSphere Application Server /bin directory location that you specified during installation, and run the following commands to stop and restart IBM WebSphere to apply the configuration changes:
sudo ./stopServer.sh <SERVER_NAME>
sudo ./startServer.sh <SERVER_NAME>
Replace <SERVER_NAME> with the IBM WebSphere Application Server name defined in Servers → Server Types → IBM WebSphere Application Servers of the WebSphere Integrated Solutions Console.