
Administration Guide
Administering Red Hat CodeReady Workspaces 2.4
Abstract
Chapter 1. CodeReady Workspaces architecture overview
Red Hat CodeReady Workspaces components are:
- A central workspace controller: an always running service that manages users workspaces through the OpenShift API.
- Users workspaces: container-based IDEs that the controller stops when the user stops coding.
Figure 1.1. High-level CodeReady Workspaces architecture
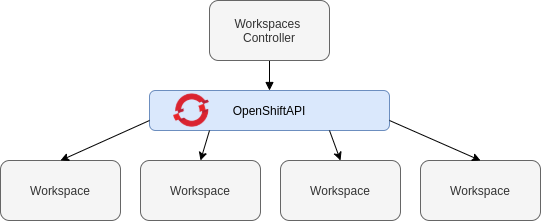
When CodeReady Workspaces is installed on a OpenShift cluster, the workspace controller is the only component that is deployed. A CodeReady Workspaces workspace is created immediately after a user requests it.
Additionnal resources
- https://access.redhat.com/documentation/en-us/red_hat_codeready_workspaces/2.4/html-single/administration_guide/index#codeready-workspaces-workspace-controller_crw
- https://access.redhat.com/documentation/en-us/red_hat_codeready_workspaces/2.4/html-single/administration_guide/index#codeready-workspaces-workspaces-architecture_crw
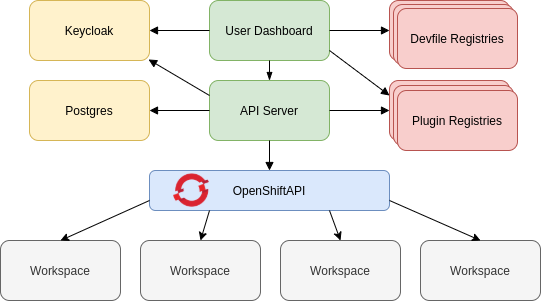
1.1. CodeReady Workspaces workspace controller
The workspaces controller manages the container-based development environments: CodeReady Workspaces workspaces. It can be deployed in the following distinct configurations:
- Single-user: No authentication service is set up. Development environments are not secured. This configuration requires fewer resources. It is more adapted for local installations, such as when using Minikube.
- Multi-user: This is a multi-tenant configuration. Development environments are secured, and this configuration requires more resources. Appropriate for cloud installations.
The different services that are a part of the CodeReady Workspaces workspaces controller are shown in the following diagram. Note that RH-SSO and PostgreSQL are only needed in the multi-user configuration.
Figure 1.2. CodeReady Workspaces workspaces controller
1.1.1. CodeReady Workspaces server
The CodeReady Workspaces server, also known as wsmaster, is the central service of the workspaces controller. It is a Java web service that exposes an HTTP REST API to manage CodeReady Workspaces workspaces and, in multi-user mode, CodeReady Workspaces users.
| Source code | |
| Container image |
|
| Environment variables |
1.1.2. CodeReady Workspaces user dashboard
The user dashboard is the landing page of Red Hat CodeReady Workspaces. It is an Angular front-end application. CodeReady Workspaces users create, start, and manage CodeReady Workspaces workspaces from their browsers through the user dashboard.
| Source code | |
| Container image |
|
1.1.3. Devfile registry
The CodeReady Workspaces devfile registry is a service that provides a list of CodeReady Workspaces stacks to create ready-to-use workspaces. This list of stacks is used in the Dashboard → Create Workspace window. The devfile registry runs in a container and can be deployed wherever the user dashboard can connect.
For more information about devfile registry customization, see the Customizing devfile registry section.
| Source code | |
| Container image |
|
1.1.4. CodeReady Workspaces plug-in registry
The CodeReady Workspaces plug-in registry is a service that provides the list of plug-ins and editors for the CodeReady Workspaces workspaces. A devfile only references a plug-in that is published in a CodeReady Workspaces plug-in registry. It runs in a container and can be deployed wherever wsmaster connects.
For more information about plug-in registry customization, see Section 3.1, “Building and running a custom registry image”.
| Source code | |
| Container image |
|
1.1.5. CodeReady Workspaces and PostgreSQL
The PostgreSQL database is a prerequisite to configure CodeReady Workspaces in multi-user mode. The CodeReady Workspaces administrator can choose to connect CodeReady Workspaces to an existing PostgreSQL instance or let the CodeReady Workspaces deployment start a new dedicated PostgreSQL instance.
The CodeReady Workspaces server uses the database to persist user configurations (workspaces metadata, Git credentials). RH-SSO uses the database as its back end to persist user information.
| Source code | |
| Container image |
|
1.1.6. CodeReady Workspaces and RH-SSO
RH-SSO is a prerequisite to configure CodeReady Workspaces in multi-user mode. The CodeReady Workspaces administrator can choose to connect CodeReady Workspaces to an existing RH-SSO instance or let the CodeReady Workspaces deployment start a new dedicated RH-SSO instance.
The CodeReady Workspaces server uses RH-SSO as an OpenID Connect (OIDC) provider to authenticate CodeReady Workspaces users and secure access to CodeReady Workspaces resources.
| Source code | |
| Container image |
|
1.2. CodeReady Workspaces workspaces architecture
A CodeReady Workspaces deployment on the cluster consists of the CodeReady Workspaces server component, a database for storing user profile and preferences, and a number of additional deployments hosting workspaces. The CodeReady Workspaces server orchestrates the creation of workspaces, which consist of a deployment containing the workspace containers and enabled plug-ins, plus related components, such as:
- ConfigMaps
- services
- endpoints
- ingresses/routes
- secrets
- PVs
The CodeReady Workspaces workspace is a web application. It is composed of microservices running in containers that provide all the services of a modern IDE (an editor, language auto-completion, debugging tools). The IDE services are deployed with the development tools, packaged in containers and user runtime applications, which are defined as OpenShift resources.
The source code of the projects of a CodeReady Workspaces workspace is persisted in a OpenShift PersistentVolume. Microservices run in containers that have read-write access to the source code (IDE services, development tools), and runtime applications have read-write access to this shared directory.
The following diagram shows the detailed components of a CodeReady Workspaces workspace.
Figure 1.3. CodeReady Workspaces workspace components
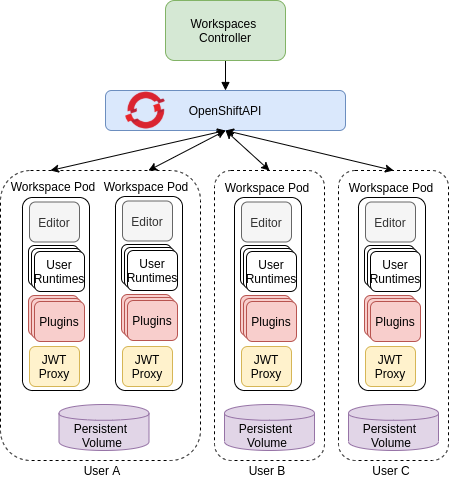
In the diagram, there are three running workspaces: two belonging to User A and one to User C. A fourth workspace is getting provisioned where the plug-in broker is verifying and completing the workspace configuration.
Use the devfile format to specify the tools and runtime applications of a CodeReady Workspaces workspace.
1.2.1. CodeReady Workspaces workspace components
This section describes the components of a CodeReady Workspaces workspace.
1.2.1.1. Che Editor plug-in
A Che Editor plug-in is a CodeReady Workspaces workspace plug-in. It defines the web application that is used as an editor in a workspace. The default CodeReady Workspaces workspace editor is Che-Theia.
The Che-Theia source-code repository is at Che-Theia Github. It is based on the Eclipse Theia open-source project.
Che-Theia is written in TypeScript and is built on the Microsoft Monaco editor. It is a web-based source-code editor similar to Visual Studio Code (VS Code). It has a plug-in system that supports VS Code extensions.
| Source code | |
| Container image |
|
| Endpoints |
|
1.2.1.2. CodeReady Workspaces user runtimes
Use any non-terminating user container as a user runtime. An application that can be defined as a container image or as a set of OpenShift resources can be included in a CodeReady Workspaces workspace. This makes it easy to test applications in the CodeReady Workspaces workspace.
To test an application in the CodeReady Workspaces workspace, include the application YAML definition used in stage or production in the workspace specification. It is a 12-factor app dev/prod parity.
Examples of user runtimes are Node.js, SpringBoot or MongoDB, and MySQL.
1.2.1.3. CodeReady Workspaces workspace JWT proxy
The JWT proxy is responsible for securing the communication of the CodeReady Workspaces workspace services. The CodeReady Workspaces workspace JWT proxy is included in a CodeReady Workspaces workspace only if the CodeReady Workspaces server is configured in multi-user mode.
An HTTP proxy is used to sign outgoing requests from a workspace service to the CodeReady Workspaces server and to authenticate incoming requests from the IDE client running on a browser.
| Source code | |
| Container image |
|
1.2.1.4. CodeReady Workspaces plug-ins broker
Plug-in brokers are special services that, given a plug-in meta.yaml file:
- Gather all the information to provide a plug-in definition that the CodeReady Workspaces server knows.
- Perform preparation actions in the workspace project (download, unpack files, process configuration).
The main goal of the plug-in broker is to decouple the CodeReady Workspaces plug-ins definitions from the actual plug-ins that CodeReady Workspaces can support. With brokers, CodeReady Workspaces can support different plug-ins without updating the CodeReady Workspaces server.
The CodeReady Workspaces server starts the plug-in broker. The plug-in broker runs in the same OpenShift project as the workspace. It has access to the plug-ins and project persistent volumes.
A plug-ins broker is defined as a container image (for example, eclipse/che-plugin-broker). The plug-in type determines the type of the broker that is started. Two types of plug-ins are supported: Che Plugin and Che Editor.
| Source code | |
| Container image |
|
1.2.2. CodeReady Workspaces workspace configuration
This section describes the properties of the CodeReady Workspaces server that affect the provisioning of a CodeReady Workspaces workspace.
1.2.2.1. Storage strategies for codeready-workspaces workspaces
Workspace Pods use Persistent Volume Claims (PVCs), which are bound to the physical Persistent Volumes (PVs) with ReadWriteOnce access mode. It is possible to configure how the CodeReady Workspaces server uses PVCs for workspaces. The individual methods for this configuration are called PVC strategies:
| strategy | details | pros | cons |
|---|---|---|---|
| unique | One PVC per workspace volume or user-defined PVC | Storage isolation | An undefined number of PVs is required |
| per-workspace (default) | One PVC for one workspace | Easier to manage and control storage compared to unique strategy | PV count still is not known and depends on workspaces number |
| common | One PVC for all workspaces in one OpenShift namespace | Easy to manage and control storage | If PV does not support ReadWriteMany (RWX) access mode then workspaces must be in a separate OpenShift namespaces Or there must not be more than 1 running workspace per namespace at the same time See how to configure namespace strategy |
Red Hat CodeReady Workspaces uses the common PVC strategy in combination with the "one project per user" project strategy when all CodeReady Workspaces workspaces operate in the user’s project, sharing one PVC.
1.2.2.1.1. The common PVC strategy
All workspaces inside a OpenShift project use the same Persistent Volume Claim (PVC) as the default data storage when storing data such as the following in their declared volumes:
- projects
- workspace logs
- additional Volumes defined by a use
When the common PVC strategy is in use, user-defined PVCs are ignored and volumes that refer to these user-defined PVCs are replaced with a volume that refers to the common PVC. In this strategy, all CodeReady Workspaces workspaces use the same PVC. When the user runs one workspace, it only binds to one node in the cluster at a time.
The corresponding containers volume mounts link to a common volume, and sub-paths are prefixed with <workspace-ID> or <original-PVC-name>. For more details, see Section 1.2.2.1.4, “How subpaths are used in PVCs”.
The CodeReady Workspaces Volume name is identical to the name of the user-defined PVC. It means that if a machine is configured to use a CodeReady Workspaces volume with the same name as the user-defined PVC has, they will use the same shared folder in the common PVC.
When a workspace is deleted, a corresponding subdirectory (${ws-id}) is deleted in the PV directory.
Restrictions on using the common PVC strategy
When the common strategy is used and a workspace PVC access mode is ReadWriteOnce (RWO), only one node can simultaneously use the PVC.
If there are several nodes, you can use the common strategy, but:
-
The workspace PVC access mode must be reconfigured to
ReadWriteMany(RWM), so multiple nodes can use this PVC simultaneously. - Only one workspace in the same project may be running. See https://access.redhat.com/documentation/en-us/red_hat_codeready_workspaces/2.4/html-single/installation_guide/index#running-more-than-one-workspace-at-a-time_crw.
The common PVC strategy is not suitable for large multi-node clusters. Therefore, it is best to use it in single-node clusters. However, in combination with the per-workspace project strategy, the common PVC strategy is usable for clusters with not more than 75 nodes. The PVC used with this strategy must be large enough to accommodate all projects to prevent a situation in which one project depletes the resources of others.
1.2.2.1.2. The per-workspace PVC strategy
The per-workspace strategy is similar to the common PVC strategy. The only difference is that all workspace Volumes, but not all the workspaces, use the same PVC as the default data storage for:
- projects
- workspace logs
- additional Volumes defined by a user
With this strategy, CodeReady Workspaces keeps its workspace data in assigned PVs that are allocated by a single PVC.
The per-workspace PVC strategy is the most universal strategy out of the PVC strategies available and acts as a proper option for large multi-node clusters with a higher amount of users. Using the per-workspace PVC strategy, users can run multiple workspaces simultaneously, results in more PVCs being created.
1.2.2.1.3. The unique PVC strategy
When using the `unique `PVC strategy, every CodeReady Workspaces Volume of a workspace has its own PVC. This means that workspace PVCs are:
Created when a workspace starts for the first time. Deleted when a corresponding workspace is deleted.
User-defined PVCs are created with the following specifics:
- They are provisioned with generated names to prevent naming conflicts with other PVCs in a project.
-
Subpaths of the mounted Physical persistent volumes that reference user-defined PVCs are prefixed with
<workspace-ID>or<PVC-name>. This ensures that the same PV data structure is set up with different PVC strategies. For details, see Section 1.2.2.1.4, “How subpaths are used in PVCs”.
The unique PVC strategy is suitable for larger multi-node clusters with a lesser amount of users. Since this strategy operates with separate PVCs for each volume in a workspace, vastly more PVCs are created.
1.2.2.1.4. How subpaths are used in PVCs
Subpaths illustrate the folder hierarchy in the Persistent Volumes (PV).
/pv0001
  /workspaceID1
  /workspaceID2
  /workspaceIDn
    /che-logs
    /projects
    /<volume1>
    /<volume2>
    /<User-defined PVC name 1 | volume 3>
    ...
When a user defines volumes for components in the devfile, all components that define the volume of the same name will be backed by the same directory in the PV as <PV-name>, <workspace-ID>, or `<original-PVC-name>. Each component can have this location mounted on a different path in its containers.
Example
Using the common PVC strategy, user-defined PVCs are replaced with subpaths on the common PVC. When the user references a volume as my-volume, it is mounted in the common-pvc with the /workspace-id/my-volume subpath.
1.2.2.2. Configuring a CodeReady Workspaces workspace with a persistent volume strategy
A persistent volume (PV) acts as a virtual storage instance that adds a volume to a cluster.
A persistent volume claim (PVC) is a request to provision persistent storage of a specific type and configuration, available in the following CodeReady Workspaces storage configuration strategies:
- Common
- Per-workspace
- Unique
The mounted PVC is displayed as a folder in a container file system.
1.2.2.2.1. Configuring a PVC strategy using the Operator
The following section describes how to configure workspace persistent volume claim (PVC) strategies of a CodeReady Workspaces server using the Operator.
It is not recommended to reconfigure PVC strategies on an existing CodeReady Workspaces cluster with existing workspaces. Doing so causes data loss.
Operators are software extensions to OpenShift that use Custom Resources to manage applications and their components.
When deploying CodeReady Workspaces using the Operator, configure the intended strategy by modifying the spec.storage.pvcStrategy property of the CheCluster Custom Resource object YAML file.
Prerequisites
-
The
octool is available.
Procedure
The following procedure steps are available for OpenShift command-line tool, '`oc’.
To do changes to the CheCluster YAML file, choose one of the following:
Create a new cluster by executing the
oc applycommand. For example:$ oc apply -f <my-cluster.yaml>Update the YAML file properties of an already running cluster by executing the
oc patchcommand. For example:$ oc patch checluster codeready-workspaces --type=json \ -p '[{"op": "replace", "path": "/spec/storage/pvcStrategy", "value": "<per-workspace>"}]'
Depending on the strategy used, replace the <per-workspace> option in the above example with unique or common.
1.2.2.3. Workspace OpenShift project configuration
The OpenShift project where a new workspace Pod is deployed depends on the CodeReady Workspaces server configuration. By default, every workspace is deployed in a distinct OpenShift project, but the user can configure the CodeReady Workspaces server to deploy all workspaces in one specific OpenShift project. The name of a OpenShift project must be provided as a CodeReady Workspaces server configuration property and cannot be changed at runtime.
1.2.3. CodeReady Workspaces workspace creation flow

The following is a CodeReady Workspaces workspace creation flow:
A user starts a CodeReady Workspaces workspace defined by:
- An editor (the default is Che-Theia)
- A list of plug-ins (for example, Java and OpenShift tools)
- A list of runtime applications
- wsmaster retrieves the editor and plug-in metadata from the plug-in registry.
- For every plug-in type, wsmaster starts a specific plug-in broker.
The CodeReady Workspaces plug-ins broker transforms the plug-in metadata into a Che Plugin definition. It executes the following steps:
- Downloads a plug-in and extracts its content.
-
Processes the plug-in
meta.yamlfile and sends it back to wsmaster in the format of a Che Plugin.
- wsmaster starts the editor and the plug-in sidecars.
- The editor loads the plug-ins from the plug-in persistent volume.
Chapter 2. Calculating CodeReady Workspaces resource requirements
This section describes how to calculate resources (memory and CPU) required to run Red Hat CodeReady Workspaces.
Both the CodeReady Workspaces central controller and user workspaces consist of a set of containers. Those containers contribute to the resources consumption in terms of CPU and RAM limits and requests.
2.1. Controller requirements
The Workspace Controller consists of a set of five services running in five distinct containers. The following table presents the default resource requirements of each of these services.
Table 2.1. ControllerServices
| Pod | Container name | Default memory limit | Default memory request |
|---|---|---|---|
| CodeReady Workspaces Server and Dashboard | che | 1 GiB | 512 MiB |
| PostgreSQL | postgres | 1 GiB | 512 MiB |
| RH-SSO | keycloak | 2 GiB | 512 MiB |
| Devfile registry | che-devfile-registry | 256 MiB | 16 MiB |
| Plug-in registry | che-plugin-registry | 256 MiB | 16 MiB |
These default values are sufficient when the CodeReady Workspaces Workspace Controller manages a small amount of CodeReady Workspaces workspaces. For larger deployments, increase the memory limit. See the https://access.redhat.com/documentation/en-us/red_hat_codeready_workspaces/2.4/html-single/installation_guide/index#advanced-configuration-options-for-the-codeready-workspaces-server-component_crw article for instructions on how to override the default requests and limits. For example, the hosted version of CodeReady Workspaces that runs on https://che.openshift.io uses 1 GB of memory.
2.2. Workspaces requirements
This section describes how to calculate the resources required for a workspace. It is the sum of the resources required for each component of this workspace.
These examples demonstrate the necessity of a proper calculation:
- A workspace with 10 active plug-ins requires more resources then the same workspace with fewer plug-ins.
- A standard Java workspace requires more resources than a standard Node.js workspace because running builds, tests, and application debugging requires more resources.
Procedure
-
Identify the workspace components explicitly specified in the
componentssection of the https://access.redhat.com/documentation/en-us/red_hat_codeready_workspaces/2.4/html-single/end-user_guide/index#making-a-workspace-portable-using-a-devfile_crw. Identify the implicit workspace components:
-
CodeReady Workspaces implicitly loads the default
cheEditor:che-theia, and thechePluginthat allows commands execution:che-machine-exec-plugin. To change the default editor, add acheEditorcomponent section in the devfile. -
When CodeReady Workspaces is running in multiuser mode, it loads the
JWT Proxycomponent. The JWT Proxy is responsible for the authentication and authorization of the external communications of the workspace components.
-
CodeReady Workspaces implicitly loads the default
Calculate the requirements for each component:
Default values:
The following table presents the default requirements for all workspace components. It also presents the corresponding CodeReady Workspaces server property to modify the defaults cluster-wide.
Table 2.2. Default requirements of workspace components by type
Component types CodeReady Workspaces server property Default memory limit Default memory request chePluginche.workspace.sidecar.default_memory_limit_mb128 MiB
128 MiB
cheEditorche.workspace.sidecar.default_memory_limit_mb128 MiB
128 MiB
kubernetes,openshift,dockerimageche.workspace.default_memory_limit_mb,che.workspace.default_memory_request_mb1 Gi
512 MiB
JWT Proxyche.server.secure_exposer.jwtproxy.memory_limit128 MiB
128 MiB
Custom requirements for
chePluginsandcheEditorscomponents:Custom memory limit and request:
If present, the
memoryLimitandmemoryRequestattributes of thecontainerssection of themeta.yamlfile define the memory limit of thechePluginsorcheEditorscomponents. CodeReady Workspaces automatically sets the memory request to match the memory limit in case it is not specified explicitly.Example 2.1. The
chePluginche-incubator/typescript/latestmeta.yamlspec section:spec: containers: - image: docker.io/eclipse/che-remote-plugin-node:next name: vscode-typescript memoryLimit: 512Mi memoryRequest: 256MiIt results in a container with the following memory limit and request:
Memory limit
512 MiB
Memory request
256 MiB
TipHow to find the
meta.yamlfile ofchePluginCommunity plug-ins are available in the che-plugin-registry GitHub repository in folder
v3/plugins/${organization}/${name}/${version}/.For non-community or customized plug-ins, the
meta.yamlfiles are available on the local OpenShift cluster at${pluginRegistryEndpoint}/v3/plugins/${organization}/${name}/${version}/meta.yaml.For example, on a local Minikube cluster, the URL for the
che-incubator/typescript/latest meta.yamlishttp://plugin-registry-che.192.168.64.78.nip.io/v3/plugins/che-incubator/typescript/latest/meta.yaml.Custom CPU limit and request:
CodeReady Workspaces does not set CPU limits and requests by default. However, it is possible to configure CPU limits for the
chePluginandcheEditortypes in themeta.yamlfile or in the devfile in the same way as it done for memory limits.Example 2.2. The
chePluginche-incubator/typescript/latestmeta.yamlspec section:spec: containers: - image: docker.io/eclipse/che-remote-plugin-node:next name: vscode-typescript cpuLimit: 2000m cpuRequest: 500mIt results in a container with the following CPU limit and request:
CPU limit
2 cores
CPU request
0.5 cores
To set CPU limits and requests globally, use the following dedicated environment variables:
|
|
|
|
|
|
Note that the LimitRange object of the OpenShift project may specify defaults for CPU limits and requests set by cluster administrators. To prevent start errors due to resources overrun, limits on application or workspace levels must comply with those settings.
Custom requirements for
dockerimagecomponentsIf present, the
memoryLimitandmemoryRequestattributes of the devfile define the memory limit of adockerimagecontainer. CodeReady Workspaces automatically sets the memory request to match the memory limit in case it is not specified explicitly.- alias: maven type: dockerimage image: eclipse/maven-jdk8:latest memoryLimit: 1536MCustom requirements for
kubernetesoropenshiftcomponents:The referenced manifest may define the memory requirements and limits.
- Add all requirements previously calculated.
2.3. A workspace example
This section describes a CodeReady Workspaces workspace example.
The following devfile defines the CodeReady Workspaces workspace:
apiVersion: 1.0.0
metadata:
 generateName: guestbook-nodejs-sample-
projects:
 - name: guestbook-nodejs-sample
   source:
     type: git
     location: "https://github.com/l0rd/nodejs-sample"
components:
 - type: chePlugin
   id: che-incubator/typescript/latest
 - type: kubernetes
   alias: guestbook-frontend
   reference: https://raw.githubusercontent.com/l0rd/nodejs-sample/master/kubernetes-manifests/guestbook-frontend.deployment.yaml
   mountSources: true
   entrypoints:
     - command: ['sleep']
       args: ['infinity']
This table provides the memory requirements for each workspace component:
Table 2.3. Total workspace memory requirement and limit
| Pod | Container name | Default memory limit | Default memory request |
|---|---|---|---|
| Workspace |
theia-ide (default | 512 MiB | 512 MiB |
| Workspace |
machine-exec (default | 128 MiB | 128 MiB |
| Workspace |
vscode-typescript ( | 512 MiB | 512 MiB |
| Workspace |
frontend ( | 1 GiB | 512 MiB |
| JWT Proxy | verifier | 128 MiB | 128 MiB |
| Total | 2.25 GiB | 1.75 GiB | |
-
The
theia-ideandmachine-execcomponents are implicitly added to the workspace, even when not included in the devfile. -
The resources required by
machine-execare the default forchePlugin. -
The resources for
theia-ideare specifically set in thecheEditormeta.yamlto 512 MiB asmemoryLimit. -
The Typescript VS Code extension has also overridden the default memory limits. In its
meta.yamlfile, the limits are explicitly specified to 512 MiB. -
CodeReady Workspaces is applying the defaults for the
kubernetescomponent type: a memory limit of 1 GiB and a memory request of 512 MiB. This is because thekubernetescomponent references aDeploymentmanifest that has a container specification with no resource limits or requests. - The JWT container requires 128 MiB of memory.
Adding all together results in 1.75 GiB of memory requests with a 2.25 GiB limit.
Additional resources
- Chapter 1, CodeReady Workspaces architecture overview
- Kubernetes compute resources management documentation
- https://access.redhat.com/documentation/en-us/red_hat_codeready_workspaces/2.4/html-single/installation_guide/index#configuring-the-codeready-workspaces-installation_crw
- https://access.redhat.com/documentation/en-us/red_hat_codeready_workspaces/2.4/html-single/installation_guide/index#advanced-configuration-options-for-the-codeready-workspaces-server-component_crw
- https://access.redhat.com/documentation/en-us/red_hat_codeready_workspaces/2.4/html-single/end-user_guide/index#making-a-workspace-portable-using-a-devfile_crw
- https://access.redhat.com/documentation/en-us/red_hat_codeready_workspaces/2.4/html-single/end-user_guide/index#making-a-workspace-portable-using-a-devfile_crw#a-minimal-devfile_crw
- Section 8.1, “Authenticating users”
- che-plugin-registry GitHub repository
Chapter 3. Customizing the devfile and plug-in registries
CodeReady Workspaces 2.4 introduces two registries: the plug-ins registry and the devfile registry. They are static websites where the metadata of CodeReady Workspaces plug-ins and CodeReady Workspaces devfiles is published.
The plug-in registry makes it possible to share a plug-in definition across all the users of the same instance of CodeReady Workspaces. Only plug-ins that are published in a registry can be used in a devfile.
The devfile registry holds the definitions of the CodeReady Workspaces stacks. These are available on the CodeReady Workspaces user dashboard when selecting Create Workspace. It contains the list of CodeReady Workspaces technological stack samples with example projects.
The devfile and plug-in registries run in two separate pods and are deployed when the CodeReady Workspaces server is deployed (that is the default behavior of the CodeReady Workspaces Operator). The metadata of the plug-ins and devfiles are versioned on GitHub and follow the CodeReady Workspaces server life cycle.
In this document, the following two ways to customize the default registries that are deployed with CodeReady Workspaces (to modify the plug-ins or devfile metadata) are described:
- Building a custom image of the registries
Running the default images but modifying them at runtime
3.1. Building and running a custom registry image
This section describes the building of registries and updating a running CodeReady Workspaces server to point to the registries.
3.1.1. Building a custom devfile registry
This section describes how to build a custom devfiles registry. Following operations are covered:
- Getting a copy of the source code necessary to build a devfiles registry.
- Adding a new devfile.
- Building the devfiles registry.
Procedure
Clone the devfile registry repository:
$ git clone git@github.com:redhat-developer/codeready-workspaces.git
$ cd codeready-workspaces/dependencies/che-devfile-registry
In the
./che-devfile-registry/devfiles/directory, create a subdirectory<devfile-name>/and add thedevfile.yamlandmeta.yamlfiles.File organization for a devfile
./che-devfile-registry/devfiles/ └── <devfile-name> ├── devfile.yaml └── meta.yaml-
Add valid content in the
devfile.yamlfile. For a detailed description of the devfile format, see https://access.redhat.com/documentation/en-us/red_hat_codeready_workspaces/2.4/html-single/end-user_guide/index#making-a-workspace-portable-using-a-devfile_crw. Ensure that the
meta.yamlfile conforms to the following structure:Table 3.1. Parameters for a devfile
meta.yamlAttribute Description descriptionDescription as it appears on the user dashboard.
displayNameName as it appears on the user dashboard.
globalMemoryLimitThe sum of the expected memory consumed by all the components launched by the devfile. This number will be visible on the user dashboard. It is informative and is not taken into account by the CodeReady Workspaces server.
iconLink to an
.svgfile that is displayed on the user dashboard.tagsList of tags. Tags usually include the tools included in the stack.
Example devfile
meta.yamldisplayName: Rust description: Rust Stack with Rust 1.39 tags: ["Rust"] icon: https://www.eclipse.org/che/images/logo-eclipseche.svg globalMemoryLimit: 1686Mi
Build the containers for the custom devfile registry:
$ docker build -t my-devfile-registry .
3.1.2. Building a custom plug-in registry
This section describes how to build a custom plug-in registry. Following operations are covered:
- Getting a copy of the source code necessary to build a custom plug-in registry.
- Adding a new plug-in.
- Building the custom plug-in registry.
Procedure
Clone the plug-in registry repository:
$ git clone git@github.com:redhat-developer/codeready-workspaces.git
$ cd codeready-workspaces/dependencies/che-plugin-registry
In the
./che-plugin-registry/v3/plugins/directory, create new directories<publisher>/<plugin-name>/<plugin-version>/and ameta.yamlfile in the last directory.File organization for a plugin
./che-plugin-registry/v3/plugins/
├── <publisher>
│   └── <plugin-name>
│       ├── <plugin-version>
│       │   └── meta.yaml
│       └── latest.txt
-
Add valid content to the
meta.yamlfile. See the “Using a Visual Studio Code extension in CodeReady Workspaces” section or the README.md file in theeclipse/che-plugin-registryrepository for a detailed description of themeta.yamlfile format. Create a file named
latest.txtwith content the name of the latest<plugin-version>directory.Example$ tree che-plugin-registry/v3/plugins/redhat/java/ che-plugin-registry/v3/plugins/redhat/java/ ├── 0.38.0 │ └── meta.yaml ├── 0.43.0 │ └── meta.yaml ├── 0.45.0 │ └── meta.yaml ├── 0.46.0 │ └── meta.yaml ├── 0.50.0 │ └── meta.yaml └── latest.txt $ cat che-plugin-registry/v3/plugins/redhat/java/latest.txt 0.50.0
Build the containers for the custom plug-in registry:
./build.sh
3.1.3. Deploying the registries
Prerequisites
The my-plug-in-registry and my-devfile-registry images used in this section are built using the docker command. This section assumes that these images are available on the OpenShift cluster where CodeReady Workspaces is deployed.
This is true on Minikube, for example, if before running the docker build commands, the user executed the eval $\{minikube docker-env} command (or, the eval $\{minishift docker-env} command for Minishift).
Otherwise, these images can be pushed to a container registry (public, such as quay.io, or the DockerHub, or a private registry).
3.1.3.1. Deploying registries in OpenShift
Procedure
An OpenShift template to deploy the plug-in registry is available in the openshift/ directory of the GitHub repository.
To deploy the plug-in registry using the OpenShift template, run the following command:
NAMESPACE=<namespace-name>  1
IMAGE_NAME="my-plug-in-registry"
IMAGE_TAG="latest"
oc new-app -f openshift/che-plugin-registry.yml \
 -n "$\{NAMESPACE}" \
 -p IMAGE="$\{IMAGE_NAME}" \
 -p IMAGE_TAG="$\{IMAGE_TAG}" \
 -p PULL_POLICY="IfNotPresent"
- 1
- If installed using crwctl, the default CodeReady Workspaces project is
openshift-workspaces. The OperatorHub installation method deploys CodeReady Workspaces to the users current project.
The devfile registry has an OpenShift template in the
deploy/openshift/directory of the GitHub repository. To deploy it, run the command:NAMESPACE=<namespace-name> 1 IMAGE_NAME="my-devfile-registry" IMAGE_TAG="latest" oc new-app -f openshift/che-devfile-registry.yml \ -n "$\{NAMESPACE}" \ -p IMAGE="$\{IMAGE_NAME}" \ -p IMAGE_TAG="$\{IMAGE_TAG}" \ -p PULL_POLICY="IfNotPresent"
- 1
- If installed using crwctl, the default CodeReady Workspaces project is
openshift-workspaces. The OperatorHub installation method deploys CodeReady Workspaces to the users current project.
Check if the registries are deployed successfully on OpenShift.
To verify that the new plug-in is correctly published to the plug-in registry, make a request to the registry path
/v3/plugins/index.json(or/devfiles/index.jsonfor the devfile registry).$ URL=$(oc get -o 'custom-columns=URL:.spec.rules[0].host' \ -l app=che-plugin-registry route --no-headers) $ INDEX_JSON=$(curl -sSL http://${URL}/v3/plugins/index.json) $ echo ${INDEX_JSON} | grep -A 4 -B 5 "\"name\":\"my-plug-in\"" ,\{ "id": "my-org/my-plug-in/1.0.0", "displayName":"This is my first plug-in for CodeReady Workspaces", "version":"1.0.0", "type":"VS Code extension", "name":"my-plug-in", "description":"This plugin shows that we are able to add plugins to the registry", "publisher":"my-org", "links": \{"self":"/v3/plugins/my-org/my-plug-in/1.0.0" } } -- -- ,\{ "id": "my-org/my-plug-in/latest", "displayName":"This is my first plug-in for CodeReady Workspaces", "version":"latest", "type":"VS Code extension", "name":"my-plug-in", "description":"This plugin shows that we are able to add plugins to the registry", "publisher":"my-org", "links": \{"self":"/v3/plugins/my-org/my-plug-in/latest" } }Verify that the CodeReady Workspaces server points to the URL of the registry. To do this, compare the value of the
CHE_WORKSPACE_PLUGIN__REGISTRY__URLparameter in thecheConfigMap (orCHE_WORKSPACE_DEVFILE__REGISTRY__URLfor the devfile registry):$ oc get \ -o "custom-columns=URL:.data['CHE_WORKSPACE_PLUGINREGISTRYURL']" \ --no-headers cm/che URL http://che-plugin-registry-che.192.168.99.100.nip.io/v3with the URL of the route:
$ oc get -o 'custom-columns=URL:.spec.rules[0].host' \
  -l app=che-plugin-registry route --no-headers
che-plugin-registry-che.192.168.99.100.nip.io
If they do not match, update the ConfigMap and restart the CodeReady Workspaces server.
$ oc edit cm/che
(...)
$ oc scale --replicas=0 deployment/che
$ oc scale --replicas=1 deployment/che
When the new registries are deployed and the CodeReady Workspaces server is configured to use them, the new plug-ins are available in the Plugin view of a workspace and the new stacks are displayed in the New Workspace tab of the user dashboard.
3.2. Including the plug-in binaries in the registry image
The plug-in registry of CodeReady Workspaces differs from the Eclipse Che version. The Eclipse Che only hosts plug-in metadata, but the CodeReady Workspaces plug-in registry also hosts the corresponding binaries, and it is built in an offline mode by default. This means the binaries are already hosted in the plug-in-registry image.
This section describes how to add a new plug-in or reference a different version of a plug-in. This is achieved by modifying the plug-in meta.yaml file to point to a new plug-in and building a new registry in offline mode that contains the modified plug-in meta.yaml file and the plug-in binary file.
Prerequisites
- An instance of CodeReady Workspaces is available.
-
The
octool is available.
Procedure
Clone the
codeready-workspacesrepository$ git clone https://github.com/redhat-developer/codeready-workspaces $ cd codeready-workspaces/dependencies/che-plugin-registry
Identify the binaries you wish to change in the plug-in registry
The
meta.yamlfile includes theextensionsection, which defines the URLs of required extensions for the plug-in. For example, theredhat/java11/0.63.0plug-in lists the following two extensions:meta.yaml
extensions:
  - https://download.jboss.org/jbosstools/vscode/3rdparty/vscode-java-debug/vscode-java-debug-0.26.0.vsix
  - https://download.jboss.org/jbosstools/static/jdt.ls/stable/java-0.63.0-2222.vsix
Change the first extension to reference the version hosted on GitHub and rebuild the plug-in registry. When using the
redhat/java11/0.63.0plug-in, the binary will be fetched from the custom plug-in-registry server. Set the following environment variables to help with the subsequent commands:ORG=redhat NAME=java11 CHE_PLUGIN_VERSION=0.63.0 VSCODE_JAVA_DEBUG_VERSION=0.26.0 VSCODE_JAVA_DEBUG_URL="https://github.com/microsoft/vscode-java-debug/releases/download/0.26.0/vscjava.vscode-java-debug-0.26.0.vsix" OLD_JAVA_DEBUG_META_YAML_URL="https://download.jboss.org/jbosstools/vscode/3rdparty/vscode-java-debug/vscode-java-debug-0.26.0.vsix"
Get the plug-in registry URL:
$ oc get route plugin-registry -o jsonpath='{.spec.host}' -n ${CHE_NAMESPACE}Save this value in a variable called
PLUGIN_REGISTRY_URL.Update the URLs in the
meta.yamlfile to point to the VS Code extension binaries that are saved in the registry container:$ sed -i -e "s#${OLD_JAVA_DEBUG_META_YAML_URL}#${VSCODE_JAVA_DEBUG_URL}#g" \ ./v3/plugins/${ORG}/${NAME}/${CHE_PLUGIN_VERSION}/meta.yaml ./v3/plugins/${ORG}/${NAME}/${CHE_PLUGIN_VERSION}/meta.yamlImportantBy default, CodeReady Workspaces is deployed with TLS enabled. For installations that do not use TLS, use
http://in theNEW_JAVA_DEBUG_URLandNEW_JAVA_LS_URLvariables.Confirm that the
meta.yamlhas the correctly substituted URLs:$ cat ./v3/plugins/${ORG}/${NAME}/${CHE_PLUGIN_VERSION}/meta.yamlmeta.yaml
extensions:
  - https://plugin-registry-che.apps-crc.testing/v3/plugins/redhat/java11/0.63.0/vscode-java-debug-0.26.0.vsix
  - https://plugin-registry-che.apps-crc.testing/v3/plugins/redhat/java11/0.63.0/java-0.63.0-2222.vsix
- Build and deploy the plug-in registry using the instructions in the Section 3.1, “Building and running a custom registry image” section.
3.3. Editing a devfile and plug-in at runtime
An alternative to building a custom registry image is to:
- Start a registry
- Modify its content at runtime
This approach is simpler and faster. But the modifications are lost as soon as the container is deleted.
3.3.1. Adding a plug-in at runtime
Procedure
To add a plug-in:
Check out the plugin registry sources.
$ git clone https://github.com/redhat-developer/codeready-workspaces; \
  cd codeready-workspaces/dependencies/che-plugin-registry
Create a
meta.yamlin some local folder. This can be done from scratch or by copying from an existing plug-in’smeta.yamlfile.$ PLUGIN="v3/plugins/new-org/new-plugin/0.0.1"; \ mkdir -p ${PLUGIN}; cp v3/plugins/che-incubator/cpptools/0.1/* ${PLUGIN}/ echo "${PLUGIN##*/}" > ${PLUGIN}/../latest.txt-
If copying from an existing plug-in, make changes to the
meta.yamlfile to suit your needs. Make sure the new plug-in has a uniquetitle,displayNameanddescription. Update thefirstPublicationDateto today’s date. These fields in
meta.yamlmust match the path defined inPLUGINabove.publisher: new-org name: new-plugin version: 0.0.1
Get the name of the Pod that hosts the plug-in registry container. To do this, filter the
component=plugin-registrylabel:$ PLUGIN_REG_POD=$(oc get -o custom-columns=NAME:.metadata.name \ --no-headers pod -l component=plugin-registry)
Regenerate the registry’s
index.jsonfile to include the new plug-in.$ cd codeready-workspaces/dependencies/che-plugin-registry; \ "$(pwd)/build/scripts/generate_latest_metas.sh" v3 && \ "$(pwd)/build/scripts/check_plugins_location.sh" v3 && \ "$(pwd)/build/scripts/set_plugin_dates.sh" v3 && \ "$(pwd)/build/scripts/check_plugins_viewer_mandatory_fields.sh" v3 && \ "$(pwd)/build/scripts/index.sh" v3 > v3/plugins/index.jsonCopy the new
index.jsonandmeta.yamlfiles from the new local plug-in folder to the container.$ cd codeready-workspaces/dependencies/che-plugin-registry; \ LOCAL_FILES="$(pwd)/${PLUGIN}/meta.yaml $(pwd)/v3/plugins/index.json"; \ oc exec ${PLUGIN_REG_POD} -i -t -- mkdir -p /var/www/html/$/{PLUGIN}; \ for f in $LOCAL_FILES; do e=${f/$(pwd)\//}; echo "Upload ${f} -> /var/www/html/${e}"; \ oc cp "${f}" ${PLUGIN_REG_POD}:/var/www/html/${e}; done- The new plug-in can now be used from the existing CodeReady Workspaces instance of the plug-in registry. To discover it, go to the CodeReady Workspaces dashboard, then click the Workspaces link. From there, click the gear icon to configure one of your workspaces. Select the Plugins tab to see the updated list of available plug-ins.
3.3.2. Adding a devfile at runtime
Procedure
To add a devfile:
Check out the devfile registry sources.
$ git clone https://github.com/redhat-developer/codeready-workspaces; \
  cd codeready-workspaces/dependencies/che-devfile-registry
Create a
devfile.yamlandmeta.yamlin some local folder. This can be done from scratch or by copying from an existing devfile.$ STACK="new-stack"; \ mkdir -p devfiles/${STACK}; cp devfiles/03_web-nodejs-simple/* devfiles/${STACK}/-
If copying from an existing devfile, make changes to the devfile to suit your needs. Make sure the new devfile has a unique
displayNameanddescription. Get the name of the Pod that hosts the devfile registry container. To do this, filter the
component=devfile-registrylabel:$ DEVFILE_REG_POD=$(oc get -o custom-columns=NAME:.metadata.name \ --no-headers pod -l component=devfile-registry)
Regenerate the registry’s
index.jsonfile to include the new devfile.$ cd codeready-workspaces/dependencies/che-devfile-registry; \ "$(pwd)/build/scripts/check_mandatory_fields.sh" devfiles; \ "$(pwd)/build/scripts/index.sh" > index.json
Copy the new
index.json,devfile.yamlandmeta.yamlfiles from the new local devfile folder to the container.$ cd che-devfile-registry; \ oc exec ${DEVFILE_REG_POD} -i -t -- mkdir -p /var/www/html/devfiles/${STACK}; \ oc cp $(pwd)/devfiles/${STACK}/meta.yaml ${DEVFILE_REG_POD}:/var/www/html/devfiles/${STACK}/meta.yaml; \ oc cp $(pwd)/devfiles/${STACK}/devfile.yaml ${DEVFILE_REG_POD}:/var/www/html/devfiles/${STACK}/devfile.yaml; \ oc cp $(pwd)/index.json ${DEVFILE_REG_POD}:/var/www/html/devfiles/index.json- The new devfile can now be used from the existing CodeReady Workspaces instance of the devfile registry. To discover it, go to the CodeReady Workspaces dashboard, then click the Workspaces link. From there, click Add Workspace to see the updated list of available devfiles.
3.4. Using a Visual Studio Code extension in CodeReady Workspaces
In Red Hat CodeReady Workspaces, Visual Studio Code (VS Code) extensions can be installed to extend the functionality of a CodeReady Workspaces workspace. VS Code extensions can run in the Che-Theia editor container, or they can be packaged in their own isolated and pre-configured containers with their prerequisites.
This document describes:
- Use of a VS Code extension in CodeReady Workspaces with workspaces.
- CodeReady Workspaces Plug-ins panel.
How to publish a VS Code extension in the CodeReady Workspaces plug-in registry (to share the extension with other CodeReady Workspaces users).
- The extension-hosting sidecar container and the use of the extension in a devfile are optional for this.
- How to review the compatibility of the VS Code extensions to be informed whether a specific API is supported or has not been implemented yet.
3.4.1. Publishing a VS Code extension into the CodeReady Workspaces plug-in registry
The user of CodeReady Workspaces can use a workspace devfile to use any plug-in, also known as Visual Studio Code (VS Code) extension. This plug-in can be added to the plug-in registry, then easily reused by anyone in the same organization with access to that workspaces installation.
Some plug-ins need a runtime dedicated container for code compilation. This fact makes those plug-ins a combination of a runtime sidecar container and a VS Code extension.
The following section describes the portability of a plug-in configuration and associating an extension with a runtime container that the plug-in needs.
3.4.1.1. Writing a meta.yaml file and adding it to a plug-in registry
The plug-in meta information is required to publish a VS Code extension in an Red Hat CodeReady Workspaces plug-in registry. This meta information is provided as a meta.yaml file. This section describes how to create a meta.yaml file for an extension.
Procedure
-
Create a
meta.yamlfile in the following plug-in registry directory:<apiVersion>/plugins/<publisher>/<plug-inName>/<plug-inVersion>/. Edit the
meta.yamlfile and provide the necessary information. The configuration file must adhere to the following structure:apiVersion: v2 1 publisher: myorg 2 name: my-vscode-ext 3 version: 1.7.2 4 type: value 5 displayName: 6 title: 7 description: 8 icon: https://www.eclipse.org/che/images/logo-eclipseche.svg 9 repository: 10 category: 11 spec: containers: 12 - image: 13 memoryLimit: 14 memoryRequest: 15 cpuLimit: 16 cpuRequest: 17 extensions: 18 - https://github.com/redhat-developer/vscode-yaml/releases/download/0.4.0/redhat.vscode-yaml-0.4.0.vsix - https://github.com/SonarSource/sonarlint-vscode/releases/download/1.16.0/sonarlint-vscode-1.16.0.vsix
- 1
- Version of the file structure.
- 2
- Name of the plug-in publisher. Must be the same as the publisher in the path.
- 3
- Name of the plug-in. Must be the same as in path.
- 4
- Version of the plug-in. Must be the same as in path.
- 5
- Type of the plug-in. Possible values:
Che Plugin,Che Editor,Theia plugin,VS Code extension. - 6
- A short name of the plug-in.
- 7
- Title of the plug-in.
- 8
- A brief explanation of the plug-in and what it does.
- 9
- The link to the plug-in logo.
- 10
- Optional. The link to the source-code repository of the plug-in.
- 11
- Defines the category that this plug-in belongs to. Should be one of the following:
Editor,Debugger,Formatter,Language,Linter,Snippet,Theme, orOther. - 12
- If this section is omitted, the VS Code extension is added into the Che-Theia IDE container.
- 13
- The Docker image from which the sidecar container will be started. Example:
theia-endpoint-image. - 14
- The maximum RAM which is available for the sidecar container. Example: "512Mi". This value might be overridden by the user in the component configuration.
- 15
- The RAM which is given for the sidecar container by default. Example: "256Mi". This value might be overridden by the user in the component configuration.
- 16
- The maximum CPU amount in cores or millicores (suffixed with "m") which is available for the sidecar container. Examples: "500m", "2". This value might be overridden by the user in the component configuration.
- 17
- The CPU amount in cores or millicores (suffixed with "m") which is given for the sidecar container by default. Example: "125m". This value might be overridden by the user in the component configuration.
- 18
- A list of VS Code extensions run in this sidecar container.
3.4.2. Adding a plug-in registry VS Code extension to a workspace
When the required VS Code extension is added into a CodeReady Workspaces plug-in registry, the user can add it into the workspace through the CodeReady Workspaces Plugins panel or through the workspace configuration.
3.4.2.1. Adding a VS Code extension using the CodeReady Workspaces Plugins panel
Prerequisites
- A running instance of Red Hat CodeReady Workspaces. To install an instance of Red Hat CodeReady Workspaces, see Installing CodeReady Workspaces on OpenShift Container Platform.
Procedure
To add a VS Code extension using the CodeReady Workspaces Plugins panel:
-
Open the CodeReady Workspaces Plugins panel by pressing
CTRL+SHIFT+Jor navigate to View/Plugins. - Change the current registry to the registry in which the VS Code extension was added.
-
In the search bar, click the Menu button and then click Change Registry to choose the registry from the list. If the required registry is not in the list, add it using the Add Registry menu option. The registry link points to the
pluginssegment of the registry, for example:https://my-registry.com/v3/plugins/index.json. -
To update the list of plug-ins after adding a new registry link, use
Refreshcommand from the search bar menu. - Search for the required plug-in using the filter, and then click the button.
- Restart the workspace for the changes to take effect.
3.4.2.2. Adding a VS Code extension using the workspace configuration
Prerequisites
- A running instance of Red Hat CodeReady Workspaces. To install an instance of Red Hat CodeReady Workspaces, see Installing CodeReady Workspaces on OpenShift Container Platform.
- An existing workspace defined on this instance of Red Hat CodeReady Workspaces https://access.redhat.com/documentation/en-us/red_hat_codeready_workspaces/2.4/html-single/end-user_guide/index#creating-and-configuring-a-new-workspace_crw.
Procedure
To add a VS Code extension using the workspace configuration:
- Click the Workspaces tab on the Dashboard and select the workspace in which you want to add the plug-in. The Workspace <workspace-name> window is opened showing the details of the workspace.
- Click the devfile tab.
Locate the components section, and add a new entry with the following structure:
- type: chePlugin id: 1- 1
- ID format: <publisher>/<plug-inName>/<plug-inVersion>
CodeReady Workspaces automatically adds the other fields to the new component.
Alternatively, you can link to a
meta.yamlfile hosted on GitHub, using the dedicated reference field.- type: chePlugin reference: 1- 1
https://raw.githubusercontent.com/<username>/<registryRepository>/v3/plugins/<publisher>/<plug-inName>/<plug-inVersion>/meta.yaml
- Restart the workspace for the changes to take effect.
3.5. Testing a Visual Studio Code extension in CodeReady Workspaces
Visual Studio Code (VS Code) extensions work in a workspace. VS Code extensions can run in the Che-Theia editor container, or in their own isolated and preconfigured containers with their prerequisites.
This section describes how to test a VS Code extension in CodeReady Workspaces with workspaces and how to review the compatibility of VS Code extensions to check whether a specific API is available.
The extension-hosting sidecar container and the use of the extension in a devfile are optional.
3.5.1. Testing a VS Code extension using GitHub gist
Each workspace can have its own set of plug-ins. The list of plug-ins and the list of projects to clone are defined in the devfile.yaml file.
For example, to enable an AsciiDoc plug-in from the Red Hat CodeReady Workspaces dashboard, add the following snippet to the devfile:
components:
 - id: joaopinto/vscode-asciidoctor/latest
   type: chePlugin
To add a plug-in that is not in the default plug-in registry, build a custom plug-in registry. See Section 3.1.2, “Building a custom plug-in registry”, or, alternatively, use GitHub and the gist service.
Prerequisites
- A running instance of Red Hat CodeReady Workspaces. To install an instance of Red Hat CodeReady Workspaces, see Installing CodeReady Workspaces on OpenShift Container Platform.
- A GitHub account.
Procedure
-
Go to the gist webpage and create a
README.mdfile with the following description:Try Bracket Pair Colorizer extension in Red Hat CodeReady Workspacesand content:Example VS Code extension. (Bracket Pair Colorizer is a popular VS Code extension.) - Click the button.
Clone the gist repository by using the URL from the navigation bar of the browser:
$ git clone https://gist.github.com/<your-github-username>/<gist-id>
Example of the output of the
git clonecommandgit clone https://gist.github.com/benoitf/85c60c8c439177ac50141d527729b9d9 1 Cloning into '85c60c8c439177ac50141d527729b9d9'... remote: Enumerating objects: 3, done. remote: Counting objects: 100% (3/3), done. remote: Total 3 (delta 0), reused 0 (delta 0), pack-reused 0 Unpacking objects: 100% (3/3), done.- 1
- Each gist has a unique ID.
Change the directory:
$ cd <gist-directory-name> 1
- 1
- Directory name matching the gist ID.
- Download the plug-in from the VS Code marketplace or from its GitHub page, and store the plug-in file in the cloned directory.
Create a
plugin.yamlfile in the cloned directory to add the definition of this plug-in.Example of the
plugin.yamlfile referencing the.vsixbinary file extensionapiVersion: v2 publisher: CoenraadS name: bracket-pair-colorizer version: 1.0.61 type: VS Code extension displayName: Bracket Pair Colorizer title: Bracket Pair Colorizer description: Bracket Pair Colorizer icon: https://raw.githubusercontent.com/redhat-developer/codeready-workspaces/master/dependencies/che-plugin-registry/resources/images/default.svg?sanitize=true repository: https://github.com/CoenraadS/BracketPair category: Language firstPublicationDate: '2020-07-30' spec: 1 extensions: - "{{REPOSITORY}}/CoenraadS.bracket-pair-colorizer-1.0.61.vsix" 2 latestUpdateDate: "2020-07-30"
Define a memory limit and volumes:
spec:
  containers:
    - image: "quay.io/eclipse/che-sidecar-java:8-0cfbacb"
      name: vscode-java
      memoryLimit: "1500Mi"
      volumes:
      - mountPath: "/home/theia/.m2"
        name: m2
Create a
devfile.yamlthat references theplugin.yamlfile:apiVersion: 1.0.0 metadata: generateName: java-maven- projects: - name: console-java-simple source: type: git location: "https://github.com/che-samples/console-java-simple.git" branch: java1.11 components: - type: chePlugin id: redhat/java11/latest - type: chePlugin 1 reference: "{{REPOSITORY}}/plugin.yaml" - type: dockerimage alias: maven image: quay.io/eclipse/che-java11-maven:nightly memoryLimit: 512Mi mountSources: true volumes: - name: m2 containerPath: /home/user/.m2 commands: - name: maven build actions: - type: exec component: maven command: "mvn clean install" workdir: ${CHE_PROJECTS_ROOT}/console-java-simple - name: maven build and run actions: - type: exec component: maven command: "mvn clean install && java -jar ./target/*.jar" workdir: ${CHE_PROJECTS_ROOT}/console-java-simple- 1
- Any other devfile definition is also accepted. The important information in this devfile are the lines defining this external component. It means that an external reference defines the plug-in (instead of an ID pointing to a definition in the default plug-in registry).
Verify there are 4 files in the current Git directory:
$ ls -la
.git
CoenraadS.bracket-pair-colorizer-1.0.61.vsix
README.md
devfile.yaml
plugin.yaml
Before committing the files, add a pre-commit hook to update the
{{REPOSITORY}}variable to the public external raw gist link:Create a
.git/hooks/pre-commitfile with this content:#!/bin/sh # get modified files FILES=$(git diff --cached --name-only --diff-filter=ACMR "*.yaml" | sed 's| |\\ |g') # exit fast if no files found [ -z "$FILES" ] && exit 0 # grab remote origin origin=$(git config --get remote.origin.url) url="${origin}/raw" # iterate on files and add the good prefix pattern for FILE in ${FILES}; do sed -e "s#{{REPOSITORY}}#${url}#g" "${FILE}" > "${FILE}.back" mv "${FILE}.back" "${FILE}" done # Add back to staging echo "$FILES" | xargs git add exit 0The hook replaces the
{{REPOSITORY}}macro and adds the external raw link to the gist.Make the script executable:
$ chmod u+x .git/hooks/pre-commit
Commit and push the files:
# Add files
$ git add *

# Commit
$ git commit -m "Initial Commit for the test of our extension"
[master 98dd370] Initial Commit for the test of our extension
 3 files changed, 61 insertions(+)
 create mode 100644 CoenraadS.bracket-pair-colorizer-1.0.61.vsix
 create mode 100644 devfile.yaml
 create mode 100644 plugin.yaml

# and push the files to the main branch
$ git push origin
Visit the gist website and verify that all links have the correct public URL and do not contain any
{{REPOSITORY}}variables. To reach the devfile:$ echo "$(git config --get remote.origin.url)/raw/devfile.yaml"
or:
$ echo "https://<che-server>/f?url=$(git config --get remote.origin.url)/raw/devfile.yaml"
3.5.2. Verifying the VS Code extension API compatibility level
Che-Theia does not fully support the VS Code extensions API. The vscode-theia-comparator is used to analyze the compatibility between the Che-Theia plug-in API and the VS Code extension API. This tool runs nightly, and the results are published on the vscode-theia-comparator GitHub page.
Prerequisites
- Personal GitHub access token. See Creating a personal access token for the command line. A GitHub access token is required to increase the GitHub download limit for your IP address.
Procedure
To run the vscode-theia comparator manually:
-
Clone the vscode-theia-comparator repository, and build it using the
yarncommand. -
Set the
GITHUB_TOKENenvironment variable to your token. -
Execute the
yarn run generatecommand to generate a report. -
Open the
out/status.htmlfile to view the report.
Chapter 4. Retrieving CodeReady Workspaces logs
For information about obtaining various types of logs in CodeReady Workspaces, see the following sections:
- Section 4.1, “Accessing OpenShift events on OpenShift”
- Section 4.3, “Viewing CodeReady Workspaces server logs”
- Section 4.4, “Viewing external service logs”
- Section 4.5, “Viewing CodeReady Workspaces workspaces logs”
- Section 4.6, “Viewing the plug-in broker logs”
- Section 4.7, “Collecting logs using crwctl”
4.1. Accessing OpenShift events on OpenShift
For high-level monitoring of OpenShift projects, view the OpenShift events that the project performs.
This section describes how to access these events in the OpenShift web console.
Prerequisites
- A running OpenShift web console.
Procedure
- In the left panel of the OpenShift web console, click the Home → Events.
- To view the list of all events for a particular project, select the project from the list.
- The details of the events for the current project are displayed.
Additional resources
- For a list of OpenShift events, see Comprehensive List of Events in OpenShift documentation.
4.2. Viewing the state of the CodeReady Workspaces cluster deployment using OpenShift 4 CLI tools
This section describes how to view the state of the CodeReady Workspaces cluster deployment using OpenShift 4 CLI tools.
Prerequisites
- An instance of Red Hat CodeReady Workspaces running on OpenShift.
-
An installation of the OpenShift command-line tool,
oc.
Procedure
Run the following commands to select the
crwproject:$ oc project <project_name>Run the following commands to get the name and status of the Pods running in the selected project:
$ oc get pods
Check that the status of all the Pods is
Running.Example 4.1. Pods with status
RunningNAME READY STATUS RESTARTS AGE codeready-8495f4946b-jrzdc 0/1 Running 0 86s codeready-operator-578765d954-99szc 1/1 Running 0 42m keycloak-74fbfb9654-g9vp5 1/1 Running 0 4m32s postgres-5d579c6847-w6wx5 1/1 Running 0 5m14s
To see the state of the CodeReady Workspaces cluster deployment, run:
$ oc logs --tail=10 -f `(oc get pods -o name | grep operator)`
Example 4.2. Logs of the Operator:
time="2019-07-12T09:48:29Z" level=info msg="Exec successfully completed"
time="2019-07-12T09:48:29Z" level=info msg="Updating eclipse-che CR with status: provisioned with OpenShift identity provider: true"
time="2019-07-12T09:48:29Z" level=info msg="Custom resource eclipse-che updated"
time="2019-07-12T09:48:29Z" level=info msg="Creating a new object: ConfigMap, name: che"
time="2019-07-12T09:48:29Z" level=info msg="Creating a new object: ConfigMap, name: custom"
time="2019-07-12T09:48:29Z" level=info msg="Creating a new object: Deployment, name: che"
time="2019-07-12T09:48:30Z" level=info msg="Updating eclipse-che CR with status: CodeReady Workspaces API: Unavailable"
time="2019-07-12T09:48:30Z" level=info msg="Custom resource eclipse-che updated"
time="2019-07-12T09:48:30Z" level=info msg="Waiting for deployment che. Default timeout: 420 seconds"
4.3. Viewing CodeReady Workspaces server logs
This section describes how to view the CodeReady Workspaces server logs using the command line.
4.3.1. Viewing the CodeReady Workspaces server logs using the OpenShift CLI
This section describes how to view the CodeReady Workspaces server logs using the OpenShift CLI (command line interface).
Procedure
In the terminal, run the following command to get the Pods:
$ oc get pods
Example
$ oc get pods
NAME            READY  STATUS   RESTARTS  AGE
codeready-11-j4w2b    1/1    Running  0         3m
To get the logs for a deployment, run the following command:
$ oc logs <name-of-pod>Example
$ oc logs codeready-11-j4w2b
4.4. Viewing external service logs
This section describes how the view the logs from external services related to CodeReady Workspaces server.
4.4.1. Viewing RH-SSO logs
The RH-SSO OpenID provider consists of two parts: Server and IDE. It writes its diagnostics or error information to several logs.
4.4.1.1. Viewing the RH-SSO server logs
This section describes how to view the RH-SSO OpenID provider server logs.
Procedure
- In the OpenShift Web Console, click Deployments.
-
In the Filter by label search field, type
keycloakto see the RH-SSO logs. -
In the Deployment Configs section, click the
keycloaklink to open it. - In the History tab, click the View log link for the active RH-SSO deployment.
- The RH-SSO logs are displayed.
Additional resources
- See the Section 4.3, “Viewing CodeReady Workspaces server logs” for diagnostics and error messages related to the RH-SSO IDE Server.
4.4.1.2. Viewing the RH-SSO client logs on Firefox
This section describes how to view the RH-SSO IDE client diagnostics or error information in the Firefox WebConsole.
Procedure
- Click Menu > WebDeveloper > WebConsole.
4.4.1.3. Viewing the RH-SSO client logs on Google Chrome
This section describes how to view the RH-SSO IDE client diagnostics or error information in the Google Chrome Console tab.
Procedure
- Click Menu > More Tools > Developer Tools.
- Click the Console tab.
4.4.2. Viewing the CodeReady Workspaces database logs
This section describes how to view the database logs in CodeReady Workspaces, such as PostgreSQL server logs.
Procedure
- In the OpenShift Web Console, click Deployments.
In the Find by label search field, type:
-
app=cheand press Enter component=postgresand EnterThe OpenShift Web Console now searches base on those two keys and displays PostgreSQL logs.
-
- Click postgres deployment to open it.
Click the View log link for the active PostgreSQL deployment.
The OpenShift Web Console displays the database logs.
Additional resources
- Some diagnostics or error messages related to the PostgreSQL server can be found in the active CodeReady Workspaces deployment log. For details to access the active CodeReady Workspaces deployments logs, see the Section 4.3, “Viewing CodeReady Workspaces server logs” section.
4.5. Viewing CodeReady Workspaces workspaces logs
This section describes how to view CodeReady Workspaces workspaces logs.
4.5.1. Viewing Che-Theia IDE logs
This section describes how to view Che-Theia IDE logs.
4.5.1.1. Viewing Che-Theia editor logs using the OpenShift CLI
Observing Che-Theia editor logs helps to get a better understanding and insight over the plug-ins loaded by the editor. This section describes how to access the Che-Theia editor logs using the OpenShift CLI (command-line interface).
Prerequisites
- CodeReady Workspaces is deployed in an OpenShift cluster.
- A workspace is created.
- User is located in a CodeReady Workspaces installation project.
Procedure
Obtain the list of the available Pods:
$ oc get pods
Example
$ oc get pods
NAME                                              READY  STATUS   RESTARTS  AGE
codeready-9-xz6g8                                 1/1    Running  1         15h
workspace0zqb2ew3py4srthh.go-cli-549cdcf69-9n4w2  4/4    Running  0         1h
Obtain the list of the available containers in the particular Pod:
$ oc get pods <name-of-pod> --output jsonpath='\{.spec.containers[*].name}'Example:
$ oc get pods workspace0zqb2ew3py4srthh.go-cli-549cdcf69-9n4w2 -o
jsonpath='\{.spec.containers[*].name}'
> go-cli che-machine-exechr7 theia-idexzb vscode-gox3r
Get logs from the
theia/idecontainer:$ oc logs --follow <name-of-pod> --container <name-of-container>
Example:
$ oc logs --follow workspace0zqb2ew3py4srthh.go-cli-549cdcf69-9n4w2 -container
theia-idexzb
>root INFO unzipping the plug-in 'task_plugin.theia' to directory: /tmp/theia-unpacked/task_plugin.theia
root INFO unzipping the plug-in 'theia_yeoman_plugin.theia' to directory: /tmp/theia-unpacked/theia_yeoman_plugin.theia
root WARN A handler with prefix term  is already registered.
root INFO [nsfw-watcher: 75] Started watching: /home/theia/.theia
root WARN e.onStart is slow, took: 367.4600000013015 ms
root INFO [nsfw-watcher: 75] Started watching: /projects
root INFO [nsfw-watcher: 75] Started watching: /projects/.theia/tasks.json
root INFO [4f9590c5-e1c5-40d1-b9f8-ec31ec3bdac5] Sync of 9 plugins took: 62.26000000242493 ms
root INFO [nsfw-watcher: 75] Started watching: /projects
root INFO [hosted-plugin: 88] PLUGIN_HOST(88) starting instance
4.5.2. Viewing logs from language servers and debug adapters
4.5.2.1. Checking important logs
This section describes how to check important logs.
Procedure
- In the OpenShift web console, click Applications → Pods to see a list of all the active workspaces.
- Click on the name of the running Pod where the workspace is running. The Pod screen contains the list of all containers with additional information.
Choose a container and click the container name.
TipThe most important logs are the
theia-idecontainer and the plug-ins container logs.- On the container screen, navigate to the Logs section.
4.5.2.2. Detecting memory problems
This section describes how to detect memory problems related to a plug-in running out of memory. The following are the two most common problems related to a plug-in running out of memory:
- The plug-in container runs out of memory
-
This can happen during plug-in initialization when the container does not have enough RAM to execute the entrypoint of the image. The user can detect this in the logs of the plug-in container. In this case, the logs contain
OOMKilled, which implies that the processes in the container requested more memory than is available in the container. - A process inside the container runs out of memory without the container noticing this
For example, the Java language server (Eclipse JDT Language Server, started by the vscode-java extension) throws an OutOfMemoryException. This can happen any time after the container is initialized, for example, when a plug-in starts a language server or when a process runs out of memory because of the size of the project it has to handle.
To detect this problem, check the logs of the primary process running in the container. For example, to check the log file of Eclipse JDT Language Server for details, see the relevant plug-in-specific sections.
4.5.2.3. Logging the client-server traffic for debug adapters
This section describes how to log the exchange between Che-Theia and a debug adapter into the Output view.
Prerequisites
- A debug session must be started for the Debug adapters option to appear in the list.
Procedure
- Click File → Settings and then open Preferences.
- Expand the Debug section in the Preferences view.
-
Set the trace preference value to
true(default isfalse). - All the communication events are now logged.
- To watch these events, click View → Output and select Debug adapters from the drop-down list at the upper right corner of the Output view.
4.5.2.4. Viewing logs for Python
This section describes how to view logs for the Python language server.
Procedure
Navigate to the Output view and select Python in the drop-down list.

4.5.2.5. Viewing logs for Go
This section describes how to view logs for the Go language server.
4.5.2.5.1. Finding the gopath
This section describes how to find where the GOPATH variable points to.
Procedure
Execute the
Go: Current GOPATHcommand.

4.5.2.5.2. Viewing the Debug Console log for Go
This section describes how to view the log output from the Go debugger.
Procedure
Set the
showLogattribute totruein the debug configuration.{ "version": "0.2.0", "configurations": [ { "type": "go", "showLog": true .... } ] }To enable debugging output for a component, add the package to the comma-separated list value of the
logOutputattribute:{ "version": "0.2.0", "configurations": [ { "type": "go", "showLog": true, "logOutput": "debugger,rpc,gdbwire,lldbout,debuglineerr" .... } ] }The debug console prints the additional information in the debug console.
4.5.2.5.3. Viewing the Go logs output in the Output panel
This section describes how to view the Go logs output in the Output panel.
Procedure
- Navigate to the Output view.
Select Go in the drop-down list.

4.5.2.6. Viewing logs for the NodeDebug NodeDebug2 adapter
No specific diagnostics exist other than the general ones.
4.5.2.7. Viewing logs for Typescript
4.5.2.7.1. Enabling the label switched protocol (LSP) tracing
Procedure
-
To enable the tracing of messages sent to the Typescript (TS) server, in the Preferences view, set the
typescript.tsserver.traceattribute toverbose. Use this to diagnose the TS server issues. -
To enable logging of the TS server to a file, set the
typescript.tsserver.logattribute toverbose. Use this log to diagnose the TS server issues. The log contains the file paths.
4.5.2.7.2. Viewing the Typescript language server log
This section describes how to view the Typescript language server log.
Procedure
To get the path to the log file, see the Typescript Output console:

To open log file, use the Open TS Server log command.

4.5.2.7.3. Viewing the Typescript logs output in the Output panel
This section describes how to view the Typescript logs output in the Output panel.
Procedure
- Navigate to the Output view
Select TypeScript in the drop-down list.

4.5.2.8. Viewing logs for Java
Other than the general diagnostics, there are Language Support for Java (Eclipse JDT Language Server) plug-in actions that the user can perform.
4.5.2.8.1. Verifying the state of the Eclipse JDT Language Server
Procedure
Check if the container that is running the Eclipse JDT Language Server plug-in is running the Eclipse JDT Language Server main process.
-
Open a terminal in the container that is running the Eclipse JDT Language Server plug-in (an example name for the container:
vscode-javaxxx). Inside the terminal, run the
ps aux | grep jdtcommand to check if the Eclipse JDT Language Server process is running in the container. If the process is running, the output is:usr/lib/jvm/default-jvm/bin/java --add-modules=ALL-SYSTEM --add-opens java.base/java.util
This message also shows the VSCode Java extension used. If it is not running, the language server has not been started inside the container.
- Check all logs described in Checking important logs
4.5.2.8.2. Verifying the Eclipse JDT Language Server features
Procedure
If the Eclipse JDT Language Server process is running, check if the language server features are working:
- Open a Java file and use the hover or autocomplete functionality. In case of an erroneous file, the user sees Java in the Outline view or in the Problems view.
4.5.2.8.3. Viewing the Java language server log
Procedure
The Eclipse JDT Language Server has its own workspace where it logs errors, information about executed commands, and events.
- To open this log file, open a terminal in the container that is running the Eclipse JDT Language Server plug-in. You can also view the log file by running the Java: Open Java Language Server log file command.
-
Run
cat <PATH_TO_LOG_FILE>wherePATH_TO_LOG_FILEis/home/theia/.theia/workspace-storage/<workspace_name>/redhat.java/jdt_ws/.metadata/.log.
4.5.2.8.4. Logging the Java language server protocol (LSP) messages
Procedure
To log the LSP messages to the VS Code Output view, enable tracing by setting the java.trace.server attribute to verbose.
Additional resources
For troubleshooting instructions, see the VS Code Java Github repository.
4.5.2.9. Viewing logs for Intelephense
4.5.2.9.1. Logging the Intelephense client-server communication
Procedure
To configure the PHP Intelephense language support to log the client-server interexchange in the Output view:
- Click File → Settings.
- Open the Preferences view.
-
Expand the Intelephense section and set the
trace.server.verbosepreference value toverboseto see all the communication events (the default value isoff).
4.5.2.9.2. Viewing Intelephense events in the Output panel
This procedure describes how to view Intelephense events in the Output panel.
Procedure
- Click View → Output
- Select Intelephense in the drop-down list for the Output view.
4.5.2.10. Viewing logs for PHP-Debug
This procedure describes how to configure the PHP Debug plug-in to log the PHP Debug plug-in diagnostic messages into the Debug Console view. Configure this before the start of the debug session.
Procedure
-
In the
launch.jsonfile, add the"log": trueattribute to the selected launch configuration. - Start the debug session.
- The diagnostic messages are printed into the Debug Console view along with the application output.
4.5.2.11. Viewing logs for XML
Other than the general diagnostics, there are XML plug-in specific actions that the user can perform.
4.5.2.11.1. Verifying the state of the XML language server
Procedure
-
Open a terminal in the container named
vscode-xml-<xxx>. Run
ps aux | grep javato verify that the XML language server has started. If the process is running, the output is:java ***/org.eclipse.ls4xml-uber.jar`
If is not, see the Checking important logs chapter.
4.5.2.11.2. Checking XML language server feature flags
Procedure
Check if the features are enabled. The XML plug-in provides multiple settings that can enable and disable features:
-
xml.format.enabled: Enable the formatter -
xml.validation.enabled: Enable the validation -
xml.documentSymbols.enabled: Enable the document symbols
-
-
To diagnose whether the XML language server is working, create a simple XML element, such as
<hello></hello>, and confirm that it appears in the Outline panel on the right. -
If the document symbols do not show, ensure that the
xml.documentSymbols.enabledattribute is set totrue. If it istrue, and there are no symbols, the language server may not be hooked to the editor. If there are document symbols, then the language server is connected to the editor. -
Ensure that the features that the user needs, are set to
truein the settings (they are set totrueby default). If any of the features are not working, or not working as expected, file an issue against the Language Server.
4.5.2.11.3. Enabling XML Language Server Protocol (LSP) tracing
Procedure
To log LSP messages to the VS Code Output view, enable tracing by setting the xml.trace.server attribute to verbose.
4.5.2.11.4. Viewing the XML language server log
Procedure
The log from the language server can be found in the plug-in sidecar at /home/theia/.theia/workspace-storage/<workspace_name>/redhat.vscode-xml/lsp4xml.log.
4.5.2.12. Viewing logs for YAML
This section describes the YAML plug-in specific actions that the user can perform, in addition to the general diagnostics ones.
4.5.2.12.1. Verifying the state of the YAML language server
This section describes how to verify the state of the YAML language server.
Procedure
Check if the container running the YAML plug-in is running the YAML language server.
-
In the editor, open a terminal in the container that is running the YAML plug-in (an example name of the container:
vscode-yaml-<xxx>). -
In the terminal, run the
ps aux | grep nodecommand. This command searches all the node processes running in the current container. Verify that a command
node **/server.jsis running.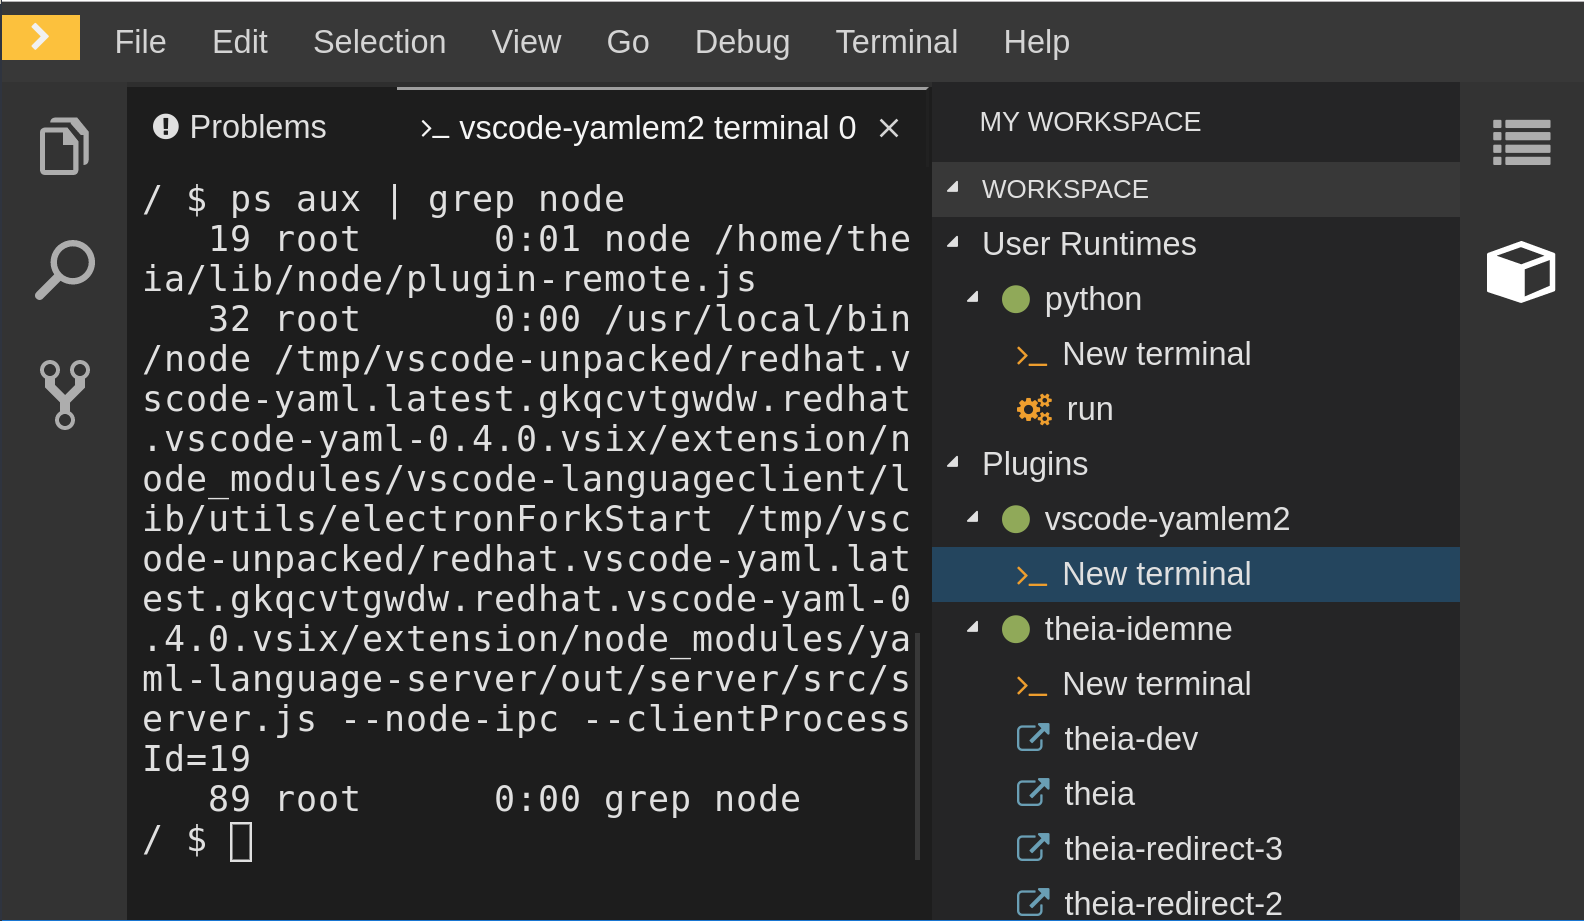
The node **/server.js running in the container indicates that the language server is running. If it is not running, the language server has not started inside the container. In this case, see Checking important logs.
4.5.2.12.2. Checking the YAML language server feature flags
Procedure
To check the feature flags:
Check if the features are enabled. The YAML plug-in provides multiple settings that can enable and disable features, such as:
-
yaml.format.enable: Enables the formatter -
yaml.validate: Enables validation -
yaml.hover: Enables the hover function -
yaml.completion: Enables the completion function
-
-
To check if the plug-in is working, type the simplest YAML, such as
hello: world, and then open the Outline panel on the right side of the editor. - Verify if there are any document symbols. If yes, the language server is connected to the editor.
-
If any feature is not working, make sure that the settings listed above are set to
true(they are set totrueby default). If a feature is not working, file an issue against the Language Server.
4.5.2.12.3. Enabling YAML Language Server Protocol (LSP) tracing
Procedure
To log LSP messages to the VS Code Output view, enable tracing by setting the yaml.trace.server attribute to verbose.
4.5.2.13. Viewing logs for Dotnet with Omnisharp-Theia plug-in
4.5.2.13.1. Omnisharp-Theia plug-in
CodeReady Workspaces uses the Omnisharp-Theia plug-in as a remote plug-in. It is located at github.com/redhat-developer/omnisharp-theia-plugin. In case of an issue, report it, or contribute your fix in the repository.
This plug-in registers omnisharp-roslyn as a language server and provides project dependencies and language syntax for C# applications.
The language server runs on .NET SDK 2.2.105.
4.5.2.13.2. Verifying the state of the Omnisharp-Theia plug-in language server
Procedure
To check if the container running the Omnisharp-Theia plug-in is running OmniSharp, execute the ps aux | grep OmniSharp.exe command. If the process is running, the following is an example output:
/tmp/theia-unpacked/redhat-developer.che-omnisharp-plugin.0.0.1.zcpaqpczwb.omnisharp_theia_plugin.theia/server/bin/mono
/tmp/theia-unpacked/redhat-developer.che-omnisharp-plugin.0.0.1.zcpaqpczwb.omnisharp_theia_plugin.theia/server/omnisharp/OmniSharp.exe
If the output is different, the language server has not started inside the container. Check the logs described in Checking important logs.
4.5.2.13.3. Checking Omnisharp Che-Theia plug-in language server features
Procedure
-
If the OmniSharp.exe process is running, check if the language server features are working by opening a
.csfile and trying the hover or completion features, or opening the Problems or Outline view.
4.5.2.13.4. Viewing Omnisharp-Theia plug-in logs in the Output panel
Procedure
If Omnisharp.exe is running, it logs all information in the Output panel. To view the logs, open the Output view and select C# from the drop-down list.
4.5.2.14. Viewing logs for Dotnet with NetcoredebugOutput plug-in
4.5.2.14.1. NetcoredebugOutput plug-in
The NetcoredebugOutput plug-in provides the netcoredbg tool. This tool implements the VS Code Debug Adapter protocol and allows users to debug .NET applications under the .NET Core runtime.
The container where the NetcoredebugOutput plug-in is running contains Dotnet SDK v.2.2.105.
4.5.2.14.2. Verifying the state of the NetcoredebugOutput plug-in
Procedure
To test the plug-in initialization:
Check if there is a netcoredbg debug configuration in the
launch.jsonfile. The following is an example debug configuration:{ "type": "netcoredbg", "request": "launch", "program": "$\{workspaceFolder}/bin/Debug/<target-framework>/<project-name.dll>", "args": [], "name": ".NET Core Launch (console)", "stopAtEntry": false, "console": "internalConsole" }-
To test if it exists, test the autocompletion feature within the braces of the
configurationsection of thelaunch.jsonfile. If you can findnetcoredbg, the Che-Theia plug-in is correctly initialized. If not, see Checking important logs.
4.5.2.14.3. Viewing NetcoredebugOutput plug-in logs in the Output panel
This section describes how to view NetcoredebugOutput plug-in logs in the Output panel.
Procedure
Open the Debug console.
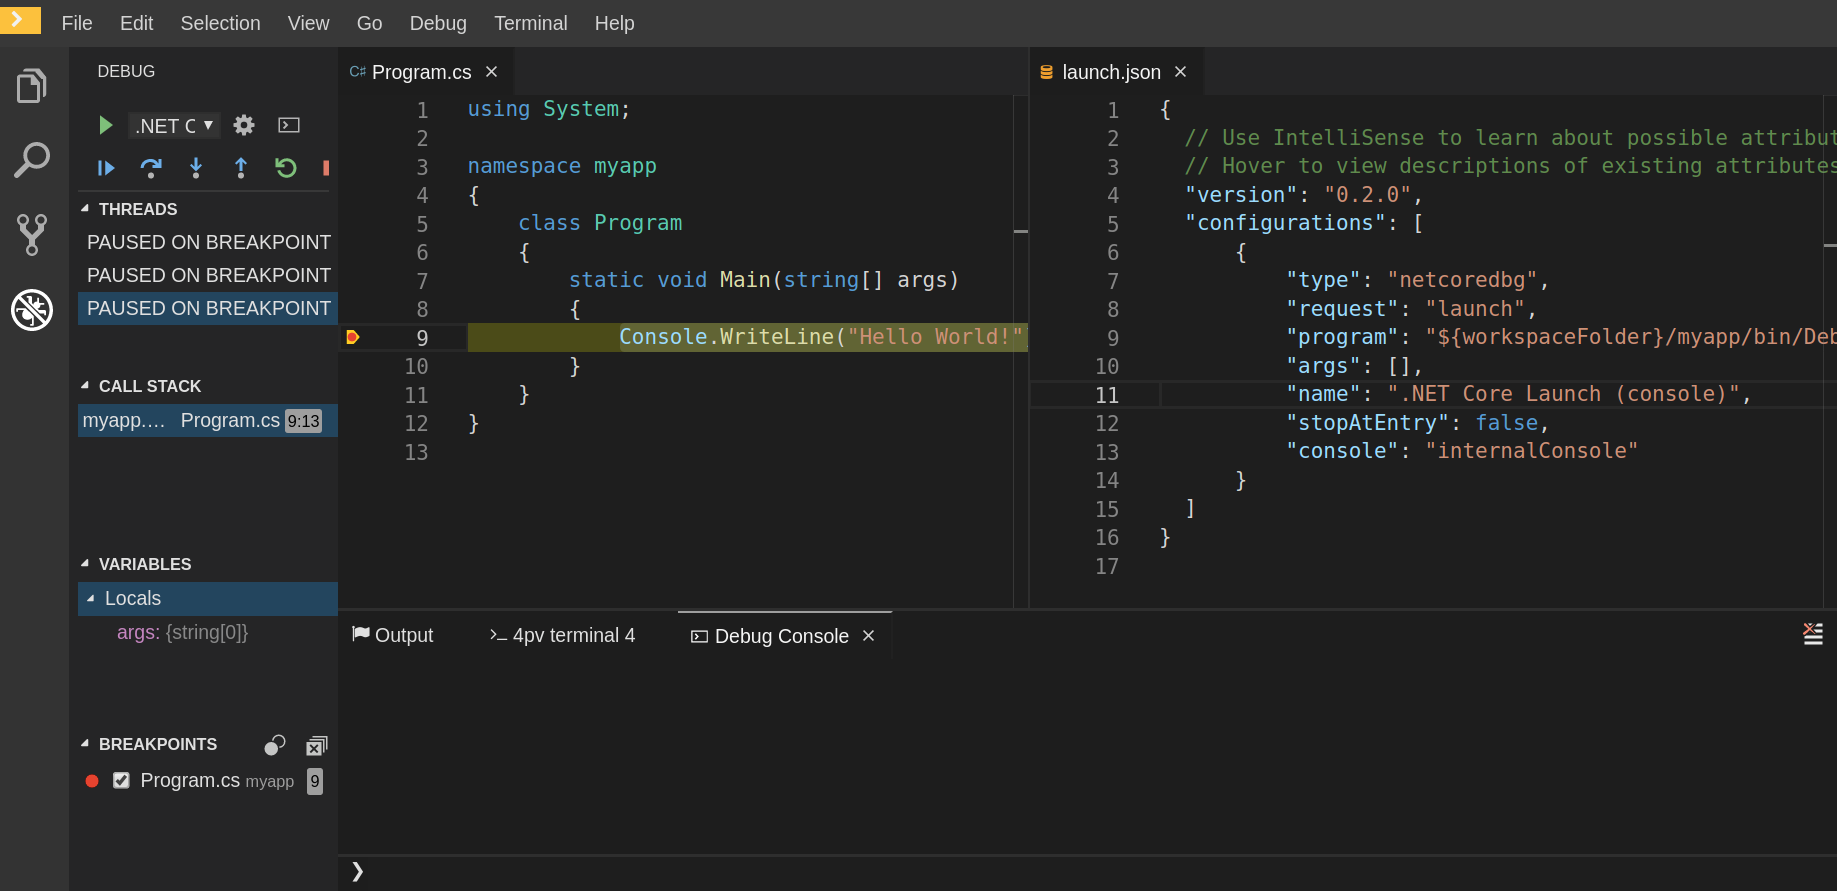
4.5.2.15. Viewing logs for Camel
4.5.2.15.1. Verifying the state of the Camel language server
Procedure
The user can inspect the log output of the sidecar container using the Camel language tools that are stored in the vscode-apache-camel<xxx> Camel container.
To verify the state of the language server:
-
Open a terminal inside the
vscode-apache-camel<xxx>container. Run the
ps aux | grep javacommand. The following is an example language server process:java -jar /tmp/vscode-unpacked/camel-tooling.vscode-apache-camel.latest.euqhbmepxd.camel-tooling.vscode-apache-camel-0.0.14.vsix/extension/jars/language-server.jar
- If you cannot find it, see Checking important logs.
4.5.2.15.2. Viewing Camel logs in the Output panel
The Camel language server is a SpringBoot application that writes its log to the $\{java.io.tmpdir}/log-camel-lsp.out file. Typically, $\{java.io.tmpdir} points to the /tmp directory, so the filename is /tmp/log-camel-lsp.out.
Procedure
The Camel language server logs are printed in the Output channel named Language Support for Apache Camel.
The output channel is created only at the first created log entry on the client side. It may be absent when everything is going well.
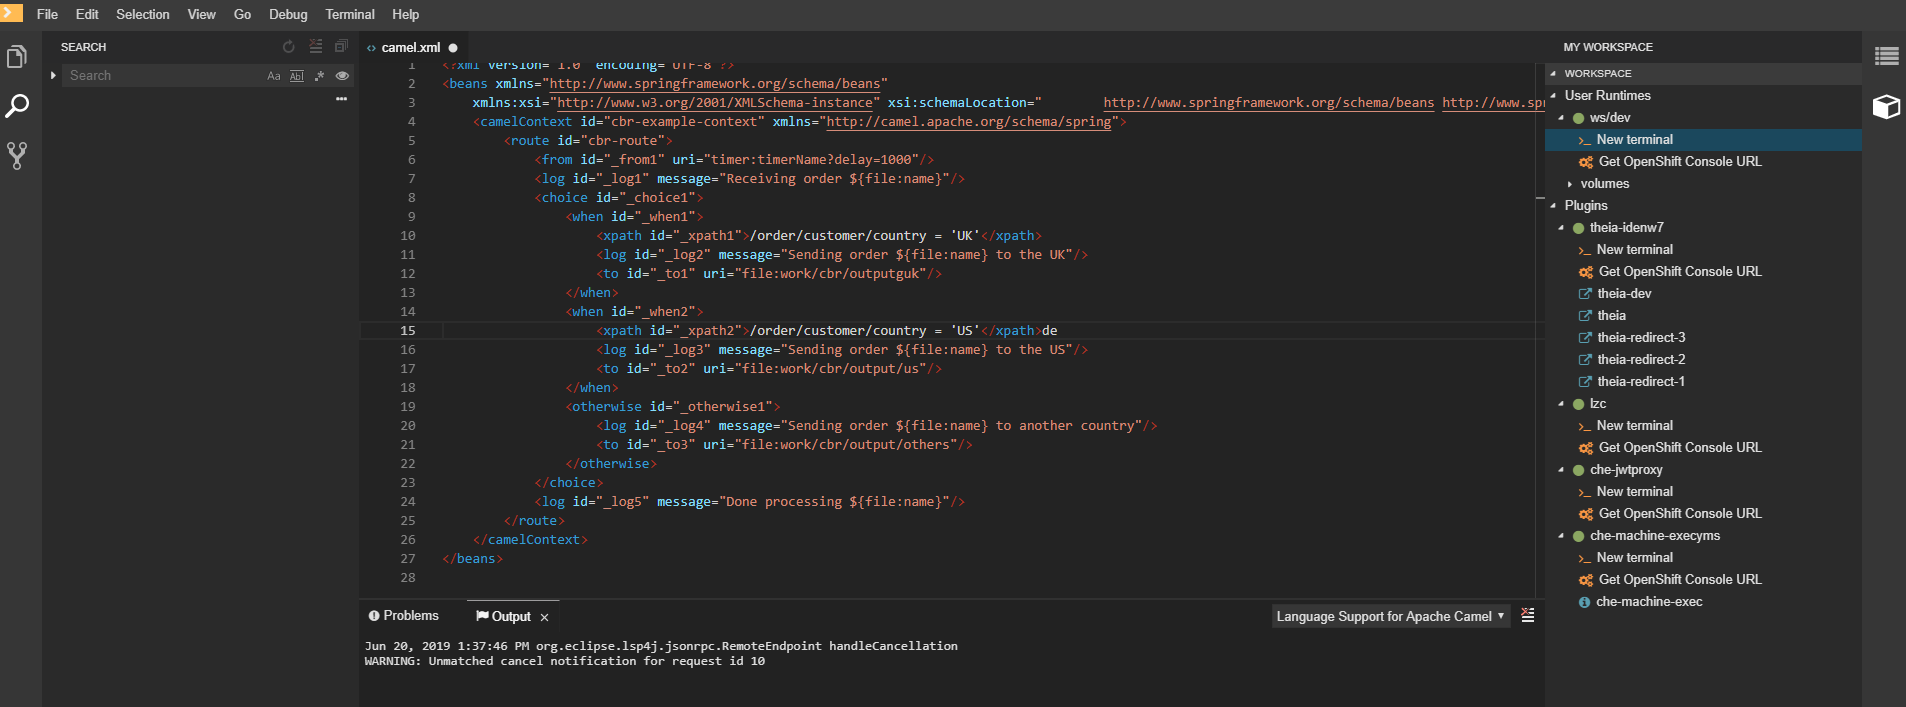
4.6. Viewing the plug-in broker logs
This section describes how to view the plug-in broker logs.
The che-plugin-broker Pod itself is deleted when its work is complete. Therefore, its event logs are only available while the workspace is starting.
Procedure
To see logged events from temporary Pods:
- Start a CodeReady Workspaces workspace.
- From the main OpenShift Container Platform screen, go to Workload → Pods.
- Use the OpenShift terminal console located in the Pod’s Terminal tab
Verification step
- OpenShift terminal console displays the plug-in broker logs while the workspace is starting
4.7. Collecting logs using crwctl
It is possible to get all Red Hat CodeReady Workspaces logs from a OpenShift cluster using the crwctl tool.
-
crwctl server:startautomatically starts collecting Red Hat CodeReady Workspaces servers logs during installation of Red Hat CodeReady Workspaces -
crwctl server:logscollects existing Red Hat CodeReady Workspaces server logs -
crwctl workspace:logscollects workspace logs
Chapter 5. Monitoring CodeReady Workspaces
This chapter describes how to configure CodeReady Workspaces to expose metrics and how to build an example monitoring stack with external tools to process data exposed as metrics by CodeReady Workspaces.
5.1. Enabling and exposing CodeReady Workspaces metrics
This section describes how to enable and expose CodeReady Workspaces metrics.
Procedure
-
Set the
CHE_METRICS_ENABLED=trueenvironment variable, which will expose the8087port as a service on the che-master host.
When Red Hat CodeReady Workspaces is installed from the OperatorHub, the environment variable is set automatically if the default CheCluster CR is used:
spec:
  metrics:
    enable: true
5.2. Collecting CodeReady Workspaces metrics with Prometheus
This section describes how to use the Prometheus monitoring system to collect, store and query metrics about CodeReady Workspaces.
Prerequisites
-
CodeReady Workspaces is exposing metrics on port
8087. See Enabling and exposing che metrics. -
Prometheus 2.9.1 or higher is running. The Prometheus console is running on port
9090with a corresponding service and route. See First steps with Prometheus.
Procedure
Configure Prometheus to scrape metrics from the
8087port:Prometheus configuration example
apiVersion: v1 kind: ConfigMap metadata: name: prometheus-config data: prometheus.yml: |- global: scrape_interval: 5s 1 evaluation_interval: 5s 2 scrape_configs: 3 - job_name: 'che' static_configs: - targets: ['[che-host]:8087'] 4- 1
- Rate, at which a target is scraped.
- 2
- Rate, at which recording and alerting rules are re-checked (not used in the system at the moment).
- 3
- Resources Prometheus monitors. In the default configuration, there is a single job called
che, which scrapes the time series data exposed by the CodeReady Workspaces server. - 4
- Scrape metrics from the
8087port.
Verification steps
Use the Prometheus console to query and view metrics.
Metrics are available at:
http://<che-server-url>:9090/metrics.For more information, see Using the expression browser in the Prometheus documentation.
Additional resources
5.3. Extending CodeReady Workspaces monitoring metrics
This section describes how to create a metric or a group of metrics to extend the monitoring metrics that CodeReady Workspaces is exposing.
CodeReady Workspaces has two major modules metrics:
-
che-core-metrics-core— contains core metrics module -
che-core-api-metrics— contains metrics that are dependent on core CodeReady Workspaces components, such as workspace or user managers
Procedure
Create a class that extends the
MeterBinderclass. This allows to register the created metric in the overriddenbindTo(MeterRegistry registry)method.The following is an example of a metric that has a function that supplies the value for it:
Example metric
public class UserMeterBinder implements MeterBinder {

  private final UserManager userManager;

  @Inject
  public UserMeterBinder(UserManager userManager) {
    this.userManager = userManager;
  }

  @Override
  public void bindTo(MeterRegistry registry) {
    Gauge.builder("che.user.total", this::count)
        .description("Total amount of users")
        .register(registry);
  }

  private double count() {
    try {
      return userManager.getTotalCount();
    } catch (ServerException e) {
      return Double.NaN;
    }
  }
Alternatively, the metric can be stored with a reference and updated manually in other place in the code.
Additional resources
Chapter 6. Tracing CodeReady Workspaces
Tracing helps gather timing data to troubleshoot latency problems in microservice architectures and helps to understand a complete transaction or workflow as it propagates through a distributed system. Every transaction may reflect performance anomalies in an early phase when new services are being introduced by independent teams.
Tracing the CodeReady Workspaces application may help analyze the execution of various operations, such as workspace creations, workspace startup, breaking down the duration of sub-operations executions, helping finding bottlenecks and improve the overall state of the platform.
Tracers live in applications. They record timing and metadata about operations that take place. They often instrument libraries, so that their use is transparent to users. For example, an instrumented web server records when it received a request and when it sent a response. The trace data collected is called a span. A span has a context that contains information such as trace and span identifiers and other kinds of data that can be propagated down the line.
6.1. Tracing API
CodeReady Workspaces utilizes OpenTracing API - a vendor-neutral framework for instrumentation. This means that if a developer wants to try a different tracing back end, then instead of repeating the whole instrumentation process for the new distributed tracing system, the developer can simply change the configuration of the tracer back end.
6.2. Tracing back end
By default, CodeReady Workspaces uses Jaeger as the tracing back end. Jaeger was inspired by Dapper and OpenZipkin, and it is a distributed tracing system released as open source by Uber Technologies. Jaeger extends a more complex architecture for a larger scale of requests and performance.
6.3. Installing the Jaeger tracing tool
The following sections describe the installation methods for the Jaeger tracing tool. Jaeger can then be used for gathering metrics in CodeReady Workspaces.
Installation methods available:
For tracing a CodeReady Workspaces instance using Jaeger, version 1.12.0 or above is required. For additional information about Jaeger, see the Jaeger website.
6.3.1. Installing Jaeger using OperatorHub on OpenShift 4
This section provide information about using Jaeger tracing tool for testing an evaluation purposes in production.
To install the Jaeger tracing tool from the OperatorHub interface in OpenShift Container Platform, follow the instructions below.
Prerequisites
- The user is logged in to the OpenShift Container Platform Web Console.
- A CodeReady Workspaces instance is available in a project.
Procedure
- Open the OpenShift Container Platform console.
- From the left menu of the main OpenShift Container Platform screen, navigate to Operators → OperatorHub.
-
In the Search by keyword search bar, type
Jaeger Operator. -
Click the
Jaeger Operatortile. -
Click the button in the
Jaeger Operatorpop-up window. -
Select the installation method:
A specific project on the clusterwhere the CodeReady Workspaces is deployed and leave the rest in its default values. - Click the Subscribe button.
- From the left menu of the main OpenShift Container Platform screen, navigate to the Operators → Installed Operators section.
- Red Hat CodeReady Workspaces is displayed as an Installed Operator, as indicated by the InstallSucceeded status.
- Click the Jaeger Operator name in the list of installed Operators.
- Navigate to the Overview tab.
-
In the Conditions sections at the bottom of the page, wait for this message:
install strategy completed with no errors. -
Jaeger Operatorand additionalElasticsearch Operatoris installed. - Navigate to the Operators → Installed Operators section.
- Click Jaeger Operator in the list of installed Operators.
- The Jaeger Cluster page is displayed.
- In the lower left corner of the window, click Create Instance
- Click Save.
-
OpenShift creates the Jaeger cluster
jaeger-all-in-one-inmemory. - Follow the steps in Enabling metrics collection to finish the procedure.
6.3.2. Installing Jaeger using CLI on OpenShift 4
This section provide information about using Jaeger tracing tool for testing an evaluation purposes.
To install the Jaeger tracing tool from a CodeReady Workspaces project in OpenShift Container Platform, follow the instructions in this section.
Prerequisites
- The user is logged in to the OpenShift Container Platform web console.
- A instance of CodeReady Workspaces in an OpenShift Container Platform cluster.
Procedure
In the CodeReady Workspaces installation project of the OpenShift Container Platform cluster, use the
occlient to create a new application for the Jaeger deployment.$ oc new-app -f / ${CHE_LOCAL_GIT_REPO}/deploy/openshift/templates/jaeger-all-in-one-template.yml: --> Deploying template "<project_name>/jaeger-template-all-in-one" for "/home/user/crw-projects/crw/deploy/openshift/templates/jaeger-all-in-one-template.yml" to project <project_name> Jaeger (all-in-one) --------- Jaeger Distributed Tracing Server (all-in-one) * With parameters: * Jaeger Service Name=jaeger * Image version=latest * Jaeger Zipkin Service Name=zipkin --> Creating resources ... deployment.apps "jaeger" created service "jaeger-query" created service "jaeger-collector" created service "jaeger-agent" created service "zipkin" created route.route.openshift.io "jaeger-query" created --> Success Access your application using the route: 'jaeger-query-<project_name>.apps.ci-ln-whx0352-d5d6b.origin-ci-int-aws.dev.rhcloud.com' Run 'oc status' to view your app.- Using the Workloads → Deployments from the left menu of main OpenShift Container Platform screen, monitor the Jaeger deployment until it finishes successfully.
- Select Networking → Routes from the left menu of the main OpenShift Container Platform screen, and click the URL link to access the Jaeger dashboard.
- Follow the steps in Enabling metrics collection to finish the procedure.
6.4. Enabling metrics collection
Prerequisites
- Installed Jaeger v1.12.0 or above. See instructions at Section 6.3, “Installing the Jaeger tracing tool”
Procedure
For Jaeger tracing to work, enable the following environment variables in your CodeReady Workspaces deployment:
# Activating CodeReady Workspaces tracing modules
CHE_TRACING_ENABLED=true

# Following variables are the basic Jaeger client library configuration.
JAEGER_ENDPOINT="http://jaeger-collector:14268/api/traces"

# Service name
JAEGER_SERVICE_NAME="che-server"

# URL to remote sampler
JAEGER_SAMPLER_MANAGER_HOST_PORT="jaeger:5778"

# Type and param of sampler (constant sampler for all traces)
JAEGER_SAMPLER_TYPE="const"
JAEGER_SAMPLER_PARAM="1"

# Maximum queue size of reporter
JAEGER_REPORTER_MAX_QUEUE_SIZE="10000"
To enable the following environment variables:
In the
yamlsource code of the CodeReady Workspaces deployment, add the following configuration variables underspec.server.customCheProperties.customCheProperties: CHE_TRACING_ENABLED: 'true' JAEGER_SAMPLER_TYPE: const DEFAULT_JAEGER_REPORTER_MAX_QUEUE_SIZE: '10000' JAEGER_SERVICE_NAME: che-server JAEGER_ENDPOINT: 'http://jaeger-collector:14268/api/traces' JAEGER_SAMPLER_MANAGER_HOST_PORT: 'jaeger:5778' JAEGER_SAMPLER_PARAM: '1'Edit the
JAEGER_ENDPOINTvalue to match the name of the Jaeger collector service in your deployment.From the left menu of the main OpenShift Container Platform screen, obtain the value of JAEGER_ENDPOINT by navigation to Networking → Services. Alternatively, execute the following
occommand:$ oc get services
The requested value is included in the service name that contains the
collectorstring.
Additional resources
- For additional information about custom environment properties and how to define them in CheCluster Custom Resource, see https://access.redhat.com/documentation/en-us/red_hat_codeready_workspaces/2.4/html-single/installation_guide/index#advanced-configuration-options-for-the-codeready-workspaces-server-component_crw.
- For custom configuration of Jaeger, see the list of Jaeger client environment variables.
6.5. Viewing CodeReady Workspaces traces in Jaeger UI
This section demonstrates how to utilize the Jaeger UI to overview traces of CodeReady Workspaces operations.
Procedure
In this example, the CodeReady Workspaces instance has been running for some time and one workspace start has occurred.
To inspect the trace of the workspace start:
In the Search panel on the left, filter spans by the operation name (span name), tags, or time and duration.
Figure 6.1. Using Jaeger UI to trace CodeReady Workspaces

Select the trace to expand it and show the tree of nested spans and additional information about the highlighted span, such as tags or durations.
Figure 6.2. Expanded tracing tree

6.6. CodeReady Workspaces tracing codebase overview and extension guide
The core of the tracing implementation for CodeReady Workspaces is in the che-core-tracing-core and che-core-tracing-web modules.
All HTTP requests to the tracing API have their own trace. This is done by TracingFilter from the OpenTracing library, which is bound for the whole server application. Adding a @Traced annotation to methods causes the TracingInterceptor to add tracing spans for them.
6.6.1. Tagging
Spans may contain standard tags, such as operation name, span origin, error, and other tags that may help users with querying and filtering spans. Workspace-related operations (such as starting or stopping workspaces) have additional tags, including userId, workspaceID, and stackId. Spans created by TracingFilter also have an HTTP status code tag.
Declaring tags in a traced method is done statically by setting fields from the TracingTags class:
TracingTags.WORKSPACE_ID.set(workspace.getId());
TracingTags is a class where all commonly used tags are declared, as respective AnnotationAware tag implementations.
Additional resources
For more information about how to use Jaeger UI, visit Jaeger documentation: Jaeger Getting Started Guide.
Chapter 7. Managing users
This section describes how to configure authorization and authentication in Red Hat CodeReady Workspaces and how to administer user groups and users.
7.1. Configuring authorization
7.1.1. Authorization and user management
Red Hat CodeReady Workspaces uses RH-SSO to create, import, manage, delete, and authenticate users. RH-SSO uses built-in authentication mechanisms and user storage. It can use third-party identity management systems to create and authenticate users. Red Hat CodeReady Workspaces requires a RH-SSO token when you request access to CodeReady Workspaces resources.
Local users and imported federation users must have an email address in their profile.
The default RH-SSO credentials are admin:admin. You can use the admin:admin credentials when logging into Red Hat CodeReady Workspaces for the first time. It has system privileges.
Identifying the RH-SSO URL
Go to the OpenShift web console and navigate to the RH-SSO project.
7.1.2. Configuring CodeReady Workspaces to work with RH-SSO
The deployment script configures RH-SSO. It creates a codeready-public client with the following fields:
- Valid Redirect URIs: Use this URL to access CodeReady Workspaces.
- Web Origins
The following are common errors when configuring CodeReady Workspaces to work with RH-SSO:
- Invalid
redirectURIerror -
Occurs when you access CodeReady Workspaces at
myhost, which is an alias, and your originalCHE_HOSTis1.1.1.1. If this error occurs, go to the RH-SSO administration console and ensure that the valid redirect URIs are configured. - CORS error
- Occurs when you have an invalid web origin.
7.1.3. Configuring RH-SSO tokens
A user token expires after 30 minutes by default.
You can change the following RH-SSO token settings:
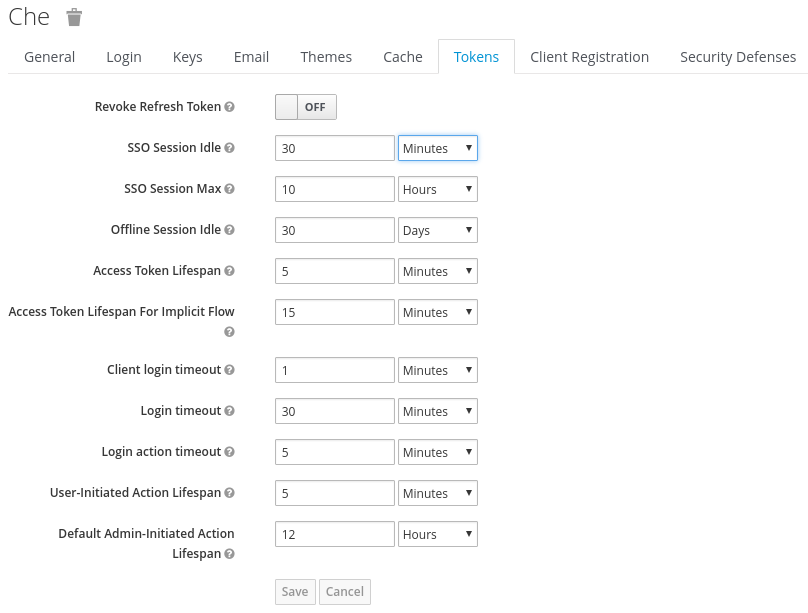
7.1.4. Setting up user federation
RH-SSO federates external user databases and supports LDAP and Active Directory. You can test the connection and authenticate users before choosing a storage provider.
See the User storage federation page in RH-SSO documentation to learn how to add a provider.
See the LDAP and Active Directory page in RH-SSO documentation to specify multiple LDAP servers.
7.1.5. Enabling authentication with social accounts and brokering
RH-SSO provides built-in support for GitHub, OpenShift, and most common social networks such as Facebook and Twitter.
See Instructions to enable Login with GitHub.
You can also enable the SSH key and upload it to the CodeReady Workspaces users’ GitHub accounts.
To enable this feature when you register a GitHub identity provider:
-
Set scope to
repo,user,write:public_key. Set store tokens and stored tokens readable to ON.
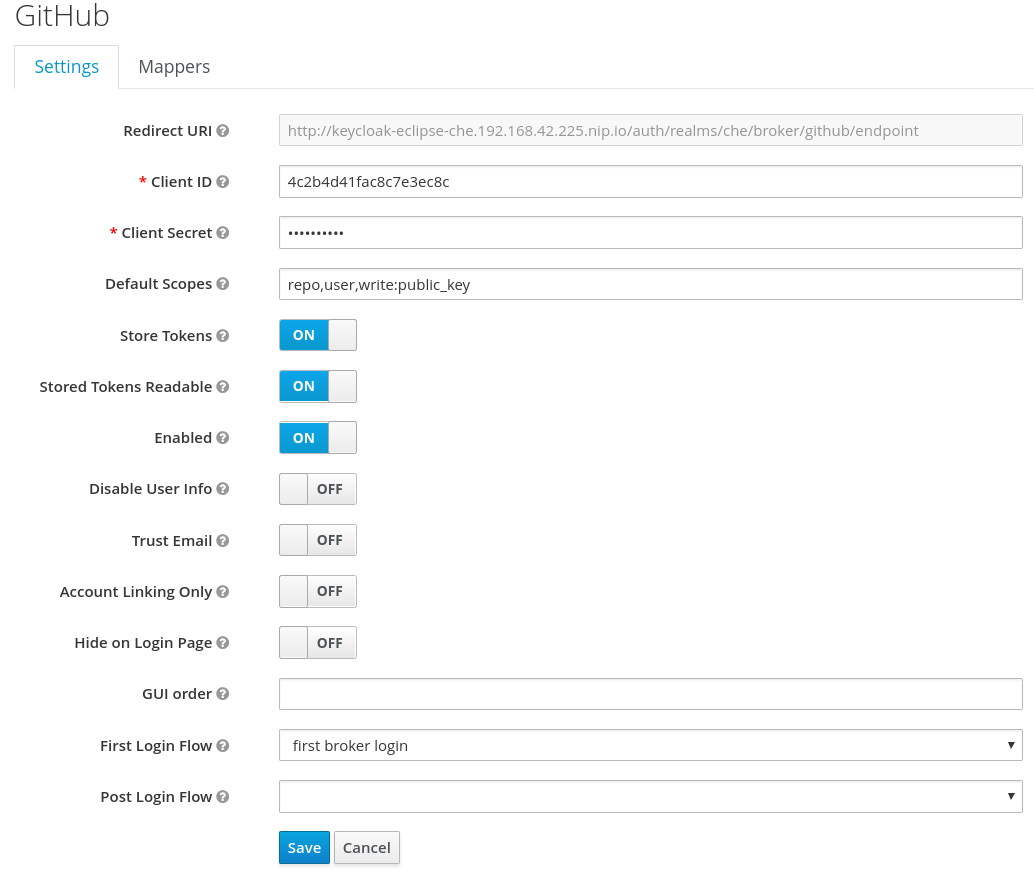
Add a default read-token role.
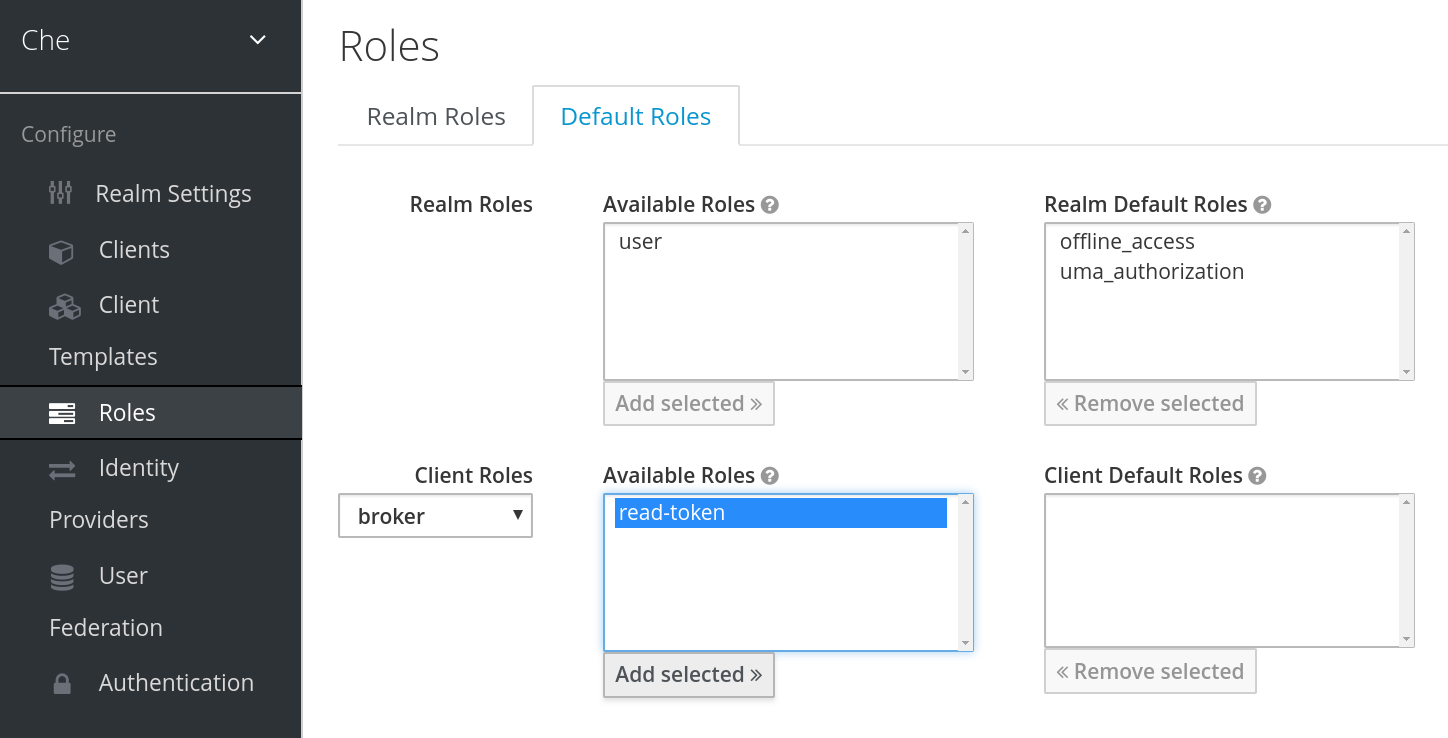
This is the default delegated OAuth service mode for multiuser CodeReady Workspaces. You can configure the OAuth service mode with the property che.oauth.service_mode.
7.1.6. Using protocol-based providers
RH-SSO supports SAML v2.0 and OpenID Connect v1.0 protocols. You can connect your identity provider systems if they support these protocols.
7.1.7. Managing users using RH-SSO
You can add, delete, and edit users in the user interface. See RH-SSO User Management for more information.
7.1.8. Configuring CodeReady Workspaces to use an external RH-SSO installation
By default, CodeReady Workspaces installation includes the deployment of a dedicated RH-SSO instance. However, using an external RH-SSO is also possible. This option is useful when a user has an existing RH-SSO instance with already-defined users, for example, a company-wide RH-SSO server used by several applications.
Table 7.1. Placeholders used in examples
|
| Identity provider realm name intended for use by CodeReady Workspaces |
|
|
Name of the |
|
| Base URL of the external RH-SSO server |
Prerequisites
In the administration console of the external installation of RH-SSO, define a realm containing the users intended to connect to CodeReady Workspaces:
In this
realm, define an OIDC client that CodeReady Workspaces will use to authenticate the users. This is an example of such a client with the correct settings: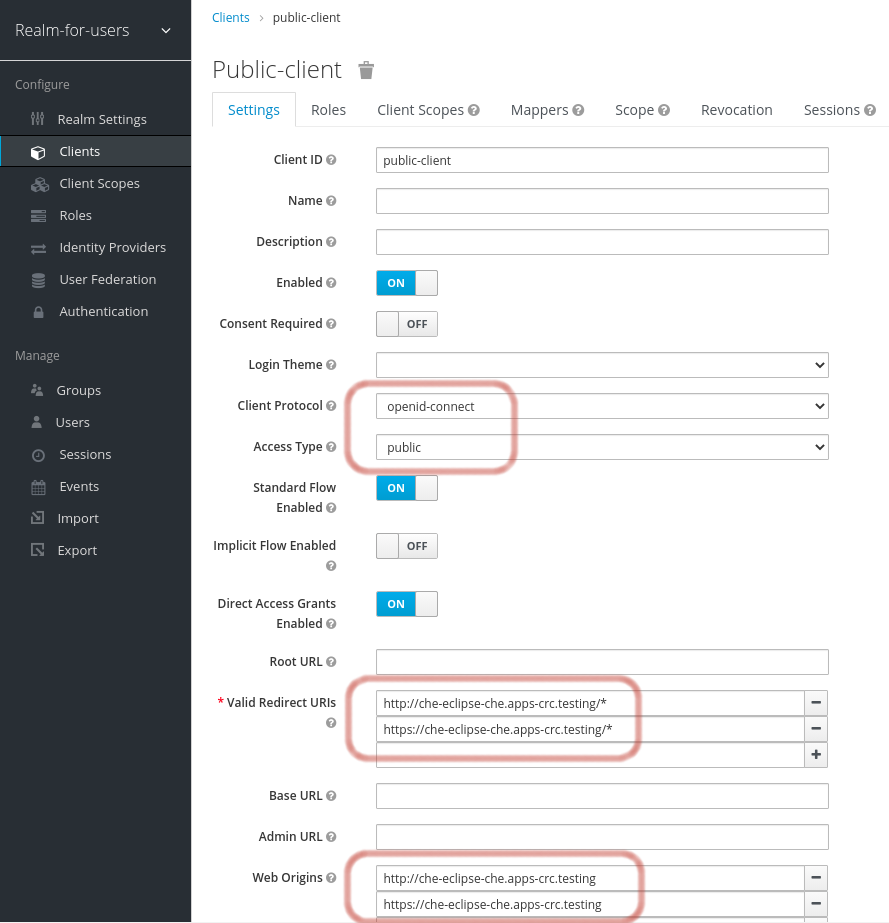 Note
Note-
CodeReady Workspaces only supports
publicOIDC clients. Therefore, selecting theopenid-connectClient Protocol option and thepublicAccess Type option is recommended. -
The list of Valid Redirect URIs must contain at least two URIs related to the CodeReady Workspaces server, one using the
httpprotocol and the otherhttps. These URIs must contain the base URL of the CodeReady Workspaces server, followed by/*wildcards. The list of Web Origins must contain at least two URIs related to the CodeReady Workspaces server, one using the
httpprotocol and the otherhttps. These URIs must contain the base URL of the CodeReady Workspaces server, without any path after the host.The number of URIs depends on the number of installed product tools.
-
CodeReady Workspaces only supports
With CodeReady Workspaces that uses the default OpenShift OAuth support, user authentication relies on the integration of RH-SSO with OpenShift OAuth. This allows users to log in to CodeReady Workspaces with their OpenShift login and have their workspaces created under personal OpenShift projects.
This requires setting up an OpenShift identity provider ins RH-SSO. When using an external RH-SSO, set up the identity provider manually. For instructions, see the appropriate RH-SSO documentations for either link:OpenShift 3[OpenShift 3] or link:OpenShift 4[OpenShift 4].
- The configured identity provider has the options Store Tokens and Stored Tokens Readable enabled.
Procedure
Set the following properties in the
CheClusterCustom Resource (CR):spec: auth: externalIdentityProvider: true identityProviderURL: <auth-base-url> identityProviderRealm: <provider-realm-name> identityProviderClientId: <oidc-client-name>When installing CodeReady Workspaces with OpenShift OAuth support enabled, set the following properties in the
CheClusterCustom Resource (CR):spec: auth: openShiftoAuth: true # Note: only if the OpenShift identity provider alias is different from 'openshift-v3' or 'openshift-v4' server: customCheProperties: CHE_INFRA_OPENSHIFT_OAUTH__IDENTITY__PROVIDER: <OpenShift identity provider alias>
7.1.9. Configuring SMTP and email notifications
Red Hat CodeReady Workspaces does not provide any pre-configured MTP servers.
To enable SMTP servers in RH-SSO:
-
Go to
che realm settings > Email. - Specify the host, port, username, and password.
Red Hat CodeReady Workspaces uses the default theme for email templates for registration, email confirmation, password recovery, and failed login.
7.2. Removing user data
7.2.1. Removing user data according to GDPR
The General Data Protection Regulation (GDPR) law enforces the right for individuals to have personal data erased.
The following procedure describes how to remove a user’s data from a cluster and the RH-SSO database.
The following commands use the default OpenShift project, openshift-workspaces, as a user’s example for the -n option.
Prerequisites
A user or an administrator authorization token. To delete any other data except the data bound to a user account,
adminprivileges are required. Theadminis a special CodeReady Workspaces administrator account pre-created and enabled using theCHE_SYSTEM_ADMIN__NAMEandCHE_SYSTEM_SUPER__PRIVILEGED__MODE = trueCustom Resource definitions.spec: server: customCheProperties: CHE_SYSTEM_SUPER__PRIVILEGED__MODE: 'true' CHE_SYSTEM_ADMIN__NAME: '<admin-name>'If needed, use commands below for creating the
adminuser:$ oc patch checluster codeready-workspaces \ --type merge \ -p '{ "spec": { "server": {"customCheProperties": {"CHE_SYSTEM_SUPER__PRIVILEGED__MODE": "true"} } }}' \ -n openshift-workspaces$ oc patch checluster codeready-workspaces \ --type merge \ -p '{ "spec": { "server": {"customCheProperties": {"CHE_SYSTEM_ADMIN__NAME": "<admin-name>"} } }}' \ -n openshift-workspacesNoteAll system permissions are granted to the administrative user who is configured in the
CHE_SYSTEM_ADMIN__NAMEproperty (the default isadmin). The system permissions are granted when the CodeReady Workspaces server starts. If the user is not present in the CodeReady Workspaces user database, it happens after the first user’s login.Authorization token privileges:
-
admin- Can delete all personal data of all users -
user- Can delete only the data related to the user
-
- A user or an administrator is logged in the OpenShift cluster with deployed CodeReady Workspaces.
A user ID is obtained. Get the user ID using the commands below:
For the current user:
$ curl -X GET \
  --header 'Authorization: Bearer <user-token>' \
  'https://<codeready-<openshift_deployment_name>.<domain_name>>/api/user'
To find a user by name:
$ curl -X GET \
  --header 'Authorization: Bearer <user-token>' \
  'https://<codeready-<openshift_deployment_name>.<domain_name>>/api/user/find?name=<username>'
To find a user by email:
$ curl -X GET \
  --header 'Authorization: Bearer <user-token>' \
  'https://<codeready-<openshift_deployment_name>.<domain_name>>/api/user/find?email=<email>'
Example of obtaining a user ID
This example uses
vparfonoas a local user name.$ curl -X GET \ --header 'Authorization: Bearer <user-token>' \ 'https://che-vp-che.apps.che-dev.x6e0.p1.openshiftapps.com/api/user/find?name=vparfono'The user ID is at the bottom of the curl command output.
{
 "name": "vparfono",
 "links": [
   {
.
.
.
   }
 ],
 "email": "vparfono@redhat.com",
 "id": "921b6f33-2657-407e-93a6-fb14cf2329ce"
}
Procedure
Update the
codeready-workspacesCheCluster CustomResource (CR) definition to permit the removal of a user’s data from the RH-SSO database:$ oc patch checluster/codeready-workspaces \ --patch "{\"spec\":{\"server\":{\"customCheProperties\": {\"CHE_KEYCLOAK_CASCADE__USER__REMOVAL__ENABLED\": \"true\"}}}}" \ --type=merge -n openshift-workspacesRemove the data using the API:
$ curl -i -X DELETE \
  --header 'Authorization: Bearer <user-token>' \
  https://<codeready-<openshift_deployment_name>.<domain_name>>/api/user/<user-id>
Verification
Running the following command returns code 204 as the API response:
$ curl -i -X DELETE \
  --header 'Authorization: Bearer <user-token>' \
  https://<codeready-<openshift_deployment_name>.<domain_name>>/api/user/<user-id>
Additional resources
To remove the data of all users, follow the instructions for https://access.redhat.com/documentation/en-us/red_hat_codeready_workspaces/2.4/html-single/installation_guide/index#uninstalling-codeready-workspaces_crw.
Chapter 8. Securing CodeReady Workspaces
This section describes all aspects of user authentication, types of authentication, and permissions models on the CodeReady Workspaces server and its workspaces.
8.1. Authenticating users
This document covers all aspects of user authentication in Red Hat CodeReady Workspaces, both on the CodeReady Workspaces server and in workspaces. This includes securing all REST API endpoints, WebSocket or JSON RPC connections, and some web resources.
All authentication types use the JWT open standard as a container for transferring user identity information. In addition, CodeReady Workspaces server authentication is based on the OpenID Connect protocol implementation, which is provided by default by RH-SSO.
Authentication in workspaces implies the issuance of self-signed per-workspace JWT tokens and their verification on a dedicated service based on JWTProxy.
8.1.1. Authenticating to the CodeReady Workspaces server
8.1.1.1. Authenticating to the CodeReady Workspaces server using OpenID
OpenID authentication on the CodeReady Workspaces server implies the presence of an external OpenID Connect provider and has the following main steps:
- Authenticate the user through a JWT token that is retrieved from an HTTP request or, in case of a missing or invalid token, redirect the user to the RH-SSO login page.
- Send authentication tokens in an Authorization header. In limited cases, when it is impossible to use the Authorization header, the token can be sent in the token query parameter. Example: OAuth authentication initialization.
-
Compose an internal
subjectobject that represents the current user inside the CodeReady Workspaces server code.
The only supported and tested OpenID provider is RH-SSO.
Procedure
To authenticate to the CodeReady Workspaces server using OpenID authentication:
-
Request the OpenID settings service where clients can find all the necessary URLs and properties of the OpenId provider, such as
jwks.endpoint,token.endpoint,logout.endpoint,realm.name, orclient_idreturned in the JSON format. The service URL is
https://codeready-<openshift_deployment_name>.<domain_name>/api/keycloak/settings, and it is only available in the CodeReady Workspaces multiuser mode. The presence of the service in the URL confirms that the authentication is enabled in the current deployment.Example output:
{
    "che.keycloak.token.endpoint": "http://172.19.20.9:5050/auth/realms/che/protocol/openid-connect/token",
    "che.keycloak.profile.endpoint": "http://172.19.20.9:5050/auth/realms/che/account",
    "che.keycloak.client_id": "che-public",
    "che.keycloak.auth_server_url": "http://172.19.20.9:5050/auth",
    "che.keycloak.password.endpoint": "http://172.19.20.9:5050/auth/realms/che/account/password",
    "che.keycloak.logout.endpoint": "http://172.19.20.9:5050/auth/realms/che/protocol/openid-connect/logout",
    "che.keycloak.realm": "che"
}
The service allows downloading the JavaScript client library to interact with the provider using the
https://codeready-<openshift_deployment_name>.<domain_name>/api/keycloak/OIDCKeycloak.jsURL.-
Redirect the user to the appropriate provider’s login page with all the necessary parameters, including
client_idand the return redirection path. This can be done with any client library (JS or Java). -
When the user is logged in to the provider, the client side-code is obtained, and the JWT token has validated the token, the creation of the
subjectbegins.
The verification of the token signature occurs in two main steps:
Authentication: The token is extracted from the Authorization header or from the
tokenquery parameter and is parsed using the public key retrieved from the provider. In case of expired, invalid, or malformed tokens, a403error is sent to the user. The minimal use of the query parameter is recommended, due to its support limitations or complete removal in upcoming versions.If the validation is successful, the parsed form of the token is passed to the environment initialization step:
Environment initialization: The filter extracts data from the JWT token claims, creates the user in the local database if it is not yet available, and constructs the
subjectobject and sets it into the per-request EnvironmentContext object, which is statically accessible everywhere.If the request was made using only a JWT token, the following single authentication filter is used:
org.eclipse.che.multiuser.machine.authentication.server.MachineLoginFilter: The filter finds the user that the
userIdtoken belongs to, retrieves the user instance, and sets the principal to the session. The CodeReady Workspaces server-to-server requests are performed using a dedicated request factory that signs every request with the current subject token obtained from theEnvironmentContextobject.
Providing user-specific data
Since RH-SSO may store user-specific information (first and last name, phone number, job title), there is a special implementation of the ProfileDao that can provide this data to consumers. The implementation is read-only, so users cannot perform create and update operations.
8.1.1.1.1. Obtaining the token from credentials through RH-SSO
Clients that cannot run JavaScript or other clients (such as command-line clients or Selenium tests) must request the authorization token directly from RH-SSO.
To obtain the token, send a request to the token endpoint with the username and password credentials. This request can be schematically described as the following cURL request:
$ curl --insecure --data "grant_type=password&client_id=codeready-public&username=<USERNAME>&password=<PASSWORD>" \ 1 2
https://<keyckloak_host>/auth/realms/codeready/protocol/openid-connect/token 3
The CodeReady Workspaces dashboard uses a customized RH-SSO login page and an authentication mechanism based on grant_type=authorization_code. It is a two-step authentication process:
- Logging in and obtaining the authorization code.
- Obtaining the token using this authorization code.
8.1.1.1.2. Obtaining the token from the OpenShift token through RH-SSO
When CodeReady Workspaces was installed on OpenShift using the Operator, and the OpenShift OAuth integration is enabled, as it is by default, the user’s CodeReady Workspaces authentication token can be retrieved from the user’s OpenShift token.
To retrieve the authentication token from the OpenShift token, send a schematically described cURL request to the OpenShift token endpoint:
$ curl --insecure -X POST  \
-d "client_id=codeready-public" \
-d "subject_token=<USER_OPENSHIFT_TOKEN>" \ 1
-d "subject_issuer=<OPENSHIFT_IDENTITY_PROVIDER_NAME>" \ 2
--data-urlencode "grant_type=urn:ietf:params:oauth:grant-type:token-exchange" \
--data-urlencode "subject_token_type=urn:ietf:params:oauth:token-type:access_token" \
https://<KEYCKLOAK_HOST>/auth/realms/codeready/protocol/openid-connect/token 3
Before using this token exchange feature, it is required for an end user to be interactively logged in at least once to the CodeReady Workspaces Dashboard using the OpenShift login page. This step is needed to link the OpenShift and RH-SSO user accounts properly and set the required user profile information.
8.1.1.2. Authenticating to the CodeReady Workspaces server using other authentication implementations
This procedure describes how to use an OpenID Connect (OIDC) authentication implementation other than RH-SSO.
Procedure
-
Update the authentication configuration parameters that are stored in the
multiuser.propertiesfile (such as client ID, authentication URL, realm name). -
Write a single filter or a chain of filters to validate tokens, create the user in the CodeReady Workspaces dashboard, and compose the
subjectobject. - If the new authorization provider supports the OpenID protocol, use the OIDC JS client library available at the settings endpoint because it is decoupled from specific implementations.
- If the selected provider stores additional data about the user (first and last name, job title), it is recommended to write a provider-specific ProfileDao implementation that provides this information.
8.1.1.3. Authenticating to the CodeReady Workspaces server using OAuth
For easy user interaction with third-party services, the CodeReady Workspaces server supports OAuth authentication. OAuth tokens are also used for GitHub-related plug-ins.
OAuth authentication has two main flows:
- delegated
- Default. Delegates OAuth authentication to RH-SSO server.
- embedded
- Uses built-in CodeReady Workspaces server mechanism to communicate with OAuth providers.
To switch between the two implementations, use the che.oauth.service_mode=<embedded|delegated> configuration property.
The main REST endpoint in the OAuth API is /api/oauth, which contains:
-
An authentication method,
/authenticate, that the OAuth authentication flow can start with. -
A callback method,
/callback, to process callbacks from the provider. -
A token GET method,
/token, to retrieve the current user’s OAuth token. -
A token DELETE method,
/token, to invalidated the current user’s OAuth token. -
A GET method,
/, to get the list of configured identity providers.
8.1.1.4. Using Swagger or REST clients to execute queries
The user’s RH-SSO token is used to execute queries to the secured API on the user’s behalf through REST clients. A valid token must be attached as the Request header or the ?token=$token query parameter.
Access the CodeReady Workspaces Swagger interface at https://codeready-<openshift_deployment_name>.<domain_name>/swagger. The user must be signed in through RH-SSO, so that the access token is included in the Request header.
8.1.2. Authenticating in a CodeReady Workspaces workspace
Workspace containers may contain services that must be protected with authentication. Such protected services are called secure. To secure these services, use a machine authentication mechanism.
JWT tokens avoid the need to pass RH-SSO tokens to workspace containers (which can be insecure). Also, RH-SSO tokens may have a relatively shorter lifetime and require periodic renewals or refreshes, which is difficult to manage and keep in sync with the same user session tokens on clients.
Figure 8.1. Authentication inside a workspace
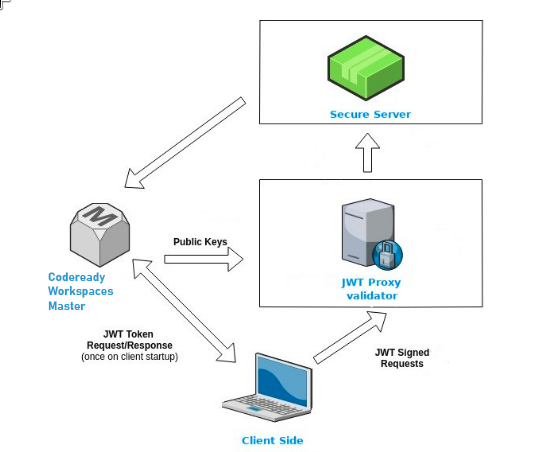
8.1.2.1. Creating secure servers
To create secure servers in CodeReady Workspaces workspaces, set the secure attribute of the endpoint to true in the dockerimage type component in the devfile.
Devfile snippet for a secure server
components:
  - type: dockerimage
    endpoints:
      - attributes:
          secure: 'true'
8.1.2.2. Workspace JWT token
Workspace tokens are JSON web tokens (JWT) that contain the following information in their claims:
-
uid: The ID of the user who owns this token -
uname: The name of the user who owns this token -
wsid: The ID of a workspace which can be queried with this token
Every user is provided with a unique personal token for each workspace. The structure of a token and the signature are different than they are in RH-SSO. The following is an example token view:
# Header
{
  "alg": "RS512",
  "kind": "machine_token"
}
# Payload
{
  "wsid": "workspacekrh99xjenek3h571",
  "uid": "b07e3a58-ed50-4a6e-be17-fcf49ff8b242",
  "uname": "john",
  "jti": "06c73349-2242-45f8-a94c-722e081bb6fd"
}
# Signature
{
  "value": "RSASHA256(base64UrlEncode(header) + . +  base64UrlEncode(payload))"
}
The SHA-256 cipher with the RSA algorithm is used for signing JWT tokens. It is not configurable. Also, there is no public service that distributes the public part of the key pair with which the token is signed.
8.1.2.3. Machine token validation
The validation of machine tokens (JWT tokens) is performed using a dedicated per-workspace service with JWTProxy running on it in a separate Pod. When the workspace starts, this service receives the public part of the SHA key from the CodeReady Workspaces server. A separate verification endpoint is created for each secure server. When traffic comes to that endpoint, JWTProxy tries to extract the token from the cookies or headers and validates it using the public-key part.
To query the CodeReady Workspaces server, a workspace server can use the machine token provided in the CHE_MACHINE_TOKEN environment variable. This token is the user’s who starts the workspace. The scope of such requests is restricted to the current workspace only. The list of allowed operations is also strictly limited.
8.2. Authorizing users
User authorization in CodeReady Workspaces is based on the permissions model. Permissions are used to control the allowed actions of users and establish a security model. Every request is verified for the presence of the required permission in the current user subject after it passes authentication. You can control resources managed by CodeReady Workspaces and allow certain actions by assigning permissions to users.
Permissions can be applied to the following entities:
- Workspace
- System
All permissions can be managed using the provided REST API. The APIs are documented using Swagger at https://codeready-<openshift_deployment_name>.<domain_name>/swagger/#!/permissions.
8.2.1. CodeReady Workspaces workspace permissions
The user who creates a workspace is the workspace owner. By default, the workspace owner has the following permissions: read, use, run, configure, setPermissions, and delete. Workspace owners can invite users into the workspace and control workspace permissions for other users.
The following permissions are associated with workspaces:
Table 8.1. CodeReady Workspaces workspace permissions
| Permission | Description |
|---|---|
| read | Allows reading the workspace configuration. |
| use | Allows using a workspace and interacting with it. |
| run | Allows starting and stopping a workspace. |
| configure | Allows defining and changing the workspace configuration. |
| setPermissions | Allows updating the workspace permissions for other users. |
| delete | Allows deleting the workspace. |
8.2.2. CodeReady Workspaces system permissions
CodeReady Workspaces system permissions control aspects of the whole CodeReady Workspaces installation. The following permissions are applicable to the system:
Table 8.2. CodeReady Workspaces system permission
| Permission | Description |
|---|---|
| manageSystem | Allows control of the system and workspaces. |
| setPermissions | Allows updating the permissions for users on the system. |
| manageUsers | Allows creating and managing users. |
| monitorSystem | Allows accessing endpoints used for monitoring the state of the server. |
All system permissions are granted to the administrative user who is configured in the CHE_SYSTEM_ADMIN__NAME property (the default is admin). The system permissions are granted when the CodeReady Workspaces server starts. If the user is not present in the CodeReady Workspaces user database, it happens after the first user’s login.
8.2.3. manageSystem permission
Users with the manageSystem permission have access to the following services:
| Path | HTTP Method | Description |
|---|---|---|
| /resource/free/ | GET | Get free resource limits. |
| /resource/free/{accountId} | GET | Get free resource limits for the given account. |
| /resource/free/{accountId} | POST | Edit free resource limit for the given account. |
| /resource/free/{accountId} | DELETE | Remove free resource limit for the given account. |
| /installer/ | POST | Add installer to the registry. |
| /installer/{key} | PUT | Update installer in the registry. |
| /installer/{key} | DELETE | Remove installer from the registry. |
| /logger/ | GET | Get logging configurations in the CodeReady Workspaces server. |
| /logger/{name} | GET | Get configurations of logger by its name in the CodeReady Workspaces server. |
| /logger/{name} | PUT | Create logger in the CodeReady Workspaces server. |
| /logger/{name} | POST | Edit logger in the CodeReady Workspaces server. |
| /resource/{accountId}/details | GET | Get detailed information about resources for the given account. |
| /system/stop | POST | Shutdown all system services, prepare CodeReady Workspaces to stop. |
8.2.4. monitorSystem permission
Users with the monitorSystem permission have access to the following services.
| Path | HTTP Method | Description |
|---|---|---|
| /activity | GET | Get workspaces in a certain state for a certain amount of time. |
8.2.5. Listing CodeReady Workspaces permissions
To list CodeReady Workspaces permissions that apply to a specific resource, perform the GET /permissions request.
To list the permissions that apply to a user, perform the GET /permissions/{domain} request.
To list the permissions that apply to all users, perform the GET /permissions/{domain}/all request. The user must have manageSystem permissions to see this information.
The suitable domain values are:
- system
- organization
- workspace
The domain is optional. If no domain is specified, the API returns all possible permissions for all the domains.
8.2.6. Assigning CodeReady Workspaces permissions
To assign permissions to a resource, perform the POST /permissions request. The suitable domain values are:
- system
- organization
- workspace
The following is a message body that requests permissions for a user with a userId to a workspace with a workspaceID:
Requesting CodeReady Workspaces user permissions
{
  "actions": [
    "read",
    "use",
    "run",
    "configure",
    "setPermissions"
  ],
  "userId": "userID",          1
  "domainId": "workspace",
  "instanceId": "workspaceID"  2
}
8.2.7. Sharing CodeReady Workspaces permissions
A user with setPermissions privileges can share a workspace and grant read, use, run, configure, or setPermissions privileges for other users.
Procedure
To share workspace permissions:
- Select a workspace in the user dashboard.
- Navigate to the Share tab and enter the email IDs of the users. Use commas or spaces as separators for multiple emails.
Chapter 9. Backup and disaster recovery
This section describes aspects of the CodeReady Workspaces backup and disaster recovery.
9.1. External database setup
The PostgreSQL database is used by the CodeReady Workspaces server for persisting data about the state of CodeReady Workspaces. It contains information about user accounts, workspaces, preferences, and other details.
By default, the CodeReady Workspaces Operator creates and manages the database deployment.
However, the CodeReady Workspaces Operator does not support full life-cycle capabilities, such as backups and recovery.
For a business-critical setup, configure an external database with the following recommended disaster-recovery options:
- High Availability (HA)
- Point In Time Recovery (PITR)
Configure an external PostgreSQL instance on-premises or use a cloud service, such as Amazon Relational Database Service (Amazon RDS). With Amazon RDS, it is possible to deploy production databases in a Multi-Availability Zone configuration for a resilient disaster recovery strategy with daily and on-demand snapshots.
The recommended configuration of the example database is:
| Parameter | Value |
|---|---|
| Instance class | db.t2.small |
| vCPU | 1 |
| RAM | 2 GB |
| Multi-az | true, 2 replicas |
| Engine version | 9.6.11 |
| TLS | enabled |
| Automated backups | enabled (30 days) |
9.1.1. Configuring external PostgreSQL
Procedure
Use the following SQL script to create user and database for the CodeReady Workspaces server to persist workspaces metadata etc:
CREATE USER <database-user> WITH PASSWORD '<database-password>' 1 2
CREATE DATABASE <database>                                      3
GRANT ALL PRIVILEGES ON DATABASE <database> TO <database-user>
ALTER USER <database-user> WITH SUPERUSER
Use the following SQL script to create database for RH-SSO back end to persist user information:
CREATE USER <identity-database-user> WITH PASSWORD '<identity-database-password>' 1 2
CREATE DATABASE <identity-database>                                               3
GRANT ALL PRIVILEGES ON DATABASE <identity-database> TO <identity-database-user>
9.1.2. Configuring CodeReady Workspaces to work with an external PostgreSQL
Prerequisites
-
The
octool is available.
Procedure
Pre-create a project for CodeReady Workspaces:
$ oc create namespace openshift-workspaces
Create a secret to store CodeReady Workspaces server database credentials:
$ oc create secret generic <server-database-credentials> \ 1
--from-literal=user=<database-user> \                            2
--from-literal=password=<database-password> \                    3
-n openshift-workspaces
Create a secret to store RH-SSO database credentials:
$ oc create secret generic <identity-database-credentials> \ 1
--from-literal=user=<identity-database-user> \                     2
--from-literal=password=<identity-database-password> \             3
-n openshift-workspaces
To make the Operator skip deploying a database and pass connection details of an existing database to a CodeReady Workspaces server set the following values in the Custom Resource:
spec:
  database:
    externalDb: true
    chePostgresHostName: <hostname>                     1
    chePostgresPort: <port>                             2
    chePostgresSecret: <server-database-credentials>    3
    chePostgresDb: <database>                           4
spec:
  auth:
    identityProviderPostgresSecret: <identity-database-credentials> 5
Additional resources
9.2. Persistent Volumes backups
Persistent Volumes (PVs) store the CodeReady Workspaces workspace data similarly to how workspace data is stored for desktop IDEs on the local hard disk drive.
To prevent data loss, back up PVs periodically. The recommended approach is to use storage-agnostic tools for backing up and restoring OpenShift resources, including PVs.
9.2.1. Recommended backup tool: Velero
Velero is an open-source tool for backing up OpenShift applications and their PVs. Velero allows you to:
- Deploy in the cloud or on premises.
- Back up the cluster and restore in case of data loss.
- Migrate cluster resources to other clusters.
- Replicate a production cluster to development and testing clusters.
Alternatively, you can use backup solutions dependent on the underlying storage system. For example, solutions that are Gluster or Ceph-specific.
Additional resources
Chapter 10. Caching images for faster workspace start
This section describes installing the Image Puller on a CodeReady Workspaces cluster to cache images on cluster nodes.
10.1. Image Puller overview
Slow starts of Red Hat CodeReady Workspaces workspaces may be caused by waiting for the underlying cluster to pull images used in workspaces from remote registries. As such, pre-pulling images can improve start times significantly. The Image Puller can be used to pre-pull images and shorten workspace start times.
The Image Puller is an additional deployment that runs alongside Red Hat CodeReady Workspaces. Given a list of images to pre-pull, the application runs inside a cluster and creates a DaemonSet that pulls the images on each node.
The minimal requirement for an image to be pre-pulled is the availability of the sleep command, which means that FROM scratch images (for example, 'che-machine-exec') are currently not supported. Also, images that mount volumes in the dockerfile are not supported for pre-pulling on OpenShift.
The application can be deployed:
- using OperatorHub or installing the Kubernetes Image Puller Operator
- by processing and applying OpenShift templates.
The Image Puller loads its configuration from a ConfigMap with the following available parameters:
Table 10.1. Image Puller default parameters
| Parameter | Usage | Default |
|---|---|---|
|
| Interval, in hours, between checking health of DaemonSets |
|
|
| The memory request for each cached image when the puller is running |
|
|
| The memory limit for each cached image when the puller is running |
|
|
| The CPU request for each cached image when the puller is running |
|
|
| The CPU limit for each cached image when the puller is running |
|
|
| Name of DaemonSet to be created |
|
|
| Namespace where DaemonSet is to be created |
|
|
|
List of images to be cached, in the format | Contains a default list of images. Before deploying, fill this with the images that fit the current requirements |
|
| Node selector applied to the Pods created by the DaemonSet |
|
The default memory requests and limits ensure that the container has enough memory to start. When changing CACHING_MEMORY_REQUEST or CACHING_MEMORY_LIMIT, you will need to consider the total memory allocated to the DaemonSet Pods in the cluster:
(memory limit) * (number of images) * (number of nodes in the cluster)
For example, running the Image Puller that caches 5 images on 20 nodes, with a container memory limit of 20Mi requires 2000Mi of memory.
10.2. Deploying Image Puller using the Operator
The recommended way to deploy the Image Puller is through the Operator.
10.2.1. Installing the Image Puller on OpenShift using OperatorHub
Prerequisites
-
A project in your cluster to host the Image Puller. This document uses the project
image-pulleras an example.
Procedure
- Navigate to your OpenShift cluster console, navigate to → .
-
Use the box to search for
Kubernetes Image Puller Operator. Click the . - Read the description of the Operator. Click → .
- Select for the . In the drop-down find the project you created to install the Image Puller. Click .
- Wait for the Kubernetes Image Puller Operator to install. Click the → .
-
In a redirected window with a YAML editor, make modifications to the
KubernetesImagePullerCustom Resource and click . - Navigate to the and menu in the project and verify that the Image Puller is available.
10.3. Deploying Image Puller using OpenShift templates
The Image Puller repository contains OpenShift templates for deploying on OpenShift.
Prerequisites
- A running OpenShift cluster.
-
The
octool is available.
The following parameters are available to further configure the OpenShift templates:
Table 10.2. Parameters for installing with OpenShift templates
| Value | Usage | Default |
|---|---|---|
|
|
The value of |
|
|
|
Image used for the |
|
|
| The image tag to pull |
|
|
| The name of the ServiceAccount used by the deployment (created as part of installation) |
|
|
|
The value of |
|
|
|
The value of |
|
|
|
The value of |
|
|
|
The value of |
|
See Table 10.1, “Image Puller default parameters” for more information about configuration values, such as DAEMONSET_NAME, CACHING_INTERVAL_HOURS, and CACHING_MEMORY_REQUEST.
Table 10.3. List of recommended images to pre-pull
| Image | URL | Tag |
|---|---|---|
| theia-rhel8 | codeready-workspaces/theia-rhel8 | 2.4 |
| theia-endpoint-rhel8 | theia-endpoint-image | 2.4 |
| pluginbroker-metadata-rhel8 | registry.redhat.io/codeready-workspaces/pluginbroker-metadata-rhel8:2.4 | 2.4 |
| pluginbroker-artifacts-rhel8 | registry.redhat.io/codeready-workspaces/pluginbroker-artifacts-rhel8:2.4 | 2.4 |
| plugin-java8-rhel8 | registry.redhat.io/codeready-workspaces/plugin-java8-rhel8:2.4 | 2.4 |
| plugin-java11-rhel8 | registry.redhat.io/codeready-workspaces/plugin-java11-rhel8:2.4 | 2.4 |
| plugin-kubernetes-rhel8 | registry.redhat.io/codeready-workspaces/plugin-kubernetes-rhel8:2.4 | 2.4 |
| plugin-openshift-rhel8 | registry.redhat.io/codeready-workspaces/plugin-openshift-rhel8:2.4 | 2.4 |
| stacks-cpp-rhel8 | registry.redhat.io/codeready-workspaces/stacks-cpp-rhel8:2.4 | 2.4 |
| stacks-dotnet-rhel8 | registry.redhat.io/codeready-workspaces/stacks-dotnet-rhel8:2.4 | 2.4 |
| stacks-golang-rhel8 | registry.redhat.io/codeready-workspaces/stacks-golang-rhel8:2.4 | 2.4 |
| stacks-php-rhel8 | registry.redhat.io/codeready-workspaces/stacks-php-rhel8:2.4 | 2.4 |
See Table 10.1, “Image Puller default parameters” for more information about configuration values, such as DAEMONSET_NAME, CACHING_INTERVAL_HOURS, and CACHING_MEMORY_REQUEST.
Procedure
Installing
Clone the Kubernetes Image Puller repository:
$ git clone https://github.com/che-incubator/kubernetes-image-puller
$ cd kubernetes-image-puller
Create a new OpenShift project to deploy the puller into:
$ oc new-project k8s-image-puller
Process and apply the templates to deploy the puller:
In CodeReady Workspaces you must use custom values to deploy the image puller. To set custom values, add to the
oc processan option:-p <parameterName>=<value>:$ oc process -f deploy/openshift/serviceaccount.yaml \ | oc apply -f - $ oc process -f deploy/openshift/configmap.yaml \ -p IMAGES='plugin-java8-rhel8=registry.redhat.io/codeready-workspaces/plugin-java8-rhel8:2.4;\ theia-rhel8=registry.redhat.io/codeready-workspaces/theia-rhel8:2.4;\ stacks-golang-rhel8=registry.redhat.io/codeready-workspaces/stacks-golang-rhel8:2.4;\ plugin-java11-rhel8=registry.redhat.io/codeready-workspaces/plugin-java11-rhel8:2.4;\ theia-endpoint-rhel8=registry.redhat.io/codeready-workspaces/theia-rhel8:2.4;\ pluginbroker-metadata-rhel8=registry.redhat.io/codeready-workspaces/pluginbroker-metadata-rhel8:2.4;\ pluginbroker-artifacts-rhel8=registry.redhat.io/codeready-workspaces/pluginbroker-artifacts-rhel8:2.4;' \ | oc apply -f - $ oc process -f deploy/openshift/app.yaml \ -p IMAGE=registry.redhat.io/codeready-workspaces/imagepuller-rhel8 \ -p IMAGE_TAG='2.4' \ | oc apply -f -
Verifying the installation
Confirm that a new deployment,
kubernetes-image-puller, and a DaemonSet (named based on the value of theDAEMONSET_NAMEparameter) exist. The DaemonSet needs to have a Pod for each node in the cluster:$ oc get deployment,daemonset,pod --namespace k8s-image-puller deployment.extensions/kubernetes-image-puller 1/1 1 1 2m19s NAME DESIRED CURRENT READY UP-TO-DATE AVAILABLE NODE SELECTOR AGE daemonset.extensions/kubernetes-image-puller 1 1 1 1 1 <none> 2m10s NAME READY STATUS RESTARTS AGE pod/kubernetes-image-puller-5495f46497-mkd4p 1/1 Running 0 2m18s pod/kubernetes-image-puller-n8bmf 3/3 Running 0 2m10s
Check that the
ConfigMapnamedk8s-image-pullerhas the values you specified in your parameter substitution, or that they contain the default values:$ oc get configmap k8s-image-puller --output yaml apiVersion: v1 data: CACHING_INTERVAL_HOURS: "1" CACHING_MEMORY_LIMIT: 20Mi CACHING_MEMORY_REQUEST: 10Mi DAEMONSET_NAME: kubernetes-image-puller IMAGES: | theia-rhel8=registry.redhat.io/codeready-workspaces/theia-rhel8:{prod-ver}; theia-endpoint-rhel8=registry.redhat.io/codeready-workspaces/theia-rhel8:{prod-ver}; pluginbroker-metadata-rhel8=registry.redhat.io/codeready-workspaces/pluginbroker-metadata-rhel8:{prod-ver}; pluginbroker-artifacts-rhel8=registry.redhat.io/codeready-workspaces/pluginbroker-artifacts-rhel8:{prod-ver}; plugin-java8-rhel8=registry.redhat.io/codeready-workspaces/plugin-java8-rhel8:{prod-ver}; plugin-java11-rhel8=registry.redhat.io/codeready-workspaces/plugin-java11-rhel8:{prod-ver}; stacks-golang-rhel8=registry.redhat.io/codeready-workspaces/stacks-golang-rhel8:{prod-ver}; NAMESPACE: k8s-image-puller NODE_SELECTOR: '{}' kind: ConfigMap metadata: annotations: kubectl.kubernetes.io/last-applied-configuration: | {"apiVersion":"v1","data":{"CACHING_INTERVAL_HOURS":"1","CACHING_MEMORY_LIMIT":"20Mi","CACHING_MEMORY_REQUEST":"10Mi","DAEMONSET_NAME":"kubernetes-image-puller","IMAGES":"theia-rhel8=registry.redhat.io/codeready-workspaces/theia-rhel8:{prod-ver}; theia-endpoint-rhel8=registry.redhat.io/codeready-workspaces/theia-rhel8:{prod-ver}; pluginbroker-metadata-rhel8=registry.redhat.io/codeready-workspaces/pluginbroker-metadata-rhel8:{prod-ver}; pluginbroker-artifacts-rhel8=registry.redhat.io/codeready-workspaces/pluginbroker-artifacts-rhel8:{prod-ver}; plugin-java8-rhel8=registry.redhat.io/codeready-workspaces/plugin-java8-rhel8:{prod-ver}; plugin-java11-rhel8=registry.redhat.io/codeready-workspaces/plugin-java11-rhel8:{prod-ver}; stacks-golang-rhel8=registry.redhat.io/codeready-workspaces/stacks-golang-rhel8:{prod-ver};\n","NAMESPACE":"k8s-image-puller","NODE_SELECTOR":"{}"},"kind":"ConfigMap","metadata":{"annotations":{},"name":"k8s-image-puller","namespace":"k8s-image-puller"},"type":"Opaque"} creationTimestamp: 2020-02-17T22:40:13Z name: k8s-image-puller namespace: k8s-image-puller resourceVersion: "72250" selfLink: /api/v1/namespaces/k8s-image-puller/configmaps/k8s-image-puller uid: 76430ed6-51d6-11ea-9c19-52fdfc072182