
Chapter 1. Customizing the devfile and plug-in registries
CodeReady Workspaces 2.3 introduces two registries: the plug-ins registry and the devfile registry. They are static websites where the metadata of CodeReady Workspaces plug-ins and CodeReady Workspaces devfiles is published.
The plug-in registry makes it possible to share a plug-in definition across all the users of the same instance of CodeReady Workspaces. Only plug-ins that are published in a registry can be used in a devfile.
The devfile registry holds the definitions of the CodeReady Workspaces stacks. These are available on the CodeReady Workspaces user dashboard when selecting Create Workspace. It contains the list of CodeReady Workspaces technological stack samples with example projects.
The devfile and plug-in registries run in two separate pods and are deployed when the CodeReady Workspaces server is deployed (that is the default behavior of the CodeReady Workspaces Operator). The metadata of the plug-ins and devfiles are versioned on GitHub and follow the CodeReady Workspaces server life cycle.
In this document, the following two ways to customize the default registries that are deployed with CodeReady Workspaces (to modify the plug-ins or devfile metadata) are described:
- Building a custom image of the registries
Running the default images but modifying them at runtime
1.1. Building and running a custom registry image
This section describes the building of registries and updating a running CodeReady Workspaces server to point to the registries.
1.1.1. Building a custom devfile registry
This section describes how to build a custom devfiles registry. Following operations are covered:
- Getting a copy of the source code necessary to build a devfiles registry.
- Adding a new devfile.
- Building the devfiles registry.
Procedure
Clone the devfile registry repository:
$ git clone git@github.com:redhat-developer/codeready-workspaces.git
$ cd codeready-workspaces/dependencies/che-devfile-registry
In the
./che-devfile-registry/devfiles/directory, create a subdirectory<devfile-name>/and add thedevfile.yamlandmeta.yamlfiles.File organization for a devfile
./che-devfile-registry/devfiles/ └── <devfile-name> ├── devfile.yaml └── meta.yaml-
Add valid content in the
devfile.yamlfile. For a detailed description of the devfile format, see Making a workspace portable using a Devfile. Ensure that the
meta.yamlfile conforms to the following structure:Table 1.1. Parameters for a devfile
meta.yamlAttribute Description descriptionDescription as it appears on the user dashboard.
displayNameName as it appears on the user dashboard.
globalMemoryLimitThe sum of the expected memory consumed by all the components launched by the devfile. This number will be visible on the user dashboard. It is informative and is not taken into account by the CodeReady Workspaces server.
iconLink to an
.svgfile that is displayed on the user dashboard.tagsList of tags. Tags usually include the tools included in the stack.
Example devfile
meta.yamldisplayName: Rust description: Rust Stack with Rust 1.39 tags: ["Rust"] icon: https://www.eclipse.org/che/images/logo-eclipseche.svg globalMemoryLimit: 1686Mi
Build the containers for the custom devfile registry:
$ docker build -t my-devfile-registry .
1.1.2. Building a custom plug-in registry
This section describes how to build a custom plug-in registry. Following operations are covered:
- Getting a copy of the source code necessary to build a custom plug-in registry.
- Adding a new plug-in.
- Building the custom plug-in registry.
Procedure
Clone the plug-in registry repository:
$ git clone git@github.com:redhat-developer/codeready-workspaces.git
$ cd codeready-workspaces/dependencies/che-plugin-registry
In the
./che-plugin-registry/v3/plugins/directory, create new directories<publisher>/<plugin-name>/<plugin-version>/and ameta.yamlfile in the last directory.File organization for a plugin
./che-plugin-registry/v3/plugins/
├── <publisher>
│   └── <plugin-name>
│       ├── <plugin-version>
│       │   └── meta.yaml
│       └── latest.txt
-
Add valid content to the
meta.yamlfile. See the “Using a Visual Studio Code extension in CodeReady Workspaces” section or the README.md file in theeclipse/che-plugin-registryrepository for a detailed description of themeta.yamlfile format. Create a file named
latest.txtwith content the name of the latest<plugin-version>directory.Example$ tree che-plugin-registry/v3/plugins/redhat/java/ che-plugin-registry/v3/plugins/redhat/java/ ├── 0.38.0 │ └── meta.yaml ├── 0.43.0 │ └── meta.yaml ├── 0.45.0 │ └── meta.yaml ├── 0.46.0 │ └── meta.yaml ├── 0.50.0 │ └── meta.yaml └── latest.txt $ cat che-plugin-registry/v3/plugins/redhat/java/latest.txt 0.50.0
Build the containers for the custom plug-in registry:
./build.sh
1.1.3. Deploying the registries
Prerequisites
The my-plug-in-registry and my-devfile-registry images used in this section are built using the docker command. This section assumes that these images are available on the OpenShift cluster where CodeReady Workspaces is deployed.
This is true on Minikube, for example, if before running the docker build commands, the user executed the eval $\{minikube docker-env} command (or, the eval $\{minishift docker-env} command for Minishift).
Otherwise, these images can be pushed to a container registry (public, such as quay.io, or the DockerHub, or a private registry).
1.1.3.1. Deploying registries in OpenShift
Procedure
An OpenShift template to deploy the plug-in registry is available in the openshift/ directory of the GitHub repository.
To deploy the plug-in registry using the OpenShift template, run the following command:
NAMESPACE=<namespace-name>  1
IMAGE_NAME="my-plug-in-registry"
IMAGE_TAG="latest"
oc new-app -f openshift/che-plugin-registry.yml \
 -n "$\{NAMESPACE}" \
 -p IMAGE="$\{IMAGE_NAME}" \
 -p IMAGE_TAG="$\{IMAGE_TAG}" \
 -p PULL_POLICY="IfNotPresent"
- 1
- If installed using crwctl, the default CodeReady Workspaces project is
workspaces. The OperatorHub installation method deploys CodeReady Workspaces to the users current project.
The devfile registry has an OpenShift template in the
deploy/openshift/directory of the GitHub repository. To deploy it, run the command:NAMESPACE=<namespace-name> 1 IMAGE_NAME="my-devfile-registry" IMAGE_TAG="latest" oc new-app -f openshift/che-devfile-registry.yml \ -n "$\{NAMESPACE}" \ -p IMAGE="$\{IMAGE_NAME}" \ -p IMAGE_TAG="$\{IMAGE_TAG}" \ -p PULL_POLICY="IfNotPresent"
- 1
- If installed using crwctl, the default CodeReady Workspaces project is
workspaces. The OperatorHub installation method deploys CodeReady Workspaces to the users current project.
Check if the registries are deployed successfully on OpenShift.
To verify that the new plug-in is correctly published to the plug-in registry, make a request to the registry path
/v3/plugins/index.json(or/devfiles/index.jsonfor the devfile registry).$ URL=$(oc get -o 'custom-columns=URL:.spec.rules[0].host' \ -l app=che-plugin-registry route --no-headers) $ INDEX_JSON=$(curl -sSL http://${URL}/v3/plugins/index.json) $ echo ${INDEX_JSON} | grep -A 4 -B 5 "\"name\":\"my-plug-in\"" ,\{ "id": "my-org/my-plug-in/1.0.0", "displayName":"This is my first plug-in for CodeReady Workspaces", "version":"1.0.0", "type":"VS Code extension", "name":"my-plug-in", "description":"This plugin shows that we are able to add plugins to the registry", "publisher":"my-org", "links": \{"self":"/v3/plugins/my-org/my-plug-in/1.0.0" } } -- -- ,\{ "id": "my-org/my-plug-in/latest", "displayName":"This is my first plug-in for CodeReady Workspaces", "version":"latest", "type":"VS Code extension", "name":"my-plug-in", "description":"This plugin shows that we are able to add plugins to the registry", "publisher":"my-org", "links": \{"self":"/v3/plugins/my-org/my-plug-in/latest" } }Verify that the CodeReady Workspaces server points to the URL of the registry. To do this, compare the value of the
CHE_WORKSPACE_PLUGIN__REGISTRY__URLparameter in thecodereadyConfigMap (orCHE_WORKSPACE_DEVFILE__REGISTRY__URLfor the devfile registry):$ oc get \ -o "custom-columns=URL:.data['CHE_WORKSPACE_PLUGINREGISTRYURL']" \ --no-headers cm/che URL http://che-plugin-registry-che.192.168.99.100.mycluster.mycompany.com/v3with the URL of the route:
$ oc get -o 'custom-columns=URL:.spec.rules[0].host' \
  -l app=che-plugin-registry route --no-headers
che-plugin-registry-che.192.168.99.100.mycluster.mycompany.com
If they do not match, update the ConfigMap and restart the CodeReady Workspaces server.
$ oc edit cm/che
(...)
$ oc scale --replicas=0 deployment/che
$ oc scale --replicas=1 deployment/che
When the new registries are deployed and the CodeReady Workspaces server is configured to use them, the new plug-ins are available in the Plugin view of a workspace and the new stacks are displayed in the New Workspace tab of the user dashboard.
1.2. Including the plug-in binaries in the registry image
The plug-in registry of CodeReady Workspaces differs from the Eclipse Che version. The Eclipse Che only hosts plug-in metadata, but the CodeReady Workspaces plug-in registry also hosts the corresponding binaries, and it is built in an offline mode by default. This means the binaries are already hosted in the plug-in-registry image.
This section describes how to add a new plug-in or reference a different version of a plug-in. This is achieved by modifying the plug-in meta.yaml file to point to a new plug-in and building a new registry in offline mode that contains the modified plug-in meta.yaml file and the plug-in binary file.
Prerequisites
- An instance of CodeReady Workspaces is available.
-
The
octool is available.
Procedure
Clone the
codeready-workspacesrepository$ git clone https://github.com/redhat-developer/codeready-workspaces $ cd codeready-workspaces/dependencies/che-plugin-registry
Identify the binaries you wish to change in the plug-in registry
The
meta.yamlfile includes theextensionsection, which defines the URLs of required extensions for the plug-in. For example, theredhat/java11/0.63.0plug-in lists the following two extensions:meta.yaml
extensions:
  - https://download.jboss.org/jbosstools/vscode/3rdparty/vscode-java-debug/vscode-java-debug-0.26.0.vsix
  - https://download.jboss.org/jbosstools/static/jdt.ls/stable/java-0.63.0-2222.vsix
Change the first extension to reference the version hosted on GitHub and rebuild the plug-in registry. When using the
redhat/java11/0.63.0plug-in, the binary will be fetched from the custom plug-in-registry server. Set the following environment variables to help with the subsequent commands:ORG=redhat NAME=java11 CHE_PLUGIN_VERSION=0.63.0 VSCODE_JAVA_DEBUG_VERSION=0.26.0 VSCODE_JAVA_DEBUG_URL="https://github.com/microsoft/vscode-java-debug/releases/download/0.26.0/vscjava.vscode-java-debug-0.26.0.vsix" OLD_JAVA_DEBUG_META_YAML_URL="https://download.jboss.org/jbosstools/vscode/3rdparty/vscode-java-debug/vscode-java-debug-0.26.0.vsix"
Get the plug-in registry URL:
$ oc get route plugin-registry -o jsonpath='{.spec.host}' -n ${CHE_NAMESPACE}Save this value in a variable called
PLUGIN_REGISTRY_URL.Update the URLs in the
meta.yamlfile to point to the VS Code extension binaries that are saved in the registry container:$ sed -i -e "s#${OLD_JAVA_DEBUG_META_YAML_URL}#${VSCODE_JAVA_DEBUG_URL}#g" \ ./v3/plugins/${ORG}/${NAME}/${CHE_PLUGIN_VERSION}/meta.yaml ./v3/plugins/${ORG}/${NAME}/${CHE_PLUGIN_VERSION}/meta.yamlImportantBy default, CodeReady Workspaces is deployed with TLS enabled. For installations that do not use TLS, use
http://in theNEW_JAVA_DEBUG_URLandNEW_JAVA_LS_URLvariables.Confirm that the
meta.yamlhas the correctly substituted URLs:$ cat ./v3/plugins/${ORG}/${NAME}/${CHE_PLUGIN_VERSION}/meta.yamlmeta.yaml
extensions:
  - https://plugin-registry-che.apps-crc.testing/v3/plugins/redhat/java11/0.63.0/vscode-java-debug-0.26.0.vsix
  - https://plugin-registry-che.apps-crc.testing/v3/plugins/redhat/java11/0.63.0/java-0.63.0-2222.vsix
- Build and deploy the plug-in registry using the instructions in the Building and running a custom registry image section.
1.3. Editing a devfile and plug-in at runtime
An alternative to building a custom registry image is to:
- Start a registry
- Modify its content at runtime
This approach is simpler and faster. But the modifications are lost as soon as the container is deleted.
1.3.1. Adding a plug-in at runtime
Procedure
To add a plug-in:
Check out the plugin registry sources.
$ git clone https://github.com/redhat-developer/codeready-workspaces; \
  cd codeready-workspaces/dependencies/che-plugin-registry
Create a
meta.yamlin some local folder. This can be done from scratch or by copying from an existing plug-in’smeta.yamlfile.$ PLUGIN="v3/plugins/new-org/new-plugin/0.0.1"; \ mkdir -p ${PLUGIN}; cp v3/plugins/che-incubator/cpptools/0.1/* ${PLUGIN}/ echo "${PLUGIN##*/}" > ${PLUGIN}/../latest.txt-
If copying from an existing plug-in, make changes to the
meta.yamlfile to suit your needs. Make sure the new plug-in has a uniquetitle,displayNameanddescription. Update thefirstPublicationDateto today’s date. These fields in
meta.yamlmust match the path defined inPLUGINabove.publisher: new-org name: new-plugin version: 0.0.1
Get the name of the Pod that hosts the plug-in registry container. To do this, filter the
component=plugin-registrylabel:$ PLUGIN_REG_POD=$(oc get -o custom-columns=NAME:.metadata.name \ --no-headers pod -l component=plugin-registry)
Regenerate the registry’s
index.jsonfile to include the new plug-in.$ cd codeready-workspaces/dependencies/che-plugin-registry; \ "$(pwd)/build/scripts/generate_latest_metas.sh" v3 && \ "$(pwd)/build/scripts/check_plugins_location.sh" v3 && \ "$(pwd)/build/scripts/set_plugin_dates.sh" v3 && \ "$(pwd)/build/scripts/check_plugins_viewer_mandatory_fields.sh" v3 && \ "$(pwd)/build/scripts/index.sh" v3 > v3/plugins/index.jsonCopy the new
index.jsonandmeta.yamlfiles from the new local plug-in folder to the container.$ cd codeready-workspaces/dependencies/che-plugin-registry; \ LOCAL_FILES="$(pwd)/${PLUGIN}/meta.yaml $(pwd)/v3/plugins/index.json"; \ oc exec ${PLUGIN_REG_POD} -i -t -- mkdir -p /var/www/html/${PLUGIN}; \ for f in $LOCAL_FILES; do e=${f/$(pwd)\//}; echo "Upload ${f} -> /var/www/html/${e}"; \ oc cp "${f}" ${PLUGIN_REG_POD}:/var/www/html/${e}; done- The new plug-in can now be used from the existing CodeReady Workspaces instance of the plug-in registry. To discover it, go to the CodeReady Workspaces dashboard, then click the Workspaces link. From there, click the gear icon to configure one of your workspaces. Select the Plugins tab to see the updated list of available plug-ins.
1.3.2. Adding a devfile at runtime
Procedure
To add a devfile:
Check out the devfile registry sources.
$ git clone https://github.com/redhat-developer/codeready-workspaces; \
  cd codeready-workspaces/dependencies/che-devfile-registry
Create a
devfile.yamlandmeta.yamlin some local folder. This can be done from scratch or by copying from an existing devfile.$ STACK="new-stack"; \ mkdir -p devfiles/${STACK}; cp devfiles/03_web-nodejs-simple/* devfiles/${STACK}/-
If copying from an existing devfile, make changes to the devfile to suit your needs. Make sure the new devfile has a unique
displayNameanddescription. Get the name of the Pod that hosts the devfile registry container. To do this, filter the
component=devfile-registrylabel:$ DEVFILE_REG_POD=$(oc get -o custom-columns=NAME:.metadata.name \ --no-headers pod -l component=devfile-registry)
Regenerate the registry’s
index.jsonfile to include the new devfile.$ cd codeready-workspaces/dependencies/che-devfile-registry; \ "$(pwd)/build/scripts/check_mandatory_fields.sh" devfiles; \ "$(pwd)/build/scripts/index.sh" > index.json
Copy the new
index.json,devfile.yamlandmeta.yamlfiles from the new local devfile folder to the container.$ cd codeready-workspaces/dependencies/che-devfile-registry; \ oc exec ${DEVFILE_REG_POD} -i -t -- mkdir -p /var/www/html/devfiles/${STACK}; \ oc cp $(pwd)/devfiles/${STACK}/meta.yaml ${DEVFILE_REG_POD}:/var/www/html/devfiles/${STACK}/meta.yaml; \ oc cp $(pwd)/devfiles/${STACK}/devfile.yaml ${DEVFILE_REG_POD}:/var/www/html/devfiles/${STACK}/devfile.yaml; \ oc cp $(pwd)/index.json ${DEVFILE_REG_POD}:/var/www/html/devfiles/index.json- The new devfile can now be used from the existing CodeReady Workspaces instance of the devfile registry. To discover it, go to the CodeReady Workspaces dashboard, then click the Workspaces link. From there, click Add Workspace to see the updated list of available devfiles.
1.4. Using a Visual Studio Code extension in CodeReady Workspaces
Starting with Red Hat CodeReady Workspaces 2.3, Visual Studio Code (VS Code) extensions can be installed to extend the functionality of a CodeReady Workspaces workspace. VS Code extensions can run in the Che-Theia editor container, or they can be packaged in their own isolated and pre-configured containers with their prerequisites.
This document describes:
- Use of a VS Code extension in CodeReady Workspaces with workspaces.
- CodeReady Workspaces Plug-ins panel.
How to publish a VS Code extension in the CodeReady Workspaces plug-in registry (to share the extension with other CodeReady Workspaces users).
- The extension-hosting sidecar container and the use of the extension in a devfile are optional for this.
- How to review the compatibility of the VS Code extensions to be informed whether a specific API is supported or has not been implemented yet.
1.4.1. Publishing a VS Code extension into the CodeReady Workspaces plug-in registry
The user of CodeReady Workspaces can use a workspace devfile to use any plug-in, also known as Visual Studio Code (VS Code) extension. This plug-in can be added to the plug-in registry, then easily reused by anyone in the same organization with access to that workspaces installation.
Some plug-ins need a runtime dedicated container for code compilation. This fact makes those plug-ins a combination of a runtime sidecar container and a VS Code extension.
The following section describes the portability of a plug-in configuration and associating an extension with a runtime container that the plug-in needs.
1.4.1.1. Writing a meta.yaml file and adding it to a plug-in registry
The plug-in meta information is required to publish a VS Code extension in an Red Hat CodeReady Workspaces plug-in registry. This meta information is provided as a meta.yaml file. This section describes how to create a meta.yaml file for an extension.
Procedure
-
Create a
meta.yamlfile in the following plug-in registry directory:<apiVersion>/plugins/<publisher>/<plug-inName>/<plug-inVersion>/. Edit the
meta.yamlfile and provide the necessary information. The configuration file must adhere to the following structure:apiVersion: v2 1 publisher: myorg 2 name: my-vscode-ext 3 version: 1.7.2 4 type: value 5 displayName: 6 title: 7 description: 8 icon: https://www.eclipse.org/che/images/logo-eclipseche.svg 9 repository: 10 category: 11 spec: containers: 12 - image: 13 memoryLimit: 14 memoryRequest: 15 cpuLimit: 16 cpuRequest: 17 extensions: 18 - https://github.com/redhat-developer/vscode-yaml/releases/download/0.4.0/redhat.vscode-yaml-0.4.0.vsix - https://github.com/SonarSource/sonarlint-vscode/releases/download/1.16.0/sonarlint-vscode-1.16.0.vsix
- 1
- Version of the file structure.
- 2
- Name of the plug-in publisher. Must be the same as the publisher in the path.
- 3
- Name of the plug-in. Must be the same as in path.
- 4
- Version of the plug-in. Must be the same as in path.
- 5
- Type of the plug-in. Possible values:
Che Plugin,Che Editor,Theia plugin,VS Code extension. - 6
- A short name of the plug-in.
- 7
- Title of the plug-in.
- 8
- A brief explanation of the plug-in and what it does.
- 9
- The link to the plug-in logo.
- 10
- Optional. The link to the source-code repository of the plug-in.
- 11
- Defines the category that this plug-in belongs to. Should be one of the following:
Editor,Debugger,Formatter,Language,Linter,Snippet,Theme, orOther. - 12
- If this section is omitted, the VS Code extension is added into the Che-Theia IDE container.
- 13
- The Docker image from which the sidecar container will be started. Example:
eclipse/che-theia-endpoint-runtime:next. - 14
- The maximum RAM which is available for the sidecar container. Example: "512Mi". This value might be overridden by the user in the component configuration.
- 15
- The RAM which is given for the sidecar container by default. Example: "256Mi". This value might be overridden by the user in the component configuration.
- 16
- The maximum CPU amount in cores or millicores (suffixed with "m") which is available for the sidecar container. Examples: "500m", "2". This value might be overridden by the user in the component configuration.
- 17
- The CPU amount in cores or millicores (suffixed with "m") which is given for the sidecar container by default. Example: "125m". This value might be overridden by the user in the component configuration.
- 18
- A list of VS Code extensions run in this sidecar container.
1.4.2. Adding a plug-in registry VS Code extension to a workspace
When the required VS Code extension is added into a CodeReady Workspaces plug-in registry, the user can add it into the workspace through the CodeReady Workspaces Plugins panel or through the workspace configuration.
1.4.2.1. Adding a VS Code extension using the CodeReady Workspaces Plugins panel
Prerequisites
- A running instance of Red Hat CodeReady Workspaces. To install an instance of Red Hat CodeReady Workspaces, see Installing CodeReady Workspaces on OpenShift Container Platform.
Procedure
To add a VS Code extension using the CodeReady Workspaces Plugins panel:
-
Open the CodeReady Workspaces Plugins panel by pressing
CTRL+SHIFT+Jor navigate to View/Plugins. - Change the current registry to the registry in which the VS Code extension was added.
-
In the search bar, click the Menu button and then click Change Registry to choose the registry from the list. If the required registry is not in the list, add it using the Add Registry menu option. The registry link points to the
pluginssegment of the registry, for example:https://my-registry.com/v3/plugins/index.json. -
To update the list of plug-ins after adding a new registry link, use
Refreshcommand from the search bar menu. - Search for the required plug-in using the filter, and then click the button.
- Restart the workspace for the changes to take effect.
1.4.2.2. Adding a VS Code extension using the workspace configuration
Prerequisites
- A running instance of Red Hat CodeReady Workspaces. To install an instance of Red Hat CodeReady Workspaces, see Installing CodeReady Workspaces on OpenShift Container Platform.
- An existing workspace defined on this instance of Red Hat CodeReady Workspaces Creating a workspace from user dashboard.
Procedure
To add a VS Code extension using the workspace configuration:
- Click the Workspaces tab on the Dashboard and select the workspace in which you want to add the plug-in. The Workspace <workspace-name> window is opened showing the details of the workspace.
- Click the devfile tab.
Locate the components section, and add a new entry with the following structure:
- type: chePlugin id: 1- 1
- ID format: <publisher>/<plug-inName>/<plug-inVersion>
CodeReady Workspaces automatically adds the other fields to the new component.
Alternatively, you can link to a
meta.yamlfile hosted on GitHub, using the dedicated reference field.- type: chePlugin reference: 1- 1
https://raw.githubusercontent.com/<username>/<registryRepository>/v3/plugins/<publisher>/<plug-inName>/<plug-inVersion>/meta.yaml
1.4.2.2.1. Testing a VS Code extension using GitHub gist
Each workspace can have its own set of plug-ins. The list of plug-ins and the list of projects to clone are defined in the devfile.yaml file.
For example, to enable an AsciiDoc plug-in from the Red Hat CodeReady Workspaces dashboard, add the following snippet to the devfile:
components:
 - id: joaopinto/vscode-asciidoctor/latest
   type: chePlugin
To add a plug-in that is not in the default plug-in registry, build a custom plug-in registry. See link:Building a custom plug-in registry[the documentation on building custom registries], or, alternatively, use GitHub and the gist service.
Prerequisites
- A running instance of Red Hat CodeReady Workspaces. To install an instance of Red Hat CodeReady Workspaces, see Installing CodeReady Workspaces on OpenShift Container Platform.
- A GitHub account.
Procedure
-
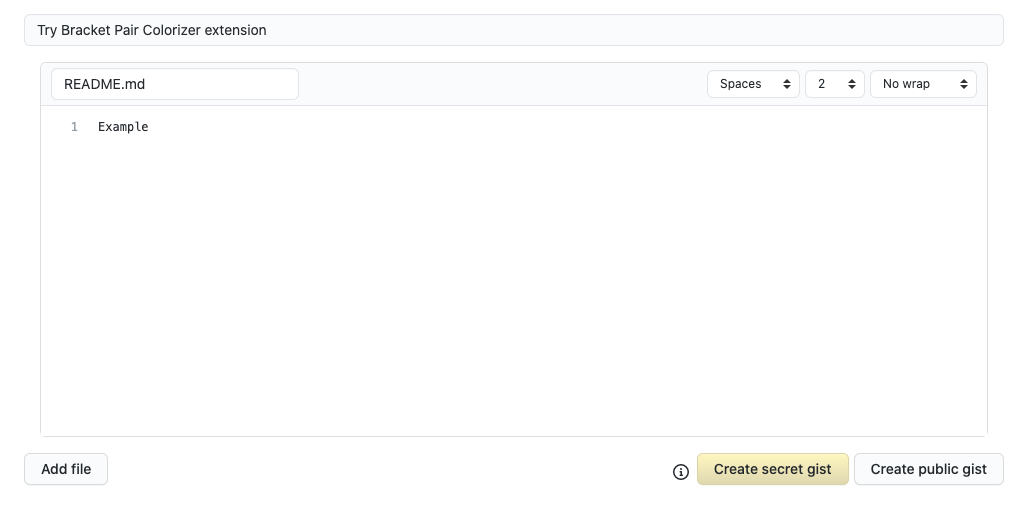
Go to the gist webpage and create a
README.mdfile with the following description:Try Bracket Pair Colorizer extension in Red Hat CodeReady Workspacesand content:Example VS Code extension. (Bracket Pair Colorizer is a popular VS Code extension.) Click the button:
Clone the gist repository by using the URL from the navigation bar of the browser:
$ git clone https://gist.github.com/<your-github-username>/<gist-id>
Example of the output of the
git clonecommandgit clone https://gist.github.com/benoitf/85c60c8c439177ac50141d527729b9d9 1 Cloning into '85c60c8c439177ac50141d527729b9d9'... remote: Enumerating objects: 3, done. remote: Counting objects: 100% (3/3), done. remote: Total 3 (delta 0), reused 0 (delta 0), pack-reused 0 Unpacking objects: 100% (3/3), done.- 1
- Each gist has a unique ID.
Change the directory:
$ cd <gist-directory-name> 1
- 1
- Directory name matching the gist ID.
- Download the plug-in from the VS Code marketplace or from its GitHub page, and store the plug-in file in the cloned directory.
Create a
plugin.yamlfile in the cloned directory to add the definition of this plug-in.Example of the
plugin.yamlfile referencing the.vsixbinary file extensionapiVersion: v2 publisher: CoenraadS name: bracket-pair-colorizer version: 1.0.61 type: VS Code extension displayName: Bracket Pair Colorizer title: Bracket Pair Colorizer description: Bracket Pair Colorizer icon: https://raw.githubusercontent.com/redhat-developer/codeready-workspaces/master/dependencies/che-plugin-registry/resources/images/default.svg?sanitize=true repository: https://github.com/CoenraadS/BracketPair category: Language firstPublicationDate: '2020-07-30' spec: 1 extensions: - "{{REPOSITORY}}/CoenraadS.bracket-pair-colorizer-1.0.61.vsix" 2 latestUpdateDate: "2020-07-30"
Define a memory limit and volumes:
spec:
  containers:
    - image: "quay.io/crw/che-sidecar-java:8-0cfbacb"
      name: vscode-java
      memoryLimit: "1500Mi"
      volumes:
      - mountPath: "/home/theia/.m2"
        name: m2
Create a
devfile.yamlthat references theplugin.yamlfile:apiVersion: 1.0.0 metadata: generateName: java-maven- projects: - name: console-java-simple source: type: git location: "https://github.com/che-samples/console-java-simple.git" branch: java1.11 components: - type: chePlugin id: redhat/java11/latest - type: chePlugin 1 reference: "{{REPOSITORY}}/plugin.yaml" - type: dockerimage alias: maven image: quay.io/crw/che-java11-maven:nightly memoryLimit: 512Mi mountSources: true volumes: - name: m2 containerPath: /home/user/.m2 commands: - name: maven build actions: - type: exec component: maven command: "mvn clean install" workdir: ${CODEREADY_PROJECTS_ROOT}/console-java-simple - name: maven build and run actions: - type: exec component: maven command: "mvn clean install && java -jar ./target/*.jar" workdir: ${CODEREADY_PROJECTS_ROOT}/console-java-simple- 1
- Any other devfile definition is also accepted. The important information in this devfile are the lines defining this external component. It means that an external reference defines the plug-in (instead of an ID pointing to a definition in the default plug-in registry).
Verify there are 4 files in the current Git directory:
$ ls -la
.git
CoenraadS.bracket-pair-colorizer-1.0.61.vsix
README.md
devfile.yaml
plugin.yaml
Before committing the files, add a pre-commit hook to update the
{{REPOSITORY}}variable to the public external raw gist link:Create a
.git/hooks/pre-commitfile with this content:#!/bin/sh # get modified files FILES=$(git diff --cached --name-only --diff-filter=ACMR "*.yaml" | sed 's| |\\ |g') # exit fast if no files found [ -z "$FILES" ] && exit 0 # grab remote origin origin=$(git config --get remote.origin.url) url="${origin}/raw" # iterate on files and add the good prefix pattern for FILE in ${FILES}; do sed -e "s#{{REPOSITORY}}#${url}#g" "${FILE}" > "${FILE}.back" mv "${FILE}.back" "${FILE}" done # Add back to staging echo "$FILES" | xargs git add exit 0The hook replaces the
{{REPOSITORY}}macro and adds the external raw link to the gist.Make the script executable:
$ chmod u+x .git/hooks/pre-commit
Commit and push the files:
# Add files
$ git add *

# Commit
$ git commit -m "Initial Commit for the test of our extension"
[master 98dd370] Initial Commit for the test of our extension
 3 files changed, 61 insertions(+)
 create mode 100644 CoenraadS.bracket-pair-colorizer-1.0.61.vsix
 create mode 100644 devfile.yaml
 create mode 100644 plugin.yaml

# and push the files to the main branch
$ git push origin
Visit the gist website and verify that all links have the correct public URL and do not contain any
{{REPOSITORY}}variables. To reach the devfile:$ echo "$(git config --get remote.origin.url)/raw/devfile.yaml"
or:
$ echo "https://<che-server>/f?url=$(git config --get remote.origin.url)/raw/devfile.yaml"
- Restart the workspace for the changes to take effect.
1.4.3. Verifying the VS Code extension API compatibility level
Che-Theia does not fully support the VS Code extensions API. The vscode-theia-comparator is used to analyze the compatibility between the Che-Theia plug-in API and the VS Code extension API. This tool runs nightly, and the results are published on the vscode-theia-comparator GitHub page.
Prerequisites
- Personal GitHub access token. See Creating a personal access token for the command line. A GitHub access token is required to increase the GitHub download limit for your IP address.
Procedure
To run the vscode-theia comparator manually:
-
Clone the vscode-theia-comparator repository, and build it using the
yarncommand. -
Set the
GITHUB_TOKENenvironment variable to your token. -
Execute the
yarn run generatecommand to generate a report. -
Open the
out/status.htmlfile to view the report.
1.5. Testing a Visual Studio Code extension in CodeReady Workspaces
Visual Studio Code (VS Code) extensions work in a workspace. VS Code extensions can run in the Che-Theia editor container, or in their own isolated and preconfigured containers with their prerequisites.
This section describes how to test a VS Code extension in CodeReady Workspaces with workspaces and how to review the compatibility of VS Code extensions to check whether a specific API is available.
The extension-hosting sidecar container and the use of the extension in a devfile are optional.
1.5.1. Testing a VS Code extension using GitHub gist
Each workspace can have its own set of plug-ins. The list of plug-ins and the list of projects to clone are defined in the devfile.yaml file.
For example, to enable an AsciiDoc plug-in from the Red Hat CodeReady Workspaces dashboard, add the following snippet to the devfile:
components:
 - id: joaopinto/vscode-asciidoctor/latest
   type: chePlugin
To add a plug-in that is not in the default plug-in registry, build a custom plug-in registry. See link:Building a custom plug-in registry[the documentation on building custom registries], or, alternatively, use GitHub and the gist service.
Prerequisites
- A running instance of Red Hat CodeReady Workspaces. To install an instance of Red Hat CodeReady Workspaces, see Installing CodeReady Workspaces on OpenShift Container Platform.
- A GitHub account.
Procedure
-
Go to the gist webpage and create a
README.mdfile with the following description:Try Bracket Pair Colorizer extension in Red Hat CodeReady Workspacesand content:Example VS Code extension. (Bracket Pair Colorizer is a popular VS Code extension.) Click the button:
Clone the gist repository by using the URL from the navigation bar of the browser:
$ git clone https://gist.github.com/<your-github-username>/<gist-id>
Example of the output of the
git clonecommandgit clone https://gist.github.com/benoitf/85c60c8c439177ac50141d527729b9d9 1 Cloning into '85c60c8c439177ac50141d527729b9d9'... remote: Enumerating objects: 3, done. remote: Counting objects: 100% (3/3), done. remote: Total 3 (delta 0), reused 0 (delta 0), pack-reused 0 Unpacking objects: 100% (3/3), done.- 1
- Each gist has a unique ID.
Change the directory:
$ cd <gist-directory-name> 1
- 1
- Directory name matching the gist ID.
- Download the plug-in from the VS Code marketplace or from its GitHub page, and store the plug-in file in the cloned directory.
Create a
plugin.yamlfile in the cloned directory to add the definition of this plug-in.Example of the
plugin.yamlfile referencing the.vsixbinary file extensionapiVersion: v2 publisher: CoenraadS name: bracket-pair-colorizer version: 1.0.61 type: VS Code extension displayName: Bracket Pair Colorizer title: Bracket Pair Colorizer description: Bracket Pair Colorizer icon: https://raw.githubusercontent.com/redhat-developer/codeready-workspaces/master/dependencies/che-plugin-registry/resources/images/default.svg?sanitize=true repository: https://github.com/CoenraadS/BracketPair category: Language firstPublicationDate: '2020-07-30' spec: 1 extensions: - "{{REPOSITORY}}/CoenraadS.bracket-pair-colorizer-1.0.61.vsix" 2 latestUpdateDate: "2020-07-30"
Define a memory limit and volumes:
spec:
  containers:
    - image: "quay.io/crw/che-sidecar-java:8-0cfbacb"
      name: vscode-java
      memoryLimit: "1500Mi"
      volumes:
      - mountPath: "/home/theia/.m2"
        name: m2
Create a
devfile.yamlthat references theplugin.yamlfile:apiVersion: 1.0.0 metadata: generateName: java-maven- projects: - name: console-java-simple source: type: git location: "https://github.com/che-samples/console-java-simple.git" branch: java1.11 components: - type: chePlugin id: redhat/java11/latest - type: chePlugin 1 reference: "{{REPOSITORY}}/plugin.yaml" - type: dockerimage alias: maven image: quay.io/crw/che-java11-maven:nightly memoryLimit: 512Mi mountSources: true volumes: - name: m2 containerPath: /home/user/.m2 commands: - name: maven build actions: - type: exec component: maven command: "mvn clean install" workdir: ${CODEREADY_PROJECTS_ROOT}/console-java-simple - name: maven build and run actions: - type: exec component: maven command: "mvn clean install && java -jar ./target/*.jar" workdir: ${CODEREADY_PROJECTS_ROOT}/console-java-simple- 1
- Any other devfile definition is also accepted. The important information in this devfile are the lines defining this external component. It means that an external reference defines the plug-in (instead of an ID pointing to a definition in the default plug-in registry).
Verify there are 4 files in the current Git directory:
$ ls -la
.git
CoenraadS.bracket-pair-colorizer-1.0.61.vsix
README.md
devfile.yaml
plugin.yaml
Before committing the files, add a pre-commit hook to update the
{{REPOSITORY}}variable to the public external raw gist link:Create a
.git/hooks/pre-commitfile with this content:#!/bin/sh # get modified files FILES=$(git diff --cached --name-only --diff-filter=ACMR "*.yaml" | sed 's| |\\ |g') # exit fast if no files found [ -z "$FILES" ] && exit 0 # grab remote origin origin=$(git config --get remote.origin.url) url="${origin}/raw" # iterate on files and add the good prefix pattern for FILE in ${FILES}; do sed -e "s#{{REPOSITORY}}#${url}#g" "${FILE}" > "${FILE}.back" mv "${FILE}.back" "${FILE}" done # Add back to staging echo "$FILES" | xargs git add exit 0The hook replaces the
{{REPOSITORY}}macro and adds the external raw link to the gist.Make the script executable:
$ chmod u+x .git/hooks/pre-commit
Commit and push the files:
# Add files
$ git add *

# Commit
$ git commit -m "Initial Commit for the test of our extension"
[master 98dd370] Initial Commit for the test of our extension
 3 files changed, 61 insertions(+)
 create mode 100644 CoenraadS.bracket-pair-colorizer-1.0.61.vsix
 create mode 100644 devfile.yaml
 create mode 100644 plugin.yaml

# and push the files to the main branch
$ git push origin
Visit the gist website and verify that all links have the correct public URL and do not contain any
{{REPOSITORY}}variables. To reach the devfile:$ echo "$(git config --get remote.origin.url)/raw/devfile.yaml"
or:
$ echo "https://<che-server>/f?url=$(git config --get remote.origin.url)/raw/devfile.yaml"
1.5.2. Verifying the VS Code extension API compatibility level
Che-Theia does not fully support the VS Code extensions API. The vscode-theia-comparator is used to analyze the compatibility between the Che-Theia plug-in API and the VS Code extension API. This tool runs nightly, and the results are published on the vscode-theia-comparator GitHub page.
Prerequisites
- Personal GitHub access token. See Creating a personal access token for the command line. A GitHub access token is required to increase the GitHub download limit for your IP address.
Procedure
To run the vscode-theia comparator manually:
-
Clone the vscode-theia-comparator repository, and build it using the
yarncommand. -
Set the
GITHUB_TOKENenvironment variable to your token. -
Execute the
yarn run generatecommand to generate a report. -
Open the
out/status.htmlfile to view the report.