
Installation Guide
Installing Red Hat CodeReady Workspaces 2.0
Abstract
Chapter 1. Installing CodeReady Workspaces on OpenShift Container Platform 4
1.1. Installing CodeReady Workspaces on OpenShift 4 from OperatorHub
On OpenShift, Red Hat CodeReady Workspaces can be installed using the OperatorHub Catalog present in the OpenShift web console. Following steps are described:
- Section 1.1.1, “Creating the CodeReady Workspaces project in OpenShift 4 web console”.
- Section 1.1.2, “Installing the CodeReady Workspaces Operator in OpenShift 4 web console”.
- Section 1.1.3, “Installing CodeReady Workspaces using the CodeReady Workspaces Operator in OpenShift 4 web console”.
- Section 1.1.4, “Viewing the state of the CodeReady Workspaces cluster deployment in OpenShift 4 web console”.
- Section 1.1.6, “Viewing the state of the CodeReady Workspaces cluster deployment using OpenShift 4 CLI tools”.
- Section 1.1.5, “Finding CodeReady Workspaces cluster URL in OpenShift 4 web console”.
- Section 1.1.7, “Finding CodeReady Workspaces cluster URL using OpenShift 4 CLI tools”.
- Section 1.1.8, “Enabling SSL on OpenShift 4”.
- Section 1.1.9, “Logging in to CodeReady Workspaces on OpenShift for the first time using OAuth”
- Section 1.1.10, “Logging in to CodeReady Workspaces on OpenShift for the first time registering as a new user”.
1.1.1. Creating the CodeReady Workspaces project in OpenShift 4 web console
This section describes how to create the CodeReady Workspaces project in OpenShift 4 web console.
Prerequisites
- An administrator account on a running instance of OpenShift 4.
Procedure
- Open the OpenShift web console.
- In the left panel, navigate to Projects.
- Click the button.
Enter the project details:
-
In the Name field, type
workspaces. -
In the Display Name field, type
Red Hat CodeReady Workspaces.
-
In the Name field, type
- Click the button.
1.1.2. Installing the CodeReady Workspaces Operator in OpenShift 4 web console
This section describes how to install the CodeReady Workspaces Operator in OpenShift 4 web console.
Prerequisites
- An administrator account on a running instance of OpenShift 4.
-
Administrative rights on an existing project named
workspaceson this instance of OpenShift 4. See Section 1.1.1, “Creating the CodeReady Workspaces project in OpenShift 4 web console”. - The Red Hat CodeReady Workspaces 1.2 Operator is not installed.
Procedure
- Open the OpenShift web console.
- In the left panel, navigate to the Operators → OperatorHub section.
-
In the Search by keyword field, type
Red Hat CodeReady Workspaces. - Click on the Red Hat CodeReady Workspaces tile.
- Click the button in the Red Hat CodeReady Workspaces pop-up window.
- In the A specific namespace on the cluster field, in the cluster drop-down list, select the namespace into which the previous version of the CodeReady Workspaces Operator was installed.
- Click the button.
- In the left panel, navigate to the Operators → Installed Operators section.
- Red Hat CodeReady Workspaces is displayed as an installed Operator having the InstallSucceeded status.
- Click on the Red Hat CodeReady Workspaces name in the list of installed operators.
- Navigate to the Overview tab.
-
In the Conditions sections at the bottom of the page, wait for this message:
install strategy completed with no errors. - Navigate to the Events tab.
-
Wait for this message:
install strategy completed with no errors.
1.1.3. Installing CodeReady Workspaces using the CodeReady Workspaces Operator in OpenShift 4 web console
This section describes how to install CodeReady Workspaces using the CodeReady Workspaces Operator in OpenShift 4 web console.
Prerequisites
- An administrator account on a running instance of OpenShift 4.
- At least one OAuth user provisionned on this instance of OpenShift 4.
- The CodeReady Workspaces Operator is installed on this instance of OpenShift 4. See Section 1.1.2, “Installing the CodeReady Workspaces Operator in OpenShift 4 web console”
Procedure
- Open the OpenShift web console.
- Navigate to the Operators → Installed Operators section.
- Click Red Hat CodeReady Workspaces in the list of installed operators.
- Click the Create Instance link in Provided APIs section.
- The Create CodeReady Workspaces Cluster page is displayed.
- Leave the default values as they are.
- Click the button in the bottom-left corner of the window.
The
codereadycluster is created.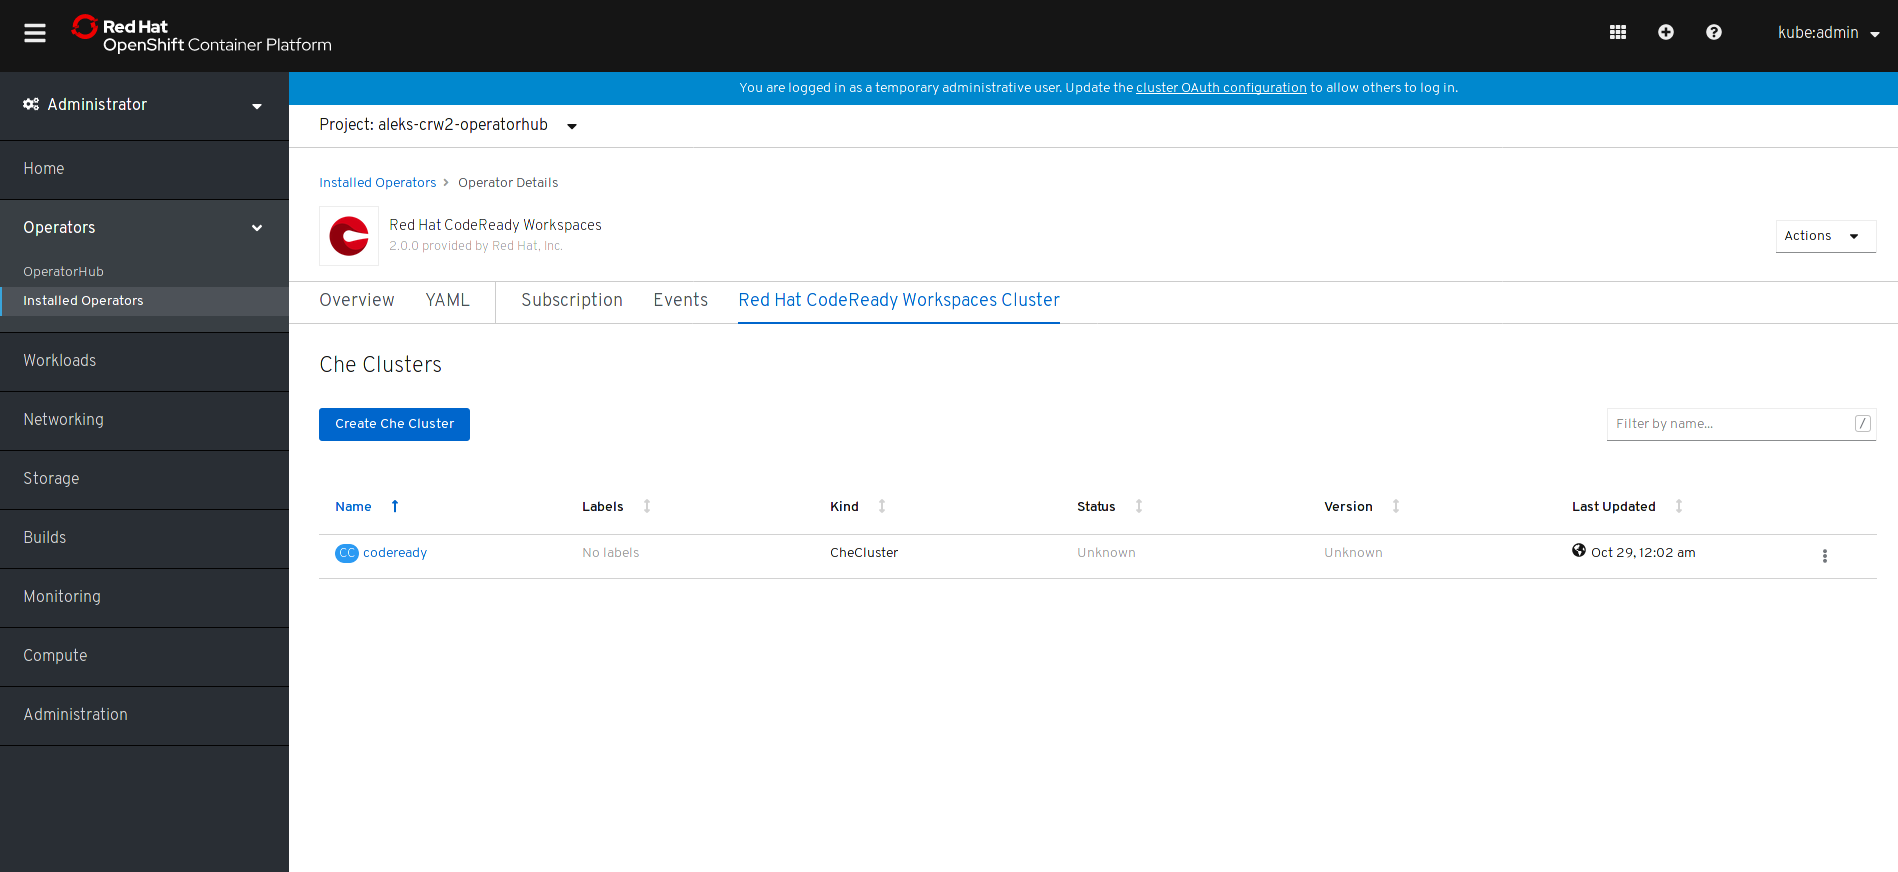
1.1.4. Viewing the state of the CodeReady Workspaces cluster deployment in OpenShift 4 web console
This section describes how to view the state of the CodeReady Workspaces cluster deployment in OpenShift 4 web console.
Prerequisites
- An administrator account on a running instance of OpenShift 4.
- A CodeReady Workspaces cluster is deployed on this instance of OpenShift 4.
Procedure
- Open the OpenShift web console.
- Navigate to the Operators → Installed Operators section.
- Click Red Hat CodeReady Workspaces in the list of installed operators.
- Navigate to the Red Hat CodeReady Workspaces Cluster tab.
- Click on the eclipse-che cluster that is listed in the table.
- Navigate to the Overview tab.
-
Watch the content of the Message field. The field contain error messages, if any. The expected content is
None. - Navigate to the Resources tab.
The screen displays the state of the resources assigned to the CodeReady Workspaces cluster deployment.

1.1.5. Finding CodeReady Workspaces cluster URL in OpenShift 4 web console
This section descibes how to find the CodeReady Workspaces cluster URL in OpenShift 4 web console.
Prerequisites
A running Red Hat CodeReady Workspaces cluster.
Procedure
- Open the OpenShift web console.
- In the left panel, navigate to the Operators → Installed Operators section.
- Click on the Red Hat CodeReady Workspaces Operator tile.
- Click on eclipse-che in the table.
- Navigate to the Overview tab.
- Read the content of the Red Hat CodeReady Workspaces URL field.
1.1.6. Viewing the state of the CodeReady Workspaces cluster deployment using OpenShift 4 CLI tools
This section describes how to view the state of the CodeReady Workspaces cluster deployment using OpenShift 4 CLI tools.
Prerequisites
- An installation of an Red Hat CodeReady Workspaces cluster. See Section 1.1.3, “Installing CodeReady Workspaces using the CodeReady Workspaces Operator in OpenShift 4 web console”.
Procedure
Run the following commands to select the
workspacesproject:$ oc project workspaces
Run the following commands to get the name and status of the pods running in the selected project:
$ oc get pods
Check that the status of all pods is
Running.NAME READY STATUS RESTARTS AGE che-8495f4946b-jrzdc 0/1 Running 0 86s che-operator-578765d954-99szg 1/1 Running 0 42m keycloak-74fbfb9654-g9vp5 1/1 Running 0 4m32s postgres-5d579c6847-w6wx5 1/1 Running 0 5m14s
Run the following command:
$ oc logs --tail=10 -f
oc get pods -o name | grep operatorThis is an example output of the command:
time="2019-07-12T09:48:29Z" level=info msg="Exec successfully completed"
time="2019-07-12T09:48:29Z" level=info msg="Updating eclipse-che CR with status: provisioned with OpenShift identity provider: true"
time="2019-07-12T09:48:29Z" level=info msg="Custom resource eclipse-che updated"
time="2019-07-12T09:48:29Z" level=info msg="Creating a new object: ConfigMap, name: che"
time="2019-07-12T09:48:29Z" level=info msg="Creating a new object: ConfigMap, name: custom"
time="2019-07-12T09:48:29Z" level=info msg="Creating a new object: Deployment, name: che"
time="2019-07-12T09:48:30Z" level=info msg="Updating eclipse-che CR with status: CodeReady Workspaces API: Unavailable"
time="2019-07-12T09:48:30Z" level=info msg="Custom resource eclipse-che updated"
time="2019-07-12T09:48:30Z" level=info msg="Waiting for deployment che. Default timeout: 420 seconds"
1.1.7. Finding CodeReady Workspaces cluster URL using OpenShift 4 CLI tools
This section describes how to CodeReady Workspaces cluster URL using OpenShift 4 CLI tool.
Prerequisites
- View the logs of the CodeReady Workspaces Operator. See Section 1.1.6, “Viewing the state of the CodeReady Workspaces cluster deployment using OpenShift 4 CLI tools”.
Procedure
Wait for the logs to show the message
Red Hat CodeReady Workspaces is now available at:followed by CodeReady Workspaces URL:time="2019-07-12T09:50:13Z" level=info msg="Updating eclipse-che CR with Red Hat CodeReady Workspaces server URL: http://che-che.apps.cluster-fre-f0a2.fre-f0a2.openshiftworkshop.com" time="2019-07-12T09:50:13Z" level=info msg="Custom resource eclipse-che updated" time="2019-07-12T09:50:13Z" level=info msg="Red Hat CodeReady Workspaces is now available at: http://che-che.apps.cluster-fre-f0a2.fre-f0a2.openshiftworkshop.com" time="2019-07-12T09:50:13Z" level=info msg="Updating eclipse-che CR with version: 7.0.0-RC-2.0"
1.1.8. Enabling SSL on OpenShift 4
Prerequisites
A running Red Hat CodeReady Workspaces cluster.
Procedure
- Open the OpenShift web console.
- In the left panel, navigate to the Operators → Installed Operators section.
- Click on the Red Hat CodeReady Workspaces Operator tile.
- Click on eclipse-che in the table.
- Navigate to the Overview tab.
- Toggle the TLS MODE switch to True.
Click Confirm change.

- Navigate to the Resources tab.
- Wait that the pods are restarted.
- Navigate to the Overview tab.
- Click the Red Hat CodeReady Workspaces URL link.
- Notice that the link is redirected to HTTPS.
- The browser displays the Red Hat CodeReady Workspaces Dashboard using a valid Let’s Encrypt certificate.
1.1.9. Logging in to CodeReady Workspaces on OpenShift for the first time using OAuth
This section describes how to log in to CodeReady Workspaces on OpenShift for the first time using OAuth.
Prerequisites
A running Red Hat CodeReady Workspaces cluster.
Know the Red Hat CodeReady Workspaces URL.
Procedure
- Navigate to the Red Hat CodeReady Workspaces URL to display the Red Hat CodeReady Workspaces login page.
- Choose the OpenShift OAuth option.
- The Authorize Access page is displayed.
- Click on the button.
-
Update the account information: fill in the
Username,Email,First nameandLast namefield and click on the button. - The browser displays the Red Hat CodeReady Workspaces Dashboard.
1.1.10. Logging in to CodeReady Workspaces on OpenShift for the first time registering as a new user
This section describes how to log in to CodeReady Workspaces on OpenShift for the first time registering as a new user.
Prerequisites
A running Red Hat CodeReady Workspaces cluster.
Know the Red Hat CodeReady Workspaces URL.
Procedure
- Navigate to the Red Hat CodeReady Workspaces URL to display the Red Hat CodeReady Workspaces login page.
- Choose the Register as a new user option.
-
Update the account information: fill in the
Username,Email,First nameandLast namefield and click on the button. - The browser displays the Red Hat CodeReady Workspaces Dashboard.
1.2. Installing CodeReady Workspaces using CLI management tool
1.2.1. Installing the crwctl CLI management tool
This section describes how to install crwctl, the CodeReady Workspaces CLI management tool.
Procedure
- Navigate to https://developers.redhat.com/products/codeready-workspaces/download.
- Download the CodeReady Workspaces CLI management tool archive for version 2.0.
- Extract the archive.
-
Place the extracted binary in your
$PATH.
1.2.2. Installing CodeReady Workspaces using CodeReady Workspaces CLI management tool
This sections describes how to install CodeReady Workspaces using the CodeReady Workspaces CLI management tool.
Prerequisites
- CodeReady Workspaces CLI management tool is installed.
- OpenShift Container Platform 4 CLI is installed.
- Access to an OpenShift Container Platform instance
1.2.2.1. Installing with default settings
Procedure
Log in to OpenShift Container Platform 4:
$ oc login ${OPENSHIFT_API_URL} -u ${OPENSHIFT_USERNAME} -p ${OPENSHIFT_PASSWORD}Run this command to install Red Hat CodeReady Workspaces with defaults settings:
$ crwctl server:start
Notecrwctl default namespace is
workspaces. If you use a namespace with a different name, run the command with the--chenamespace=your namespaceflag, for example:$ {prod-cli} server:start --chenamespace=codeready-workspaces
1.2.2.2. Installing with custom settings
Procedure
To override specific settings of the red-hat-codeready-workspaces installation, provide a dedicated custom resource when running the above crwctl command:
- Download the default custom resource YAML file.
-
Name the downloaded custom resource
org_v1_che_cr.yaml, and copy it into the current directory. -
Modify the
org_v1_che_cr.yamlfile to override or add any field. Run the installation using the
org_v1_che_cr.yamlfile to override the CodeReady Workspaces CLI management tool defaults:$ crwctl server:start --che-operator-cr-yaml=org_v1_che_cr.yaml
NoteSome basic installation settings can be overridden in a simpler way by using additional
crwctlarguments. To display the list of available arguments:$ crwctl server:start --help
Chapter 2. Installing CodeReady Workspaces on OpenShift 3 using the Operator
This chapter describes how to install CodeReady Workspaces on OpenShift 3, with the CLI management tool, using the Operator method.
2.1. Preparing OpenShift 3 for installing CodeReady Workspaces
Prerequisites
- A running instance of OpenShift 3.11.
- Administrator rights on this OpenShift 3 instance.
-
The
ocOpenShift 3.11 CLI management tool is installed and configured. See Installing the OpenShift 3.11 CLI. -
The
crwctlCLI management tool is installed. See the CodeReady Workspaces 2.0 Installation Guide.
Procedure
Log in to OpenShift. See Basic Setup and Login.
$ oc login
Run the following command to verify that the version of the
ocOpenShift CLI management tool is 3.11:$ oc version oc v3.11.0+0cbc58b
Run the following commands to create a dummy project to find the URL that this OpenShift instance is using to deploy applications.
$ oc new-project hello-world
$ oc new-app centos/httpd-24-centos7~https://github.com/openshift/httpd-ex
$ oc expose svc/httpd-ex
$ oc get route httpd-ex
NAME     HOST/PORT                                                PATH     SERVICES PORT     TERMINATION WILDCARD
httpd-ex httpd-ex-hello-world.apps.rhpds311.openshift.opentlc.com httpd-ex          8080-tcp             None
-
Extract the domain from
httpd-ex-hello-world.apps.rhpds311.openshift.opentlc.com. It is the part after the first name:apps.rhpds311.openshift.opentlc.com. Remember this URL as<OPENSHIFT_APPS_URL>. Remove the dummy project:
$ oc delete project hello-world
2.2. Installing CodeReady Workspaces on OpenShift 3 using the Operator
This section describes how to install CodeReady Workspaces on OpenShift 3 with the CLI management tool, using the Operator method.
Prerequisites
- A running instance of OpenShift 3.11.
- Administrator rights on this OpenShift 3 instance.
-
The
crwctlCLI management tool is installed. See the CodeReady Workspaces 2.0 Installation Guide. -
The URL for applications on this OpenShift instance is known as
<OPENSHIFT_APPS_URL>. See Section 2.1, “Preparing OpenShift 3 for installing CodeReady Workspaces”.
Procedure
Run the following command to create the CodeReady Workspaces instance:
$ crwctl server:start --platform=openshift --installer=operator \
  --domain=<OPENSHIFT_APPS_URL>
Verification steps
The output of the previous command ends with:
Command server:start has completed successfully.
-
Navigate to the CodeReady Workspaces cluster instance:
http://che-che.<OPENSHIFT_APPS_URL>.
2.3. Installing CodeReady Workspaces on OpenShift 3 using the Operator and SSL
This section describes how to install CodeReady Workspaces on OpenShift 3 with the CLI management tool, using the Operator method and the SSL option.
Prerequisites
- A running instance of OpenShift 3.11.
- Administrator rights on this OpenShift 3 instance.
-
The
crwctlCLI management tool is installed. See the CodeReady Workspaces 2.0 Installation Guide. -
The URL for applications on this OpenShift instance is known as
<OPENSHIFT_APPS_URL>. See Section 2.1, “Preparing OpenShift 3 for installing CodeReady Workspaces”.
Procedure
Run the following command to create the CodeReady Workspaces instance:
$ crwctl server:start --platform=openshift --installer=operator --domain=<OPENSHIFT_APPS_URL> --tls
Verification steps
The output of the previous command ends with:
Command server:start has completed successfully.
-
Navigate to the CodeReady Workspaces cluster instance. The domain is now prefixed with HTTPS and using Let’s Encrypt ACME certificates:
http(s)://codeready-workspaces.<OPENSHIFT_APPS_URL>
Chapter 3. Installing CodeReady Workspaces in a restricted enviroment
By default, Red Hat CodeReady Workspaces workspaces reference various external resources, mainly container images available in public registries.
To deploy CodeReady Workspaces in an environment where these external resources are not available (for example, on a cluster that is not exposed to the public Internet):
- Identify the image registry used by the OpenShift cluster, and ensure you can push to it.
- Push all the images needed for running CodeReady Workspaces to this registry.
- Configure CodeReady Workspaces to use the images that have been pushed to the registry.
- Proceed to the CodeReady Workspaces installation.
The procedure for installing CodeReady Workspaces in restricted environments applies to both OpenShift 3.11 and 4.x.
Notes on network connectivity in restricted environments
Restricted network environments range from a private subnet in a cloud provider to a separate network owned by a company, disconnected from the public Internet. Regardless of the network configuration, CodeReady Workspaces works provided that the Ingress and Routes that are created for CodeReady Workspaces components (codeready-workspaces-server, identity provider, devfile and plugin registries) are accessible from inside the OpenShift cluster.
Take into account the network topology of the environment to determine how best to accomplish this. For example, on a network owned by a company or an organization, the network administrators must ensure that traffic bound from the cluster can be routed to Ingress and Route hostnames. In other cases, for example, on AWS, create a proxy configuration allowing the traffic to leave the node to reach an external-facing Load Balancer.
Prerequisites
- A running OpenShift cluster. See the OpenShift Container Platform 4.2 Documentation for instructions on how to install an OpenShift cluster.
3.1. Preparing an image registry for installing CodeReady Workspaces in a restricted environment
Prerequisites
-
The
octool is installed. - An image registry that is accessible from the OpenShift cluster. Ensure you can push to it from a location that has, at least temporarily, access to the Internet.
The
podmantool is installed.NoteWhen pushing images to other registry than the OpenShift internal registry, and the
podmantool fails to work, use thedockertool instead.
The following placeholders are used in this section.
Table 3.1. Placeholders used in examples
|
| host name and port of the container-image registry accessible in the restricted environment |
|
| organization of the container-image registry |
For the OpenShift internal registry, the placeholder values are typically the following:
Table 3.2. Placeholders for the internal OpenShift registry
|
|
|
|
|
|
See OpenShift documentation for more details.
Procedure
Define the environment variable with the external endpoint of the image registry:
For the OpenShift internal registry, use:
$ REGISTRY_ENDPOINT=$(oc get route default-route --namespace openshift-image-registry \
  --template='{{ .spec.host }}')
For other registries, use the host name and port of the image registry:
$ REGISTRY_ENDPOINT=<internal-registry>Log into the internal image registry:
$ podman login --username <user> --password <password> <internal-registry>
NoteWhen using the OpenShift internal registry, follow the steps described in the related OpenShift documentation to first expose the internal registry through a route, and then log in to it.
Download, tag, and push the necessary images. Repeat the step for every image in the following lists:
$ podman pull <image_name>:<image_tag>
$ podman tag <image_name>:<image_tag> ${REGISTRY_ENDPOINT}/<organization>/<image_name>:<image_tag>
$ podman push ${REGISTRY_ENDPOINT}/<organization>/<image_name>:<image_tag>
Essential images
The following infrastructure images are included in every workspace launch:
- registry.redhat.io/codeready-workspaces/server-operator-rhel8:2.0
- registry.redhat.io/codeready-workspaces/server-rhel8:2.0
- registry.redhat.io/codeready-workspaces/pluginregistry-rhel8:2.0
- registry.redhat.io/codeready-workspaces/devfileregistry-rhel8:2.0
- registry.redhat.io/codeready-workspaces/pluginbroker-rhel8:2.0
- registry.redhat.io/codeready-workspaces/pluginbrokerinit-rhel8:2.0
- registry.redhat.io/codeready-workspaces/jwtproxy-rhel8:2.0
- registry.redhat.io/codeready-workspaces/machineexec-rhel8:2.0
- registry.redhat.io/codeready-workspaces/theia-rhel8:2.0
- registry.redhat.io/codeready-workspaces/theia-endpoint-rhel8:2.0
- registry.redhat.io/rhscl/postgresql-96-rhel7:1-47
- registry.redhat.io/redhat-sso-7/sso73-openshift:1.0-15
- registry.redhat.io/ubi8-minimal:8.0-213
Workspace-specific images
These are images that are required for running a workspace. A workspace generally uses only a subset of the images below. It is only necessary to include the images related to required technology stacks.
- registry.redhat.io/codeready-workspaces/stacks-cpp-rhel8:2.0
- registry.redhat.io/codeready-workspaces/stacks-dotnet-rhel8:2.0
- registry.redhat.io/codeready-workspaces/stacks-golang-rhel8:2.0
- registry.redhat.io/codeready-workspaces/stacks-java-rhel8:2.0
- registry.redhat.io/codeready-workspaces/stacks-node-rhel8:2.0
- registry.redhat.io/codeready-workspaces/stacks-php-rhel8:2.0
- registry.redhat.io/codeready-workspaces/stacks-python-rhel8:2.0
- registry.redhat.io/codeready-workspaces/plugin-openshift-rhel8:2.0
3.2. Preparing CodeReady Workspaces Custom Resource for restricted environment
When installing CodeReady Workspaces in a restricted environment using crwctl or OperatorHub, provide a CodeReady WorkspacesCluster custom resource with additional information.
3.2.1. Downloading the default CodeReady WorkspacesCluster Custom Resource
Procedure
- Download the default custom resource YAML file.
-
Name the downloaded custom resource
org_v1_che_cr.yaml. Keep it for further modification and usage.
3.2.2. Customizing the CodeReady WorkspacesCluster Custom Resource for restricted environment
Prerequisites
- All required images available in an image registry that is visible to the OpenShift cluster where CodeReady Workspaces is to be deployed. This is described in Section 3.1, “Preparing an image registry for installing CodeReady Workspaces in a restricted environment”, where the placeholders used in the following examples are also defined.
Procedure
In the
CodeReady WorkspacesClusterCustom Resource, which is managed by the CodeReady Workspaces Operator, add the fields used to facilitate deploying an instance of CodeReady Workspaces in a restricted environment:# [...] spec: server: airGapContainerRegistryHostname: '<internal-registry>' airGapContainerRegistryOrganization: '<organization>' # [...]Setting these fields in the Custom Resource uses
<internal-registry>and<organization>for all images. This means, for example, that the Operator expects the offline plug-in and devfile registries to be available at:<internal-registry>/<organization>/pluginregistry-rhel8:<ver> <internal-registry>/<organization>/pluginregistry-rhel8:<ver>
For example, to use the OpenShift 4 internal registry as the image registry, define the following fields in the
CodeReady WorkspacesClusterCustom Resource:# [...] spec: server: airGapContainerRegistryHostname: 'image-registry.openshift-image-registry.svc:5000' airGapContainerRegistryOrganization: 'openshift' # [...]-
In the downloaded
CodeReady WorkspacesClusterCustom Resource, add the two fields described above with the proper values according to the container-image registry with all the mirrored container images.
3.3. Starting CodeReady Workspaces installation in a restricted environment using CodeReady Workspaces CLI management tool
This sections describes how to start the CodeReady Workspaces installation in a restricted environment using the CodeReady Workspaces CLI management tool.
Prerequisites
- CodeReady Workspaces CLI management tool is installed.
-
The
octool is installed. - Access to an OpenShift instance.
Procedure
Log in to OpenShift Container Platform:
$ oc login ${OPENSHIFT_API_URL} --username ${OPENSHIFT_USERNAME} \
                                --password ${OPENSHIFT_PASSWORD}
Install CodeReady Workspaces with the customized Custom Resource to add fields related to restricted environment:
$ crwctl server:start \
  --che-operator-image=<image-registry>/<organization>/server-operator-rhel8:2.0 \
  --che-operator-cr-yaml=org_v1_che_cr.yaml
3.4. Starting CodeReady Workspaces installation in a restricted environment using OperatorHub
Installing CodeReady Workspaces from OperatorHub in a restricted environment is not supported.
Chapter 4. Upgrading CodeReady Workspaces
This chapter describes how to upgrade from CodeReady Workspaces 1.2 instance to CodeReady Workspaces 2.0.
The method that was used to install the CodeReady Workspaces 1.2 instance determines the method to proceed with for the upgrade.
Following scenarios are covered:
After a major upgrade of the CodeReady Workspaces instance from 1.2 to 2.0, it is necessary to migrate the workspaces to new devfiles definitions:
See the CodeReady Workspaces 2.0 End-user Guide.
4.1. Upgrading CodeReady Workspaces on OpenShift 4 using the web console
This section describes how to upgrade from CodeReady Workspaces 1.2 to CodeReady Workspaces 2.0 on OpenShift 4 using the OpenShift web console. This method is using the Operator from OperatorHub.
4.1.1. Preparing the upgrade of CodeReady Workspaces on OpenShift using the Operator
This section describes how to prepare upgrade from CodeReady Workspaces 1.2 to CodeReady Workspaces 2.0 on OpenShift using the Operator.
Uninstalling the Red Hat CodeReady Workspaces 1.2 Operator means that the OpenShift cluster do not receive any updates of the CodeReady Workspaces 1.2 Operator. As a consequence, the existing CodeReady Workspaces instances do not receive any update. The CodeReady Workspaces instances that are already present, including their database, remains present.
Prerequisites
- And administrative account on an OpenShift 4 instance.
- Red Hat CodeReady Workspaces 1.2 Operator is installed on this OpenShift 4 instance.
- A running instance of CodeReady Workspaces 1.2 on this OpenShift 4 instance.
Procedure
- In all running workspaces in the CodeReady Workspaces 1.2 instance, save and push changes back to the git repositories.
- Shut down all workspaces in the CodeReady Workspaces 1.2 instance.
- Open the OpenShift console.
- Navigate to Operators > Installed Operators.
- Click on Red Hat CodeReady Workspaces 1.2.
- Click on the button on the top right.
- A drop-down menu appears.
- Click on Uninstall Operator to uninstall the CodeReady Workspaces 1.2 Operator.
-
Accept the selected option
Also completely remove the Operator from the selected namespace. - Click on the button.
- Navigate to Operators > Installed Operators.
- The Operator is removed from the list of installed operators.
4.1.2. Creating the CodeReady Workspaces project in OpenShift 4 web console
This section describes how to create the CodeReady Workspaces project in OpenShift 4 web console.
Prerequisites
- An administrator account on a running instance of OpenShift 4.
Procedure
- Open the OpenShift web console.
- In the left panel, navigate to Projects.
- Click the button.
Enter the project details:
-
In the Name field, type
workspaces. -
In the Display Name field, type
Red Hat CodeReady Workspaces.
-
In the Name field, type
- Click the button.
4.1.3. Installing the CodeReady Workspaces Operator in OpenShift 4 web console
This section describes how to install the CodeReady Workspaces Operator in OpenShift 4 web console.
Prerequisites
- An administrator account on a running instance of OpenShift 4.
-
Administrative rights on an existing project named
workspaceson this instance of OpenShift 4. See Section 4.1.2, “Creating the CodeReady Workspaces project in OpenShift 4 web console”. - The Red Hat CodeReady Workspaces 1.2 Operator is not installed.
Procedure
- Open the OpenShift web console.
- In the left panel, navigate to the Operators → OperatorHub section.
-
In the Search by keyword field, type
Red Hat CodeReady Workspaces. - Click on the Red Hat CodeReady Workspaces tile.
- Click the button in the Red Hat CodeReady Workspaces pop-up window.
- In the A specific namespace on the cluster field, in the cluster drop-down list, select the namespace into which the previous version of the CodeReady Workspaces Operator was installed.
- Click the button.
- In the left panel, navigate to the Operators → Installed Operators section.
- Red Hat CodeReady Workspaces is displayed as an installed Operator having the InstallSucceeded status.
- Click on the Red Hat CodeReady Workspaces name in the list of installed operators.
- Navigate to the Overview tab.
-
In the Conditions sections at the bottom of the page, wait for this message:
install strategy completed with no errors. - Navigate to the Events tab.
-
Wait for this message:
install strategy completed with no errors.
4.1.4. Viewing the state of the CodeReady Workspaces cluster deployment in OpenShift 4 web console
This section describes how to view the state of the CodeReady Workspaces cluster deployment in OpenShift 4 web console.
Prerequisites
- An administrator account on a running instance of OpenShift 4.
- A CodeReady Workspaces cluster is deployed on this instance of OpenShift 4.
Procedure
- Open the OpenShift web console.
- Navigate to the Operators → Installed Operators section.
- Click Red Hat CodeReady Workspaces in the list of installed operators.
- Navigate to the Red Hat CodeReady Workspaces Cluster tab.
- Click on the eclipse-che cluster that is listed in the table.
- Navigate to the Overview tab.
-
Watch the content of the Message field. The field contain error messages, if any. The expected content is
None. - Navigate to the Resources tab.
The screen displays the state of the resources assigned to the CodeReady Workspaces cluster deployment.
4.1.5. Finishing the upgrade of CodeReady Workspaces on OpenShift using the Operator
This section describes how to finish the upgrade from CodeReady Workspaces 1.2 to CodeReady Workspaces 2.0 on OpenShift using the Operator.
Prerequisites
- The CodeReady Workspaces 1.2 Operator is removed. See Section 4.1.1, “Preparing the upgrade of CodeReady Workspaces on OpenShift using the Operator”
- The CodeReady Workspaces 2.0 Operator is deployed. See Section 4.1.3, “Installing the CodeReady Workspaces Operator in OpenShift 4 web console”
- The CodeReady Workspaces 2.0 Operator has finished upgrading the Red Hat CodeReady Workspaces cluster. See Section 4.1.4, “Viewing the state of the CodeReady Workspaces cluster deployment in OpenShift 4 web console”
Procedure
- Log into the Red Hat CodeReady Workspaces instance.
- Select an old workspace and click on the button.
- An error message appears, with a link to the documentation explaining how to migrate a workspace to a devfile.
- For each workspace, create a devfile that represent your workspace. See the CodeReady Workspaces 2.0 End-user Guide.
- Use the devfile to start the new workspace. See the CodeReady Workspaces 2.0 End-user Guide.
4.2. Upgrading CodeReady Workspaces on OpenShift 4 using the CLI management tool
This section describes how to upgrade from CodeReady Workspaces 1.2 to CodeReady Workspaces 2.0 on OpenShift 4 using the CLI management tool.
Prerequisites
- And administrative account on an OpenShift 4 instance.
- A running instance of Red Hat CodeReady Workspaces running on OpenShift 4.
- This instance was installed using the CLI management tool, not using OperatorHub.
-
The
crwctlmanagement tool is installed. See the CodeReady Workspaces 2.0 Installation Guide.
Procedure
- In all running workspaces in the CodeReady Workspaces 1.2 instance, save and push changes back to the Git repositories.
- Shut down all workspaces in the CodeReady Workspaces 1.2 instance.
Run following command:
$ crwctl server:update
Verification steps
- Log in to the CodeReady Workspaces instance.
- The 2.0 version number is displayed at the bottom of the page.
4.3. Upgrading CodeReady Workspaces on OpenShift 3 using the CLI management tool
This section describes how to upgrade from CodeReady Workspaces 1.2 to CodeReady Workspaces 2.0 on OpenShift 3 using the CLI management tool.
Prerequisites
- And administrative account on an OpenShift 3 instance.
- A running instance of Red Hat CodeReady Workspaces running on OpenShift 3.
- This instance was installed using the CLI management tool.
-
The
crwctlmanagement tool is installed. See the CodeReady Workspaces 2.0 Installation Guide.
Procedure
- In all running workspaces in the CodeReady Workspaces 1.2 instance, save and push changes back to the Git repositories.
- Shut down all workspaces in the CodeReady Workspaces 1.2 instance.
Run the following command:
$ crwctl server:update
Verification steps
- Log in to the CodeReady Workspaces instance.
- The 2.0 version number is displayed at the bottom of the page.
4.4. Known issues
4.4.1. Upgrading from CodeReady Workspaces 1.2 to CodeReady Workspaces 2.0 using the Operator
When upgrading the Operator of a CodeReady Workspaces 1.2 installation to CodeReady Workspaces 2.0, some components may not be automatically updated. To fix this, manually update the images listed in the checluster custom resource, which describes the CodeReady Workspaces installation. To reset the images to their default versions for given Operator version, set the image properties to empty strings. This forces the CodeReady Workspaces Operator to use the default versions it was built with.
Review the following components:
| Component | CR attribute name |
| Postgresql |
|
| Keycloak |
|
| PVC Jobs |
|
4.4.2. Updating a CodeReady Workspaces installation using the Operator
When making changes to the checluster custom resource, use patching to make updates to it. For example:
On OpenShift, run:
$ oc patch checluster <my-che> --type=json -n <che-namespace> -p '...'
On OpenShift, run:
$ oc patch checluster <my-che> --type=json -n <che-namespace> -p '...'
Making local updates to the YAML file of the checluster resource and then applying such changed resource to the cluster using oc apply -f or oc apply -f can result in an invalidation of the CodeReady Workspaces installation.
Chapter 5. Advanced configuration options
The following section describes advanced deployment and configuration methods for Red Hat CodeReady Workspaces.
5.1. CodeReady Workspaces configMaps and their behavior
The following section describes CodeReady Workspaces configMaps and how they behave.
A configMap is provided as an editable file that lists options to customize the CodeReady Workspaces environment. Based on the CodeReady Workspaces installation method, configMaps can be used to customize the working environment. The type of configMaps available in your CodeReady Workspaces environment varies based on the method used for installing CodeReady Workspaces.
5.1.1. CodeReady Workspaces installed using an Operator
Operators are software extensions to OpenShift that use custom resources to manage applications and their components.
CodeReady Workspaces installed using the Operator provides the user with an automatically generated configMap called workspaces.
The workspaces configMap contains the main properties for the CodeReady Workspaces server, and is in sync with the information stored in the CheCluster Custom Resource file. User modifications of the workspaces configMap after installing CodeReady Workspaces using the Operator are automatically overwritten by values that the Operator obtains from the CheCluster Custom Resource.
To edit the workspaces configMap, edit the Custom Resource manually. The configMap derives values from the CheCluster field. User modifications of the CheCluster Custom Resource field cause the Operator to change the attributes of the workspaces configMap accordingly. The configMap changes automatically trigger a restart of the CodeReady Workspaces Pod.
To add custom properties to the CodeReady Workspaces server, such as environment variables that are not automatically generated in the workspaces configMap by the Operator, or to override automatically generated properties, the CheCluster Custom Resource has a customCheProperties field, which expects a map.
For example, to overrride the default memory limit for workspaces, add the CHE_WORKSPACE_DEFAULT__MEMORY__LIMIT__MB property to customCheProperties:
apiVersion: org.eclipse.che/v1
kind: CheCluster
metadata:
  name: eclipse-che
  namespace: che
spec:
  server:
    cheImageTag: ''
    devfileRegistryImage: ''
    pluginRegistryImage: ''
    tlsSupport: false
    selfSignedCert: false
    customCheProperties:
      CHE_WORKSPACE_DEFAULT__MEMORY__LIMIT__MB: "2048"
  auth:
...
Previous versions of the CodeReady Workspaces Operator had a configMap named custom to fulfill this role. If the CodeReady Workspaces Operator finds a configMap with the name custom, it adds the data it contains into the customCheProperties field, redeploys CodeReady Workspaces, and deletes the custom configMap.
5.2. Configuring namespace strategies
The term namespace (Kubernetes) is used interchangeably with project (OpenShift).
The namespace strategies are configured using the CHE_INFRA_KUBERNETES_NAMESPACE_DEFAULT environment variable.
There are legacy variables CHE_INFRA_KUBERNETES_NAMESPACE and CHE_INFRA_OPENSHIFT_PROJECT. These should be left unset for new instalations. Changing these variables during update can lead to data loss.
5.2.1. One namespace per workspace strategy
The strategy creates a new namespace for each new workspace.
To use the strategy, the CHE_INFRA_KUBERNETES_NAMESPACE_DEFAULT variable value must contain the <workspaceid> identifier. It can be used alone or combined with other identifiers or any string.
Example 5.1. One namespace per workspace
To assign namespace names composed of a che-ws prefix and workspace id, set:
CHE_INFRA_KUBERNETES_NAMESPACE_DEFAULT=che-ws-<workspaceid>5.2.2. One namespace for all workspaces strategy
The strategy uses one predefined namespace for all workspaces.
To use the strategy, the CHE_INFRA_KUBERNETES_NAMESPACE_DEFAULT variable value must be the name of the desired namespace to use.
Example 5.2. One namespace for all workspaces
To have all workspaces created in che-workspaces namespace, set:
CHE_INFRA_KUBERNETES_NAMESPACE_DEFAULT=che-workspaces
To run more than one workspace at a time when using this strategy together with the common PVC strategy, configure persistent volumes to use ReadWriteMany access mode.
5.2.3. One namespace per user strategy
The strategy isolates each user in their own namespace.
To use the strategy, the CHE_INFRA_KUBERNETES_NAMESPACE_DEFAULT variable value must contain one or more user identifiers. Currently supported identifiers are <username> and <userid>.
Example 5.3. One namespace per user
To assign namespace names composed of a che-ws prefix and individual usernames (che-ws-user1, che-ws-user2), set:
CHE_INFRA_KUBERNETES_NAMESPACE_DEFAULT=che-ws-<username>
To run more than one workspace at a time when using this strategy together with the common PVC strategy, configure persistent volumes to use ReadWriteMany access mode.
To limit the number of concurrently running workspaces per user to one, set the CHE_LIMITS_USER_WORKSPACES_RUN_COUNT environment variable to 1.
To limit the number of concurrently running workspaces per user to one (1):
-
For Helm Chart deployments: set the
.global.workspace.numberparameter to1. -
For Operator deployments: set the
spec.server.cheCustomProperties.CHE_LIMITS_USER_WORKSPACE_RUN_COUNTvariable of the CheCluster Custom Resource (CR) to1.
5.2.4. Allowing user-defined workspace namespaces
Che server can be configured to honor the user selection of a namespace when a workspace is created. This feature is disabled by default. To allow user-defined workspace namespaces, set:
CHE_INFRA_KUBERNETES_NAMESPACE_ALLOWUSERDEFINED=true5.3. Deploying CodeReady Workspaces with support for Git repositories with self-signed certificates
This procedure describes how to configure CodeReady Workspaces for deployment with support for Git operations on repositories that use self-signed certificates.
Prerequisites
- Git version 2 or later.
Configuring support for self-signed Git repositories on OpenShift
Deploying CodeReady Workspaces using a Helm Chart
Configure the workspace exposure strategy using the
global.useGitSelfSignedCertsproperty. To do that, add the following option to thehelm upgradecommand:$ helm upgrade che --set global.useGitSelfSignedCerts=true
Create a new configMap with details about the Git server:
$ oc create configmap che-git-self-signed-cert --from-file=<ca.crt> \
  --from-literal=githost=<host:port> -n=che
In the command, substitute
<ca.crt>for the self-signed certificate and `<host:port>` for the host and port of the HTTPS connection on the Git server (optional).NoteWhen
githostis not specified, the given certificate is used for all HTTPS repositories.
Create and start new workspace. Every container used by the workspace mounts a special volume that contains a file with the self-signed certificate. The repository’s .git/config file contains information about the Git server host (its URL) and the path to the certificate in the http section (see Git documentation about git-config). For example:
[http "https://10.33.177.118:3000"]
        sslCAInfo = /etc/che/git/cert/ca.crt
5.4. CodeReady Workspaces configMaps fields reference
5.4.5. k8s configuration settings specific to CodeReady Workspaces installations on OpenShift
| Property | Default value | Description |
|---|---|---|
|
|
| Ingress class that defines which controller manages ingresses. |
|
| omit |
Global ingress domain for a K8S cluster. This field must be explicitly specified. This drives the |
|
|
|
Strategy for ingress creation. This can be |
|
|
| FSGroup the CodeReady Workspaces Pod and Workspace Pods containers should run in. |
|
|
| ID of the user the CodeReady Workspaces Pod and Workspace Pods containers should run as. |
|
| omit |
Name of a secret that is used to set ingress TLS termination if TLS is enabled. See also the |
5.4.6. installation defines the observed state of CodeReady Workspaces installation
| Property | Description |
|---|---|
|
|
Status of a CodeReady Workspaces installation. Can be |
|
| Public URL to the CodeReady Workspaces server. |
|
| Currently installed CodeReady Workspaces version. |
|
| Indicates whether a Postgres instance has been correctly provisioned. |
|
| Public URL to the Devfile registry. |
|
| A URL to where to find help related to the current Operator status. |
|
| Indicates whether an Identity Provider instance (Keycloak / RH SSO) has been provisioned with realm, client and user. |
|
| Public URL to the Identity Provider server (Keycloak / RH SSO). |
|
| A human-readable message with details about why the Pod is in this state. |
|
| Indicates whether an Identity Provider instance (Keycloak / RH SSO) has been configured to integrate with the OpenShift OAuth. |
|
| Public URL to the Plugin registry. |
|
| A brief CamelCase message with details about why the Pod is in this state. |
5.4.7. Limits for workspaces
| Property | Default value | Description |
|---|---|---|
|
|
| The maximum amount of RAM that a user can allocate to a workspace when they create a new workspace. The RAM slider is adjusted to this maximum value. |
|
|
| The length of time that a user is idle with their workspace when the system will suspend the workspace and then stopping it. Idleness is the length of time that the user has not interacted with the workspace, meaning that one of our agents has not received interaction. Leaving a browser window open counts toward idleness. |
5.4.8. Limits for the workspaces of an user
| Property | Default value | Description |
|---|---|---|
|
|
| he total amount of RAM that a single user is allowed to allocate to running workspaces. A user can allocate this RAM to a single workspace or spread it across multiple workspaces. |
|
|
| The maximum number of workspaces that a user is allowed to create. The user will be presented with an error message if they try to create additional workspaces. This applies to the total number of both running and stopped workspaces. |
|
|
| The maximum number of running workspaces that a single user is allowed to have. If the user has reached this threshold and they try to start an additional workspace, they will be prompted with an error message. The user will need to stop a running workspace to activate another. |
5.4.9. Limits for for the workspaces of an organization
| Property | Default value | Description |
|---|---|---|
|
|
| The total amount of RAM that a single organization (team) is allowed to allocate to running workspaces. An organization owner can allocate this RAM however they see fit across the team’s workspaces. |
|
|
| The maximum number of workspaces that a organization is allowed to own. The organization will be presented an error message if they try to create additional workspaces. This applies to the total number of both running and stopped workspaces. |
|
|
| The maximum number of running workspaces that a single organization is allowed. If the organization has reached this threshold and they try to start an additional workspace, they will be prompted with an error message. The organization will need to stop a running workspace to activate another. |
Chapter 6. Uninstalling CodeReady Workspaces
This section describes uninstallation procedures for Red Hat CodeReady Workspaces installed on OpenShift. The uninstallation process leads to a complete removal of CodeReady Workspaces-related user data. The appropriate uninstallation method depends on what method was used to install the CodeReady Workspaces instance.
- For CodeReady Workspaces installed using OperatorHub, see Section 6.1, “Uninstalling CodeReady Workspaces after OperatorHub installation”.
- For CodeReady Workspaces installed using crwctl, see Section 6.2, “Uninstalling CodeReady Workspaces after crwctl installation”
6.1. Uninstalling CodeReady Workspaces after OperatorHub installation
Users have two options for uninstalling CodeReady Workspaces from an OpenShift cluster. The following sections describe both of these methods:
- Using the OpenShift Administrator Perspective web UI
-
Using
occommands from the terminal
6.1.1. Uninstalling CodeReady Workspaces using the OpenShift web console
This section describes how to uninstall CodeReady Workspaces from a cluster using the Openshift Administrator Perspective main menu.
Prerequsities
- Che was installed on an OpenShift cluster using OperatorHub.
Procedure: deleting the CodeReady Workspaces deployment
- Open the OpenShift web console.
- Navigate to the Operators > Installed Operators section.
- Click Red Hat CodeReady Workspaces in the list of installed operators.
- Navigate to the Red Hat CodeReady Workspaces Cluster tab.
- In the row that displays information about the specific CodeReady Workspaces cluster, delete the CodeReady Workspaces Cluster deployment using the drop-down menu illustrated as three horizontal dots situated on the right side of the screen.
-
Alternatively, delete the CodeReady Workspaces deployment by clicking the displayed Red Hat CodeReady Workspaces Cluster,
red-hat-codeready-workspaces, and select the Delete cluster option in the Actions drop-down menu on the top right.
Procedure: deleting the CodeReady Workspaces Operator
- Open the OpenShift web console.
- Navigate to the Operators > Installed Operators section in OpenShift Developer Perspective.
- In the row that displays information about the specific Red Hat CodeReady Workspaces Operator, uninstall the CodeReady Workspaces Operator using the drop-down menu illustrated as three horizontal dots situated on the right side of the screen.
- Accept the selected option, Also completely remove the Operator from the selected namespace.
-
Alternatively, uninstall the Red Hat CodeReady Workspaces Operator by clicking the displayed Red Hat CodeReady Workspaces Operator,
Eclipse Che, followed by selecting the Uninstall Operator option in the Actions drop-down menu on the top right.
6.1.2. Uninstalling CodeReady Workspaces using oc commands
This section provides instructions on how to uninstall a CodeReady Workspaces instance using oc commands.
Prerequisites
- CodeReady Workspaces was installed on an OpenShift cluster using OperatorHub.
-
OpenShift command-line tools (
oc) are installed on the local workstation.
Procedure
The following procedure provides command-line outputs as examples. Note that output in the user terminal may differ.
To uninstall a CodeReady Workspaces instance from a cluster:
Sign in to the cluster:
$ oc login -u <username> -p <password> <cluster_URL>
Switch to the project where the CodeReady Workspaces instance is deployed:
$ oc project <codeready-workspaces_project>Obtain the CodeReady Workspaces cluster name. The following shows a cluster named
red-hat-codeready-workspaces:$ oc get codeready-workspacescluster NAME AGE red-hat-codeready-workspaces 27m
Delete the CodeReady Workspaces cluster:
$ oc delete codeready-workspacescluster red-hat-codeready-workspaces
checluster.org.eclipse.che "red-hat-codeready-workspaces" deleted
Obtain the name of the CodeReady Workspaces cluster service version (CSV) module. The following detects a CSV module named
red-hat-codeready-workspaces.v2.0.0:$ oc get csv NAME DISPLAY VERSION REPLACES PHASE red-hat-codeready-workspaces.v2.0.0 Red Hat CodeReady Workspaces 2.0.0 red-hat-codeready-workspaces.v1.2.0 Succeeded
Delete the CodeReady Workspaces CSV:
$ oc delete csv red-hat-codeready-workspaces.v2.0.0
clusterserviceversion.operators.coreos.com "red-hat-codeready-workspaces.v2.0.0" deleted
6.2. Uninstalling CodeReady Workspaces after crwctl installation
This section describes how to uninstall an instance of Red Hat CodeReady Workspaces that was installed using the crwctl tool.
-
For CodeReady Workspaces installed using the
crwctl server:startcommand and the-nargument (custom namespace specified), use the-nargument also to uninstall the CodeReady Workspaces instance. -
For installations that did not use the
-nargument, the created namespace is namedworkspacesby default.
Prerequisites
-
CodeReady Workspaces was installed on an OpenShift cluster using
crwctl. -
OpenShift command-line tools (
oc) andcrwctlare installed on the local workstation. -
The user is logged in a CodeReady Workspaces cluster using
oc.
Procedure
Stop the Red Hat CodeReady Workspaces Server:
$ crwctl server:stop
Obtain the name of the CodeReady Workspaces namespace:
$ oc get checluster --all-namespaces -o=jsonpath="{.items[*].metadata.namespace}"Remove CodeReady Workspaces from the cluster:
$ crwctl server:delete -n <namespace>This removes all CodeReady Workspaces installations from the cluster.