
Chapter 2. Installing CodeReady Workspaces
This section describes how to obtain installation files for Red Hat CodeReady Workspaces and how to use them to deploy the product on an instance of OpenShift (such as Red Hat OpenShift Container Platform).
2.1. Downloading the CodeReady Workspaces deployment script
This procedure describes how to obtain and unpack the archive with the CodeReady Workspaces deployment shell script.
The CodeReady Workspaces deployment script uses the OpenShift Operator to deploy Red Hat Single Sign-On, the PostgreSQL database, and the CodeReady Workspaces server container images on an instance of Red Hat OpenShift Container Platform. The images are available in the Red Hat Container Catalogue.
Prerequisites
- Registered for the free Red Hat Developer Program.
- Logged in to the Red Hat Developer Portal.
Procedure
Change to a temporary directory. Create it if necessary. For example:
$ mkdir ~/tmp
$ cd ~/tmp
-
Download the archive with the deployment script and the
config.yamlfile using the browser with which you logged into the Red Hat Developer Portal: codeready-workspaces-1.0.2.GA-operator-installer.tar.gz. Unpack the downloaded archive and change to the created directory:
$ tar xvf codeready-workspaces-1.0.2.GA-operator-installer.tar.gz \
  && cd codeready-workspaces-operator-installer/
Next steps
Continue by configuring and running the deployment script. See Section 2.2, “Running the CodeReady Workspaces deployment script”.
2.2. Running the CodeReady Workspaces deployment script
The CodeReady Workspaces deployment script uses command-line arguments and the config.yaml file to populate a set of configuration environment variables for the OpenShift Operator used for the actual deployment.
Prerequisites
- Downloaded and unpacked the deployment script and the configuration file. See Section 2.1, “Downloading the CodeReady Workspaces deployment script”.
- A running instance of Red Hat OpenShift Container Platform 3.11 or OpenShift Dedicated 3.11. To install OpenShift Container Platform, see the Getting Started with OpenShift Container Platform guide. To install OpenShift Dedicated 3.11, see OKD documentation.
-
The OpenShift command-line client tool,
oc, is in the path. -
The user is logged in to the OpenShift instance (using, for example,
oc login). - CodeReady Workspaces is supported for use with Google Chrome 70.0.3538.110 (Official Build) (64bit).
2.2.1. Deploying CodeReady Workspaces with default settings
Run the following command:
$ ./deploy.sh --deploy \
--server-image=registry.access.redhat.com/codeready-workspaces/server:1.0 \
--operator-image=registry.access.redhat.com/codeready-workspaces/server-operator:1.0
NoteRun the
./deploy.sh --helpcommand to get a list of all available arguments. For a description of all the options, see Section 2.2.6, “Configuring environment variables”.The following message indicates that CodeReady Workspaces is getting installed:
[INFO]: Welcome to CodeReady Workspaces Installer
[INFO]: Found oc client in PATH
[INFO]: Checking if you are currently logged in...
[INFO]: Active session found. Your current context is: myproject/192-168-42-106:8443/developer
[INFO]: Creating namespace "codeready"
[INFO]: Namespace "codeready" successfully created
[INFO]: Creating installer service account
serviceaccount "codeready-apb" created
The CodeReady Workspaces successfully deployed and available at <URL> message confirms that the deployment is successful.
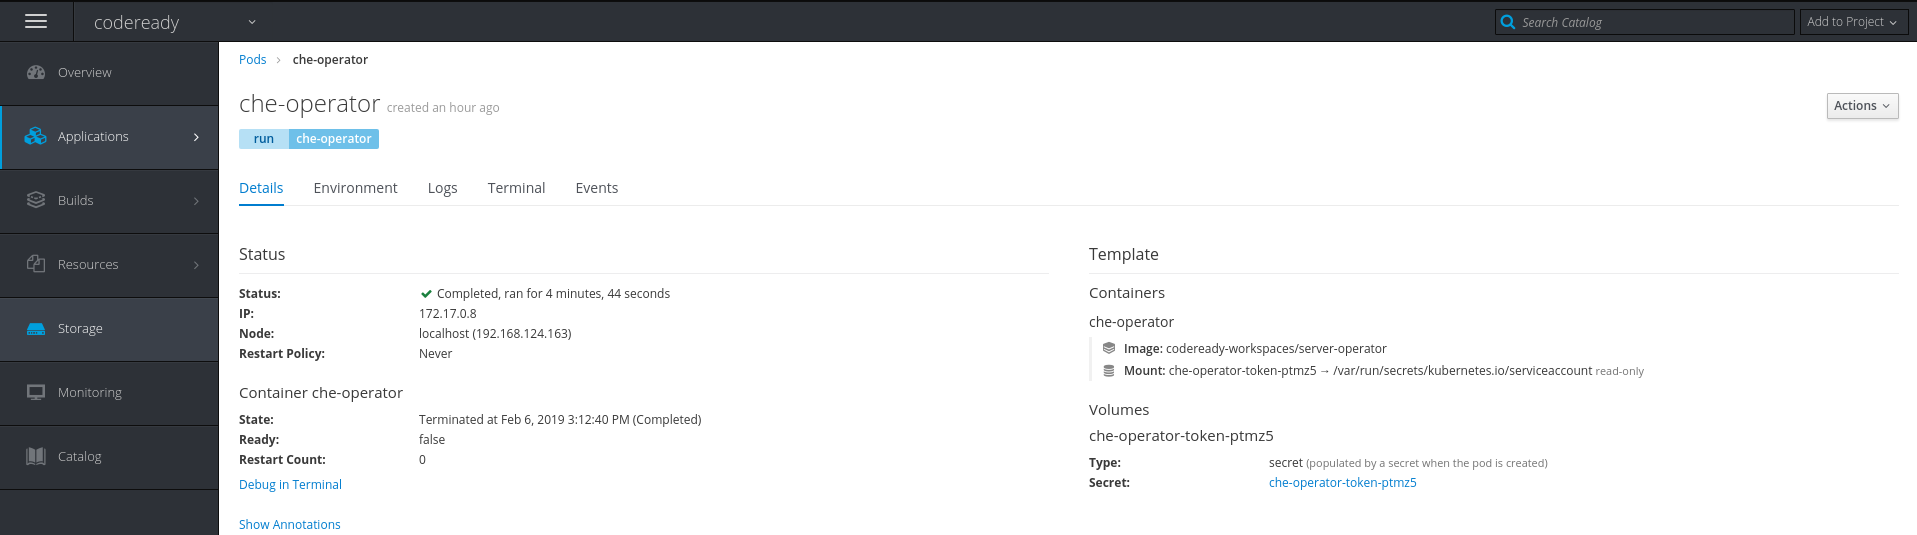
-
Open the OpenShift console in a web browser (
<OpenShift-IP>/console). - In the My Projects pane, click codeready.
- Click Applications > Pods.
- Click che-operator to see the pod running.
Figure 2.1. Pod for codeready shown running
2.2.2. Deploying CodeReady Workspaces with a self-signed certificate and OpenShift oAuth
To deploy CodeReady Workspaces with a self-signed certificate, specify its location for the deploy.sh script using the --cert option. Then build a custom stack container image with the certificate to launch workspaces.
Run the deployment script with the following options:
$ ./deploy.sh --deploy --enable-oauth \
  --cert=<path-to-the-certificate> \
  --server-image=registry.access.redhat.com/codeready-workspaces/server:1.0 \
  --operator-image=registry.access.redhat.com/codeready-workspaces/server-operator:1.0
Example:
$ ./deploy.sh --deploy --enable-oauth \
  --cert=/var/lib/origin/openshift.local.config/master/ca.crt \
  --server-image=registry.access.redhat.com/codeready-workspaces/server:1.0 \
  --operator-image=registry.access.redhat.com/codeready-workspaces/server-operator:1.0
2.2.3. Deploying CodeReady Workspaces with a public certificate
When deploying CodeReady Workspaces to a cluster configured with public certificates, the deployment script requires no additional parameters.
Run the deploy script as:
$ ./deploy.sh --deploy \
  --server-image=registry.access.redhat.com/codeready-workspaces/server:1.0 \
  --operator-image=registry.access.redhat.com/codeready-workspaces/server-operator:1.0
2.2.4. Deploying CodeReady Workspaces with external Red Hat SSO and Keycloak
To deploy with an external Red Hat SSO and enable a Keycloak instance, take the following steps:
Update the following values in the
config.yamlfile:CHE_EXTERNAL_KEYCLOAK: "true" 1 CHE_KEYCLOAK_AUTH__SERVER__URL: "<keycloak_url>" 2 CHE_KEYCLOAK_ADMIN_USERNAME: "<keycloak_admin_username>" 3 CHE_KEYCLOAK_ADMIN_PASSWORD: "<keycloak_admin_password>" 4 CHE_KEYCLOAK_REALM: "<realm>" 5 CHE_KEYCLOAK_CLIENT_ID: "<client_id>" 6
- 1
- Connect to an existing external Keycloak instance and skip deploying a dedicated Keycloak instance. The default value is
false. - 2
- Keycloak/Red Hat SSO
- 3
- Keycloak Administrator username. Not required when connecting to an existing realm.
- 4
- Keycloak Administrator password. Auto-generated if empty.
- 5
- Red Hat SSO realm.
- 6
- Red Hat SSO client ID.
Run the deploy script:
$ ./deploy.sh --deploy \
  --server-image=registry.access.redhat.com/codeready-workspaces/server:1.0 \
  --operator-image=registry.access.redhat.com/codeready-workspaces/server-operator:1.0
2.2.5. Deploying CodeReady Workspaces with external Red Hat SSO and PostgreSQL
To deploy with an external Red Hat SSO and PostgreSQL database, take the following steps:
Update the following values in the
config.yamlfile:CHE_EXTERNAL_KEYCLOAK: "true" 1 CHE_KEYCLOAK_AUTH__SERVER__URL: "<keycloak_url>" 2 CHE_KEYCLOAK_ADMIN_USERNAME: "<keycloak_admin_username>" 3 CHE_KEYCLOAK_ADMIN_PASSWORD: "<keycloak_admin_password>" 4 CHE_KEYCLOAK_REALM: "<realm>" 5 CHE_KEYCLOAK_CLIENT_ID: "<client_id>" 6
- 1
- Connect to an existing external Keycloak instance and skip deploying a dedicated Keycloak instance. The default value is
false. - 2
- Keycloak/Red Hat SSO
- 3
- Keycloak Administrator username. Not required when connecting to an existing realm.
- 4
- Keycloak Administrator password. Auto-generated if empty.
- 5
- Red Hat SSO realm.
- 6
- Red Hat SSO client ID.
Update the following values in the
config.yamlfile:CHE_EXTERNAL_DB: "true" 1 CHE_DB_HOSTNAME: "<postgres_service_ip>" 2 CHE_DB_PORT: "5432" 3 CHE_DB_DATABASE: "<database_name>" 4 CHE_JDBC_USERNAME: "<user_name>" 5 CHE_JDBC_PASSWORD: "<password>" 6 CHE_DB_ADMIN_PASSWORD: "<password>" 7
- 1
- Use an existing external Postgres database. The default value is
falsewhich means that a new instance of Postgres will be started. When set totrue, provide the connection details and ensure that the database user is aSUPERUSER. - 2
- Database hostname from Applications → Services → Cluster IP.
- 3
- Database port.
- 4
- Database name.
- 5
- Database username.
- 6
- Database password.
- 7
- Your database administrator password.
Run the deploy script:
$ ./deploy.sh --deploy \
--server-image=registry.access.redhat.com/codeready-workspaces/server:1.0 \
--operator-image=registry.access.redhat.com/codeready-workspaces/server-operator:1.0
2.2.6. Configuring environment variables
The config.yaml file contains default values for the installation parameters. Those parameters that take environment variables as values can be overridden from a command line. Not all installation parameters are available as flags.
Before running the deployment script in a fast mode, review the config.yaml file. Run the ./deploy.sh --help command to get a list of all available arguments.
The following is an annotated example of the config.yaml file with all available parameters:
General Che settings:
CHE_FLAVOR: 				"codeready"	1
CHE_IMAGE: 				""		2
CHE_TLS_SUPPORT: 			""		3
CHE_INFRA_KUBERNETES_PVC_STRATEGY: 	""		4
CHE_INFRA_KUBERNETES_PVC_QUANTITY: 	""		5
CHE_SELF_SIGNED_CERT: 			""		6
CHE_OPENSHIFT_OAUTH: 			""		7
CHE_OPENSHIFT_API_URL: 			""		8
CHE_WORKSPACE_PLUGIN_REGISTRY_URL: 	""		9
CHE_UPDATE_CHE_ADMIN_PASSWORD: 		""		10
- 1
- Che flavor. Upstream
cheor Red Hatcodeready. Defaults toche. - 2
- Docker image for Che server. Defaults to
eclipse/che-server:latest. Keep blank unless you need to deploy your custom image. - 3
- TLS support in Che. Defaults to
false. - 4
- PVC strategy for Che workspaces. Defaults to 'common' where all workspaces use one shared PVC. A 'unique' strategy implies that each workspace gets own PVC.
- 5
- Workspace PVC claim. Defaults to
1Gi. It is recommended to increase it when using shared PVC. - 6
- cat root ca.crt | base64 -w 0
- 7
- Enable login with OpenShift in Codeready Workspaces. OpenShift only. Defaults to
false. - 8
- OpenShift API endpoint URL. Required only when
OPENSHIFT_OAUTHistrue. Auto detected. - 9
- Plugin registry URL. Defaults to
https://che-plugin-registry.openshift.io. - 10
- Asks for password update at first login as Che administrator user. Defaults to
true, that is, you will be asked to update password.
Che Proxy settings:
CHE_WORKSPACE_MASTER_PROXY_JAVA_OPTS: 	""	1
CHE_WORKSPACE_PROXY_JAVA_OPTS: 		""	2
CHE_WORKSPACE_HTTP__PROXY: 		""	3
CHE_WORKSPACE_HTTPS__PROXY: 		""	4
CHE_WORKSPACE_NO__PROXY: 		""	5
- 1
- Proxy settings for workspace master, for example:
Dhttp.proxyHost=host-Dhttp.proxyPort=8080 -Dhttps.proxyHost=host -Dhttps.proxyPort=8080 -Dhttp.nonProxyHosts='localhost|127.0.0.1|*.foo.com' - 2
- Proxy settings for workspace JVM, Maven, and workspace agent:
Dhttp.proxyHost=host,Dhttp.proxyPort=8080,Dhttps.proxyHost=host,Dhttps.proxyPort=8080,Dhttp.nonProxyHosts='localhost|127.0.0.1|*.foo.com' - 3
- http proxy for workspaces. Example:
http://myproxy:8051 - 4
- https proxy for workspaces. Example:
http://myproxy:8051 - 5
- no_proxy for workspaces. Example:
localhost,10.2.34.54
Database settings:
CHE_EXTERNAL_DB: 	""		1
CHE_DB_HOSTNAME: 	""		2
CHE_DB_PORT: 		"5432"		3
CHE_DB_DATABASE: 	""		4
CHE_JDBC_USERNAME: 	""		5
CHE_JDBC_PASSWORD: 	""		6
CHE_DB_ADMIN_PASSWORD: 	""		7
- 1
- Use external existing Postgres database. Defaults to
falsewhich means a new instance of Postgres will be started. When set totrue, provide connection details and ensure that the database user is aSUPERUSER - 2
- Database hostname
- 3
- Database port
- 4
- DB database
- 5
- Database username
- 6
- Database password
- 7
- Your databse administrator password
Keycloak settings:
CHE_EXTERNAL_KEYCLOAK: 		""		1
CHE_KEYCLOAK_AUTH__SERVER__URL: ""		2
CHE_KEYCLOAK_ADMIN_USERNAME: 	""		3
CHE_KEYCLOAK_ADMIN_PASSWORD: 	"admin"		4
CHE_KEYCLOAK_REALM: 		""		5
CHE_KEYCLOAK_CLIENT__ID: 	""		6
- 1
- Connect to an existing external Keycloak and skip deploying a dedicated Keycloak instance. Defaults to
false. - 2
- Keycloak or Red Hat SSO.
- 3
- Keyloak administrator username. Not required when connecting to an existing realm.
- 4
- Keycloak administrator password. Auto-generated if empty.
- 5
- Red Hat SSO realm.
- 6
- Red Hat SSO client ID
Operator settings:
WAIT_DEPLOYMENT_TIMEOUT: "" 1- 1
- wait timeout for an Operator to watch deployments. Defaults to 420 seconds.
2.3. Viewing CodeReady Workspaces installation logs
You can view the installation logs in the terminal or from the OpenShift console.
2.3.1. Viewing CodeReady Workspaces installation logs in the terminal
To view the installation logs on the terminal, take the following steps:
To obtain the names of the pods, run:
$ oc get pods
To view the logs for the pod, run:
$ oc logs --follow=false <log-name>The following is an example output:
time="2019-02-06T09:38:52Z" level=info msg="Provisioning resources in pod postgres-7dd4d9cd8f-dwk77"
time="2019-02-06T09:38:52Z" level=info msg="Provisioning completed"
time="2019-02-06T09:38:53Z" level=info msg="Waiting for deployment keycloak. Default timeout: 420 seconds"
time="2019-02-06T09:41:02Z" level=info msg="keycloak successfully deployed"
time="2019-02-06T09:41:02Z" level=info msg="Provisioning resources in pod keycloak-66f64ddd49-xmsk7"
time="2019-02-06T09:41:11Z" level=info msg="Provisioning completed"
time="2019-02-06T09:41:11Z" level=info msg="Waiting for deployment che. Default timeout: 420 seconds"
time="2019-02-06T09:42:39Z" level=info msg="che successfully deployed"
time="2019-02-06T09:42:39Z" level=info msg="Che is available at: http://codeready-codeready.192.168.42.192.nip.io"
time="2019-02-06T09:42:39Z" level=info msg="Deployment took 4m43.240319357s"
2.3.2. Viewing CodeReady Workspaces installation logs in the OpenShift console
To view installation logs in OpenShift console, take the following steps:
-
Navigate to
<OpenShift-IP>/console. - In the My Projects pane, click codeready.
- Click Applications > Pods. Click che-operator.
Click Logs and click Follow.
time="2019-02-06T09:38:52Z" level=info msg="Provisioning completed"
time="2019-02-06T09:38:53Z" level=info msg="Waiting for deployment keycloak. Default timeout: 420 seconds"
time="2019-02-06T09:41:02Z" level=info msg="keycloak successfully deployed"
time="2019-02-06T09:41:02Z" level=info msg="Provisioning resources in pod keycloak-66f64ddd49-xmsk7"
time="2019-02-06T09:41:11Z" level=info msg="Provisioning completed"
time="2019-02-06T09:41:11Z" level=info msg="Waiting for deployment che. Default timeout: 420 seconds"
time="2019-02-06T09:42:39Z" level=info msg="che successfully deployed"
time="2019-02-06T09:42:39Z" level=info msg="Che is available at: http://codeready-codeready.192.168.42.192.nip.io "
time="2019-02-06T09:42:39Z" level=info msg="Deployment took 4m43.240319357s"
2.4. Viewing CodeReady Workspaces operation logs
After the CodeReady Workspaces pods are created, you can view the operation logs of the application in the terminal or through the OpenShift console.
2.4.1. Viewing CodeReady Workspaces operation logs in the terminal
To view the operation logs on the terminal, run the following commands:
To view the names of the pods, run:
$ oc get pods
This command shows the pods that have been created:
NAME                        READY     STATUS      RESTARTS   AGE
che-58d8456f55-89pvw        1/1       Running     0          1h
che-operator                0/1       Completed   0          1h
keycloak-66f64ddd49-xmsk7   1/1       Running     0          1h
postgres-7dd4d9cd8f-dwk77   1/1       Running     0          1h
To view the operation log for a specific pod, run:
$ oc logs --follow=false <log-name>The output of this command for the che-58d8456f55-89pvw pod (as an example) is as follows:
2019-02-06 09:42:36,818[ost-startStop-1]  [INFO ] [o.a.c.startup.HostConfig 957]        - Deploying web application archive [/home/jboss/codeready/tomcat/webapps/dashboard.war]
2019-02-06 09:42:37,976[ost-startStop-1]  [INFO ] [o.a.c.startup.HostConfig 1020]       - Deployment of web application archive [/home/jboss/codeready/tomcat/webapps/dashboard.war] has finished in [1,158] ms
2019-02-06 09:42:37,976[ost-startStop-1]  [INFO ] [o.a.c.startup.HostConfig 957]        - Deploying web application archive [/home/jboss/codeready/tomcat/webapps/swagger.war]
2019-02-06 09:42:38,490[ost-startStop-1]  [INFO ] [o.a.c.startup.HostConfig 1020]       - Deployment of web application archive [/home/jboss/codeready/tomcat/webapps/swagger.war] has finished in [513] ms
2019-02-06 09:42:38,490[ost-startStop-1]  [INFO ] [o.a.c.startup.HostConfig 957]        - Deploying web application archive [/home/jboss/codeready/tomcat/webapps/workspace-loader.war]
2019-02-06 09:42:38,620[ost-startStop-1]  [INFO ] [o.a.c.startup.HostConfig 1020]       - Deployment of web application archive [/home/jboss/codeready/tomcat/webapps/workspace-loader.war] has finished in [130] ms
2019-02-06 09:42:38,623[main]             [INFO ] [o.a.c.http11.Http11NioProtocol 588]  - Starting ProtocolHandler ["http-nio-8080"]
2019-02-06 09:42:38,646[main]             [INFO ] [o.a.catalina.startup.Catalina 700]   - Server startup in 34592 ms
For operation logs of the other pods, run:
-
For the keycloak-66f64ddd49-xmsk7 pod:
oc logs --follow=false keycloak-66f64ddd49-xmsk7 -
For the postgres-7dd4d9cd8f-dwk77 pod:
oc logs --follow=false postgres-7dd4d9cd8f-dwk77 -
For the che-operator pod:
oc logs --follow=false che-operator
-
For the keycloak-66f64ddd49-xmsk7 pod:
2.4.2. Viewing CodeReady Workspaces operation logs in the OpenShift console
To view the operation logs in the OpenShift console, take the following steps:
-
Navigate to
<OpenShift-IP>/console. - In the My Projects pane, click codeready.
- In the Overview tab, click the application that you want to view the logs for.
- In the Deployments > <application-name> window, click the name of the pod.
- Scroll down to the Pods section and click the <pod-name>.
Click Logs
Figure 2.2. Clicking View Log

Click Follow to follow the log.
09:41:00,260 INFO  [org.jboss.resteasy.resteasy_jaxrs.i18n] (ServerService Thread Pool -- 62) RESTEASY002220: Adding singleton resource org.keycloak.services.resources.RealmsResource from Application class org.keycloak.services.resources.KeycloakApplication
09:41:00,260 INFO  [org.jboss.resteasy.resteasy_jaxrs.i18n] (ServerService Thread Pool -- 62) RESTEASY002220: Adding singleton resource org.keycloak.services.resources.admin.AdminRoot from Application class org.keycloak.services.resources.KeycloakApplication
09:41:00,260 INFO  [org.jboss.resteasy.resteasy_jaxrs.i18n] (ServerService Thread Pool -- 62) RESTEASY002210: Adding provider singleton org.keycloak.services.util.ObjectMapperResolver from Application class org.keycloak.services.resources.KeycloakApplication
09:41:00,260 INFO  [org.jboss.resteasy.resteasy_jaxrs.i18n] (ServerService Thread Pool -- 62) RESTEASY002220: Adding singleton resource org.keycloak.services.resources.RobotsResource from Application class org.keycloak.services.resources.KeycloakApplication
09:41:00,260 INFO  [org.jboss.resteasy.resteasy_jaxrs.i18n] (ServerService Thread Pool -- 62) RESTEASY002220: Adding singleton resource org.keycloak.services.resources.ServerVersionResource from Application class org.keycloak.services.resources.KeycloakApplication
2.5. Configuring CodeReady Workspaces to work behind the HTTPS proxy server
This procedure describes how to configure CodeReady Workspaces for use in a deployment behind a proxy. To access external resources (for example, to download Maven artifacts to build Java projects), change the workspace configuration.
Prerequisites
- Installed CodeReady Workspaces
-
Deployment parameters in
config.yamlreflecting proxy set up
Procedure
For example, to build a Java project, delete HTTPS-proxy related parameters from the JAVA_OPTS value. Edit the HTTPS-proxy related parameters in the che configuration map:
- In the OpenShift web console, click Resources > Config Maps > che.
- Click Actions > Edit YAML.
-
In the editor, navigate to the
JAVA_OPTSsection. Delete the following HTTPS-proxy related parameters from the
JAVA_OPTSvalues:-Dhttps.proxyHost -Dhttps.proxyPort -Dhttps.nonProxyHosts
- To re-deploy CodeReady Workspaces from OpenShift web console, click Applications > Deployments > codeready > Deploy.