
Chapter 2. Maven basics in CodeReady Studio
Maven provides a standardized build system for application development, and facilitates fetching dependencies from one or more repositories.
Root Maven projects can serve as aggregators for multiple Maven modules (sub-projects). For each module that is part of a maven project, a <module> entry is added to the project’s pom.xml file. A pom.xml contains <module> entries and is often referred to as an aggregator pom.
When modules are included into a project it is possible to execute Maven goals across all modules by a single command issued from the parent project directory.
2.1. Creating a new Maven project
The following section describes how to create a new Maven project in CodeReady Studio.
Procedure
- Start CodeReady Studio.
Click → → .
The Show View window appears.
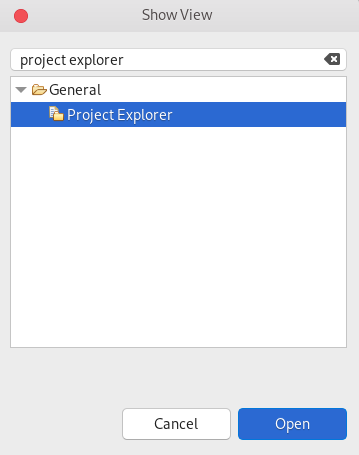
- Enter Project Explorer in the search field.
- Select Project Explorer.
Click .
The Project Explorer view appears.
Press Ctrl+N.
The Select a wizard window appears.
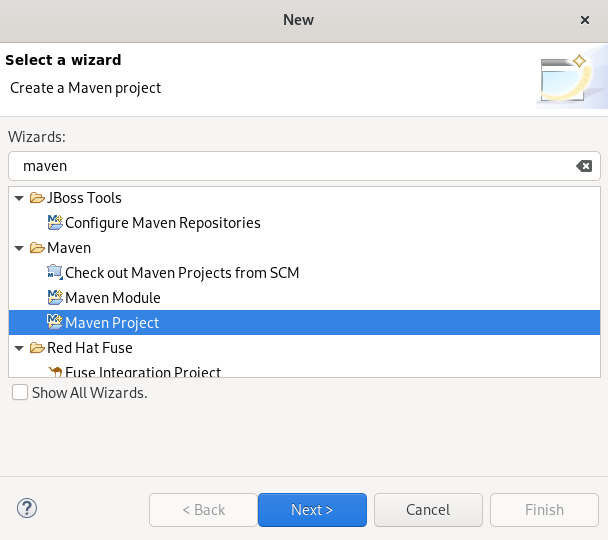
- Enter Maven in the Wizards field.
- Select Maven Project.
Click .
The New Maven Project window appears.
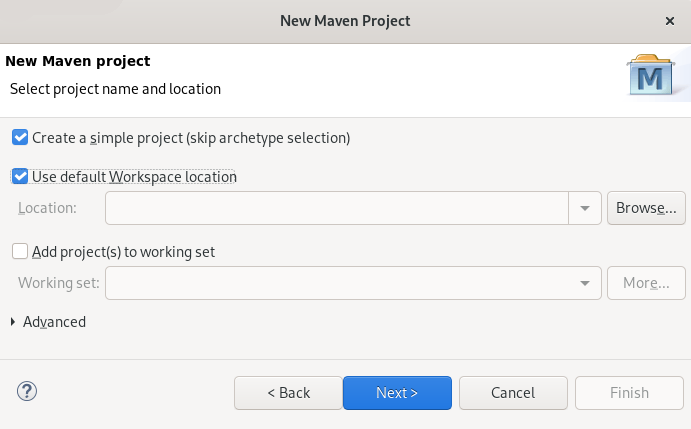
Select the Create a simple project check box.
NoteBy selecting the Create a simple project check box you are skipping the archetype selection and the project type is automatically set to Project Object Model (POM), which is a requirement for multi-module Maven projects.
To create a standalone Maven project instead, clear the Create a simple project check box and follow the onscreen instructions to set the packaging option to
jarorwar.- Click to select the workspace location.
Click .
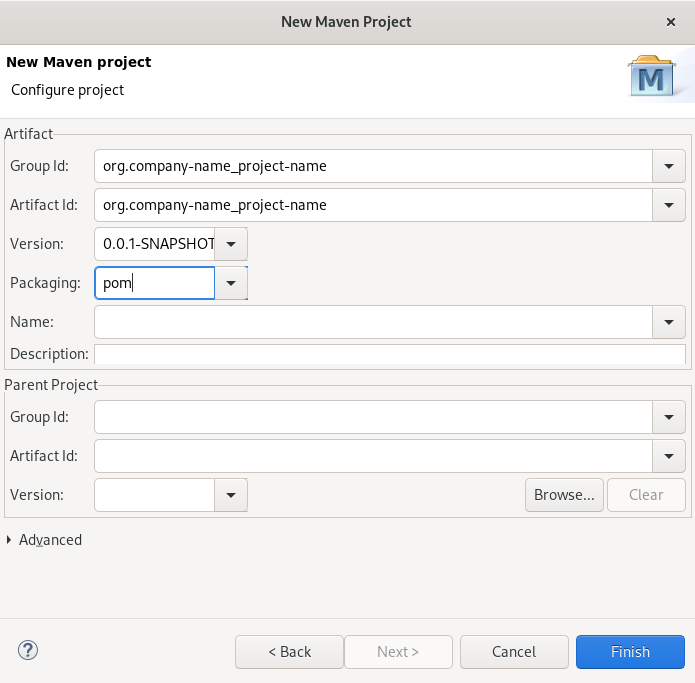
Enter the group ID and the artifact ID.
NoteThe values for the IDs cannot include spaces or special characters. The only special characters allowed are periods (
.), underscores (_), and dashes (-). An example of a typical group ID or artifact ID isorg.company-name_project-name.Optionally, you can name your project and add a description.
- Set Packaging to pom, jar or war.
- Click .
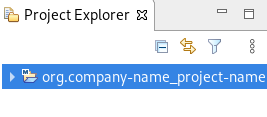
Your newly created Maven project is now listed in the Project Explorer view.
2.2. Importing existing Maven projects
The following section describes how to import existing Maven projects into CodeReady Studio.
2.2.1. Importing an existing locally stored Maven project
The following section describes how to import an existing locally stored Maven project into CodeReady Studio.
Procedure
- Start CodeReady Studio.
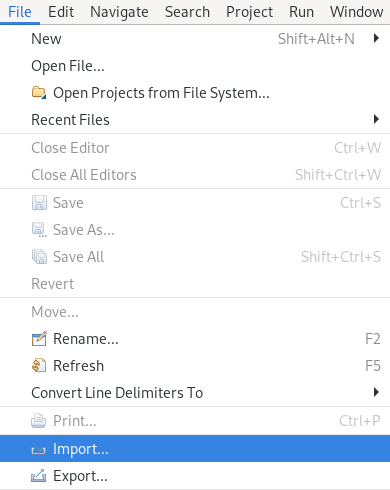
Click → .
The Import window appears.

- Enter Maven in the Select an import wizard field.
- Select Existing Maven Projects.
Click .
The Import Maven Project window appears.
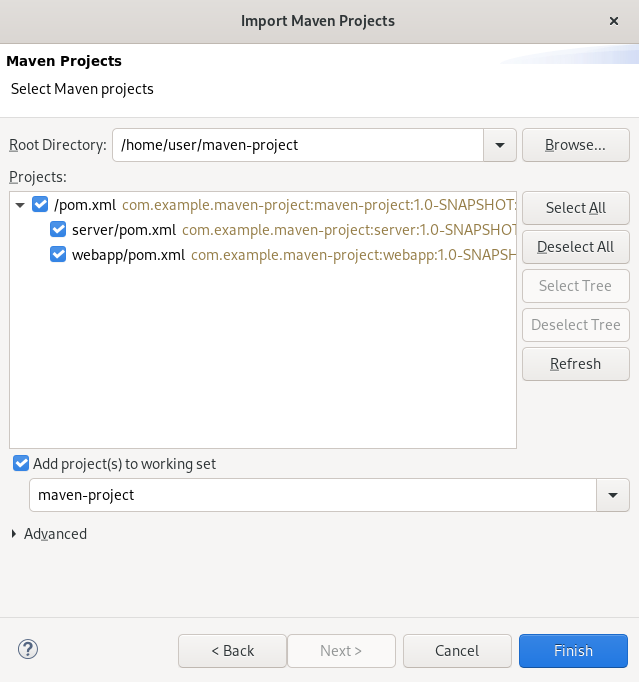
- Click to locate your Maven project.
- Select the Add project(s) to working set check box.
- Click .
Your local Maven project is now listed in the Project Explorer view.
2.2.2. Importing an existing remotely stored Maven project
The following section describes how to import an existing remotely stored Maven project into CodeReady Studio.
Procedure
- Start CodeReady Studio.
- Open Git Perspective.
Click the Clone a Git repository and import existing Maven projects icon.

The Check out as Maven project from SCM window appears.
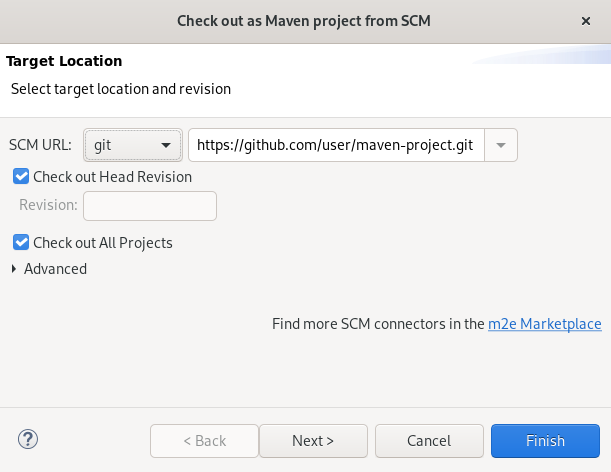
- Add the address for the source repository to the SCM URL field.
Click .
The Select Project Location window appears.
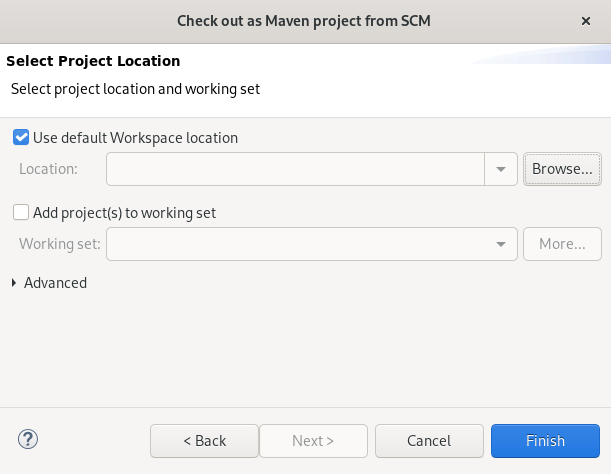
- Click to select the workspace location.
- Click .
Your remote Maven project is now listed in the Git Repositories view.
2.3. Creating a new Maven module
The following section describes how to create a new Maven module.
Prerequisites
An existing Maven project.
For more information on how to create a Maven project, see Section 2.1, “Creating a new Maven project”.
Procedure
- Start CodeReady Studio.
Press Ctrl+N.
The Select a wizard window appears.
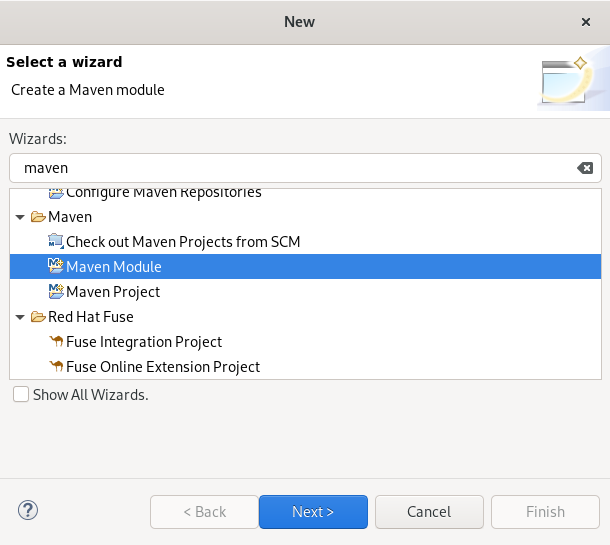
- Enter Maven in the Wizards field.
- Select Maven Module.
Click .
The New Maven Module window appears.
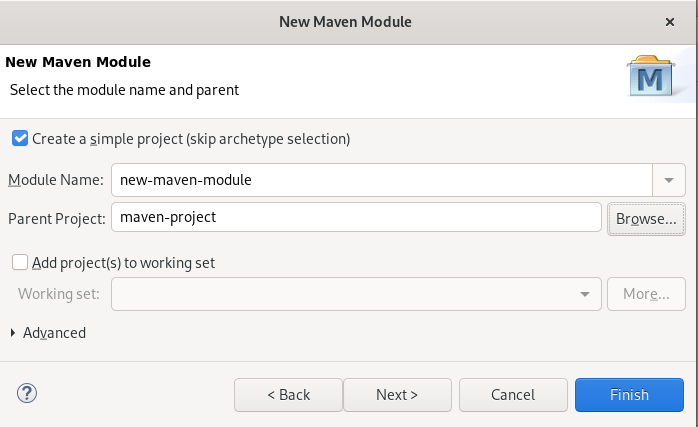
Select the Create a simple project check box.
NoteBy selecting the Create a simple project check box you are skipping the archetype selection and the project type is automatically set to Project Object Model (POM), which is a requirement for multi-module Maven projects.
To create a standalone Maven project instead, clear the Create a simple project check box and follow the onscreen instructions to set the packaging option to
jarorwar.- Name your module.
- Click to select the parent project.
Click .
The Configure Project window appears.
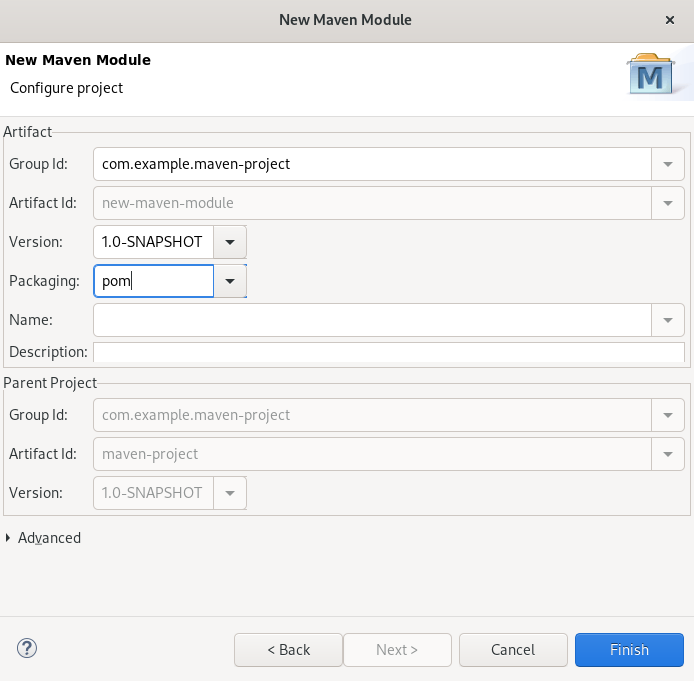
Set Packaging to pom, jar or war.
Optionally, you can name your module and add a description.
- Click .
Your newly created Maven module is now listed below your Maven project.
2.4. Adding a Maven dependency to a Maven project
The following section describes how to add a Maven dependency to a Maven project in CodeReady Studio.
Prerequisites
An existing Maven project.
For more information on how to create a Maven project, see Section 2.1, “Creating a new Maven project”.
Procedure
- Start CodeReady Studio.
- Open Project Explorer.
Right-click your Maven → → .
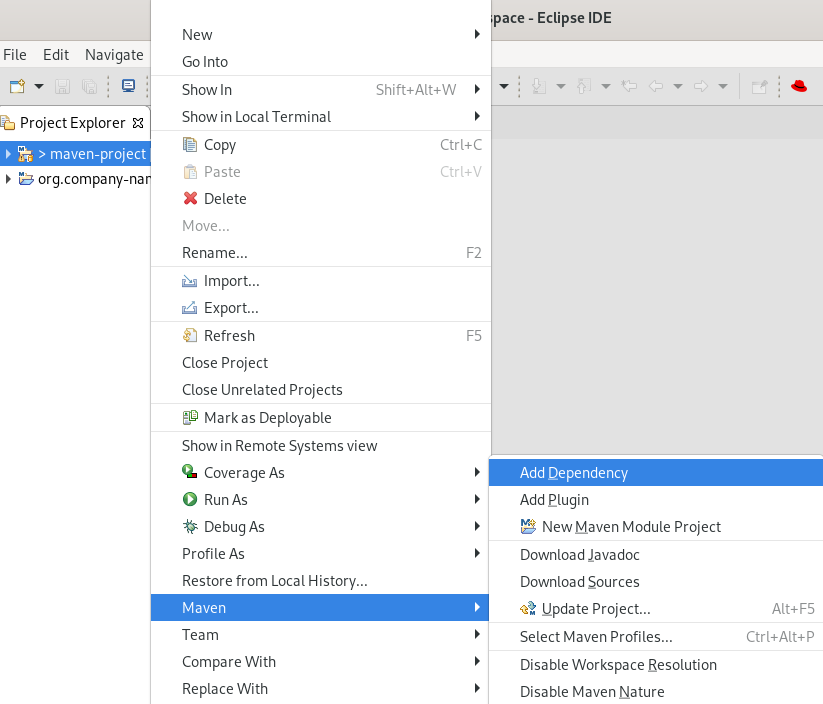
The Add Dependency window appears.
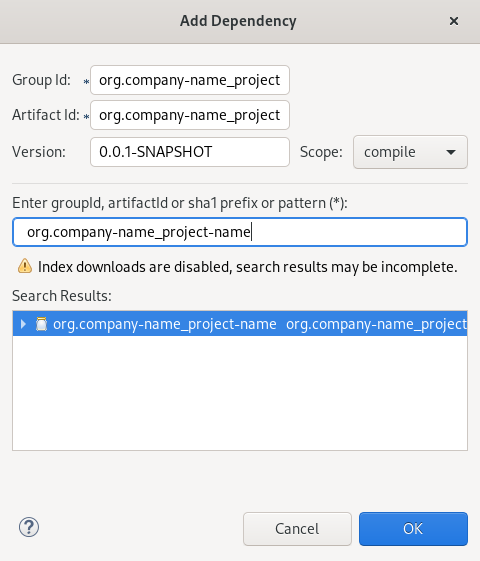
Enter the group ID or the artifact ID in the Enter groupId, artifactId or sha1 prefix or pattern field.
The fields above are populated automatically.
- Click .
The dependency is now added to the pom.xml file of your project.
2.5. Adding Maven support to an existing non-Maven project
The following section describes how to add Maven support to an application created without Maven support.
- Start CodeReady Studio.
- Open Project Explorer.
Right-click your → → .
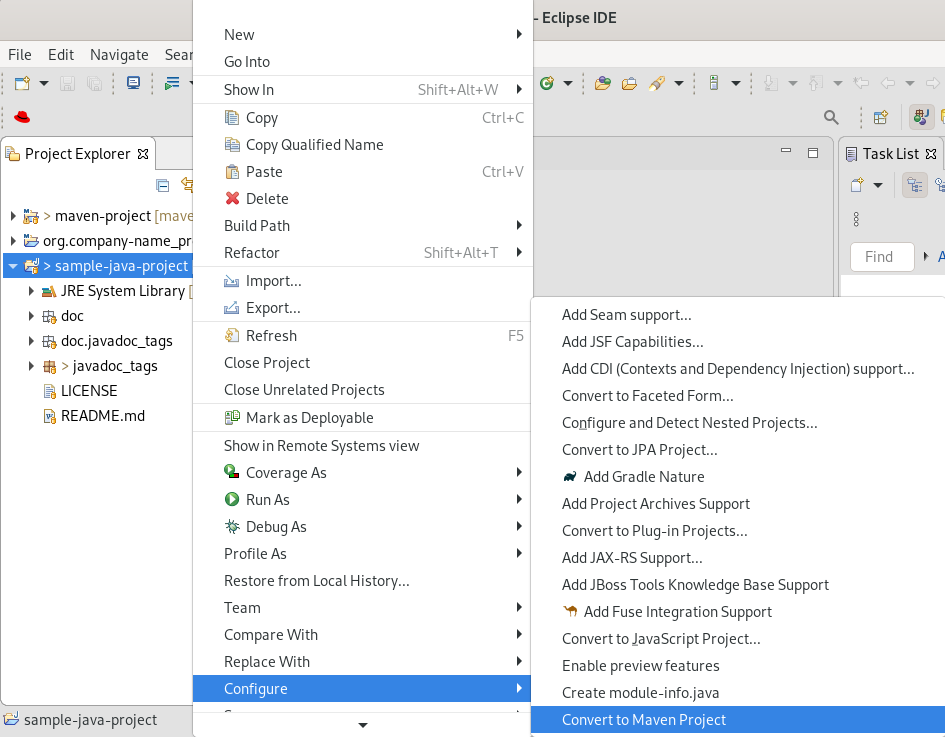
The Create a new POM window appears.
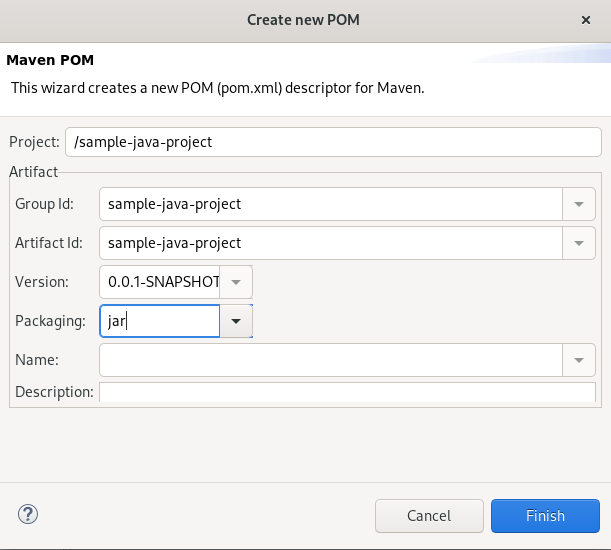
All fields are populated automatically. If you want to change the group ID or the artifact ID, note that the values cannot include spaces or special characters. The only special characters allowed are periods (
.), underscores (_), and dashes (-). An example of a typical group ID or artifact ID is org.company-name_project-name.Click .
Your newly generated
pom.xmlfile appears under your Java project.
2.6. Additional resources
- For more information on how to use the Maven software project management and comprehension tool, see the JBoss Community Archive.