
Chapter 1. Git basics in CodeReady Studio
CodeReady Studio includes Git Perspective, which allows developers to manage their Git repositories from a graphical interface. The following section outlines the basic workflow of a Git project in Git Perspective and describes how to accomplish the most common Git-related tasks.
1.1. Setting up Git Perspective
The following section describes how to open Git Perspective in CodeReady Studio.
Procedure
- Start CodeReady Studio.
Click → → → .
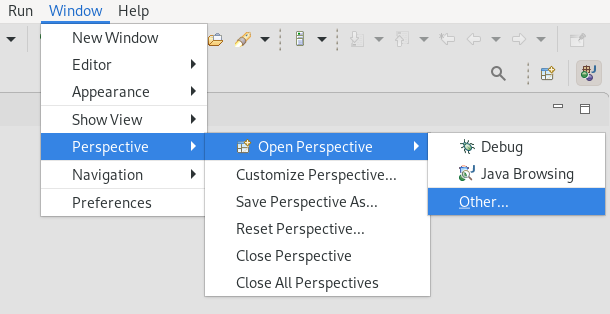
The Open Perspective window appears.

- Select Git.
Click .
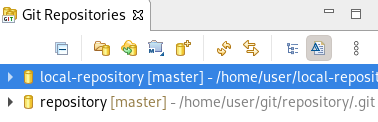
The Git Repositories view appears.

1.2. Managing repositories in Git Perspective
1.2.1. Creating a new Git repository
The following section describes how to use Git Perspective to create a new Git repository.
Procedure
- Start CodeReady Studio.
- Open Git Perspective.
Click the Create a new Git Repository and add it to this view icon.

The Create a Git Repository window appears.
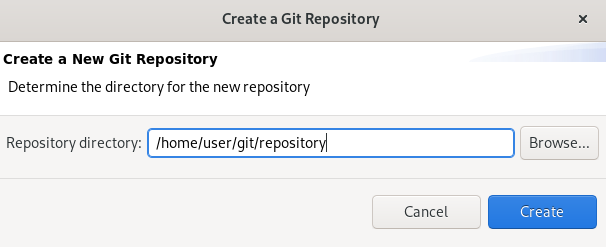
The path to the default Repository directory is generated automatically. Choose the path where you want your repository to be stored at and continue with the repository creation.
Optionally, you can select the Create as bare repository check box.
NoteBare repositories are recommended for central repositories, not for development environments. They do not contain a working or checked out copy of any source file. This prevents editing files and committing changes. Additionally, they store the Git revision history for your repository in the
rootfolder instead of a.gitsub-folder.Click .
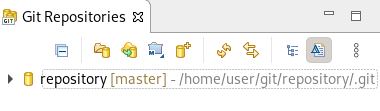
A new Git repository is created on your local machine and is now listed in the Git Repositories view.
1.2.2. Adding an existing local Git repository
The following section describes how to use Git Perspective to add a local Git repository to CodeReady Studio.
Procedure
- Start CodeReady Studio.
- Open Git Perspective.
Click the Add an existing local Git Repository to this view icon.

The Add Git Repositories window appears.
Click to locate your local Git repository.
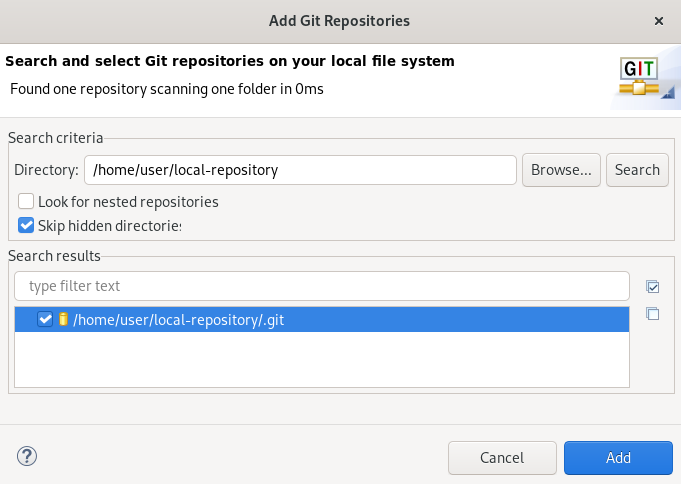
-
In the Search results field, select the checkbox displaying the path to the
.gitfile. - Click .
Your local repository is now listed in the Git Repositories view.
1.2.3. Cloning an existing Git repository
The following section describes how to use Git Perspective to create a local clone of a repository that already exists online (GitHub, GitLab).
Procedure
- Start CodeReady Studio.
- Open Git Perspective.
Click the Clone a Git Repository and add the clone to this view icon.

The Clone Git Repository window appears.
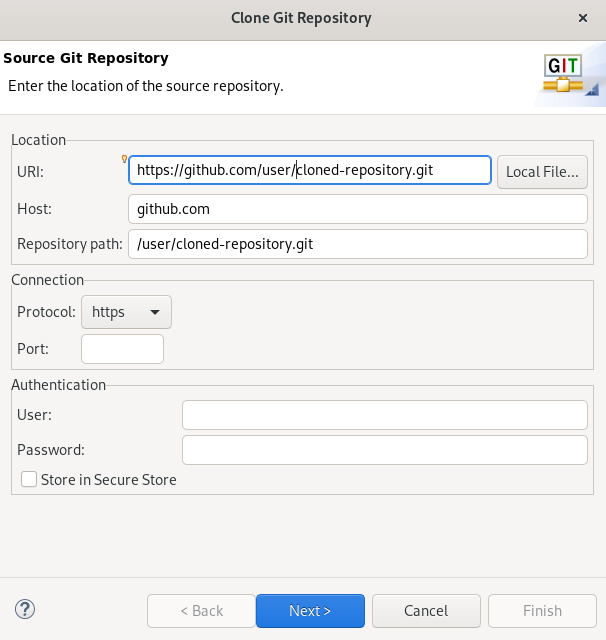
Add the address for the source repository to the URI field.
The Host and Repository path fields are populated automatically.
- Click .
- Select the branches you want to clone.
- Click .
Ensure that the Directory path and Initial branch are set correctly.

- Click .
Your cloned repository is now listed in the Git Repositories view of CodeReady Studio.

1.2.4. Adding a remote for the repository
After setting up your repository in Git Perspective for the first time, add a remote for the repository. This is a one-time set up step for newly created or added repositories.
The following section describes how to use Git Perspective to set up the remote for your repository.
Procedure
- Start CodeReady Studio.
- Open Git Perspective.
Expand your repository.

Right-click → .
The New Remote window appears.
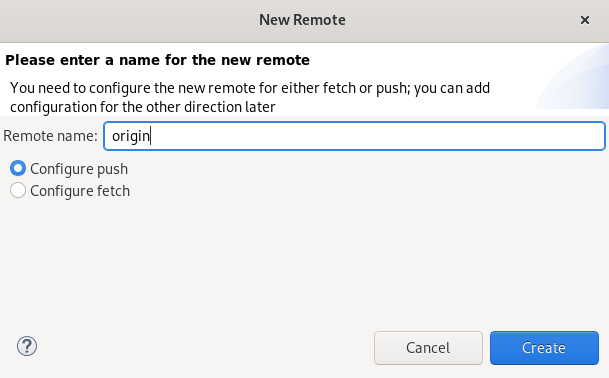
- Name your remote.
- Ensure that Configure push is selected.
Click .
The Configure Push window appears.

Click .
The Select a URI window appears.
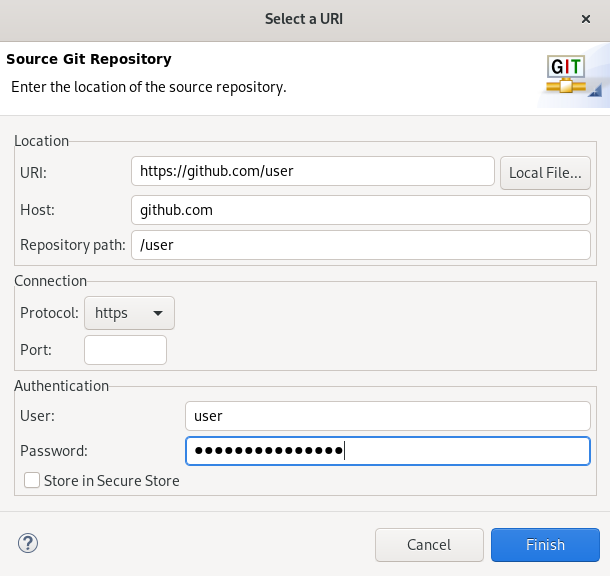
Add the URI, username and password for the source repository.
The Host and Repository path fields are populated automatically.
- Click .
- Click .
Your newly added remote is now listed in the Git Repositories view in CodeReady Studio.

1.3. Managing branches in Git Perspective
1.3.1. Creating a new branch
The following section describes how to use Git Perspective to create a new branch.
Procedure
- Start CodeReady Studio.
- Open Git Perspective.
- Expand your repository.
Under → , right-click → .

The Create Branch window appears.
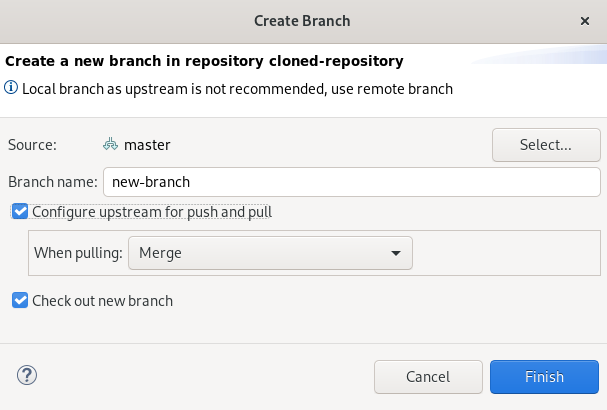
- Click to pick the source of the new branch.
- Name your branch.
- Select the Configure upstream for push and pull and Checkout new branch check boxes.
- Select an option in the When pulling field.
- Click .
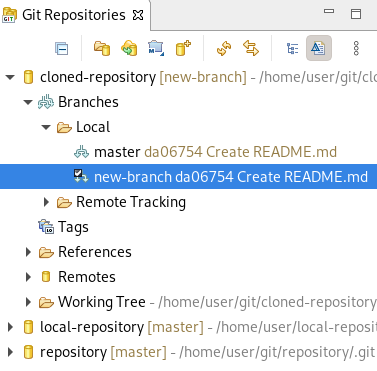
Your newly added branch is now listed in the Git Repositories view under → in CodeReady Studio.
1.3.2. Working in the branch
The following section describes how to open a built-in terminal in Git Perspective so you can work on the created branch.
Procedure
- Start CodeReady Studio.
- Open Git Perspective.
Press Shift+Ctrl+Alt+T.
The Launch Terminal window appears.
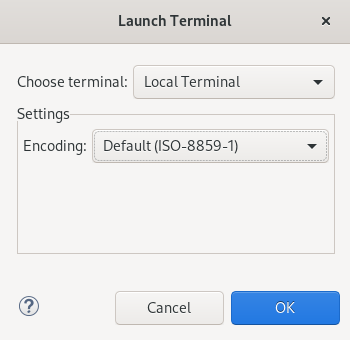
- Choose Local Terminal.
- Set Encoding to Default (ISO-8859-1).
Click .
The Terminal window now displays the command-line terminal.
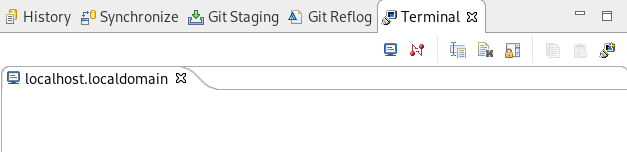
Note that by default the current working directory is the home directory of your current user.
1.3.3. Updating your local repository
To avoid merge conflicts, update your local repository before merging your changes, especially when working in a shared repository.
To update your local repository, pull changes from the remote repository and merge them into your local repository.
Procedure
- Start CodeReady Studio.
- Open Git Perspective.
Right-click your → .
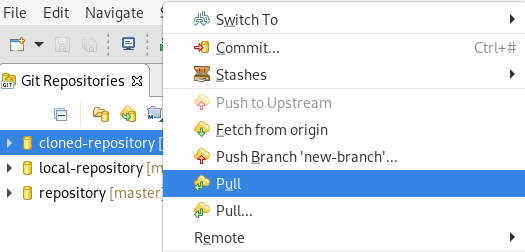
The Pull Results window appears.
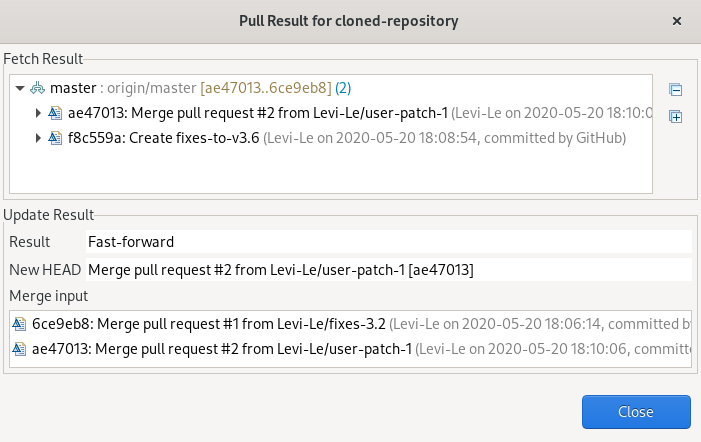
- Click .
Now the changes from the remote repository are merged into your local repository.
1.4. Committing and pushing changes
The following section describes how to commit and push changes in CodeReady Studio.
Procedure
- Start CodeReady Studio.
- Open Git Perspective.
Right-click your → .
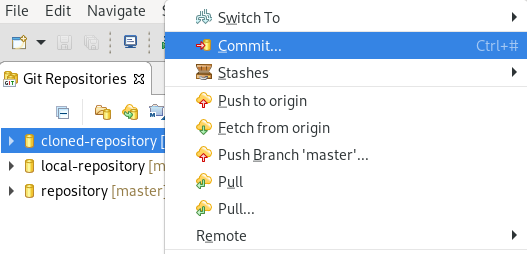
The Git Staging view appears.

- Select the changes you want to stage.
- Click the Add selected files to the index icon to stage the changes.
Add a commit message to the Commit Message field.
Author and Committer fields are populated automatically.
- Click to commit your changes, or to commit your changes and push them to the remote repository.
Note that when selecting the Commit and Push option you are prompted to enter the repository address, your access username, and password for the repository.