
Chapter 6. Ceph user management
As a storage administrator, you can manage the Ceph user base by providing authentication, and access control to objects in the Red Hat Ceph Storage cluster.
6.1. Prerequisites
- A running Red Hat Ceph Storage cluster.
- Access to a Ceph Monitor or Ceph client node.
Cephadm manages the client keyrings for the Red Hat Ceph Storage cluster as long as the clients are within the scope of Cephadm. Users should not modify the keyrings that are managed by Cephadm, unless there is troubleshooting.
6.2. Ceph user management background
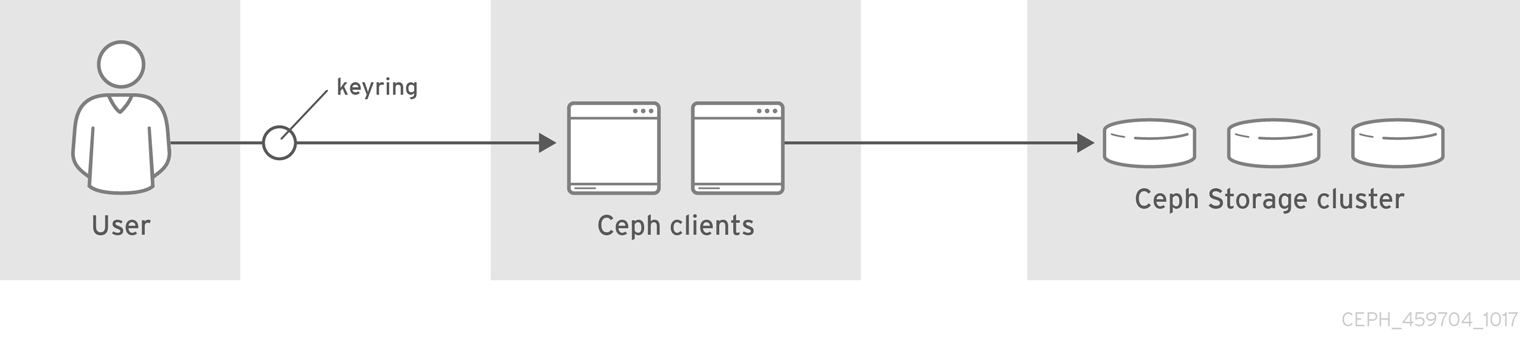
When Ceph runs with authentication and authorization enabled, you must specify a user name. If you do not specify a user name, Ceph will use the client.admin administrative user as the default user name.
Alternatively, you may use the CEPH_ARGS environment variable to avoid re-entry of the user name and secret.
Irrespective of the type of Ceph client, for example, block device, object store, file system, native API, or the Ceph command line, Ceph stores all data as objects within pools. Ceph users must have access to pools in order to read and write data. Additionally, administrative Ceph users must have permissions to execute Ceph’s administrative commands.
The following concepts can help you understand Ceph user management.
Storage Cluster Users
A user of the Red Hat Ceph Storage cluster is either an individual or as an application. Creating users allows you to control who can access the storage cluster, its pools, and the data within those pools.
Ceph has the notion of a type of user. For the purposes of user management, the type will always be client. Ceph identifies users in period (.) delimited form consisting of the user type and the user ID. For example, TYPE.ID, client.admin, or client.user1. The reason for user typing is that Ceph Monitors, and OSDs also use the Cephx protocol, but they are not clients. Distinguishing the user type helps to distinguish between client users and other users—streamlining access control, user monitoring and traceability.
Sometimes Ceph’s user type may seem confusing, because the Ceph command line allows you to specify a user with or without the type, depending upon the command line usage. If you specify --user or --id, you can omit the type. So client.user1 can be entered simply as user1. If you specify --name or -n, you must specify the type and name, such as client.user1. Red Hat recommends using the type and name as a best practice wherever possible.
A Red Hat Ceph Storage cluster user is not the same as a Ceph Object Gateway user. The object gateway uses a Red Hat Ceph Storage cluster user to communicate between the gateway daemon and the storage cluster, but the gateway has its own user management functionality for its end users.
Syntax
DAEMON_TYPE 'allow CAPABILITY' [DAEMON_TYPE 'allow CAPABILITY']
Monitor Caps: Monitor capabilities include
r,w,x,allow profile CAP, andprofile rbd.Example
mon 'allow rwx`
mon 'allow profile osd'
OSD Caps: OSD capabilities include
r,w,x,class-read,class-write,profile osd,profile rbd, andprofile rbd-read-only. Additionally, OSD capabilities also allow for pool and namespace settings. :Syntax
osd 'allow CAPABILITY' [pool=POOL_NAME] [namespace=NAMESPACE_NAME]
The Ceph Object Gateway daemon (radosgw) is a client of the Ceph storage cluster, so it isn’t represented as a Ceph storage cluster daemon type.
The following entries describe each capability.
|
| Precedes access settings for a daemon. |
|
| Gives the user read access. Required with monitors to retrieve the CRUSH map. |
|
| Gives the user write access to objects. |
|
|
Gives the user the capability to call class methods (that is, both read and write) and to conduct |
|
|
Gives the user the capability to call class read methods. Subset of |
|
|
Gives the user the capability to call class write methods. Subset of |
|
| Gives the user read, write and execute permissions for a particular daemon or pool, and the ability to execute admin commands. |
|
| Gives a user permissions to connect as an OSD to other OSDs or monitors. Conferred on OSDs to enable OSDs to handle replication heartbeat traffic and status reporting. |
|
| Gives a user permissions to bootstrap an OSD, so that they have permissions to add keys when bootstrapping an OSD. |
|
| Gives a user read-write access to the Ceph Block Devices. |
|
| Gives a user read-only access to the Ceph Block Devices. |
Pool
A pool defines a storage strategy for Ceph clients, and acts as a logical partition for that strategy.
In Ceph deployments, it is common to create a pool to support different types of use cases. For example, cloud volumes or images, object storage, hot storage, cold storage, and so on. When deploying Ceph as a back end for OpenStack, a typical deployment would have pools for volumes, images, backups and virtual machines, and users such as client.glance, client.cinder, and so on.
Namespace
Objects within a pool can be associated to a namespace—a logical group of objects within the pool. A user’s access to a pool can be associated with a namespace such that reads and writes by the user take place only within the namespace. Objects written to a namespace within the pool can only be accessed by users who have access to the namespace.
Currently, namespaces are only useful for applications written on top of librados. Ceph clients such as block device and object storage do not currently support this feature.
The rationale for namespaces is that pools can be a computationally expensive method of segregating data by use case, because each pool creates a set of placement groups that get mapped to OSDs. If multiple pools use the same CRUSH hierarchy and ruleset, OSD performance may degrade as load increases.
For example, a pool should have approximately 100 placement groups per OSD. So an exemplary cluster with 1000 OSDs would have 100,000 placement groups for one pool. Each pool mapped to the same CRUSH hierarchy and ruleset would create another 100,000 placement groups in the exemplary cluster. By contrast, writing an object to a namespace simply associates the namespace to the object name with out the computational overhead of a separate pool. Rather than creating a separate pool for a user or set of users, you may use a namespace.
Only available using librados at this time.
Additional Resources
- See the Red Hat Ceph Storage Configuration Guide for details on configuring the use of authentication.
6.3. Managing Ceph users
As a storage administrator, you can manage Ceph users by creating, modifying, deleting, and importing users. A Ceph client user can be either individuals or applications, which use Ceph clients to interact with the Red Hat Ceph Storage cluster daemons.
6.3.1. Prerequisites
- A running Red Hat Ceph Storage cluster.
- Access to a Ceph Monitor or Ceph client node.
6.3.2. Listing Ceph users
You can list the users in the storage cluster using the command-line interface.
Prerequisites
- A running Red Hat Ceph Storage cluster.
- Root-level access to the node.
Procedure
To list the users in the storage cluster, execute the following:
Example
[ceph: root@host01 /]# ceph auth list
installed auth entries:

osd.10
	key: AQBW7U5gqOsEExAAg/CxSwZ/gSh8iOsDV3iQOA==
	caps: [mgr] allow profile osd
	caps: [mon] allow profile osd
	caps: [osd] allow *
osd.11
	key: AQBX7U5gtj/JIhAAPsLBNG+SfC2eMVEFkl3vfA==
	caps: [mgr] allow profile osd
	caps: [mon] allow profile osd
	caps: [osd] allow *
osd.9
	key: AQBV7U5g1XDULhAAKo2tw6ZhH1jki5aVui2v7g==
	caps: [mgr] allow profile osd
	caps: [mon] allow profile osd
	caps: [osd] allow *
client.admin
	key: AQADYEtgFfD3ExAAwH+C1qO7MSLE4TWRfD2g6g==
	caps: [mds] allow *
	caps: [mgr] allow *
	caps: [mon] allow *
	caps: [osd] allow *
client.bootstrap-mds
	key: AQAHYEtgpbkANBAANqoFlvzEXFwD8oB0w3TF4Q==
	caps: [mon] allow profile bootstrap-mds
client.bootstrap-mgr
	key: AQAHYEtg3dcANBAAVQf6brq3sxTSrCrPe0pKVQ==
	caps: [mon] allow profile bootstrap-mgr
client.bootstrap-osd
	key: AQAHYEtgD/QANBAATS9DuP3DbxEl86MTyKEmdw==
	caps: [mon] allow profile bootstrap-osd
client.bootstrap-rbd
	key: AQAHYEtgjxEBNBAANho25V9tWNNvIKnHknW59A==
	caps: [mon] allow profile bootstrap-rbd
client.bootstrap-rbd-mirror
	key: AQAHYEtgdE8BNBAAr6rLYxZci0b2hoIgH9GXYw==
	caps: [mon] allow profile bootstrap-rbd-mirror
client.bootstrap-rgw
	key: AQAHYEtgwGkBNBAAuRzI4WSrnowBhZxr2XtTFg==
	caps: [mon] allow profile bootstrap-rgw
client.crash.host04
	key: AQCQYEtgz8lGGhAAy5bJS8VH9fMdxuAZ3CqX5Q==
	caps: [mgr] profile crash
	caps: [mon] profile crash
client.crash.host02
	key: AQDuYUtgqgfdOhAAsyX+Mo35M+HFpURGad7nJA==
	caps: [mgr] profile crash
	caps: [mon] profile crash
client.crash.host03
	key: AQB98E5g5jHZAxAAklWSvmDsh2JaL5G7FvMrrA==
	caps: [mgr] profile crash
	caps: [mon] profile crash
client.nfs.foo.host03
	key: AQCgTk9gm+HvMxAAHbjG+XpdwL6prM/uMcdPdQ==
	caps: [mon] allow r
	caps: [osd] allow rw pool=nfs-ganesha namespace=foo
client.nfs.foo.host03-rgw
	key: AQCgTk9g8sJQNhAAPykcoYUuPc7IjubaFx09HQ==
	caps: [mon] allow r
	caps: [osd] allow rwx tag rgw *=*
client.rgw.test_realm.test_zone.host01.hgbvnq
	key: AQD5RE9gAQKdCRAAJzxDwD/dJObbInp9J95sXw==
	caps: [mgr] allow rw
	caps: [mon] allow *
	caps: [osd] allow rwx tag rgw *=*
client.rgw.test_realm.test_zone.host02.yqqilm
	key: AQD0RE9gkxA4ExAAFXp3pLJWdIhsyTe2ZR6Ilw==
	caps: [mgr] allow rw
	caps: [mon] allow *
	caps: [osd] allow rwx tag rgw *=*
mgr.host01.hdhzwn
	key: AQAEYEtg3lhIBxAAmHodoIpdvnxK0llWF80ltQ==
	caps: [mds] allow *
	caps: [mon] profile mgr
	caps: [osd] allow *
mgr.host02.eobuuv
	key: AQAn6U5gzUuiABAA2Fed+jPM1xwb4XDYtrQxaQ==
	caps: [mds] allow *
	caps: [mon] profile mgr
	caps: [osd] allow *
mgr.host03.wquwpj
	key: AQAd6U5gIzWsLBAAbOKUKZlUcAVe9kBLfajMKw==
	caps: [mds] allow *
	caps: [mon] profile mgr
	caps: [osd] allow *
The TYPE.ID notation for users applies such that osd.0 is a user of type osd and its ID is 0, client.admin is a user of type client and its ID is admin, that is, the default client.admin user. Note also that each entry has a key: VALUE entry, and one or more caps: entries.
You may use the -o FILE_NAME option with ceph auth list to save the output to a file.
6.3.3. Display Ceph user information
You can display a Ceph’s user information using the command-line interface.
Prerequisites
- A running Red Hat Ceph Storage cluster.
- Root-level access to the node.
Procedure
To retrieve a specific user, key and capabilities, execute the following:
Syntax
ceph auth export TYPE.ID
Example
[ceph: root@host01 /]# ceph auth export mgr.host02.eobuuv
You can also use the
-o FILE_NAMEoption.Syntax
ceph auth export TYPE.ID -o FILE_NAME
Example
[ceph: root@host01 /]# ceph auth export osd.9 -o filename
export auth(key=AQBV7U5g1XDULhAAKo2tw6ZhH1jki5aVui2v7g==)
The auth export command is identical to auth get, but also prints out the internal auid, which isn’t relevant to end users.
6.3.4. Add a new Ceph user
Adding a user creates a username, that is, TYPE.ID, a secret key and any capabilities included in the command you use to create the user.
A user’s key enables the user to authenticate with the Ceph storage cluster. The user’s capabilities authorize the user to read, write, or execute on Ceph monitors (mon), Ceph OSDs (osd) or Ceph Metadata Servers (mds).
There are a few ways to add a user:
-
ceph auth add: This command is the canonical way to add a user. It will create the user, generate a key and add any specified capabilities. -
ceph auth get-or-create: This command is often the most convenient way to create a user, because it returns a keyfile format with the user name (in brackets) and the key. If the user already exists, this command simply returns the user name and key in the keyfile format. You may use the-o FILE_NAMEoption to save the output to a file. -
ceph auth get-or-create-key: This command is a convenient way to create a user and return the user’s key only. This is useful for clients that need the key only, for example,libvirt. If the user already exists, this command simply returns the key. You may use the-o FILE_NAMEoption to save the output to a file.
When creating client users, you may create a user with no capabilities. A user with no capabilities is useless beyond mere authentication, because the client cannot retrieve the cluster map from the monitor. However, you can create a user with no capabilities if you wish to defer adding capabilities later using the ceph auth caps command.
A typical user has at least read capabilities on the Ceph monitor and read and write capability on Ceph OSDs. Additionally, a user’s OSD permissions are often restricted to accessing a particular pool. :
[ceph: root@host01 /]# ceph auth add client.john mon 'allow r' osd 'allow rw pool=mypool'
[ceph: root@host01 /]# ceph auth get-or-create client.paul mon 'allow r' osd 'allow rw pool=mypool'
[ceph: root@host01 /]# ceph auth get-or-create client.george mon 'allow r' osd 'allow rw pool=mypool' -o george.keyring
[ceph: root@host01 /]# ceph auth get-or-create-key client.ringo mon 'allow r' osd 'allow rw pool=mypool' -o ringo.key
If you provide a user with capabilities to OSDs, but you DO NOT restrict access to particular pools, the user will have access to ALL pools in the cluster!
6.3.5. Modifying a Ceph User
The ceph auth caps command allows you to specify a user and change the user’s capabilities.
Prerequisites
- A running Red Hat Ceph Storage cluster.
- Root-level access to the node.
Procedure
To add capabilities, use the form:
Syntax
ceph auth caps USERTYPE.USERID DAEMON 'allow [r|w|x|*|...] [pool=POOL_NAME] [namespace=NAMESPACE_NAME]'
Example
[ceph: root@host01 /]# ceph auth caps client.john mon 'allow r' osd 'allow rw pool=mypool'
[ceph: root@host01 /]# ceph auth caps client.paul mon 'allow rw' osd 'allow rwx pool=mypool'
[ceph: root@host01 /]# ceph auth caps client.brian-manager mon 'allow *' osd 'allow *'
To remove a capability, you may reset the capability. If you want the user to have no access to a particular daemon that was previously set, specify an empty string:
Example
[ceph: root@host01 /]# ceph auth caps client.ringo mon ' ' osd ' '
Additional Resources
- See Authorization capabilities for additional details on capabilities.
6.3.6. Deleting a Ceph user
You can delete a user from the Ceph storage cluster using the command-line interface.
Prerequisites
- A running Red Hat Ceph Storage cluster.
- Root-level access to the node.
Procedure
To delete a user, use
ceph auth del:Syntax
ceph auth del TYPE.ID
Example
[ceph: root@host01 /]# ceph auth del osd.6
6.3.7. Print a Ceph user key
You can display a Ceph user’s key information using the command-line interface.
Prerequisites
- A running Red Hat Ceph Storage cluster.
- Root-level access to the node.
Procedure
To print a user’s authentication key to standard output, execute the following:
Syntax
ceph auth print-key TYPE.ID
Example
[ceph: root@host01 /]# ceph auth print-key osd.6

AQBQ7U5gAry3JRAA3NoPrqBBThpFMcRL6Sr+5w==[ceph: root@host01 /]#
Printing a user’s key is useful when you need to populate client software with a user’s key, for example,
libvirt.Syntax
mount -t ceph HOSTNAME:/MOUNT_POINT -o name=client.user,secret=
ceph auth print-key client.userExample
[ceph: root@host01 /]# mount -t ceph host02:/ceph -o name=client.user,secret=`ceph auth print-key client.user`