
Using Cryostat to manage a JFR recording
Abstract
Preface
The Red Hat build of Cryostat is a container-native implementation of JDK Flight Recorder (JFR) that you can use to securely monitor the Java Virtual Machine (JVM) performance in workloads that run on an OpenShift Container Platform cluster. You can use Cryostat 2.4 to start, stop, retrieve, archive, import, and export JFR data for JVMs inside your containerized applications by using a web console or an HTTP API.
Depending on your use case, you can store and analyze your recordings directly on your Red Hat OpenShift cluster by using the built-in tools that Cryostat provides or you can export recordings to an external monitoring application to perform a more in-depth analysis of your recorded data.
Red Hat build of Cryostat is a Technology Preview feature only. Technology Preview features are not supported with Red Hat production service level agreements (SLAs) and might not be functionally complete. Red Hat does not recommend using them in production. These features provide early access to upcoming product features, enabling customers to test functionality and provide feedback during the development process.
For more information about the support scope of Red Hat Technology Preview features, see Technology Preview Features Support Scope.
Making open source more inclusive
Red Hat is committed to replacing problematic language in our code, documentation, and web properties. We are beginning with these four terms: master, slave, blacklist, and whitelist. Because of the enormity of this endeavor, these changes will be implemented gradually over several upcoming releases. For more details, see our CTO Chris Wright’s message.
Chapter 1. Security options
You can configure security settings for Cryostat, so that you can better protect your Cryostat instance.
An application can send an API request that includes the JMX Authentication header to Cryostat. Cryostat must then pass an authentication challenge, so that Cryostat can connect to the application. The Red Hat build of Cryostat Operator stores credentials in memory for the duration of establishing a connection between Cryostat and the target JVM application.
Cryostat can encrypt and store credentials for a target JVM application in a database that is stored on a persistent volume claim (PVC) on Red Hat OpenShift. Cryostat supports SSL/TLS on the HTTP request that adds credentials to the database and on the JMX connection that uses those credentials to connect to the target application. Cryostat also encrypts the credentials within the database by using a passphrase that is either provided by the user or that is generated by the Red Hat build of Cryostat Operator.
1.1. Uploading an SSL certificate
If you receive an SSL error message from the Recordings or Events tab in your Cryostat web console, you must upload an SSL certificate for your target JVM. Otherwise, you cannot access Cryostat tools, such as tools for creating a JFR recording.
Prerequisites
- Entered your authentication details for your Cryostat instance.
- Created a target JVM from the Dashboard panel.
- Downloaded the SSL certificate for your target JVM.
Procedure
Navigate to the Recordings menu or the Events menu on your Cryostat instance.
NoteThe remaining steps use the Recordings menu as an example, but you can follow similar steps on the Events menu.
From the Recordings panel, select your target JVM from the drop-down list. You will receive a prompt if your target JVM does not contain a trusted SSL certificate, as demonstrated in the following example:
Figure 1.1. SSL error message
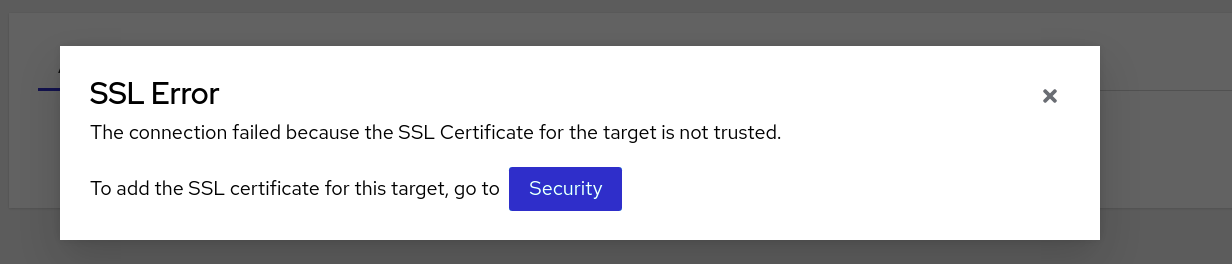
Click the Security button. A window opens on the Cryostat web console that shows the Security dialog box.
Figure 1.2. Security dialog box
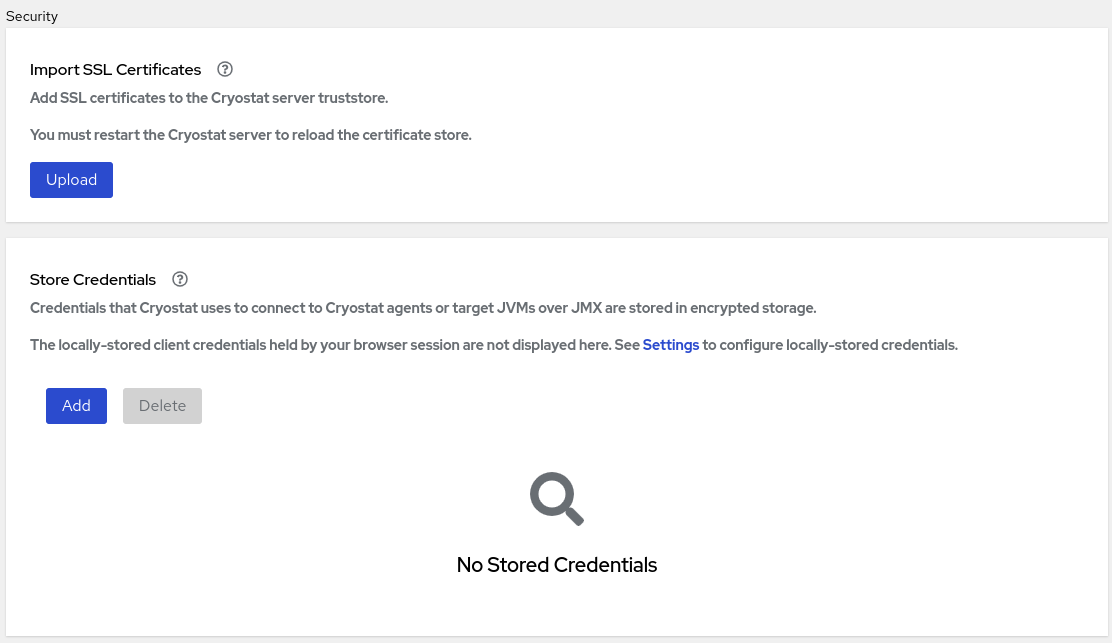
Click the Upload button. An Upload SSL certificate window opens on your Cryostat web console.
Figure 1.3. Upload SSL certificate window
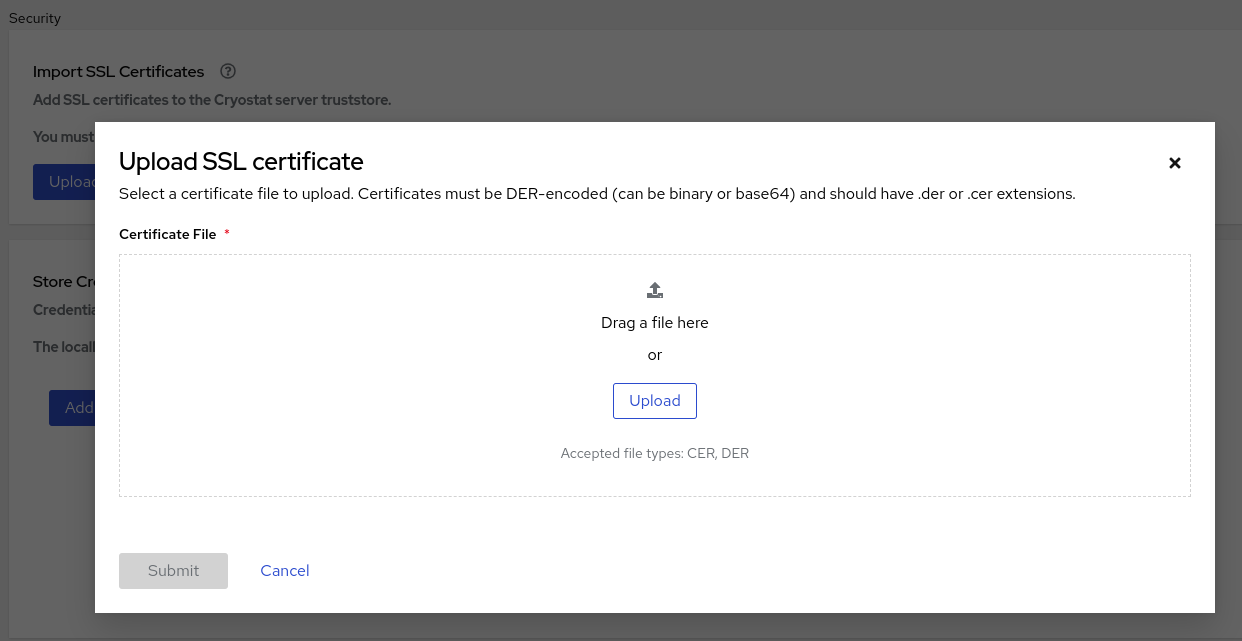
Click the Browse button and locate the SSL certificate on your local system.
ImportantYour SSL certificate must be DER-encoded in either
binaryorbase64format. Cryostat supports.derand.cerfile extensions.- Restart your Cryostat instance.
- Navigate to the Recordings menu on your Cryostat instance.
- If you get prompted with an Authentication Required message on your web console, enter your credentials. Some target JVMs require you to authenticate before you can access the data for auditing purposes.
Additional resources
1.2. Storing and managing credentials
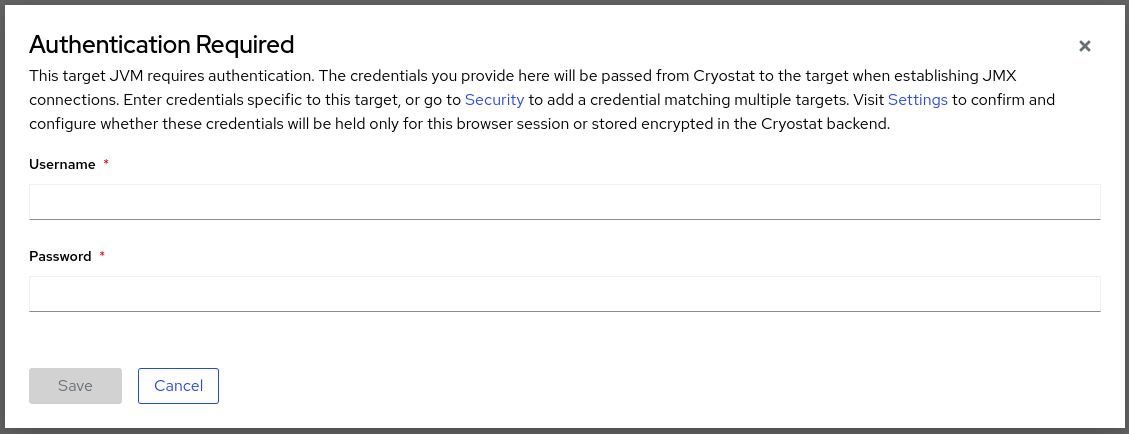
If you enable Java Management Extensions (JMX) authentication or HTTP authentication for your target JVM application, Cryostat prompts you to enter your credentials before Cryostat can access any of the application’s JFR recordings.
When you click the Recordings or Events menu item on the Cryostat web console, an Authentication Required window opens on the console. You must enter the username and password of the target JVM application. You can then view the recordings or perform any additional recording operations on the application.
Figure 1.4. Example of a Cryostat Authentication Required window
Cryostat stores credentials that it uses to connect to Cryostat agents or target JVMs.
If you need to restart your target JVM application, ensure that you complete one of the following tasks to avoid losing JFR recording data for the application:
- Click the Recordings menu item on the Cryostat web console and archive your JFR recording.
- Create an automated rule that schedules Cryostat to copy a snapshot recording to the storage location for the Cryostat archives.
When you want to monitor multiple target JVMs by creating an automated rule, you can configure Cryostat to store and then reuse your credentials for each target JVM connection. By using this configuration, you do not need to re-enter your credentials whenever you want to revisit the JFR recording for your application on the Cryostat web console.
Prerequisites
- Enabled JMX or HTTP authentication for your target JVM application.
Procedure
- Click the Security menu item.
From the Store Credentials window, click the Add button. The Store Credentials window opens.
Figure 1.5. Example of a Store Credentials window
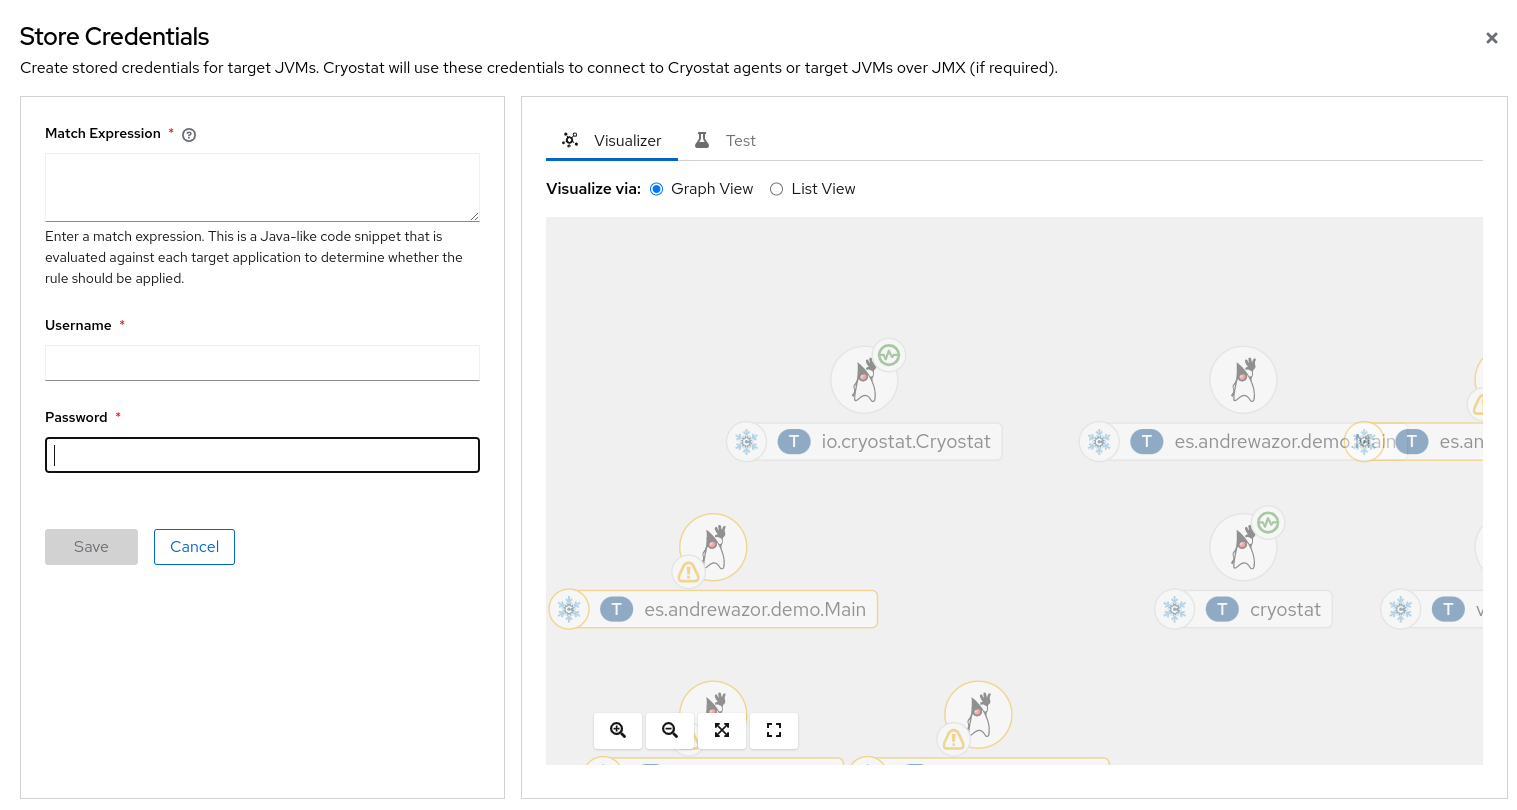
In the Match Expression field, specify the match expression details.
NoteSelect the question mark icon to view suggested syntax in a Match Expression Hint snippet.
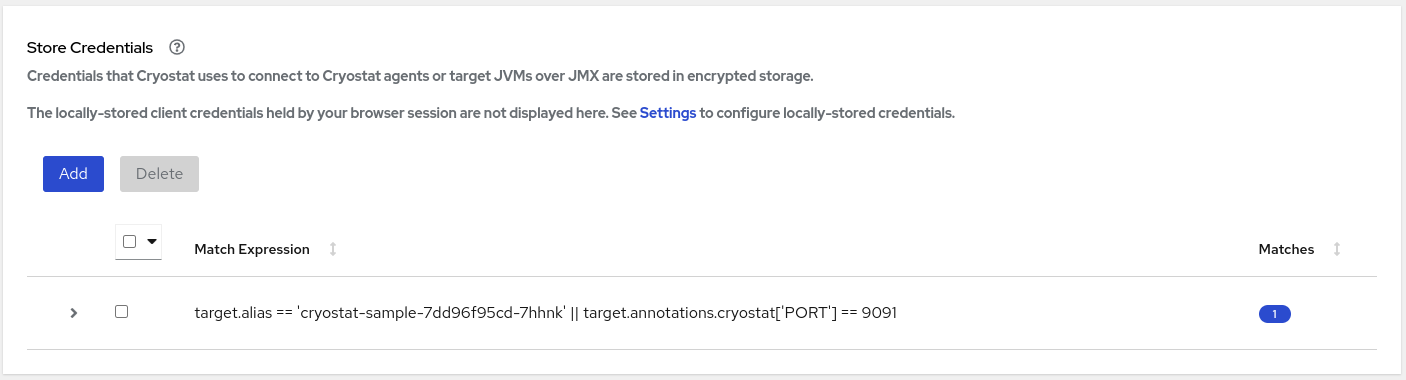
Click Save. A table entry is displayed in the Store Credentials window that shows the Match Expression for your target JVM.
Figure 1.6. Example of a table entry on the Store Credentials pane
 Important
For security purposes, a table entry does not display your username or password.
- Optional: If you want to delete your stored credentials for a target JVM, you can select the checkbox next to the table entry for this target JVM and then click Delete.
Chapter 2. Archive JFR recordings
You can archive active JFR recordings to avoid potential data loss from JFR recordings. You can download or upload the archived JFR recording, so that you can analyze the recording to suits your needs.
You can find archived JFR recordings from the Archives menu in chronological order under one of three headings: All Targets, All Archives, and Uploads. Depending on what actions you performed on a JFR recording, the recording might display under each table.
2.1. Archiving JDK Flight Recorder (JFR) recordings
You can archive active JFR recordings to avoid potential data loss from JFR recordings. Data loss might occur when Cryostat replaces legacy JFR recording data with new data to save storage space or when a target JVM abruptly stops or restarts.
When you create an archived recording, Cryostat copies the active JFR recording’s data and stores the data in a persistent storage location on your Cryostat instance. The Red Hat build of Cryostat Operator builds this persistent storage location onto the associated persistent volume claim (PVC) on the Red Hat OpenShift cluster.
You can archive any JFR recording, regardless of its configuration. Additionally, you can archive snapshots from a JFR recording.
Prerequisites
- Entered your authentication details for your Cryostat instance.
- Created a target JVM recording and entered your authenticated details to access the Recordings menu. See Creating a JDK Flight Recorder (JFR) recording (Creating a JFR recording with Cryostat).
Procedure
On the Active Recordings tab, select the checkbox for your JFR recording. The Archive button is activated in the Active Recordings toolbar.
Figure 2.1. Archive button for your JFR recording
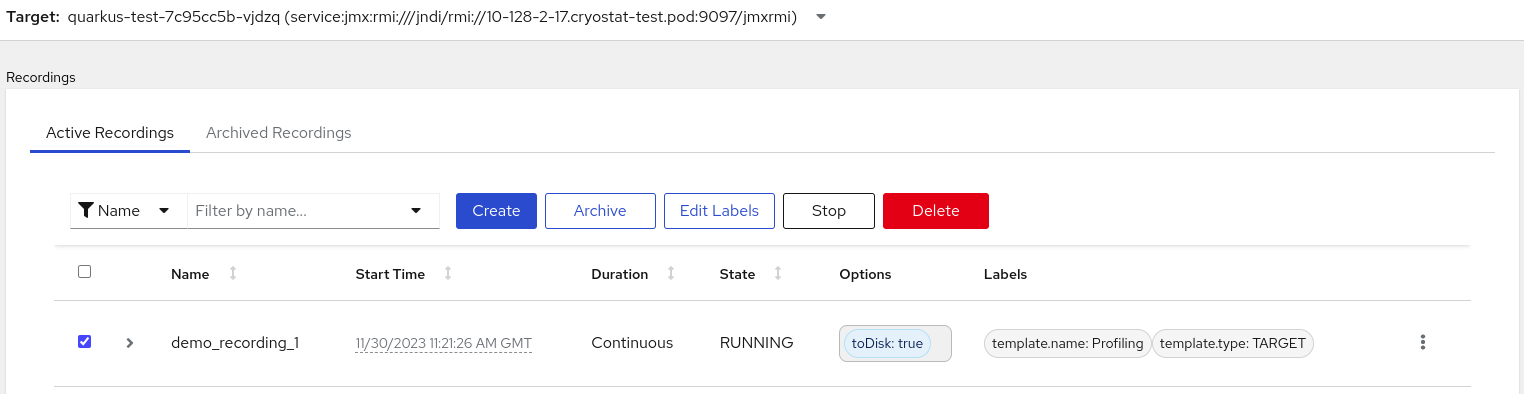
Click the Archive button. Cryostat creates an archived recording of your JFR recording.
You can view your archived recording from under the Archived Recordings tab along with any other recording that relates to your selected target JVM.
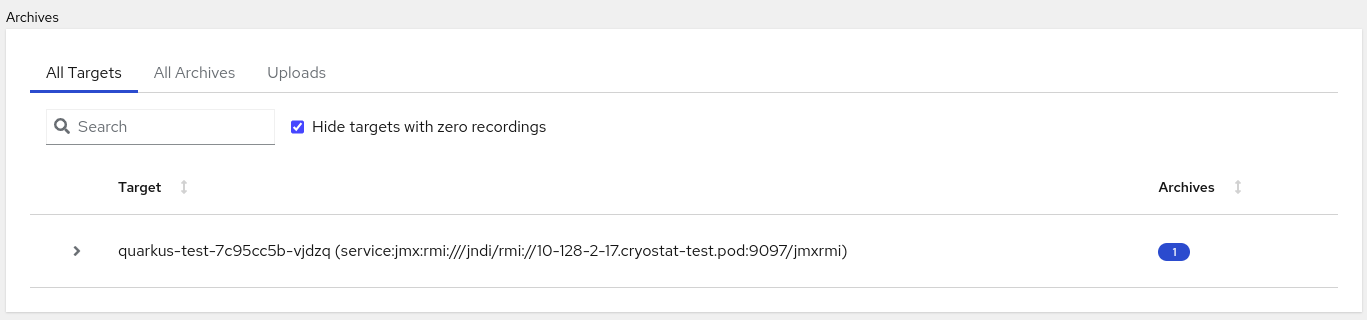
Alternatively, you can view your archived recording from under the All Targets table.
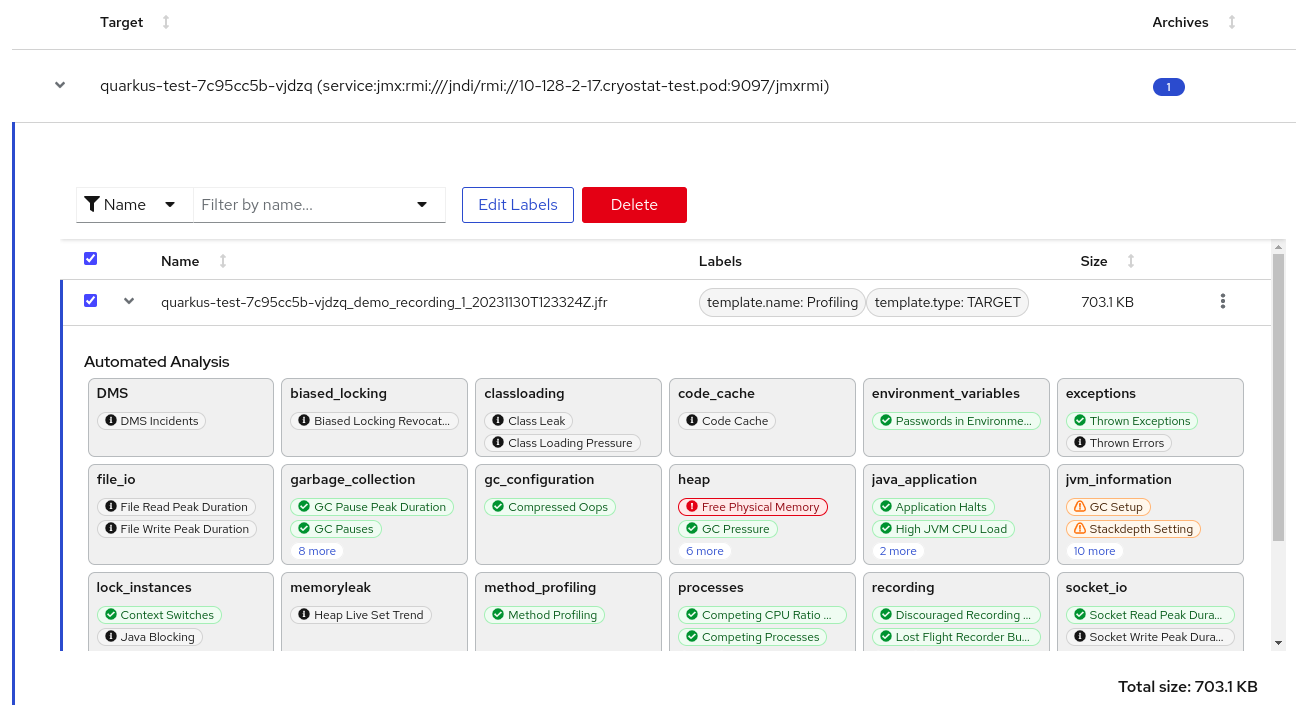
Figure 2.2. Example of a listed target JVM application that is under the All Targets table
 Tip
TipTo remove a target JVM entry that does not have an archived recording, select the Hide targets with zero recordings checkbox.
After you click on the twistie (v) beside the JVM target entry, you can access a filter function, where you can edit labels to enhance your filter or click the Delete button to remove the filter.
- From the All Targets table, select the checkbox beside each target JVM application that you want to review. The table lists each archived recording and its source location.
Go to the All Archives table. This table looks similar to the All Targets table, but the All Archives table lists target JVM applications from files that Cryostat archived inside Cryostat.
NoteIf an archived file has no recognizable JVM applications, it is still listed on the All Archives table but opens within a nested table under the heading
lost.Optional: To delete an archived recording, select the checkbox next to the specific archived JFR recording item, and click Delete when prompted.
Figure 2.3. Deleting an archived JFR recording
 Note
NoteCryostat assigns names to archived recordings based on the address of the target JVM’s application, the name of the active recording, and the timestamp of the created archived recordings.
Additional resources
2.2. Downloading an active recording or an archived recording
You can use Cryostat to download an active recording or an archived recording to your local system.
Prerequisites
- Entered your authentication details for your Cryostat instance.
- Created a JFR recording. See Creating a JDK Flight Recorder (JFR) recording (Creating a JFR recording with Cryostat).
- Optional: Uploaded an SSL certificate or provided your credentials to the target JVM.
- Optional: Archived your JFR recording. See Archiving JDK Flight Recorder (JFR) recordings (Using Cryostat to manage a JFR recording).
Procedure
Navigate to the Recordings menu or the Archives menu on your Cryostat instance.
NoteThe remaining steps use the Recordings menu as an example, but you can follow similar steps on the Archives menu.
- Determine the recording you want by clicking either the Active Recordings tab or the Archived Recordings tab.
Locate your listed JFR recording and then select its overflow menu.
Figure 2.4. Viewing a JFR recording’s overflow menu
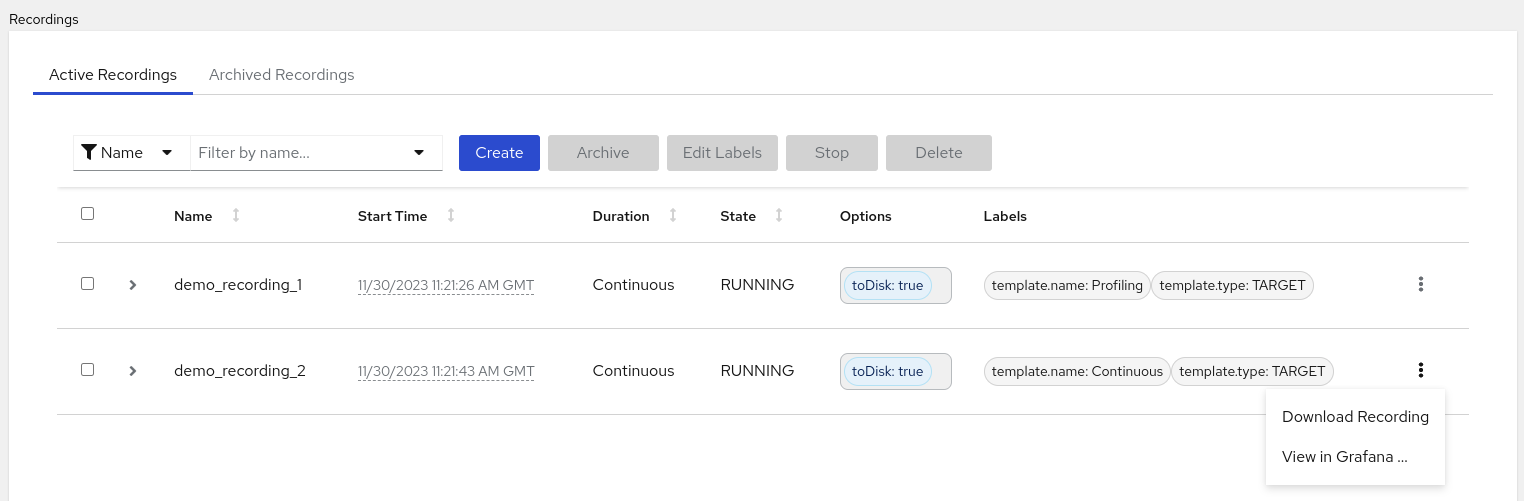
Choose one of the following options:
- From the overflow menu, click Download Recording. Depending on how you configured your operating system, a file-save dialog opens. Save the JFR binary file and the JSON file to your preferred location.
- From the All Targets table, select the overflow menu for your listed JFR recordings. Click Download to save the archived file along with its JSON file, which contains metadata and label information, to your local system.
Optional: View the downloaded file with the Java Mission Control (JMC) desktop application.
NoteIf you do not want to download the
.jfrfile, but instead want to view the data from your recording on the Cryostat application, you can click the View in Grafana option.
2.3. Uploading a JFR recording to the Cryostat archives location
You can upload a JFR recording from your local system to the archives location of your Cryostat.
To save Cryostat storage space, you might have scaled down or removed your JFR recording. If you downloaded a JFR recording, you can upload it to your Cryostat instance when you scale up or redeploy the instance.
Additionally, you can upload a file from a previous Cryostat instance to a new Cryostat instance. Cryostat analysis tools work on the recording uploaded to the new Cryostat instance.
Prerequisites
- Entered your authentication details for your Cryostat instance.
- Created a JFR recording. See Creating a JDK Flight Recorder (JFR) recording (Creating a JFR recording with Cryostat).
- See Downloading an active recording or an archived recordings (Using Cryostat to manage a JFR recording).
Procedure
Go to the Archives menu on your Cryostat instance.
Figure 2.5. Archives menu on the Cryostat web console

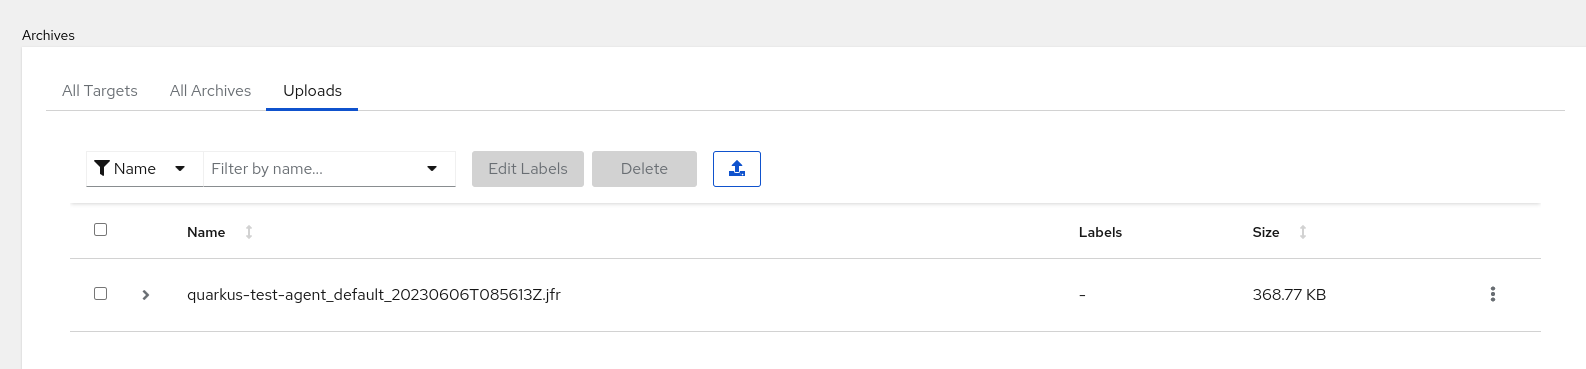
Optional: From the Uploads table, you can view all of your uploaded JFR recordings. The Uploads table also includes a filtering mechanism similar to other tables, such as the All Targets table, and other output. You can also use the filtering mechanism on the Archives menu to find an archived file that might have no recognizable target JVM application.
Figure 2.6. The Uploads table in the Archives menu
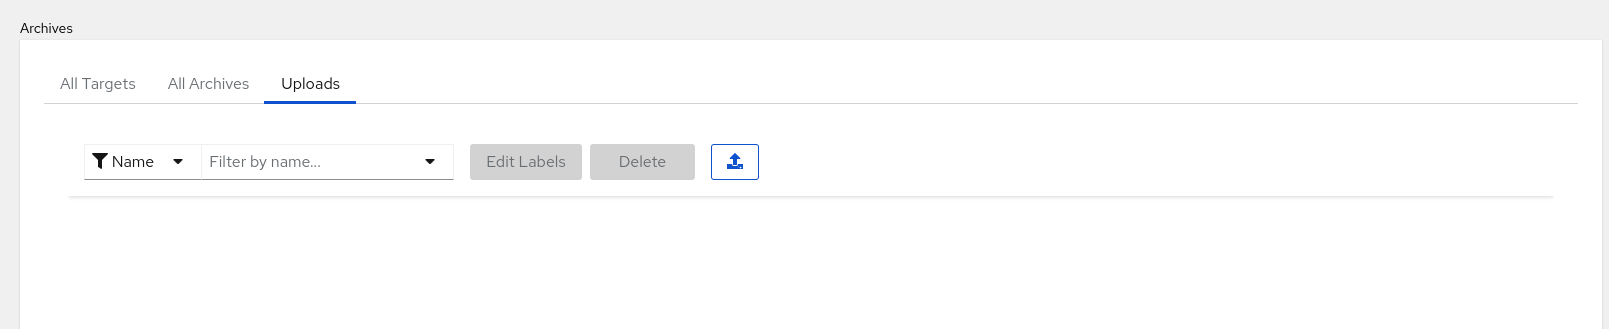
Click the upload icon. A Re-Upload Archived Recording window opens in your Cryostat web console:
Figure 2.7. Re-Upload Archived Recording window
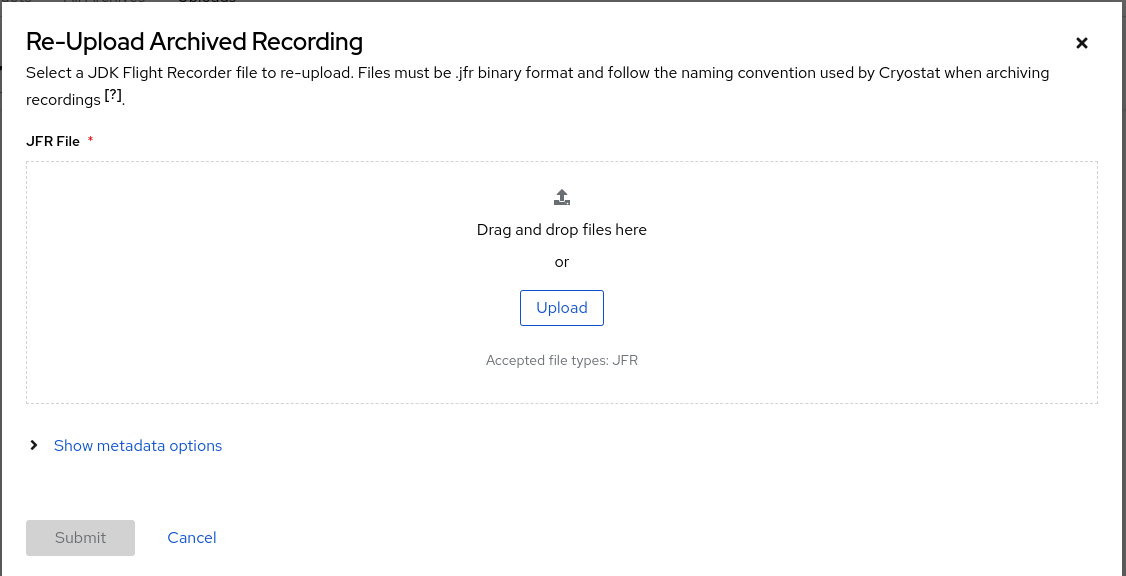
- In the JFR File field, click Upload.
Locate the JFR recording files, which are files with a
.jfrextension, and then click Submit.NoteAlternatively, you can drag and drop
.jfrfiles into the JFR File field.
Your JFR recording files open in the Uploads table.
Figure 2.8. Example of a JFR recording that is in the Uploads table
Chapter 3. Event templates
Cryostat includes default event templates that you can use to quickly create a JFR recording for monitoring your target JVM’s performance.
3.1. Using custom event templates
You can choose either one of the following default event templates when creating a JDK Flight Recorder (JFR) recording:
- Continuous template, which collects basic target Java Virtual Machine (JVM) data for either a fixed duration or until it is explicitly stopped.
- Profiling template, which collects in-depth target JVM data for either a fixed duration or until it is explicitly stopped.
By using either of these default event templates, you can quickly create a JFR recording for monitoring your target JVM’s performance. You can edit either event template at a later stage to suit your needs. For example, the default event templates do not contain application-specific custom events, so you must add these custom events to the custom template.
Cryostat also supports the ALL meta-template, which enables a JFR to monitor all event types for a target JVM. Default values exist for each event type. The ALL meta-template does not contain an XML definition, so you cannot download an XML file for the ALL meta-template.
Prerequisites
- Installed Cryostat 2.4 on Red Hat OpenShift by using the Installed Operators option.
- Created a Cryostat instance in your Red Hat OpenShift project.
Procedure
- On the Dashboard panel for your Cryostat instance, select a Target JVM from the drop-down list.
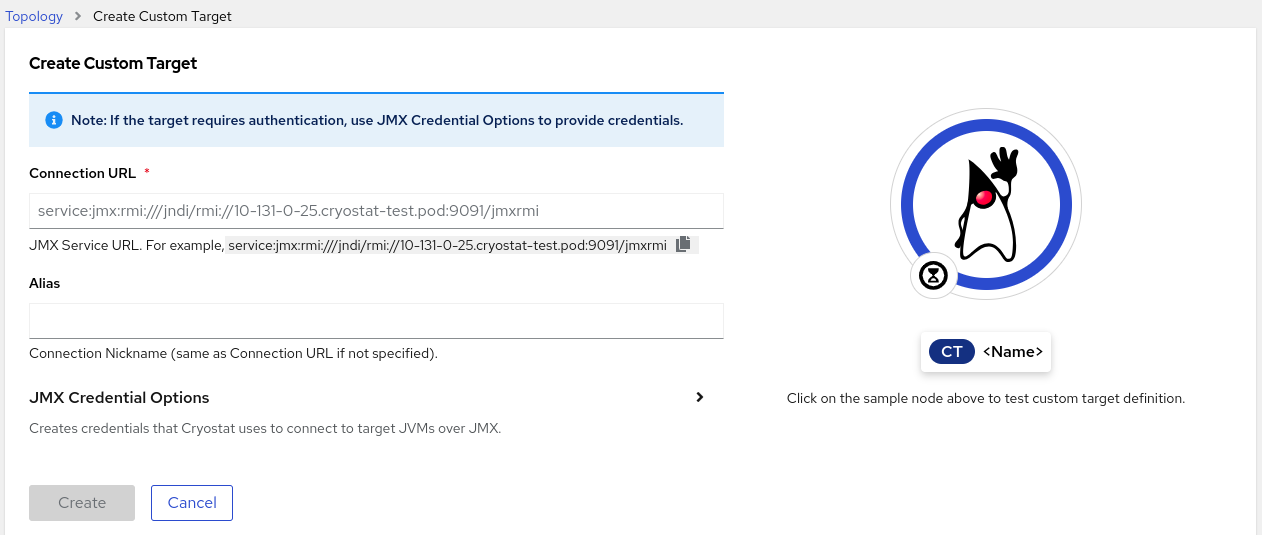
Optional: On the Topology panel, you can define a target JVM by selecting the Add to view icon. After you select the icon, a window opens for defining a custom target connection URL.
- In the Connection URL field, enter the URL for your JVM’s Java Management Extension (JMX) endpoint.
- Optional: In the Alias field, enter an alias for your JMX Service URL.
Click Create.
Figure 3.1. Create Target dialog box
From the navigation menu on the Cryostat web console, click Events. An Authentication Required dialog might open on your web console. If prompted, enter your Username and Password in the Authentication Required dialog box, and click Save to provide your credentials to the target JVM.
NoteIf the selected target JMX has SSL certification enabled for JMX connections, you must add its certificate when prompted.
Cryostat can encrypt and store credentials for a target JVM application in a database that is stored on a persistent volume claim (PVC) on Red Hat OpenShift.
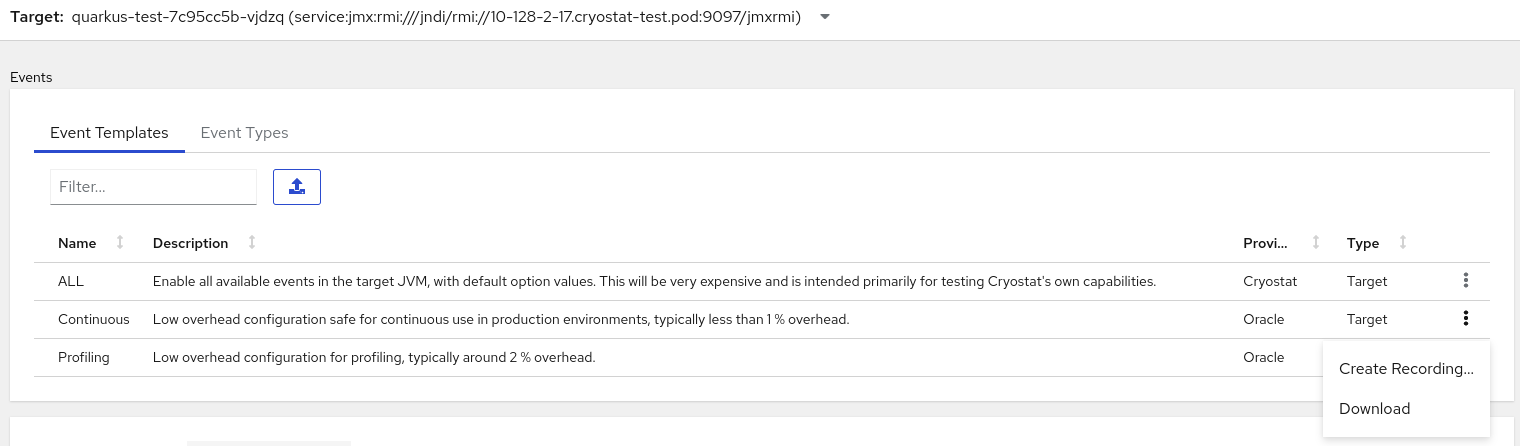
- Under the Event Templates tab, locate your listed event template and then select its more options menu.
From the more options menu, click Download. Depending on how you configured your operating system, a file-save dialog opens. Save the file to your preferred location.
Figure 3.2. Example of an event template’s more options menu
Open the file with your default file editor and edit the file to meet your needs. You must save your file to retain your configuration changes.
NoteYou can add values to the
descriptionandproviderattributes that can help with identifying your file at a later stage.From the Events menu, go to the Event Templates tab then click the Upload icon. A Create Custom Event Template window opens in your Cryostat web console.
Figure 3.3. Create Custom Event Template window
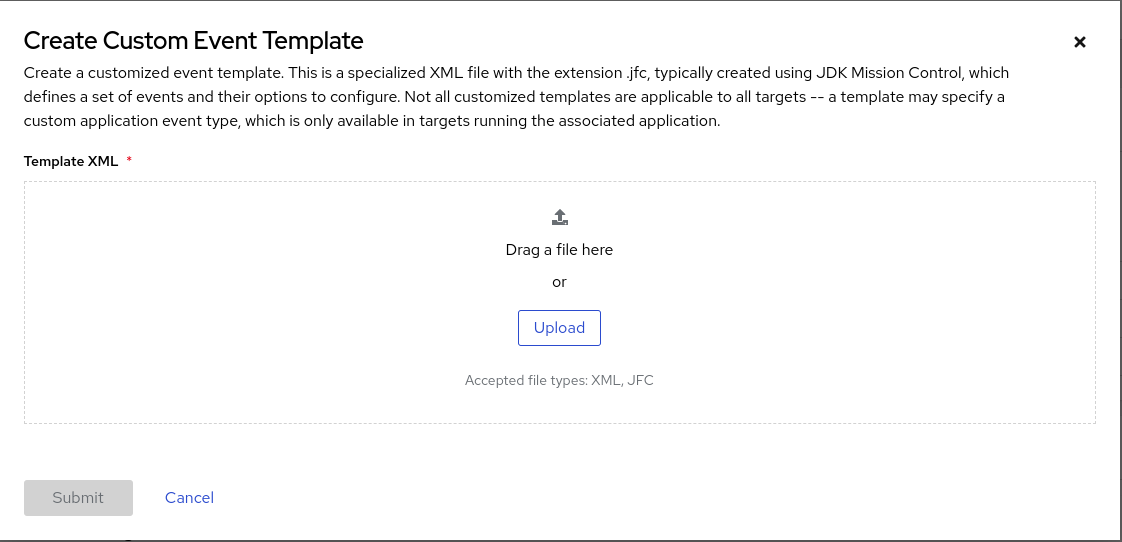
- Click Upload and use your default file editor to upload one or more configured event template files to the Cryostat web console. You can also drag and drop the files into the Template XML window.
- Click the Submit button. The Event Templates tab opens on your Cryostat web console, where you can now view your custom event template.
Optional: After you create your event template, you can choose one of the following options for using your template to create a JFR recording:
- From the Automated Rules menu, click Create and then select an event template from the Template list.
- From the Events menu, locate your listed event template, then from the more options menu, select Create Recording.
- From the Recordings menu, under the Active Recordings tab, click Create.
Additional resources
- See Creating a JDK Flight Recorder (JFR) recording (Creating a JFR recording with Cryostat)
- See Uploading an SSL certificate (Using Cryostat to manage a JFR recording)
- See Archiving JDK Flight Recorder (JFR) recordings (Using Cryostat to manage a JFR recording)
- See Enabling or disabling automated rules(Using automated rules on Cryostat)
Chapter 4. Integrated applications
Cryostat integrates with specific applications that can enhance how you analyze data from your JFR recording.
4.1. Viewing a JFR recording on Grafana
Cryostat 2.4 integrates with the Grafana application, so you can plot JFR recording data in Grafana. You can view plot data in time interval sections to precisely analyze the performance of your target JVM application.
Prerequisites
- Entered your authentication details for your Cryostat instance.
- Created a JFR recording. See Creating a JDK Flight Recorder (JFR) recording (Creating a JFR recording with Cryostat).
Procedure
- Go to the Recordings menu or the Archives menu on your Cryostat instance.
- Depending on your needs, click either the Active Recordings tab or the Archived Recordings tab.
Locate your JFR recording and then select the overflow menu.
Figure 4.1. Overflow menu items available for an example JFR recording
- From the overflow menu, click the View in Grafana option. The Grafana application opens in a new web browser window.
- Click the sign-in icon on the Grafana dashboard.
Determine your credentials by issuing the following commands in your terminal.
<cryostat_name>=$(kubectl get cryostat -o jsonpath='{$.items[0].metadata.name}')

oc get secret $<cryostat_name>-grafana-basic -o jsonpath='{$.data.GF_SECURITY_ADMIN_USER}' | base64 -d

oc get secret $<cryostat_name>-grafana-basic -o jsonpath='{$.data.GF_SECURITY_ADMIN_PASSWORD}' | base64 -d
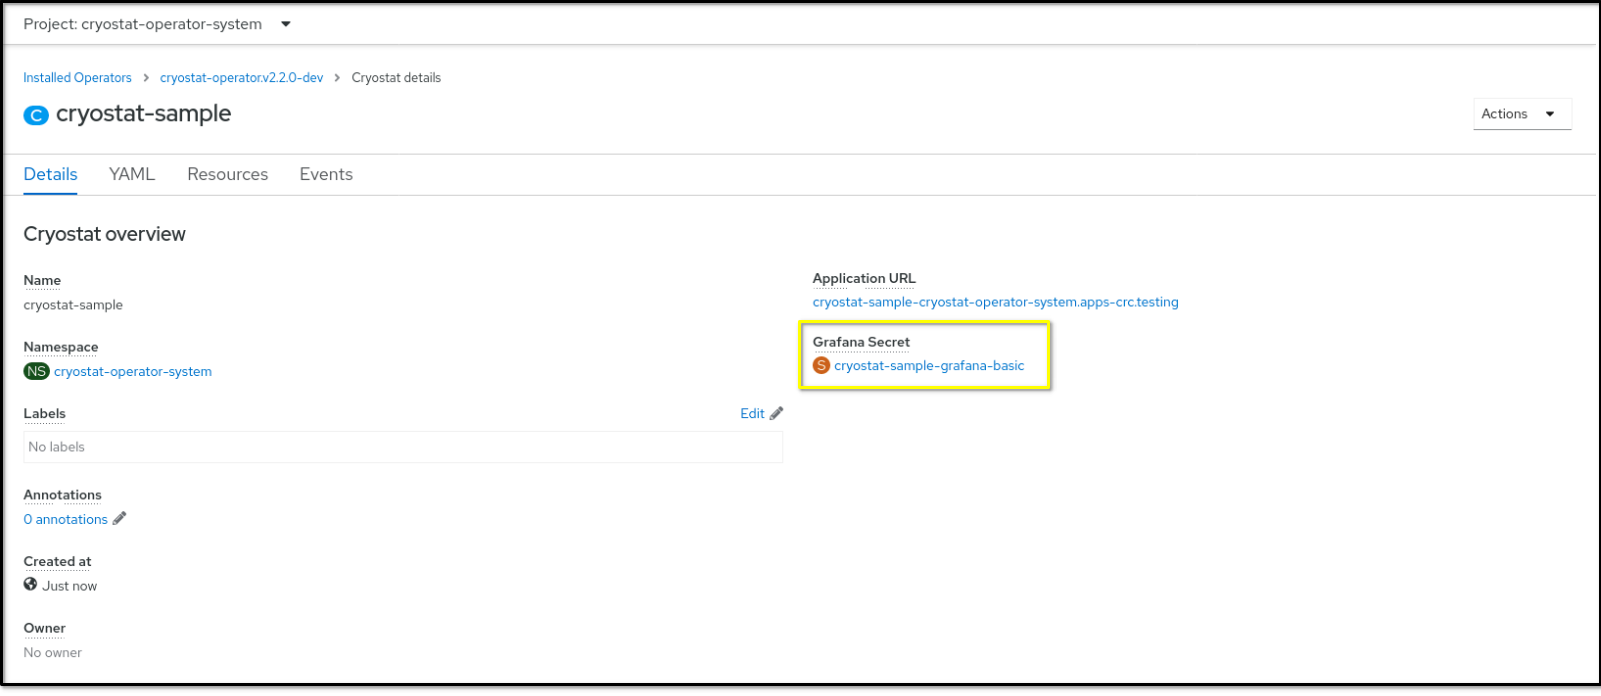
You can also locate your credentials from the Grafana Secret custom resource (CR) on the Cryostat details page on Red Hat OpenShift.
Figure 4.2. The Grafana Secret CR on the Cryostat details page on OpenShift
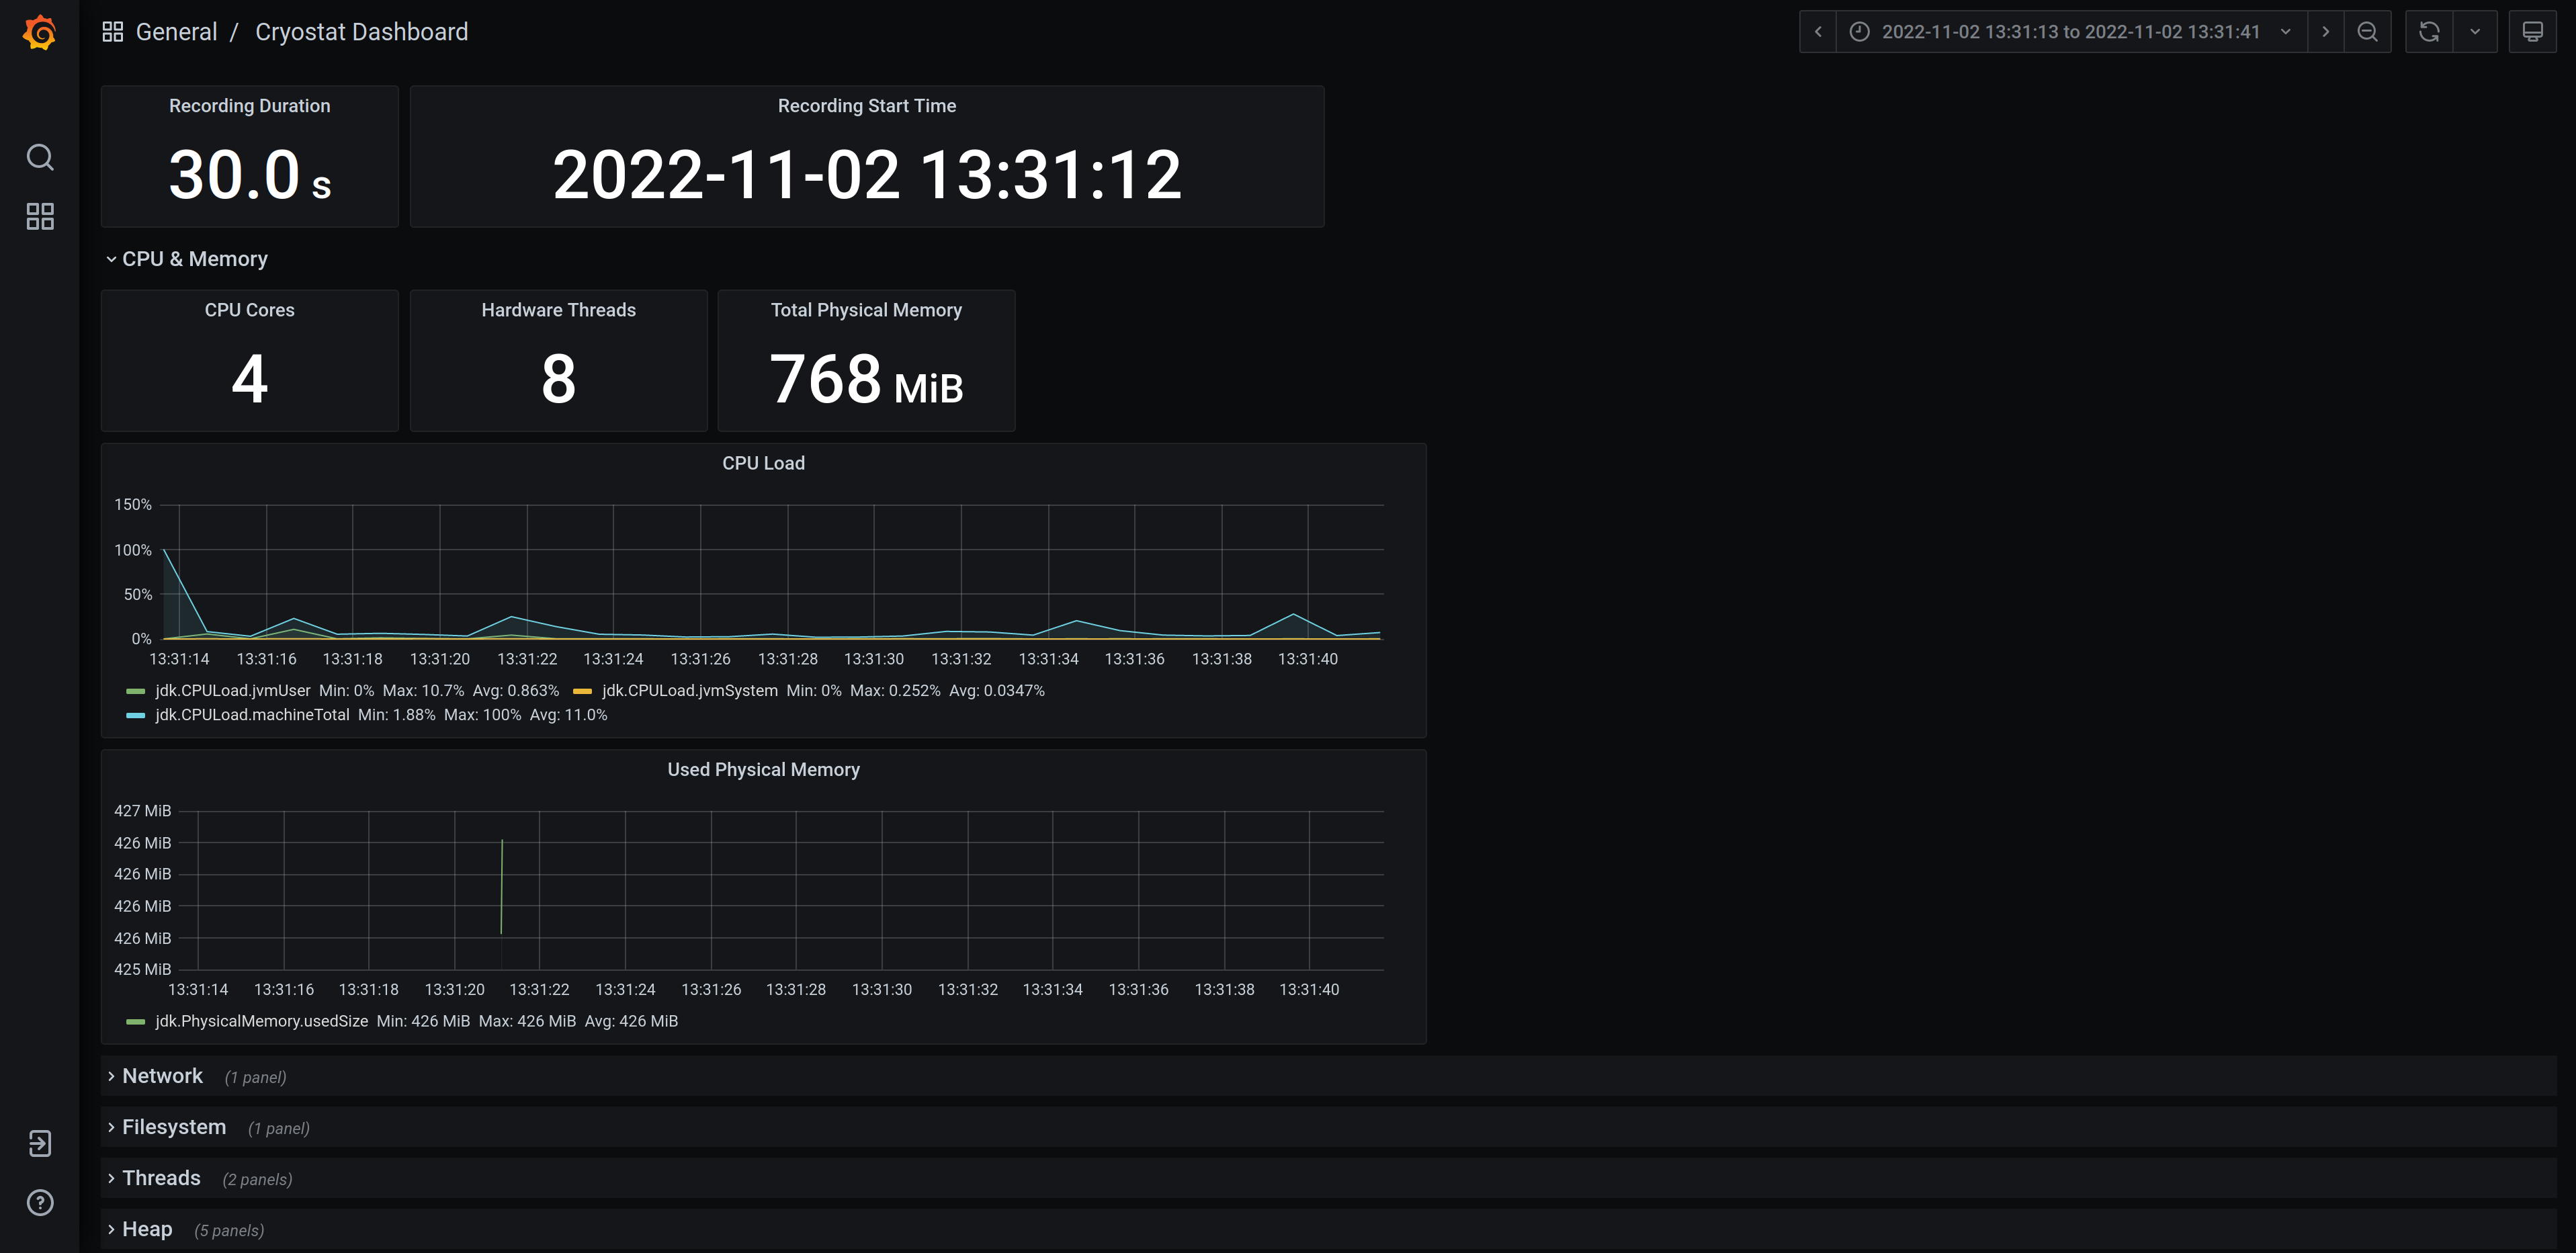
- Enter your credentials in the Grafana web console login page. A dashboard window opens and shows your JFR recording’s data in various time-series plots.
Optional: Interact with any plot by selecting a time-series segment on the plot. Grafana expands the on-screen data to show only the data for that time interval.
Figure 4.3. Example of a Grafana dashboard with plotted graphs
Revised on 2023-12-12 17:53:25 UTC