
Chapter 4. Deploying AMQ Streams
Having prepared your environment for a deployment of AMQ Streams, this section shows:
- How to create the Kafka cluster
Optional procedures to deploy other Kafka components according to your requirements:
The procedures assume an OpenShift cluster is available and running.
4.1. Create the Kafka cluster
In order to create your Kafka cluster, you deploy the Cluster Operator to manage the Kafka cluster, then deploy the Kafka cluster.
When deploying the Kafka cluster using the Kafka resource, you can deploy the Topic Operator and User Operator at the same time. Alternatively, if you are using a non-AMQ Streams Kafka cluster, you can deploy the Topic Operator and User Operator as standalone components.
Deploying a Kafka cluster with the Topic Operator and User Operator
Perform these deployment steps if you want to use the Topic Operator and User Operator with a Kafka cluster managed by AMQ Streams.
- Deploy the Cluster Operator
Use the Cluster Operator to deploy the:
Deploying a standalone Topic Operator and User Operator
Perform these deployment steps if you want to use the Topic Operator and User Operator with a Kafka cluster that is not managed by AMQ Streams.
4.1.1. Deploying the Cluster Operator
The Cluster Operator is responsible for deploying and managing Apache Kafka clusters within an OpenShift cluster.
The procedures in this section show:
How to deploy the Cluster Operator to watch:
Alternative deployment options:
4.1.1.1. Watch options for a Cluster Operator deployment
When the Cluster Operator is running, it starts to watch for updates of Kafka resources.
You can choose to deploy the Cluster Operator to watch Kafka resources from:
- A single namespace (the same namespace containing the Cluster Operator)
- Multiple namespaces
- All namespaces
AMQ Streams provides example YAML files to make the deployment process easier.
The Cluster Operator watches for changes to the following resources:
-
Kafkafor the Kafka cluster. -
KafkaConnectfor the Kafka Connect cluster. -
KafkaConnectS2Ifor the Kafka Connect cluster with Source2Image support. -
KafkaConnectorfor creating and managing connectors in a Kafka Connect cluster. -
KafkaMirrorMakerfor the Kafka MirrorMaker instance. -
KafkaBridgefor the Kafka Bridge instance
When one of these resources is created in the OpenShift cluster, the operator gets the cluster description from the resource and starts creating a new cluster for the resource by creating the necessary OpenShift resources, such as StatefulSets, Services and ConfigMaps.
Each time a Kafka resource is updated, the operator performs corresponding updates on the OpenShift resources that make up the cluster for the resource.
Resources are either patched or deleted, and then recreated in order to make the cluster for the resource reflect the desired state of the cluster. This operation might cause a rolling update that might lead to service disruption.
When a resource is deleted, the operator undeploys the cluster and deletes all related OpenShift resources.
4.1.1.2. Deploying the Cluster Operator to watch a single namespace
This procedure shows how to deploy the Cluster Operator to watch AMQ Streams resources in a single namespace in your OpenShift cluster.
Prerequisites
-
This procedure requires use of an OpenShift user account which is able to create
CustomResourceDefinitions,ClusterRolesandClusterRoleBindings. Use of Role Base Access Control (RBAC) in the OpenShift cluster usually means that permission to create, edit, and delete these resources is limited to OpenShift cluster administrators, such assystem:admin.
Procedure
Edit the AMQ Streams installation files to use the namespace the Cluster Operator is going to be installed into.
For example, in this procedure the Cluster Operator is installed into the namespace
my-cluster-operator-namespace.On Linux, use:
sed -i 's/namespace: .*/namespace: my-cluster-operator-namespace/' install/cluster-operator/*RoleBinding*.yamlOn MacOS, use:
sed -i '' 's/namespace: .*/namespace: my-cluster-operator-namespace/' install/cluster-operator/*RoleBinding*.yamlDeploy the Cluster Operator:
oc apply -f install/cluster-operator -n my-cluster-operator-namespaceVerify that the Cluster Operator was successfully deployed:
oc get deployments
4.1.1.3. Deploying the Cluster Operator to watch multiple namespaces
This procedure shows how to deploy the Cluster Operator to watch AMQ Streams resources across multiple namespaces in your OpenShift cluster.
Prerequisites
-
This procedure requires use of an OpenShift user account which is able to create
CustomResourceDefinitions,ClusterRolesandClusterRoleBindings. Use of Role Base Access Control (RBAC) in the OpenShift cluster usually means that permission to create, edit, and delete these resources is limited to OpenShift cluster administrators, such assystem:admin.
Procedure
Edit the AMQ Streams installation files to use the namespace the Cluster Operator is going to be installed into.
For example, in this procedure the Cluster Operator is installed into the namespace
my-cluster-operator-namespace.On Linux, use:
sed -i 's/namespace: .*/namespace: my-cluster-operator-namespace/' install/cluster-operator/*RoleBinding*.yamlOn MacOS, use:
sed -i '' 's/namespace: .*/namespace: my-cluster-operator-namespace/' install/cluster-operator/*RoleBinding*.yamlEdit the
install/cluster-operator/050-Deployment-strimzi-cluster-operator.yamlfile to add a list of all the namespaces the Cluster Operator will watch to theSTRIMZI_NAMESPACEenvironment variable.For example, in this procedure the Cluster Operator will watch the namespaces
watched-namespace-1,watched-namespace-2,watched-namespace-3.apiVersion: apps/v1 kind: Deployment spec: # ... template: spec: serviceAccountName: strimzi-cluster-operator containers: - name: strimzi-cluster-operator image: registry.redhat.io/amq7/amq-streams-rhel7-operator:1.5.0 imagePullPolicy: IfNotPresent env: - name: STRIMZI_NAMESPACE value: watched-namespace-1,watched-namespace-2,watched-namespace-3For each namespace listed, install the
RoleBindings.In this example, we replace
watched-namespacein these commands with the namespaces listed in the previous step, repeating them forwatched-namespace-1,watched-namespace-2,watched-namespace-3:oc apply -f install/cluster-operator/020-RoleBinding-strimzi-cluster-operator.yaml -n watched-namespace oc apply -f install/cluster-operator/031-RoleBinding-strimzi-cluster-operator-entity-operator-delegation.yaml -n watched-namespace oc apply -f install/cluster-operator/032-RoleBinding-strimzi-cluster-operator-topic-operator-delegation.yaml -n watched-namespace
Deploy the Cluster Operator:
oc apply -f install/cluster-operator -n my-cluster-operator-namespaceVerify that the Cluster Operator was successfully deployed:
oc get deployments
4.1.1.4. Deploying the Cluster Operator to watch all namespaces
This procedure shows how to deploy the Cluster Operator to watch AMQ Streams resources across all namespaces in your OpenShift cluster.
When running in this mode, the Cluster Operator automatically manages clusters in any new namespaces that are created.
Prerequisites
-
This procedure requires use of an OpenShift user account which is able to create
CustomResourceDefinitions,ClusterRolesandClusterRoleBindings. Use of Role Base Access Control (RBAC) in the OpenShift cluster usually means that permission to create, edit, and delete these resources is limited to OpenShift cluster administrators, such assystem:admin.
Procedure
Edit the AMQ Streams installation files to use the namespace the Cluster Operator is going to be installed into.
For example, in this procedure the Cluster Operator is installed into the namespace
my-cluster-operator-namespace.On Linux, use:
sed -i 's/namespace: .*/namespace: my-cluster-operator-namespace/' install/cluster-operator/*RoleBinding*.yamlOn MacOS, use:
sed -i '' 's/namespace: .*/namespace: my-cluster-operator-namespace/' install/cluster-operator/*RoleBinding*.yamlEdit the
install/cluster-operator/050-Deployment-strimzi-cluster-operator.yamlfile to set the value of theSTRIMZI_NAMESPACEenvironment variable to*.apiVersion: apps/v1 kind: Deployment spec: # ... template: spec: # ... serviceAccountName: strimzi-cluster-operator containers: - name: strimzi-cluster-operator image: registry.redhat.io/amq7/amq-streams-rhel7-operator:1.5.0 imagePullPolicy: IfNotPresent env: - name: STRIMZI_NAMESPACE value: "*" # ...Create
ClusterRoleBindingsthat grant cluster-wide access for all namespaces to the Cluster Operator.oc create clusterrolebinding strimzi-cluster-operator-namespaced --clusterrole=strimzi-cluster-operator-namespaced --serviceaccount my-cluster-operator-namespace:strimzi-cluster-operator oc create clusterrolebinding strimzi-cluster-operator-entity-operator-delegation --clusterrole=strimzi-entity-operator --serviceaccount my-cluster-operator-namespace:strimzi-cluster-operator oc create clusterrolebinding strimzi-cluster-operator-topic-operator-delegation --clusterrole=strimzi-topic-operator --serviceaccount my-cluster-operator-namespace:strimzi-cluster-operator
Replace
my-cluster-operator-namespacewith the namespace you want to install the Cluster Operator into.Deploy the Cluster Operator to your OpenShift cluster.
oc apply -f install/cluster-operator -n my-cluster-operator-namespaceVerify that the Cluster Operator was successfully deployed:
oc get deployments
4.1.1.5. Deploying the Cluster Operator from the OperatorHub
You can deploy the Cluster Operator to your OpenShift cluster by installing the AMQ Streams Operator from the OperatorHub. The OperatorHub is available in OpenShift 4 only.
Prerequisites
-
The Red Hat Operators
OperatorSourceis enabled in your OpenShift cluster. If you can see Red Hat Operators in the OperatorHub, the correctOperatorSourceis enabled. For more information, see the Operators guide. - Installation requires a user with sufficient privileges to install Operators from the OperatorHub.
Procedure
- In the OpenShift 4 web console, click Operators > OperatorHub.
Search or browse for the AMQ Streams Operator, in the Streaming & Messaging category.
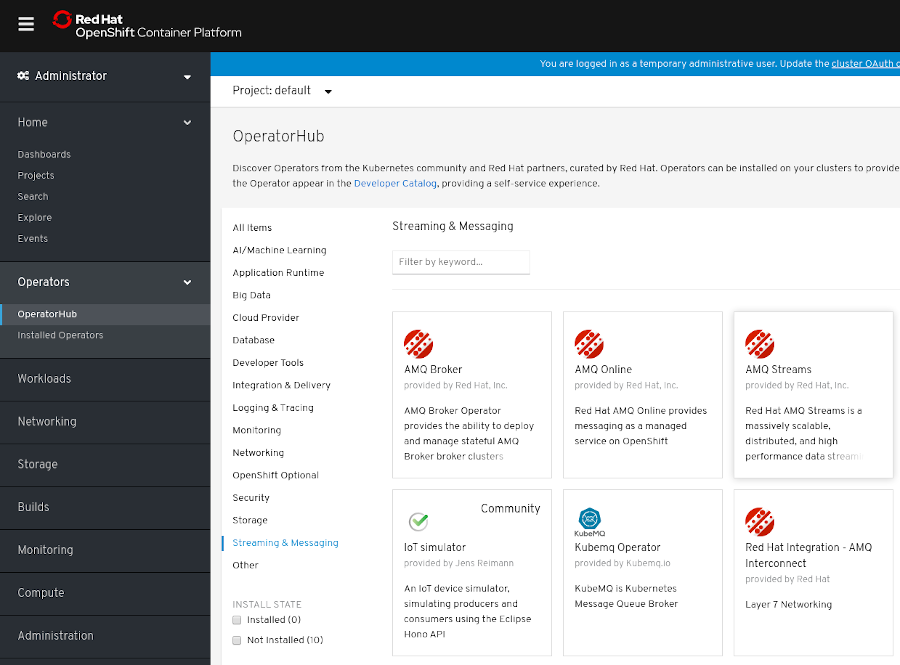
- Click the AMQ Streams tile and then, in the sidebar on the right, click Install.
On the Create Operator Subscription screen, choose from the following installation and update options:
- Installation Mode: Choose to install the AMQ Streams Operator to all (projects) namespaces in the cluster (the default option) or a specific (project) namespace. It is good practice to use namespaces to separate functions. We recommend that you dedicate a specific namespace to the Kafka cluster and other AMQ Streams components.
- Approval Strategy: By default, the AMQ Streams Operator is automatically upgraded to the latest AMQ Streams version by the Operator Lifecycle Manager (OLM). Optionally, select Manual if you want to manually approve future upgrades. For more information, see the Operators guide in the OpenShift documentation.
Click Subscribe; the AMQ Streams Operator is installed to your OpenShift cluster.
The AMQ Streams Operator deploys the Cluster Operator, CRDs, and role-based access control (RBAC) resources to the selected namespace, or to all namespaces.
On the Installed Operators screen, check the progress of the installation. The AMQ Streams Operator is ready to use when its status changes to InstallSucceeded.

Next, you can deploy the other components of AMQ Streams, starting with a Kafka cluster, using the YAML example files.
4.1.2. Deploying Kafka
Apache Kafka is an open-source distributed publish-subscribe messaging system for fault-tolerant real-time data feeds.
The procedures in this section show:
How to use the Cluster Operator to deploy:
- An ephemeral or persistent Kafka cluster
The Topic Operator and User Operator by configuring the
Kafkacustom resource:
Alternative standalone deployment procedures for the Topic Operator and User Operator:
When installing Kafka, AMQ Streams also installs a ZooKeeper cluster and adds the necessary configuration to connect Kafka with ZooKeeper.
4.1.2.1. Deploying the Kafka cluster
This procedure shows how to deploy a Kafka cluster to your OpenShift using the Cluster Operator.
The deployment uses a YAML file to provide the specification to create a Kafka resource.
AMQ Streams provides example YAMLs files for deployment in examples/kafka/:
kafka-persistent.yaml- Deploys a persistent cluster with three ZooKeeper and three Kafka nodes.
kafka-jbod.yaml- Deploys a persistent cluster with three ZooKeeper and three Kafka nodes (each using multiple persistent volumes).
kafka-persistent-single.yaml- Deploys a persistent cluster with a single ZooKeeper node and a single Kafka node.
kafka-ephemeral.yaml- Deploys an ephemeral cluster with three ZooKeeper and three Kafka nodes.
kafka-ephemeral-single.yaml- Deploys an ephemeral cluster with three ZooKeeper nodes and a single Kafka node.
In this procedure, we use the examples for an ephemeral and persistent Kafka cluster deployment:
- Ephemeral cluster
-
In general, an ephemeral (or temporary) Kafka cluster is suitable for development and testing purposes, not for production. This deployment uses
emptyDirvolumes for storing broker information (for ZooKeeper) and topics or partitions (for Kafka). Using anemptyDirvolume means that its content is strictly related to the pod life cycle and is deleted when the pod goes down. - Persistent cluster
-
A persistent Kafka cluster uses
PersistentVolumesto store ZooKeeper and Kafka data. ThePersistentVolumeis acquired using aPersistentVolumeClaimto make it independent of the actual type of thePersistentVolume. For example, it can use Amazon EBS volumes in Amazon AWS deployments without any changes in the YAML files. ThePersistentVolumeClaimcan use aStorageClassto trigger automatic volume provisioning.
The example clusters are named my-cluster by default. The cluster name is defined by the name of the resource and cannot be changed after the cluster has been deployed. To change the cluster name before you deploy the cluster, edit the Kafka.metadata.name property of the Kafka resource in the relevant YAML file.
apiVersion: kafka.strimzi.io/v1beta1
kind: Kafka
metadata:
  name: my-cluster
# ...
For more information about configuring the Kafka resource, see Kafka cluster configuration
Prerequisites
Procedure
Create and deploy an ephemeral or persistent cluster.
For development or testing, you might prefer to use an ephemeral cluster. You can use a persistent cluster in any situation.
To create and deploy an ephemeral cluster:
oc apply -f examples/kafka/kafka-ephemeral.yaml
To create and deploy a persistent cluster:
oc apply -f examples/kafka/kafka-persistent.yaml
Verify that the Kafka cluster was successfully deployed:
oc get deployments
4.1.2.2. Deploying the Topic Operator using the Cluster Operator
This procedure describes how to deploy the Topic Operator using the Cluster Operator.
You configure the entityOperator property of the Kafka resource to include the topicOperator.
If you want to use the Topic Operator with a Kafka cluster that is not managed by AMQ Streams, you must deploy the Topic Operator as a standalone component.
For more information about configuring the entityOperator and topicOperator properties, see Entity Operator.
Prerequisites
Procedure
Edit the
entityOperatorproperties of theKafkaresource to includetopicOperator:apiVersion: kafka.strimzi.io/v1beta1 kind: Kafka metadata: name: my-cluster spec: #... entityOperator: topicOperator: {} userOperator: {}Configure the Topic Operator
specusing the properties described inEntityTopicOperatorSpecschema reference.Use an empty object (
{}) if you want all properties to use their default values.Create or update the resource:
Use
oc apply:oc apply -f <your-file>
4.1.2.3. Deploying the User Operator using the Cluster Operator
This procedure describes how to deploy the User Operator using the Cluster Operator.
You configure the entityOperator property of the Kafka resource to include the userOperator.
If you want to use the User Operator with a Kafka cluster that is not managed by AMQ Streams, you must deploy the User Operator as a standalone component.
For more information about configuring the entityOperator and userOperator properties, see Entity Operator.
Prerequisites
Procedure
Edit the
entityOperatorproperties of theKafkaresource to includeuserOperator:apiVersion: kafka.strimzi.io/v1beta1 kind: Kafka metadata: name: my-cluster spec: #... entityOperator: topicOperator: {} userOperator: {}Configure the User Operator
specusing the properties described inEntityUserOperatorSpecschema reference.Use an empty object (
{}) if you want all properties to use their default values.Create or update the resource:
oc apply -f <your-file>
4.1.3. Alternative standalone deployment options for AMQ Streams Operators
When deploying a Kafka cluster using the Cluster Operator, you can also deploy the Topic Operator and User Operator. Alternatively, you can perform a standalone deployment.
A standalone deployment means the Topic Operator and User Operator can operate with a Kafka cluster that is not managed by AMQ Streams.
4.1.3.1. Deploying the standalone Topic Operator
This procedure shows how to deploy the Topic Operator as a standalone component.
A standalone deployment requires configuration of environment variables, and is more complicated than deploying the Topic Operator using the Cluster Operator. However, a standalone deployment is more flexible as the Topic Operator can operate with any Kafka cluster, not necessarily one deployed by the Cluster Operator.
Prerequisites
- You need an existing Kafka cluster for the Topic Operator to connect to.
Procedure
Edit the
Deployment.spec.template.spec.containers[0].envproperties in theinstall/topic-operator/05-Deployment-strimzi-topic-operator.yamlfile by setting:-
STRIMZI_KAFKA_BOOTSTRAP_SERVERSto list the bootstrap brokers in your Kafka cluster, given as a comma-separated list ofhostname:portpairs. -
STRIMZI_ZOOKEEPER_CONNECTto list the ZooKeeper nodes, given as a comma-separated list ofhostname:portpairs. This should be the same ZooKeeper cluster that your Kafka cluster is using. -
STRIMZI_NAMESPACEto the OpenShift namespace in which you want the operator to watch forKafkaTopicresources. -
STRIMZI_RESOURCE_LABELSto the label selector used to identify theKafkaTopicresources managed by the operator. -
STRIMZI_FULL_RECONCILIATION_INTERVAL_MSto specify the interval between periodic reconciliations, in milliseconds. -
STRIMZI_TOPIC_METADATA_MAX_ATTEMPTSto specify the number of attempts at getting topic metadata from Kafka. The time between each attempt is defined as an exponential back-off. Consider increasing this value when topic creation could take more time due to the number of partitions or replicas. Default6. -
STRIMZI_ZOOKEEPER_SESSION_TIMEOUT_MSto the ZooKeeper session timeout, in milliseconds. For example,10000. Default20000(20 seconds). -
STRIMZI_TOPICS_PATHto the Zookeeper node path where the Topic Operator stores its metadata. Default/strimzi/topics. -
STRIMZI_TLS_ENABLEDto enable TLS support for encrypting the communication with Kafka brokers. Defaulttrue. -
STRIMZI_TRUSTSTORE_LOCATIONto the path to the truststore containing certificates for enabling TLS based communication. Mandatory only if TLS is enabled throughSTRIMZI_TLS_ENABLED. -
STRIMZI_TRUSTSTORE_PASSWORDto the password for accessing the truststore defined bySTRIMZI_TRUSTSTORE_LOCATION. Mandatory only if TLS is enabled throughSTRIMZI_TLS_ENABLED. -
STRIMZI_KEYSTORE_LOCATIONto the path to the keystore containing private keys for enabling TLS based communication. Mandatory only if TLS is enabled throughSTRIMZI_TLS_ENABLED. -
STRIMZI_KEYSTORE_PASSWORDto the password for accessing the keystore defined bySTRIMZI_KEYSTORE_LOCATION. Mandatory only if TLS is enabled throughSTRIMZI_TLS_ENABLED. -
STRIMZI_LOG_LEVELto the level for printing logging messages. The value can be set to:ERROR,WARNING,INFO,DEBUG, andTRACE. DefaultINFO. -
STRIMZI_JAVA_OPTS(optional) to the Java options used for the JVM running the Topic Operator. An example is-Xmx=512M -Xms=256M. -
STRIMZI_JAVA_SYSTEM_PROPERTIES(optional) to list the-Doptions which are set to the Topic Operator. An example is-Djavax.net.debug=verbose -DpropertyName=value.
-
Deploy the Topic Operator:
oc apply -f install/topic-operator
Verify that the Topic Operator has been deployed successfully:
oc describe deployment strimzi-topic-operator
The Topic Operator is deployed when the
Replicas:entry shows1 available.NoteYou may experience a delay with the deployment if you have a slow connection to the OpenShift cluster and the images have not been downloaded before.
4.1.3.2. Deploying the standalone User Operator
This procedure shows how to deploy the User Operator as a standalone component.
A standalone deployment requires configuration of environment variables, and is more complicated than deploying the User Operator using the Cluster Operator. However, a standalone deployment is more flexible as the User Operator can operate with any Kafka cluster, not necessarily one deployed by the Cluster Operator.
Prerequisites
- You need an existing Kafka cluster for the User Operator to connect to.
Procedure
Edit the following
Deployment.spec.template.spec.containers[0].envproperties in theinstall/user-operator/05-Deployment-strimzi-user-operator.yamlfile by setting:-
STRIMZI_KAFKA_BOOTSTRAP_SERVERSto list the Kafka brokers, given as a comma-separated list ofhostname:portpairs. -
STRIMZI_ZOOKEEPER_CONNECTto list the ZooKeeper nodes, given as a comma-separated list ofhostname:portpairs. This must be the same ZooKeeper cluster that your Kafka cluster is using. Connecting to ZooKeeper nodes with TLS encryption is not supported. -
STRIMZI_NAMESPACEto the OpenShift namespace in which you want the operator to watch forKafkaUserresources. -
STRIMZI_LABELSto the label selector used to identify theKafkaUserresources managed by the operator. -
STRIMZI_FULL_RECONCILIATION_INTERVAL_MSto specify the interval between periodic reconciliations, in milliseconds. -
STRIMZI_ZOOKEEPER_SESSION_TIMEOUT_MSto the ZooKeeper session timeout, in milliseconds. For example,10000. Default20000(20 seconds). -
STRIMZI_CA_CERT_NAMEto point to an OpenShiftSecretthat contains the public key of the Certificate Authority for signing new user certificates for TLS client authentication. TheSecretmust contain the public key of the Certificate Authority under the keyca.crt. -
STRIMZI_CA_KEY_NAMEto point to an OpenShiftSecretthat contains the private key of the Certificate Authority for signing new user certificates for TLS client authentication. TheSecretmust contain the private key of the Certificate Authority under the keyca.key. -
STRIMZI_CLUSTER_CA_CERT_SECRET_NAMEto point to an OpenShiftSecretcontaining the public key of the Certificate Authority used for signing Kafka brokers certificates for enabling TLS-based communication. TheSecretmust contain the public key of the Certificate Authority under the keyca.crt. This environment variable is optional and should be set only if the communication with the Kafka cluster is TLS based. -
STRIMZI_EO_KEY_SECRET_NAMEto point to an OpenShiftSecretcontaining the private key and related certificate for TLS client authentication against the Kafka cluster. TheSecretmust contain the keystore with the private key and certificate under the keyentity-operator.p12, and the related password under the keyentity-operator.password. This environment variable is optional and should be set only if TLS client authentication is needed when the communication with the Kafka cluster is TLS based. -
STRIMZI_CA_VALIDITYthe validity period for the Certificate Authority. Default is365days. -
STRIMZI_CA_RENEWALthe renewal period for the Certificate Authority. -
STRIMZI_LOG_LEVELto the level for printing logging messages. The value can be set to:ERROR,WARNING,INFO,DEBUG, andTRACE. DefaultINFO. -
STRIMZI_GC_LOG_ENABLEDto enable garbage collection (GC) logging. Defaulttrue. Default is30days to initiate certificate renewal before the old certificates expire. -
STRIMZI_JAVA_OPTS(optional) to the Java options used for the JVM running User Operator. An example is-Xmx=512M -Xms=256M. -
STRIMZI_JAVA_SYSTEM_PROPERTIES(optional) to list the-Doptions which are set to the User Operator. An example is-Djavax.net.debug=verbose -DpropertyName=value.
-
Deploy the User Operator:
oc apply -f install/user-operator
Verify that the User Operator has been deployed successfully:
oc describe deployment strimzi-user-operator
The User Operator is deployed when the
Replicas:entry shows1 available.NoteYou may experience a delay with the deployment if you have a slow connection to the OpenShift cluster and the images have not been downloaded before.
4.2. Deploy Kafka Connect
Kafka Connect is a tool for streaming data between Apache Kafka and external systems.
In AMQ Streams, Kafka Connect is deployed in distributed mode. Kafka Connect can also work in standalone mode, but this is not supported by AMQ Streams.
Using the concept of connectors, Kafka Connect provides a framework for moving large amounts of data into and out of your Kafka cluster while maintaining scalability and reliability.
Kafka Connect is typically used to integrate Kafka with external databases and storage and messaging systems.
The procedures in this section show how to:
The term connector is used interchangeably to mean a connector instance running within a Kafka Connect cluster, or a connector class. In this guide, the term connector is used when the meaning is clear from the context.
4.2.1. Deploying Kafka Connect to your OpenShift cluster
This procedure shows how to deploy a Kafka Connect cluster to your OpenShift cluster using the Cluster Operator.
A Kafka Connect cluster is implemented as a Deployment with a configurable number of nodes (also called workers) that distribute the workload of connectors as tasks so that the message flow is highly scalable and reliable.
The deployment uses a YAML file to provide the specification to create a KafkaConnect resource.
In this procedure, we use the example file provided with AMQ Streams:
-
examples/kafka-connect/kafka-connect.yaml
For more information about configuring the KafkaConnect resource, see:
Prerequisites
Procedure
Deploy Kafka Connect to your OpenShift cluster.
oc apply -f examples/kafka-connect/kafka-connect.yaml
Verify that Kafka Connect was successfully deployed:
oc get deployments
4.2.2. Extending Kafka Connect with connector plug-ins
The AMQ Streams container images for Kafka Connect include two built-in file connectors for moving file-based data into and out of your Kafka cluster.
| File Connector | Description |
|---|---|
|
| Transfers data to your Kafka cluster from a file (the source). |
|
| Transfers data from your Kafka cluster to a file (the sink). |
The Cluster Operator can also use images that you have created to deploy a Kafka Connect cluster to your OpenShift cluster.
The procedures in this section show how to add your own connector classes to connector images by:
You create the configuration for connectors directly using the Kafka Connect REST API or KafkaConnector custom resources.
4.2.2.1. Creating a Docker image from the Kafka Connect base image
This procedure shows how to create a custom image and add it to the /opt/kafka/plugins directory.
You can use the Kafka container image on Red Hat Ecosystem Catalog as a base image for creating your own custom image with additional connector plug-ins.
At startup, the AMQ Streams version of Kafka Connect loads any third-party connector plug-ins contained in the /opt/kafka/plugins directory.
Prerequisites
Procedure
Create a new
Dockerfileusingregistry.redhat.io/amq7/amq-streams-kafka-25-rhel7:1.5.0as the base image:FROM registry.redhat.io/amq7/amq-streams-kafka-25-rhel7:1.5.0 USER root:root COPY ./my-plugins/ /opt/kafka/plugins/ USER 1001Example plug-in file
$ tree ./my-plugins/
./my-plugins/
├── debezium-connector-mongodb
│   ├── bson-3.4.2.jar
│   ├── CHANGELOG.md
│   ├── CONTRIBUTE.md
│   ├── COPYRIGHT.txt
│   ├── debezium-connector-mongodb-0.7.1.jar
│   ├── debezium-core-0.7.1.jar
│   ├── LICENSE.txt
│   ├── mongodb-driver-3.4.2.jar
│   ├── mongodb-driver-core-3.4.2.jar
│   └── README.md
├── debezium-connector-mysql
│   ├── CHANGELOG.md
│   ├── CONTRIBUTE.md
│   ├── COPYRIGHT.txt
│   ├── debezium-connector-mysql-0.7.1.jar
│   ├── debezium-core-0.7.1.jar
│   ├── LICENSE.txt
│   ├── mysql-binlog-connector-java-0.13.0.jar
│   ├── mysql-connector-java-5.1.40.jar
│   ├── README.md
│   └── wkb-1.0.2.jar
└── debezium-connector-postgres
    ├── CHANGELOG.md
    ├── CONTRIBUTE.md
    ├── COPYRIGHT.txt
    ├── debezium-connector-postgres-0.7.1.jar
    ├── debezium-core-0.7.1.jar
    ├── LICENSE.txt
    ├── postgresql-42.0.0.jar
    ├── protobuf-java-2.6.1.jar
    └── README.md
- Build the container image.
- Push your custom image to your container registry.
Point to the new container image.
You can either:
Edit the
KafkaConnect.spec.imageproperty of theKafkaConnectcustom resource.If set, this property overrides the
STRIMZI_KAFKA_CONNECT_IMAGESvariable in the Cluster Operator.apiVersion: kafka.strimzi.io/v1beta1 kind: KafkaConnect metadata: name: my-connect-cluster spec: 1 #... image: my-new-container-image 2 config: 3 #...
or
-
In the
install/cluster-operator/050-Deployment-strimzi-cluster-operator.yamlfile, edit theSTRIMZI_KAFKA_CONNECT_IMAGESvariable to point to the new container image, and then reinstall the Cluster Operator.
Additional resources
-
For more information on the
KafkaConnect.spec.image property, see Container images. -
For more information on the
STRIMZI_KAFKA_CONNECT_IMAGESvariable, see Cluster Operator Configuration.
4.2.2.2. Creating a container image using OpenShift builds and Source-to-Image
This procedure shows how to use OpenShift builds and the Source-to-Image (S2I) framework to create a new container image.
An OpenShift build takes a builder image with S2I support, together with source code and binaries provided by the user, and uses them to build a new container image. Once built, container images are stored in OpenShift’s local container image repository and are available for use in deployments.
A Kafka Connect builder image with S2I support is provided on the Red Hat Ecosystem Catalog as part of the registry.redhat.io/amq7/amq-streams-kafka-25-rhel7:1.5.0 image. This S2I image takes your binaries (with plug-ins and connectors) and stores them in the /tmp/kafka-plugins/s2i directory. It creates a new Kafka Connect image from this directory, which can then be used with the Kafka Connect deployment. When started using the enhanced image, Kafka Connect loads any third-party plug-ins from the /tmp/kafka-plugins/s2i directory.
Procedure
On the command line, use the
oc applycommand to create and deploy a Kafka Connect S2I cluster:oc apply -f examples/connect/kafka-connect-s2i.yaml
Create a directory with Kafka Connect plug-ins:
$ tree ./my-plugins/
./my-plugins/
├── debezium-connector-mongodb
│   ├── bson-3.4.2.jar
│   ├── CHANGELOG.md
│   ├── CONTRIBUTE.md
│   ├── COPYRIGHT.txt
│   ├── debezium-connector-mongodb-0.7.1.jar
│   ├── debezium-core-0.7.1.jar
│   ├── LICENSE.txt
│   ├── mongodb-driver-3.4.2.jar
│   ├── mongodb-driver-core-3.4.2.jar
│   └── README.md
├── debezium-connector-mysql
│   ├── CHANGELOG.md
│   ├── CONTRIBUTE.md
│   ├── COPYRIGHT.txt
│   ├── debezium-connector-mysql-0.7.1.jar
│   ├── debezium-core-0.7.1.jar
│   ├── LICENSE.txt
│   ├── mysql-binlog-connector-java-0.13.0.jar
│   ├── mysql-connector-java-5.1.40.jar
│   ├── README.md
│   └── wkb-1.0.2.jar
└── debezium-connector-postgres
    ├── CHANGELOG.md
    ├── CONTRIBUTE.md
    ├── COPYRIGHT.txt
    ├── debezium-connector-postgres-0.7.1.jar
    ├── debezium-core-0.7.1.jar
    ├── LICENSE.txt
    ├── postgresql-42.0.0.jar
    ├── protobuf-java-2.6.1.jar
    └── README.md
Use the
oc start-buildcommand to start a new build of the image using the prepared directory:oc start-build my-connect-cluster-connect --from-dir ./my-plugins/
NoteThe name of the build is the same as the name of the deployed Kafka Connect cluster.
- When the build has finished, the new image is used automatically by the Kafka Connect deployment.
4.2.3. Creating and managing connectors
When you have created a container image for your connector plug-in, you need to create a connector instance in your Kafka Connect cluster. You can then configure, monitor, and manage a running connector instance.
A connector is an instance of a particular connector class that knows how to communicate with the relevant external system in terms of messages. Connectors are available for many external systems, or you can create your own.
You can create source and sink types of connector.
- Source connector
- A source connector is a runtime entity that fetches data from an external system and feeds it to Kafka as messages.
- Sink connector
- A sink connector is a runtime entity that fetches messages from Kafka topics and feeds them to an external system.
AMQ Streams provides two APIs for creating and managing connectors:
-
KafkaConnectorresources (referred to asKafkaConnectors) - Kafka Connect REST API
Using the APIs, you can:
- Check the status of a connector instance
- Reconfigure a running connector
- Increase or decrease the number of tasks for a connector instance
-
Restart failed tasks (not supported by
KafkaConnectorresource) - Pause a connector instance
- Resume a previously paused connector instance
- Delete a connector instance
4.2.3.1. KafkaConnector resources
KafkaConnectors allow you to create and manage connector instances for Kafka Connect in an OpenShift-native way, so an HTTP client such as cURL is not required. Like other Kafka resources, you declare a connector’s desired state in a KafkaConnector YAML file that is deployed to your OpenShift cluster to create the connector instance.
You manage a running connector instance by updating its corresponding KafkaConnector, and then applying the updates. You remove a connector by deleting its corresponding KafkaConnector.
To ensure compatibility with earlier versions of AMQ Streams, KafkaConnectors are disabled by default. To enable them for a Kafka Connect cluster, you must use annotations on the KafkaConnect resource. For instructions, see Enabling KafkaConnector resources.
When KafkaConnectors are enabled, the Cluster Operator begins to watch for them. It updates the configurations of running connector instances to match the configurations defined in their KafkaConnectors.
AMQ Streams includes an example KafkaConnector, named examples/connect/source-connector.yaml. You can use this example to create and manage a FileStreamSourceConnector.
4.2.3.2. Availability of the Kafka Connect REST API
The Kafka Connect REST API is available on port 8083 as the <connect-cluster-name>-connect-api service.
If KafkaConnectors are enabled, manual changes made directly using the Kafka Connect REST API are reverted by the Cluster Operator.
The operations supported by the REST API are described in the Apache Kafka documentation.
4.2.4. Deploying a KafkaConnector resource to Kafka Connect
This procedure describes how to deploy the example KafkaConnector to a Kafka Connect cluster.
The example YAML will create a FileStreamSourceConnector to send each line of the license file to Kafka as a message in a topic named my-topic.
Prerequisites
-
A Kafka Connect deployment in which
KafkaConnectorsare enabled - A running Cluster Operator
Procedure
Edit the
examples/connect/source-connector.yamlfile:apiVersion: kafka.strimzi.io/v1alpha1 kind: KafkaConnector metadata: name: my-source-connector 1 labels: strimzi.io/cluster: my-connect-cluster 2 spec: class: org.apache.kafka.connect.file.FileStreamSourceConnector 3 tasksMax: 2 4 config: 5 file: "/opt/kafka/LICENSE" topic: my-topic # ...
- 1
- Enter a name for the
KafkaConnectorresource. This will be used as the name of the connector within Kafka Connect. You can choose any name that is valid for an OpenShift resource. - 2
- Enter the name of the Kafka Connect cluster in which to create the connector.
- 3
- The name or alias of the connector class. This should be present in the image being used by the Kafka Connect cluster.
- 4
- The maximum number of tasks that the connector can create.
- 5
- Configuration settings for the connector. Available configuration options depend on the connector class.
Create the
KafkaConnectorin your OpenShift cluster:oc apply -f examples/connect/source-connector.yaml
Check that the resource was created:
oc get kctr --selector strimzi.io/cluster=my-connect-cluster -o name
4.3. Deploy Kafka MirrorMaker
The Cluster Operator deploys one or more Kafka MirrorMaker replicas to replicate data between Kafka clusters. This process is called mirroring to avoid confusion with the Kafka partitions replication concept. MirrorMaker consumes messages from the source cluster and republishes those messages to the target cluster.
4.3.1. Deploying Kafka MirrorMaker to your OpenShift cluster
This procedure shows how to deploy a Kafka MirrorMaker cluster to your OpenShift cluster using the Cluster Operator.
The deployment uses a YAML file to provide the specification to create a KafkaMirrorMaker or KafkaMirrorMaker2 resource depending on the version of MirrorMaker deployed.
In this procedure, we use the example files provided with AMQ Streams:
-
examples/mirror-maker/kafka-mirror-maker.yaml -
examples/mirror-maker/kafka-mirror-maker-2.yaml
For information about configuring KafkaMirrorMaker or KafkaMirrorMaker2 resources, see Kafka MirrorMaker configuration.
Prerequisites
Procedure
Deploy Kafka MirrorMaker to your OpenShift cluster:
For MirrorMaker:
oc apply -f examples/mirror-maker/kafka-mirror-maker.yaml
For MirrorMaker 2.0:
oc apply -f examples/mirror-maker/kafka-mirror-maker-2.yaml
Verify that MirrorMaker was successfully deployed:
oc get deployments
4.4. Deploy Kafka Bridge
The Cluster Operator deploys one or more Kafka bridge replicas to send data between Kafka clusters and clients via HTTP API.
4.4.1. Deploying Kafka Bridge to your OpenShift cluster
This procedure shows how to deploy a Kafka Bridge cluster to your OpenShift cluster using the Cluster Operator.
The deployment uses a YAML file to provide the specification to create a KafkaBridge resource.
In this procedure, we use the example file provided with AMQ Streams:
-
examples/bridge/kafka-bridge.yaml
For information about configuring the KafkaBridge resource, see Kafka Bridge configuration.
Prerequisites
Procedure
Deploy Kafka Bridge to your OpenShift cluster:
oc apply -f examples/bridge/kafka-bridge.yaml
Verify that Kafka Bridge was successfully deployed:
oc get deployments