
Red Hat Training
A Red Hat training course is available for Red Hat AMQ
Chapter 6. Managing AMQ Broker
You can use AMQ Console to view important information about AMQ Broker brokers and manage the following resources:
- Incoming network connections (acceptors)
- Addresses
- Queues
6.1. Viewing Details about the Broker
You can view configuration properties and their values to see how the broker is configured.
Procedure
On the Artemis tab, in the folder tree, select a broker.
A list of configuration properties are displayed for the broker.
- Connections - Displays information about the client connections.
- Sessions - Displays information about the client sessions.
- Consumers - Displays information about the client consumers.
- Producers - Displays information about the session producers.
- Addresses - Displays information about the addresses.
- Queues - Displays information about the queues.
- Diagrams - Displays diagram of all AMQ Broker resources in your topology, including brokers (masters and slaves), producers and consumers, addresses, and queues.
- Attributes - Displays information about the configured attributes.
- Operations - Displays information about the operations that can be executed on the server.
- Chart - Displays real-time data for the selected attributes.

6.2. Viewing the Broker Diagram
You can view a diagram of all AMQ Broker resources in your topology, including brokers (masters and slaves), producers and consumers, addresses, and queues.
Procedure
On the Artemis tab, click Diagram.
This example shows three brokers with 10 queues.
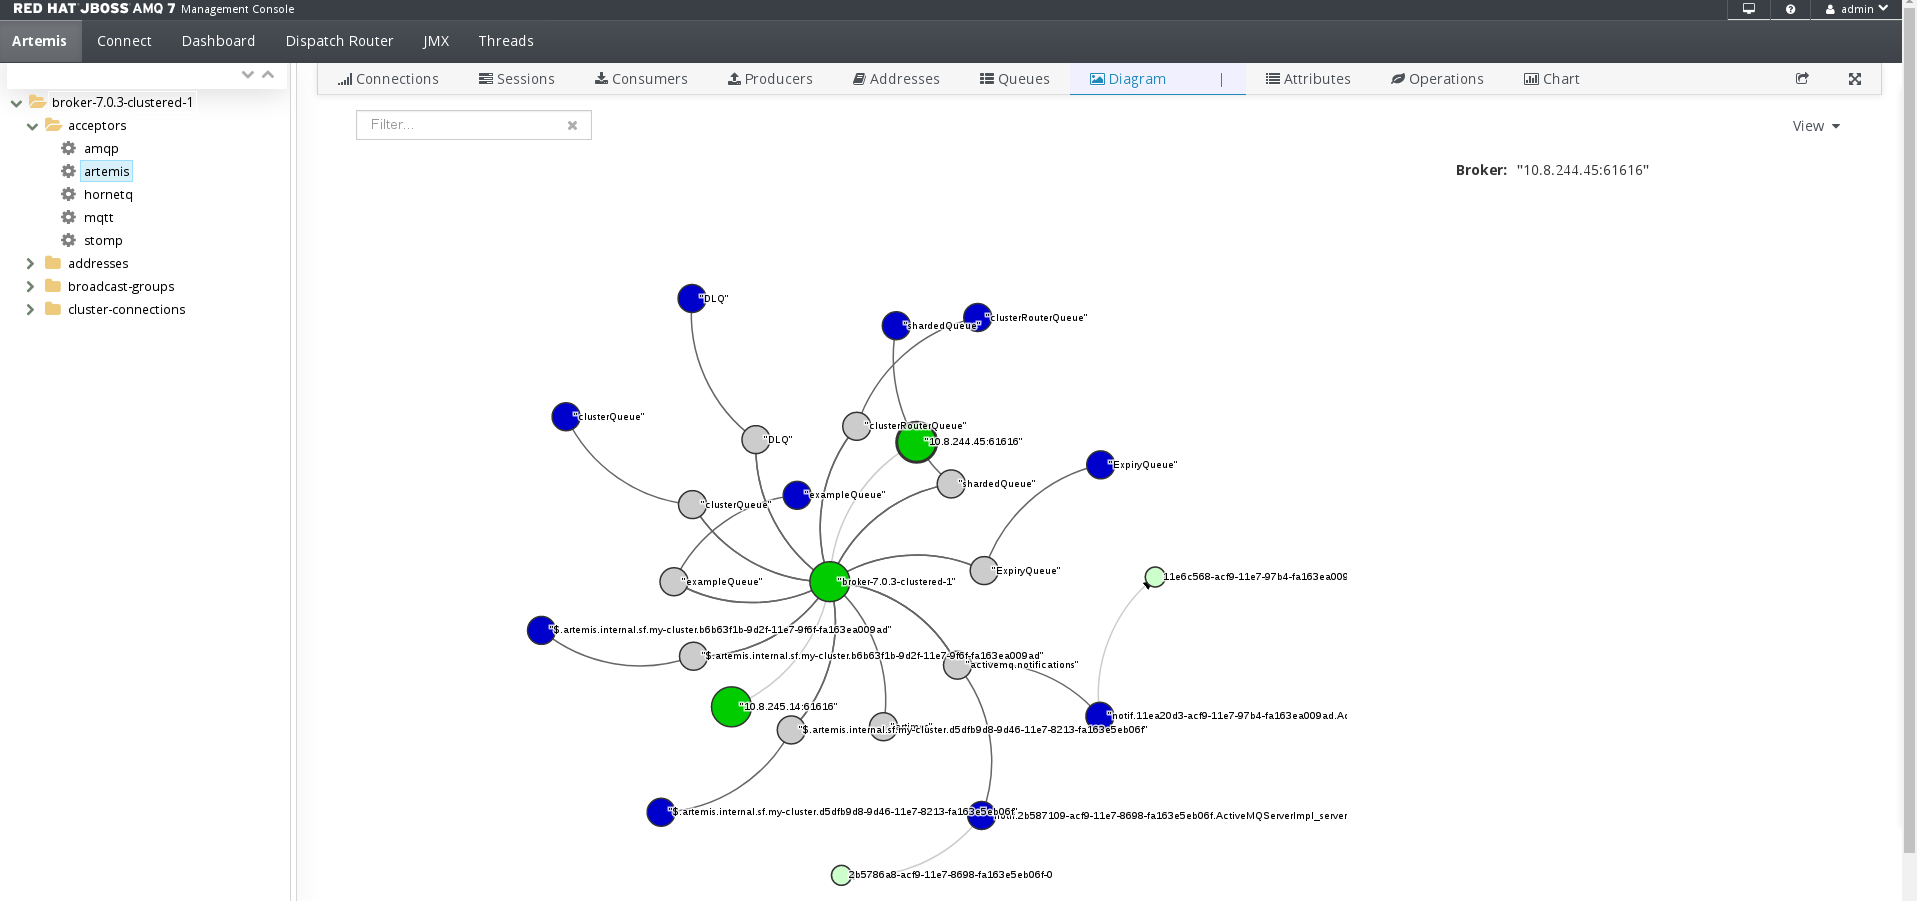
- To change what objects are displayed on the diagram, click the View drop-down and select the items that you want to be displayed.
6.3. Viewing Acceptors
You can view details about the acceptors configured for the broker.
Procedure
- On the Artemis tab, in the folder tree, expand the acceptors folder.
Click an acceptor to view details about how it is configured.
This example shows the configuration properties for the
amqpacceptor, which is the default acceptor provided for the AMQP protocol:
6.4. Managing Addresses and Queues
6.4.1. Creating Addresses
Procedure
- In the folder tree, select a broker.
On the navigation bar, click
 drop-down icon, and then click Create.
A page appears for creating an address.
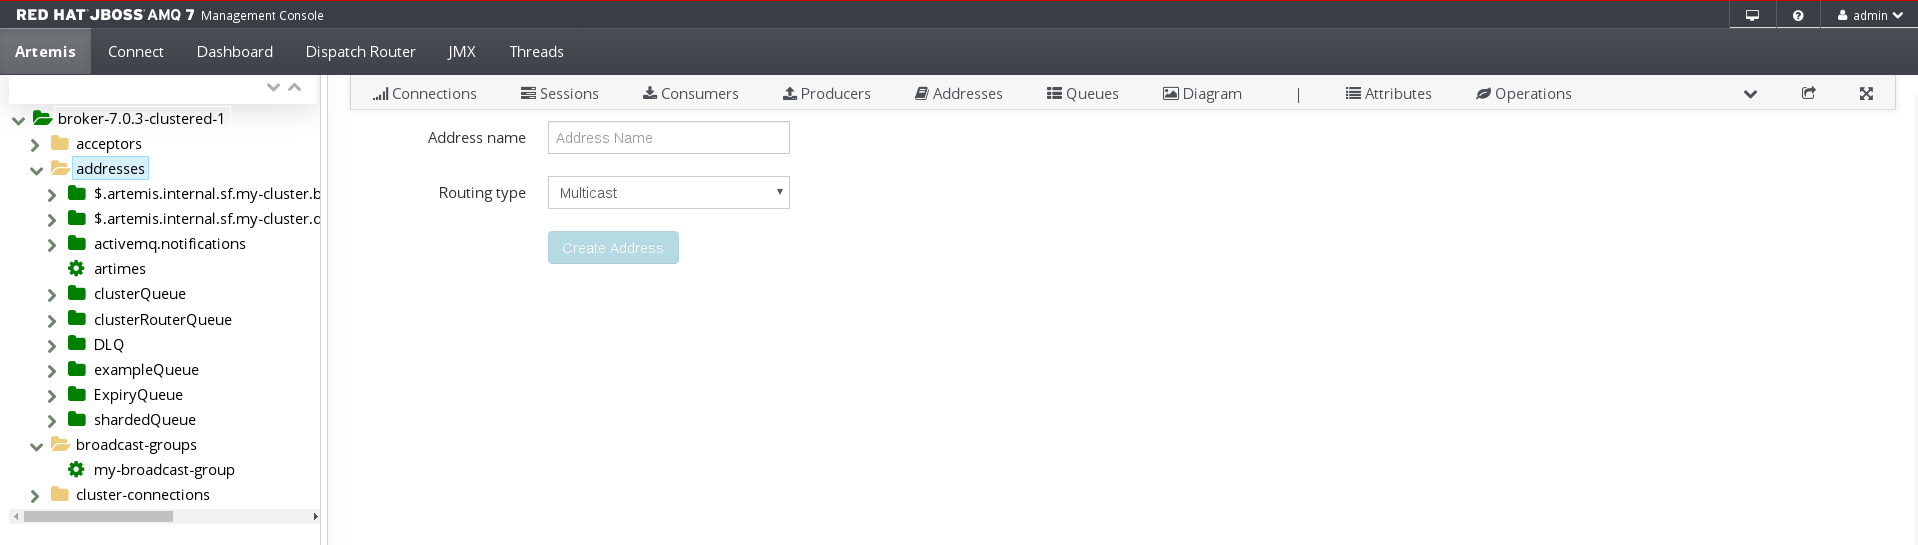
Complete the following fields:
Address name- The routing name of the address.
Routing typeSelect one of the following options:
-
Multicast- Messages sent to this address will be distributed to all subscribers in a publish-subscribe manner. -
Anycast- Messages sent to this address will be distributed to only one subscriber in a point-to-point manner. -
Both- Enables you to define more than one routing type per address. However, this typically results in an anti-pattern and is therefore not recommended.
-
NoteIf an address does use both routing types, however, and the client does not show a preference for either one, the broker typically defaults to the
anycastrouting type. The one exception is when the client uses the MQTT protocol. In that case, the default routing type ismulticast.- Click Create Address.
6.4.2. Sending Messages to an Address
Procedure
- In the folder tree, select an address.
On the navigation bar, click
drop-down icon, and then click Send.
A page appears for you to compose the message.
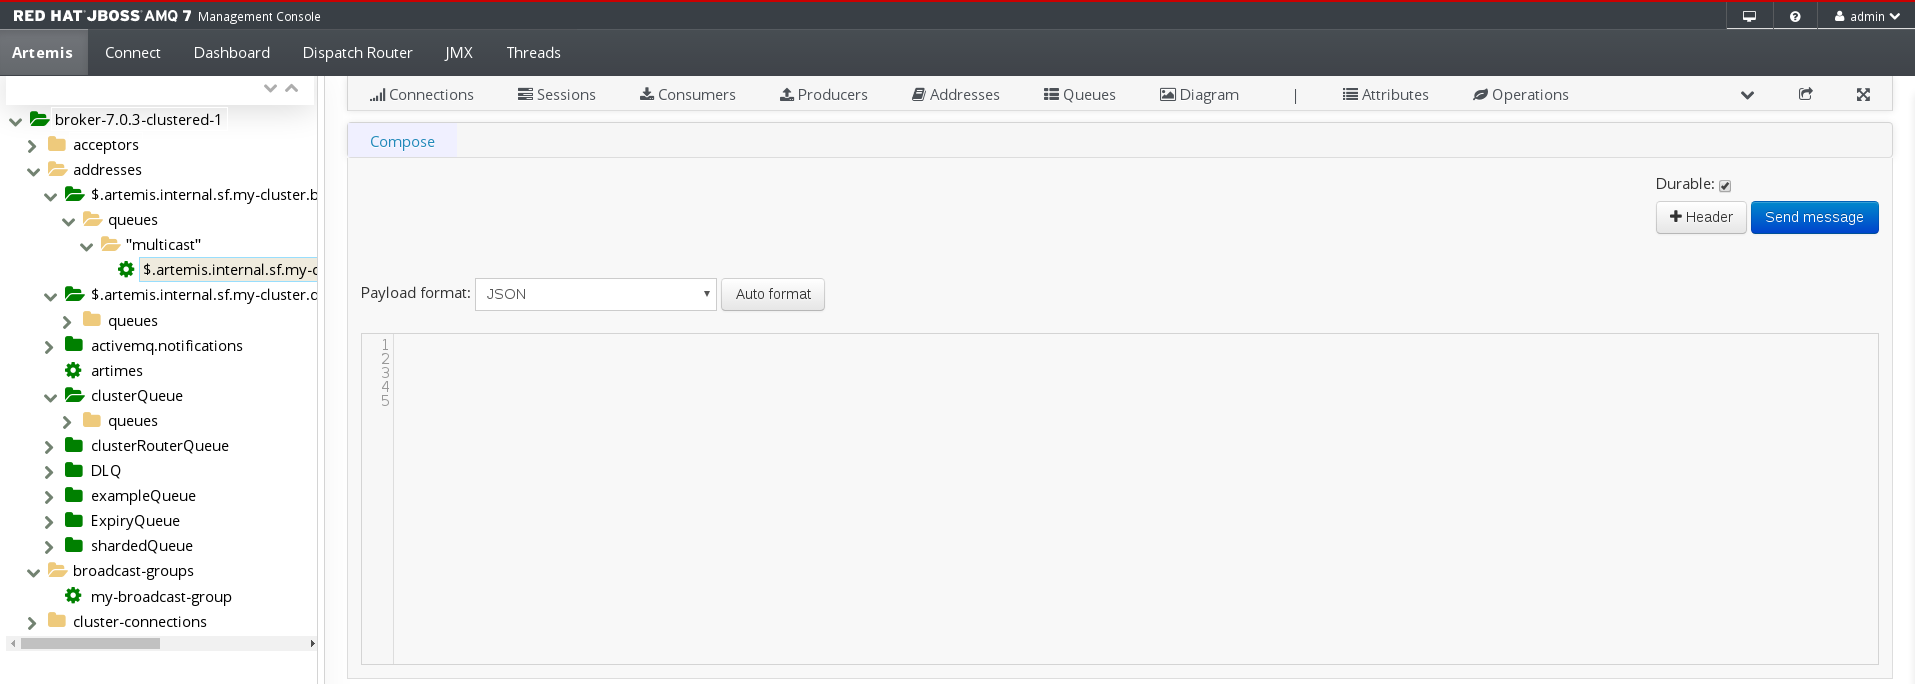
- If necessary, click the Header button to add message header information.
- Enter the message body.
In the Payload format drop-down, select an option for the format of the message body, and then click Auto format.
The message body is formatted in a human-readable style for the format you selected.
Click Send message.
The message is sent.
- To send additional messages, change any of the information you entered, and then click Send message.
6.4.3. Creating Queues
Prerequisites
- The address to which you want to bind the queue must exist.
Procedure
- In the folder tree, select the address to which you want to bind the queue.
On the navigation bar, click
drop-down icon, and then click Create.
A page appears for you to create the queue.
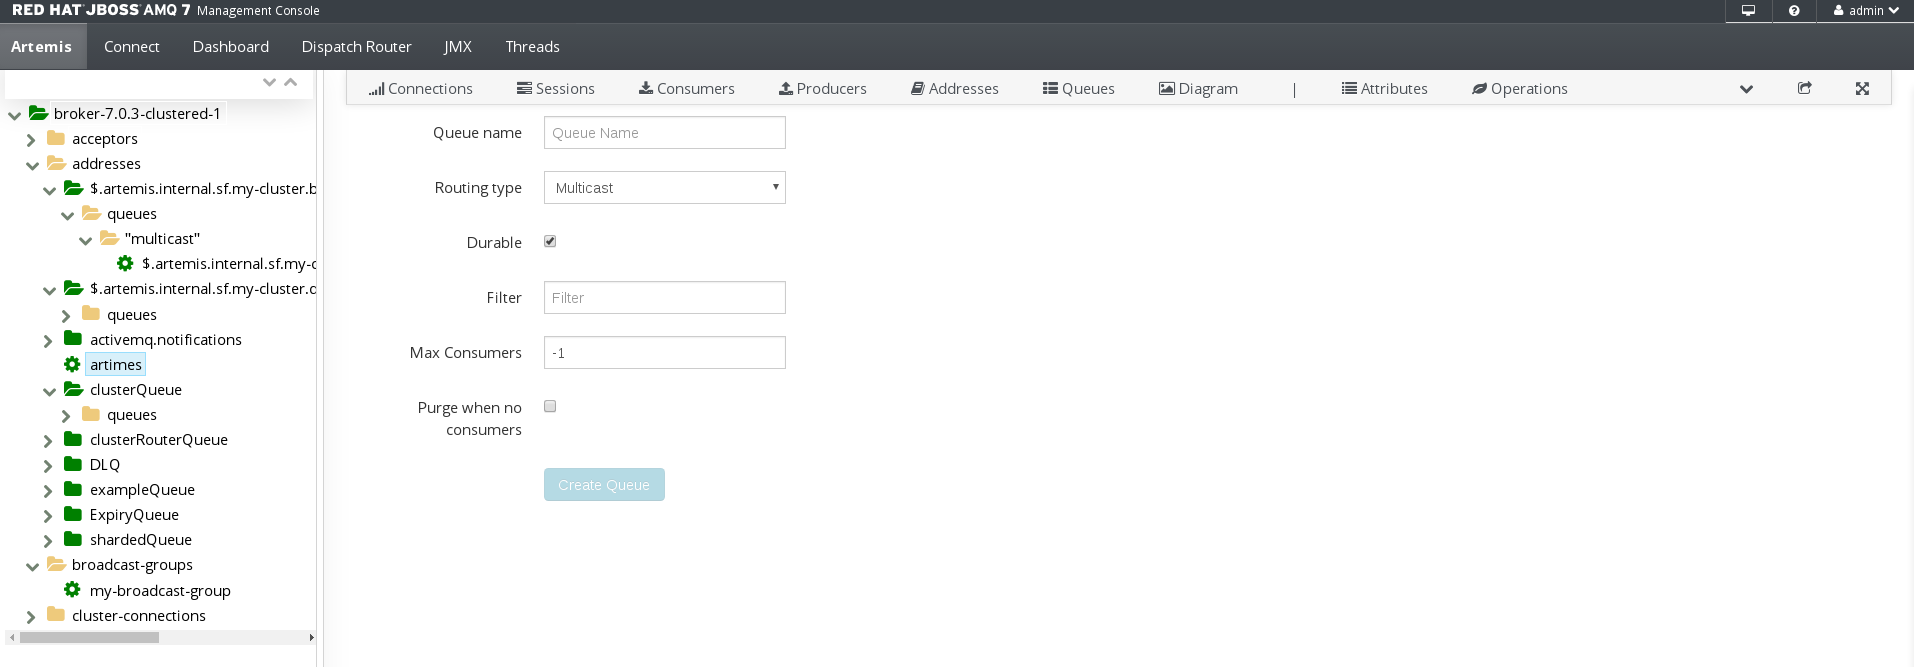
Complete the following fields:
Queue name- A unique name for the queue.
Routing typeSelect one of the following options:
-
Multicast- Messages sent to this address will be distributed to all queues bound to the address. -
Anycast- Only one queue bound to the parent address will receive a copy of the message. Messages will be distributed evenly among all of the queues bound to the address.
-
Durable- If you select this option, the queue and its messages will be persistent.
Filter- The username to be used when connecting to the broker.
Max Consumers- The maximum number of consumers that can access the queue at a given time.
Purge when no consumers- If selected, the queue will be purged when no consumers are connected.
Click Create Queue.
The queue is created. You can access it in the folder tree under the address to which it is bound. Queues for an address are organized into a
Queuesfolder. Within theQueuesfolder, queues are further organized by routing type (MULTICASTandANYCAST).In this example, the
clusterQueuequeue is located within theclusterQueueaddress: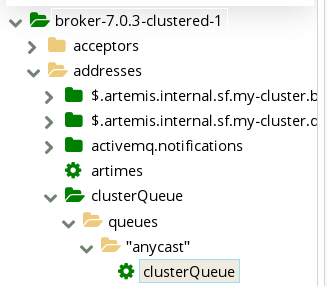
6.4.4. Checking the Status of a Queue
Charts provide a real-time view of the status of a queue on a broker.
Procedure
In the folder tree, navigate to a queue.
To view a chart for multiple queues for an address, select the
ANYCASTorMULTICASTfolder that contains the queues.On the navigation bar, click
drop-down icon, and then click Chart.
A chart is displayed showing real-time data for all of the queue’s attributes.
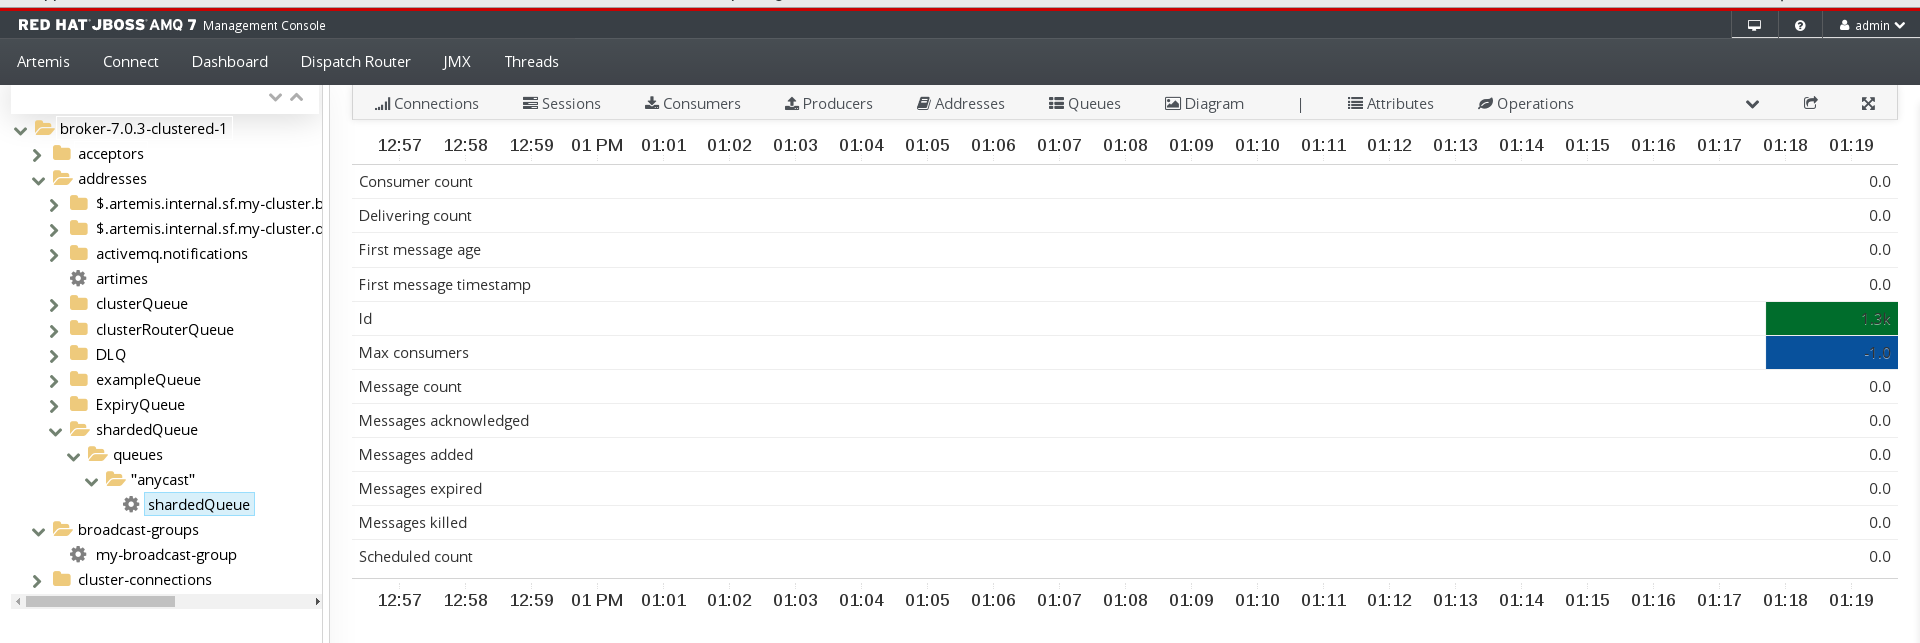
If necessary, select different criteria for the chart:
-
On the navigation bar, click
drop-down icon, and then click Edit Chart.
In the
Attributeslist, select one or more attributes that you want to include in the chart.To select multiple attributes, press and hold the Ctrl key and select each attribute.
Click the View Chart button.
The chart is displayed based on the criteria you selected.
-
On the navigation bar, click
6.4.5. Browsing Queues
Browsing a queue displays all of the messages in the queue. You can also filter and sort the list to find specific messages.
Procedure
In the folder tree, navigate to a queue.
Queues are located within the address to which they are bound.
On the navigation bar, click
drop-down icon, and then click Browse.
The messages in the queue are displayed. By default, the first 200 messages are displayed.
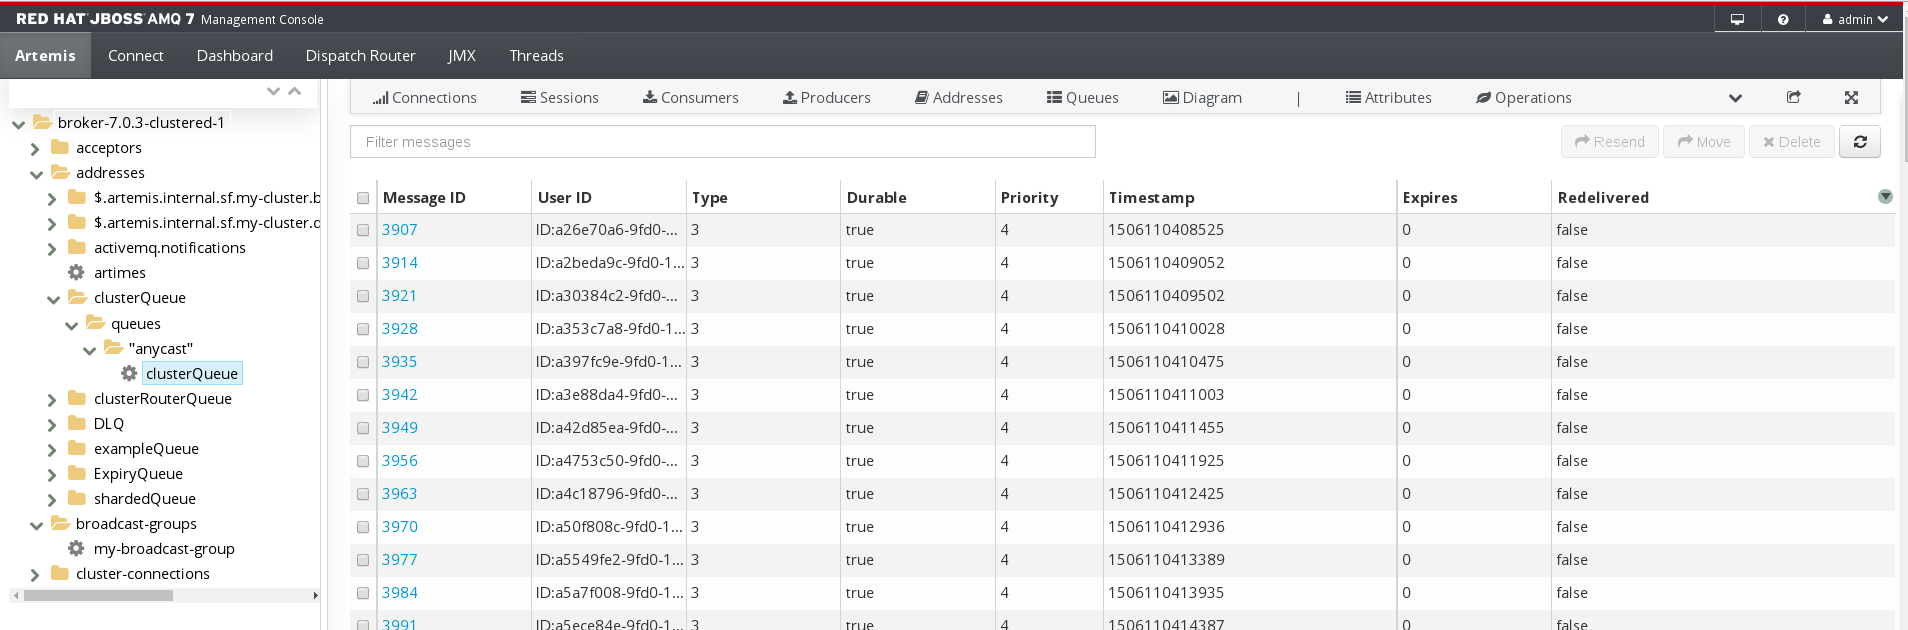
To browse for a specific message or group of messages, do one of the following:
To… Do this… Filter the list of messages
In the
Filter messagestext field, enter a filter criteria and then press Enter.Sort the list of messages
In the list of messages, click a column header. To sort the messages in descending order, click the header a second time.
To view the content of a message, click the message ID.
You can view the message header, properties, and body.
6.4.6. Sending Messages to a Queue
Procedure
- In the folder tree, select the queue to which you want to send the message.
On the navigation bar, click
drop-down icon, and then click Send.
A page appears for you to compose the message.

- If necessary, click the Header button to add message header information.
- Enter the message body.
In the Payload format drop-down, select an option for the format of the message body, and then click Auto format.
The message body is formatted in a human-readable style for the format you selected.
Click Send message.
The message is sent.
- To send additional messages, change any of the information you entered, and click Send message.
6.4.7. Resending Messages to a Queue
You can resend previously sent messages.
Procedure
- Browse for the message you want to resend.
- Click the checkbox next to the message that you want to resend.
Click the Resend button.
The message is displayed.
- Update the message header and body as needed, and then click Send message.
6.4.8. Moving Messages to a Different Queue
You can move one or more messages in a queue to a different queue.
Procedure
- Browse for the messages you want to move.
- Click the checkbox next to each message that you want to move.
Click the Move button.
A confirmation dialog box appears.

- Enter the name of the queue to which you want to move the messages, and then click Move.
6.4.9. Deleting Queues
You can delete a queue or purge all of the messages from a queue.
Procedure
- Browse for the queue you want to delete or purge.
Do one of the following:
To… Do this… Delete a message from the queue
- Click the checkbox next to each message you want to delete.
- Click the Delete button.
Purge all messages from the queue
- On the navigation bar, click Delete.
- Click the Purge queue button.
Delete the queue
- On the navigation bar, click Delete.
- Click the Delete queue button.