
Chapter 15. Summary: from zero to hero Developer Portal
Most best practice reviews of API deployments agree that a well structured developer portal and great documentation are key elements to assure adoption. Your developer portal is not only a source of documentation. It is also your main hub to manage interactions with developers and for developers to access to their API keys in a secure way.
15.1. Goal
By the end of this tutorial, you will have a Developer Portal up and running to promote your API, allow developers sign up for accounts, and access their API keys.
15.2. Configuring your Developer Portal
15.2.1. Planning your portal concept
From early stages, it is a good idea to plan out the concept for your Developer Portal. The most important elements to consider in your plan include:
- Site map: A skeleton of what the portal structure will be.
- Top menu bar: The navigation that will be repeated on every page.
- Side menu bars: To access to individual pages within each section.
- Page layout guidelines: To give your portal a consistent look and feel.
15.2.2. Setting up the editing environment
The best setup of your editing environment has proven to be:
- A tab showing yourcompany-admin.3scale.net/p/admin/cms logged in with your admin credentials, which gives access to Developer Portal for the portal
- Second tab pointing to yourcompany.3scale.net, the public view of your portal (if you access this though the Site link, you don’t have to worry about the access code)
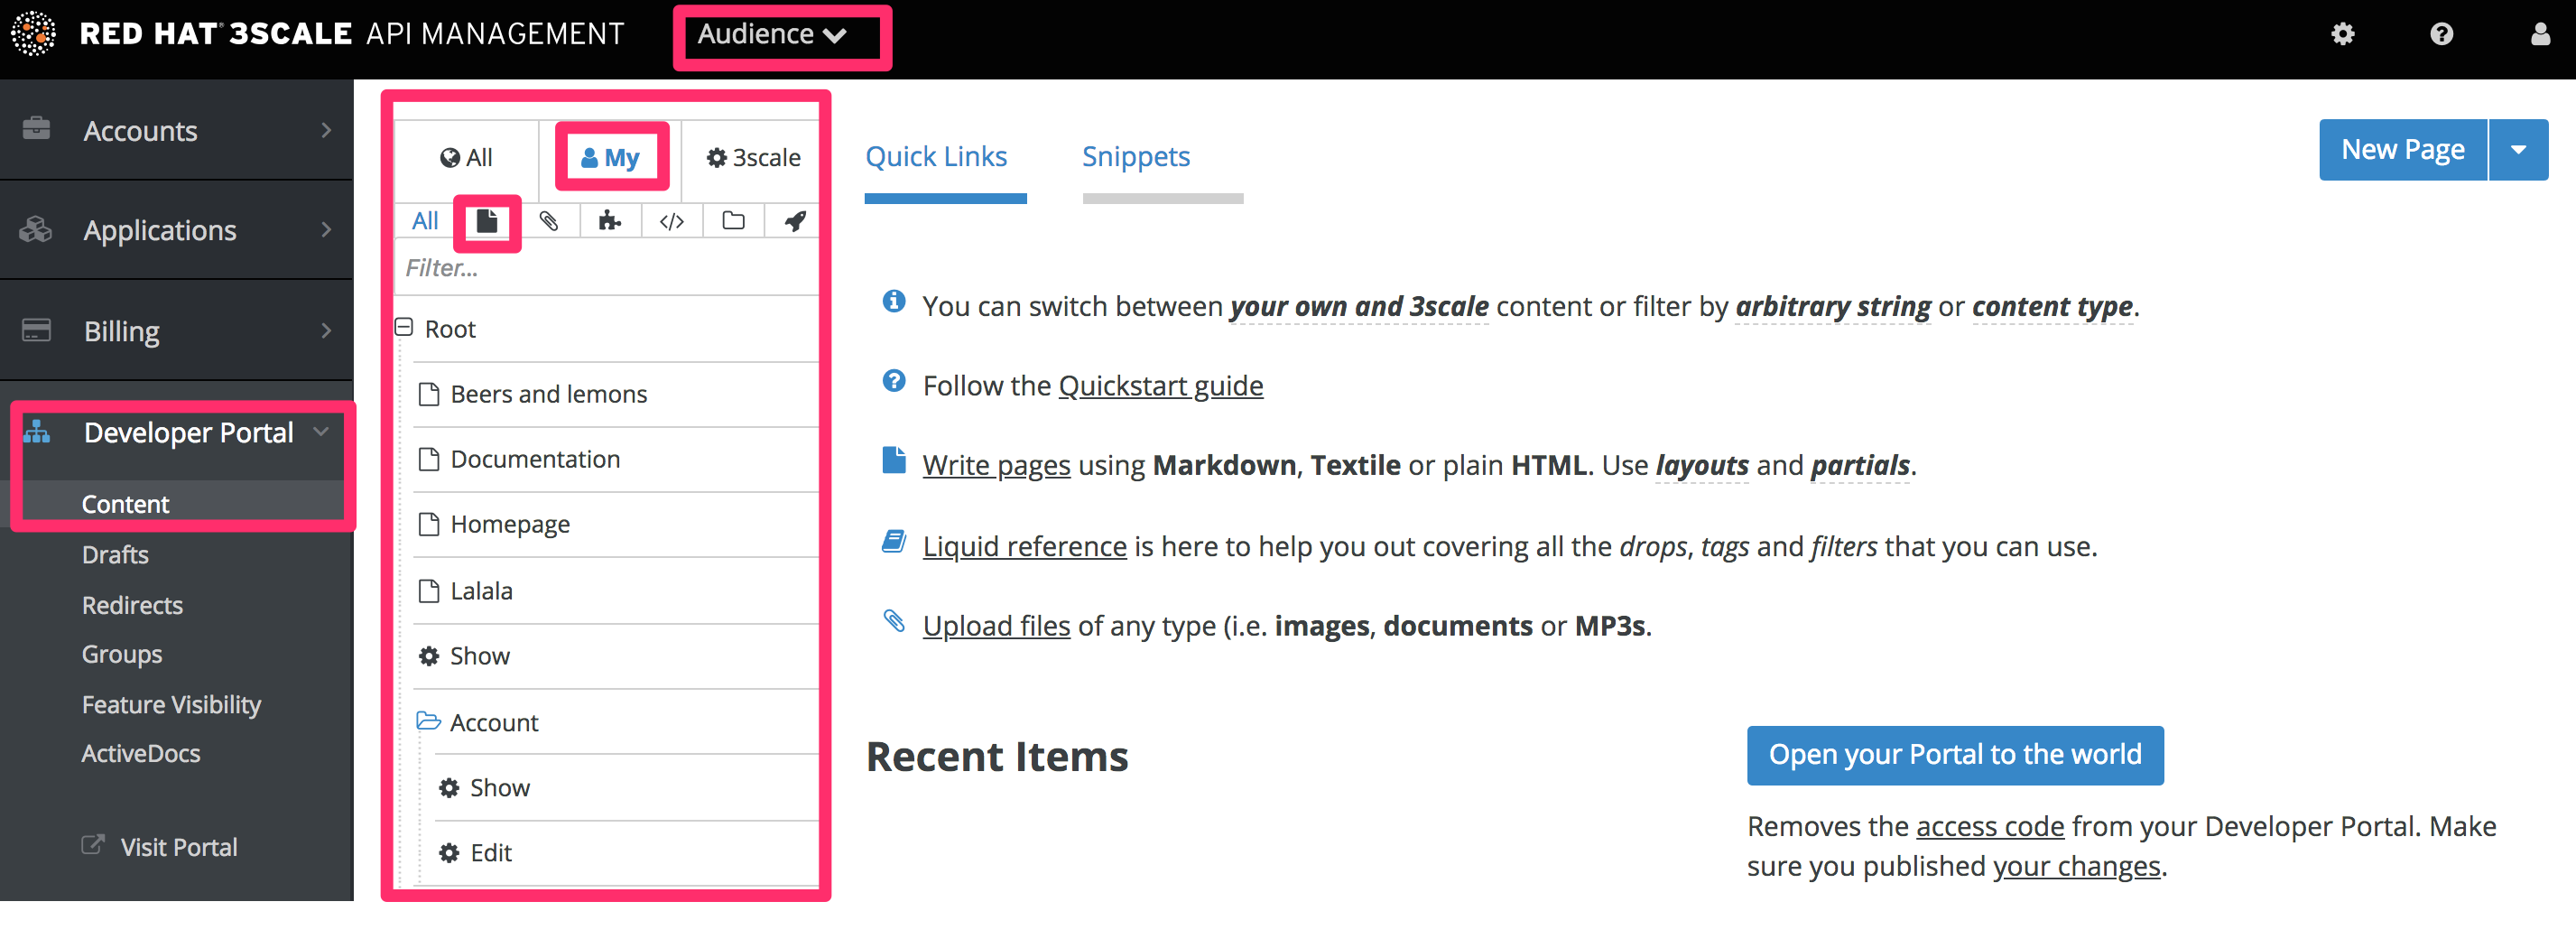
In the Admin Panel, you can see all your developer portal’s elements in the left sidebar:
15.2.3. Defining the page layout templates
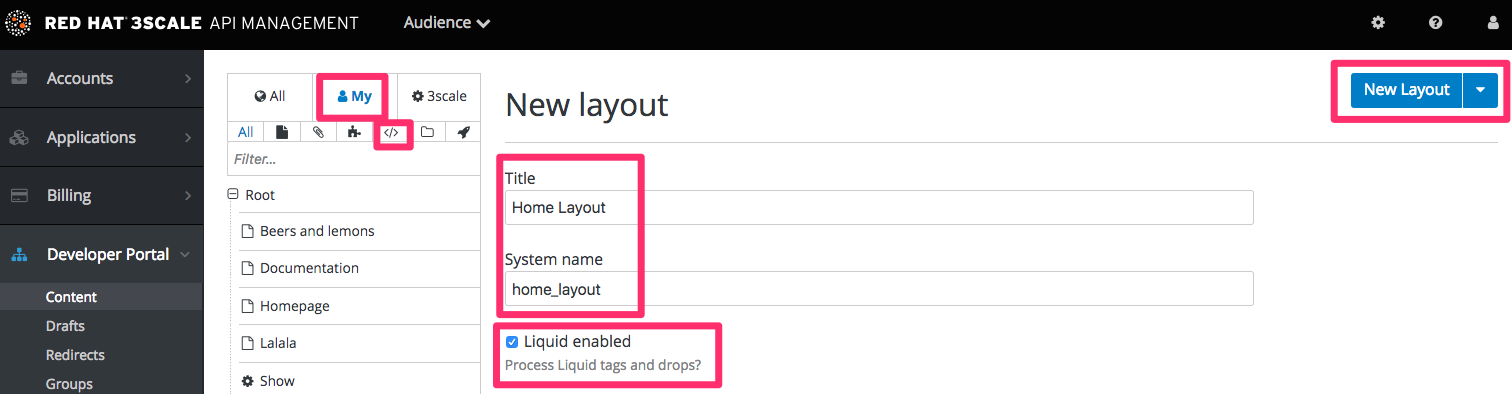
The general idea is to define a separate layout for each of the different page styles in your portal. There is one standard layout called “main layout” when you start. It’s best not to make any changes to this until you are quite expert at using the Developer Portal because this is used by all the system-generated pages. Usually you’ll want to have a unique style for the home page of your portal.
The main layout template will be a starting point for your customizations. Create a new layout, and copy/paste the content of main layout into it.
Remove the sidebar menu by deleting this line from your “home layout”:
{% include 'submenu'%}
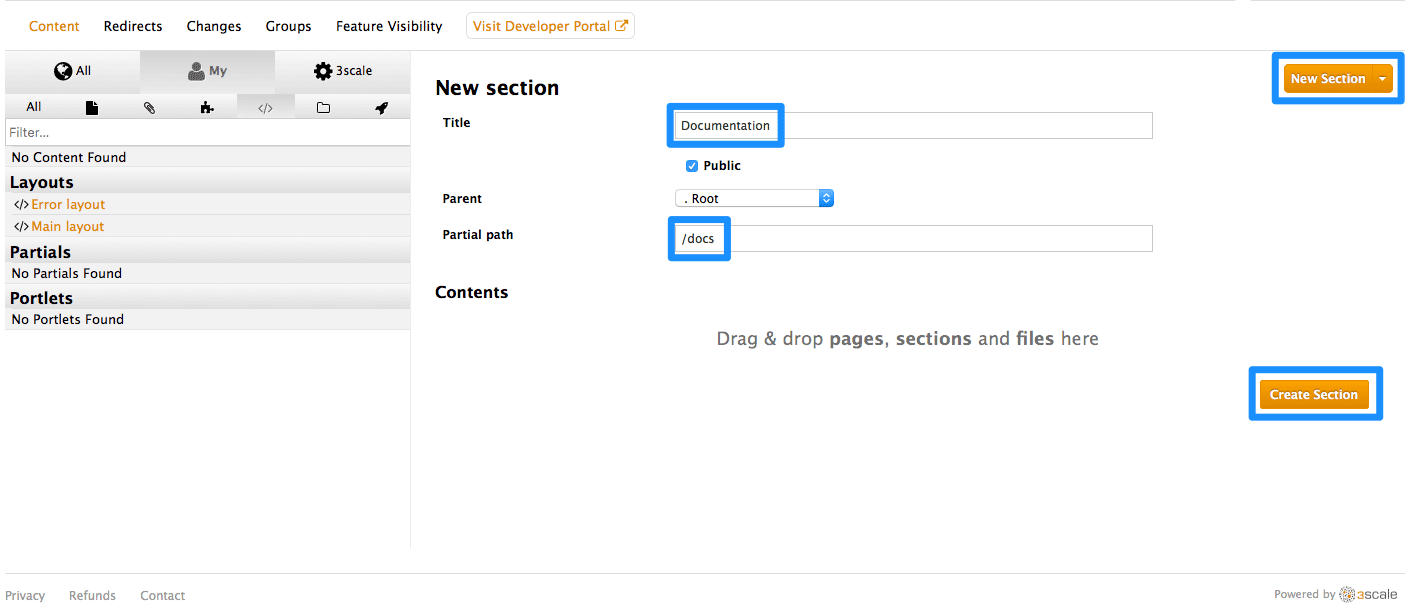
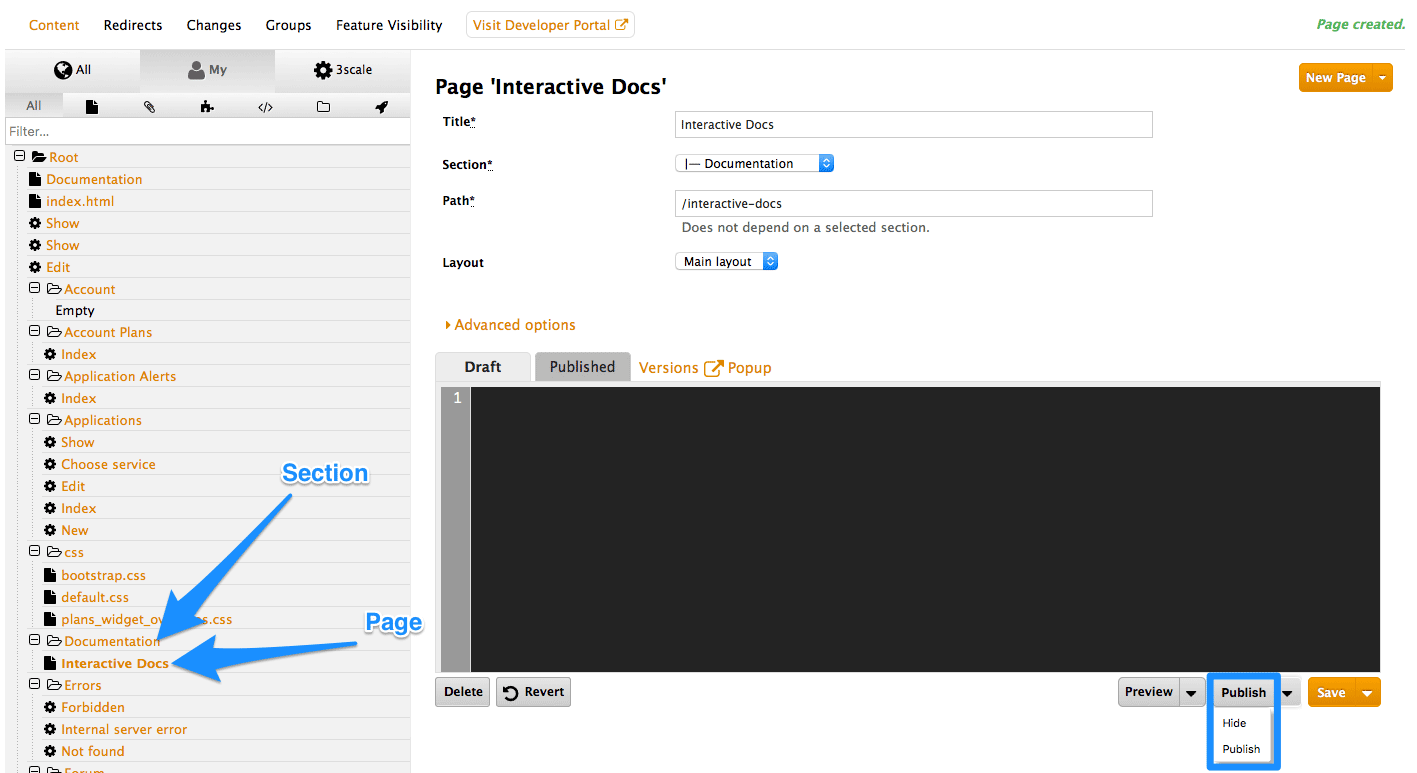
15.2.4. Creating your page hierarchy
Begin at the root level in the site map, and add a new section for each of your top menu items (add sections by expanding the “new” button on the righthand side). Assign a title, parent section, and the path.
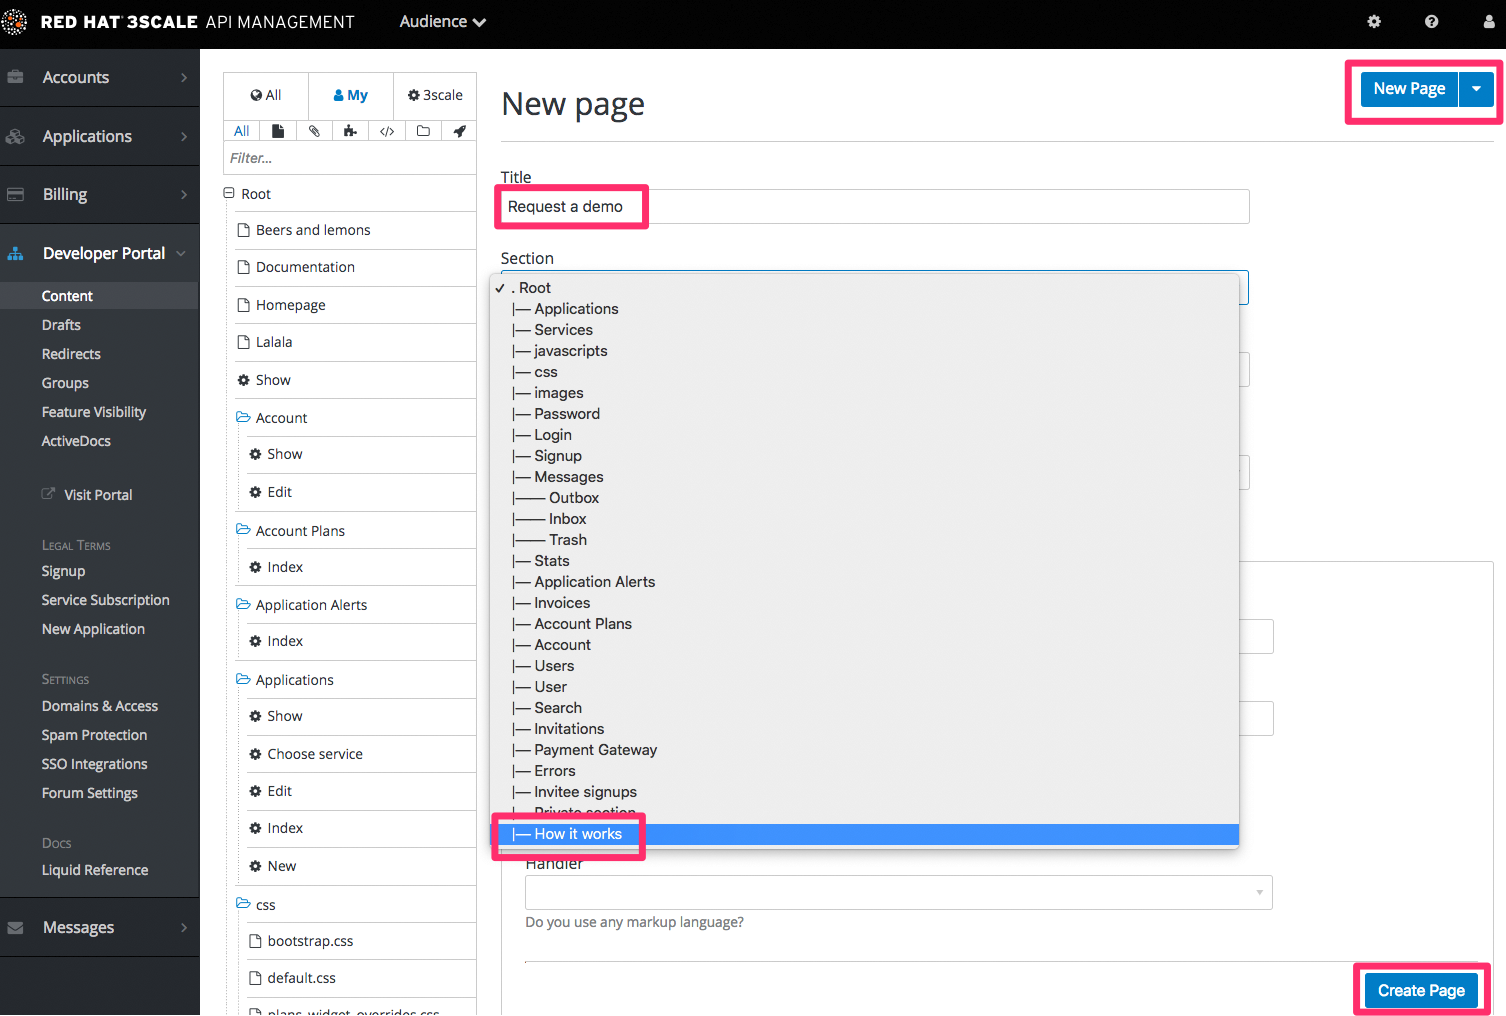
Similar to adding a section, add a page. Choose the desired section in order to structure your URL paths consistently. Next, select the layout that the page will be using. After completing the page content, hit “create page”. If you are writing a lot of content, you may prefer to use a markup language like Textile or Markdown, which you can select in the advanced page settings.
View the draft preview and refine the page content until you are happy and ready to publish it.
- Repeat for all pages in the section.
- Then repeat for all sections in the site.
15.2.5. Editing your page headers
All repetitive page elements such as headers and footers are defined in the portal Developer Portal section called “partials”. If you have only one layout, or very few of them, you can omit this step and include the header and footer inside the layouts code. However, remember to customize these elements in the layout. For example, the default “menu” partial should be edited to reflect your site map.

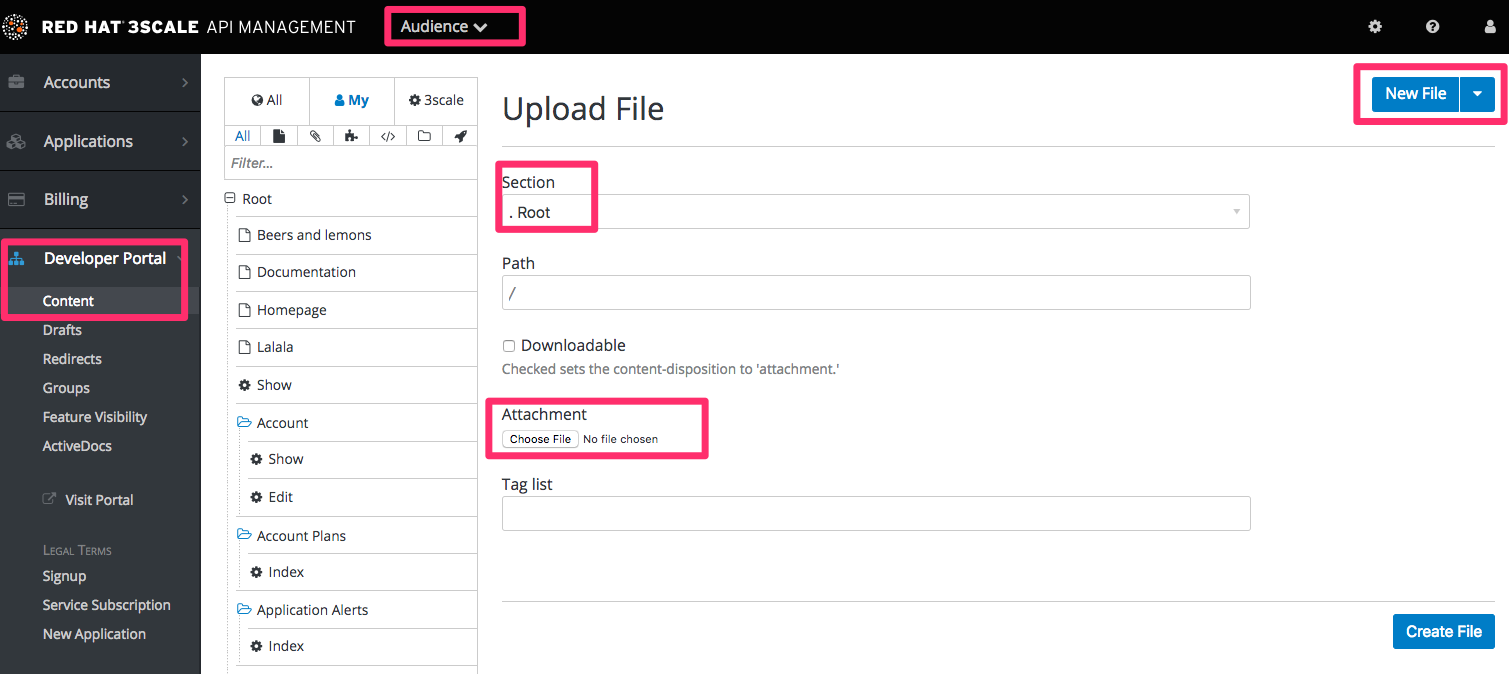
15.2.6. Adding images and other assets
For images or other files, first load the files into the content library, then insert a link into your text content.
- Select New File in order to choose your file, and identify where you will save it on your site.
- Copy the URL to the image
- Now you can add your HTML or <a> tag, and paste in the URL for your image.
15.2.7. Customizing with your branding
There is a default stylesheet called default.css, which is quite large and complex. Rather than extend this, it is better to create your own stylesheet with your own customizations to overwrite the defaults.
You can create a new stylesheet the same way you create a page – just remember to choose an appropriate MIME content type in the advanced page settings. Then add the link to your custom CSS in your layout templates after the link to default.css, for example:
<link rel="stylesheet" href="/stylesheets/custom.css" />
15.2.8. Going live
The final task is to view the entire portal site and check all the workflows. You can publish each page or all of the pages in the Changes section. Once you’re happy with everything, make a final check that all pages have been published.
Now you’re ready to remove any access code for the portal:
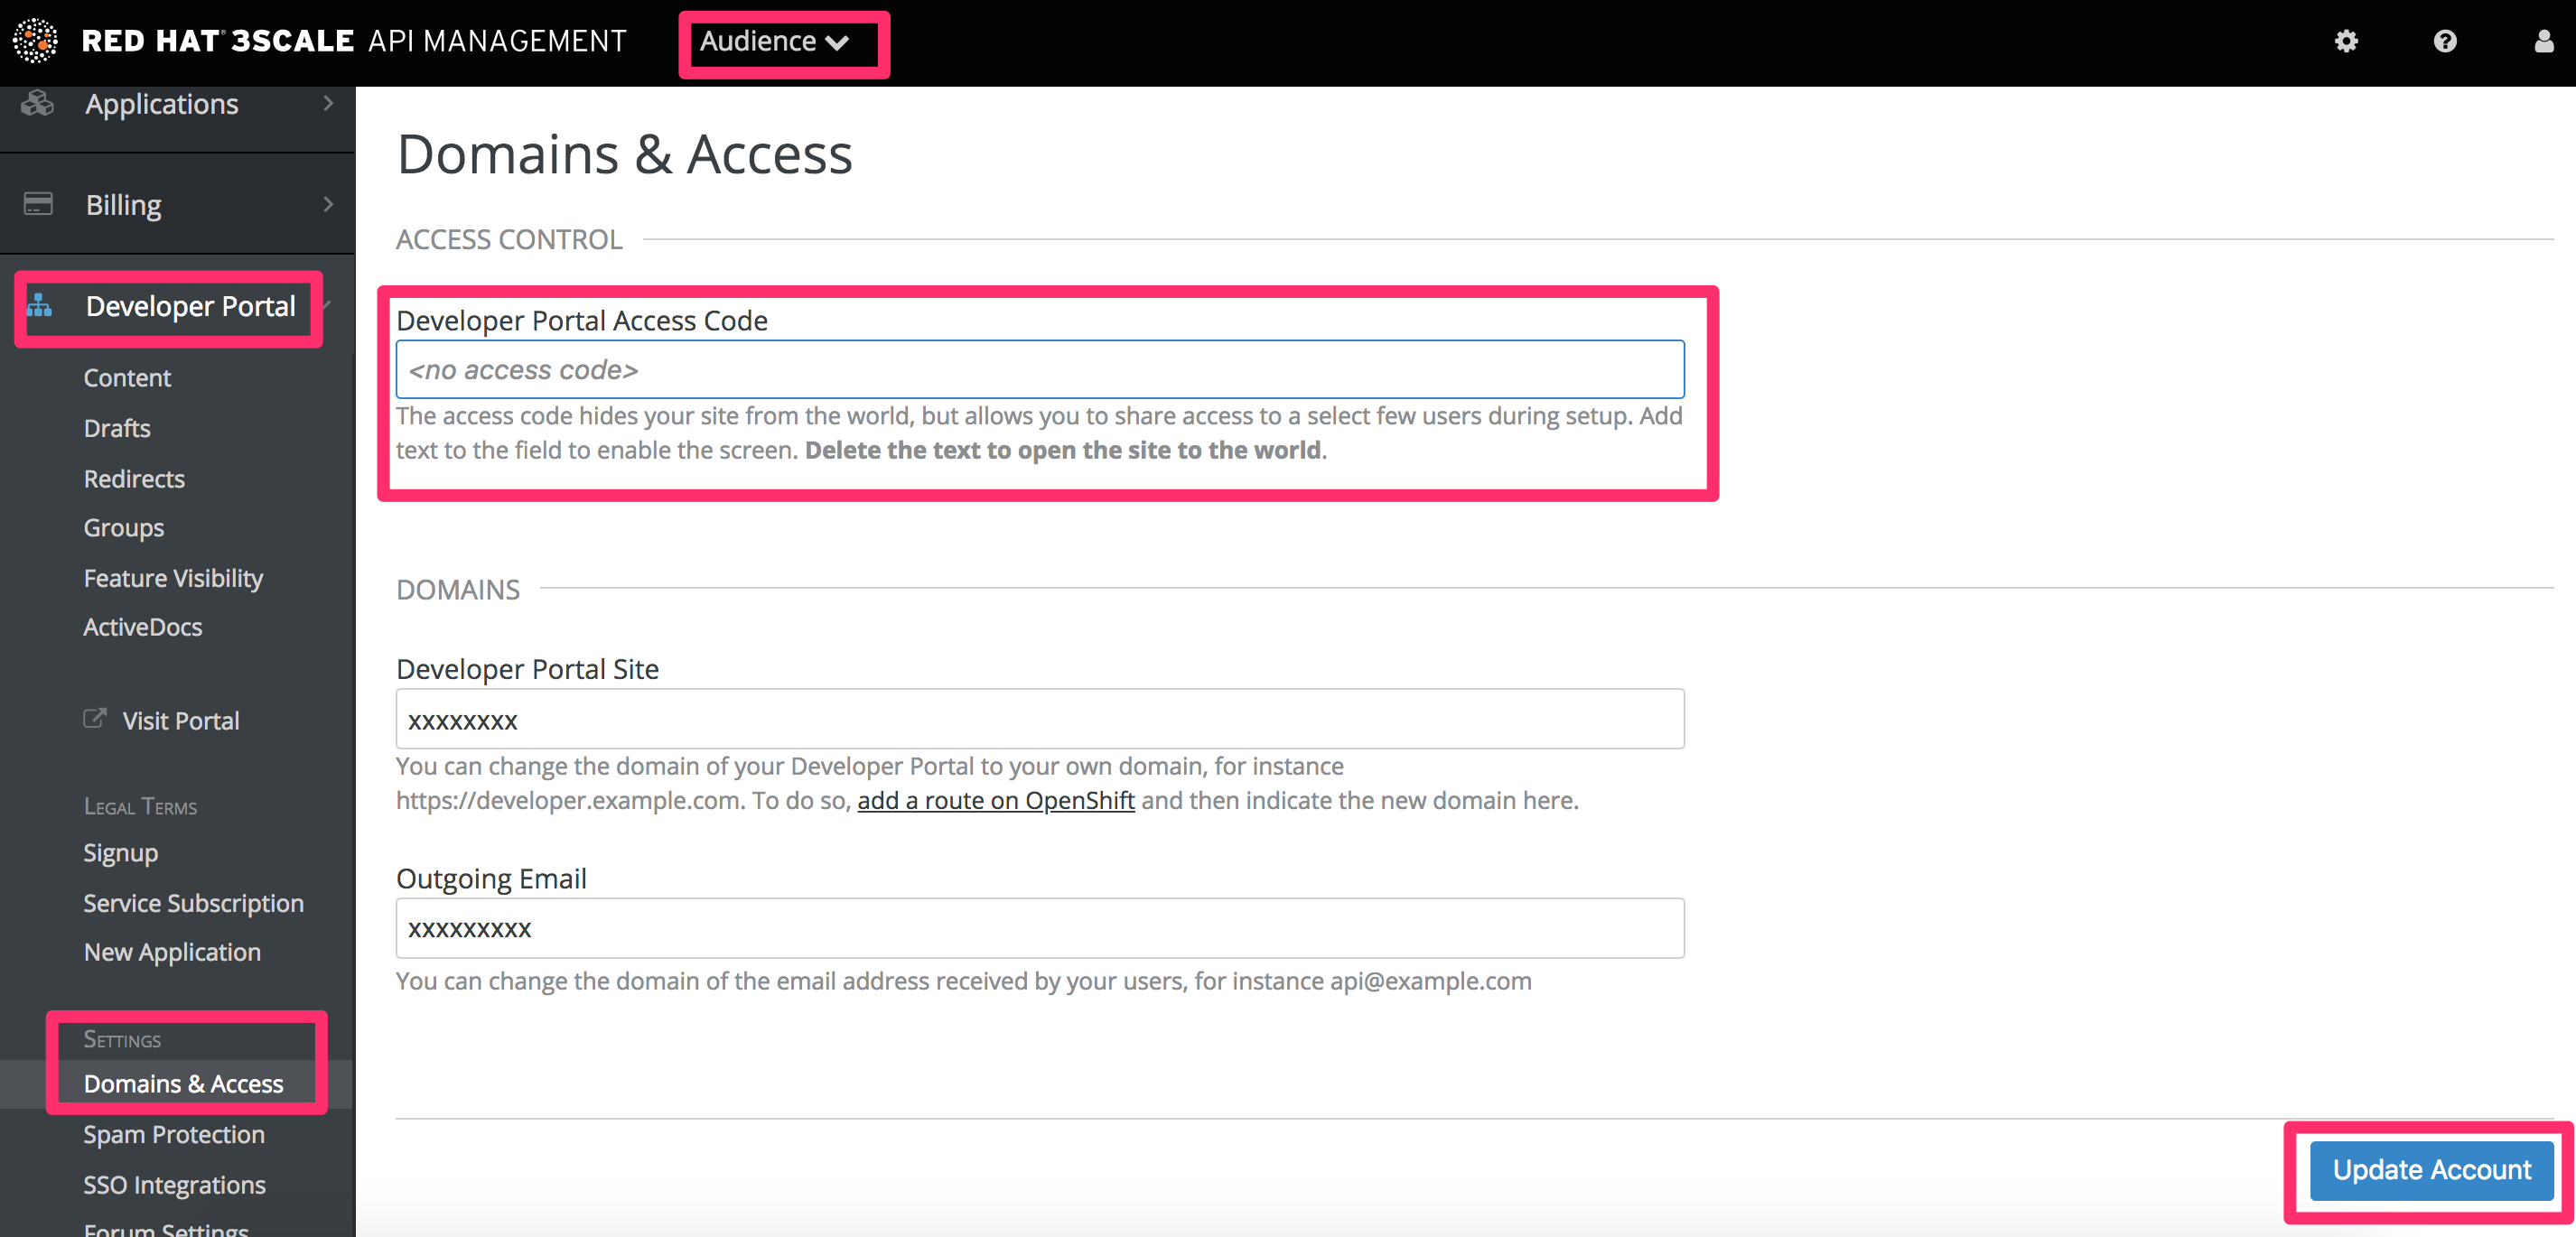
Congratulations! Your Developer Portal is now live and ready to help build your developer community.
15.3. Additional configuration options for your Developer Portal
There are additional areas interacting with your Developer Portal that you can configure:
- Set up your application plans: With these plans, you have the access rights configured for the API keys that you will issue.
- Configure your developer signup flows: These flows can be anywhere on the range from self-service, to approval required, or invite only with signups disabled.