
Chapter 6. Braintree Integration
These are the steps to set up the Braintree gateway in order to to charge for use of your API.
6.1. Step 1: Get your API keys from Braintree
You’ll need to open an account with Braintree. You need a Gateway and Merchant account plus Vault. As an optional extra, you can choose to allow American Express cards as a payment method.
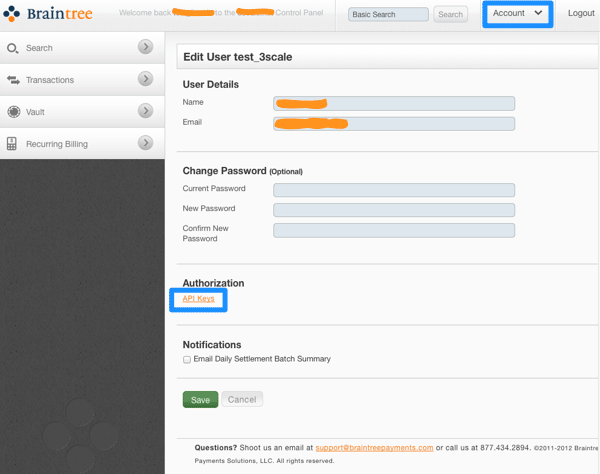
To begin, log in to your Braintree account. Then find your API keys in the Account > MyUser area:
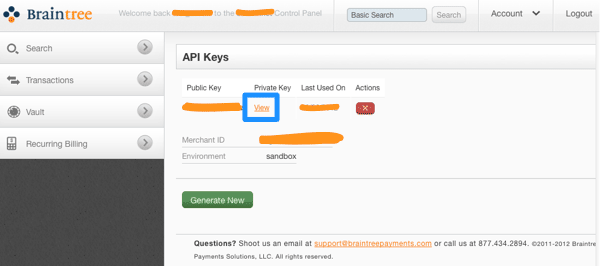
The API keys page still hides the private key, so select the option to view it:
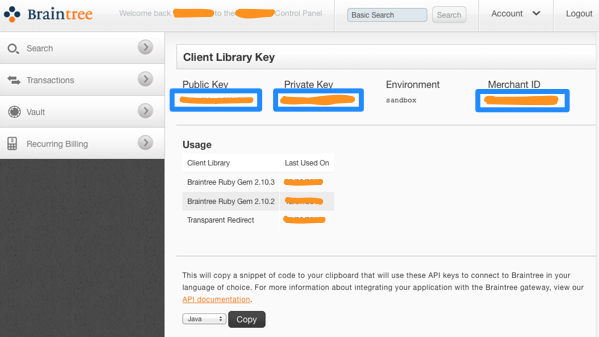
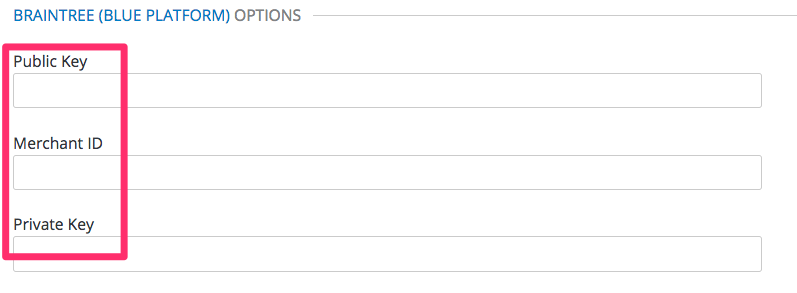
Finally you have the Public Key, Private Key, and Merchant ID that you’ll need for the 3scale billing settings:
6.2. Step 2: Configure your settings in 3scale
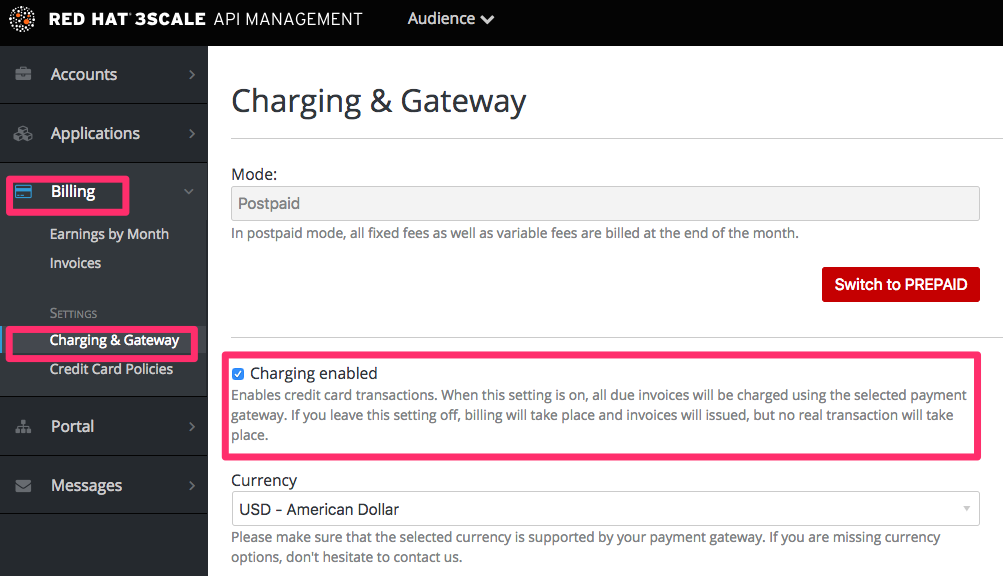
You need to tell 3scale to start using these API keys. To do this, log in to your 3scale Admin Portal and go to Audience > Billing > Charging & Gateway.
Ensure that the currency type specified on the billing page matches the currency type used in your Braintree merchant account.
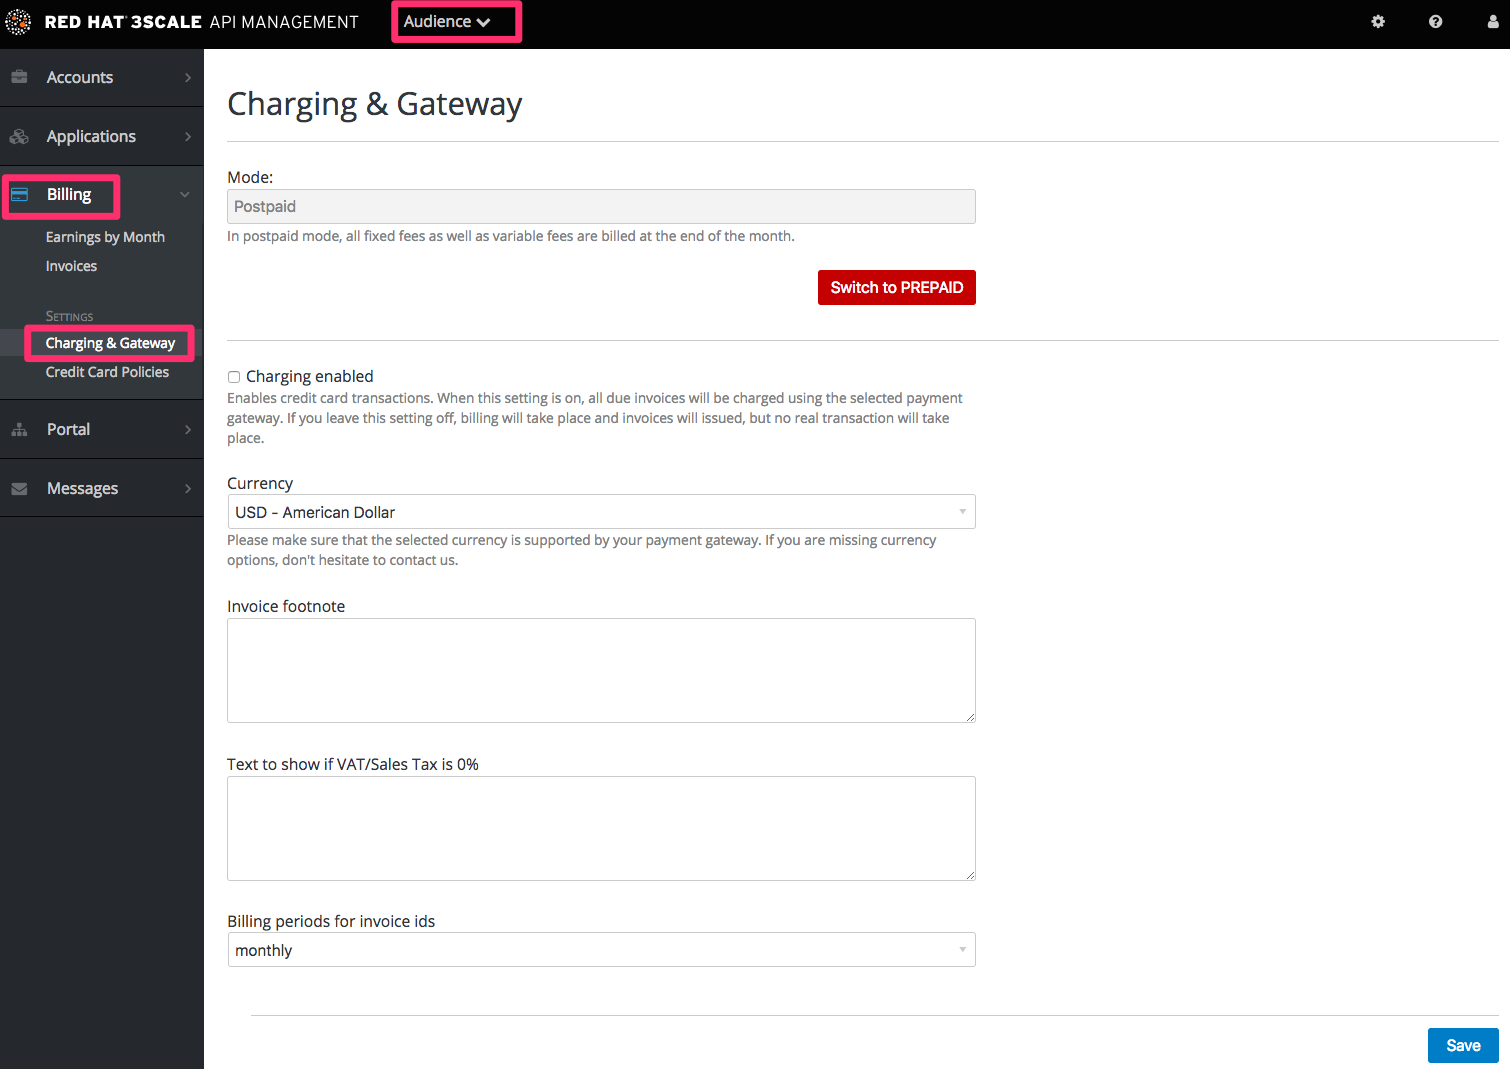
If the Charging Enabled flag is not active, enable it and click Save.
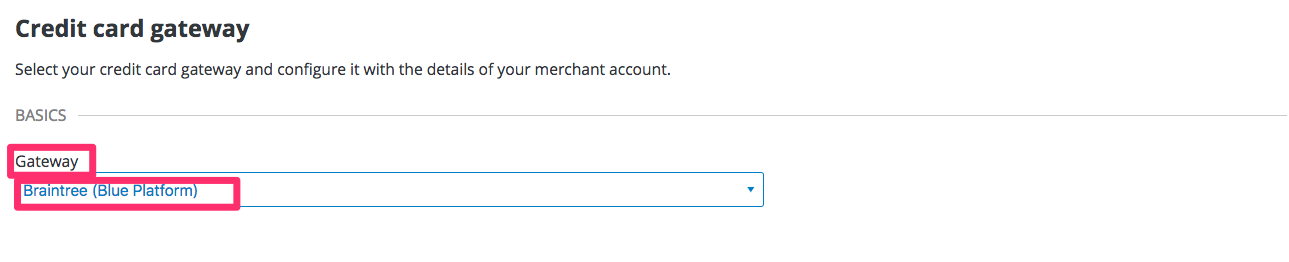
You should see a drop-down called Gateway near the bottom of the page. Change it to Braintree (Blue Platform).
The form below the drop-down should change to show two fields. Insert your Braintree keys and click Save.
You might see a couple of alerts when you change your payment gateway. This is expected. Read and accept them if they appear.
Your users should now be able to pay you using the Braintree gateway.
6.2.1. Note
In order to map your data from Braintree with your data on 3scale, you can use the Braintree field called customer.id which is composed of 3scale-[PROVIDER_ID]-[DEVELOPER_ACCOUNT_ID]
6.2.2. Troubleshooting
In case your account is in the sandbox mode and you encounter any problems, you will have to change it to production.