Accounts
How to manage admin and member rights and invite teammates to use the admin portal.
Abstract
Chapter 1. Account Configuration
After creating your account, update basic information about your company. Set your location, contact information and add your company logo to the admin dashboard.
The account view is only visible to admins (and not to members).
1.1. Step 1: Add your company information
Once you’ve created your new account, click on the gear icon in the top navigation bar, and then on Account → Overview and click on Edit in the Details item. Fill in the information for your account.
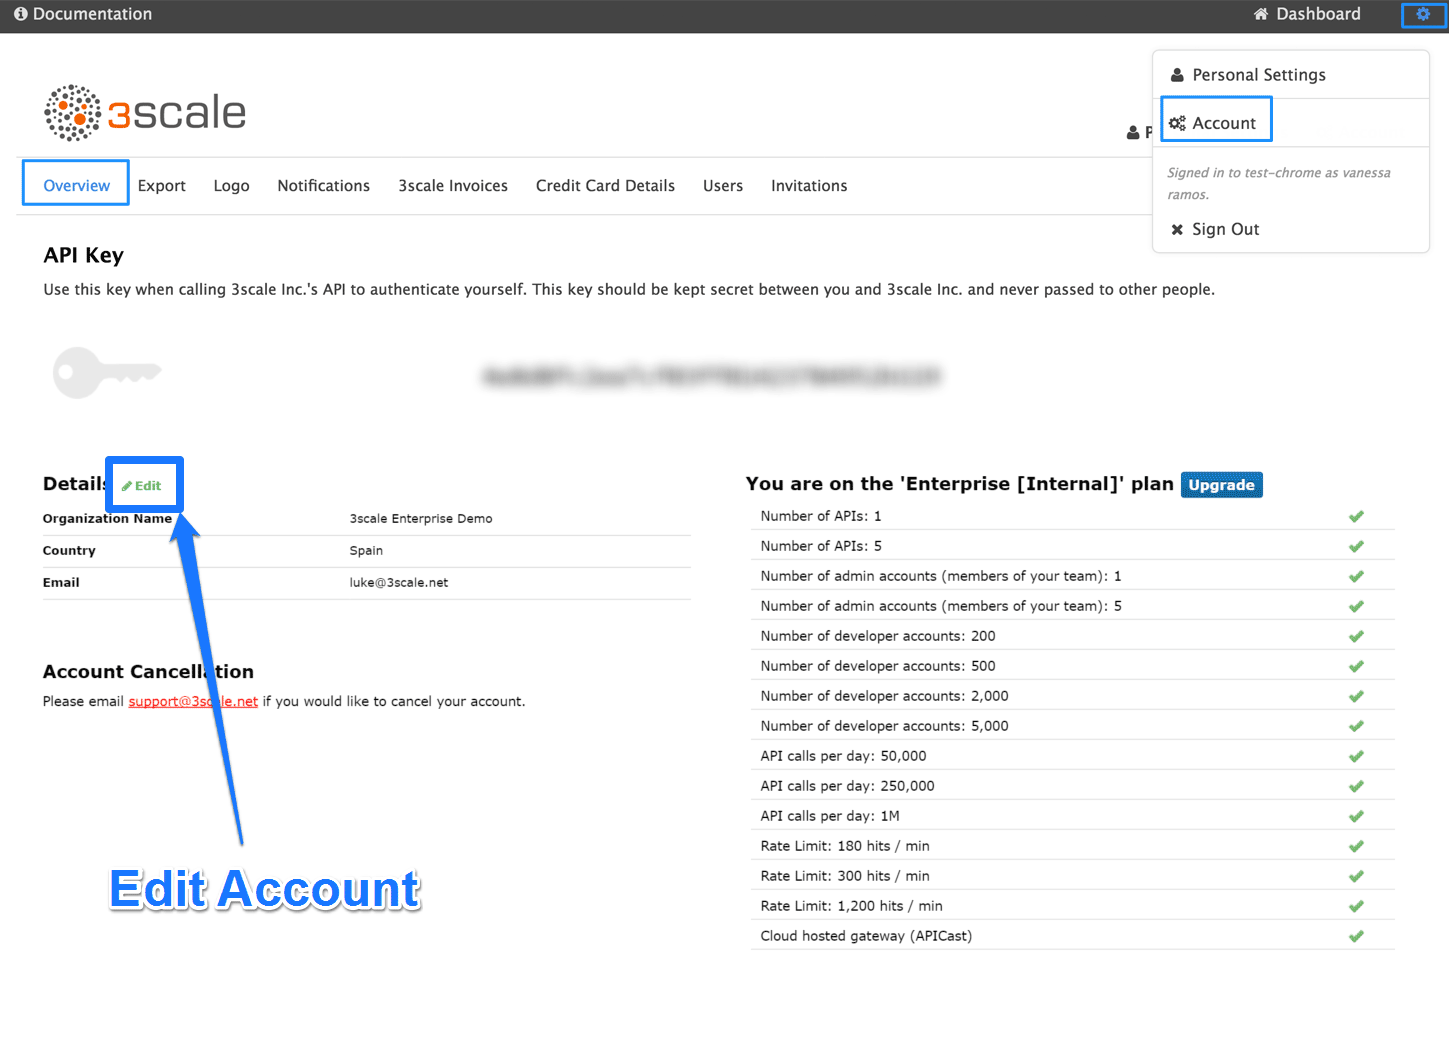
The address you write here is what we use for billing purposes (if you are on a paid plan) and also what your user will see on your invoices if you’re using the billing and payments modules.
1.2. Step 2: Select your preferred time zone
On the same page you can also select the time zone you’d like to use on all system displays. This setting affects analytics graphs. However, billing cycle calculations are made according to UTC time.
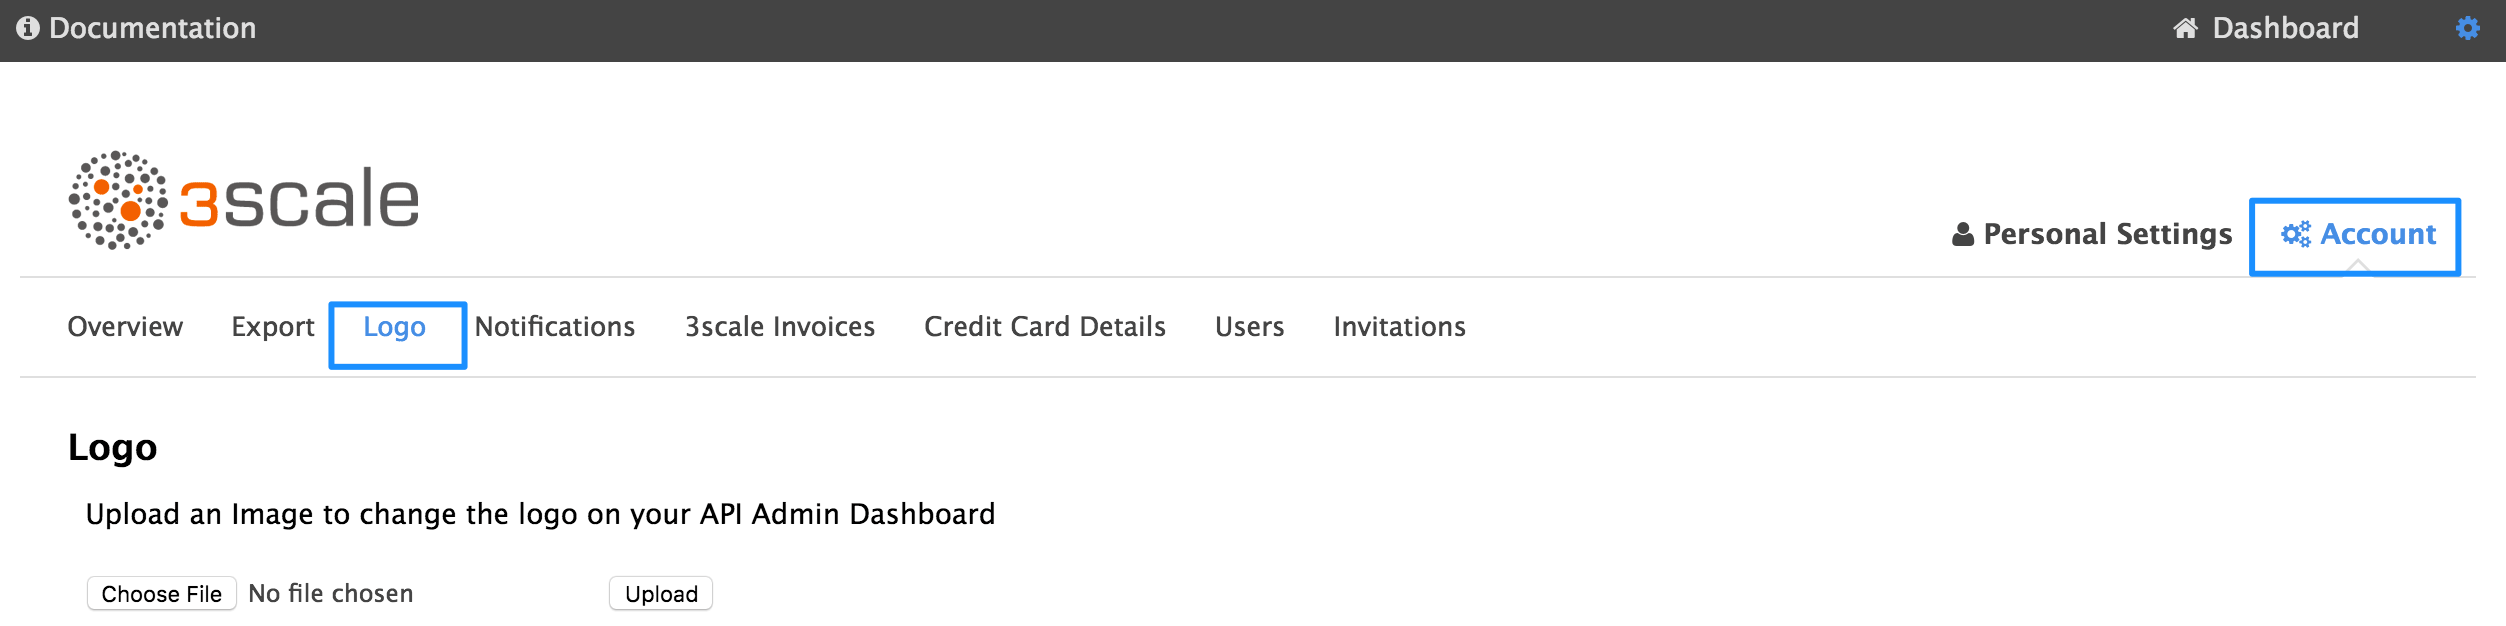
1.3. Step 3: Add your logo to the dashboard
To change the standard logo on the dashboard, head to the settings area of the portal. In the Logo section, upload a new file. This will be the logo that appears on your internal 3scale dashboard, but it will not affect the Developer Portal in any way, unless you use the "logo".
Chapter 2. Single Sign On for Admin Portal
This guide provides information about how to configure and use single sign on with the 3scale admin portal
2.1. Step 1: Enable Red Hat SSO or Auth0 member Authentication
3scale supports single sign on (SS0) authentication for your members and admins.
The admin portal supports the following SSO providers, each which support a number of identity brokering and member federation options:
You can enable multiple SSO member authentication types
Only users that have been added to RH SSO or Auth0 will be able to access your 3scale admin portal through SSO. If you want to further restrict the access by either roles or user groups you should refer to the corresponding step by step tutorials on the RH SSO or Auth0 support portals.
Once you have established SSO through your chosen provider, you must configure it and enable it on the 3scale admin portal.
2.1.1. RH SSO Prerequisites
- An RH SSO instance and realm configured as described under the Configuring Red Hat Single Sign-On section of the developer portal documentation
2.1.2. Auth0 Prerequisites
- An Auth0 Subscription and account
2.1.3. Enable SSO
As an administrator, perform the following steps in the 3scale admin panel to enable RH SSO or Auth0:
- Ensure your preferred SSO provider, highlighted in the prerequisites, has been properly configured
Navigate to the SSO tab:
- Select the gear icon in the upper right corner of the page
- Select Account → SSO Integrations → New SSO Integration
- Select your SSO provider from the dropdown list
Enter the required information, provided when you configured your SSO:
- Client
- Client Secret
- Realm or Site
- Click Create Authentication Provider
If, during testing, you encounter a callback URL mismatch, add the callback URL shown in the error message to your Auth0 allowed callback URLs.
2.2. Step 2: Using SSO with 3scale
Once you have configured SSO, members can sign on using the account credentials in connected IdPs.
Follow these steps to log in to the 3scale Admin portal using SSO:
Navigate to your 3scale login page:
https://<organization>-admin.3scale.net/p/login
- Authorize 3scale with your IdP
- If necessary, complete sign up by entering any needed information
Once you successfully sign up, you will have a member account under the API provider organization, and you will be automatically logged in.
Chapter 3. Inviting Users And Managing Rights
In order to share the workload of administering your APIs, you may wish to invite team members from your organization to access the 3scale Admin Portal. In this tutorial, you’ll see how to that and what types of roles and rights are available. Note: The 'invite' feature is only available for Pro and Enterprise customers.
We’ll walk you through how to give access rights to the 3scale Admin Portal to one or more team members.
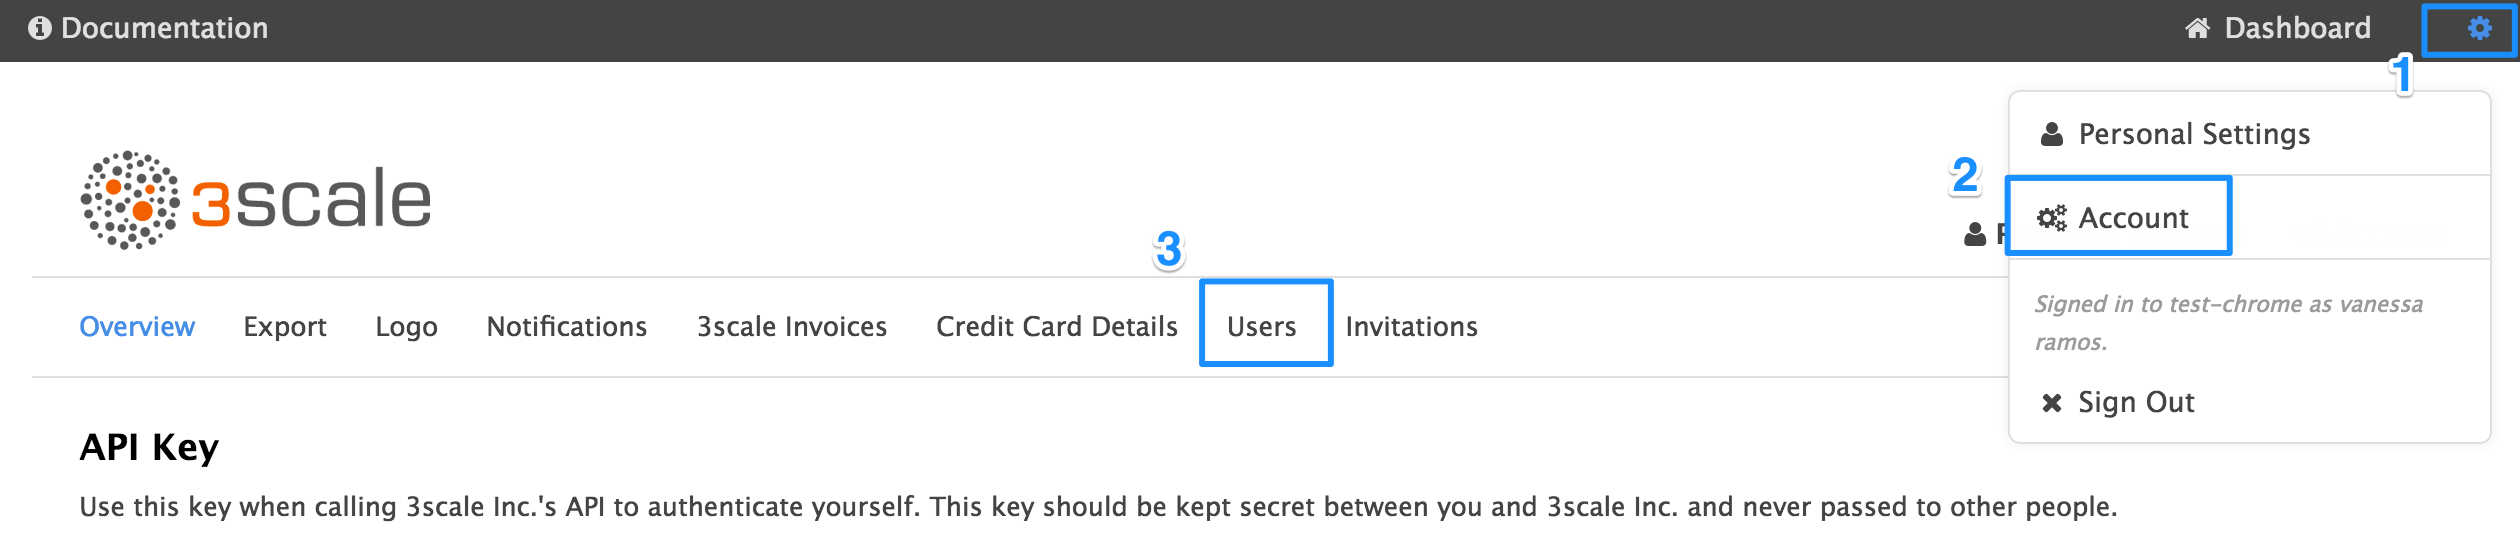
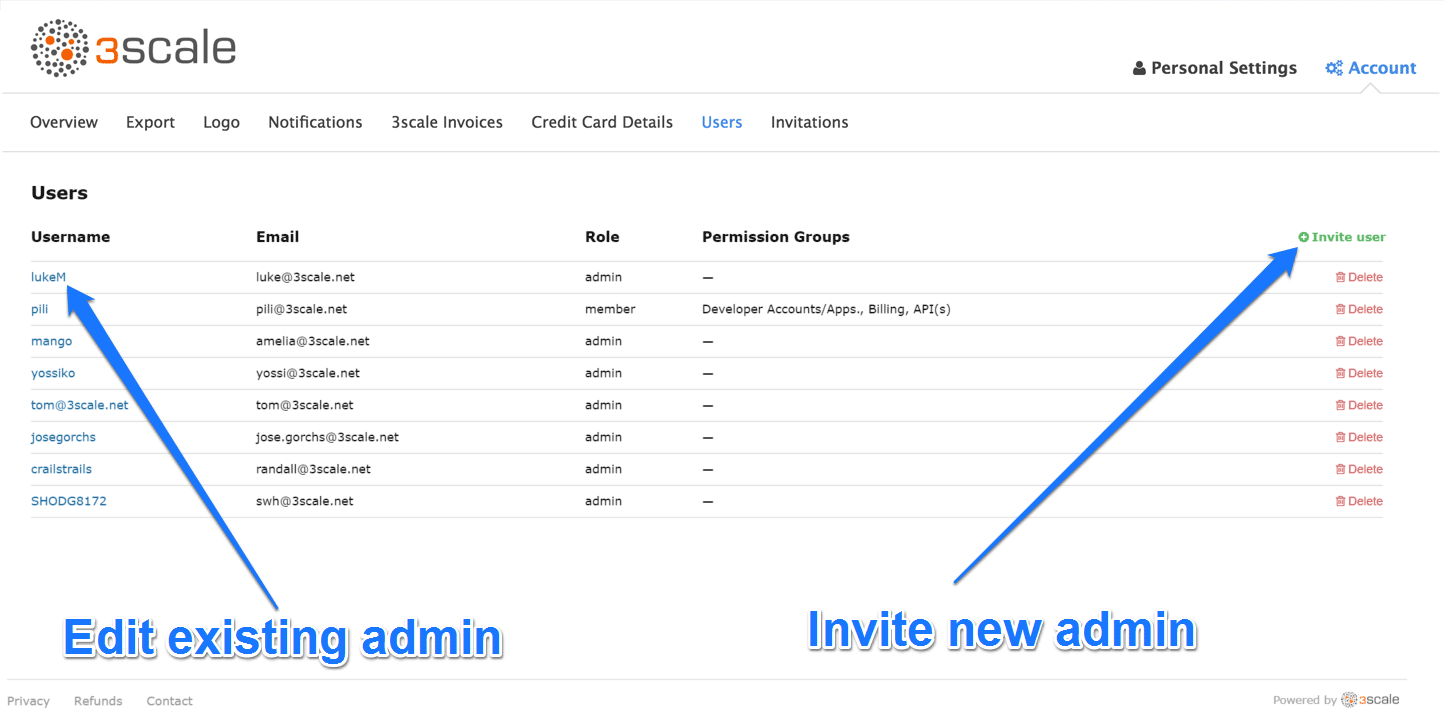
3.1. Step 1: Navigate to user administration
On the Admin Portal top navigation bar, click on the gear icon and then on Account on the top righthand side. Select Users from the submenu.
When we refer to users, we’re talking about members of your team. The 3scale Admin Portal has two types of users:
- Admins: Which have full access to all areas and services, and can invite other members (if your plan allows it).
- Members: Which have limited access to areas of the product (e.g. Analtyics, Developer Portal) and, if you’re an enterprise customer, also to services.
From the menu, click on the Invite user link.
3.2. Step 2: Send an invitation
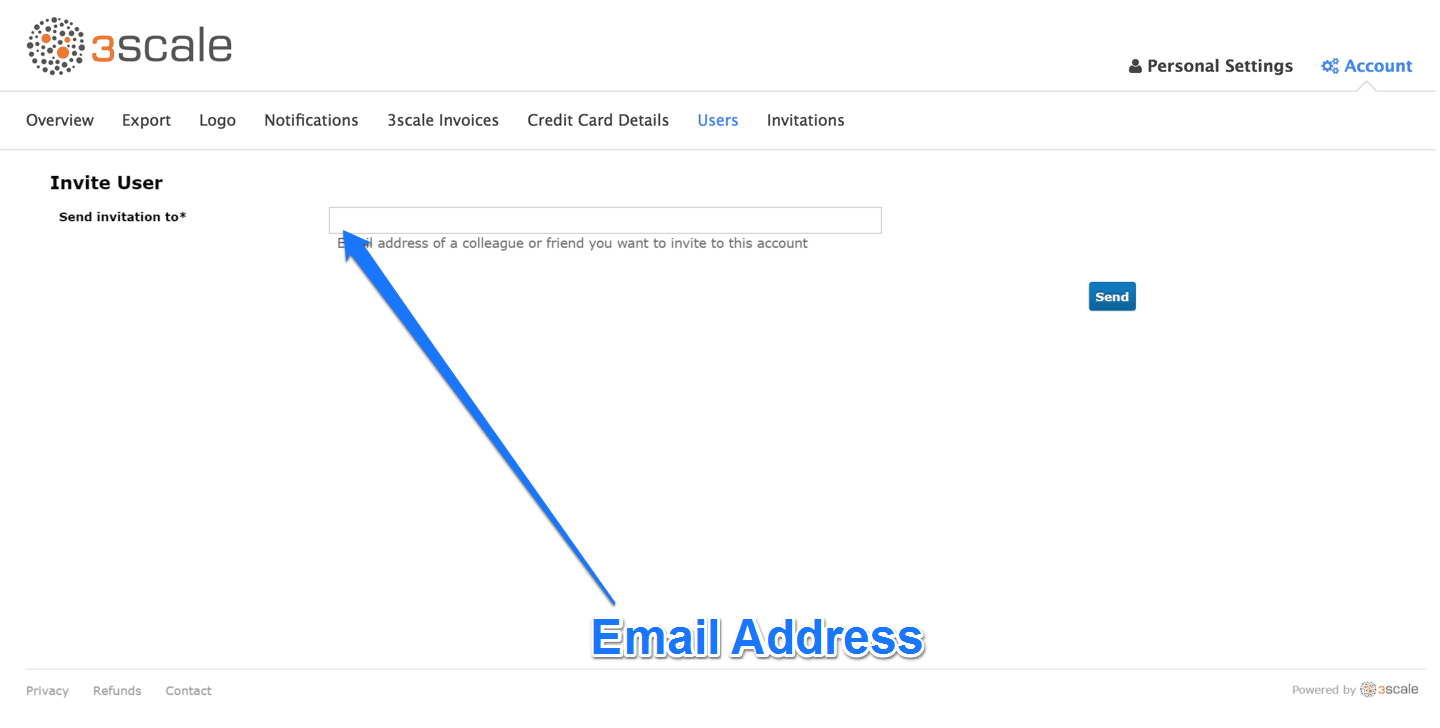
Enter the email address of the person you want to invite and click send. An invitation email will be sent to the address you entered. If the email doesn’t arrive, make sure it didn’t get marked as spam.
3.3. Step 3: Accept the invitation
Your new administrator or member must click the link in the invitation email and complete the form to complete the process. Once the form is submitted, their account will be activated.
3.4. Step 4: Give new users rights
There are two main type of rights you can give to members of your team:
- By area: Such as analytics, billing, or developer administration.
- By service: Choose which services to give access to members amongst all of your services. Note: This feature is only available for enterprise customers.
To give a new user rights, edit the new user by selecting them from the user menu and clicking on Edit.
Changing their rights to “admin” will give them full access to control the dashboard.
Changing their rights to "member" will give you the option of choosing which areas and services the team member has access to.
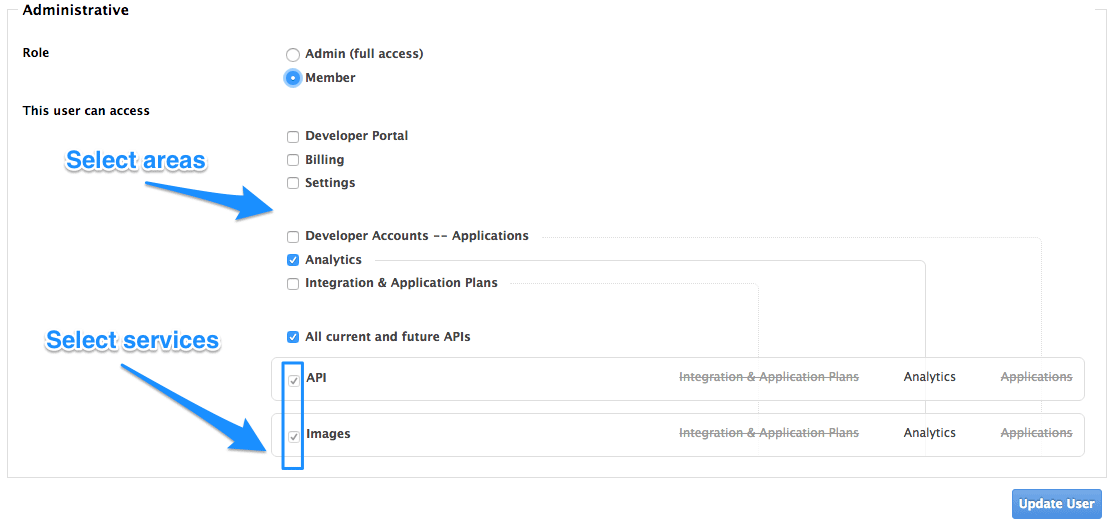
Giving members access to certain areas of the 3scale Admin Portal will give them access only to the equivalent API:
- Developer accounts — Applications: Gives access to the Account management API
- Analytics: Gives access to the Analytics API
- Billing: Gives access to the Billing API
Chapter 4. Notifications
Notifications are sent to admins and members to make it easier to parse developer activity (new account
4.1. Types of notifications
There are different types of notifications:
- Accounts
- Billing
- Applications
- Service subscriptions
- Usage alerts
4.2. Visibility
Admin users have access to all notifications.
Member users have access only to notifications of the areas they have been given access to. For example, a member will only have access to notifications related to billing if they have access to the billing section.
For enterprise accounts, member users will only have access to notifications regarding activity of the services they have been granted access to.
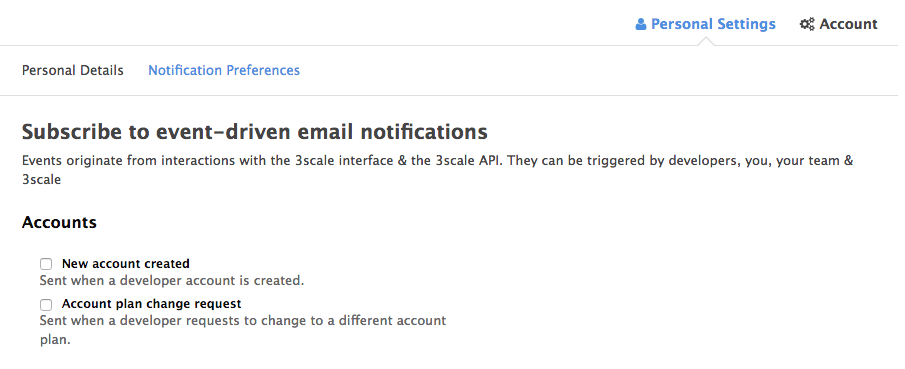
4.3. Subscribing to notifications by email
Subscriptions are personal and can only be modified by the person receiving those notifications. In order to edit your subscritpions, go to Personal settings> Notification preferences and check the notifications you’d like to receive.
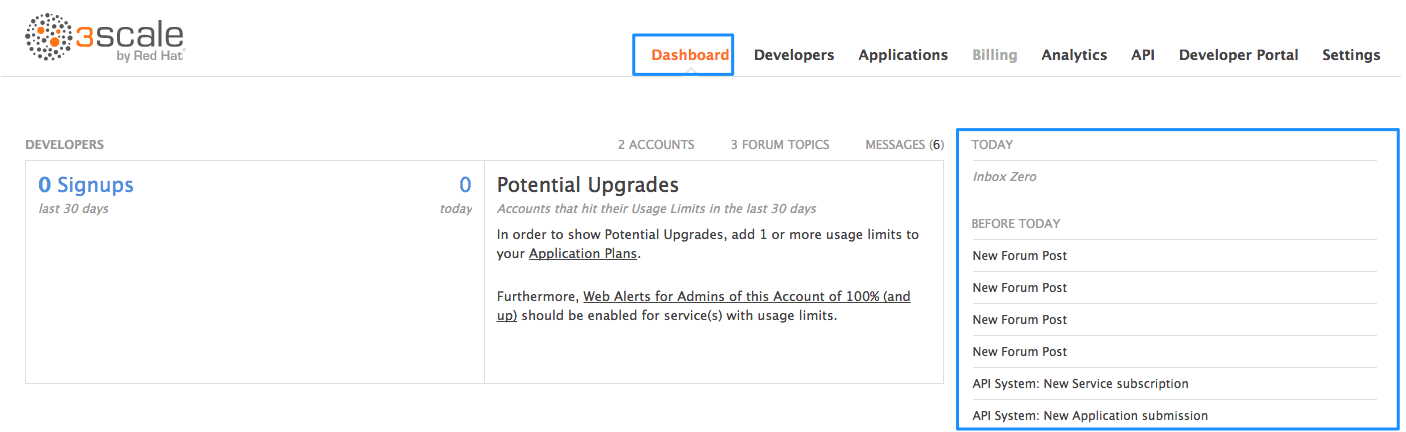
4.4. Web notifications
In addition to email notifications, these can be found in your Dashboard:
Chapter 5. Personal Settings
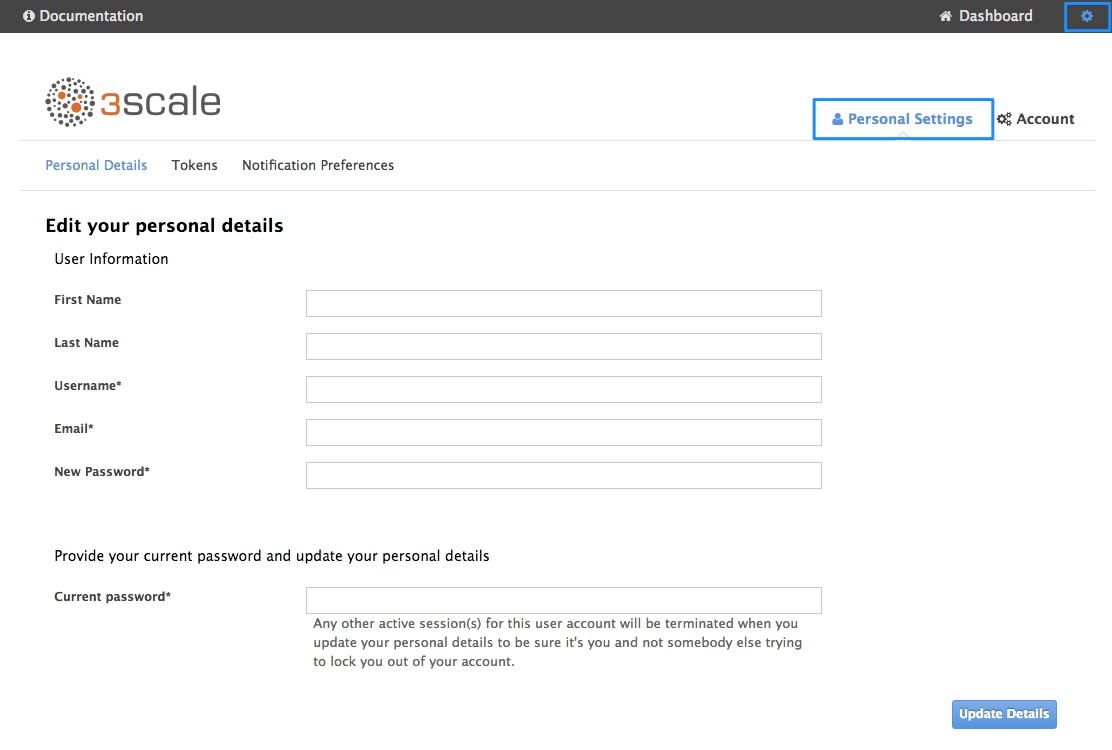
In Personal settings you can edit your preferences as a team member. If you’re an admin, you will also be able to edit the account preferences. For that, check out the account configuration tutorial.
5.1. Types of settings
There are 3 types of settings you can edit from here
- Personal Details: Name, email, password, etc.
- Tokens: Create access tokens to authenticate against the 3scale APIs – Billing, Account Management, and Analytics – and try them out using our ActiveDocs (interactive documentation). Learn more about 3scale tokens.
- Notification Preferences: Select which notifications you’d like to receive. Note: If you’re an enterprise customer, and if you are a member, these are filtered by area and service. This means you’ll only be able to subscribe to notifications re: areas and services you’ve been given access to. More on notification preferences here.
Chapter 6. Tokens
In this tutorial you’ll learn about 3scale tokens: what are they, how they work, and how to create them.
3scale has two types of tokens: Access tokens (created by the user) and Service tokens (automatically created when you create a new service in 3scale).
6.1. Access tokens
Access tokens allow API provider admins and members to authenticate against the 3scale APIs – Billing, Account management, and Analytics – and try them out using our ActiveDocs (interactive documentation).
An access token may provide either read and write access, or read only.
An important thing to take into account is how access tokens work, which is according to the member’s rights. Admins can create tokens to authenticate against all three 3scale APIs. Members will be limited by their permissions to access the different parts of the Admin Portal. For example, if a member doesn’t have access to the Billing area, they won’t be able to create a token to authenticate against the Billing API.
6.2. Creating access tokens
Access tokens can be created on the tokens page. To access the tokens page, click on the gear icon in the upper right corner of the page, followed by Personal Settings > Tokens.

Click on Add Access Token and choose a name, scope, and permissions.
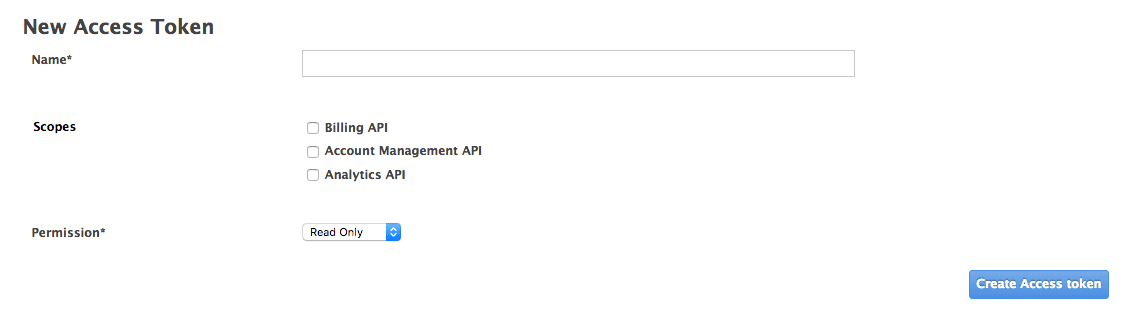
Note that if you are a member, you might not see all the APIs – just the ones you’ve been given access to by the admin of your account.
You can create as many access tokens as you need, but take into account that for security reasons, they won’t be stored on 3scale. When you create a new token, you’ll be alerted to save the token so you can then use it to make requests to the 3scale API. If you lose a token, we recommend that you delete it – which will disable it and render it invalid – then create a new one.
6.3. Using access tokens
When using your access token to make calls to the 3scale APIs the results will be filtered by the services you have access to.
For example, when deploying APIcast self-managed, you’ll need an access token so your APIcast API gateway can pull the configuration of the service using the Account Management API.
The way it works is if your organization has set up three services on 3scale, and as a member, you have access to Service 1, but not 2 and 3, and you also have access to the Account Management API, when you create a token and make a request to the Account Management API you will only get the applications which are using Service 1.
Following the same example, if you have access to the Account Management API, but access to zero services, when making a call, you’ll get "access denied" error.
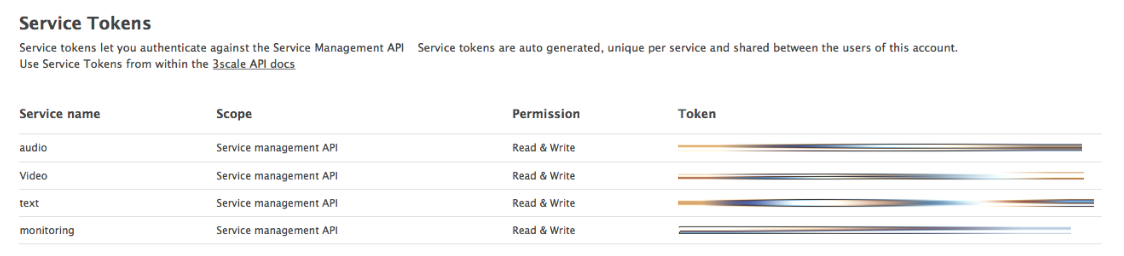
6.3.1. Service tokens
Service tokens are used to authenticate against 3scale Service Management API. Service tokens are generated automatically when a new service is created in 3scale, and are unique per service. They are shared among the users of the 3scale account, and the service tokens for the services that the user has access to can be found in Personal Settings > Tokens section of the admin portal.